
In 2025, sardines and other tinned fish became more than just food; they appeared on beaded bags, shirts, and prints. They also made their way to the fiber arts community, which inspired me to make a fish print sweater for Kyle, who enjoys fishing IRL and in video games. I just like the video game version.
The Design Concept
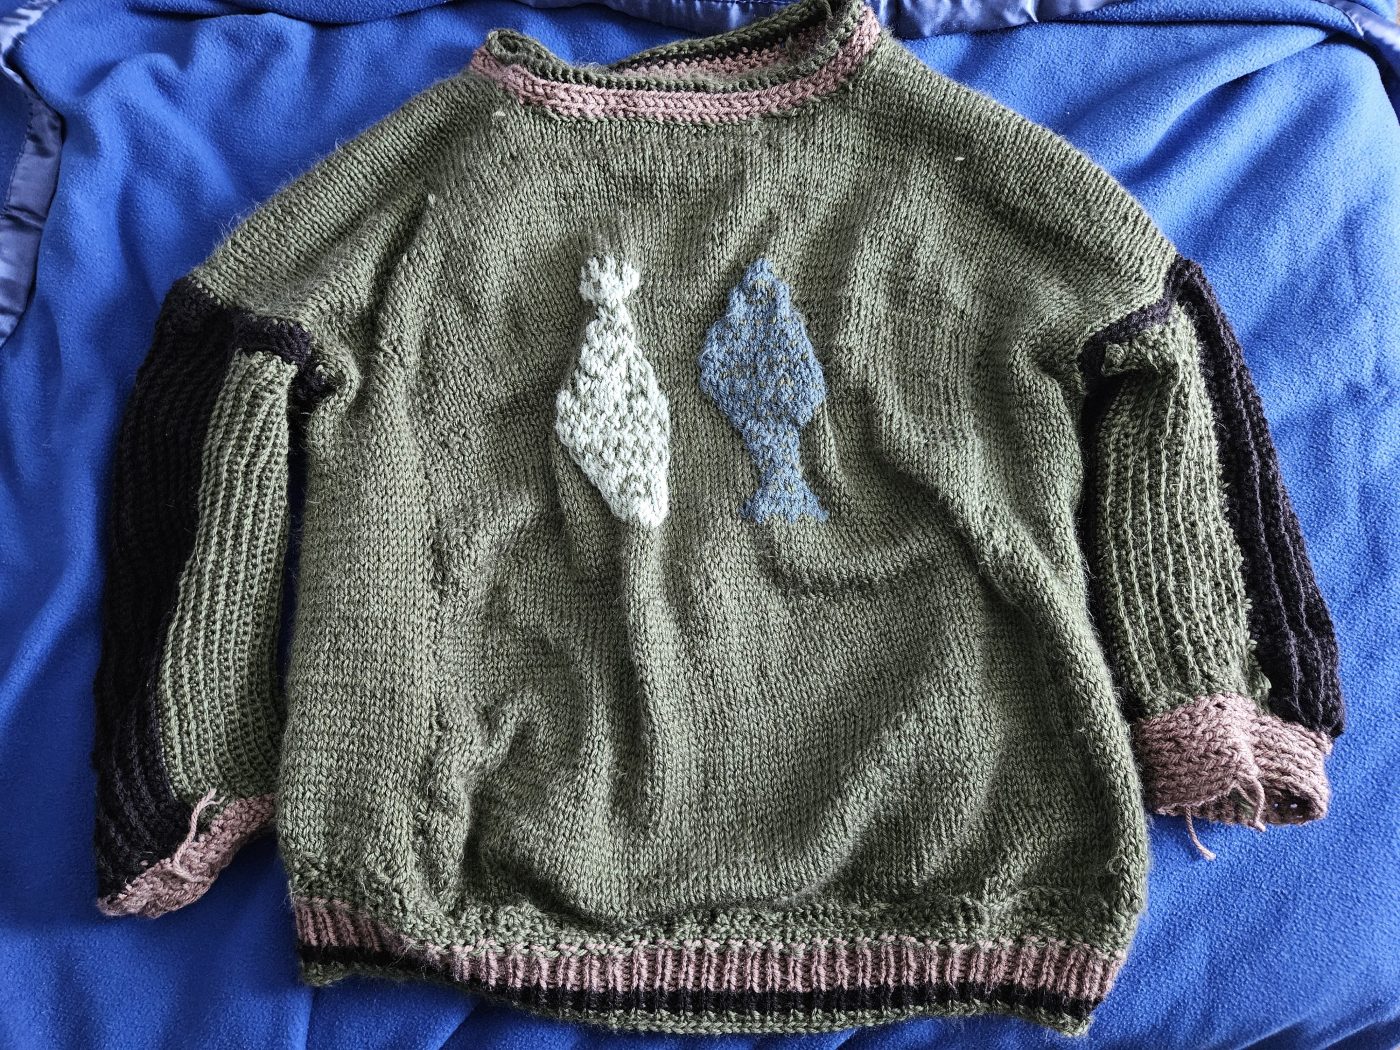
When planning a garment with a colorwork motif, I always consider scale, placement, and repetition. To do this, I use what I learned in art class many years ago – the seven fundamentals of art. So I consider line, shape, color, value, form, texture, and scale. In the catch-of-the-day sweater, it was important to make the fish wearable and to ensure good form and function. How do I make the fish on this sweater make sense? I decided to hang freshly caught fish on the sweater to help with the scale of the art. I placed them in the center, on the front, only to keep the perspective of this in focus. I thought placing more fish would become overwhelming to the eye and become unwearable.
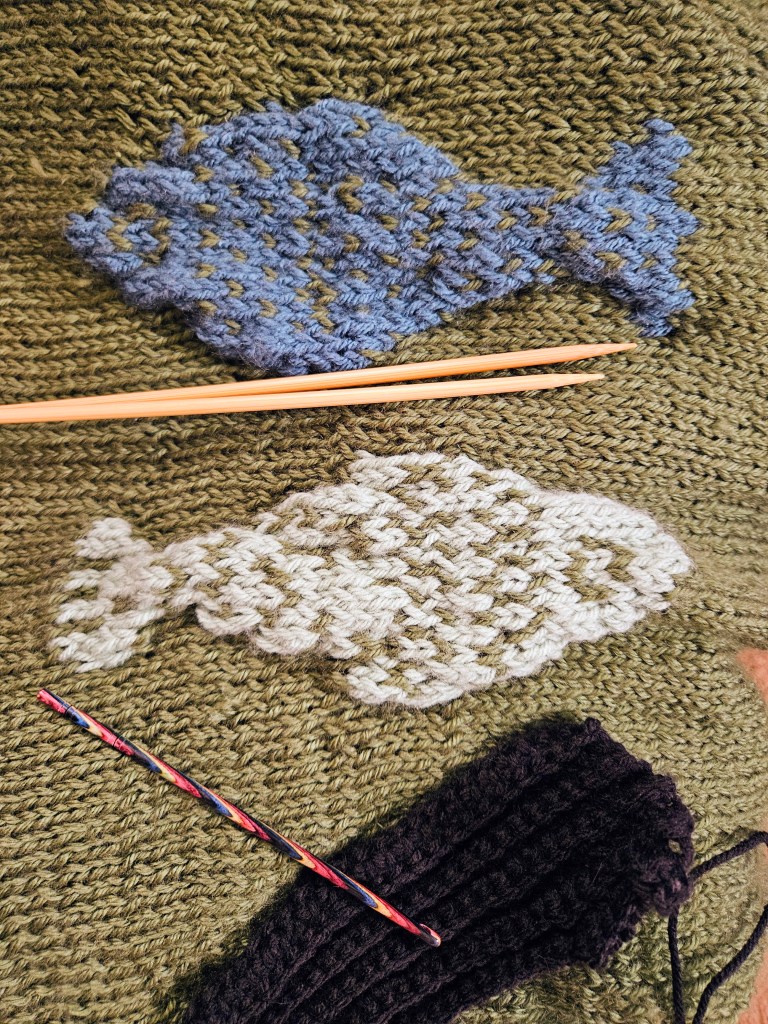
Adding more fish would have required adjusting the scale and the color, meaning I would have simplified the sweater down to two yarn colors only, with sections of fair isle colorwork, which is a smaller, more concentrated technique. But I like the color contrast of using two colors, representing two types of fish with slightly different scale patterns. How big is too big? How do you represent a fish, with their scales and texture? For this, I went to Pinterest to find cross-stitch or knitting colorwork charts for inspiration. I believe I settled on a cross-stitch pattern because it had the detailed lines and scale I was looking for. I wanted the fish to look realistic, although it could be in an imagined world like Animal Crossing New Horizons or Stardew Valley. Whimsical? I think that is the best way to sum it up.
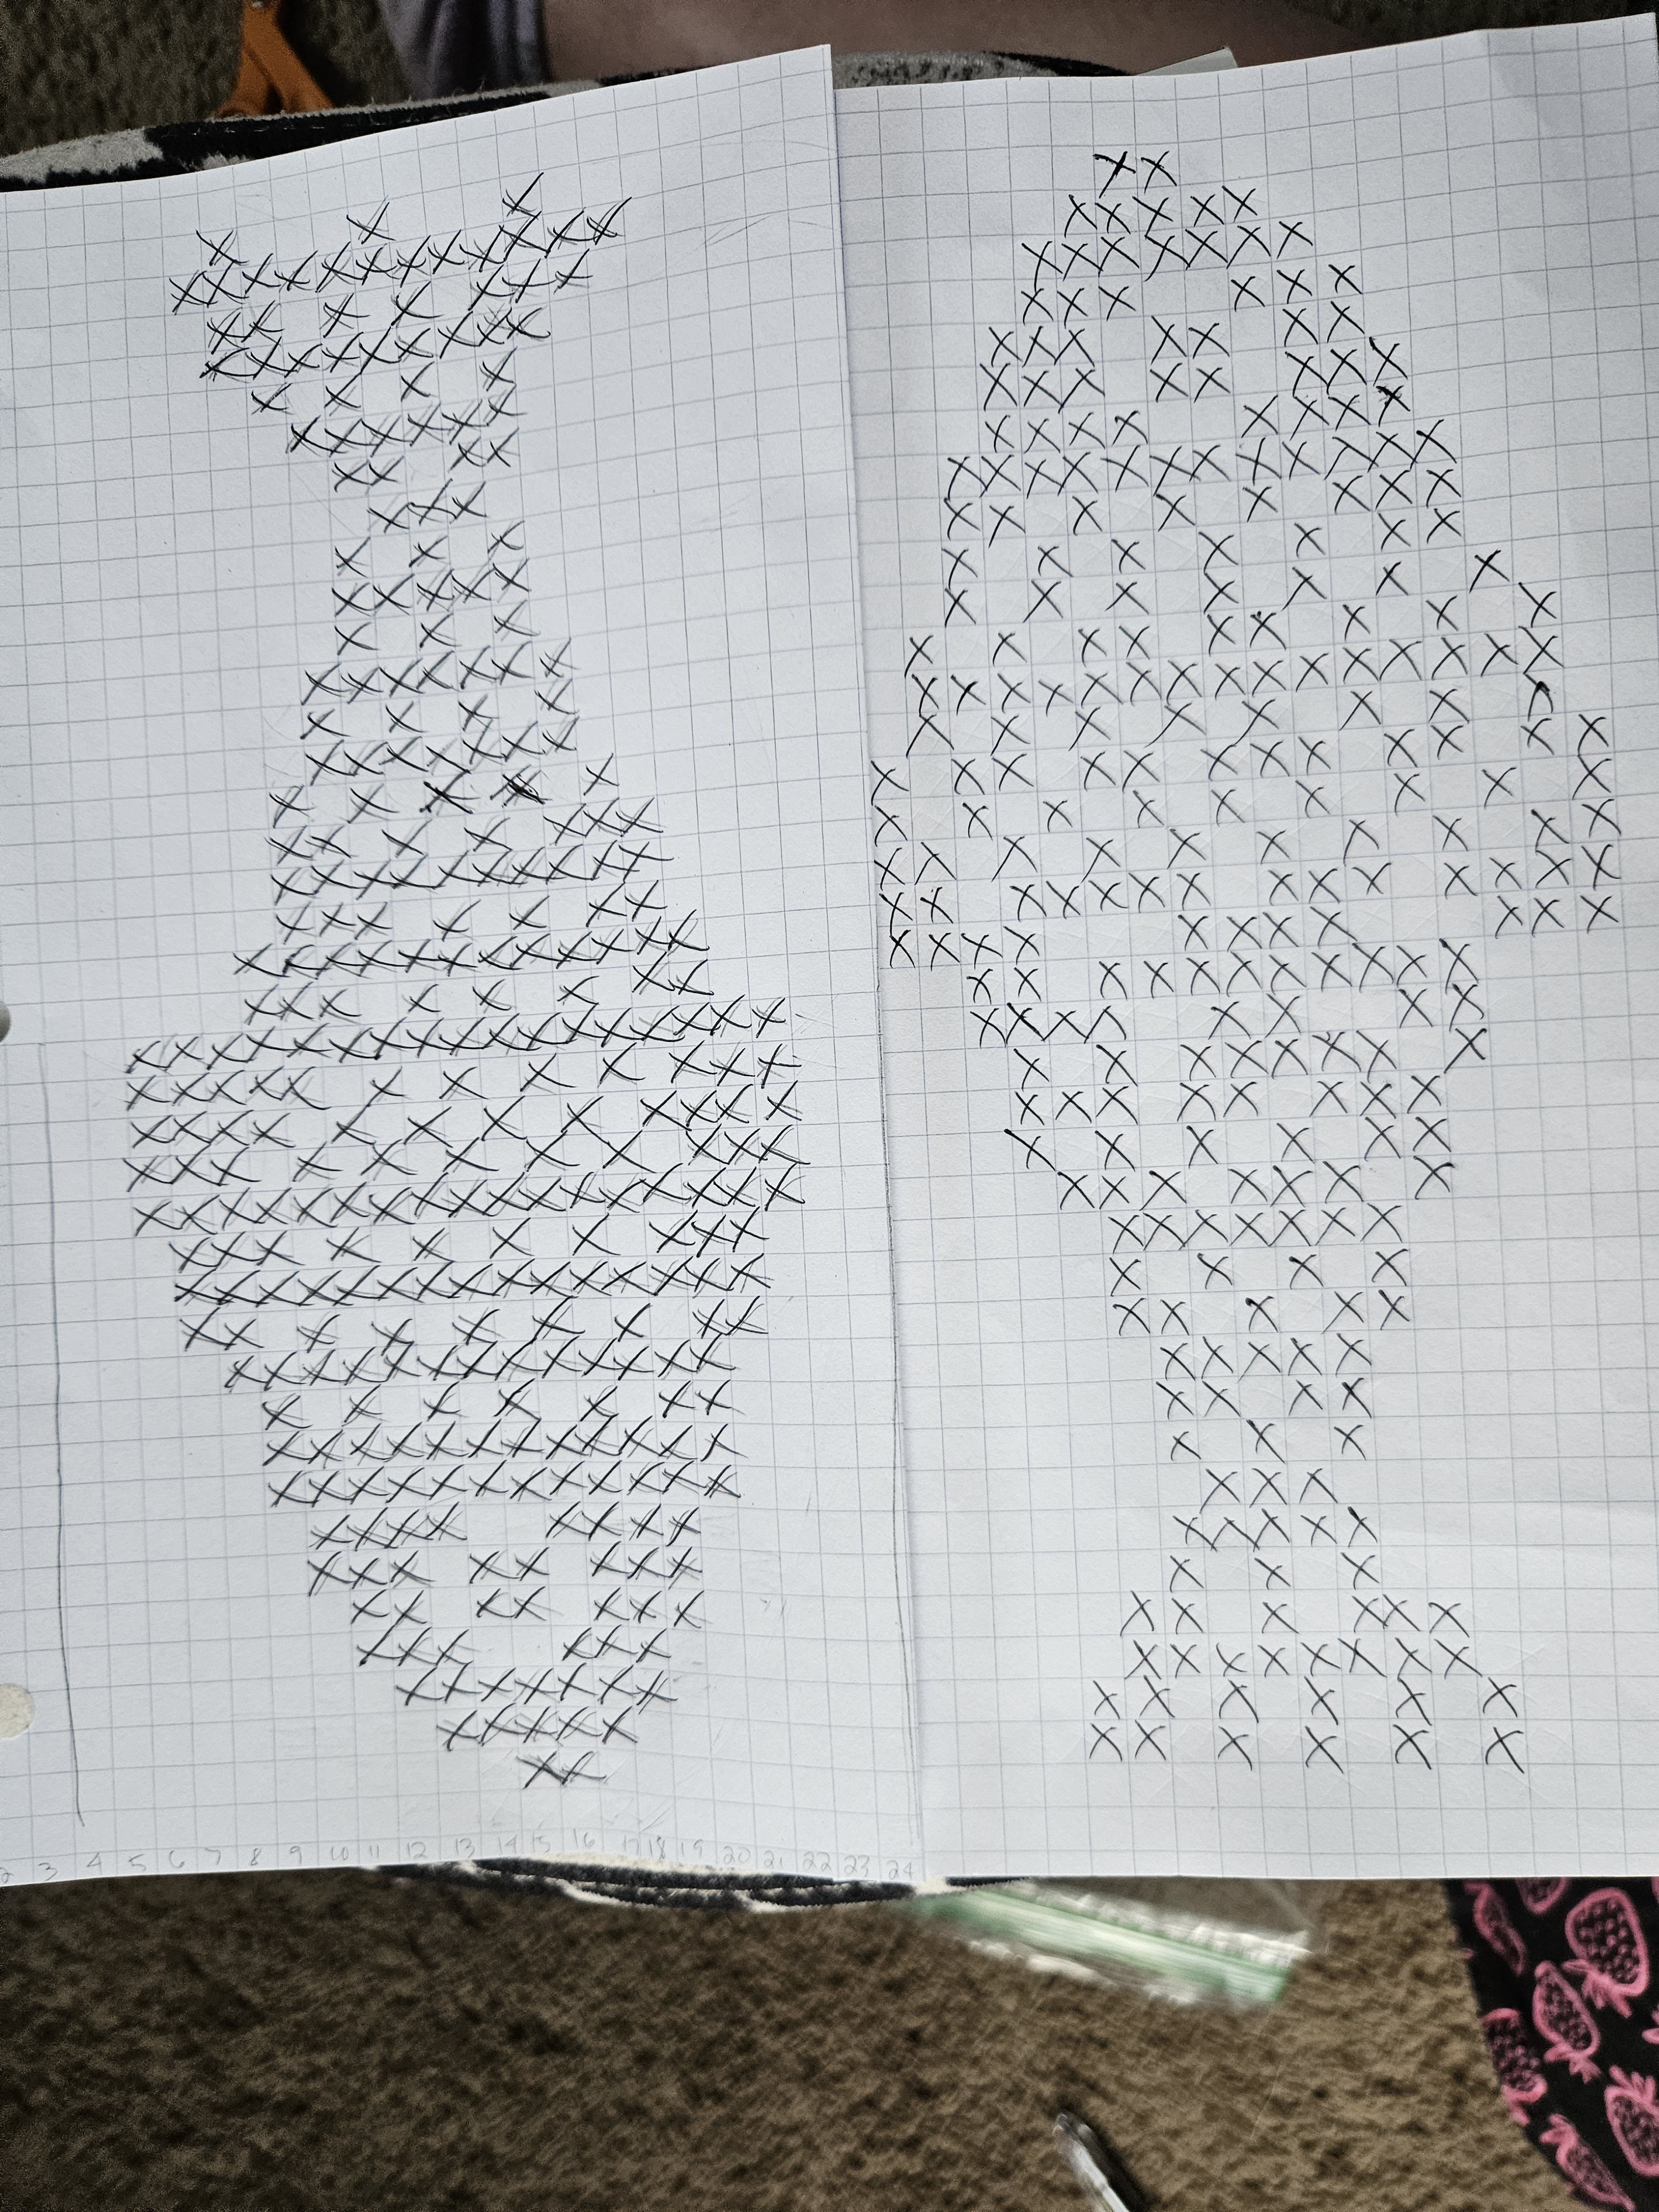

To make my pattern, I used the cross stitch reference and transferred it to graph paper by hand, tweaking some areas to make the inspiration my own. I did this in the same application for my Red Velvet Cosmic Knit Tank project. Next, I needed to determine the scale of the fish within the sweater pattern. It’s important to plan out how many stitches you need to complete the colorwork section across your rows and keep it centered. To do this, subtract the number of stitches in your colorwork pattern from the number of stitches in your row. Divide the sum by two and adjust to keep the stitches on either side equal, to keep the pattern centered. It is also important to note how tall the color work pattern is compared to the garment you are knitting, to allow enough room above and below that the graphic motif makes sense and doesn’t look misplaced on the garment. I think I literally held my pattern up to Kyle’s chest to figure it out.
Fiber Content
For this sweater, I went in a different yarn direction to try something new. I chose a wool and acrylic blend from Knit Picks called Mighty Stitch. It was underwhelming. The yarn, while soft, pills something fierce. It is also a slim worsted weight, which was exaggerated by the large needle size I used – US 10 or 6 mm. This created a breathable, airy sweater, but dang, did it throw off my pattern and design. Eventually, I had to face my fate – I was running out of yarn, and my panel was too narrow. Not exactly the outcome you want after spending a week on the front panel with the intricate fish design. I would rather start over than frog the color work, always.
I had some decisions to make. I originally purchased the Mighty Stitch on sale, but when I ran out of yarn, it was not on sale, and I wasn’t interested in doubling the price of this already too expensive project that was in the process of failing. So like Miss Frizzle recommends, I got ready to “Take chances, make mistakes, get messy!” I went to my closet of yarn and fabric and began to dig through the stash for something else I could introduce into the design. I found a warm-toned gray and neutral black yarn from Big Twist that was also worsted weight. Because the Mighty Stitch is a washable yarn, I felt comfortable combining the two yarns. I had already introduced acrylic yarn to the project through the mint and teal fish, using scrap Big Twist for those sections. Always check your fiber content, though, to avoid incompatible fibers that will make the project hard to care for over time.
Making a Change
The original design was changing from color palette to overall concept. This sweater would need to have color blocking sections now, to stretch the main green color. I decided to not only change up the design, but to change up my technique, opting for crochet on the sleeves to make the sleeves go faster. Knitting is a slow craft, and for some reason, knitted garments for Kyle have this curse of going horribly wrong and also knitting up slowly because of the hiccups. I wanted him to be able to wear this sweater for the bulk of the winter season of 2025-2026, and I was knitting this in August-October, so I took a shortcut. But in my defense, the texture of the sleeves, ironically, looks like fish scales to me. Especially with the gray and black colors!
The second change I made was adding width to the sides of the front panel to make the sweater a drop shoulder. I then knit the back panel wider from the start, and added a section of gray on the middle to upper back panel. It adds a nice contrast to the overall composition of the sweater, while making the sleeves feel cohesive.
Men vs Women Shoulder Shaping
The shoulders gave me such grief in this project! I’m used to making sweaters for myself and my female form. The bust makes the shoulders rest differently than I realized, and this came back to bite me. For a man’s sweater, the back needs to be longer. Especially the shoulder section on the back of the sweater is going to ride up the back, and be too long in the front. This happened, and I was bamboozled on how to fix it. Enter short row shaping and the principles of perspective and scale.
I learned that I needed to add short rows, meaning only working a section across a row to add length to a specific portion of the back panel, the back middle. To do this, you work back and forth on the section, evenually go back to working across the entire row. In addition, I made the back collar and back ribbing longer to compensate. These simple changes made the sweater appear the same length back and front, draping across the shoulders pleasantly, even if one side was technically longer. It doesn’t matter because of the role of perspective. Magic!
Final Thoughts
I learned a tremendous amount of knowledge from the Catch of the Day sweater, and I am grateful it all came together in the end to make a sweater that Kyle enjoys wearing. I have saved my patterns to attempt this again in the future with better yarn and proper dimensions to make the pattern fit well from the start, instead of scrambling to adjust at the end.
