This is a post I originally came up with last fall, but it was too late in the growing season to make sense. This post is going to be regularly updated to share what we’re currently growing. It’ll be a way to keep everyone in the know with what’s currently in the garden and containers.
Beans
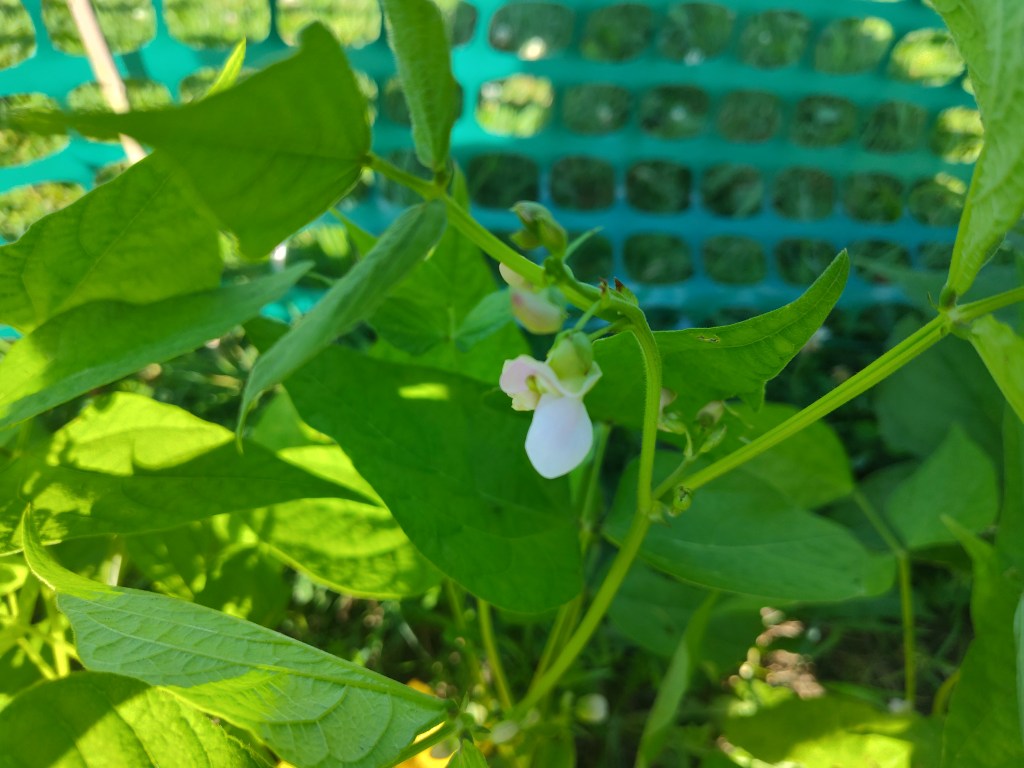
Our beans are being grown in two sections of our property. We have the majority of them growing in the ground in one of our garden beds alongside our corn. These are our bush-habit beans, so they won’t grow too tall and don’t have to be trellised. They’re growing along the perimeter of the bed, alongside the fence. The 7 varieties we’re growing here are Cranberry (shelling), Missouri Bill (shelling), Black Turtle (shelling), Maxibel Hericort Vert (snap), Blue Lake 274 (snap), Beurre de Rocquen (snap), and Cherokee Wax (snap). All of our bush beans have germinated, with the majority of the plants about 2 inches tall. These were planted close together and shouldn’t need to be thinned. Update: As of mid-July, all of our beans are doing very well. They’re all about 18 inches tall, have flowers, and small beans growing.
We also have 3 pole beans growing elsewhere on the property in the trellising containers that I built. These are located alongside our garage and by our potatoes. Update: Of the pole beans we planted, only the Iroquois Skunk pole beans have grown. The other varieties failed to germinate, so we replaced those with the Skunk pole beans. The first planter has done very well and has a lot of beans growing on the vines.
Corn
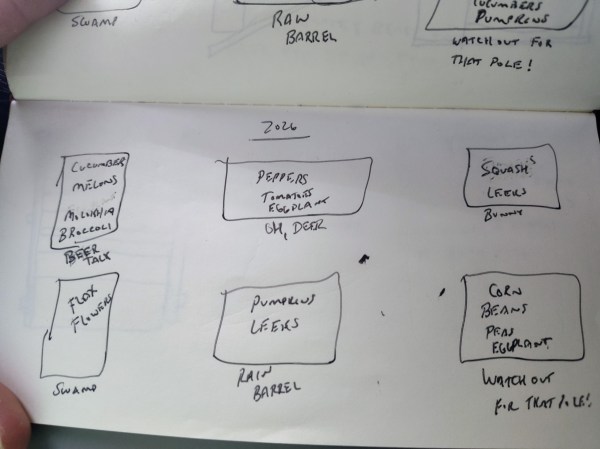
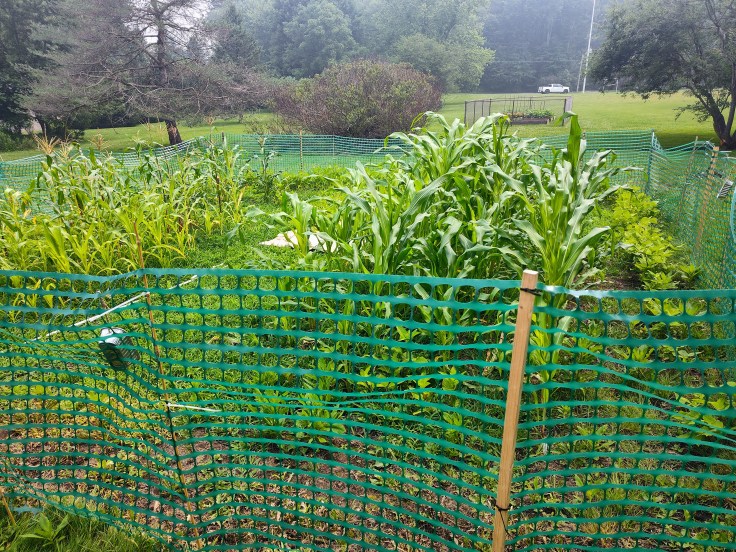
We enjoyed growing corn so much last year that we wanted to expand upon the 3 varieties we planted, which we did by buying 9 varieties for this year’s garden. As mentioned above, our corn is growing in the same bed as the beans, which was intentional since they are companion crops and are two-thirds of what the Native Americans called the Three Sisters, along with squash. In the right circumstances, corn stalks can be used as the pole that beans will climb, eliminating the need for a trellis system.
The 9 varieties are Hopi Blue (flint), Painted Mountain (flint), Northern Lights (flint), Country Gentleman (sweet), Luther Hill (sweet), Stowell’s Evergreen (sweet), Sweet Iroquois Black Mexican (sweet), Hjeirleid Blue (sweet), and Bear Paw (popcorn). Of these, we grew the Hopi Blue and Sweet Iroquois Black Mexican last year. Everything else is new to us. We’ve also never grown popcorn before, so that’ll be exciting.
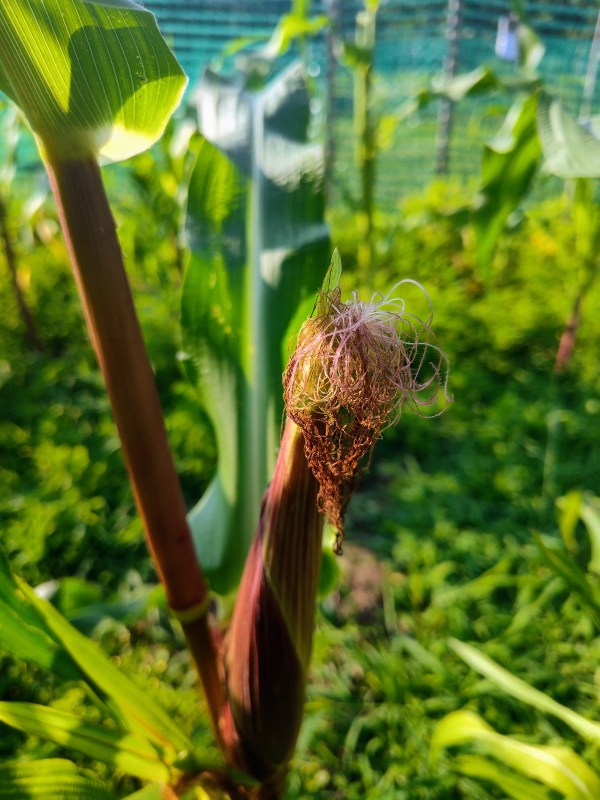
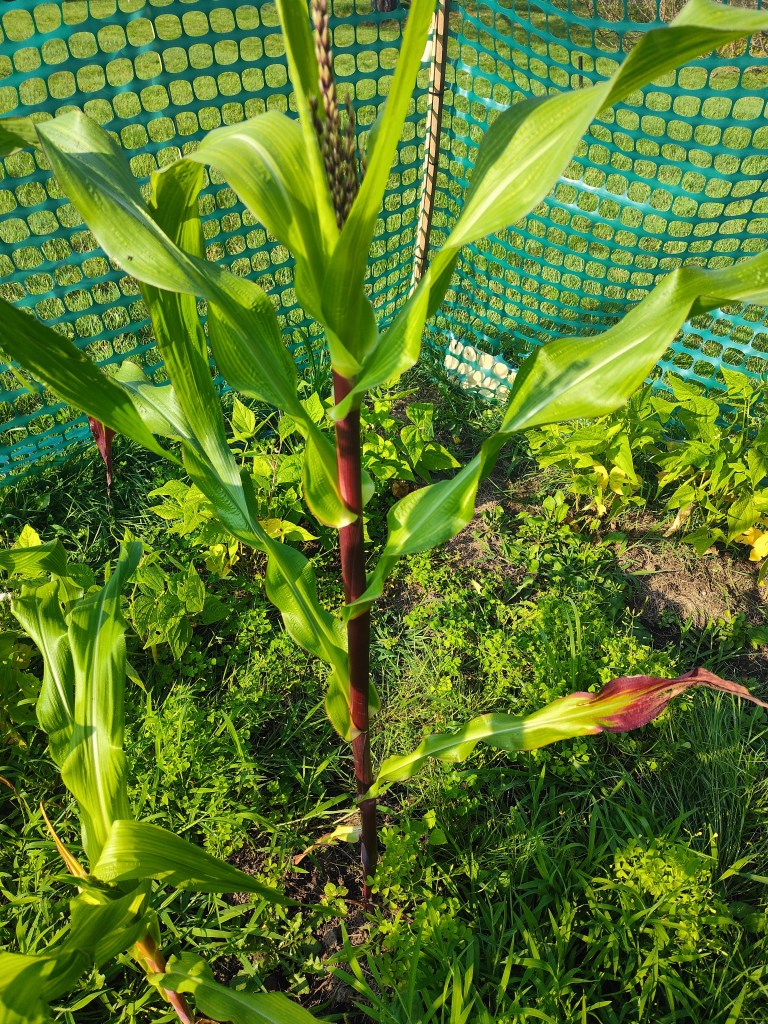
Update: After starting with full rows of flint, popcorn, and dent corn and half rows of sweet corn, all the varieties now have full rows. Germination went pretty well even though oppressive heat and excessive rain occurred not long after the second sowing occurred. The corn has a wide range of heights, from ankle height for the newest plants to 6 feet tall for the flint corn we planted first. There are multiple varieties that are in tassel and putting on ears to the point where silk is showing.
Cucumbers
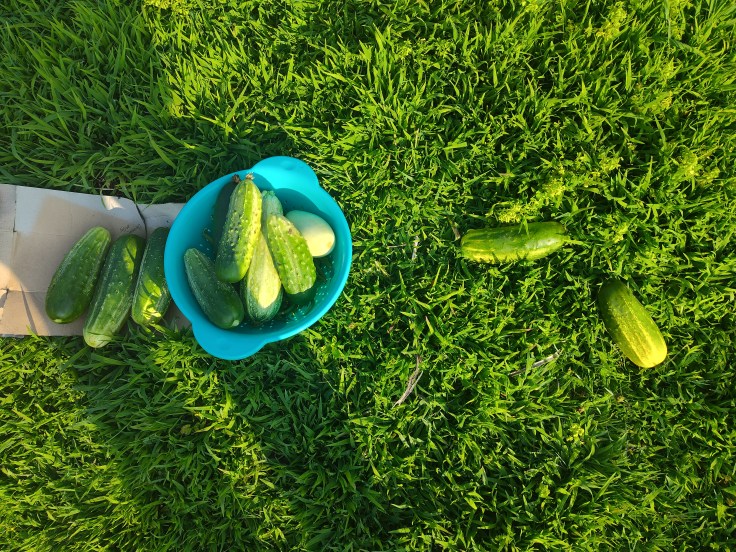
We’re only growing 2 varieties of cucumbers this year. One is called Bushy, and it’s a non-vining variety that produces cucumbers that can be used for slicing or pickling. I started 4 of these inside and transplanted them into our garden. Of the 4 plants, 3 are still alive and have sprawled much more than I thought they would based on their name. Update: We have had a lot of blossoms and many small cucumbers, with the largest being roughly 5 inches long. We should be able to pick them soon.
The other variety is the Mexican Sour Gherkin, also known as the Mouse Melon cucumber. These put out vines and need to be trellised. The cucumbers are small, roughly the size of a golf ball, and look like baby watermelons. We’re growing these in one of the planters I built from the Ikea chair. I started the first batch of these inside and transplanted them. Unfortunately, they didn’t transplant successfully, so I had to restart them by direct sowing. They have yet to germinate. Update: These never germinated.
Eggplant
We greatly enjoyed growing and eating eggplant last year. We bought an Asian variety from our local greenhouse and enjoyed slicing and roasting them all summer. This year, we again opted to buy 2 starts from the greenhouse over seeds. They were a couple of inches tall when purchased and have grown since being transplanted into the garden, but they aren’t looking the healthiest. Some of the leaves turned brown at first, which I think is the result of a watering issue (Too much or too little? Who knows?). We also had some small flying bugs that were causing damage, but I think these have been addressed with Sevin spray. Update: The plants are about 15 inches tall but have yet to flower. Last year, I think I remember the plants flowering and putting on fruit earlier than this, but the plants look healthy now. At one point, I was convinced the plants were dying, but they look very healthy now.
Leeks
I don’t understand how to grow onion-adjacent vegetables. I’ve never tried to grow bulb onions, but I’ve never been able to get spring onions to reach maturity so that they can be harvested. They start out looking great and eventually die off. This year, we passed over onions in favor of leeks, but it looks like it could be the same result. I started 12 cells of them inside and transplanted them when they were 3 inches tall. Update: I believe that the transplanted leeks died. However, in a stunning turn of events, the seeds that I planted have germinated and have greens on them 10 inches long. I’m still unsure if we’ll get a full-size leek out of it, but I’m really excited by the progress so far.
Melons
Pennsylvania isn’t the first state that comes to mind when you think of growing melons, but we had decent success last year with them. We grew heirloom varieties that weren’t native to the region. They also weren’t bred for cool climates, yet we still harvested a half-dozen or so fruit. This year, we focused on varieties that were bred to have success in cool areas. They are Cream of Saskatchewan, Montreal Market, and Pride of Wisconsin. We are growing 4 of each, and all were directly sown into the garden bed.
Update: I believe that 9 of the 12 plants remain and are having success to varying degrees. A few plants have vined out and have small, ping-pong ball-sized fruits on them.
Molokhia
I also struggle to grow greens. I’ve never been able to successfully grow lettuce. Last year, we grew mustard greens with some success, but they quickly got out of control. Molokhia is the only green we’re growing this year. It’s a vegetable that is popular in Middle Eastern and African cuisines and is also known as Egyptian Spinach. Molokhia plants enjoy hot weather, so I started the seeds inside to give them a head start. They germinated well, and I was able to transplant 6 plants; however, in the first days after being transplanted, they began not looking so great and have since died. I directly sowed another line of seeds, which have germinated, but it’s still too early to know if they’ll succeed.
Update: The tallest of our Molokhia plants are 6 to 7 inches tall. Because this is the first year we’ve grown it, we’re a little unsure how things will progress until we harvest some of the leaves. What we do know is that it should be harvested when the plant is 12 inches tall.
Peas
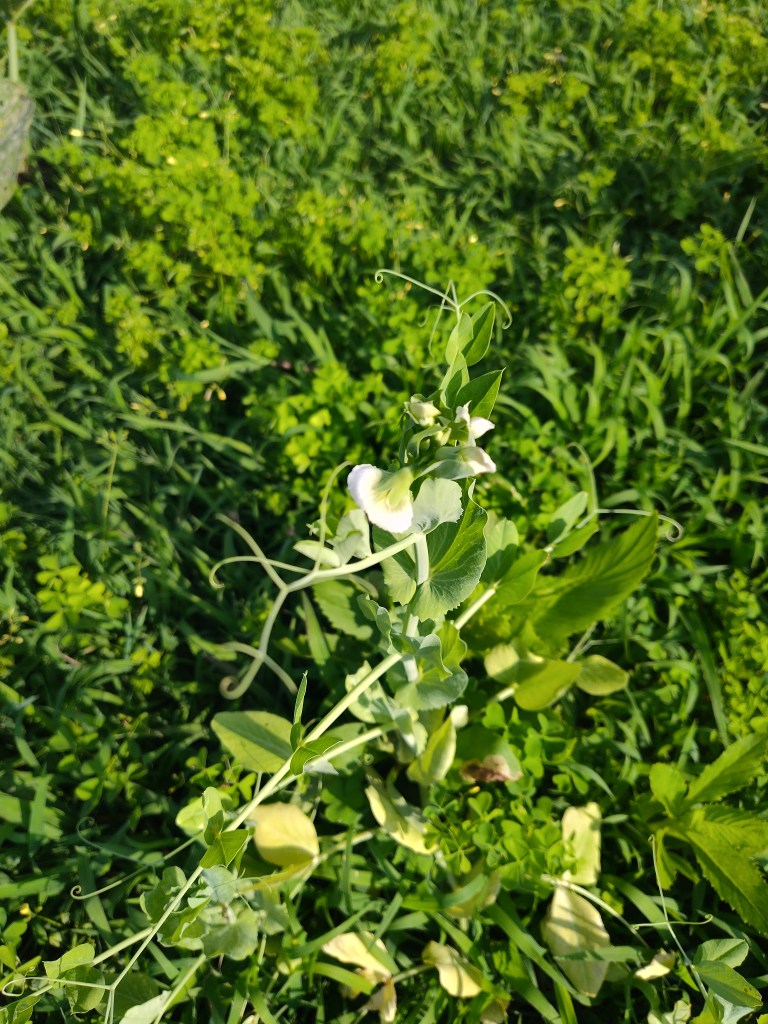
We grew one type of peas last year. They were a snap variety, which I love to eat. They were successful in that we harvested some pods, but we didn’t get the yield I was hoping for. That was largely because I planted them when I was feeling overwhelmed by all the other plants and didn’t give them the attention they deserved. This year, we’re growing 3 varieties: Green Arrow (shelling), Sugar Ann (snap), and Oregon Sugar Pod (snow). I was more careful with organizing the rows of peas this year than I was last year, and it’s going to pay off as the plants grow.
Update: We have rows of each pea variety growing, with the majority of the plants roughly 10 inches tall. They’re also putting on blossoms. I think we’ll get some pods to develop, but I wonder if they were planted too late due to weather.
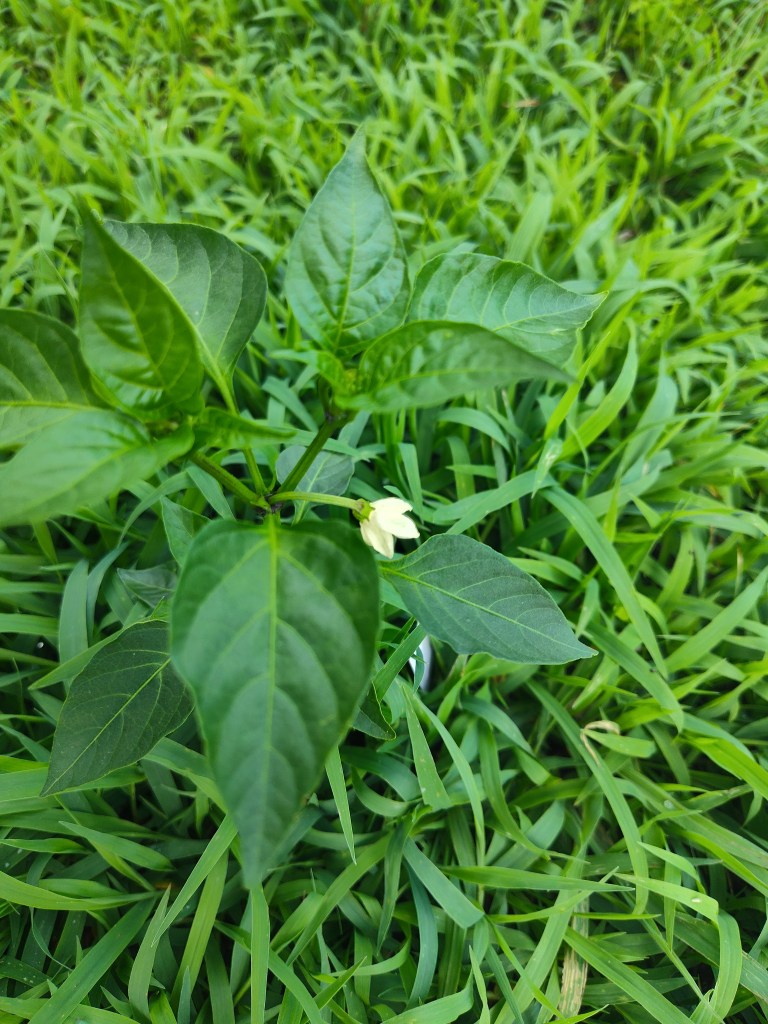
Peppers
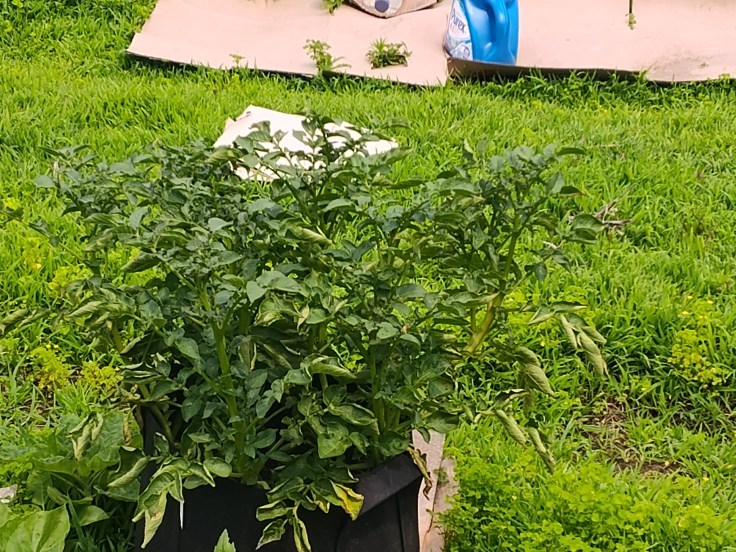
Peppers were another vegetable we had issues with last year. I started seeds and we bought starts, but none of the plants ever produced a mature pepper. Peppers can be tough to grow, and I don’t believe I was ready to correctly handle them last year. This year, we bought 4 varieties: Gochugarju (hot), Jaluv an Attitude (hot), Habanero (hot), and Takii’s New Ace (sweet bell). We bought the Takii’s New Ace largely because it can produce mature fruit quicker than other varieties, which is important in northern states where it can take until June to regularly get above 70 degrees. I also started a lot of cells for each variety and was intentional with developing a good root nest before transplanting.
Update: Peppers remain the most problematic vegetable for me to grow. There are still a few plants in the garden, but the others have died. We have a couple of fruits developing on a gochugaru plant, but I was hoping for more success with them this year. We still have the 4 plants that I started in the basement still growing in containers, and they’re looking good. I’m unsure if I’ll transplant them into the garden bed or to another container at this point.
Potatoes
I recently wrote in-depth about how we’re growing our potatoes in bags this year and how well it’s going. If you didn’t read that post, I recommend checking it out. We’re growing 4 potato varieties this year: Red Norland (early season), Adirondack Blue (midseason), German Butterball (late season), and Magic Molly (late season). They’re all doing very well.
We split each of the 4 varieties into 5 grow bags for a total of 20, and they’ve all needed to be hilled with dirt to the point where we won’t be adding any more dirt to the bags. Within a few days of planting, some of the plants began poking through the soil. We were adding more dirt on a daily basis for a while until we decided to buy enough dirt to top off all of the bags in early June. I am shocked with how well and quickly they’ve grown. Still, we’ve had several of the bags begin to show plants poking through the soil, so we’re seeing a lot of growth and may only be a month away from harvesting our first potatoes. From here on out, we’ll only have to water the bags, monitor them for weeds, and wait for the plants to flower and die off.
Update: Our potatoes continue to be the most productive and successful vegetable. All of our bags have plants growing, with the majority of them completely full. The most successful bags have plants that are 18 inches above the top of the bag and are starting to put on flowers.
Pumpkins
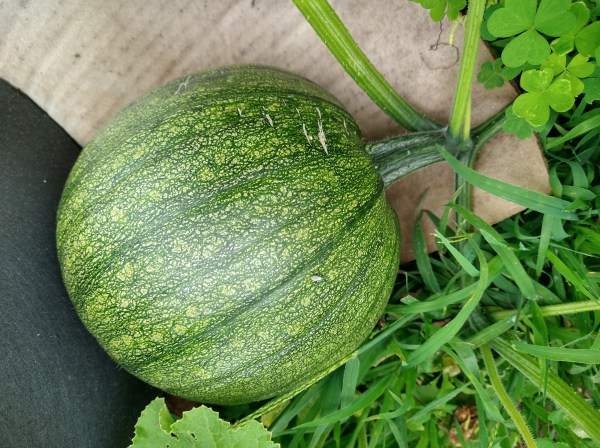
We loved growing pumpkins last year and had a lot of success with them despite not knowing what we were doing. We harvested 3 of them, making pumpkin pie with them for Thanksgiving. They made the most delicious pumpkin pie we’ve ever had. We would have been able to harvest more of them had deer not broken through our fence and ate some of the pumpkins.
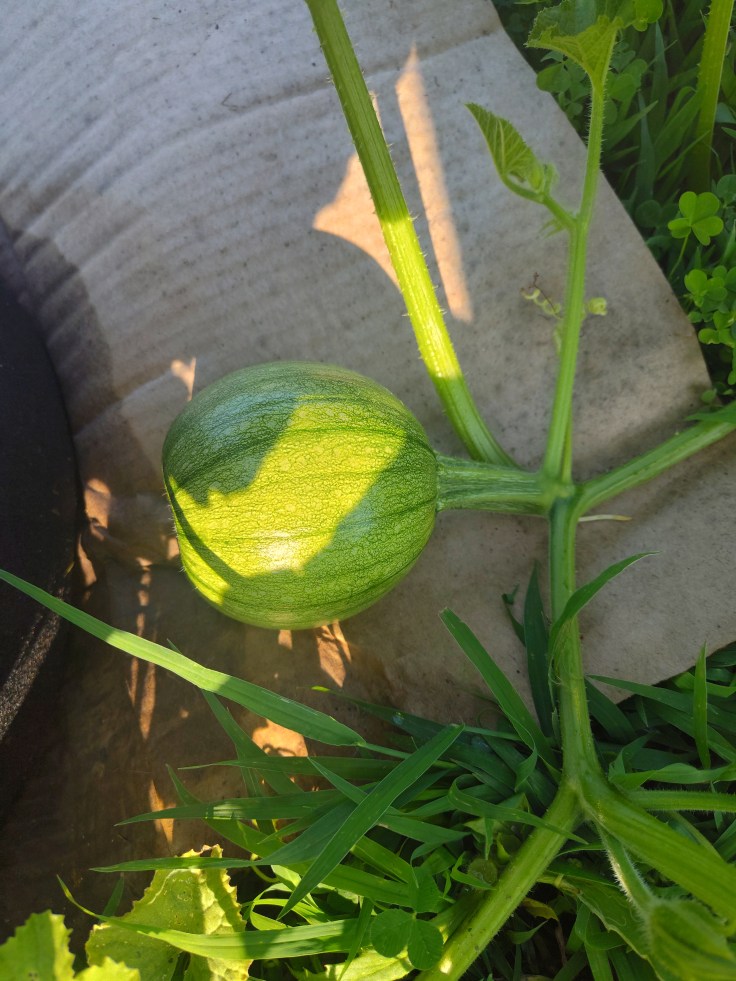
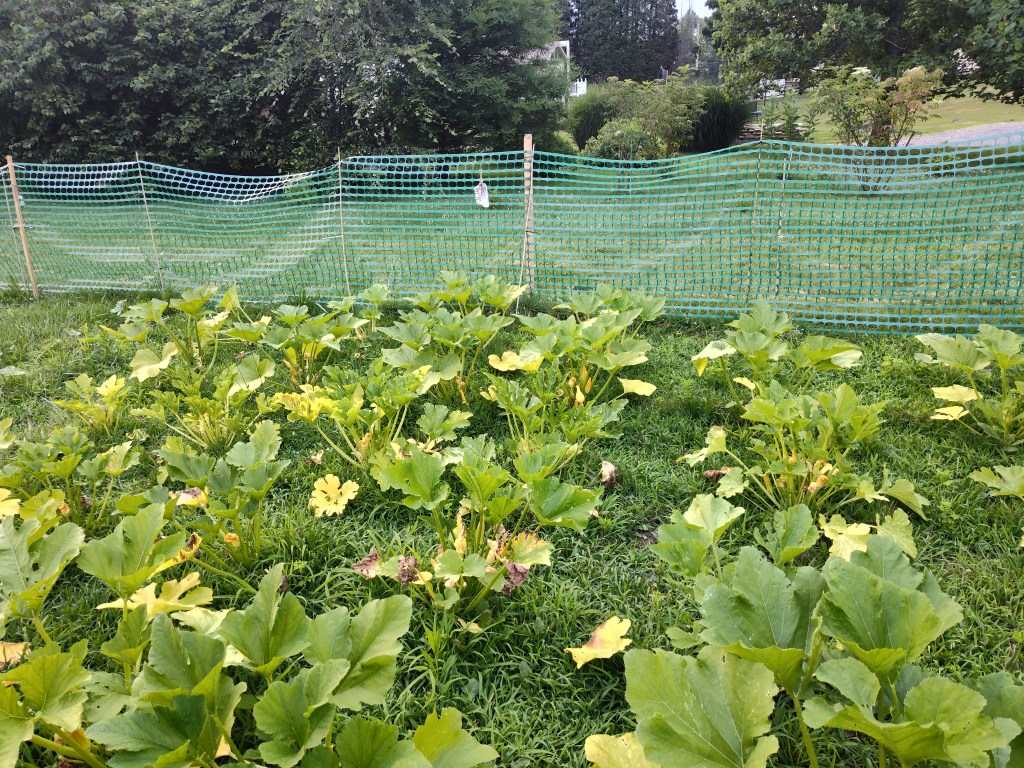
This year, we’re only growing 2 varieties—Winter Luxury and New England Sugar Pie, which grew last year. We’re being really intentional with how we’re growing our pumpkins this year, with 5 hills built for each variety. Weirdly, only 1 plant of each variety has germinated so far, and we’re going to re-sow seeds. Update: After re-sowing the seeds, all 10 of the hills germinated. All of the plants currently have flowers, with one plant vining out and beginning to grow fruit.
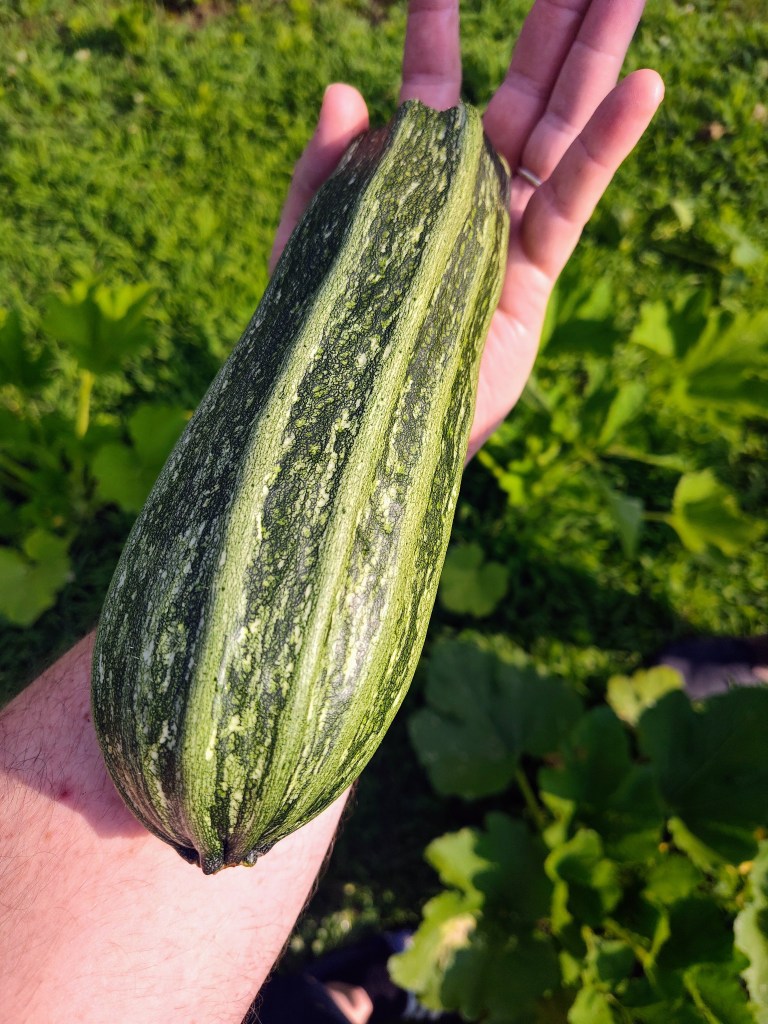
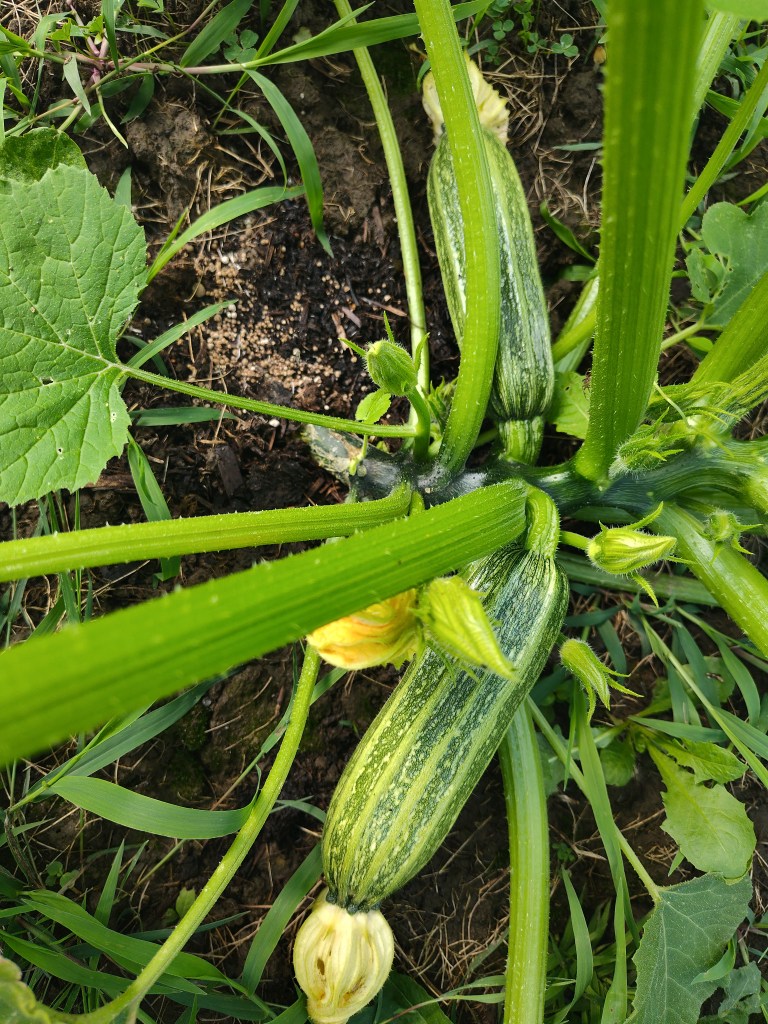
Squash (Summer)
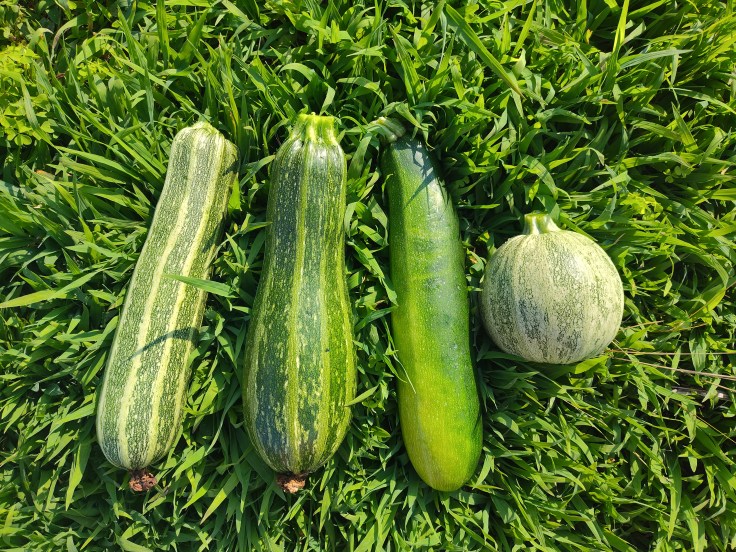
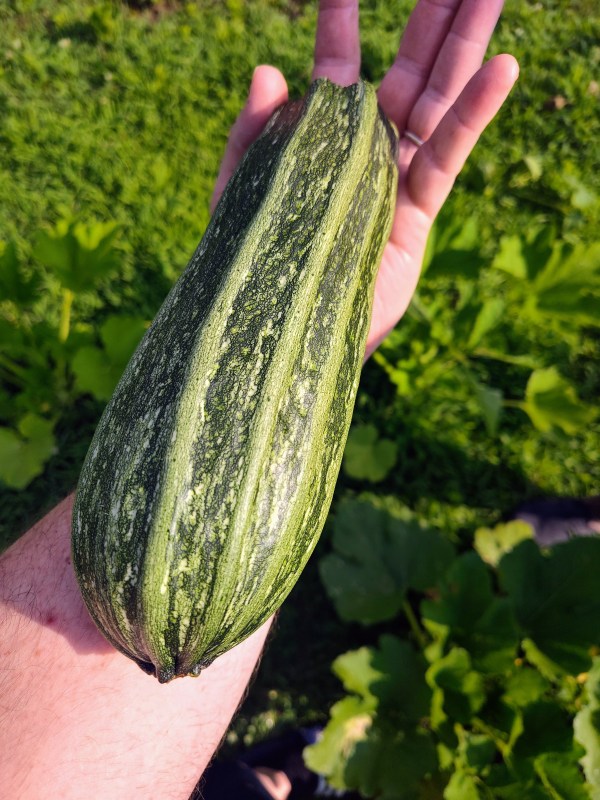
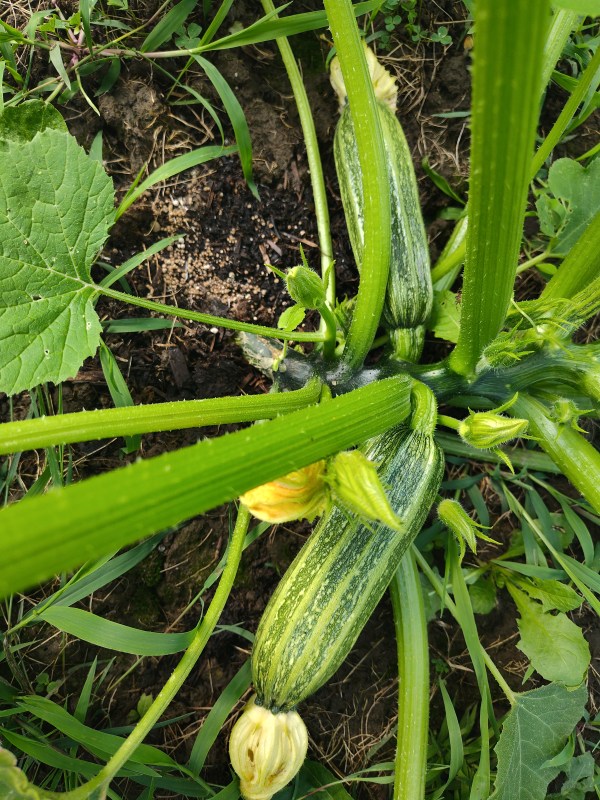
We are growing a ton of summer squash with 7 varieties: Black Beauty (Zucchini), Costata Romanesca (Zucchini), Early Summer Crookneck (Yellow Squash), Lebanese White (Zucchini), Ronde de Nice (Zucchini/Scallop hybrid), White Scallop (Patty Pan), and Yellow Crookneck (Yellow Squash). We love squash, if you couldn’t tell.
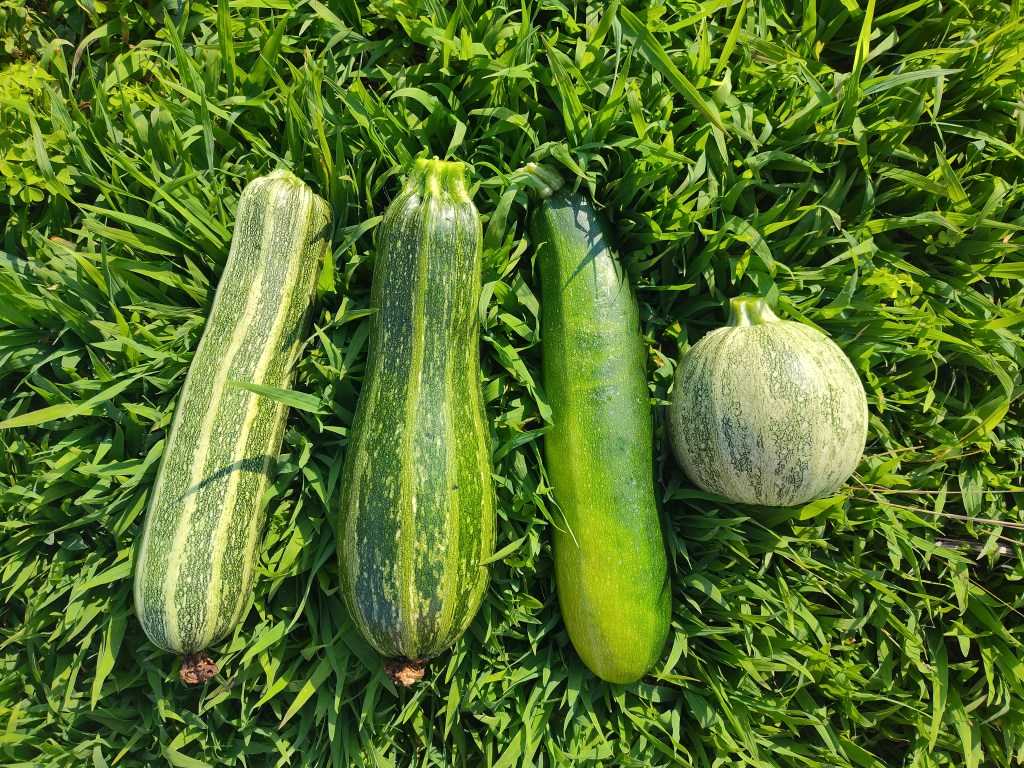
We directly sowed 5 of each variety, and all have germinated. Update: Our squash has taken off like crazy, and we’ve harvested multiple fruits: 1 Black Beauty zucchini, 2 Costata Romanesca zucchini, and 1 Ronde de Nice squash. We have more that are close to being picked and several baby yellow Crooknecks growing.
Squash (Winter)
We’re also growing 3 varieties of winter squash: Burpee’s Butterbush (Butternut), Turks Turban (Gourd), and Burgess Buttercup (Buttercup). We started 3 of each variety directly in the garden, and then our neighbor gave us 5 more buttercup starts. Three of the starts didn’t make it, but I replaced them with seeds from our stash, giving us 14 winter squash plants, assuming everything germinates. Update: After re-sowing the winter squash seeds, we had successful germination. Unfortunately, the buttercup squash our neighbor gave us aren’t doing too well; however, the seeds I planted have grown into healthy-looking plants.
Tomatoes
We’re growing a ton of tomatoes this year, so buckle up. After growing some rare and colorful varieties last year, we returned to growing all red tomatoes. The varieties are Aichi First (Slicing), Early Cherry (Cherry), Heinz (Paste), Korean Long (Paste), Large Red (Slicing), Little Bing (Cherry), Martino’s Roma (Paste), Mountaineer Pride (Slicing), Sub Arctic Plenty (Slicing), and Umpqua Beauty (Slicing). I don’t remember the exact number, but I think I started 6 cells of each variety and transplanted a total of 20 or so plants. Not all have survived, but we probably have around 16 plants, with 13 of them in the garden and 3 Little Bing plants in a planter. Immediately after transplanting our starts, I started more Heinz, Early Cherry, and Aichi First seeds, which have since germinated.
Update: Our tomato plants have put me through the wringer this year. They started out perfectly, but then an issue with grass growing in the garden bed combined with me forgetting to trim leaves on the plants led to them looking sickly. That was followed by torrential rainstorms that yielded 3.5 inches of rain in less than 12 hours. Since then, we’ve had warm weather and more consistent precipitation, which has salvaged the majority of the plants. We have lots of blossoms and small fruits growing on the plants. Our most successful variety has been the Little Bing, which is being grown in a planter. It looks healthy and has dozens of small tomatoes on it.