Using Doodle Decks for the First Time

The Doodle Decks from Pacific Knit Co had this aura, pulling me in from the first instance I saw online. Maybe it’s because of my 90s and 2000s childhood? It reminded me of the crafts we do as kids – the mini weaving looms, tie dye shirts, friendship bracelets, bedazzling etc. There was something about this deck cards.

If you are not familiar with the doodle decks, they are curated colorwork charts that are combined into a small deck of cards, with a design per card, and additional cards to teach you how to make the most from the themed deck of your choice. I love the approachable nature of this pattern! Instead of a paper pattern, with line by line instructions, you get miniature charts contained per card, that is far easier to keep track of when you are knitting.

I found this format incredibly easy to use! I could quickly flip through my options, and choose my pattern cards. You can compare options or brainstorm sections of your project by easily laying out the cards on a table. The small card, the size of a playing card, was easy to manage in my project bag. To pause my work, all I needed to do was slip my card on top of the deck, and slide the deck back into the box. No graph paper to fold or book to mark, easy peasy!

As a self-drafter, I am not the best at following patterns. I think some of this stems from neurodivergence, and some from the fierce individuality instilled from girlhood in the 90s-2000s. I remember, not wanting to be accused of “copying” someone’s style, or locker layout, or room decor. It was a major social faux pas. Even though knitting patterns are literally sold for this purpose, to share your design with the world, I can feel myself resisting. But with these doodle decks, even though I was not the one to draw these charts, I feel like it is a choose your adventure kind of pattern.

There are ideas for sure suggested in the deck, but you can follow your own heart. I like the customization of Pacific Knit Co’s format. I have learned a lot from them through this experience of using their color work doodle decks, including new perspective in regard to my own self-drafted color work charts. I always go big, with these large graphics, that span the front of a piece, when big is not the only way. Small designs, with repetition, in the fair isle tradition, are just as effective and a new way to tell the same story.

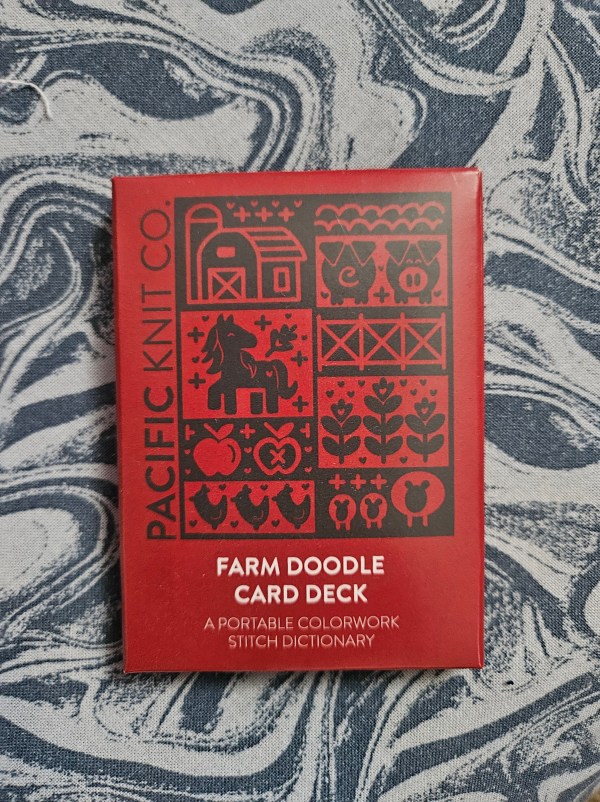
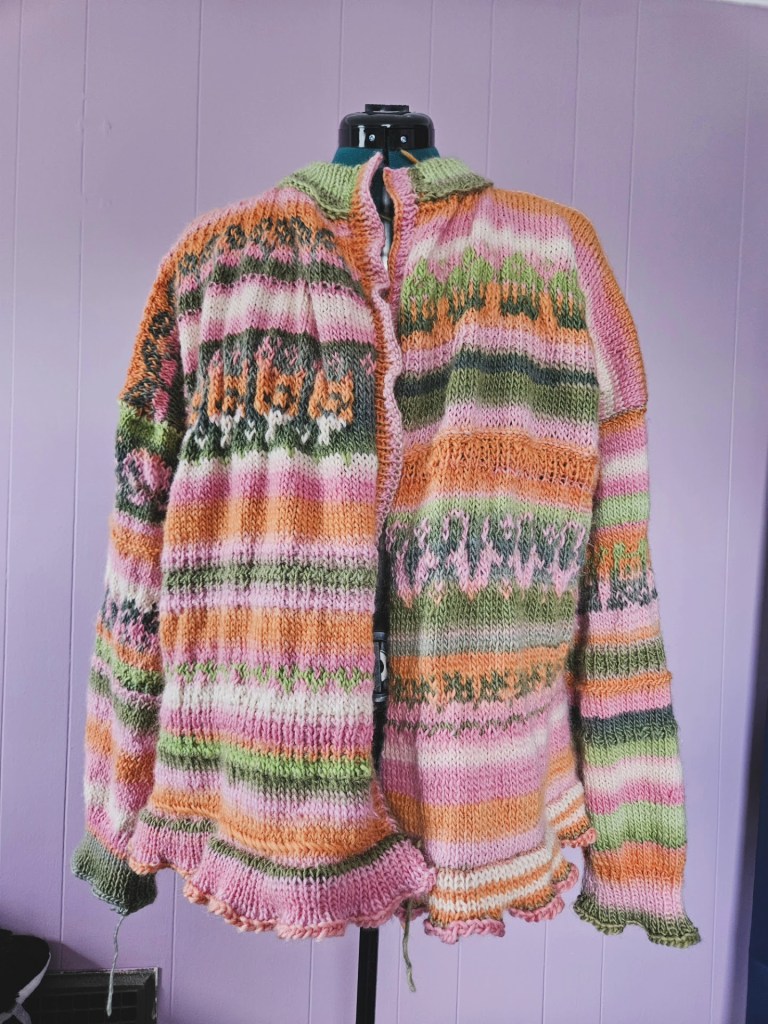
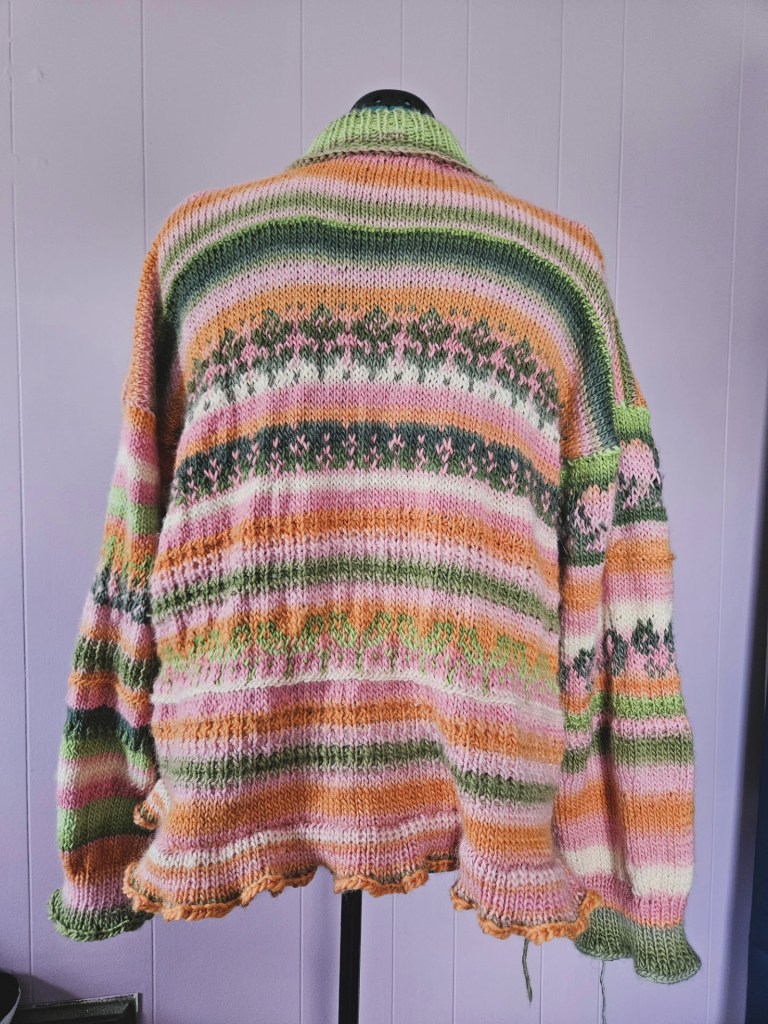
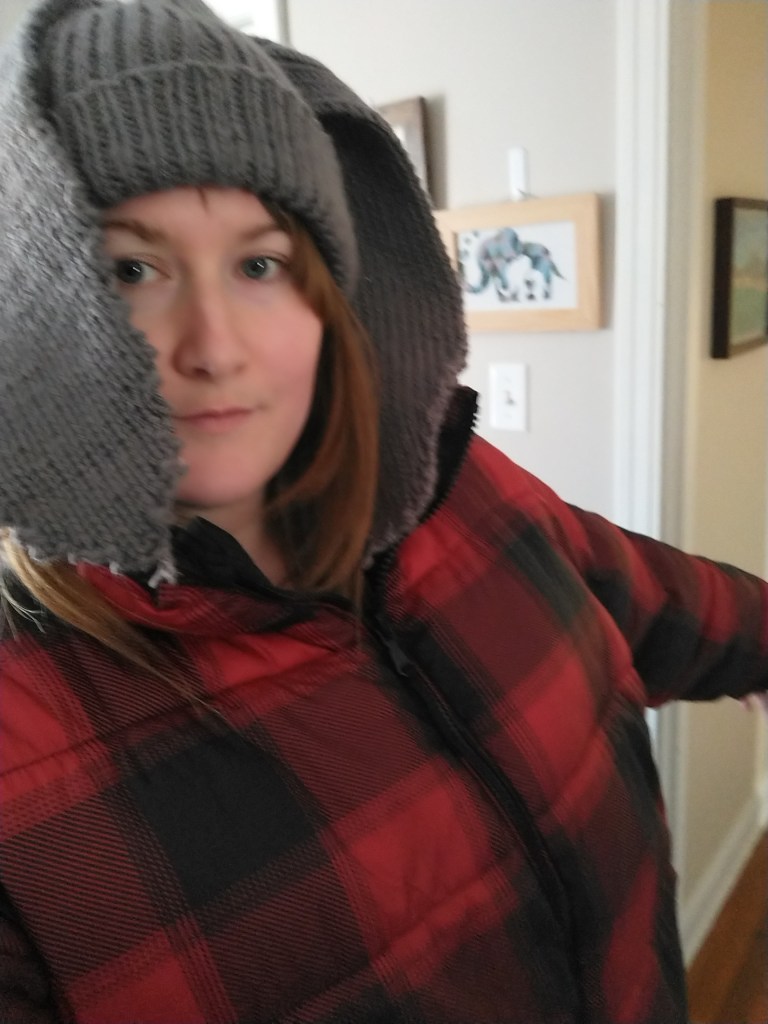
I would highly recommend giving these decks a try. I purchased the Farm Doodle Deck from my local yarn store, Moon and Yarn Craft Room to make the Town Farm Cardigan. For copyright reasons, I did not show the cards, aside from the front of the deck, but as you can see from these photos of my finished object, they contain lovely variety that will spark your imagination.

Night Sky Sweater

I’ve mentioned this before, but as a maker, I revisit a single project many times before it is done. Sometimes I will live with a finished object for a month, a few months, or even a year, and suddenly pick it back up again to adjust something that feels off. Honestly, taking a season or two away from that garment – such as, putting away a dress for the winter, or a sweater while you sweat it out for the summer, can give your mind the space to forget and re-acquaint yourself to the garment like you picked it up from the store. It is a whole new piece again, which can lead to me be less than thrilled with past me and her design choices.

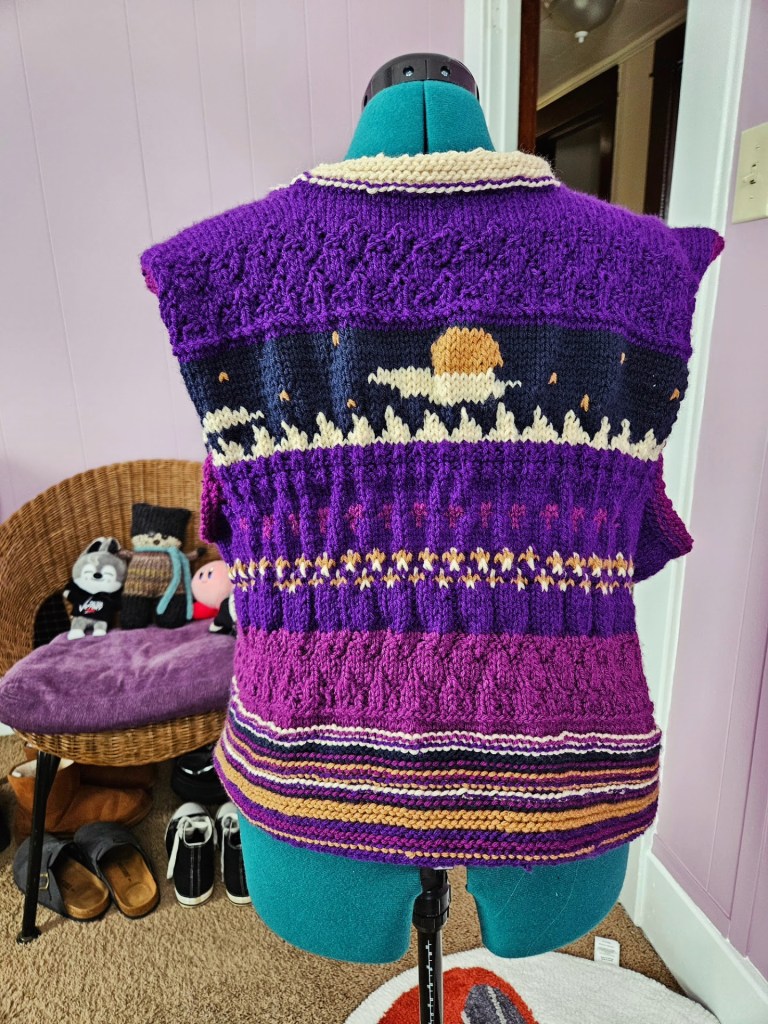
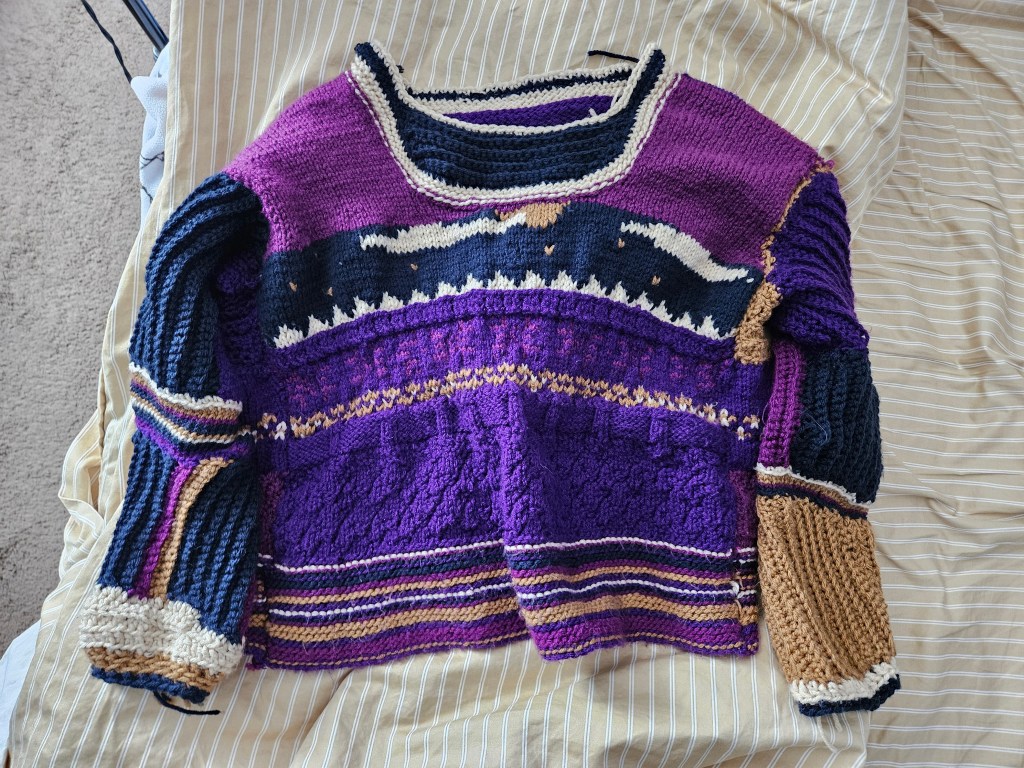
Take this vest for example, I began this project in December 2024, wrapping it in February 2025. I wore it a few times, as it stands as a vest that winter and spring, then it was put away for the warm weather. When cool air returned in the fall, I pulled it out of its drawer and set it on my dress form. This vest did not feel complete, it had more to say, even though my hands were weary back in the winter, so I stopped and called this piece done. But its not done, it would be a gorgeous colorful sweater, and it was time to go back to this garment to make it whole.

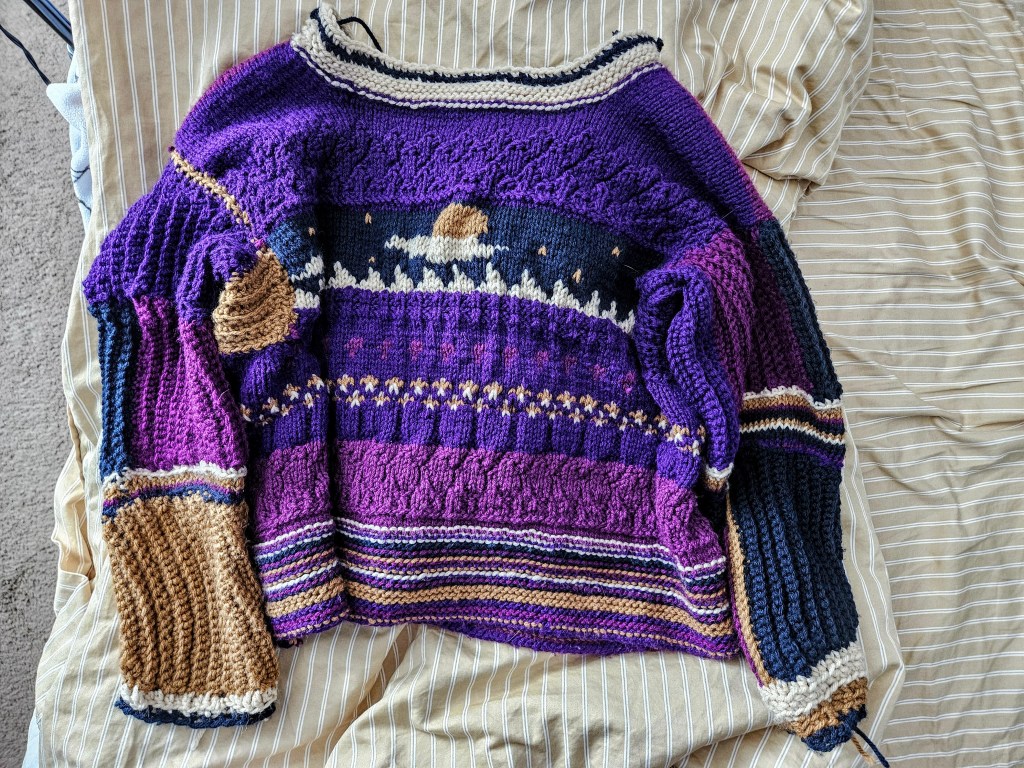
Now, this was a self drafted piece. A complicated self drafted piece that helped me cut my color work chops in a garment. This was the first sweater I made with such a large color palette and the first time I decided to make a knitted piece with the motivation of telling a story. I wanted to evoke a winter sky, with a moon that was visible on the front and back. A moon with stars, and clouds, floating above a forest. This sweater would not only feature colorful forms across the fabric, it would have texture. I chose to use the ‘seersucker stitch’ as it was labeled from a Pinterest chart, to weave a diamond texture into the fabric for a 3-D plush effect. I chose large and miniature color work sections to create ebb and flow in the color story.

For the bind off, I had grown tired of the classic 1×1 rib, so I tried something a little different! I chose to create tight stripes, knit stitched together. Instead of stockinette which used knit (right side) and purl (wrong side) for it’s classic construction, I decided knit stitch, knitting the right side and wrong side, would stabilize the stitches for a lack of curling in the finished fabric. And it worked! The technique and color changes ground the color palette for a cohesive garment.

Keeping these previous choices in mind, when it came time to add sleeves and a new collar, I chose to employee a new to me technique, crochet. I wanted the sleeves to be made in the round, and be completed quickly so I could wear this piece for most of the winter. Crochet is much easier to do in the round, and to make progress quickly. The crochet stitches allowed me to work in new directions too, so the sweater had vertical texture to contrast with the horizontal lines of the original vest. With sleeves complete, this is one of my favorite pieces to date. It tells a story. The color palette reminds me of Stardew Valley. The cloud on the back reminds me of an episode of Avatar: The Last Airbender when Appa is missing, and Aang thinks a cloud flying above is Appa floating above. I love the variety of colors – gold, navy, magenta, violet, and cream.

This was a labor of love, but I would highly recommend trying a complex project such as this if you are interested in making your own garments. Not only does this piece express my identity, it taught me how to be a better fiber artist. I feel proud each time I wear it. Get inspired and start stitching something from your own imagination!

Blossom Bright Cardigan

A project that I have struggled with as a fiber artist, has been the classic cardigan. Like menswear, there is something deceivingly simple yet downright complex. This is my journey to make my first successful cardigan project!

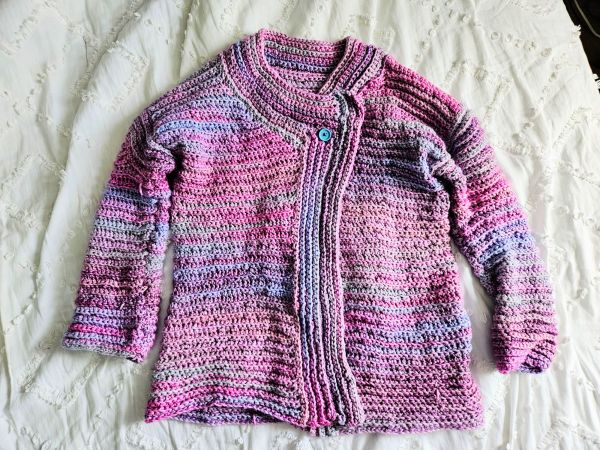
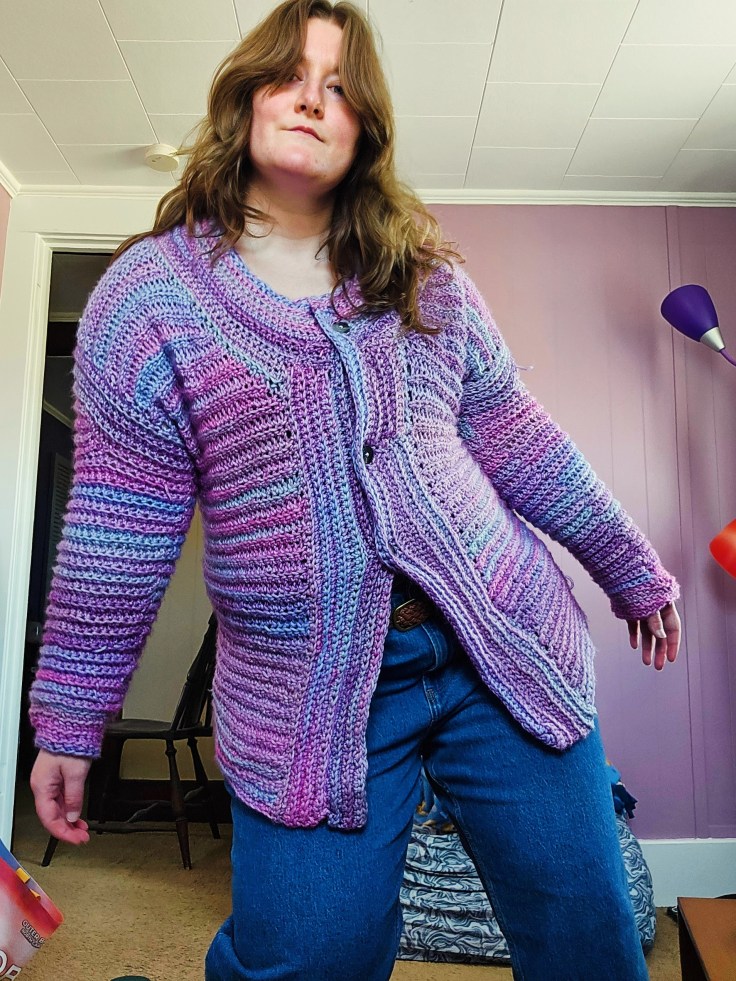
To make this garment, I used 3 Caron Blossom Cakes for a total yardage of 1443, give or take a yard or three left over. I used a 5.5 mm hook and chose a combination of single crochet for the collar and cuffs, and double crochet for the body of the garment. This was my second crochet project, and I’m shocked with how well it turned out, compared to my first knit garments! Crochet is such a forgiving medium, compared to working live stitches between two needles in knitting. It’s simple to pull back progress to correct mistakes, without losing the integrity of the garment. Seaming the garment was far easier, using the hook to single crochet slip stitch the panels together. For the sleeves, it was a straightforward transition to crocheting in the round, compared to how confusing I find knitting in the round to be. In the same way, finding the stitches to pick up for the collar and button band, was a piece of cake!

Honestly, I have struggled with cardigans in the past – including felting a finished garment less than a week after I finished knitting it. It was devastating! The only thing I struggled with in this project was button color, size, and placement. As you can see from the featured photo and this one below, I have changed the color and button placement with wear. The vintage teal buttons I bought secondhand are brittle, one actually snapped in half. These tortoiseshell buttons are darker than I planned to use. I originally wanted to use buttons in a similar color value to the yarn hue, but the contrast is not bad. I think it brings more polish to the finished piece. The tortoiseshell buttons are actually the same I used on my felted cardigan. Always save your notions!

Because this cardigan is made from Caron Blossom Cakes, it is a combination of cotton and polyester, and is quite breathable for how chunky and fuzzy the yarn is. Now, the crochet stitches are certainly helping, but I am impressed by how comfortable this yarn is to wear. It tempts me to buy more, in a different colorway to make another sweater or cardigan. I have pause though. All the color offerings are vibrant. What if two garments with this yarn style is too much?

Overall, I loved my experience making this garment and wearing it. It’s a solid cardigan for Fall and Spring, with appropriate layering I’m sure I would feel warm enough in Winter too.

Have you crocheted a cardigan before? What was your first crochet project? Have you worked with Caron Blossom Cakes?

NMIXX Fe:304 Forward Inspired Knitwear

Nmixx is a relatively new K-pop band, debuting in 2022 under the label JYP Entertainment. Comprised of six members – Lily, Haewon, Bae, Sullyoon, Jiwoo, and Kyujin, they are young but immensely talented. Nmixx had a rocky start, similar to Stray Kids, who share the same label, being panned as noisy and chaotic. As time passed, Nmixx developed its sound to a polished mix-pop with killer vocals. In 2026, they are finally getting the respect they deserve, and I am thrilled to see it!

They first came on my radar in 2023, thanks to their song ‘Love Me Like This’, but I didn’t become a fan, or NSWER as their fandom is called, until 2024 with their Fe304 album series.

Fe304: BREAK released in January 2024, with songs such as Dash, Run for Roses, and Soñar to help me get through the chaos of moving. Fe304: STICK OUT, released in August 2024, was the soundtrack of our trip up to Erie. Fe304: FORWARD hit just as we broke ground on the garden in 2025, and this album, some days, carried me through running that tiller in the mud and stubborn grass shag. From High Horse to Slingshot, this album changed something in me, lifting Nmixx to my favorite girl group (sorry, Aespa). Nmixx scratches a creative chaos in my mind that fills me with joy.

Bring a fan, I thought it would be cool to get some merch, which became quite difficult in 2025. With Nmixx being in their third year, there was a lack of offerings in the US, and those pesky tariffs from the head idiot in charge. So, I decided to get creative like I did with my Cosmic Tank.

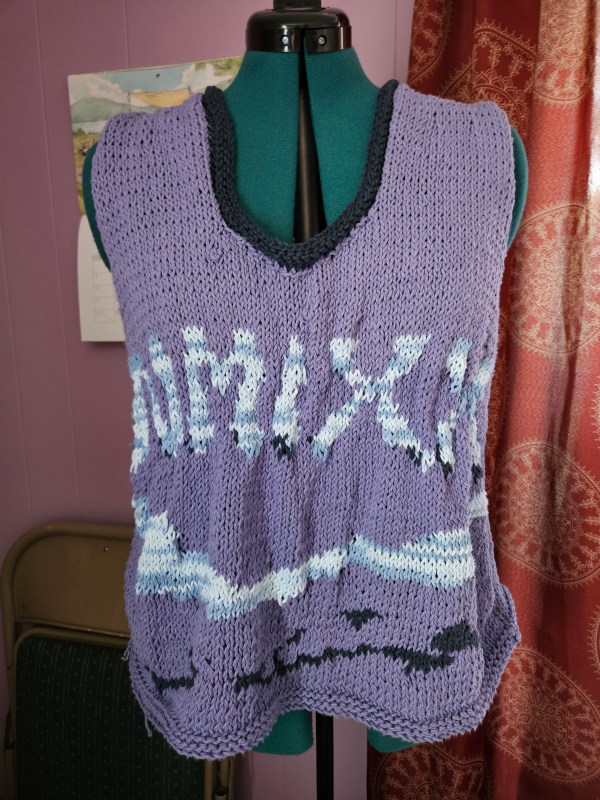
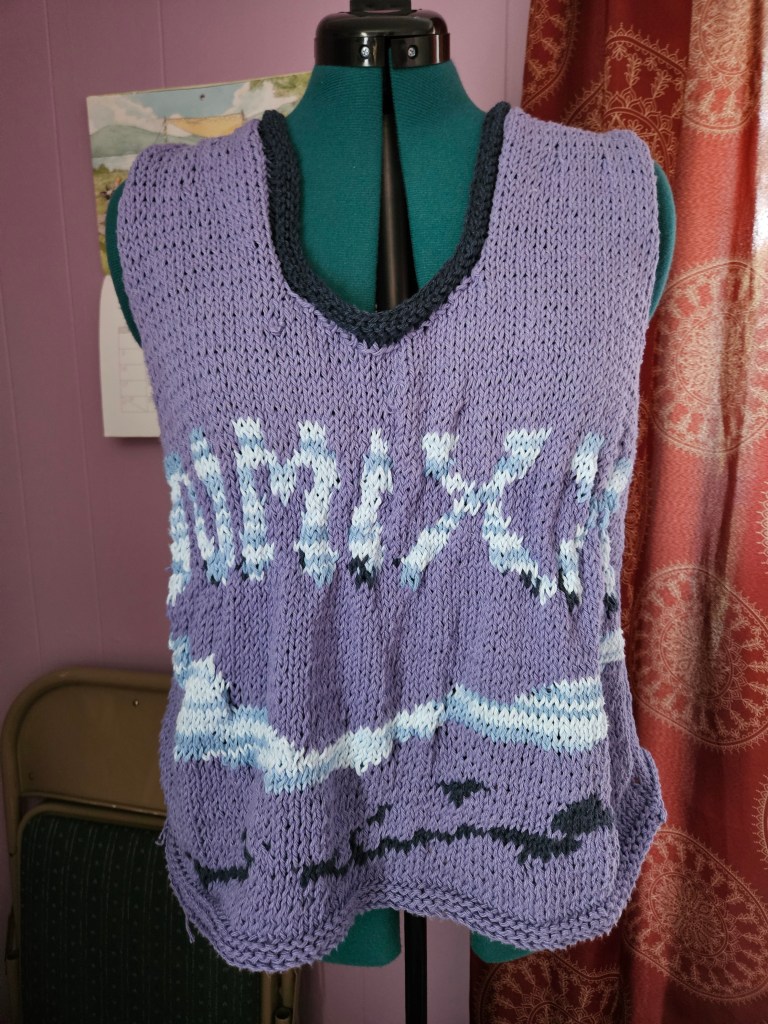
Nmixx’s lore is based on water imagery; there is a whale on their lightstick, sea creatures, boats, and a water drop font. The font was my jumping off point. I went to Michael’s and picked up water-inspired colors – a cool purple, deep blue, and a variegated blue and white to mimic light dancing on the ocean. Three songs from the album Fe304:Forward caught my attention – Ocean, High Horse, and Know About Me, which features the girls going on an under-the-sea journey on this boat spaceship. The color palette of the album is similar to the colors I chose to knit with. I knew that for the color work, I wanted to evoke waves, incorporate ocean imagery, and feature the water drop font.

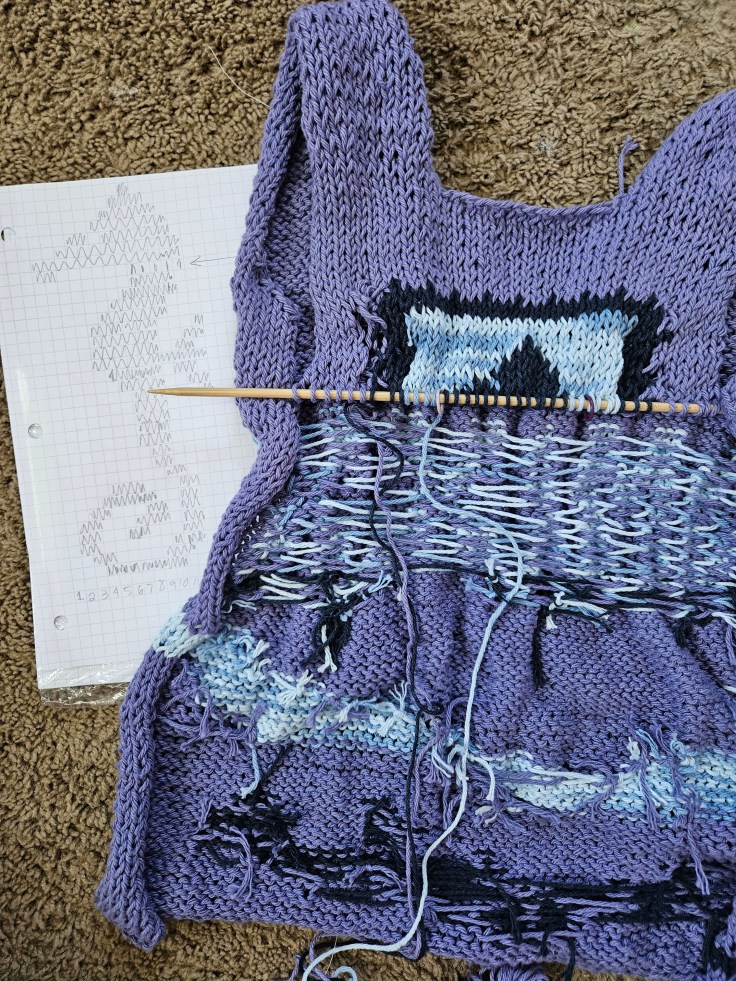
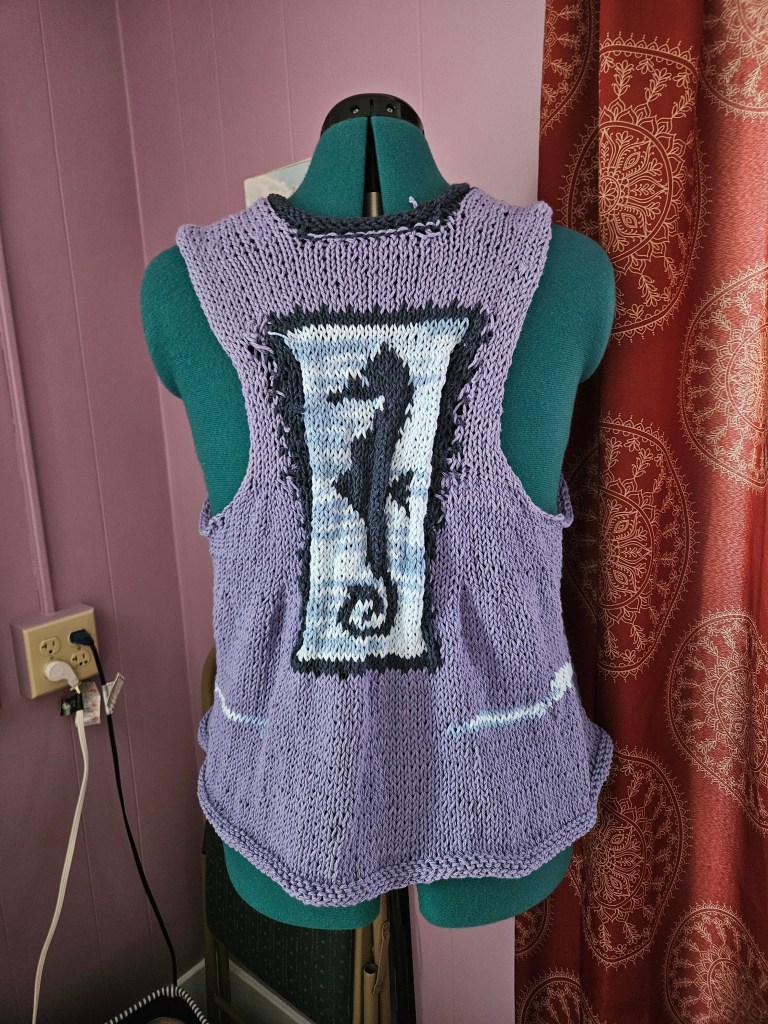
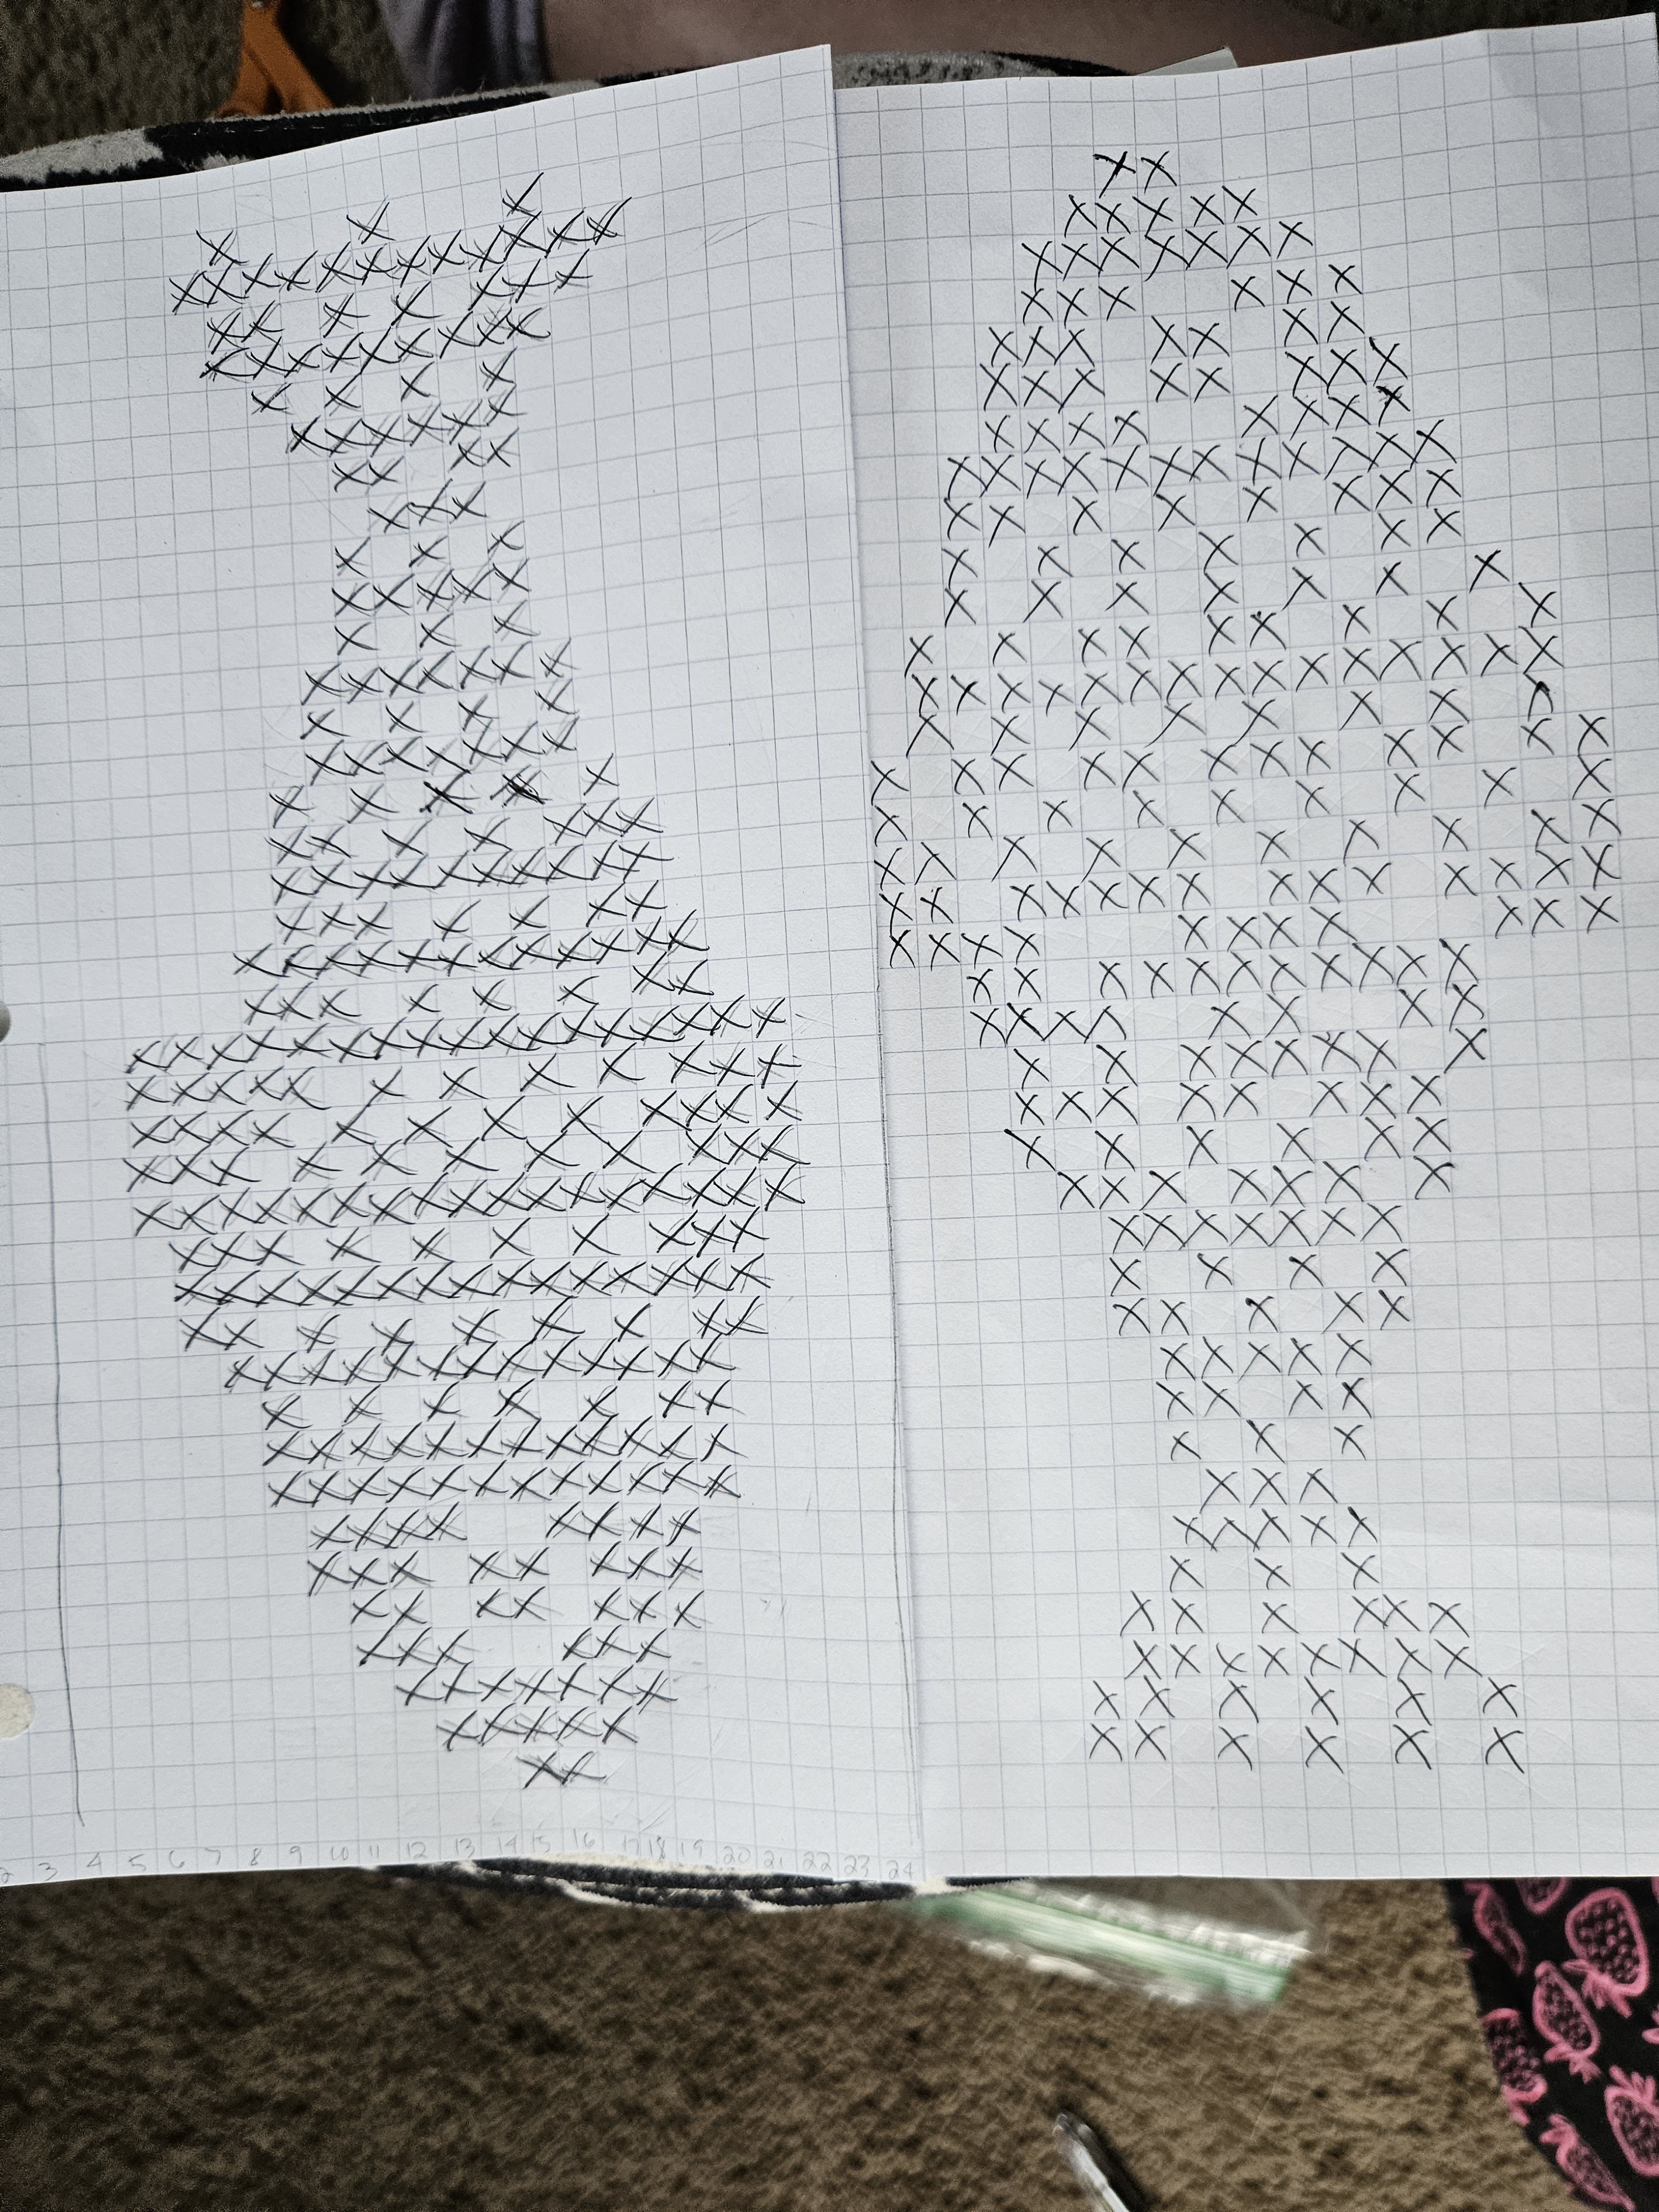
I chose to freehand a chart for the font using graph paper and an image I pulled from the internet from Nmixx promotional posts. The waves were more, see what I felt as I knit, the seahorse came from pure Pinterest roulette. The original chart was a cross-stitch seahorse that I adapted to knitting, on graph paper, later adding a stamp border to help the floats stay anchored. No pun intended. This was my first project using three colors at a time, and wow, it was brutal. On the front, I wanted the blues to create highlights and shadows, like a water drop would have. This led to some crazy tension issues and wild floats on the back.

Another issue I ran into was scale, particularly with the font. To achieve the bubbly curves, I made my scale rather large, stretching across two pieces of graph paper, and maybe this is just inexperience, or possibly I made my chart too complex, but I noticed myself ad-libbing stitches instead of following the chart due to all the mistakes I made. It turned out just fine, but it was not executed exactly how I wanted it to be. I’m pleased with the waves on the bottom and how they wrap around the tank. The back, I am lukewarm towards. I like the placement of the seahorse, for “High Horse” and the stamp for the journey they embark on, but the racer back is a little messy, since I was freehanding this pattern. But hey, the only way to get better is to practice.

Compared to my Red Velvet project, I felt confident that I could execute something to bring me joy and capture the spirit of the Fe304: Forward album. I love how this piece is one of a kind. No one else has this t-shirt or artwork, it’s a nerdy piece of knitwear for my special interest – kpop. ☺️

With this being my third merch project, I’m excited to see what speaks to me next. I’ve considered a Stray Kids Karma project and an Aespa Armageddon logo etched into a sweater. That one is going to be a big project, the logo is so intricate that when I attempted to sketch the chart last year, it was spread across four sheets pf graph paper. Maybe an Ateez project? Who knows. I do know that making your own art, and combining it with something you are passionate about, is a fantastic experience. Your passion becomes this physical object you can show off, and hopefully, bring a little sunshine to the world around you.

Catch of the Day Sweater

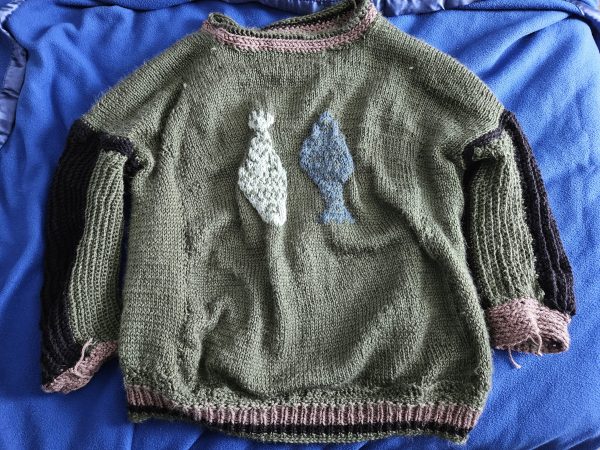
In 2025, sardines and other tinned fish became more than just food; they appeared on beaded bags, shirts, and prints. They also made their way to the fiber arts community, which inspired me to make a fish print sweater for Kyle, who enjoys fishing IRL and in video games. I just like the video game version.

The Design Concept

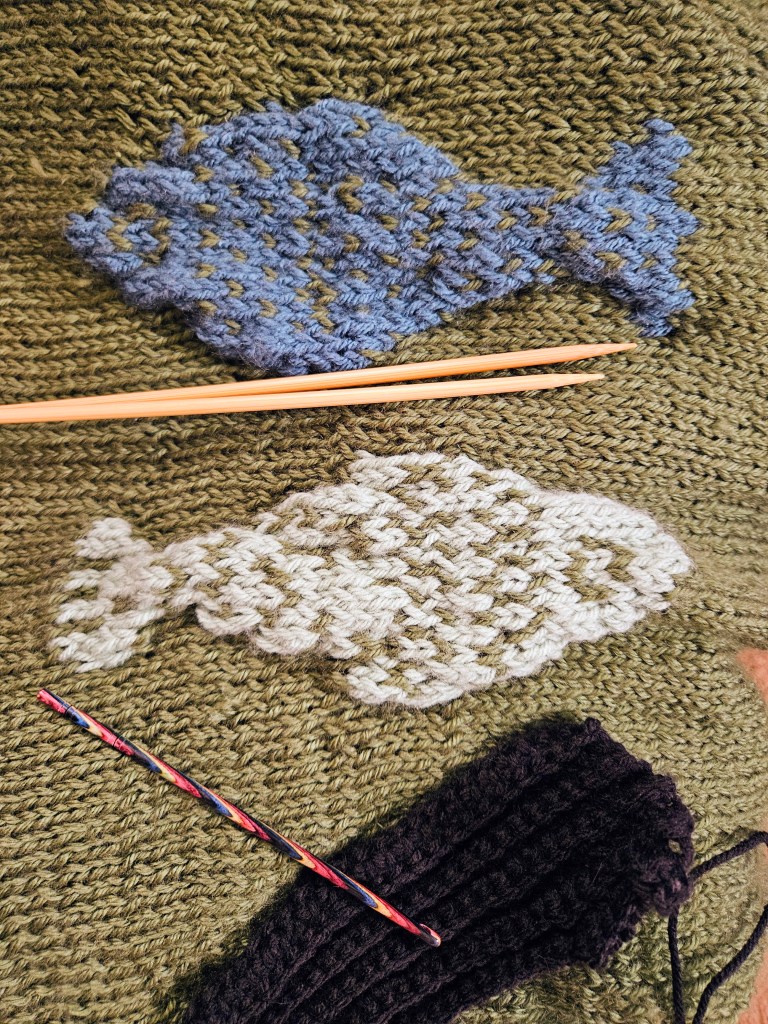
When planning a garment with a colorwork motif, I always consider scale, placement, and repetition. To do this, I use what I learned in art class many years ago – the seven fundamentals of art. So I consider line, shape, color, value, form, texture, and scale. In the catch-of-the-day sweater, it was important to make the fish wearable and to ensure good form and function. How do I make the fish on this sweater make sense? I decided to hang freshly caught fish on the sweater to help with the scale of the art. I placed them in the center, on the front, only to keep the perspective of this in focus. I thought placing more fish would become overwhelming to the eye and become unwearable.

Adding more fish would have required adjusting the scale and the color, meaning I would have simplified the sweater down to two yarn colors only, with sections of fair isle colorwork, which is a smaller, more concentrated technique. But I like the color contrast of using two colors, representing two types of fish with slightly different scale patterns. How big is too big? How do you represent a fish, with their scales and texture? For this, I went to Pinterest to find cross-stitch or knitting colorwork charts for inspiration. I believe I settled on a cross-stitch pattern because it had the detailed lines and scale I was looking for. I wanted the fish to look realistic, although it could be in an imagined world like Animal Crossing New Horizons or Stardew Valley. Whimsical? I think that is the best way to sum it up.

To make my pattern, I used the cross stitch reference and transferred it to graph paper by hand, tweaking some areas to make the inspiration my own. I did this in the same application for my Red Velvet Cosmic Knit Tank project. Next, I needed to determine the scale of the fish within the sweater pattern. It’s important to plan out how many stitches you need to complete the colorwork section across your rows and keep it centered. To do this, subtract the number of stitches in your colorwork pattern from the number of stitches in your row. Divide the sum by two and adjust to keep the stitches on either side equal, to keep the pattern centered. It is also important to note how tall the color work pattern is compared to the garment you are knitting, to allow enough room above and below that the graphic motif makes sense and doesn’t look misplaced on the garment. I think I literally held my pattern up to Kyle’s chest to figure it out.

Fiber Content

For this sweater, I went in a different yarn direction to try something new. I chose a wool and acrylic blend from Knit Picks called Mighty Stitch. It was underwhelming. The yarn, while soft, pills something fierce. It is also a slim worsted weight, which was exaggerated by the large needle size I used – US 10 or 6 mm. This created a breathable, airy sweater, but dang, did it throw off my pattern and design. Eventually, I had to face my fate – I was running out of yarn, and my panel was too narrow. Not exactly the outcome you want after spending a week on the front panel with the intricate fish design. I would rather start over than frog the color work, always.

I had some decisions to make. I originally purchased the Mighty Stitch on sale, but when I ran out of yarn, it was not on sale, and I wasn’t interested in doubling the price of this already too expensive project that was in the process of failing. So like Miss Frizzle recommends, I got ready to “Take chances, make mistakes, get messy!” I went to my closet of yarn and fabric and began to dig through the stash for something else I could introduce into the design. I found a warm-toned gray and neutral black yarn from Big Twist that was also worsted weight. Because the Mighty Stitch is a washable yarn, I felt comfortable combining the two yarns. I had already introduced acrylic yarn to the project through the mint and teal fish, using scrap Big Twist for those sections. Always check your fiber content, though, to avoid incompatible fibers that will make the project hard to care for over time.

Making a Change

The original design was changing from color palette to overall concept. This sweater would need to have color blocking sections now, to stretch the main green color. I decided to not only change up the design, but to change up my technique, opting for crochet on the sleeves to make the sleeves go faster. Knitting is a slow craft, and for some reason, knitted garments for Kyle have this curse of going horribly wrong and also knitting up slowly because of the hiccups. I wanted him to be able to wear this sweater for the bulk of the winter season of 2025-2026, and I was knitting this in August-October, so I took a shortcut. But in my defense, the texture of the sleeves, ironically, looks like fish scales to me. Especially with the gray and black colors!

The second change I made was adding width to the sides of the front panel to make the sweater a drop shoulder. I then knit the back panel wider from the start, and added a section of gray on the middle to upper back panel. It adds a nice contrast to the overall composition of the sweater, while making the sleeves feel cohesive.

Men vs Women Shoulder Shaping

The shoulders gave me such grief in this project! I’m used to making sweaters for myself and my female form. The bust makes the shoulders rest differently than I realized, and this came back to bite me. For a man’s sweater, the back needs to be longer. Especially the shoulder section on the back of the sweater is going to ride up the back, and be too long in the front. This happened, and I was bamboozled on how to fix it. Enter short row shaping and the principles of perspective and scale.

I learned that I needed to add short rows, meaning only working a section across a row to add length to a specific portion of the back panel, the back middle. To do this, you work back and forth on the section, evenually go back to working across the entire row. In addition, I made the back collar and back ribbing longer to compensate. These simple changes made the sweater appear the same length back and front, draping across the shoulders pleasantly, even if one side was technically longer. It doesn’t matter because of the role of perspective. Magic!

Final Thoughts

I learned a tremendous amount of knowledge from the Catch of the Day sweater, and I am grateful it all came together in the end to make a sweater that Kyle enjoys wearing. I have saved my patterns to attempt this again in the future with better yarn and proper dimensions to make the pattern fit well from the start, instead of scrambling to adjust at the end.

Bat Ear Beanie

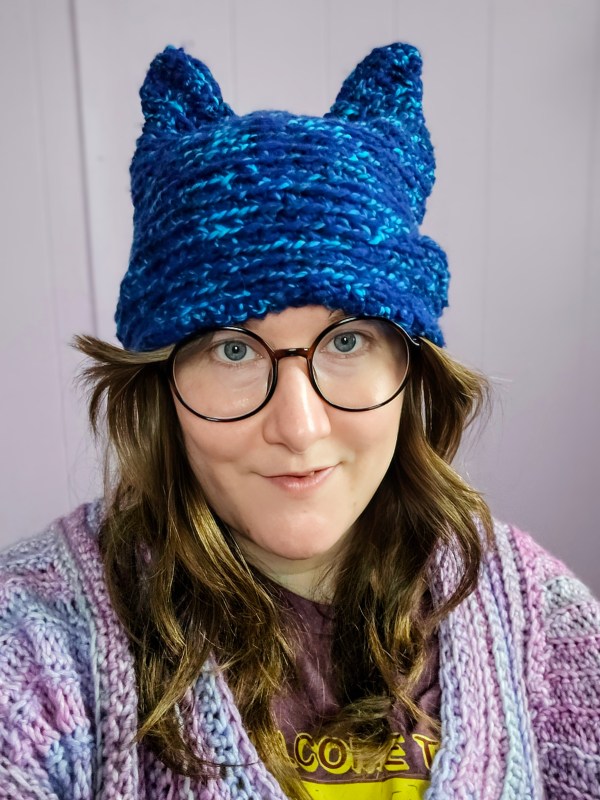
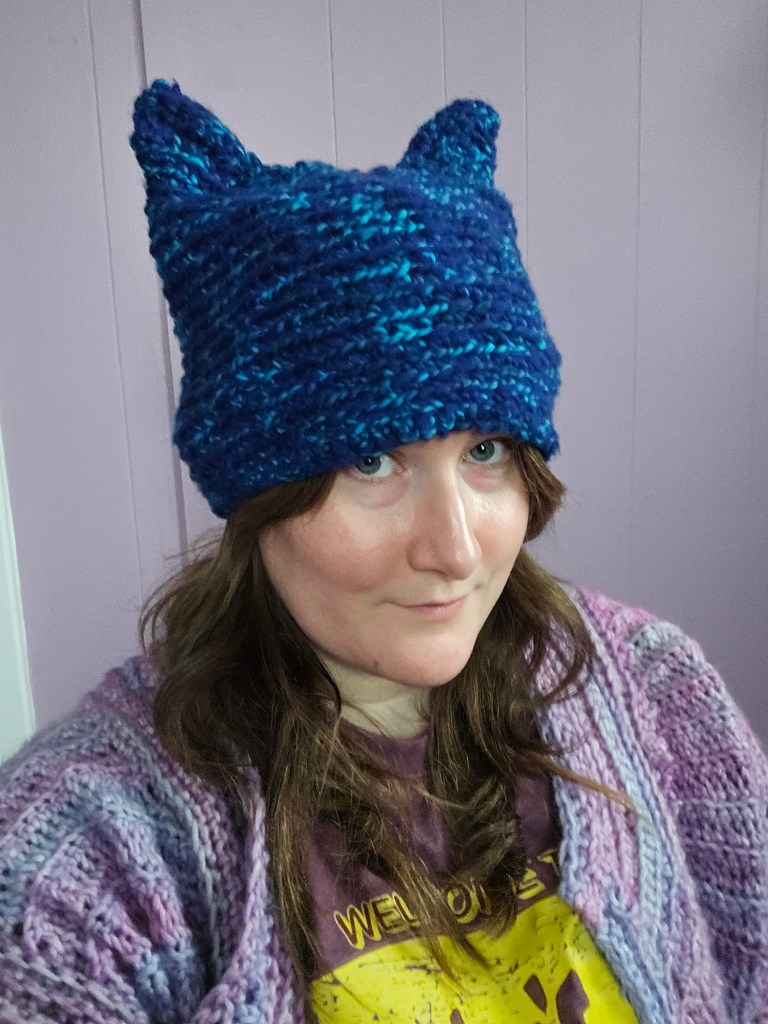
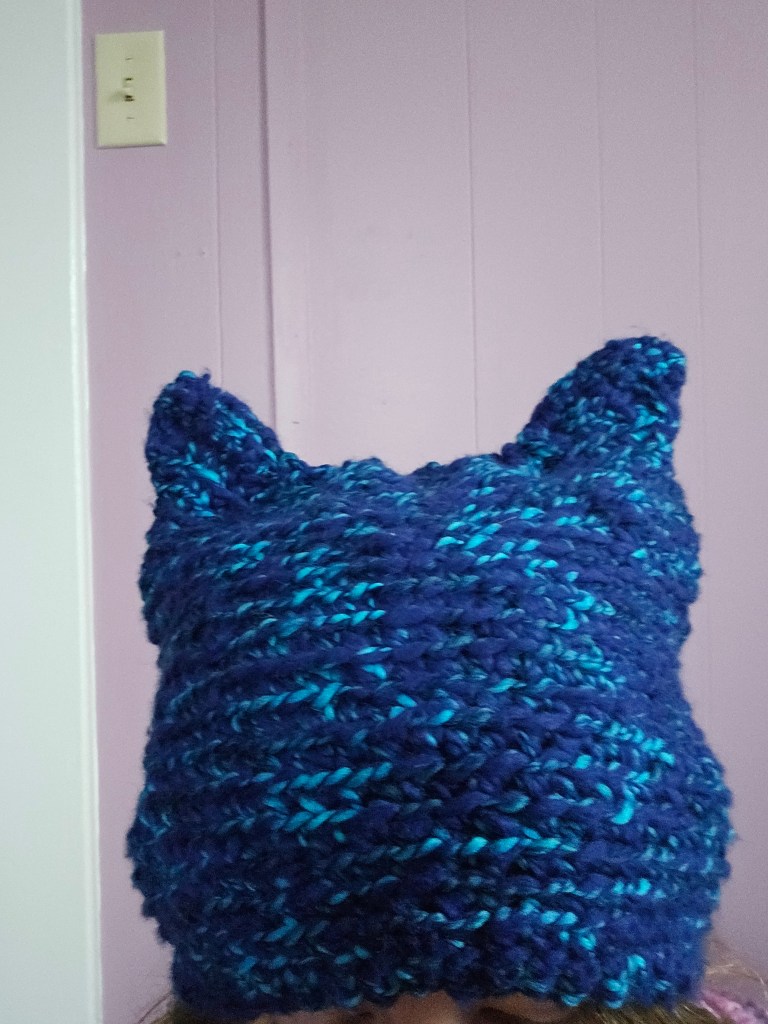
I’ve shared several animal ear projects on the blog before, the Cat Ear Beanie, and my Loverboy re-creation Bunny Hat, but now, without further ado, may I present the Bat Ear Beanie! This was made with less than 100 grams of local spun wool I found at my farmer’s market, held double with less than 100 grams of Knit Picks Snuggle Puff yarn in Neptune. I decided to crochet this hat instead of knitting, as I did with previous projects, to have a bit more freedom in the creation. Crochet reminds me of sculpture or papier-mache. You can always add onto the stitches in ways that the tension of knit stitches does not allow, and for that, the bat ear project seemed like a great place to practice my crochet technique once again.

The hat was crocheted in the round – so much easier than knitting in the round, in my opinion, with double crochet stitches, and was knit like a normal hat. I don’t have an exact pattern for it, but you can easily make it to your measurements. The yarn I used, one strand Snuggle Puff, a heavy worsted, and one strand local wool, a DK weight, resulted in an Aran/Bulky-weight yarn. Because of this, I used a 5.5 mm hook to create my stitches. I chained the number of stitches I needed based on my head measurement and double crocheted around and around until the hat was long enough to cover my ears and most of my head, then I began my decreases. I wanted a gradual curve shape for the crown of this hat. Go slow, and remember, you can always frog and try again if the shape is not what you want. After the hat was complete, I plotted my bat ears.

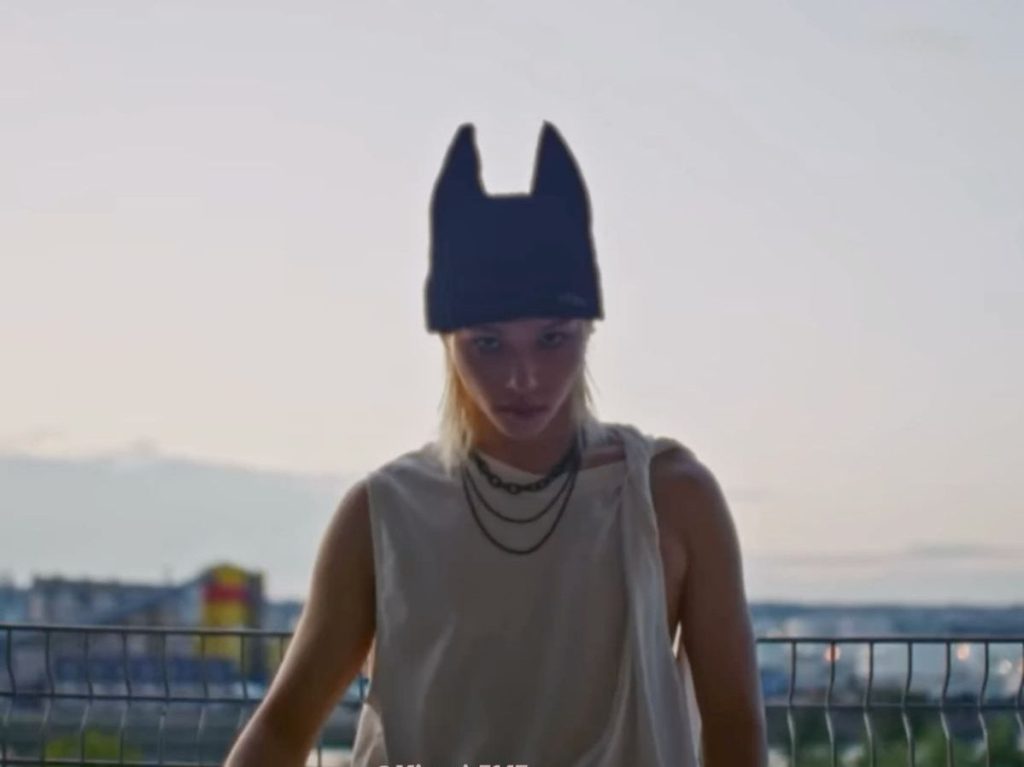
What makes an animal hat special to me is the scale and placement. What I learned with my cat ear beanie was that you can make the ears too wide and too big, leading to a sloppy effect. With the bunny hat, I learned you can put them too close together, not allowing the ears to drape properly. The effect can change the entire character of the piece, so place your ears with care and think about how you want to wear it on your head so that the animal cuteness is achieved. For this hat, I was inspired by the hat Felix from Stray Kids wears at the beginning of the Creed music video from 2025.

I began my bat ears by picking up stitches on the outside of the hat. I also crocheted these in a round, to give these good structure. By crocheting these in a round, to keep the tension even across the ears, so that they would stay upward like a bat. I used single crochet stitches and tapered the ears accordingly, simply weaving in the end to the inside of the hat, with a tapestry needle.

Why did I choose a bat? To raise awareness for bats. Did you know that bats are not a nuisance, but an essential part of the ecosystem? But due to misunderstanding the nocturnal animal, mainly I would say due to vampire lore, they are seen as dangerous. Yes, they can carry rabies like many wild animals, but this is not a reason for the animal to go extinct. Their habitats are under threat, and they deserve the space to thrive. They eat pests, contribute to the pollination process, and help spread seeds.

Socks Are Madness

This is a story of a winding road. It is not just passion that makes us try new and difficult things, but also the desire to fit in. Sometimes the road is bumpy, and bumpier still than we expected.

Last winter, I began a journey; at the time, I did not realize how technical this would be, and oh, how I miss the naive wonder of that time. I started my quest to make socks. The sock does not appear technical from the outside. It is a tube of knit fabric which we slip on our feet, most every day. Due to the Industrial Revolution, socks can be knit by machine with ease and speed. This has suspended our connection to the technology that first developed the sock—hand knitting.

In our modern day, socks are affordable and accessible. They are for sale everywhere in a myriad of textures, weights, and styles. We have socks for athleticism, socks for leisure, socks for style. They are boring, mundane Christmas gifts of childhood, and puppets with googly eyes. But what does it take to make a sock by hand?

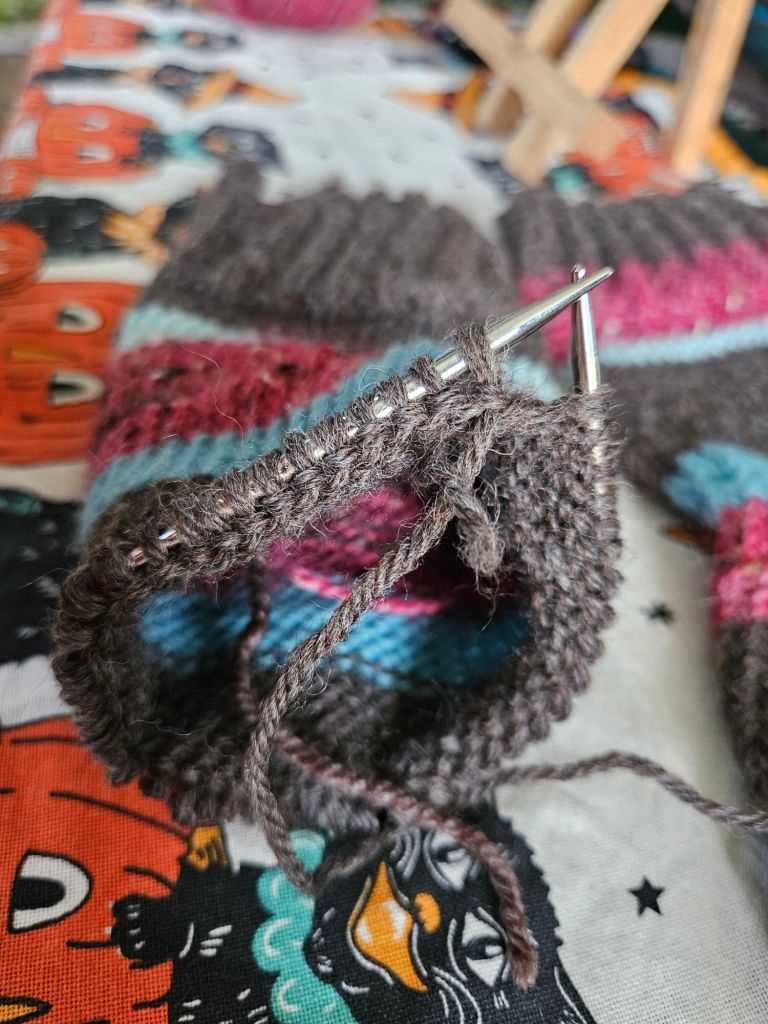
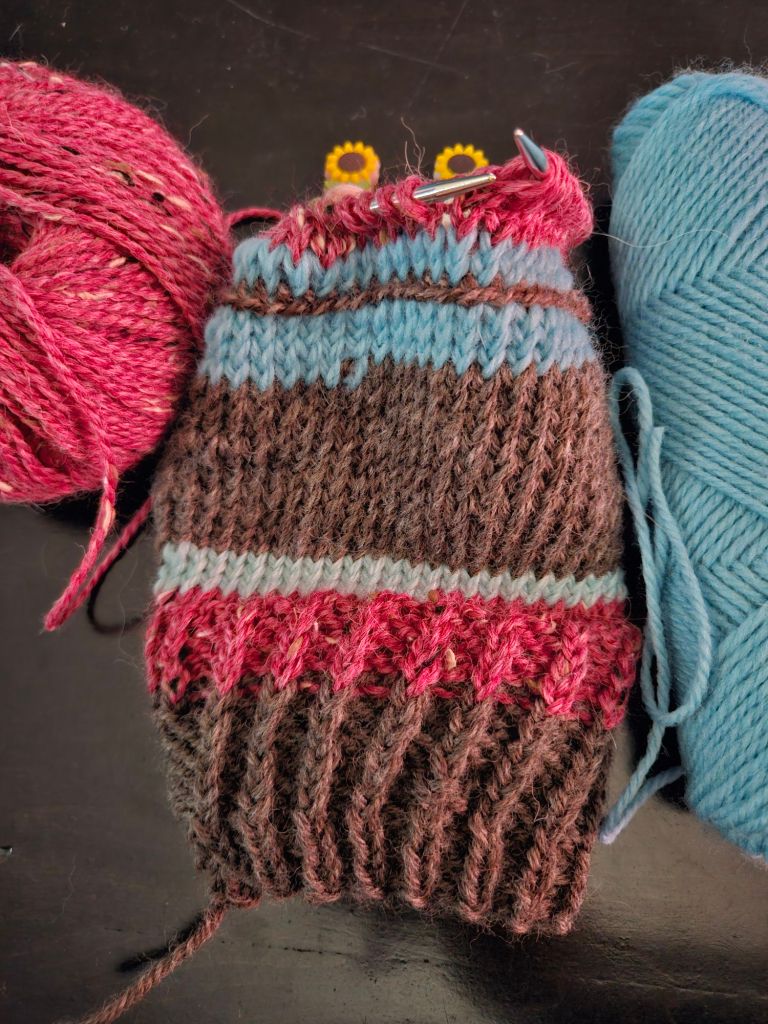
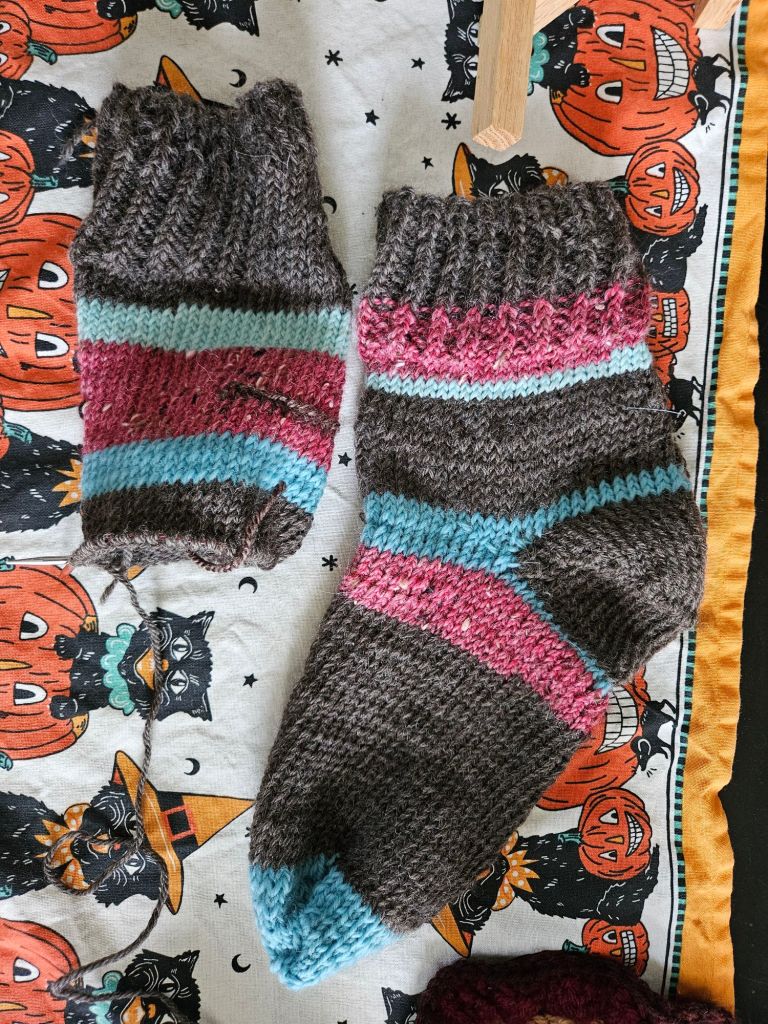
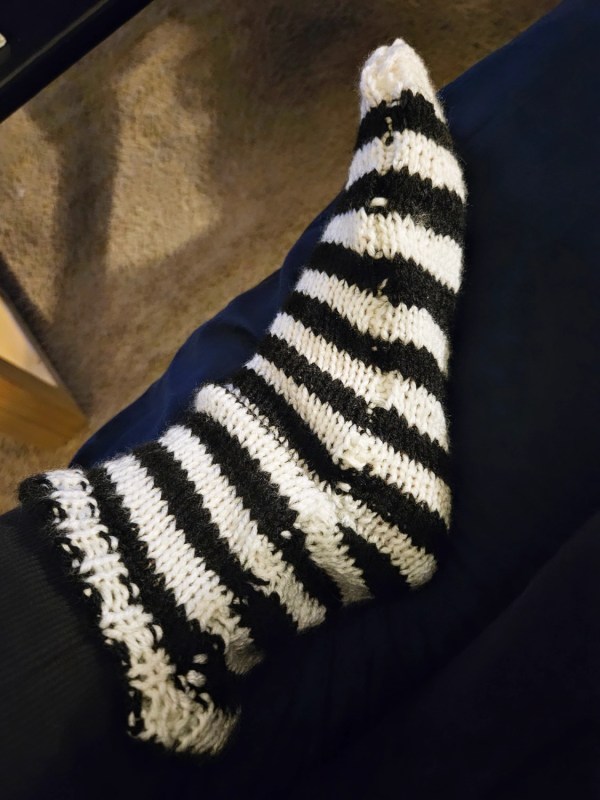
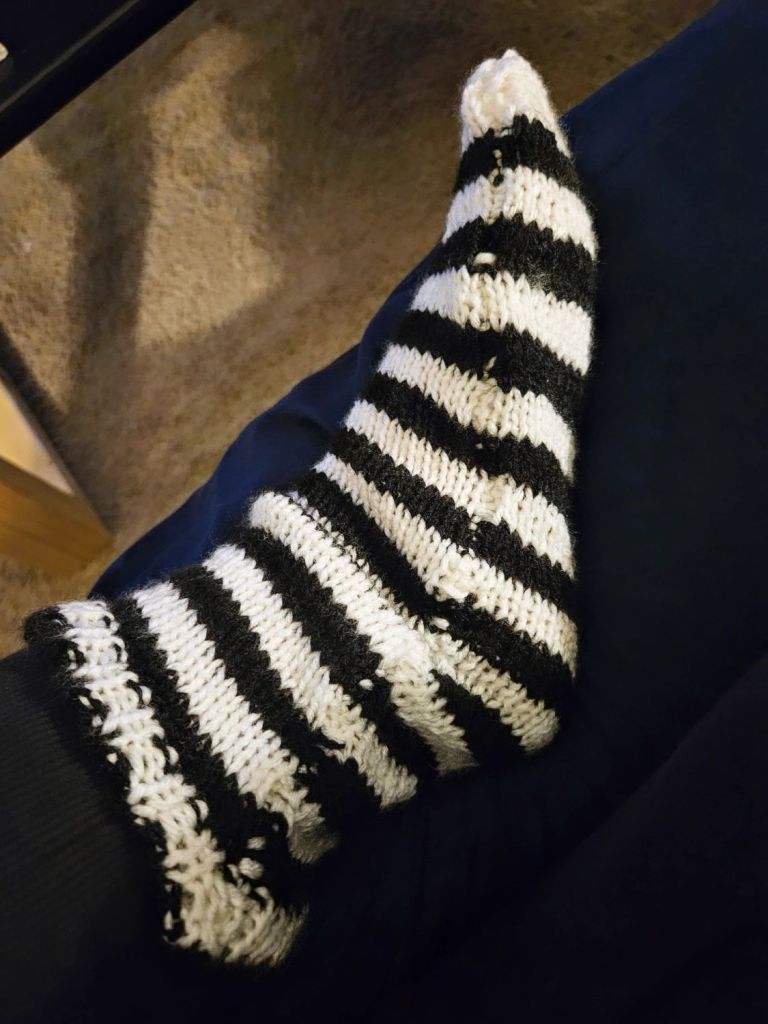
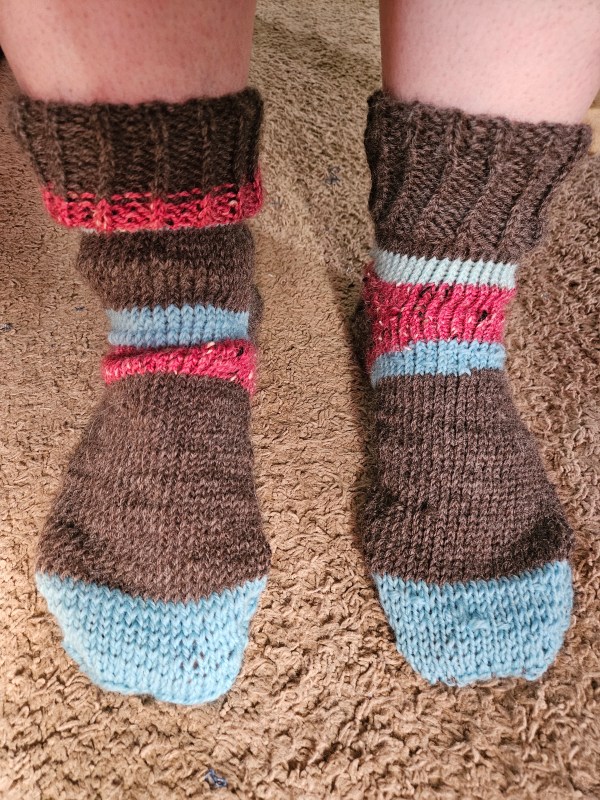
I gave this a shot last year, and it challenged me! I cataloged my experience in Socks, A Journey, and Socks: An Update, where I began knitting socks flat on straight needles and three months later gave circular knitting a try. My first flat knit socks were made top down, in a tube style that negates the heel flap and requires sewing the sock into a tube. They are loose in fit but warm and great socks to wear around the house. My advanced tries, knitting in the round and turning the heel, were more of an adventure. My tension was tight, and my heel flap a nightmare, unable to be duplicated into a second sock, for how off script my technique became. I didn’t grasp the why of what I was doing and therefore messed up the pattern.

This summer, I went to a local yarn shop where I began my journey to sock more traditionally. I picked up a pair of small-gauge double-pointed needles and sock sock-making kit with proper sock yarn of wool and nylon, to do it “properly” and oh my, did this bomb. The toe-up pattern, new to me from my previous projects that were cuff down, pushed me far out of my depth. I sank instead of swimming. The four double-pointed needles and my uncoordinated hands created tension and laddering in the knit, which looks exactly as it sounds. I tried three times to knit a few centimeters before the stitches fell off the needles, the sock falling off with the stitches. In desperation, as the needles were 29 USD and the sock kit 29 USD, I was feeling very silly and wasteful purchasing new needles and new yarn that I couldn’t do anything with.

So I pivoted to my trusty straight needles until I saw my mom later that weekend, and she lent me a pair of small-gauge, small-circumference needles to finish the sock. Still baffled by the heel flap and the vague instructions on the pattern, I tried German short rows for shaping the heel. In a fortnight, I completed the first of the two socks. I cast off and handed it to Kyle to try on, and the size was all wrong. I tried to frog it back into a skein of yarn, but the splitty yarn tangled, ripped, and became a ball of knots. It was over, and I was furious with myself for wasting time, money, resources, and, honestly, hurting my eyes squinting to see my tiny stitches for almost two weeks to accomplish nothing.

Socks are madness. And maybe I should stop beating myself up about my failure when socks are one of the hardest things to make by hand. I am an overachiever and a perfectionist, so this type of failure cuts me deep. I obsess, I rage, and I fall apart in the madness of learning something that may take years to execute once, not even perfectly. But you know what? I have made good socks before! Comfortable, almost perfect for what I was looking to achieve, socks. But I rejected them as being good because I was embarrassed at how I made them. I didn’t follow the right techniques, I used the “wrong” yarn, and I didn’t turn the heel.

Sometimes I have major imposter syndrome as a knitter. I feel like a fraud because I don’t use the exact same patterns, same tools, same yarn as everyone else on the internet. But why is that a bad thing? I’ve listened to other knitters in podcasts discuss how the sameness of knitting is making it boring. Apparently, at Rhinebeck or other knitting events, it is easy to see the same sweater throughout the sea of people, and that is a new thing. Listening to knitters, who have been knitting long before 2020, when I really started knitting consistently, knitters used to do their own thing. Yarn suggestions in patterns were exactly that – a suggestion.

People were designing more and experimenting instead of knitting in the homogenized way we see today, which is one of the ways I feel like an outsider. I don’t want to knit the same things as everyone else, but I also want to be good at the craft, and it leaves me in this push-and-pull tension. It became clear to me, though, that my search to “fit in” with the proper sock kit and the expensive needles didn’t make me a better maker. It was honestly a bit of a handicap. So I guess my takeaway is to be yourself?

I don’t want to stagnate in my skills, but if I can find my own technique to make socks and other garments with the “non-standard” tools and yarn, then is it really stagnation or just getting creative with where my skill level is at? I’ve been pondering this a lot and have more thoughts on this from both the point of view of a knitter and a sewist. But that will have to wait for next time.

A Procrastinator’s Temperature Blanket Guide

Did you know that you can find daily highs and lows in a database to use for temperature blankets? I didn’t either until a year ago. (Yes, this project post is long overdue.)

I learned this from the lovely Toni Lipsey of TLYarnCrafts, which saved me when I spontaneously decided to make a temperature project last year for Christmas…after Thanksgiving.

I am a last-minute Christmas gift maker, along with many people out there. I am not special or organized, but I’d like to change the second one. Anyways!

What is a temperature blanket?

It is a fiber-based project, knit or crocheted, whose color palette and sometimes its pattern are determined by the daily weather of a specific location over a certain time span. I thought you had to track every day, but you do not, which is amazing because you can make this project on a whim. Although the actual work time will be longer than you may expect, it was for me.

It’s a fantastic stash-busting project or a way to use colorful yarn you may not put together in the same project. You can do whatever you want, and that is what makes this project such a special one. Your color changes will be different depending on what date range you choose and where you live.

It’s like a fiber fingerprint of a certain time, a memory, crafted into fabric.

The traditional date range is a year of weather, usually highs, which is what I did with my first project, but you can do whatever you want, and isn’t that amazing? You can do lows, weather patterns, etc. I had the idea of honoring a family member’s birthday by researching the temperature on their birthday every year since they were born. It truly is a free-form, fascinating way to engage with crafting and nature!

Materials, Temperatures Recorded, and Yardage

I chose to stash-bust my backlog of half-used acrylic skeins for a random color palette, but it can be whatever you like. You can use wool, cotton, or alpaca. You can plan an entire color palette that is unique to your design sensibility. I think an ombre in the same color family would be lovely if you can find the yarn swatches to do this. I think that with the right design eye, this usually random-looking project can look exquisitely planned out.

I believe the most important part of the project is getting the data recorded down into a spreadsheet or notebook, whatever fits your crafting style, so that you can see what temperature ranges are the most common and therefore which ranges will be the most common through the piece. I had a really tough time deciding this, and in hindsight, I wish I had tallied how many of each I had before knitting, because for one color, I almost ran out! It would have been so much easier to have swapped the colors I was using according to the yardage I had instead of choosing at random. I think that is why crafting practice and crafting community are so vital to this work, because sometimes you don’t know until you try, and sharing our experiences informs the greater knowledge for us all.

For my temperature data, I am an analog gal, so I recorded my temperature highs in a notebook and checked off each day as I went to keep track of my progress. I highly suggest doing this in some capacity because otherwise, you are going to have to count rows, and checking off progress in a spreadsheet or notebook is just quicker.

If you are a beginner knitter or crocheter, might I also recommend Caron or Big Twist acrylic yarn for this project? The value for yardage and lack of splitting of these yarns make a huge difference for a first crafting experience, so that this project easily transforms from a skein of yarn to a lovely blanket made with your own hands.

Would you make a temperature blanket? Have you ever tried to make one before? Did you enjoy your experience?

Granny Squares, Maybe Not For Me?

This is an interesting reflection for me, because granny squares, and crochet in general was my crafting white whale. Since their rise in popularity in the 2020s, the granny square technique, with its colorful bursts of color called to me.

They looked so different from the form and function of knitting. I found myself bamboozled by their craftsmanship, yet enamored by their novelty and variety. Which brings me to a shocking revelation – I don’t think I like them after all.

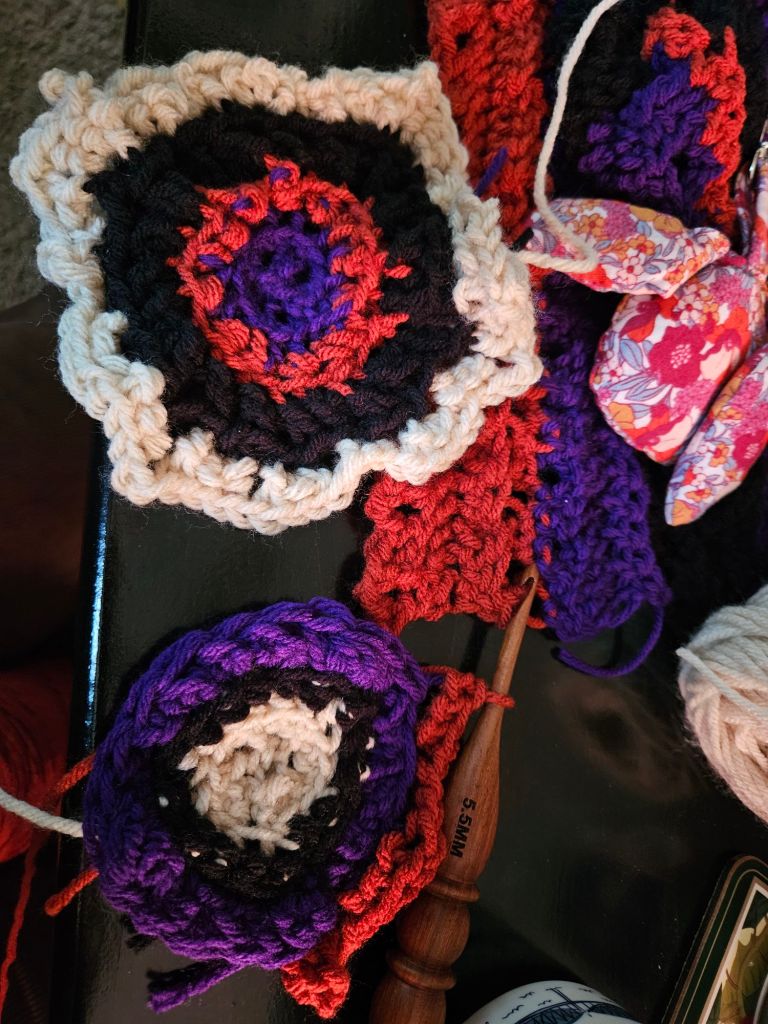
Yeah…I was not expecting this to be my reaction after crocheting four squares with a brand new colorburst square pattern for a halloween sweater I am working on.

The Importance of Design Point of View

So why, as soon as I made dedicated granny squares for a halloween project, did I not like them? I spent hours learning the colorburst granny square pattern. I struggled with the techniques of the cluster stitch, and the treble crochet corners, but didn’t give up. I expected to feel a sense of accomplishment and excitement, but instead I felt unsatisfied.

This surprised me. The squares and the design of the crochet cardigan with the squares added, didn’t feel like me. I didn’t like wearing them. It clashed with my own personal design point of view.

There was nothing wrong with the design, it just wasn’t me, and neither are the granny squares. And so, I think this is part of being an artist and the process. Learning the new skill is not a waste of time, even though it felt like I was wasting my week working on this design. If I want to be a designer and find my thing, I have to try things that won’t always feel like me, and adjust accordingly.

It’s all apart of the journey.

Forest Creature Hat

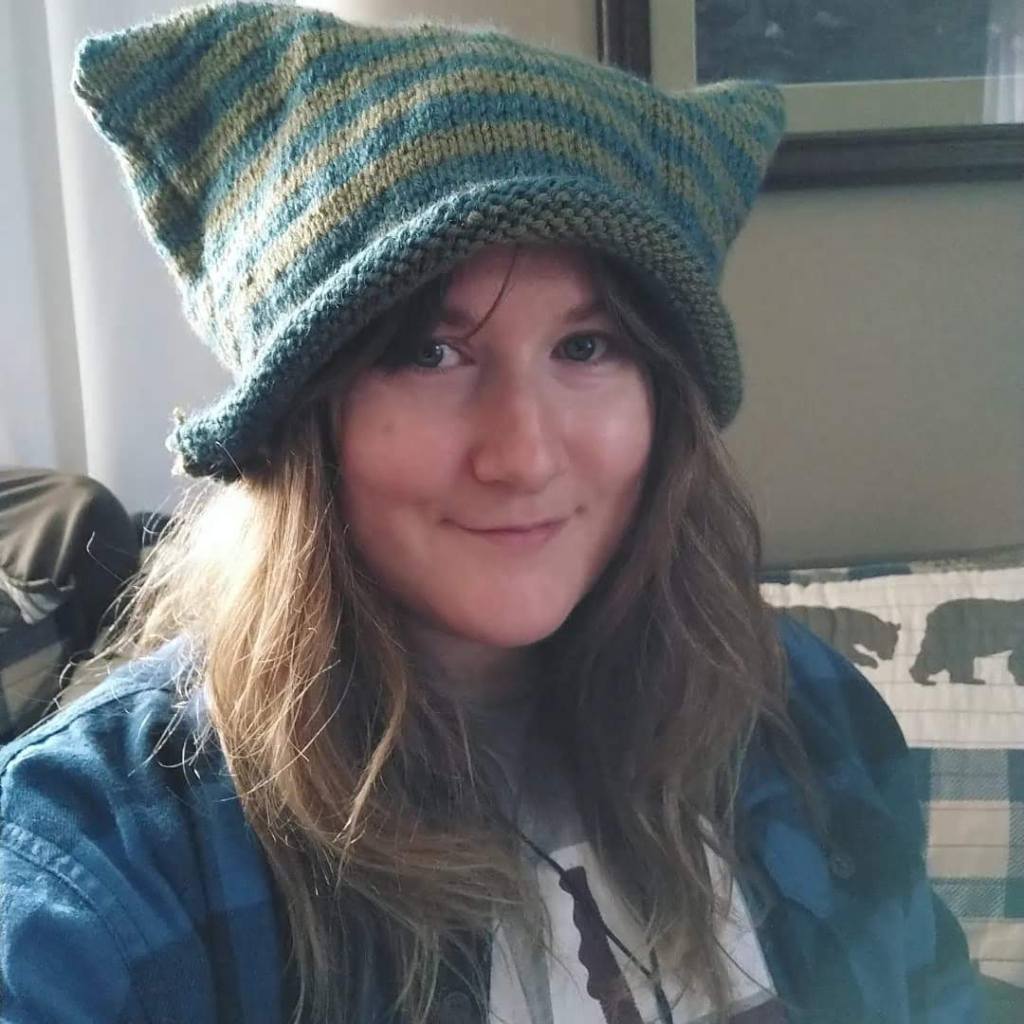
Have you ever wanted to look like you emerged from a cozy video game? Maybe you’d like to wear a hat that reminds you of spooky season? Behold my new crochet adventure, not my first hat, but the second stitched together for this autumnal season.

This hat is inspired by the pointed witch hats, either sewn or made from yarn, that make an appearance in October, either in patterns that I see advertised or inspiration sources online. I didn’t want to make anything too witchy. I am not aiming to be a witch; I am looking for something fantastical. My hat is more of an allusion to the pointed, wide-brimmed headwear, while also aiming to be something a bit historical, rural, maybe hobbity in form.

The inspiration image I used for this project is a hat from Animal Crossing: New Horizons – the frugal hat. It is a subtle nod to a scarecrow, while it could belong in the wizarding world. I chose to crochet this project for the ability to sculpt the hat in a way that is freeform. I love how crochet lets you create without managing all the stitches on a needle; instead, I was able to switch from the hat portion to the bill with ease. I crocheted onto the side of the hat and used varying stitches of single crochet, double crochet, and granny stitch to add the frilly volume to the bottom.

Another reason I chose to crochet, over knitting this hat, was to provide the hat with more structure than knit stitches. Crochet stitches have more body to them. This was a scrap project, using leftover yarn from my first sweater dress, now a cardigan, made in 2023. Which was also scrap yarn, from a previous scrap yarn project – my cat ear beanie from 2024. As time passes, and I make more things, I love seeing how projects are connected through materials over time, because scrap yarn is kind of magical. It’s always worth it, in my opinion, to hold on to the extras for these random projects that call for just a little bit of yarn.

Finally, this hat project was inspired by one other seasonal topic, the state of my country. It just never stops right now….ahhhh!!!

Am I living in the 1950s? No, but dang was this what McCarthyism was like? I’m sick of the FBI telling Black Americans not to mourn Assata Shakur. Charlie Kirk is being touted as a martyr by MAGA and the primarily white church, tainting the message of the gospel with that Nationalist sham of a funeral, complete with Hitler-esque photos by the orange man. It’s getting ICY in a lot of places nationwide. So, I made a witch hat, because the Salem Witch Trials of 1692 and 1693 were not about witchcraft.

Instead, they were about religious extremism, sumptuary laws, xenophobia, and social tension. It was profitable to report your neighbor as a witch. You could gain financial and political power by reporting people who did nothing wrong. So I made a witch hat, because I am done with the injustices being played off as not that serious, and I am tired of our own political witch hunts. I feel helpless and angry all the time because of the Idiocracy. So I made a hat to try to do something creative with my feelings.

This forest creature hat, named by my sibling, was designed by me and created using worsted-weight acrylic yarn with a 5.5 mm crochet hook.

Create a website or blog at WordPress.com

Up ↑