NMIXX Fe:304 Forward Inspired Knitwear

Nmixx is a relatively new K-pop band, debuting in 2022 under the label JYP Entertainment. Comprised of six members – Lily, Haewon, Bae, Sullyoon, Jiwoo, and Kyujin, they are young but immensely talented. Nmixx had a rocky start, similar to Stray Kids, who share the same label, being panned as noisy and chaotic. As time passed, Nmixx developed its sound to a polished mix-pop with killer vocals. In 2026, they are finally getting the respect they deserve, and I am thrilled to see it!

They first came on my radar in 2023, thanks to their song ‘Love Me Like This’, but I didn’t become a fan, or NSWER as their fandom is called, until 2024 with their Fe304 album series.

Fe304: BREAK released in January 2024, with songs such as Dash, Run for Roses, and Soñar to help me get through the chaos of moving. Fe304: STICK OUT, released in August 2024, was the soundtrack of our trip up to Erie. Fe304: FORWARD hit just as we broke ground on the garden in 2025, and this album, some days, carried me through running that tiller in the mud and stubborn grass shag. From High Horse to Slingshot, this album changed something in me, lifting Nmixx to my favorite girl group (sorry, Aespa). Nmixx scratches a creative chaos in my mind that fills me with joy.

Bring a fan, I thought it would be cool to get some merch, which became quite difficult in 2025. With Nmixx being in their third year, there was a lack of offerings in the US, and those pesky tariffs from the head idiot in charge. So, I decided to get creative like I did with my Cosmic Tank.

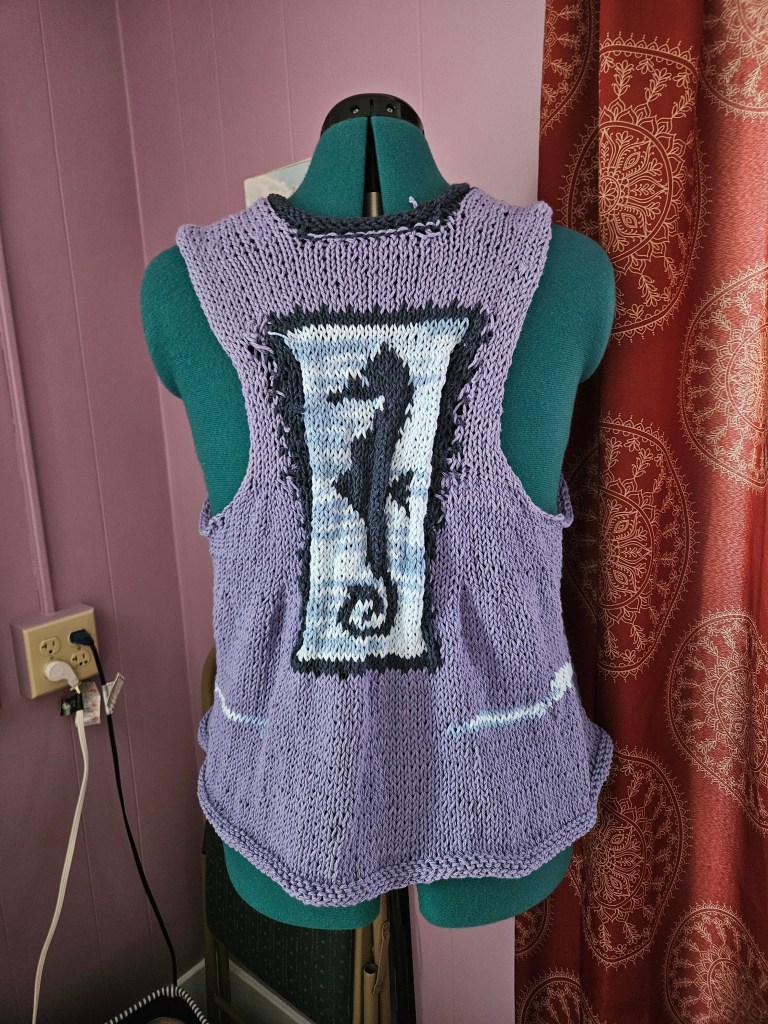
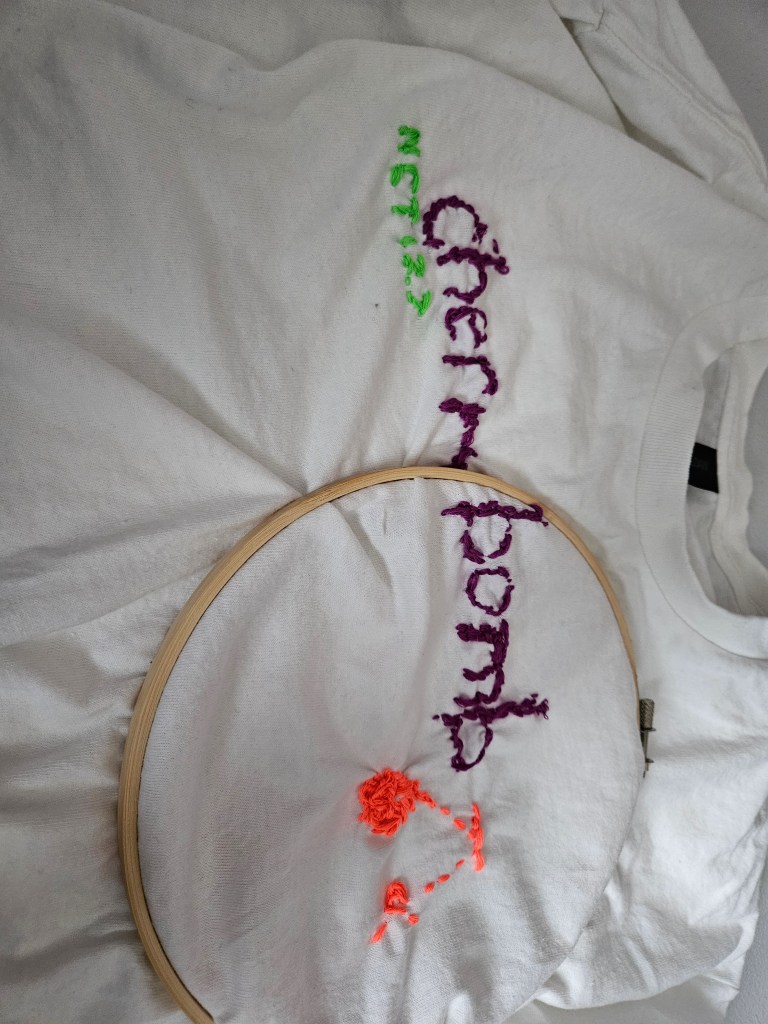
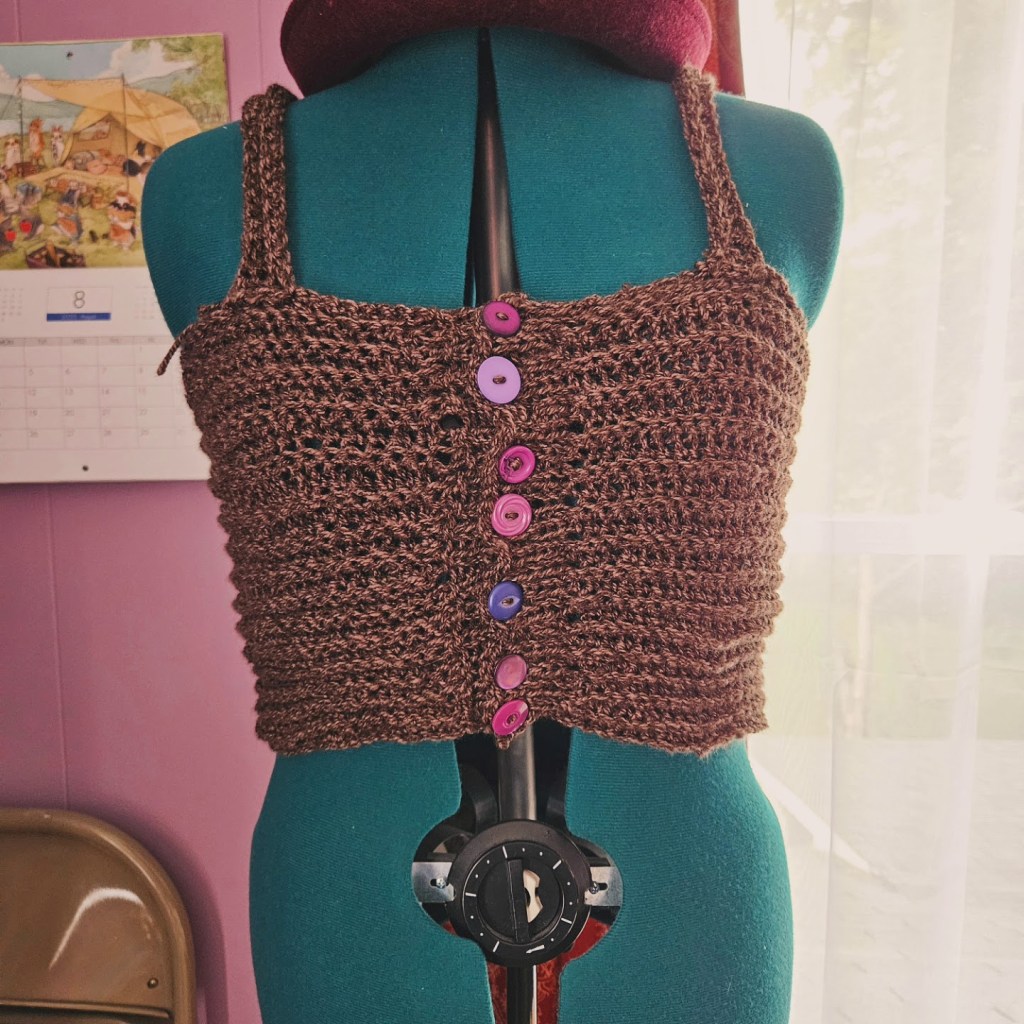
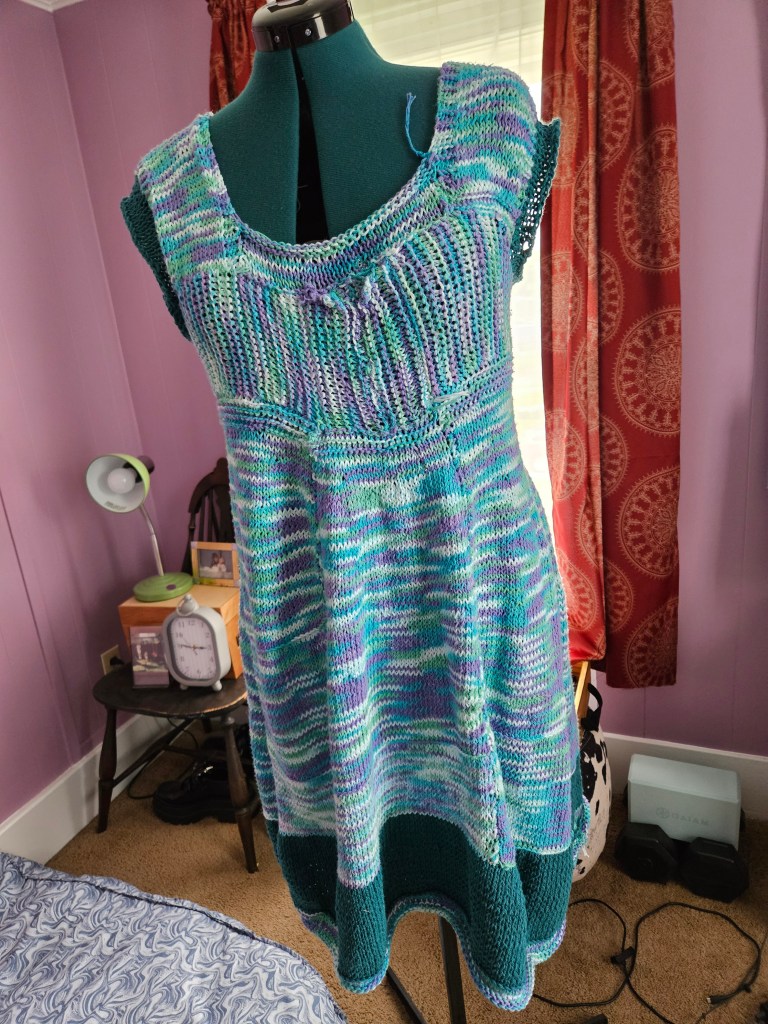
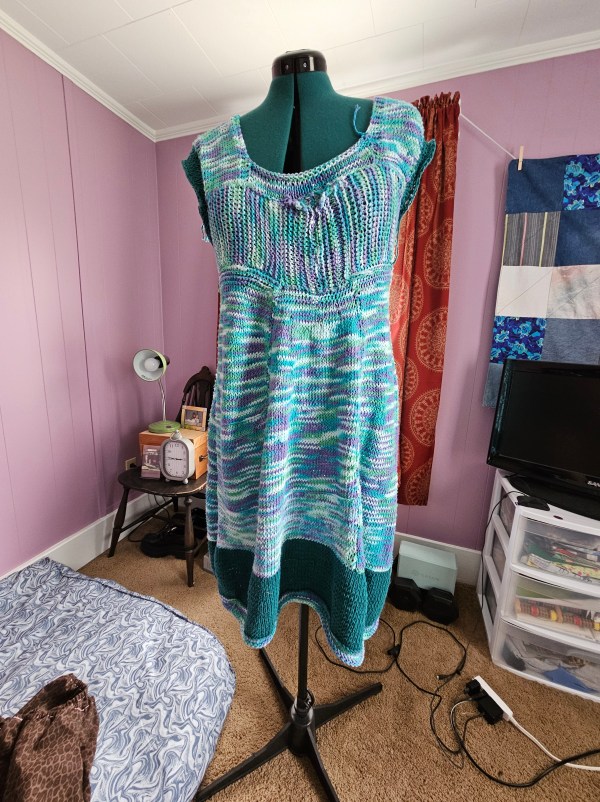
Nmixx’s lore is based on water imagery; there is a whale on their lightstick, sea creatures, boats, and a water drop font. The font was my jumping off point. I went to Michael’s and picked up water-inspired colors – a cool purple, deep blue, and a variegated blue and white to mimic light dancing on the ocean. Three songs from the album Fe304:Forward caught my attention – Ocean, High Horse, and Know About Me, which features the girls going on an under-the-sea journey on this boat spaceship. The color palette of the album is similar to the colors I chose to knit with. I knew that for the color work, I wanted to evoke waves, incorporate ocean imagery, and feature the water drop font.

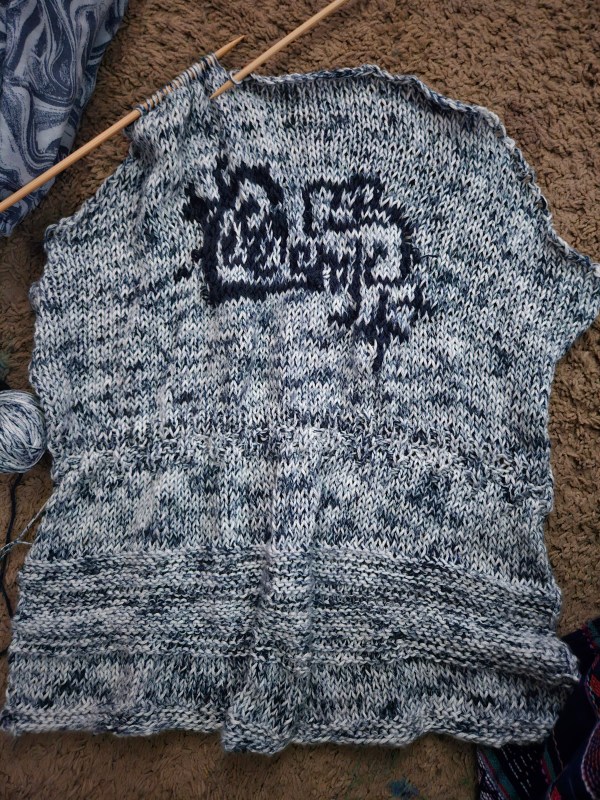
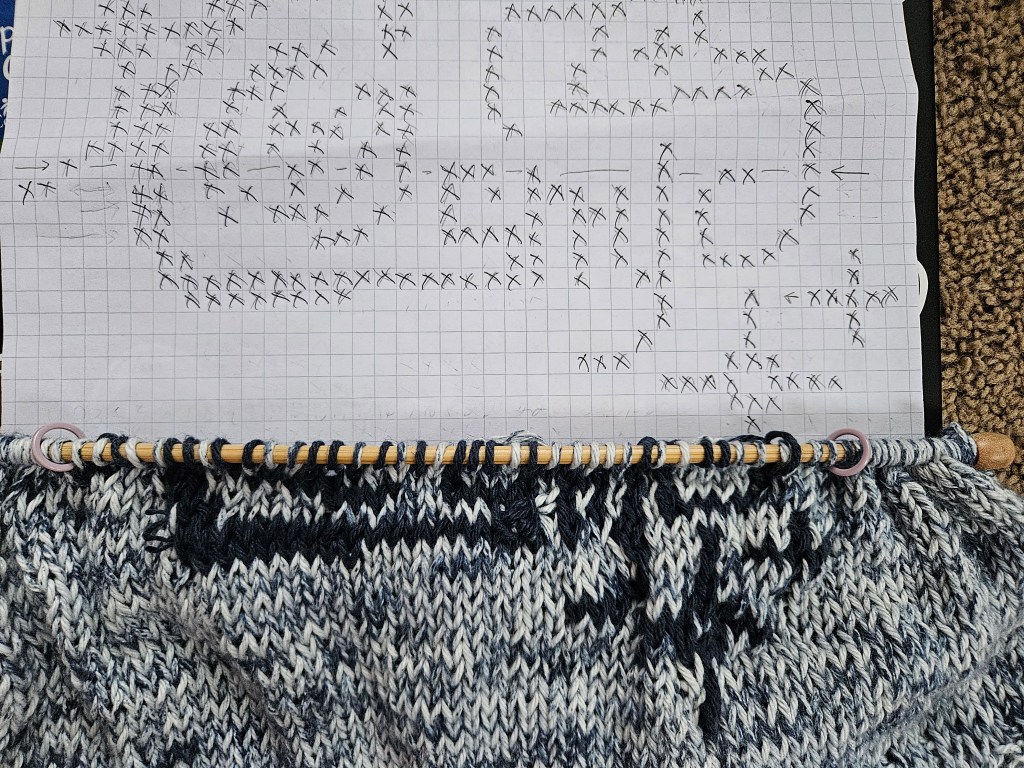
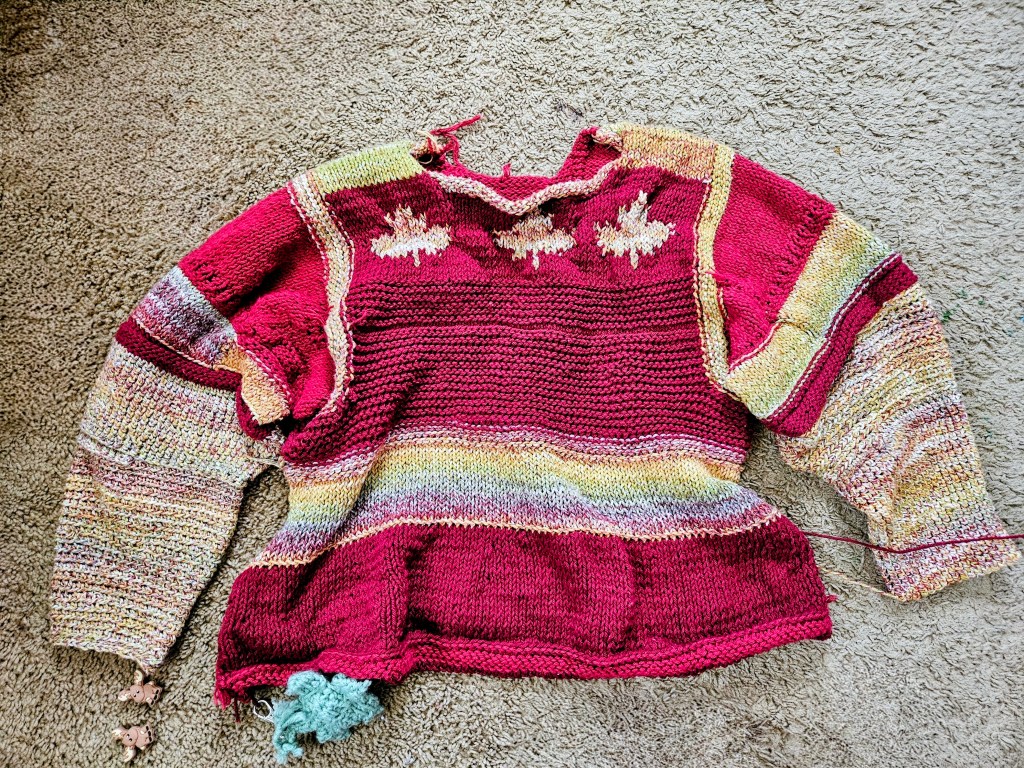
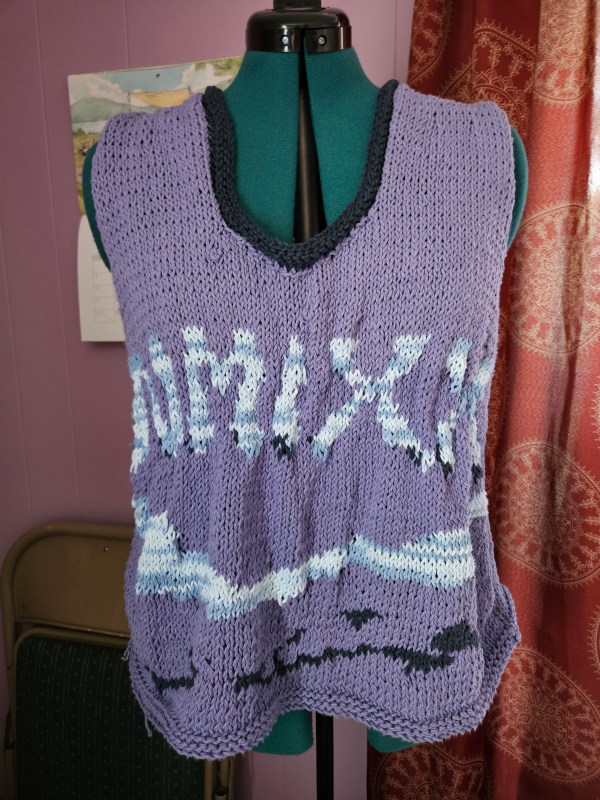
I chose to freehand a chart for the font using graph paper and an image I pulled from the internet from Nmixx promotional posts. The waves were more, see what I felt as I knit, the seahorse came from pure Pinterest roulette. The original chart was a cross-stitch seahorse that I adapted to knitting, on graph paper, later adding a stamp border to help the floats stay anchored. No pun intended. This was my first project using three colors at a time, and wow, it was brutal. On the front, I wanted the blues to create highlights and shadows, like a water drop would have. This led to some crazy tension issues and wild floats on the back.

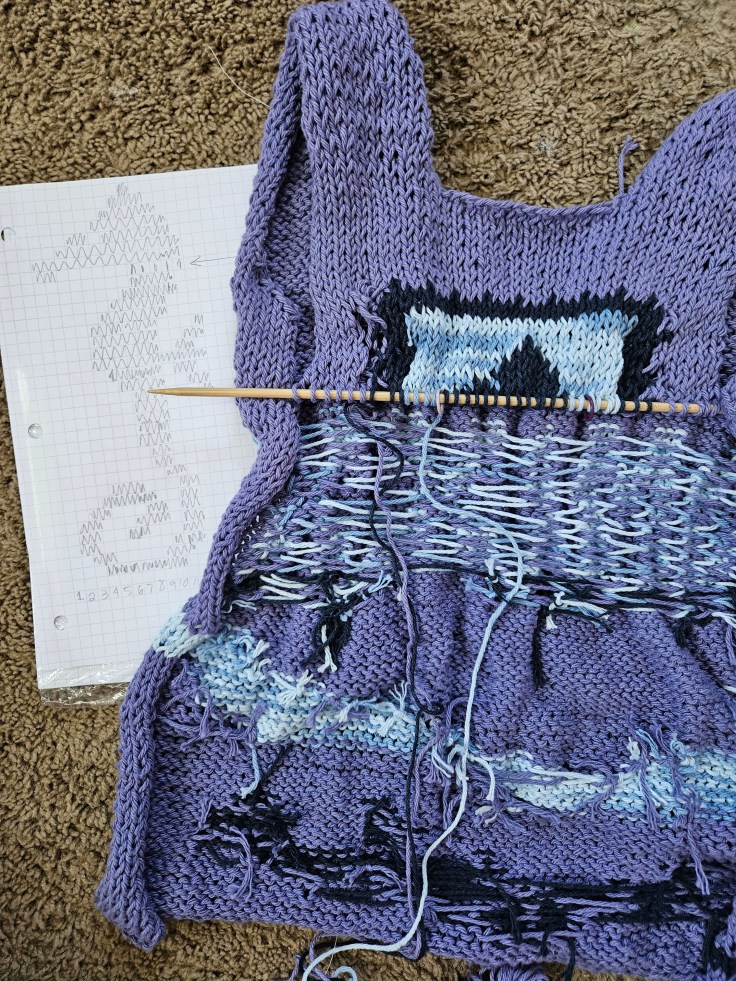
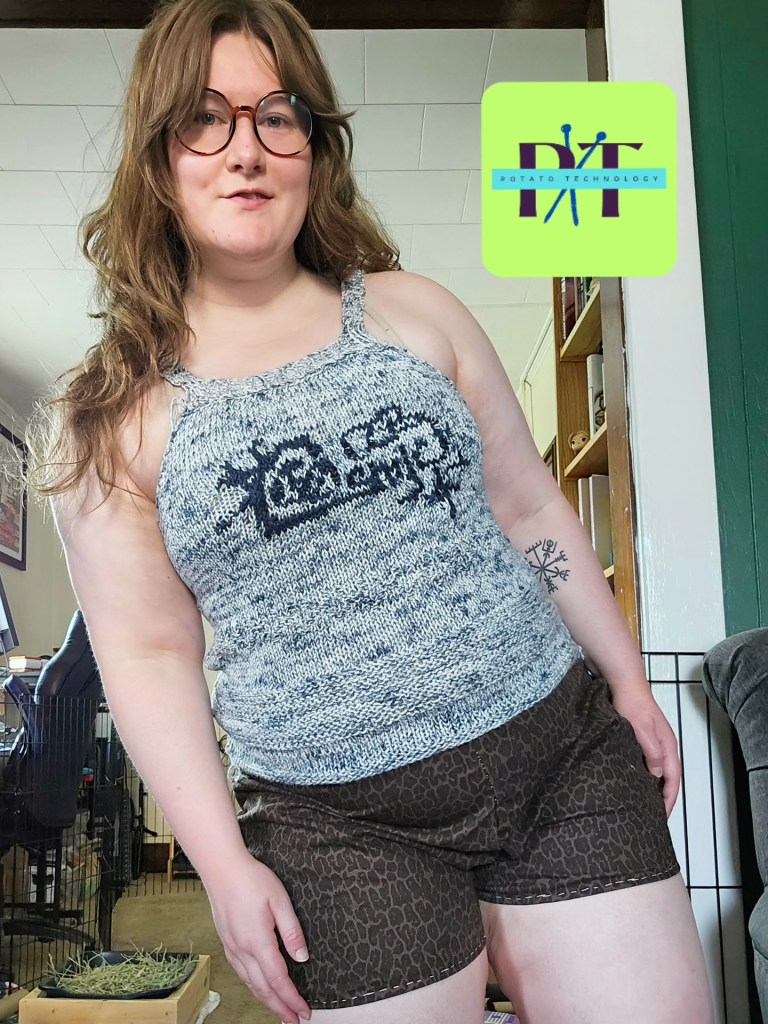
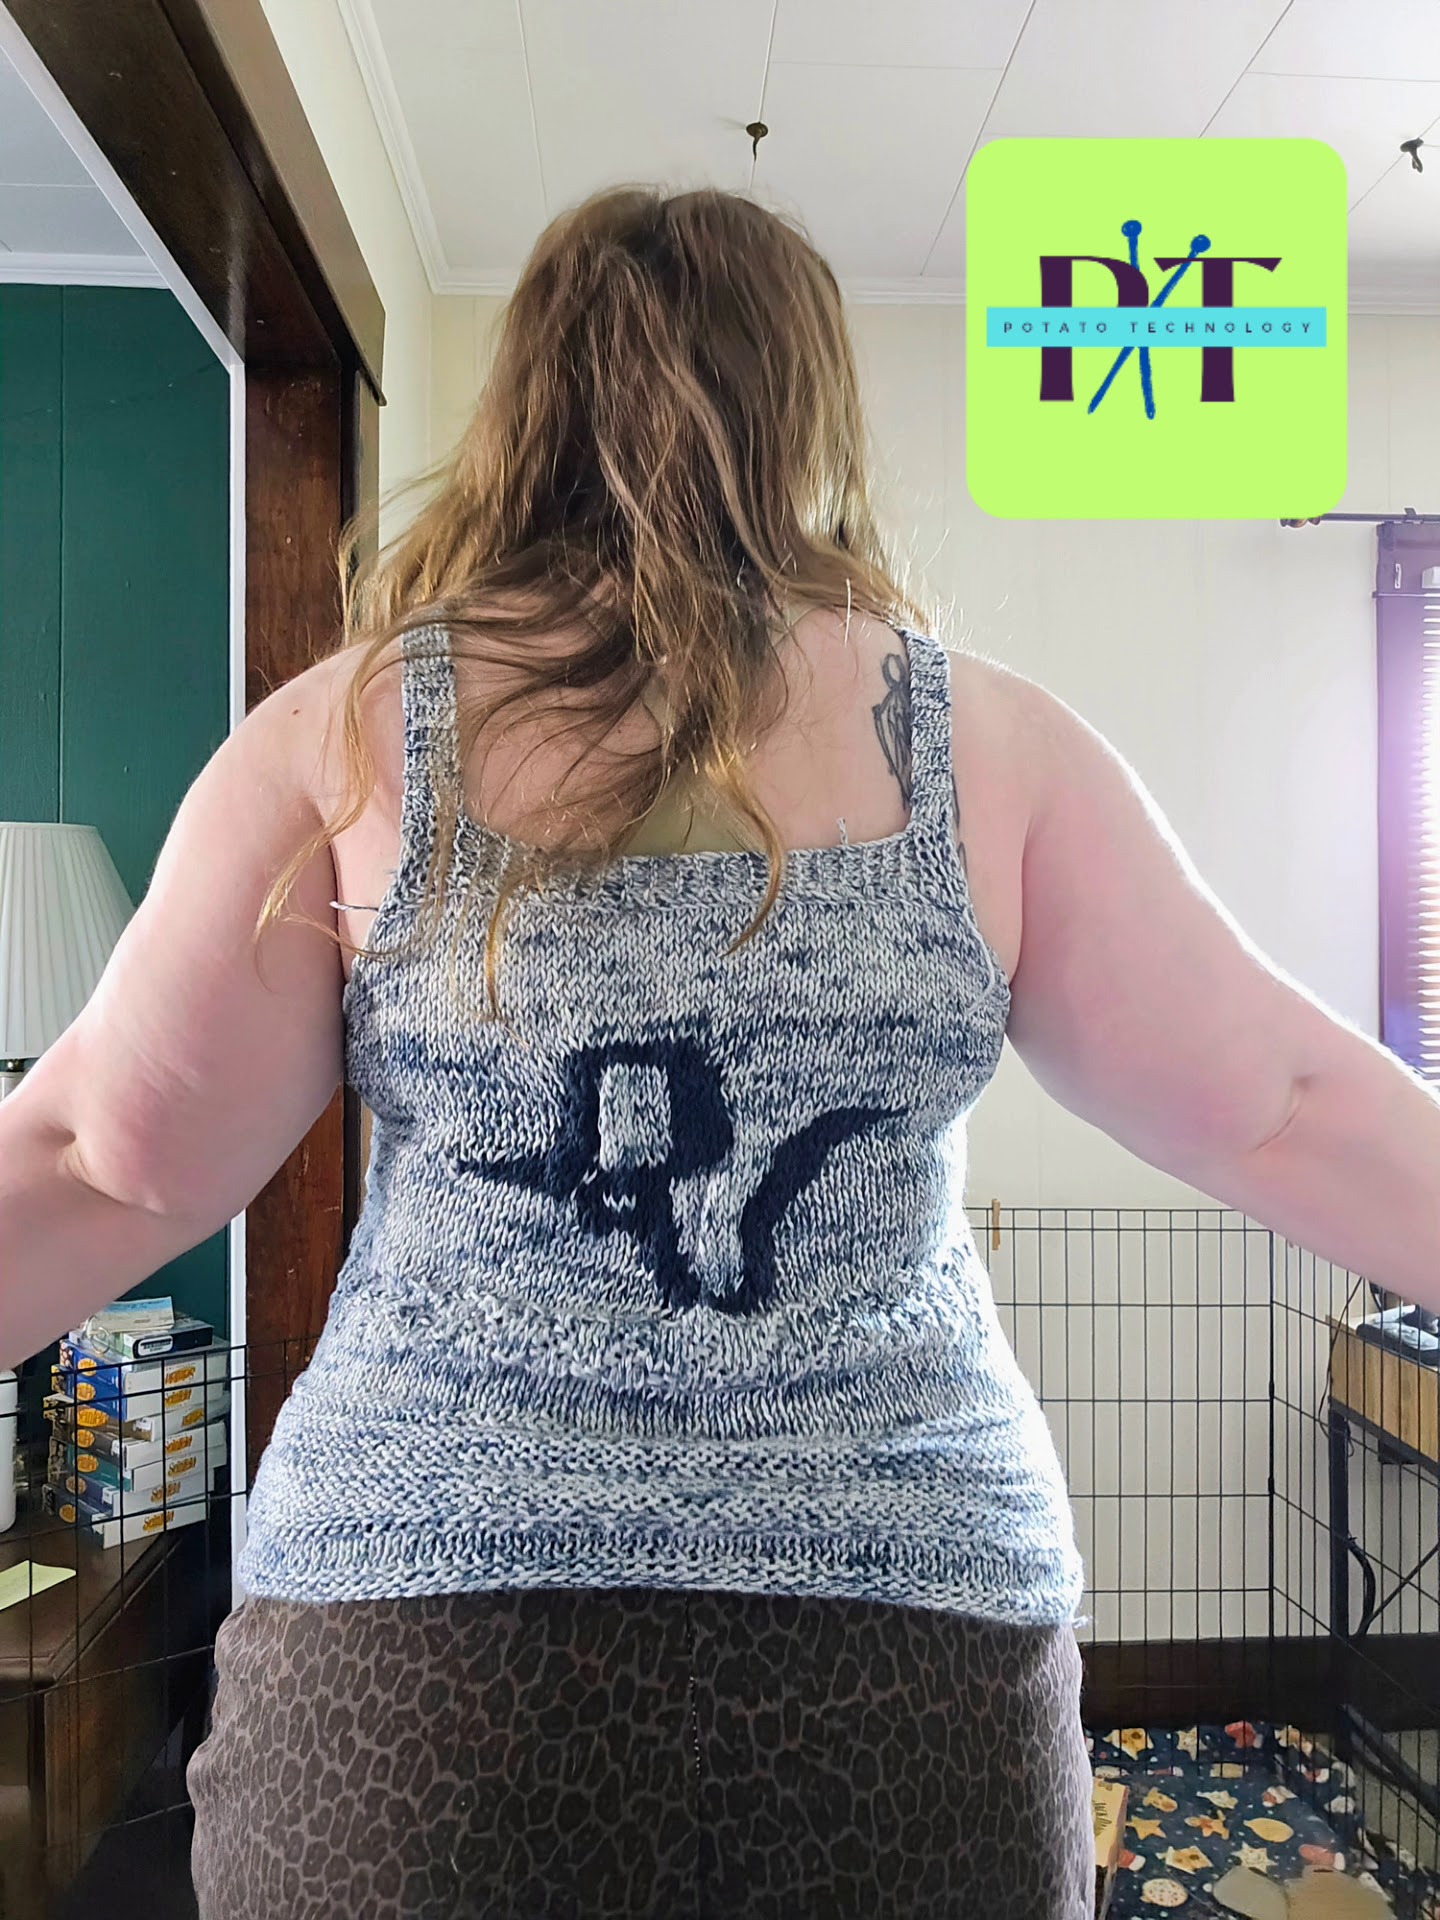
Another issue I ran into was scale, particularly with the font. To achieve the bubbly curves, I made my scale rather large, stretching across two pieces of graph paper, and maybe this is just inexperience, or possibly I made my chart too complex, but I noticed myself ad-libbing stitches instead of following the chart due to all the mistakes I made. It turned out just fine, but it was not executed exactly how I wanted it to be. I’m pleased with the waves on the bottom and how they wrap around the tank. The back, I am lukewarm towards. I like the placement of the seahorse, for “High Horse” and the stamp for the journey they embark on, but the racer back is a little messy, since I was freehanding this pattern. But hey, the only way to get better is to practice.

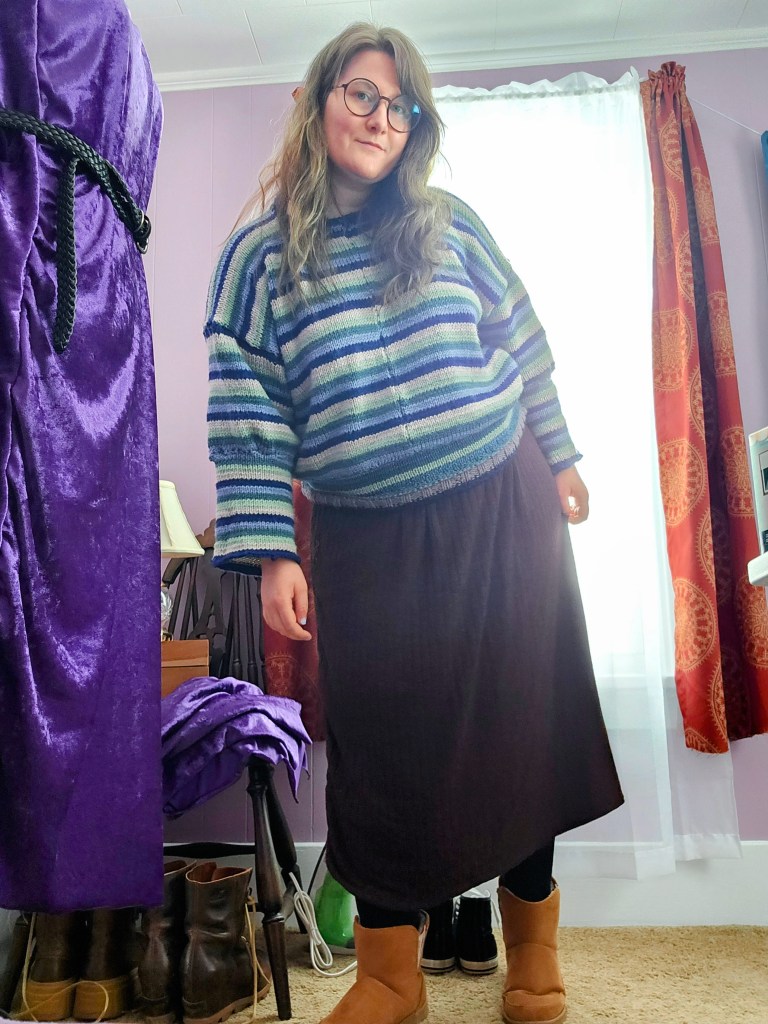
Compared to my Red Velvet project, I felt confident that I could execute something to bring me joy and capture the spirit of the Fe304: Forward album. I love how this piece is one of a kind. No one else has this t-shirt or artwork, it’s a nerdy piece of knitwear for my special interest – kpop. ☺️

With this being my third merch project, I’m excited to see what speaks to me next. I’ve considered a Stray Kids Karma project and an Aespa Armageddon logo etched into a sweater. That one is going to be a big project, the logo is so intricate that when I attempted to sketch the chart last year, it was spread across four sheets pf graph paper. Maybe an Ateez project? Who knows. I do know that making your own art, and combining it with something you are passionate about, is a fantastic experience. Your passion becomes this physical object you can show off, and hopefully, bring a little sunshine to the world around you.

Pivot! An Important Sewing Skill

Okay, as a millennial, I can’t hear the word pivot without thinking of this scene from Friends. But, silliness aside, Ross was correct; you have to pivot and pivot well. The longer I sew, the more agitated I get when I make foolish cutting or measuring mistakes in my garments. Like my shortalls from last year, I tried them on over the weekend because it is feeling warm and springlike here, and I was shocked by how poorly I fit the shorts. The top portion of the shorts fits excellently, but not the shorts. No one wants weird bunching when it comes to shorts, and that was exactly the problem!

At first, I went through the stages of grief – denial, anger, bargaining, depression, and finally acceptance that no matter how delusional I chose to be, these shortalls are uncomfortable. I would not wear them. This made me feel so many regrets. The pink overalls I drafted completely from scratch, using a special fabric featuring corgis and bread from a Japanese fabric brand called Kokka Fabric, sourced from my local fabric shop, Firecracker Fabrics. The second pair was cobbled together as a challenge of fabric and repurposing. The fabric was 1 yard of 59″ cotton twill from Mood Fabrics, and the pockets were sourced from a pair of shorts in my closet. I refused to scrap these. But what could I do to fix these? With all the patterns at play, adding in a new fabric sounded scary. Cutting these into bags or future quilting projects was throwing in the towel too soon for me.

My solution came to me one night, as I was washing my face; I didn’t have to make a drastic change. I had to address the problem – the way I cut the curve of the pants. I could remove the section that divided the fabric into legs, and transform the shortalls into pinafore dresses with a few cuts and stitches! It was a success! The shorts are now a skirt, by cutting away the curved line and sewing a straight seam on the back and front of the skirt. I also made a quick swap to the back bib of the brown floral pair, adjusting the square bib to the triangle shape of the pink ones. This adjusted the fit of the dress in an excellent way. The purpose of the triangle, I believe, from the fit change on my garment is to eliminate gapping between your shirt and the back bib, so the fit follows the line of your body.

Now, sewing is not the only place to pivot, obviously. Problem-solving is a fundamental part of the creative process. Projects rarely work out the way you want, from knitting to cooking to building a piece of furniture. In this fast fashion, consume and donate, culture poisoning my country’s culture, we are losing the art of problem-solving. This has been exacerbated by the rise of AI and ChatGPT. Why think at all? Why imagine, ponder, or research? Why try if you aren’t going to get “expert” results? That is what the rise of optimization culture is creating: the fear of trying. But you have to try to become an expert. AI is not an expert; it is a thief, stealing the knowledge of humans who have spent years and decades striving to know, unafraid to try and fail. It’s literally the scientific method. So if you are an impressionable person, who is growing up in this current era, don’t give up your creative ability for AI to do it for you. You will lose crucial thinking and creative skills if you don’t exercise your mind and problem-solve on your own. Just do it.

DIY K-Pop Band Tees Using Embroidery and Knitting

In 2025, one of my goals was to try my hand at crafting my own K-Pop Merch. Some bands are easy to find Merch for, and others, well, you are left to your own ingenuity. The bands I selected to try for this are NCT 127 and NMIXX, which I have tried and failed to find band tees for that I liked. For this project, I used two different techniques – embroidery and stranded colorwork knitting.

NCT 127 Embroidery

My first idea was to pick up a blank T-shirt from the craft section and get to work. The shirt I chose was a Gildan tee from Walmart, which I DO NOT recommend. This shirt is so freaking thin. Horrible quality compared to the blanks I have found at Michael’s, Dollar General, or even Hobby Lobby. But as I was dubious of my embroidery skills, I went ahead with the Walmart shirt as practice. That was the right call, because dang, embroidery is not as straightforward as it looks.

For this project, you will need: an embroidery hoop, embroidery floss bundles, a marker or pen to sketch your design on your shirt, and backing like embroidery interfacing or a fabric scrap that I used (because I forgot that the embroidery needed a backing).

For the design, I chose something simple. The song, the band, and a little imagery. I love their early album Cherrybomb (2017), but the song is almost 10 years old now, and it’s kinda hard to find any NCT Merch with it at this point. Seemed like the perfect option for a first try. I wasn’t expecting my stitches to be so tight; I felt like I was fighting myself across the whole piece. This was because I forgot about the backing for stability, and all this embroidery on this poor quality shirt, yeah, it wasn’t great. Afterwards, I added a backing to the embroidery with a scrap piece of another t-shirt.

Is it my best work? No. But is it a start for making better projects in the future? Yes! And I wear it anyway in the garden and as a sleep shirt.

Red Velvet Knitting

My desire for Red Velvet Merch was entirely motivated by the confusing announcement in April 2025 that members Yeri and Wendy did not renew their contracts with SM Entertainment, but Red Velvet was not disbanding. They have become one of my top girl groups after their release of Cosmic in 2024, so it seemed only appropriate to use the album Cosmic as my muse for a cotton knit tank with stranded colorwork. It’s a bit easier to find Red Velvet Merch on sites like Teepublic, from which I have bought a shirt. This project was more about expressing my love for this album, and I hope that Cosmic will not be their last release as a group.

You will need: a pencil, pen, graph paper, and stitch markers. (Along with your basic knitting supplies – needles, yarn, scissors, tapestry needle)

To start, I searched Pinterest for album artwork and a logo. I found a lot of options to use as a compass for the project, but decided the simplest option would be best. I opted for one color to keep the floats simple. To make my colorwork charts, I always use graph paper and a pencil to be able to adjust the marks that I transfer from the image. Once I am happy with my design, I trace over it in pen and use a pencil to cross out the lines of the pattern as I complete the project to mark my progress. To understand the dimensions of the image as I worked, I also marked the “canvas” with stitch markers. It is also important to note your garment construction and how that relates to your chart. I made this tank knitting bottom up, so I began working on my colorwork from the bottom of the chart.

I am thrilled with how this project turned out! As my first stranded colorwork project with this complex of a design, it was far easier than I thought to complete. You just have to plan out your image and be patient with your floats. Try not to hold too tightly and remember that blocking will help the tension relax.

Part Two: Sewing Overalls Step by Step

I’ve been looking at how to make a custom overalls pattern, based on drafting techniques, which I began with this post: Drafting Shortalls from Scratch. But how to construct them? Well, that’s what I plan to explore today! To do this, yesterday, I cut out another pair of overalls, this time for the fall-winter-spring season, to retrace my steps.

Step One

With your pieces cut out according to your measurements, you should have four leg pieces – two front and two back. The next two bib pieces should be cut out, with the back piece cut a bit differently to accommodate the straps. This is to anchor the straps at the middle of your shoulders to keep the overalls securely on your frame.

Step Two

I like to begin with the pants or shorts portion of an overall project, because they are foundational to the silhouette. I like to pin the leg pieces together to try on before sewing. Remember to leave several inches of the outer thigh seams pinned for the flies and buttons.

Once you know that the pieces will fit, with seam allowance accounted for, I begin sewing the leg pieces together, leaving out the crotch seam and the top part of the inseam, to attach the two pieces as one pair of pants. After these have been sewn together and I have tried them on, I will move on to the bib.

Step Three

For less bulk, I like to cut the seams of the crotch portion and leg seams that will join together, with pinking shears, to make my hems less thick. This lets the sewing machine, or your hand sewing needle, pass through the seam with ease, and is more comfortable to wear.

How do you join pants? Well, you leave the top of the inseam open so that those two inseams will line up together, making the two legs join at the top where the pelvis is. Remember this is a bifurcated garment, so you want your final shape to be two tubes, joined to make one tube at the top. I’ve messed this up several times; it’s okay even if you sew it wrong the first thousand times. That is what mockups and seam rippers are for!

Step Four

For the bib of these overalls pictured above, they were cut into short pieces, so I just had to join these pieces together. I added a facing to the inside of the bibs, which is just a piece of the fabric’s right side facing inside, so that the bibs are finished cleaner around the neckline.

I inserted the straps between the facing and the bib for a clean and secure stitch. The straps were finished with a loop on either side of the front bib to tie around, instead of the metal fastenings. I was inspired by Lucy and Yak Dungarees.

Step Five

The final touches are the bias tape, the side buttons, and the five pockets. I find the bias tape the most mundane thing; therefore, I choose to do that next, which is a 1-2″ ribbon of the fabric used to finish the raw edges still exposed on the sides.

Step Six

Next, I created the flies on either side by folding over the fabric to make the button placket and button hole placket. This was planned out when I cut out the overalls. After making the button holes and finishing them with either the machine or by hand, I mark out on the other side where the holes overlap to mark for buttons.

Step Seven

Finally, I sew the pockets. I chose a large, half-rounded bib pocket on the front, two smaller rectangle pockets on the backside, and medium side pockets sewn across the hip. Next? Enjoy your creation and feel a sense of accomplishment. You did something hard, and probably felt lost at times, but you persevered to learn a new skill. It’s not cringeworthy to try. So go for it! ❤

Drafting Shortalls from Scratch

Did you know, that through simple measurements,  reference photos, and a few tools, you can draft your own clothes? Not just a t-shirt or a circle skirt, but big projects!

That’s how I have made some of my most ambitious projects, no patterns required!

What is Pattern Drafting?

A pattern can be easily made with a tape measure, pencil, and the key places to measure. For my overalls, I was most concerned with the width of the bib, the length of the rise from the top of the bib to the crotch curve, the width of the hip from the center of your body to the end of your hip. You can also measure the circumference of your hips but I think having separate measurments for the front of the pants compared to the back of the pants. The back is usually wider.

For the overalls, I worked in four pieces. Front left, front right, back right, and back left. To do this I marked out the front left and front right on the fabric, accounting for the crotch seam which is part of the leg. I added a 2-3 inches to the width of the hip measurement of each of the four pieces to make the curve with my french curve.

When planning pants, keep in mind that you don’t need as much inseam as you think to make shorts. What you will need is a long rise because you can always cut more, so be cautious and double check the measurments of your rise.

Now for the bib, the top portion of the overalls, I plotted the width of the bib above the pants portion and with pencil I carefully drew a tapered curve upward. I cut this extra long to have excess fabric to fold over to make the facing. This fabric is like a lining for the top of the bib, the part you are most likely to see.

Always use pencil or a tailors chalk and take your time. Using a mock up fabric is a great idea to get the cut right. After repeating this for both front pieces, remember to adjust the width of the hip for the seat of your pants, all while remembering to account for the french curve line of the inseam.

After cutting all for pieces you will need to set aside fabric for pockets, I added 5 to mine. A bib pocket, two side-front pockets, and two back pockets. You will need fabric for the straps, measure accordingly based on the height of the bib, over your shoulder and to the back bib, remembering to add more length to tie.

Next is scrap scavenging! You will need small pieces for the loops to tie the straps around on the front bib. This will call for two loops. You will also need bias tape sized pieces to finish the edges of the overalls on the bib. Finally, save some fabric for the button flies on either side of the overall legs to help you get in and out of the garment.

It’s a lot of information to sift through but I hope this small tutorial will help you sew overalls if you wish with free instructions. I will be following up with a second post that explains the order of operation, to make sense of all these pieces, to help these fabric pieces transform into a wearable garment you can enjoy!

Can I Make Mid-Size Overalls from 1 Yard of Fabric?

Do you ever think of something you’ve accomplished and wonder if you could do it even smaller? Well, I set a challenge for myself. A year ago, I wrote about creating a summer dress with a button-front from less than 1.5 yards of fabric. That post inspired this one, as this summer I was able to squeak out a pair of shortalls (overall shorts) from a yard of 59″ stretch twill from Mood Fabrics. This was not my first overall attempt, but I think my most ambitious because this yardage was for a pair of shorts with some abundant pockets, but I changed my mind after seeing a variety of overalls styled for spring and summer. I’ve owned this style before in denim. My favorite version I’ve purchased was a pair of vintage ’90s denim shortalls that were baggy and breathable for those swampy summer days. The more fitted versions I’ve found in stores in recent years are not my cup of tea, because for me, overalls are best when they are oversized.

When I cut these overalls out, I had just completed my draft of an overalls pattern from 2 yards of 44″ cotton twill from Kokka Fabrics, and I was itching to make more without fabric shopping, so I went for a dig in my fabric/yarn closet. It’s more of an antique clothing press, to be fair. This is where I found my gold – 1 yard of 59″ across cotton twill in a fun pattern, sturdy enough for a bottom weight garment with just enough fabric to cut the shorts, the bib, the straps. That was all I could muster for sure. I set aside the project and got to work on my Kokka Fabric project, which taught me so many things about sewing overalls that I had overlooked in past attempts.

Firstly, the back bib is not a rectangle. Secondly, a facing for the bib makes the project feel more professional. Thirdly, the buttons on the side need to be properly assembled with the fly for the right stability. Finishing the edges with twill tape made from the project’s fabric helped create a crisp look. Fourth, the overalls need pockets in order for the garment to sit well on the body. Lastly, I did not accomplish these with my 1-yard of fabric overalls. I took some shortcuts.

I ran out of fabric for the pockets, the fly, and the twill tape. To remedy this, I kept the shape to a romper style and less of a traditional overall. The bib is rectangular on both the front and back. The pockets were added from a previous project; I upcycled shorts into pockets. The side does not have any fastening, instead I sewed up the seam and let the boxy cut of the shorts and stretch of the fabric help me compensate for my lack of fabric.

So if this project is a pair of overalls that is not a traditional overall, but more of a romper, why am I writing about this?

Well, because the finished product is a wonderfully comfortable garment, practical for many things – gardening, sewing, cooking, knitting, farmers market, apple picking, cleaning, walking in the woods, going to the beach, etc – and I made it without being an expert. I made this garment through hand sewing, so you don’t even need a sewing machine if it’s out of your current budget. I purchased this fabric on sale for 10 USD/yard. I used less than a spool of thread, and repurposed the pockets from an item in my closet that I didn’t want to wear anymore. Have you seen the price of overalls? They are expensive, even the short version. A low-quality version will still set you back 30 USD.

I made these with 10 USD of fabric for a midsize frame, so this is accessible to all of us, not just the slim people. A lot of popular and cheap DIYs on the internet are made for very small bodies, which makes me nervous that if I try it, it will be expensive, but this wasn’t. Making these overalls was incredibly rewarding, too. These aren’t even the best pair I’ve made this summer, I’ll share the other ones soon! But these ones will have a special place in my heart because they are unique, comfortable, and made with my own hands. So if you have an idea of how you could make something by hand, make it happen! It’s a lot easier than you think, a great learning experience, and there are tons of resources here online to help you succeed!

Will I Wear A Knit Tank?

This is a follow-up to my recent post, ‘Will I Wear a Knit T-shirt?’, where I examined the fibers and wearability of a knit t-shirt and discussed whether this summer knit project could be a suitable option. Since then, I finished and got to wear a new piece of knitwear – my first knit tank top. I wore it in July, in full humidity with highs in the upper 80s to low 90s Fahrenheit. My experience surprised me – I said before that my knit t-shirts are wonderfully comfortable, but have a temperature and humidity limit for me, but the tank top surprised me!

I think it was the high pima cotton content in the Knit Picks Comfy – a 75% Pima Cotton and 25% Acrylic mixture that uplifted the breathability for me. I was melting in the hot sun, but the air flow and temperature regulation were spectacular! This tank had delicate straps but did not have a lacy stitch or open weave. It was constructed with regular knit and purl stitches, with sections that had double layers of yarn due to two sections of colorwork graphics on the front and back.

With Pima Cotton, Silk, Bamboo, or Linen as the primary fiber, or a blend of these natural fibers, I believe knit tanks are just as breathable as woven fabric, and for sure more breathable than moisture-wicking tech fabrics, which are polyester. No, I wouldn’t work out in this top, but there is something to say for a garment that is comfy and breathable for those long summer days. It was a simple stitch-up up only calling for two hanks of 100-gram worsted-weight yarn, about 240 yards, with the addition of 1/3 or 40 yards of the accent yarn, another cotton-acrylic worsted-weight blend from Loops and Threads. You can make a tank like this for 30 USD or less, and this is a size large. So if you have a small amount of yarn, you can do a lot with it!

Do you think a knit tank would be an item you would wear?

Knitting a Dress for the First Time

Knitting a dress, how hard can it be right? It was actually pretty managable garment as an intermediate knitter. I would not recommend unless you have made a sweater before but would definitely recommend knitting a dress if you want a soft and stretchy garment that hugs you!

Inspiration

I have made plenty of dresses over the past 5 years, but they have all been cut and sewn from fabric. Knitting kicks it up a notch, asking you to assemble the dress, but make the fabric to boot. I thought it would be silly to try until I discovered some lovely crochet designers on You Tube who make with imagination!

I was inspired by Mama Gwen of TL Yarn Crafts to give designing a knit dress a try. She makes such beautiful dresses all from self-drafted patterns in knit and crochet. Along with Dana from Blondie Knots. Her Coachella scrap two piece outfit helped me have the boost of confidence to try something new.

Materials

Last summer at Joann, before the shenanigans began, I purchased 14 Big Twist Cotton 50g skeins on a sale with the intention of knitting a top. Many months later, this yarn was sitting in my stash with my mind uncertain if the punchy color changing yarn was my cup of tea for a cotton knit top. But a dress? Yes, that could work. Did I have enough yarn though? I’d have to make it so because there was no more being sold.

Because of the circumstances, I decided this dress would be my goodbye to Big Twist.

Design

I knew from sewing, my design would need to be a dress that was either tubular or empire waist to suit my body shape. I decided to knit this on US 7 needles, straight needles. Sometimes I would shift to circular, but this was not knit in the round. With the combination of yarn minders, a measuring tape and patience this dress came together!

To start I knew I wanted the bodice to be the anchor I worked out from so I cast on stitches to work horizontally. From the bodice, I then added one strap to plan the width and placement of the top. I was uncertain how much yardage the skirt would consume, therefore I paused to determine sleeves later.

My plan for the skirt was to knit a section by casting on the bottom of the bodice, adding stitches to increase width until I finished a skein. Repeat and fill out the row by picking up stitches to join the sections vertically into a tube. I continued on, and on  until weeks later I had a skirt but panicked that I was not going to achieve my desired length and second sleeve!

I decided to pull a teal yarn from my Landscape Painting with Yarn project. This hue pulled the cool tones into harmony in a pleasing way. I used two skeins of this teal color and then finished with the original Water Lily tonal yarn. I finished the second sleeve and tried on the piece with relative ease. There was one fit issue – plunging neckline. But it was a lovely, cozy knit from scratch dress!

The final touches to this project were addressing the neckline and the sleeves which were set too deep. I cast on to the neckline to fill in the gap and provided structure to the straps with several rows of decreases to give the dress a cap sleeve befitting my vision.

Final Thoughts

I am definitely making more dresses with knit! It’s far more pleasant than sewing if you want a comfy yet elegant style. You have both control of the drape and the fabric design. It’s your world, as Bob Ross would say.

This project was more than a goodbye to Big Twist, it was a new chapter for me. I began this journey 5 years ago to learn how to make and now I feel empowered by knowing I can make my own clothes, not just with fabric but with skeins of yarn and needles. It has been a wonderful journey of discovery!

If you want to knit a dress, I’d say go for it! If you’re a beginner, make one but not as your first project – you will be overwhelmed by the sheer amount of time this project took. It was weeks of work that as a beginner, would have scared me. In time I know you can do it though! ❤

Create a website or blog at WordPress.com

Up ↑