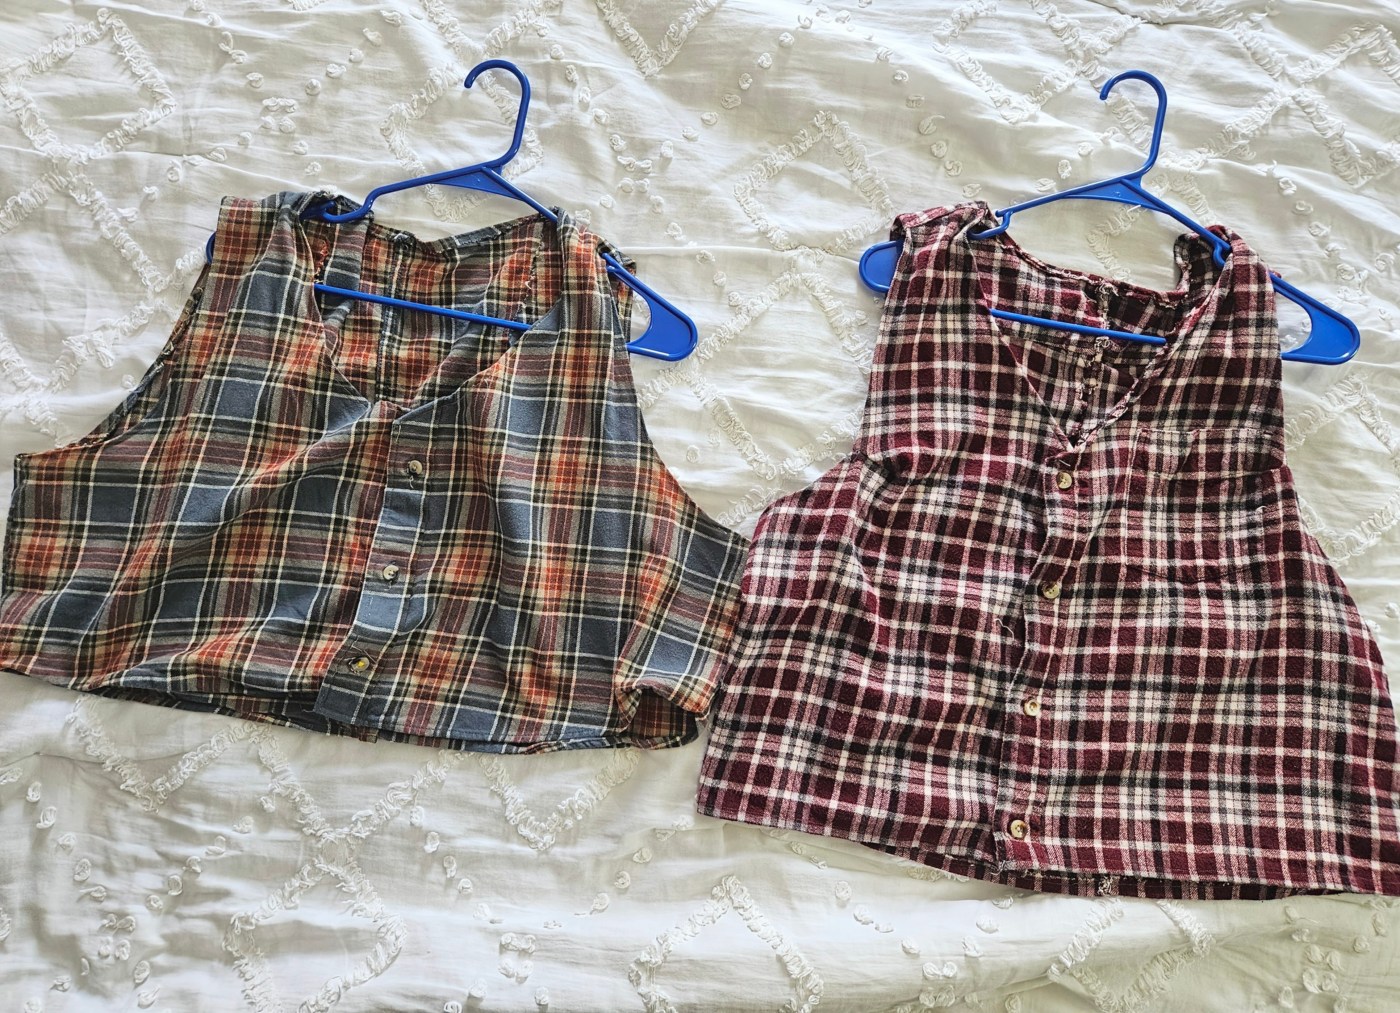
Last summer, I wanted to introduce vests into my wardrobe. I have made vests before for Kyle, but have not sewn a vest for myself before; I have knit them. Because this was a spontaneous idea, I needed to be budget-conscious and find a way to use what I had to make a vest. So I went to my closet and got creative! I had a few flannels in my closet that were hanging there, waiting for me to wear them, but I didn’t. That’s when I looked at the shirts closely – there was a button placket, shoulder yoke, and a sturdy fabric, with room to crop them. I saw the vest within the shirt, so I grabbed my scissors—and was a bit too zealous with the first one! Don’t be like me, have a plan. So how did I make this upcycle work? And what did I learn from my failed attempt?
Shoulder Seams, Yoke, and Waist Length
The crucial points of cutting, I would say, are being aware of the shoulder seams, accounting for the back yoke width, and properly measuring your waist length for a proper fit.
- Shoulder seams on a flannel are boxy and loose. To achieve the set-in sleeve opening that accentuates and reveals the shirt underneath, you need to cut away the shoulder line – but not too much. Be mindful of how far into the shoulder you plan to cut, so that you are left with a proportional line.
- The shoulder yoke is a technique used to tailor the shoulder line, while leaving the fabric below the shoulder loose. As a result, there will be more fabric on the back of the vest, which may affect the fit of the arm openings and possibly require a dart to remedy the loose fabric. If not, the back will gape open, looking awkward and like a mistake. A vest should hug the body, be tailored, or else the upcycle will look exactly like you cut up a flannel.
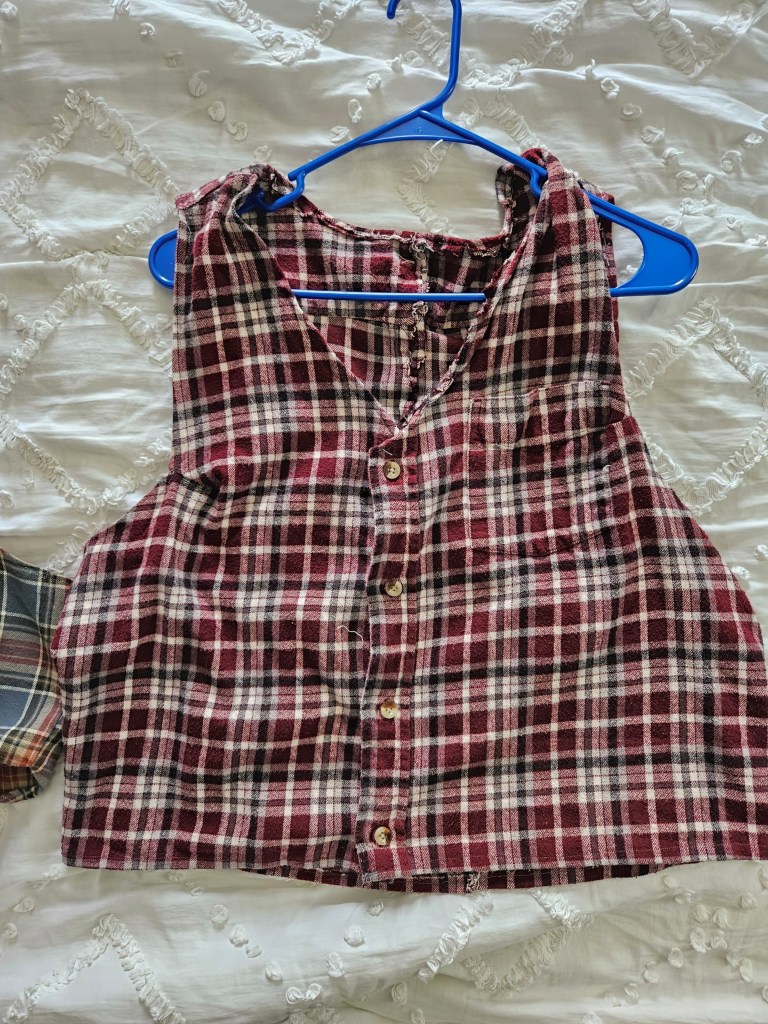
- The length of the vest determines the style and balance of an outfit. One of my vests I cut too short, and this limits how I can wear it. I find it cuts me off in a regency high-waisted fashion that is fine when I wear it with a high-waisted skirt, but with pants or my linen Darcy shirt, it’s awkward. The other vest was cropped, in a careful fashion, ending at my hip and balancing my body line like a well-tailored garment. It’s far more versatile.
- Cutting the neckline is crucial. For the front, a tapered cut to the button placket provides the classic look. Be careful not to cut too low for a historical silhouette. Also, remember not to cut the back the same as the front! I made this mistake and had to sew the cut portion back into my vest. This should be a crew neck line, straight across, with a slight dip in the middle for comfort.
Why a Flannel Shirt?
I chose flannel shirts as my medium to work with for three specific reasons. The first one I already mentioned – cost. We had just moved into our house and paid quarterly taxes. The vests were not a necessity, just a whim, so it made sense to me to take an existing item, I didn’t wear to create something I would wear. It’s funny how the sustainable option is sometimes the free option too. Secondly, flannel is a sturdy fabric, appropriate for the structure of the vest, that could be sewn without the addition of a lining, which I could add later if I wished, when I was more comfortable spending money on fabric. Thirdly, flannel is a classic pattern that reminded me of the woven woolen coating fabrics that vests have been sewn with for centuries, so it was a good match! I hope this inspires you to repurpose items you have to make something new! For the rest of the flannel, the pieces I cut away, like the sleeves, stay tuned to see what I did with those. It’s one of my favorite makes. 🙂