After Thought Heel Socks

A special thanks to the pattern writing of Weichien Chan from Saskie & Co and Jamie Lomax from Pacific Knit Co, for explaining this process with such clarity, that I leveled up from a sock knitting dreamer to a sock knitter. Check out their patterns! I’m glad I did. 😃

The Sock Saga

How? And, why? Those were the questions burning at the back of mind as the sock process eluded me, again and again. For years, I couldn’t wrap my mind around the heel of the sock patterns I acquired. I tried a toe up approach. I tried to mess around with short rows. I even bought a sock pattern book from a used book store, for a bit of sock heritage. Heel flap, confused me. The mechanics of double pointed needles, challenged my hand eye coordination. Magic Loop tested my patience and exposed my tight tension, from my cluttered mind. But the Addi Sockenwunder 9″ cable in 3.5mm became the key to unlock knitting mechanics I was lacking.

If you’re familiar with this blog, you know my frustrations with knitting in the round. This came to a head in February, during the Melt the ICE hat knit along. I seriously messed up my tension, and initial attempt by twisting my work. My joined stitches became a helix, coiling around the cable. I frogged my work, and started again, this time waiting a few rows before joining. (I found this wisdom thanks to the advice of Reddit, I think? To the past comment thread that helped me, know that I am eternally grateful.) This time around, I was determined to keep my hands loose and my mind relaxed, and it worked. I did not feel the hand fatigue, I normally experience when knitting in the round. The short cable length of the Sockenwunder needles was the key, the stitches slid easily around in the exact space of a sock circumference. This is why Magic Loop and I, did not form a lasting relationship, the shifting of stitches was a hurdle I disliked. Same with DPNs, I don’t want to keep track of stitches on needles, I want to be in a flow state of stitching. That is the best part of knitting in the round, in my opinion, you just go and knit. It is incredibly relaxing, like crocheting a simple stitch across a project, you and the stitching implement become one with the yarn, looping and creating a fabric with a relaxed mind.
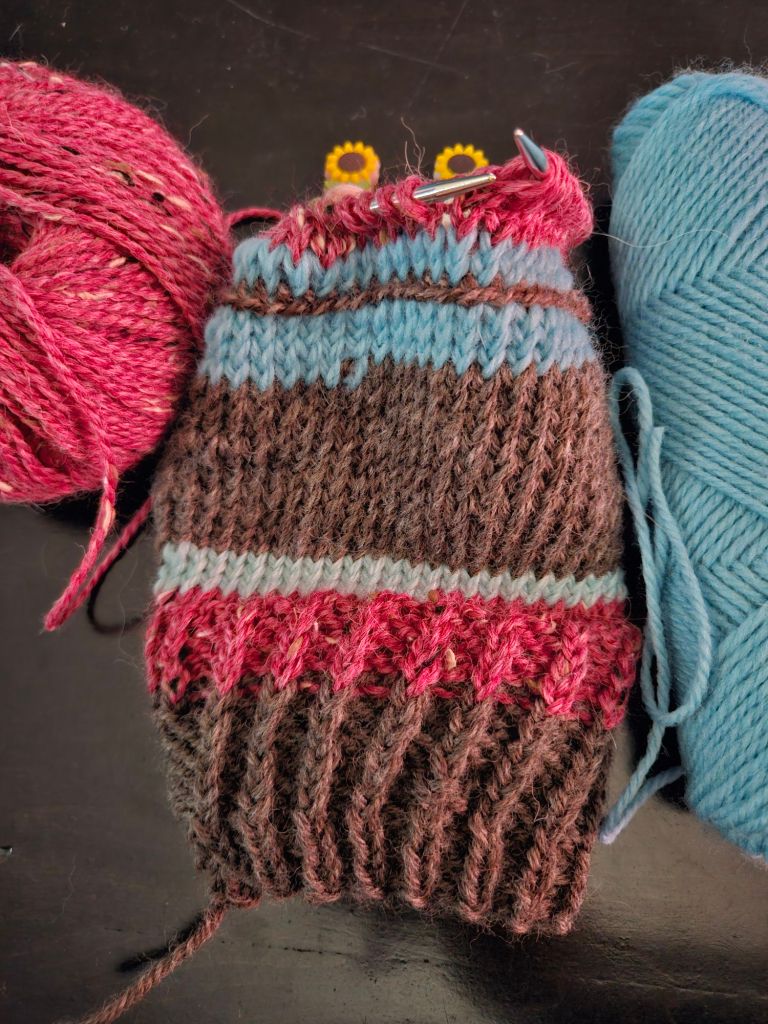
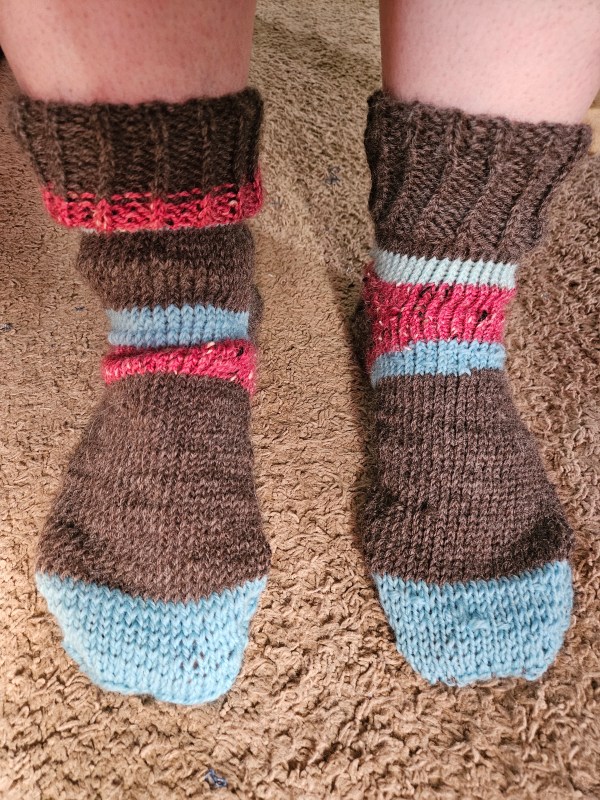
For this reason, the Sockenwunder socks came together quickly, despite the new techniques I was employing in this project. My first sock, I began at the end of the day on a Thursday, knit the body of the sock on Friday, and finished the toe and heel on Saturday. My second sock was began on Sunday, knit Monday, and wrapped up on Tuesday. Quick and easy, compared to a sweater! It’s what I want out of this knitting practice, something quick and relaxing, that is a pleasure to replicate over and over again. In the short term for my own feet for this coming winter, and in the long term for loved ones and beyond, hopefully charity knitting socks and possibly selling them at a market or online marketplace.

Sock Pattern

My sock pattern was loosely based on the patterns featured in the Arctic Knits book, which I will not go into detail for copyright reasons, but one thing I will talk about is my sizing mistake. I cast on an extra ten stitches from the Saskie & Co pattern, because of my usual tight tension knitting in the round. They fit a bit loose, and that’s okay. These first socks are a toile, for future socks, as I develop my preferences for socks. They are still usable, with a relaxed cabin socks fit for lounging around the house. I may layer other cotton socks underneath on cold days to pad the fit.

Another deviation from the sock patterns in the Arctic Knits book, was my choice to knit stripes, with scrap yarn from my Saskie Cardigan (another Saskie & Co project I will share soon). I didn’t know if these socks would turn out or be another failed attempt, so I used up my extras, in random stripes. This freed up my mind to concentrate on the mechanics of knitting the sock, and not the knitting charts. In the future, I plan to make the socks as written by Weichien Chan, they are stunning color work socks.
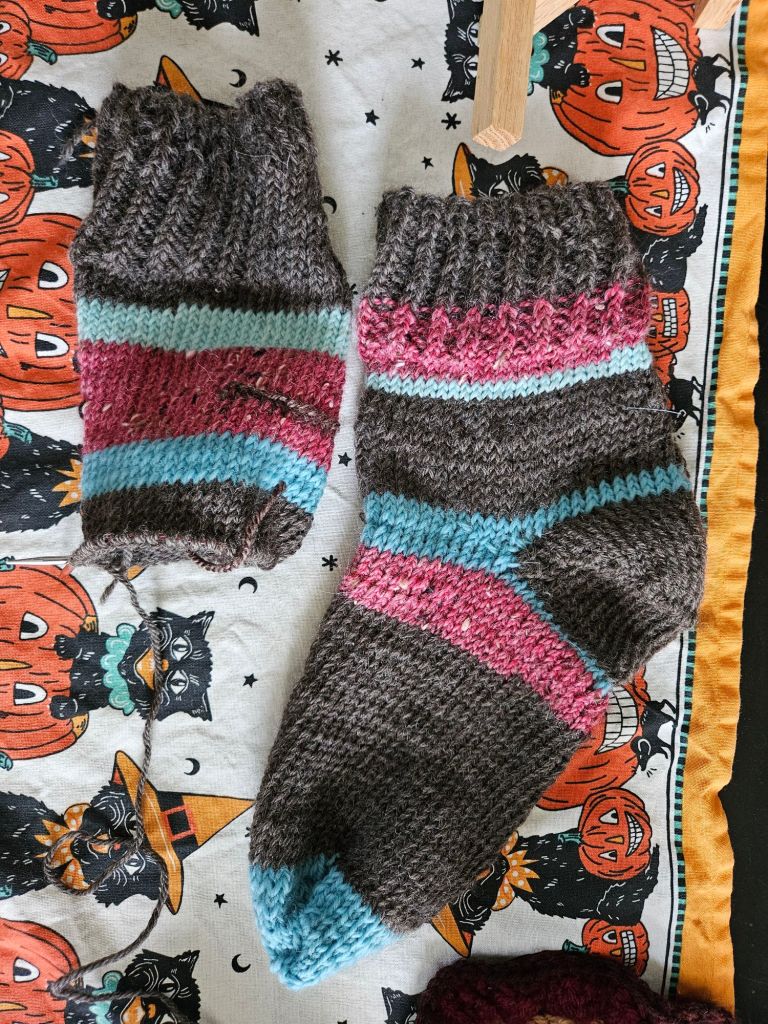
I used a combination of Knit Picks Wool of the Andes, Knit Picks Stroll, and Kelbourne Woolens Germantown.

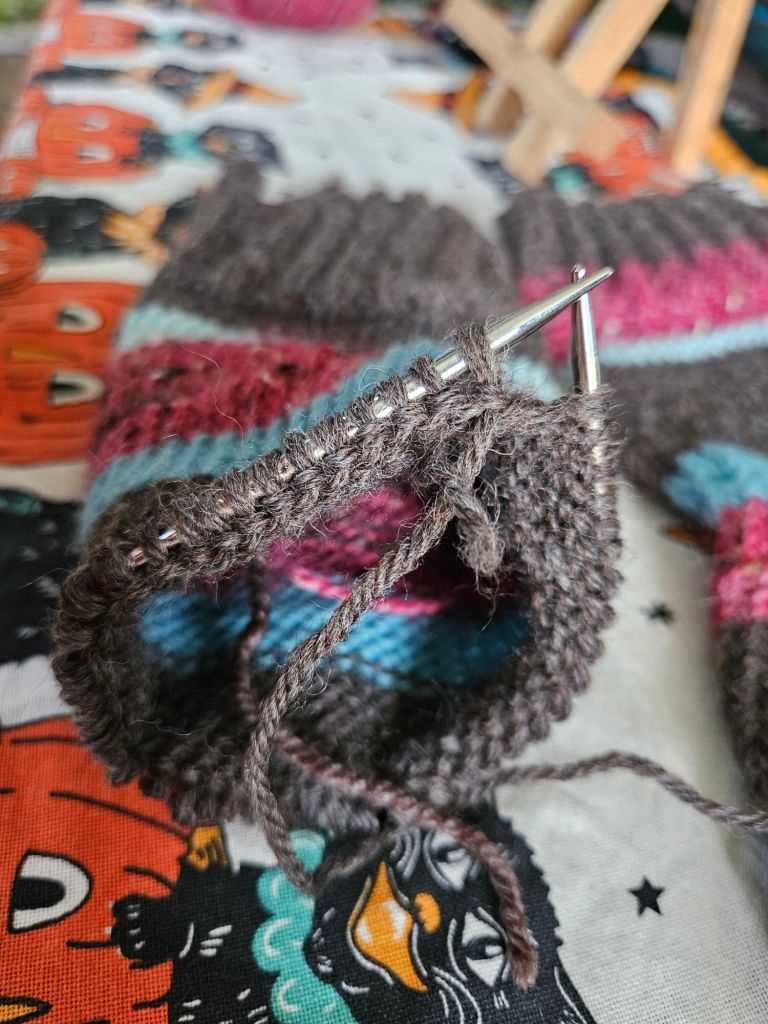
Now, what about that random raised row of brown yarn? That is the magic of the after thought sock! You make temporary arrangements for your heel and pick it up again after the sock body and toe are complete. This is where Pacific Knit Co’s tutorial had my back. Sometimes I need things rephrased, and many detailed pictures to make a new skill click. I’m a visual learner. Sometimes those patterns, although well written jumble in my mind. By using the combination of both pattern designers I successfully picked up the stitches above and below. I did this with a second set of circulars from Clover that were a bit longer, 16″ but the same gauge of 3.5 mm. The length difference was helpful during the knitting process, as the long needles hung down out of the way of my hands knitting on the Sockenwunder, and alleviated the stress of stitches falling off when unattended to.

Both Weichien and Jamie helped finally see the how and why of the heel shaping. With the heel flap techniques, I lost sight of the point. With the patterns that had me turn the heel while knitting the body, the complexity of this, overwhelmed me. But the after thought heel, eliminated both of these hiccups. I could see the sock body and the heel taking shape, it was intuitive. If you have experienced overwhelm by socks, I high recommend mixing up your tools and techniques. That is why we have so many to choose from, you must experiment to find the right fit like selecting a bowling ball.

Experimentation and repetition are my biggest takeaways from this multi-year sock saga. It’s not the finished project, as much as the process that defines the success. Knitting requires a patience and tenacity to frog and cast on again that has been hard for me, as a perfectionist with squirrel brain to stay the course with. Mistakes anger me. Frogging feels like a waste of time, but its not. Committing the skills to memory by practice is no different to volleyball practice drills or math homework. To be a skilled maker, you must put the time in, no short cuts. In this age of information and short cuts, it’s counter-cultural to slow down and fixate one skill until it is acquired, but it is the only way as humans we learn.
Using Doodle Decks for the First Time

The Doodle Decks from Pacific Knit Co had this aura, pulling me in from the first instance I saw online. Maybe it’s because of my 90s and 2000s childhood? It reminded me of the crafts we do as kids – the mini weaving looms, tie dye shirts, friendship bracelets, bedazzling etc. There was something about this deck cards.

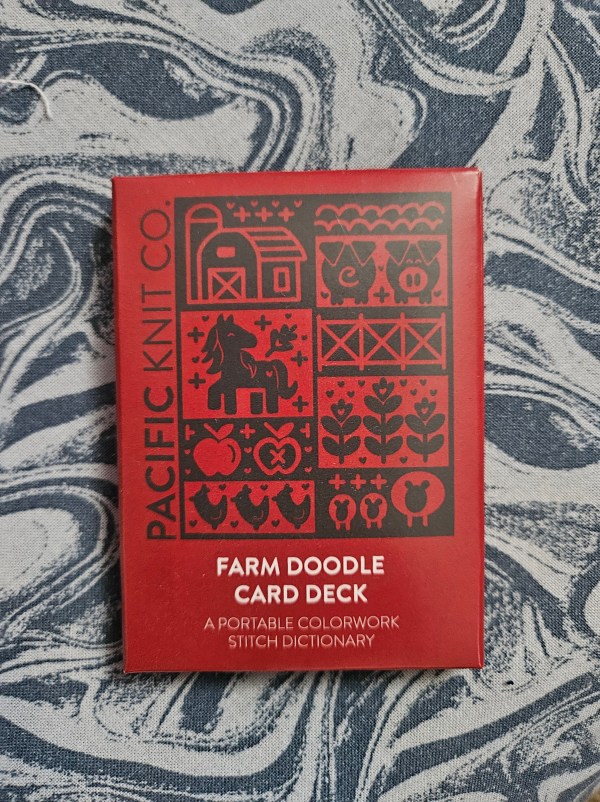
If you are not familiar with the doodle decks, they are curated colorwork charts that are combined into a small deck of cards, with a design per card, and additional cards to teach you how to make the most from the themed deck of your choice. I love the approachable nature of this pattern! Instead of a paper pattern, with line by line instructions, you get miniature charts contained per card, that is far easier to keep track of when you are knitting.

I found this format incredibly easy to use! I could quickly flip through my options, and choose my pattern cards. You can compare options or brainstorm sections of your project by easily laying out the cards on a table. The small card, the size of a playing card, was easy to manage in my project bag. To pause my work, all I needed to do was slip my card on top of the deck, and slide the deck back into the box. No graph paper to fold or book to mark, easy peasy!

As a self-drafter, I am not the best at following patterns. I think some of this stems from neurodivergence, and some from the fierce individuality instilled from girlhood in the 90s-2000s. I remember, not wanting to be accused of “copying” someone’s style, or locker layout, or room decor. It was a major social faux pas. Even though knitting patterns are literally sold for this purpose, to share your design with the world, I can feel myself resisting. But with these doodle decks, even though I was not the one to draw these charts, I feel like it is a choose your adventure kind of pattern.

There are ideas for sure suggested in the deck, but you can follow your own heart. I like the customization of Pacific Knit Co’s format. I have learned a lot from them through this experience of using their color work doodle decks, including new perspective in regard to my own self-drafted color work charts. I always go big, with these large graphics, that span the front of a piece, when big is not the only way. Small designs, with repetition, in the fair isle tradition, are just as effective and a new way to tell the same story.

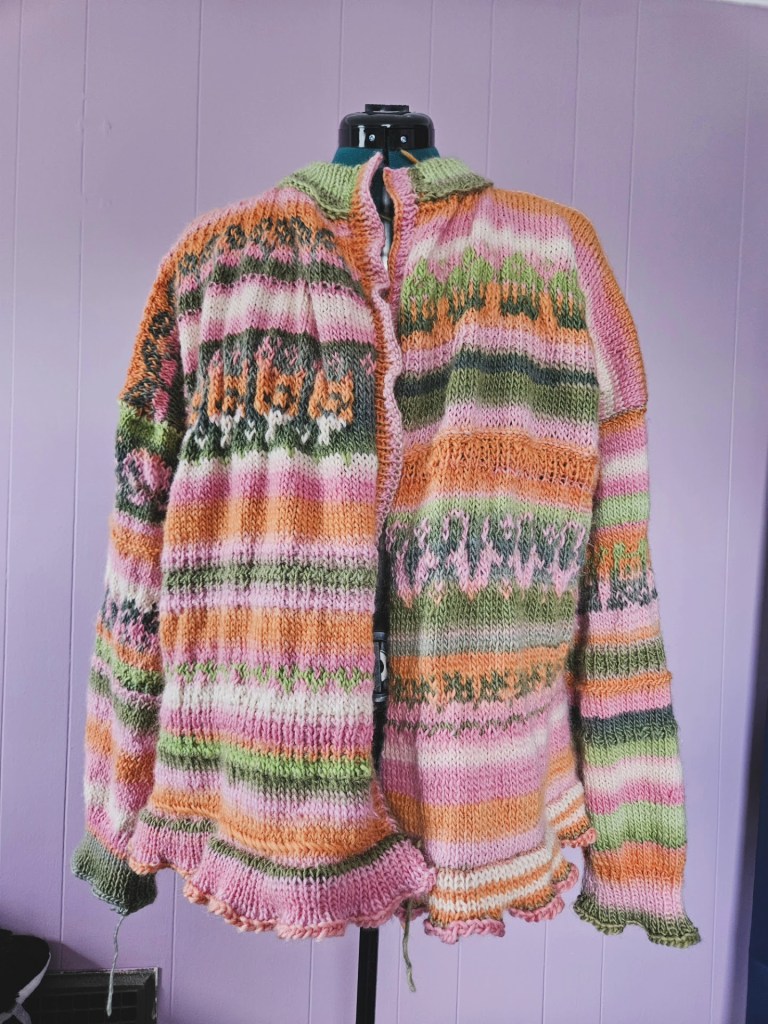
I would highly recommend giving these decks a try. I purchased the Farm Doodle Deck from my local yarn store, Moon and Yarn Craft Room to make the Town Farm Cardigan. For copyright reasons, I did not show the cards, aside from the front of the deck, but as you can see from these photos of my finished object, they contain lovely variety that will spark your imagination.

Maple Leaf Sweater

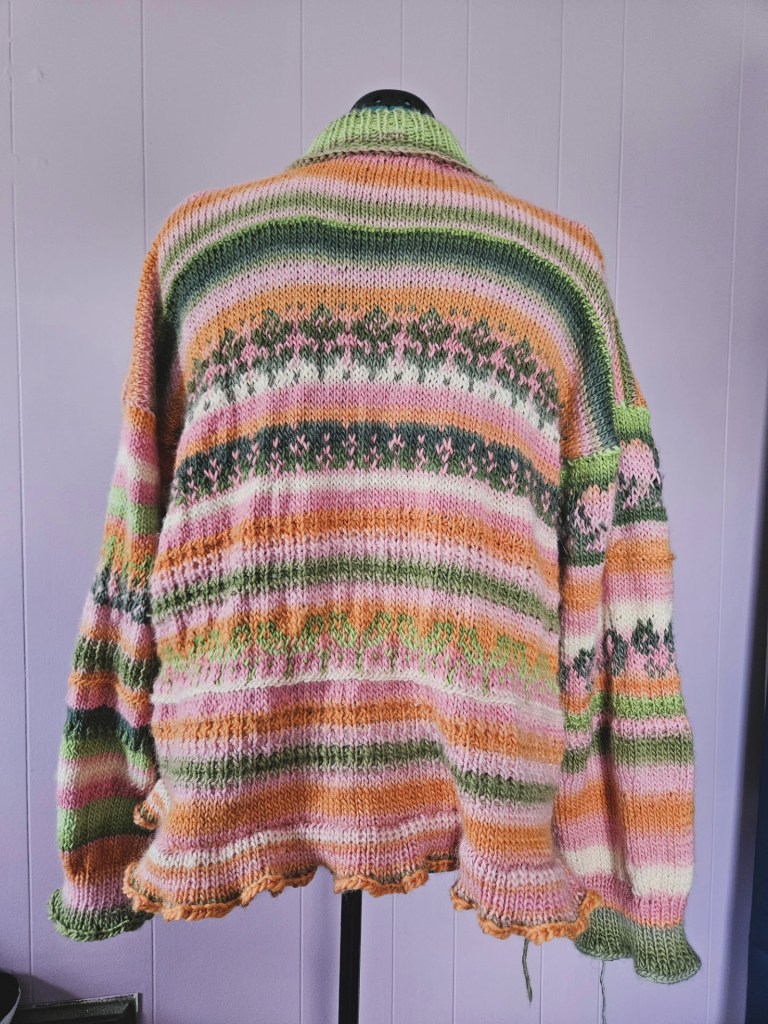
I love fall, and I wanted a sweater to celebrate that. But what makes this project even more personal to my taste, is the maple leaf motif at the neckline. Through my dad, I am half Canadian. They are from all over Canada from Saskatchewan to Alberta, and a lot from Ontario. Growing up, because of the nature of divorce and my dad’s messy relationships, I didn’t get to know this side until my twenties, and although it continues to be complicated, I wanted to knit a piece that spoke to my own heritage. Maple leaves seemed like a perfect motif to jump into. With the addition of the tonal yarn, this piece has a lovely fall gradient, that evokes the season, but doesn’t pigeon hole the garment into one season. I wear this in the winter and spring, without feeling out of place.

You may recognize the base of this sweater from my post, ‘Will I Wear a Knit T-shirt?’ and the answer for this project was yes, but, I’d love this even more as a full length sleeve! So as it goes, this project was cast back on to needles to make some sleeves, except, this time I tried a new to me technique – crochet – to create sleeves in the round. I wanted this piece to have a lot of texture, so I experimented with knit and crochet stitches to make this piece, which has a simple design, compared to my other projects feel a bit unique. In the end, I think I ended up with a lovely love letter to a part of me that I don’t always understand but are connected to even when they feel far away.

DIY K-Pop Band Tees Using Embroidery and Knitting

In 2025, one of my goals was to try my hand at crafting my own K-Pop Merch. Some bands are easy to find Merch for, and others, well, you are left to your own ingenuity. The bands I selected to try for this are NCT 127 and NMIXX, which I have tried and failed to find band tees for that I liked. For this project, I used two different techniques – embroidery and stranded colorwork knitting.

NCT 127 Embroidery

My first idea was to pick up a blank T-shirt from the craft section and get to work. The shirt I chose was a Gildan tee from Walmart, which I DO NOT recommend. This shirt is so freaking thin. Horrible quality compared to the blanks I have found at Michael’s, Dollar General, or even Hobby Lobby. But as I was dubious of my embroidery skills, I went ahead with the Walmart shirt as practice. That was the right call, because dang, embroidery is not as straightforward as it looks.

For this project, you will need: an embroidery hoop, embroidery floss bundles, a marker or pen to sketch your design on your shirt, and backing like embroidery interfacing or a fabric scrap that I used (because I forgot that the embroidery needed a backing).

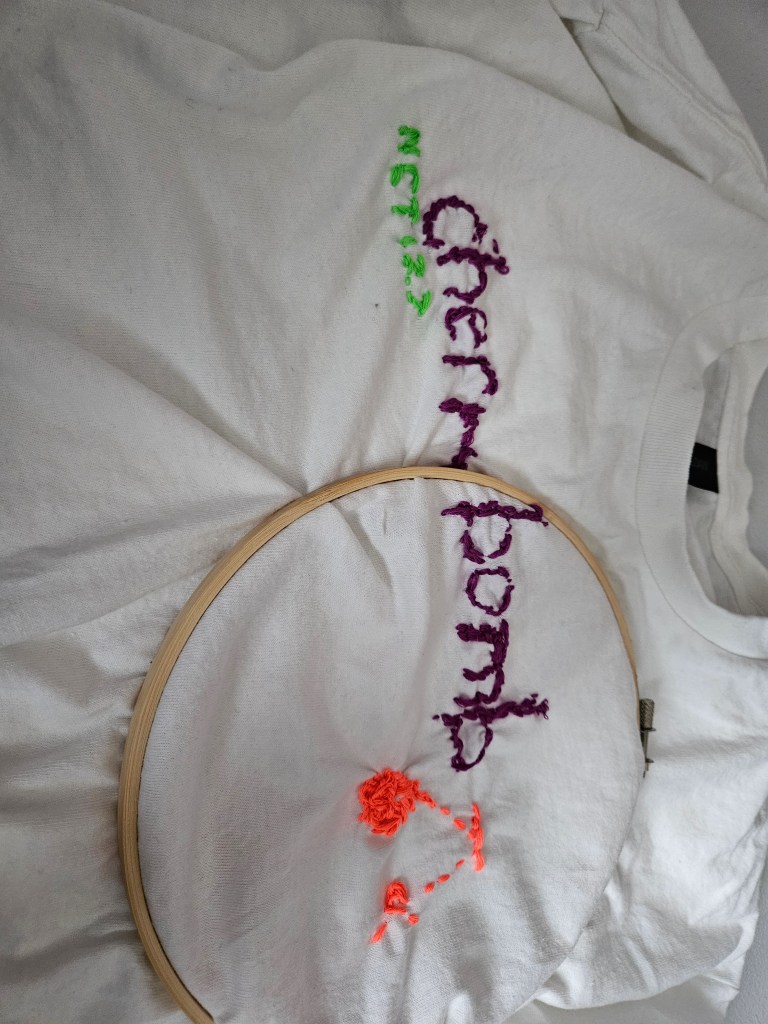
For the design, I chose something simple. The song, the band, and a little imagery. I love their early album Cherrybomb (2017), but the song is almost 10 years old now, and it’s kinda hard to find any NCT Merch with it at this point. Seemed like the perfect option for a first try. I wasn’t expecting my stitches to be so tight; I felt like I was fighting myself across the whole piece. This was because I forgot about the backing for stability, and all this embroidery on this poor quality shirt, yeah, it wasn’t great. Afterwards, I added a backing to the embroidery with a scrap piece of another t-shirt.

Is it my best work? No. But is it a start for making better projects in the future? Yes! And I wear it anyway in the garden and as a sleep shirt.

Red Velvet Knitting

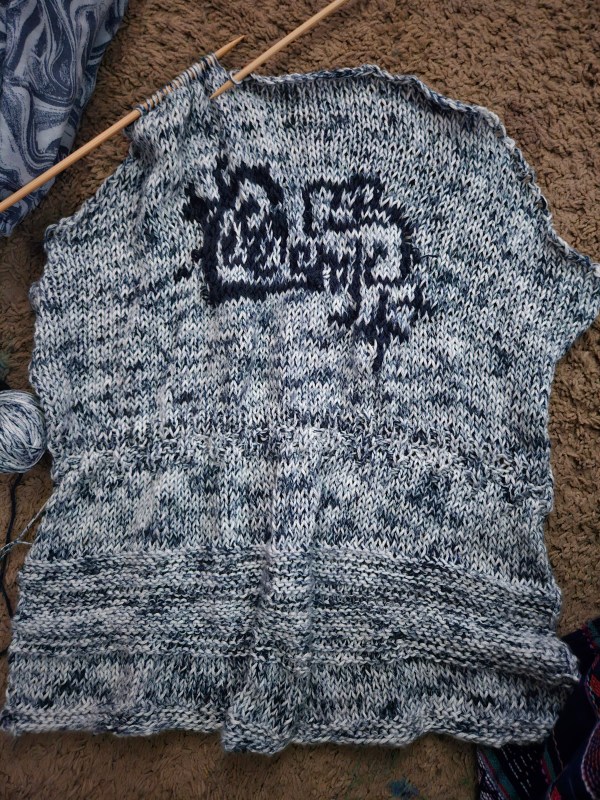
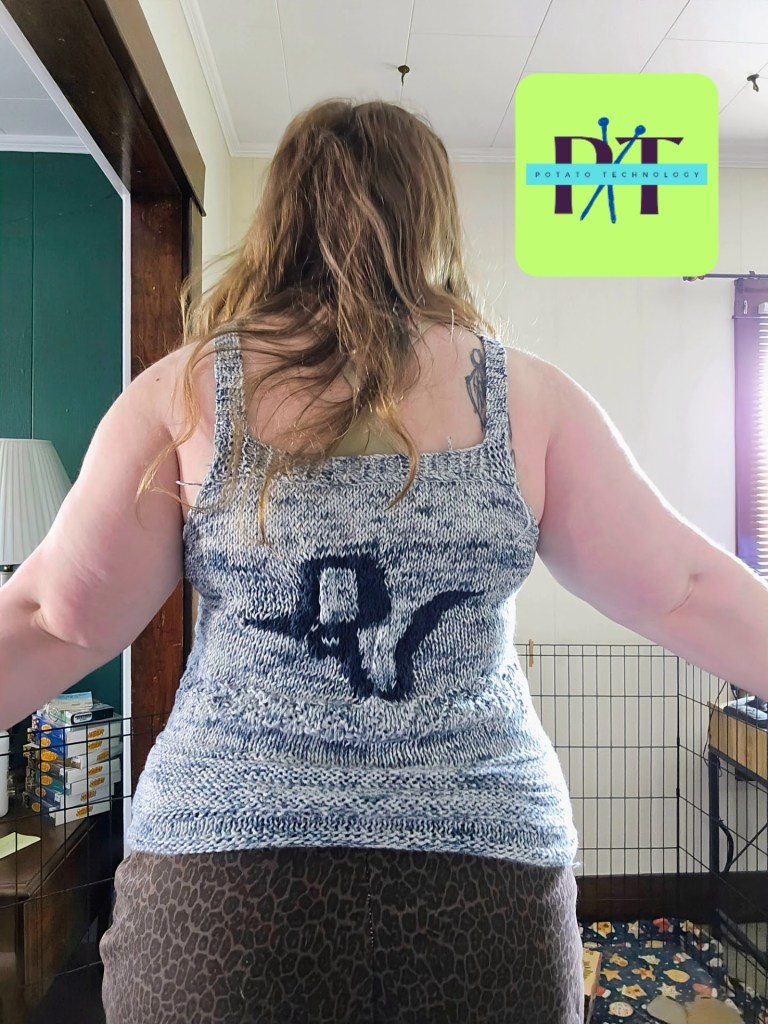
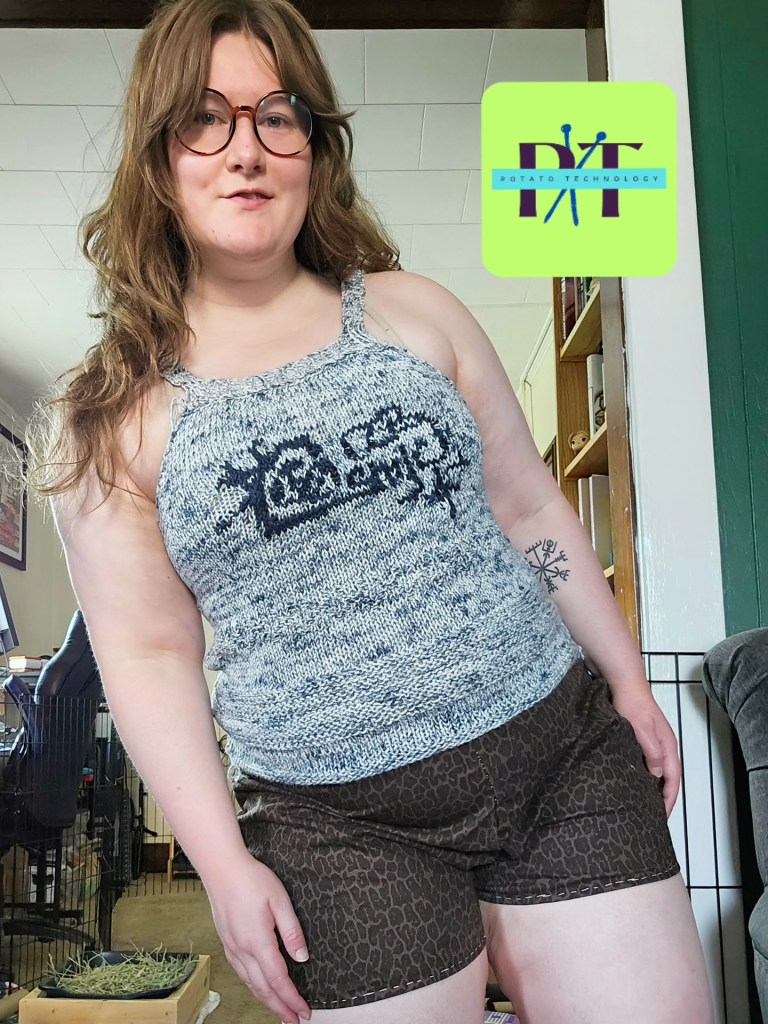
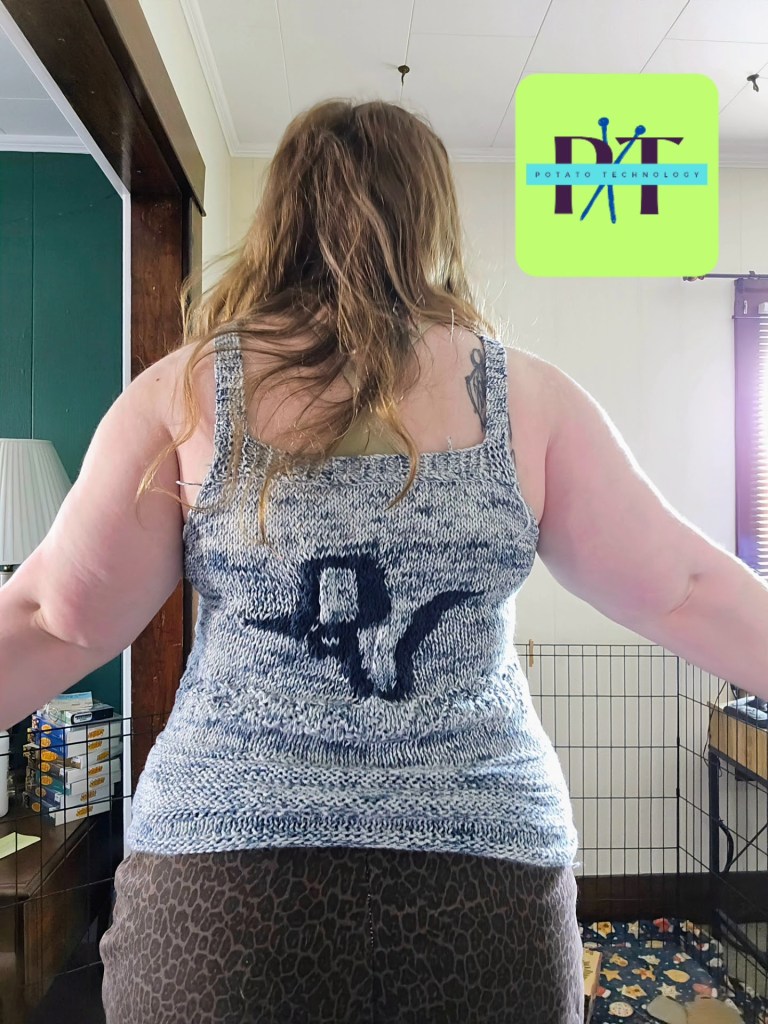
My desire for Red Velvet Merch was entirely motivated by the confusing announcement in April 2025 that members Yeri and Wendy did not renew their contracts with SM Entertainment, but Red Velvet was not disbanding. They have become one of my top girl groups after their release of Cosmic in 2024, so it seemed only appropriate to use the album Cosmic as my muse for a cotton knit tank with stranded colorwork. It’s a bit easier to find Red Velvet Merch on sites like Teepublic, from which I have bought a shirt. This project was more about expressing my love for this album, and I hope that Cosmic will not be their last release as a group.

You will need: a pencil, pen, graph paper, and stitch markers. (Along with your basic knitting supplies – needles, yarn, scissors, tapestry needle)

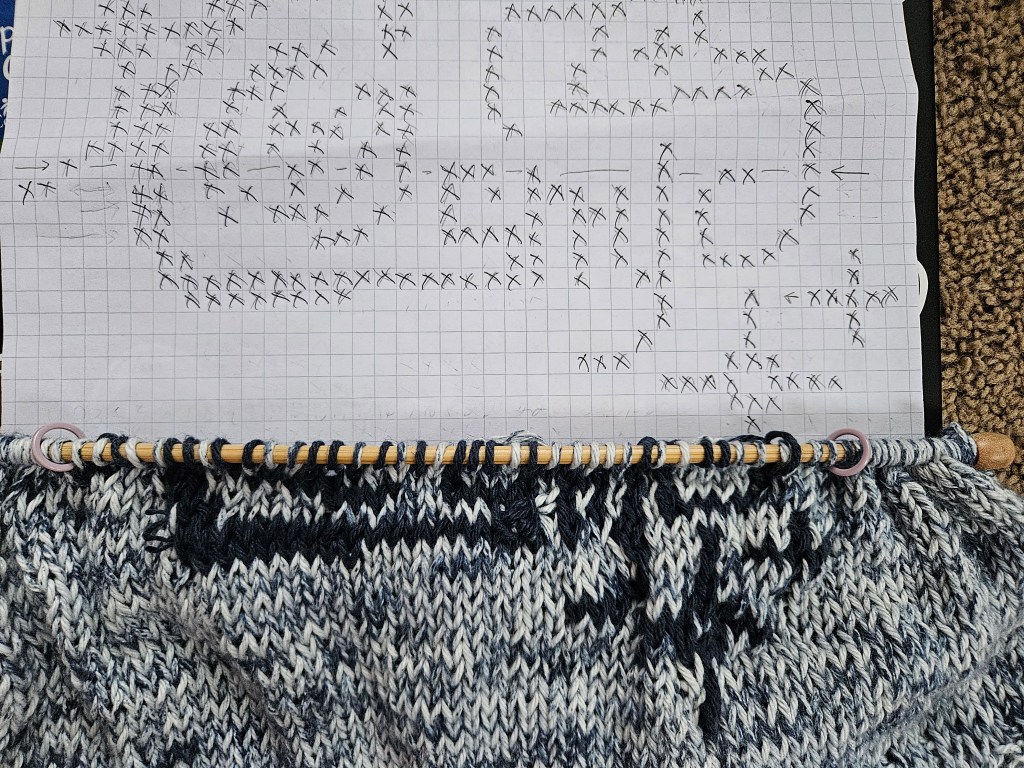
To start, I searched Pinterest for album artwork and a logo. I found a lot of options to use as a compass for the project, but decided the simplest option would be best. I opted for one color to keep the floats simple. To make my colorwork charts, I always use graph paper and a pencil to be able to adjust the marks that I transfer from the image. Once I am happy with my design, I trace over it in pen and use a pencil to cross out the lines of the pattern as I complete the project to mark my progress. To understand the dimensions of the image as I worked, I also marked the “canvas” with stitch markers. It is also important to note your garment construction and how that relates to your chart. I made this tank knitting bottom up, so I began working on my colorwork from the bottom of the chart.

I am thrilled with how this project turned out! As my first stranded colorwork project with this complex of a design, it was far easier than I thought to complete. You just have to plan out your image and be patient with your floats. Try not to hold too tightly and remember that blocking will help the tension relax.

Bat Ear Beanie

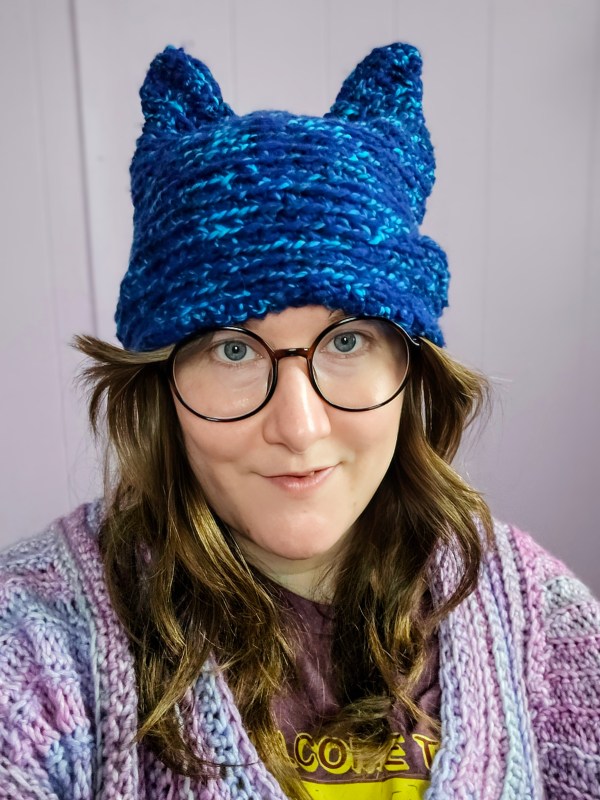
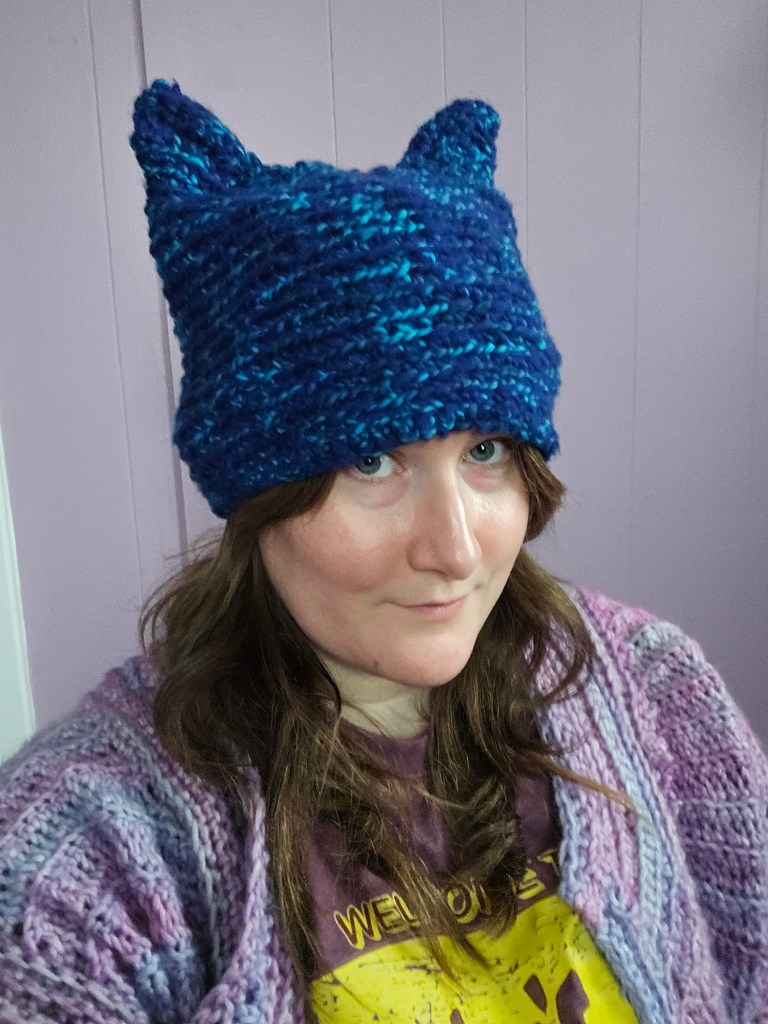
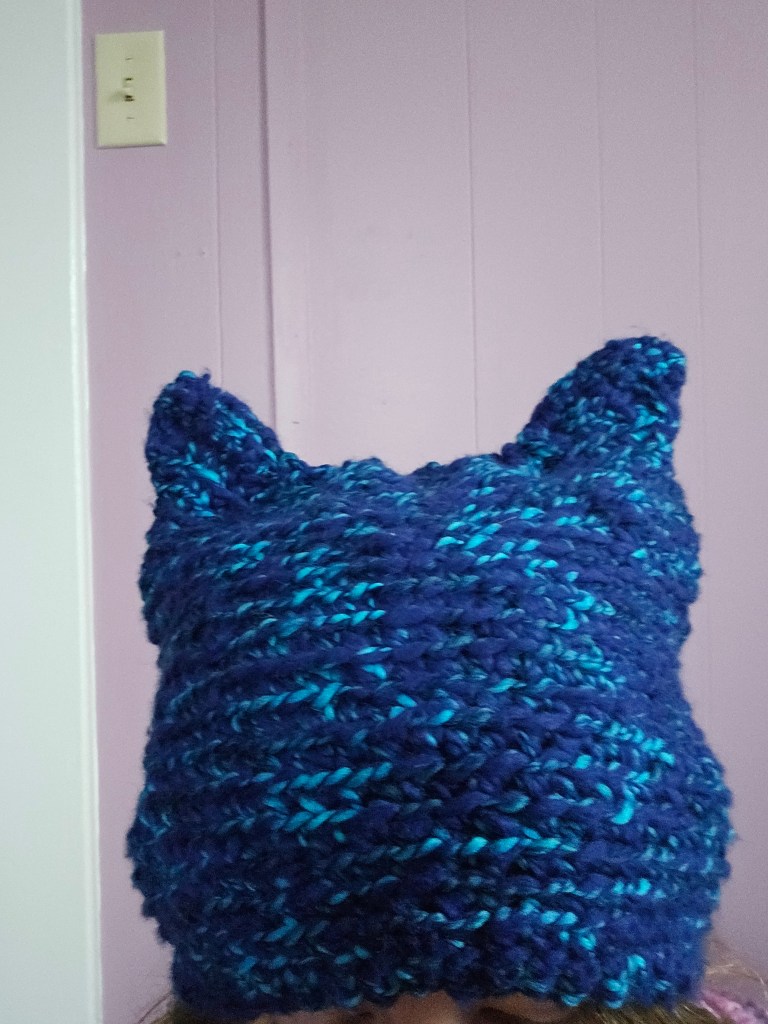
I’ve shared several animal ear projects on the blog before, the Cat Ear Beanie, and my Loverboy re-creation Bunny Hat, but now, without further ado, may I present the Bat Ear Beanie! This was made with less than 100 grams of local spun wool I found at my farmer’s market, held double with less than 100 grams of Knit Picks Snuggle Puff yarn in Neptune. I decided to crochet this hat instead of knitting, as I did with previous projects, to have a bit more freedom in the creation. Crochet reminds me of sculpture or papier-mache. You can always add onto the stitches in ways that the tension of knit stitches does not allow, and for that, the bat ear project seemed like a great place to practice my crochet technique once again.

The hat was crocheted in the round – so much easier than knitting in the round, in my opinion, with double crochet stitches, and was knit like a normal hat. I don’t have an exact pattern for it, but you can easily make it to your measurements. The yarn I used, one strand Snuggle Puff, a heavy worsted, and one strand local wool, a DK weight, resulted in an Aran/Bulky-weight yarn. Because of this, I used a 5.5 mm hook to create my stitches. I chained the number of stitches I needed based on my head measurement and double crocheted around and around until the hat was long enough to cover my ears and most of my head, then I began my decreases. I wanted a gradual curve shape for the crown of this hat. Go slow, and remember, you can always frog and try again if the shape is not what you want. After the hat was complete, I plotted my bat ears.

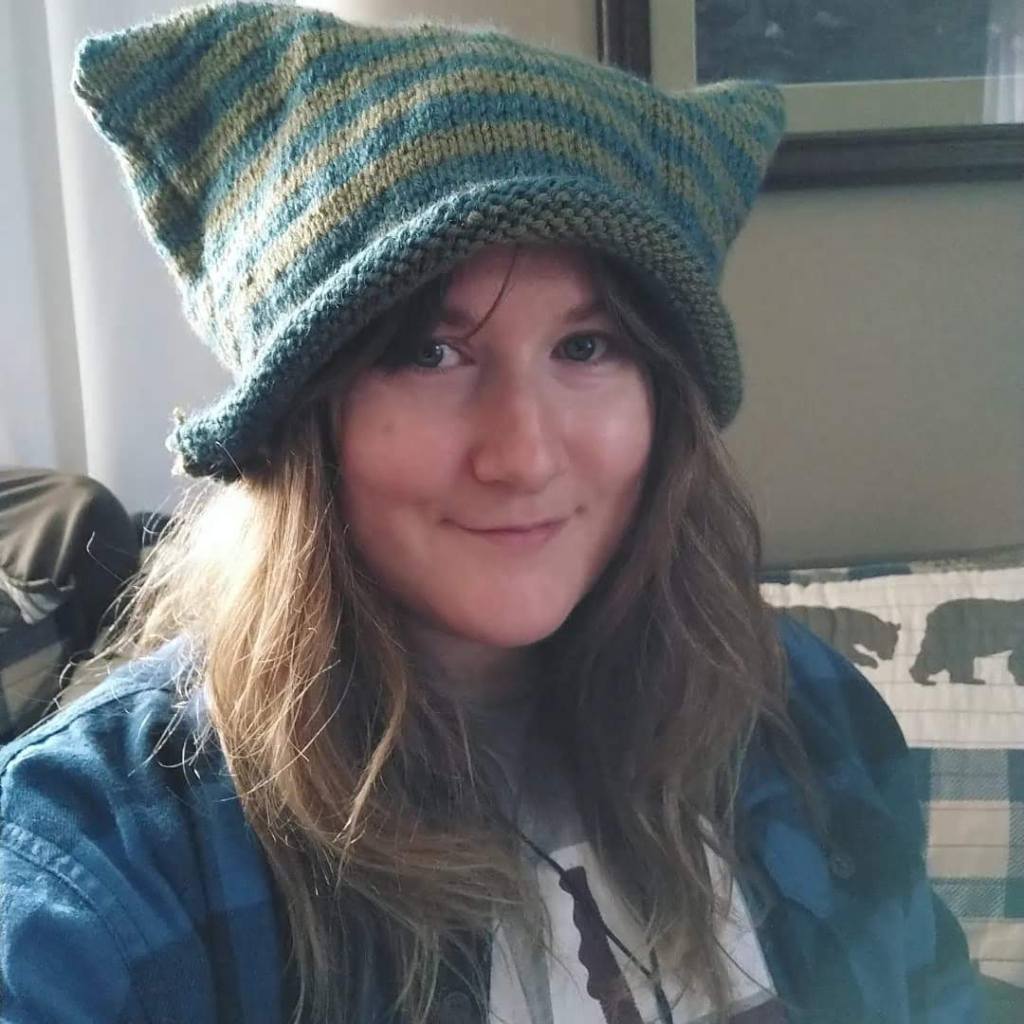
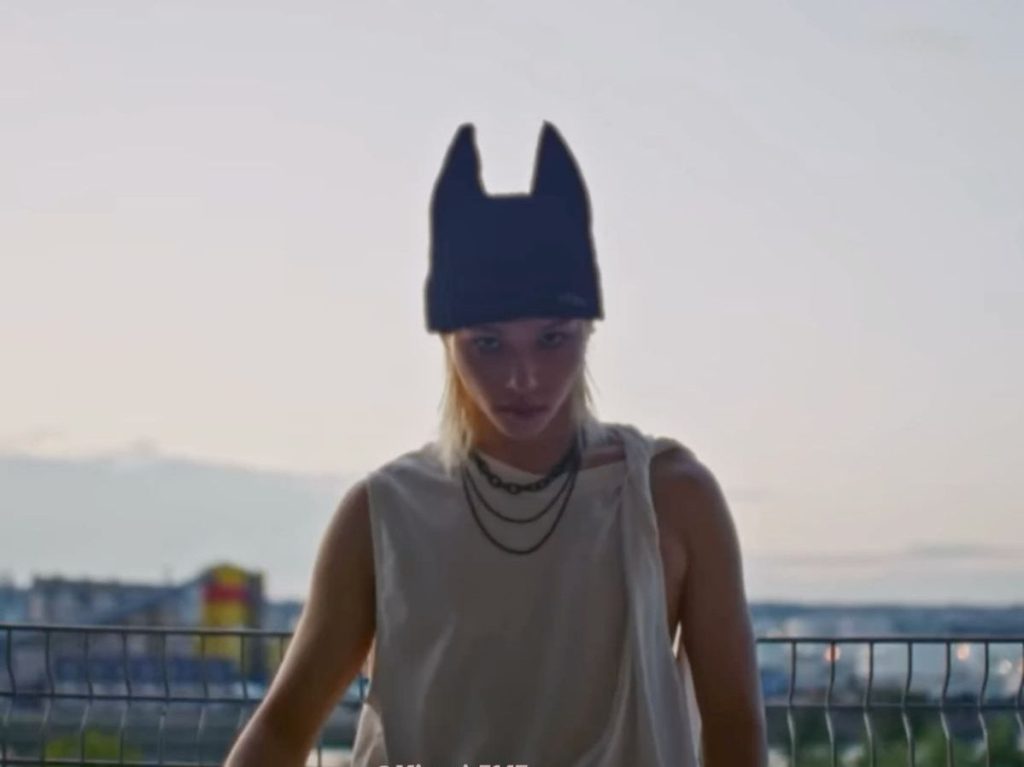
What makes an animal hat special to me is the scale and placement. What I learned with my cat ear beanie was that you can make the ears too wide and too big, leading to a sloppy effect. With the bunny hat, I learned you can put them too close together, not allowing the ears to drape properly. The effect can change the entire character of the piece, so place your ears with care and think about how you want to wear it on your head so that the animal cuteness is achieved. For this hat, I was inspired by the hat Felix from Stray Kids wears at the beginning of the Creed music video from 2025.

I began my bat ears by picking up stitches on the outside of the hat. I also crocheted these in a round, to give these good structure. By crocheting these in a round, to keep the tension even across the ears, so that they would stay upward like a bat. I used single crochet stitches and tapered the ears accordingly, simply weaving in the end to the inside of the hat, with a tapestry needle.

Why did I choose a bat? To raise awareness for bats. Did you know that bats are not a nuisance, but an essential part of the ecosystem? But due to misunderstanding the nocturnal animal, mainly I would say due to vampire lore, they are seen as dangerous. Yes, they can carry rabies like many wild animals, but this is not a reason for the animal to go extinct. Their habitats are under threat, and they deserve the space to thrive. They eat pests, contribute to the pollination process, and help spread seeds.

Granny Squares, Maybe Not For Me?

This is an interesting reflection for me, because granny squares, and crochet in general was my crafting white whale. Since their rise in popularity in the 2020s, the granny square technique, with its colorful bursts of color called to me.

They looked so different from the form and function of knitting. I found myself bamboozled by their craftsmanship, yet enamored by their novelty and variety. Which brings me to a shocking revelation – I don’t think I like them after all.

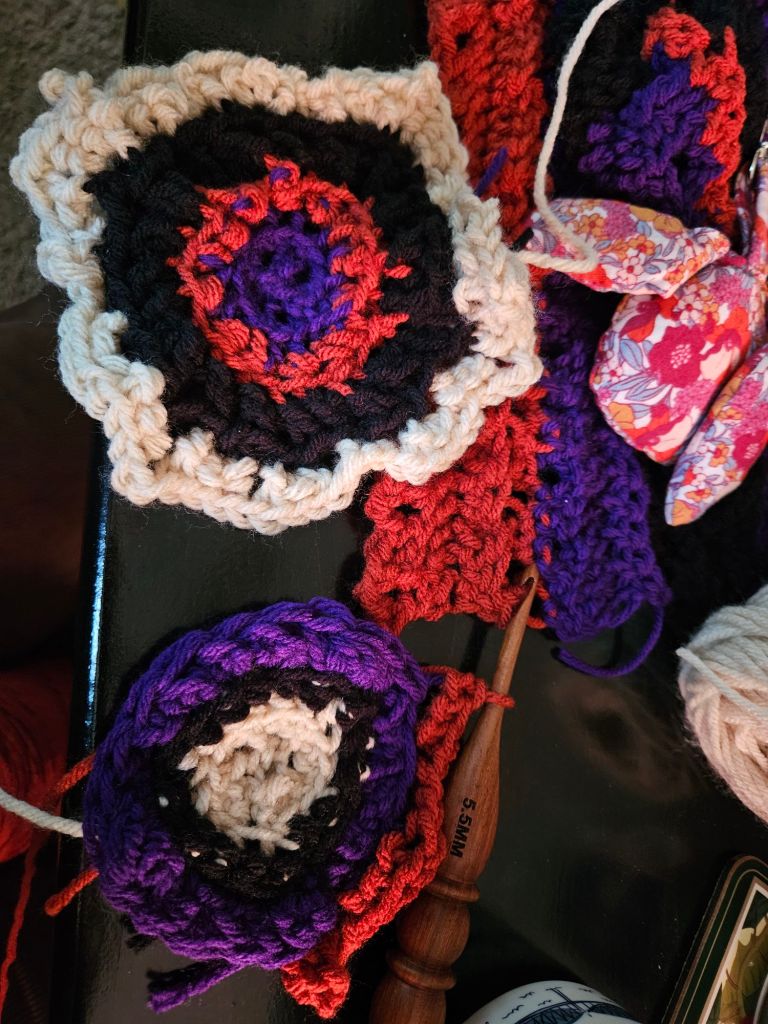
Yeah…I was not expecting this to be my reaction after crocheting four squares with a brand new colorburst square pattern for a halloween sweater I am working on.

The Importance of Design Point of View

So why, as soon as I made dedicated granny squares for a halloween project, did I not like them? I spent hours learning the colorburst granny square pattern. I struggled with the techniques of the cluster stitch, and the treble crochet corners, but didn’t give up. I expected to feel a sense of accomplishment and excitement, but instead I felt unsatisfied.

This surprised me. The squares and the design of the crochet cardigan with the squares added, didn’t feel like me. I didn’t like wearing them. It clashed with my own personal design point of view.

There was nothing wrong with the design, it just wasn’t me, and neither are the granny squares. And so, I think this is part of being an artist and the process. Learning the new skill is not a waste of time, even though it felt like I was wasting my week working on this design. If I want to be a designer and find my thing, I have to try things that won’t always feel like me, and adjust accordingly.

It’s all apart of the journey.

Drafting Shortalls from Scratch

Did you know, that through simple measurements,  reference photos, and a few tools, you can draft your own clothes? Not just a t-shirt or a circle skirt, but big projects!

That’s how I have made some of my most ambitious projects, no patterns required!

What is Pattern Drafting?

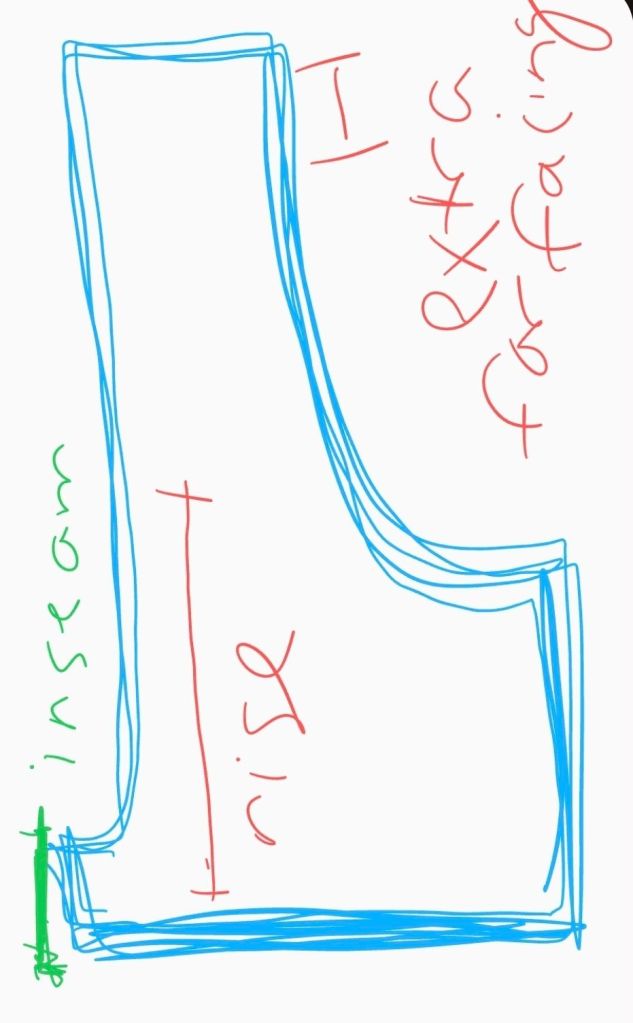
A pattern can be easily made with a tape measure, pencil, and the key places to measure. For my overalls, I was most concerned with the width of the bib, the length of the rise from the top of the bib to the crotch curve, the width of the hip from the center of your body to the end of your hip. You can also measure the circumference of your hips but I think having separate measurments for the front of the pants compared to the back of the pants. The back is usually wider.

For the overalls, I worked in four pieces. Front left, front right, back right, and back left. To do this I marked out the front left and front right on the fabric, accounting for the crotch seam which is part of the leg. I added a 2-3 inches to the width of the hip measurement of each of the four pieces to make the curve with my french curve.

When planning pants, keep in mind that you don’t need as much inseam as you think to make shorts. What you will need is a long rise because you can always cut more, so be cautious and double check the measurments of your rise.

Now for the bib, the top portion of the overalls, I plotted the width of the bib above the pants portion and with pencil I carefully drew a tapered curve upward. I cut this extra long to have excess fabric to fold over to make the facing. This fabric is like a lining for the top of the bib, the part you are most likely to see.

Always use pencil or a tailors chalk and take your time. Using a mock up fabric is a great idea to get the cut right. After repeating this for both front pieces, remember to adjust the width of the hip for the seat of your pants, all while remembering to account for the french curve line of the inseam.

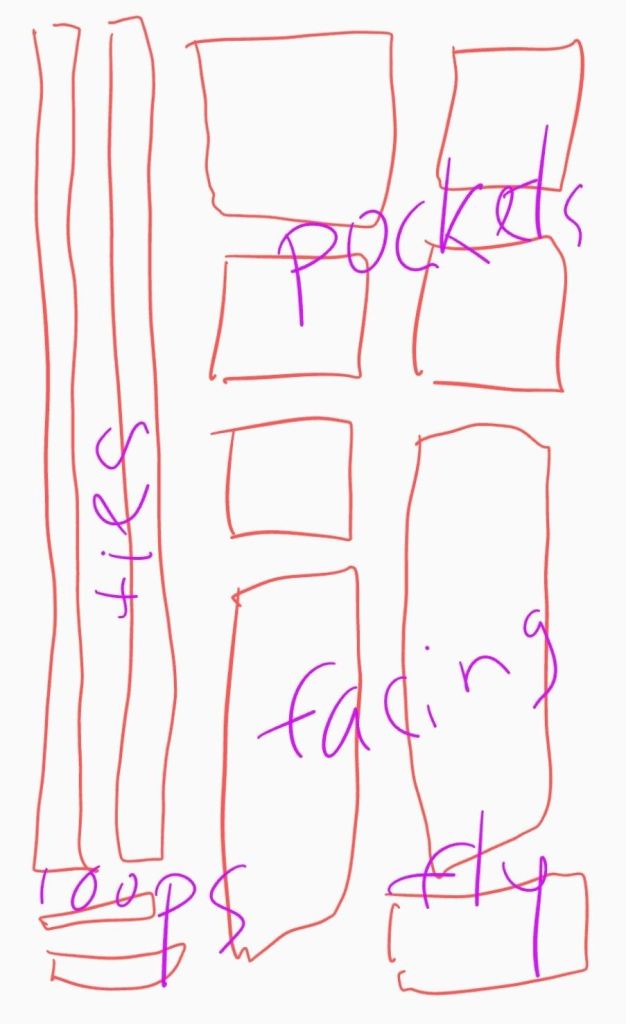
After cutting all for pieces you will need to set aside fabric for pockets, I added 5 to mine. A bib pocket, two side-front pockets, and two back pockets. You will need fabric for the straps, measure accordingly based on the height of the bib, over your shoulder and to the back bib, remembering to add more length to tie.

Next is scrap scavenging! You will need small pieces for the loops to tie the straps around on the front bib. This will call for two loops. You will also need bias tape sized pieces to finish the edges of the overalls on the bib. Finally, save some fabric for the button flies on either side of the overall legs to help you get in and out of the garment.

It’s a lot of information to sift through but I hope this small tutorial will help you sew overalls if you wish with free instructions. I will be following up with a second post that explains the order of operation, to make sense of all these pieces, to help these fabric pieces transform into a wearable garment you can enjoy!

Upcycling Pillowcases into a Vest and Skirt

What if the clothing we wear is more than just a garment, but connects us to the fibers of our being?

What if a pillowcase, from a loved one no longer here with you, could be more than just an item cluttering your closet? How could you repurpose it so the memories can walk with you in the new days ahead. All while the smell of their laundry detergent, and their home, so distinct to your senses, that being near it makes you feel comfort.

That is what this project is to me. More than an upcycle, or a thrifty hack, but a way to process feelings. Find a way forward. So the things left behind, that remind of what is missing, can do more than drown us in memory and stuff, but become a tangible way of healing.

Flannel Upcycling | Making A Vest

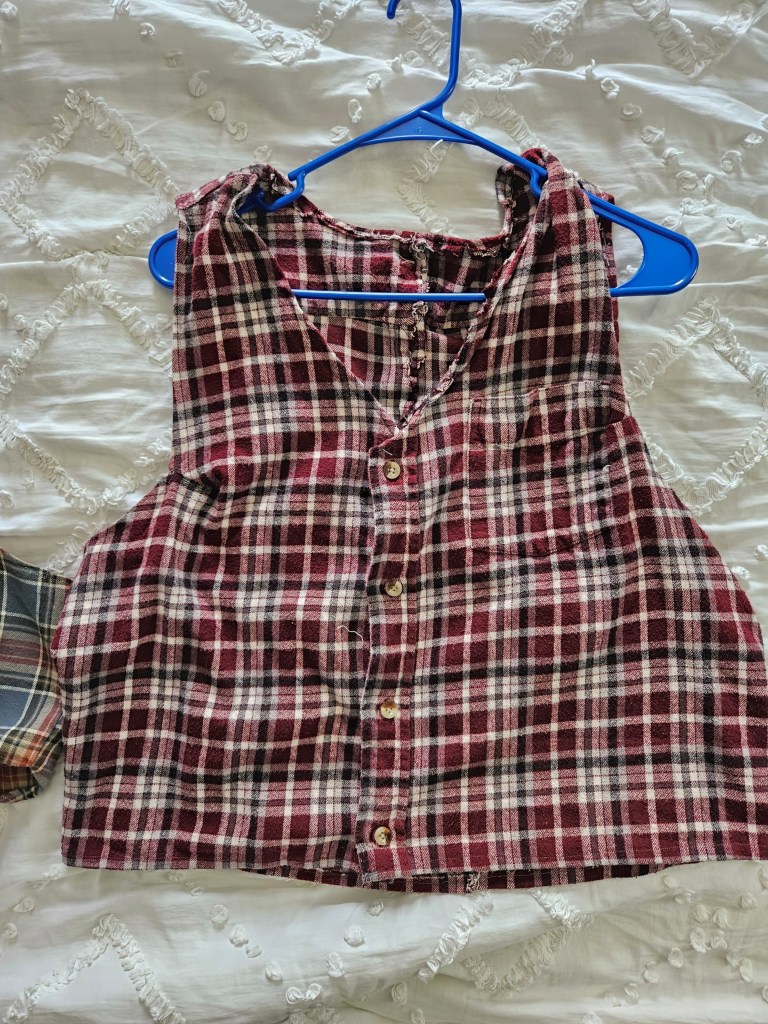
Last summer, I wanted to introduce vests into my wardrobe. I have made vests before for Kyle, but have not sewn a vest for myself before; I have knit them. Because this was a spontaneous idea, I needed to be budget-conscious and find a way to use what I had to make a vest. So I went to my closet and got creative! I had a few flannels in my closet that were hanging there, waiting for me to wear them, but I didn’t. That’s when I looked at the shirts closely – there was a button placket, shoulder yoke, and a sturdy fabric, with room to crop them. I saw the vest within the shirt, so I grabbed my scissors—and was a bit too zealous with the first one! Don’t be like me, have a plan. So how did I make this upcycle work? And what did I learn from my failed attempt?

Shoulder Seams, Yoke, and Waist Length

The crucial points of cutting, I would say, are being aware of the shoulder seams, accounting for the back yoke width, and properly measuring your waist length for a proper fit.

  • Shoulder seams on a flannel are boxy and loose. To achieve the set-in sleeve opening that accentuates and reveals the shirt underneath, you need to cut away the shoulder line – but not too much. Be mindful of how far into the shoulder you plan to cut, so that you are left with a proportional line.
  • The shoulder yoke is a technique used to tailor the shoulder line, while leaving the fabric below the shoulder loose. As a result, there will be more fabric on the back of the vest, which may affect the fit of the arm openings and possibly require a dart to remedy the loose fabric. If not, the back will gape open, looking awkward and like a mistake. A vest should hug the body, be tailored, or else the upcycle will look exactly like you cut up a flannel.
  • The length of the vest determines the style and balance of an outfit. One of my vests I cut too short, and this limits how I can wear it. I find it cuts me off in a regency high-waisted fashion that is fine when I wear it with a high-waisted skirt, but with pants or my linen Darcy shirt, it’s awkward. The other vest was cropped, in a careful fashion, ending at my hip and balancing my body line like a well-tailored garment. It’s far more versatile.
  • Cutting the neckline is crucial. For the front, a tapered cut to the button placket provides the classic look. Be careful not to cut too low for a historical silhouette. Also, remember not to cut the back the same as the front! I made this mistake and had to sew the cut portion back into my vest. This should be a crew neck line, straight across, with a slight dip in the middle for comfort.

Why a Flannel Shirt?

I chose flannel shirts as my medium to work with for three specific reasons. The first one I already mentioned – cost. We had just moved into our house and paid quarterly taxes. The vests were not a necessity, just a whim, so it made sense to me to take an existing item, I didn’t wear to create something I would wear. It’s funny how the sustainable option is sometimes the free option too. Secondly, flannel is a sturdy fabric, appropriate for the structure of the vest, that could be sewn without the addition of a lining, which I could add later if I wished, when I was more comfortable spending money on fabric. Thirdly, flannel is a classic pattern that reminded me of the woven woolen coating fabrics that vests have been sewn with for centuries, so it was a good match! I hope this inspires you to repurpose items you have to make something new! For the rest of the flannel, the pieces I cut away, like the sleeves, stay tuned to see what I did with those. It’s one of my favorite makes. 🙂

Will I Wear A Knit Tank?

This is a follow-up to my recent post, ‘Will I Wear a Knit T-shirt?’, where I examined the fibers and wearability of a knit t-shirt and discussed whether this summer knit project could be a suitable option. Since then, I finished and got to wear a new piece of knitwear – my first knit tank top. I wore it in July, in full humidity with highs in the upper 80s to low 90s Fahrenheit. My experience surprised me – I said before that my knit t-shirts are wonderfully comfortable, but have a temperature and humidity limit for me, but the tank top surprised me!

I think it was the high pima cotton content in the Knit Picks Comfy – a 75% Pima Cotton and 25% Acrylic mixture that uplifted the breathability for me. I was melting in the hot sun, but the air flow and temperature regulation were spectacular! This tank had delicate straps but did not have a lacy stitch or open weave. It was constructed with regular knit and purl stitches, with sections that had double layers of yarn due to two sections of colorwork graphics on the front and back.

With Pima Cotton, Silk, Bamboo, or Linen as the primary fiber, or a blend of these natural fibers, I believe knit tanks are just as breathable as woven fabric, and for sure more breathable than moisture-wicking tech fabrics, which are polyester. No, I wouldn’t work out in this top, but there is something to say for a garment that is comfy and breathable for those long summer days. It was a simple stitch-up up only calling for two hanks of 100-gram worsted-weight yarn, about 240 yards, with the addition of 1/3 or 40 yards of the accent yarn, another cotton-acrylic worsted-weight blend from Loops and Threads. You can make a tank like this for 30 USD or less, and this is a size large. So if you have a small amount of yarn, you can do a lot with it!

Do you think a knit tank would be an item you would wear?

Create a website or blog at WordPress.com

Up ↑