
I wanted to share the beauty of vegetable blossoms in the garden. It’s fun to see how unique each vegetable’s blossom is.

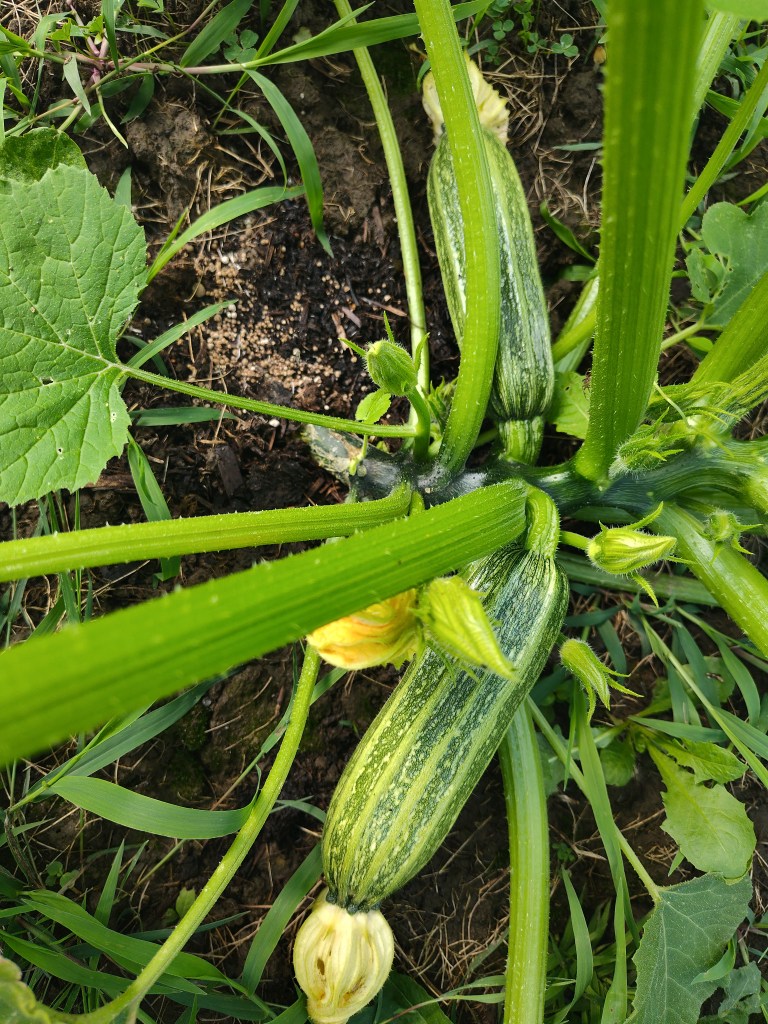
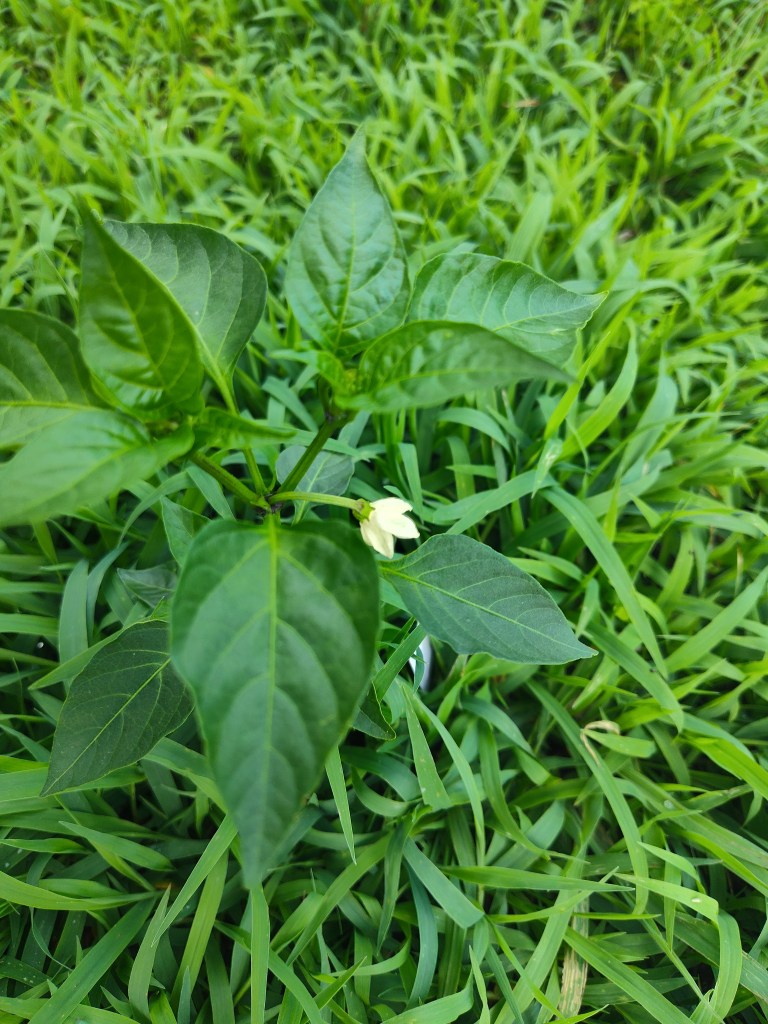

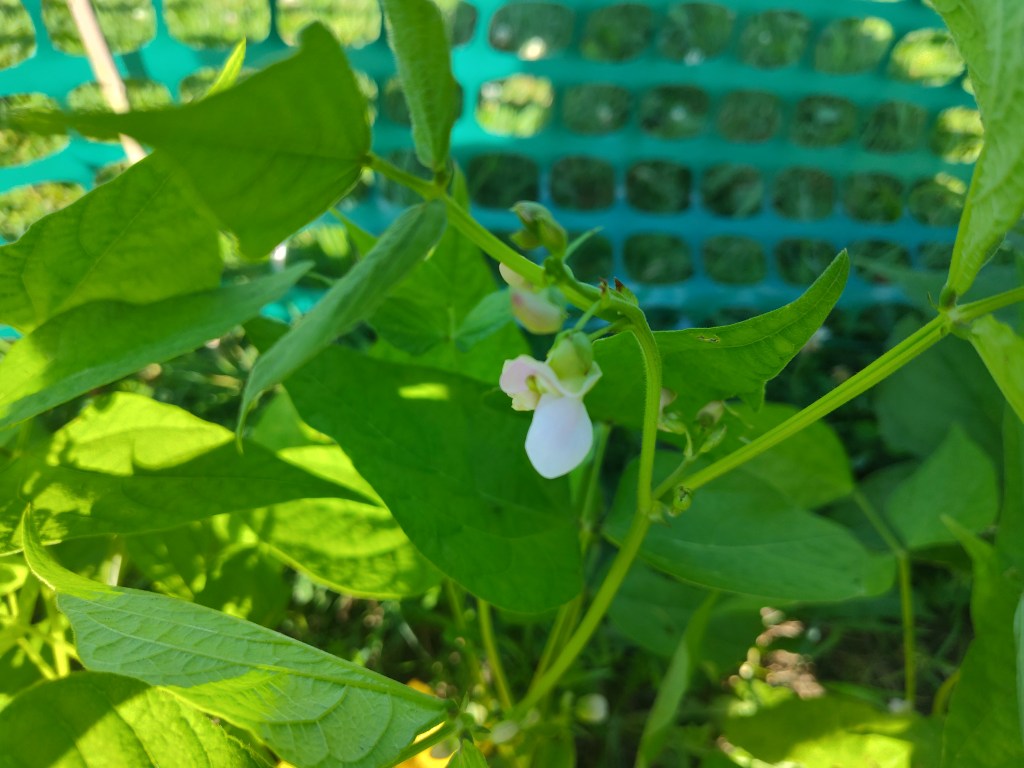

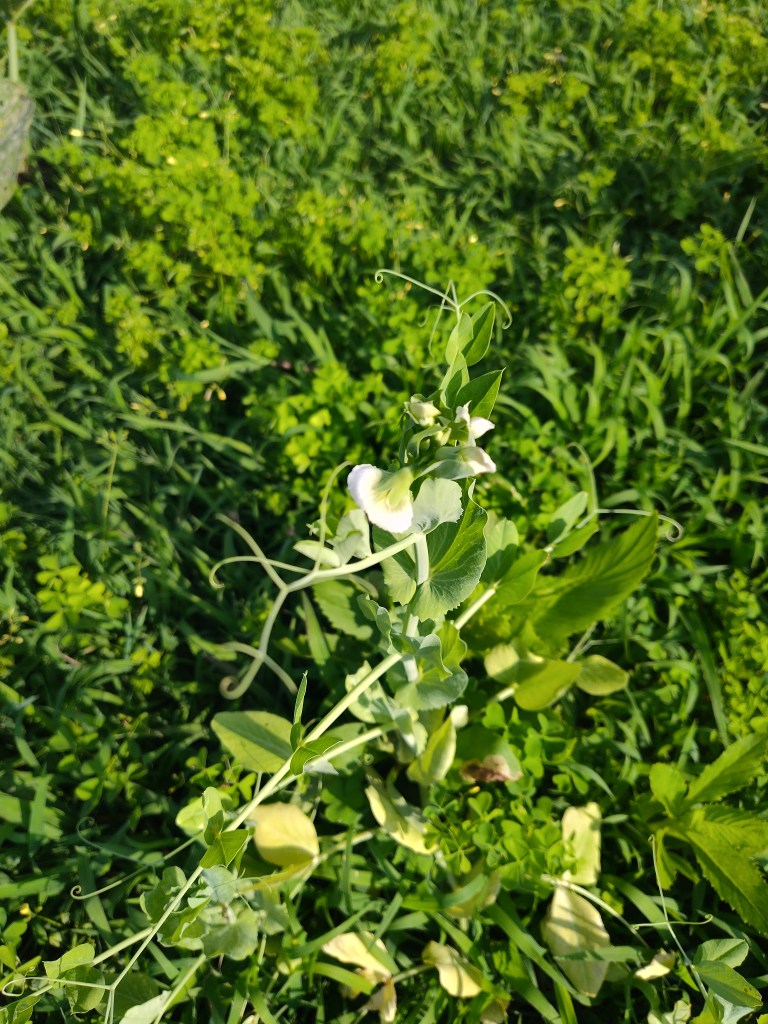
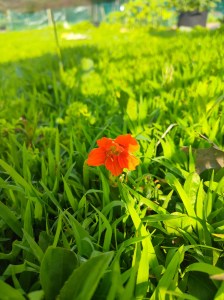
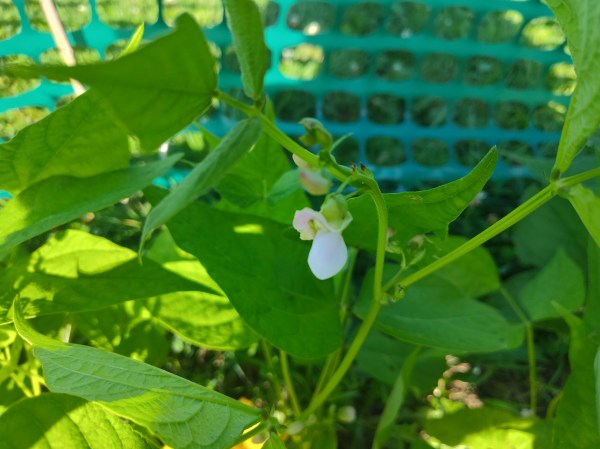
I wanted to share the beauty of vegetable blossoms in the garden. It’s fun to see how unique each vegetable’s blossom is.
In this week’s update, I go over a very helpful comment I received about how to fix a tomato problem we were having. I also highlight some of the incredible progress we’re seeing in the garden, including zucchinis that are close to being ready for harvest.
Last week, I wrote about a problem we were having with a single tomato plant in our garden. This plant was clearly dying even though all the surrounding plants were healthy. A wonderful reader commented on the post to say that it was likely a fungus that was the result of the tomato’s leaves touching wet grass. I knew this and addressed it last year but had forgotten to take care of it prior to receiving the comment. On Saturday, I went out and addressed the tomatoes by trimming some of the branches that weren’t producing fruit and were low enough to touch the grass. I then staked the tomatoes to hold them upright and removed the grass growing below them. They immediately looked more maintained and healthier; however, unfortunately, it may have been too late, or there’s a larger issue at hand.
It rained a lot on July 4th and 5th. Our rain gauge, which I had emptied on the morning of July 5th, showed 3.25 inches on July 6th. I know that rain gauges aren’t always the most accurate, but it’s safe to say that we received a ton of rain. Yesterday, the majority of the plants I trimmed looked stressed. The leaves were drooping, and the stems appeared to have no strength to hold themselves upright. What’s really weird is that another tomato plant in the same bed looks fine. Also, the rogue plants that are growing in another bed are looking healthy. It’s weird because if there was a fungal issue, I think it would affect all plants in the same bed. I’m also now questioning the need to rotate vegetables if our tomatoes were successful last year in another bed even though the same grass issues were present. I don’t have a lot of hope that the tomato plants are going to survive, but this morning, they did look healthier than they did last night, so it could be that the soil needs to drain and that they were simply overwatered. It would be amazing if that were the case.
We have so many blossoms on our plants, and it feels like it happened all at once. Like one evening they weren’t there, and the next morning they were. It’s happening on our squash, cucumber, bean, melon, and tomato plants. We’ve had cucumber blossoms and baby cucumbers for a few days now, and the Costata Romanesca zucchini plants have had blossoms for a bit. But the other zucchinis, beans, tomatoes, and melons are all more recent.
This time of the year is amazing for gardening. It feels like things are changing all the time and that there’s something new to look at every time you go into the garden. One of my favorite things is noticing the difference between the varieties of a vegetable. For example, our Montreal Market melon blossoms are different from the Pride of Wisconsin blossoms. I’m taking pictures of the different varieties to share in an upcoming post.
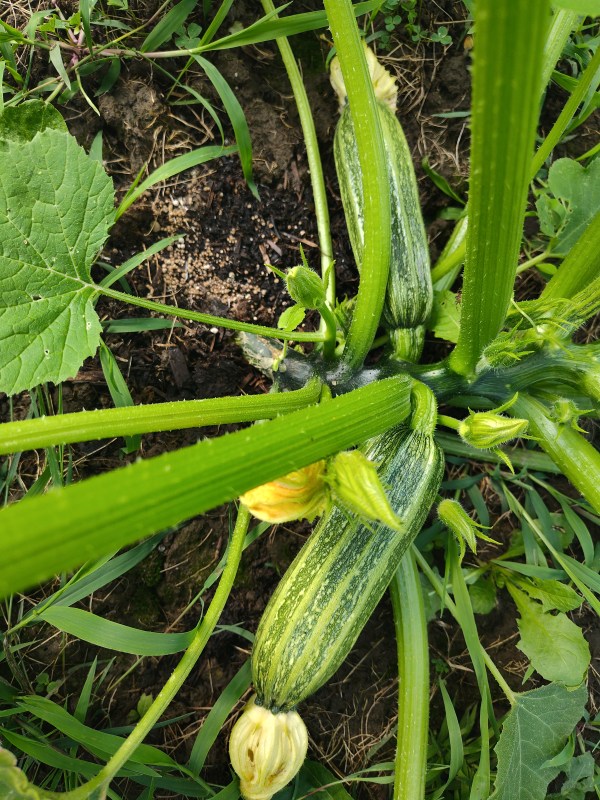
The most exciting garden development has been the appearance and growth of two Costata Romanesca zucchinis. Late last week, we noticed that one of the plants was putting fruit on, with two of them reaching finger length. When we looked last night, one zucchini was roughly six inches long, and the other was four inches long.

Unlike other zucchinis, though, this variety shouldn’t be picked until it reaches 12 inches. We may be able to pick the first one at the end of this week, which is so exciting. Take a look at how beautiful these zucchinis are.
I think the biggest thing we’ll be monitoring this week is the health of our tomatoes. Will they survive or die? We’re also looking forward to harvesting the first vegetables this week. Lastly, we’re still seeing evidence that deer are getting into the garden bed where our corn is growing. I have a rough idea of how to get the fence higher, but we’ll see if it works. Happy gardening!
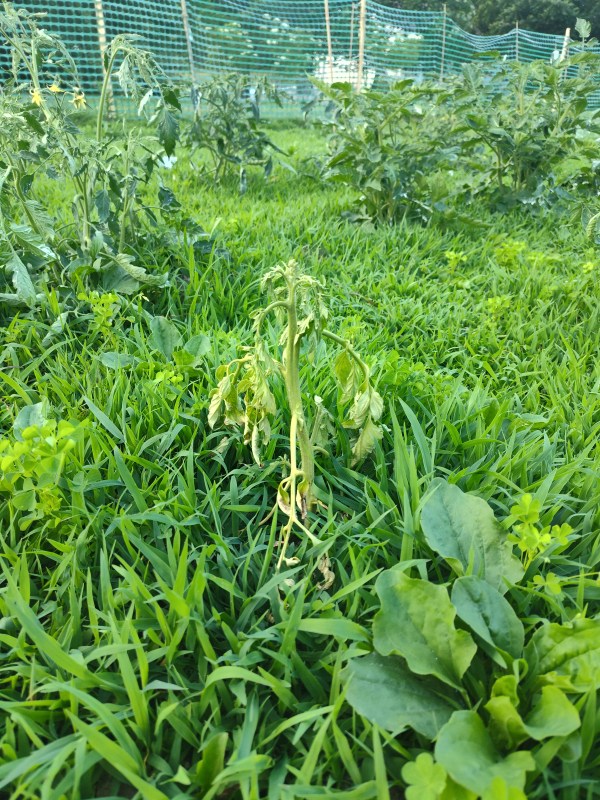
Our garden is doing very well this year. Our squash plants are thriving and putting on finger-length fruit, our tomatoes have a lot of blossoms, and our corn is up to my waist. In general, we are ecstatic with how much success we’re having. But this is a garden, so let’s be realistic: we’re not achieving perfection. And one example of where something is failing is this single tomato plant.
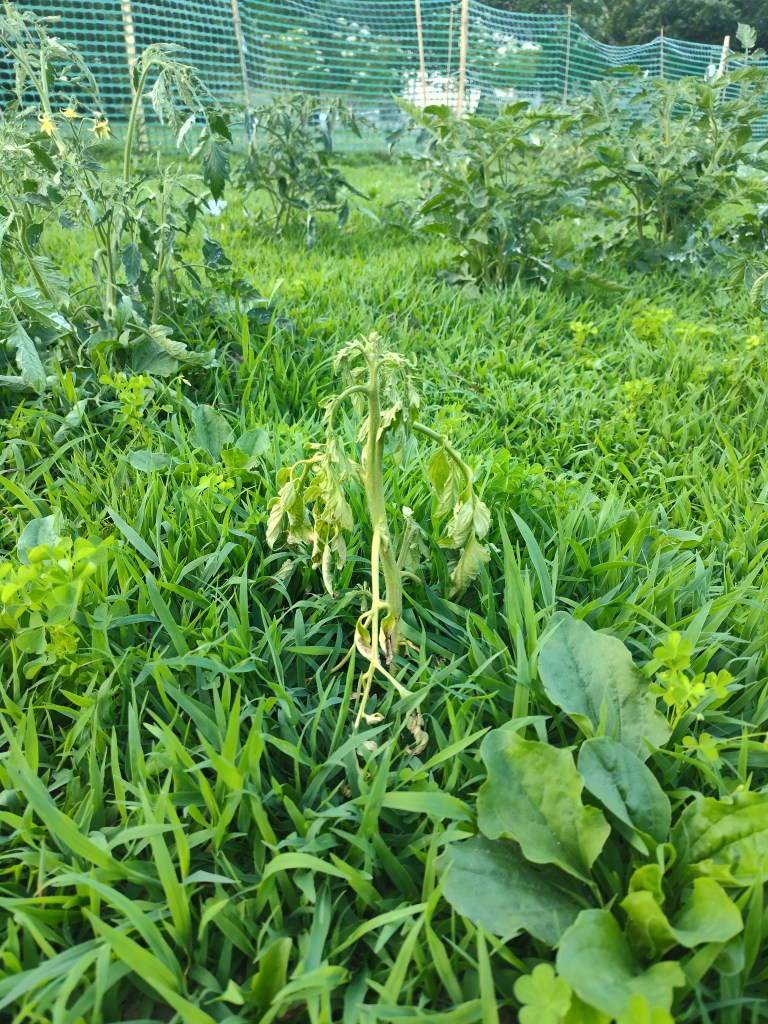
I took this picture last evening, and it’s pretty clear that the plant is going to die, but the thing I can’t figure out is why. I know that there is a lot of grass and other weeds growing around it. We’re in the process of remedying that with cardboard, but the grass is present around our other plants, and they’re thriving. It’s not the soil, moisture levels, nutrients, or amount of sun. This bed is full of tomato plants, and this is the only one that looks like this. For comparison’s sake, here’s the tomato plant that’s right beside it.
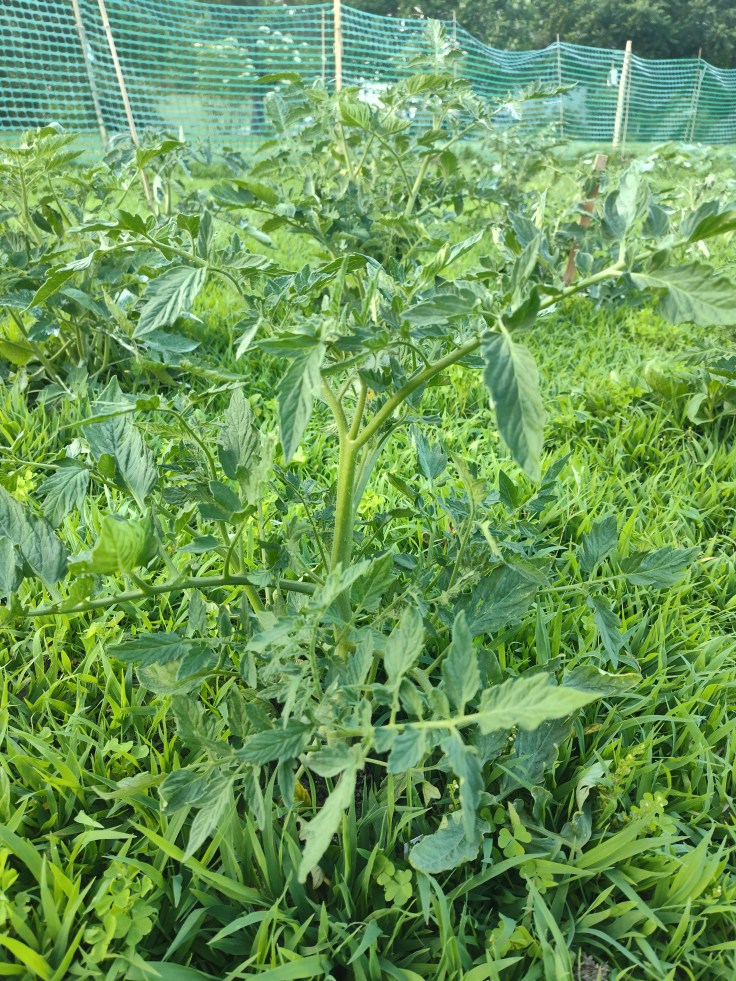
This tomato plant is the same variety and only planted about 18 inches from the dying one. It has healthy leaves, it’s standing upright without support, and it has blossoms on it. By all counts, it’s doing very well and will produce fruit. The majority of our tomato plants look just like this one. Side note: we’re going through a week-long heat wave, so the plants show signs of stress from the heat before the sun goes down. Besides that, though, they’re incredibly healthy with a lot of flowers. So, if everything is the same between the dying plant and this one that is thriving, what is the cause? I honestly don’t know, but if you have any theories, I would love to hear them, because I’m perplexed.
Actually, although I wish I knew the answer to what’s causing the plant to die, there is something so refreshing about gardening, with how you don’t always have solutions. Gardening is quite analog when almost everything in our world is digital. And even though there is a lot of science behind a successful garden, you also need to rely on your senses. Is a tomato plant’s leaves curled? Do they feel brittle? How firm is the zucchini? Does the soil feel moist when you place a finger in it? These are all things that research can’t give you straightforward answers to. Sure, books, blogs, and videos can describe how something should feel, look, or smell, but you have to experience it for yourself.
We were watching something on YouTube last night about the lack of silence in the world today, which is something I’ve expressed frustration over in recent years. The video included a clip of Fred Rogers from Mr. Rogers’ Neighborhood. In it, he said:
Our society is much more interested in information than wonder, in noise rather than silence…And I feel that we need a lot more wonder and a lot more silence in our lives.
With the explosion of data, social media, and the internet’s intrusion into our lives, the quote could easily be from 2026. But if you’re familiar with Fred Rogers, you’ll know that he passed away in 2003. That quote was actually from 1994 or 1997. Charlie Rose interviewed him twice, and I’m having some difficulty determining which interview this quote is from, but I believe it’s 1994. Either way, though, it was at least a couple of years before the Internet became a household norm and at least a decade before the first iPhone. He was concerned about the wave of information long before it reached its current level.
Gardening is great because you can escape the oppressive nature of technology and information. When you look up the cause of tomato leaf curl, you’ll get a lot of different answers. It could be too much water. It could be too little water. It could be too much sun. It could be not enough sun. A lack of nutrients could be the problem. It could be root rot. And then there are the endless number of pests it could be. Because gardening is an extension of nature, it feels like it’s beyond the realm of technology, and I think that’s what draws many of us to it. My job requires me to be on a computer on a daily basis, which I’ve accepted because it’s allowed us to buy a house and have a garden. But beyond that, I generally hate technology even though I’m guilty of doom scrolling on Reddit or picking up my phone because I’m bored. But nature and gardening allow us to escape that, if we choose to. It’s like John Muir said: “Into the woods I go, to lose my mind and find my soul.” I’ve seen woods replaced with forest, but I also think garden or nature work here. As a society, it seems that we’ve grown afraid of not knowing the answer to something, but that mindset causes us to lose all wonder and creativity. It leads to an absence of being motivated to discover the answer on our own.
To circle back to our dying tomato plant, I have no idea what caused it to die, but I’m sad about it. I’m also comfortable with not knowing the answer at this time. Plants are living creatures, just like humans and animals. Unfortunately, they get sick like we do, and sometimes we just don’t know the reason. But I’ll continue to hone my gardening skills so that this happens less over time, and if you have any ideas as to why it died, I’d love to hear them. I’m not interested in researching the answer and becoming overwhelmed by information, but I’m always up for a good conversation. And in the meantime, happy gardening!
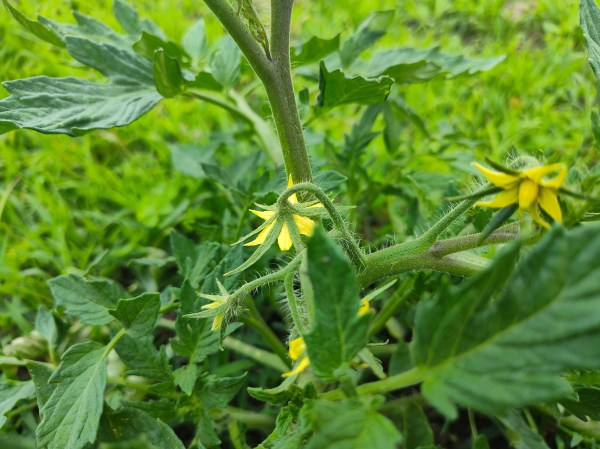
In this week’s update, we’ve been noticing tomato plants popping up in a bed where we didn’t plant them this year. We’ve also had great growth in our cucumbers and intentionally planted tomatoes and now have blossoms on them. Still, one vegetable that isn’t growing as well as we’d like is pepper. But with a heat wave on the horizon, that may change this week. Finally, I expanded our trellises to accommodate the pole beans we’re growing. Let’s dive in.
Something pretty bizarre and funny is happening in our garden this year: we’ve had close to a dozen tomato plants germinate that we didn’t plant. The bed they’re appearing in is where we grew tomatoes last year; however, this year, we’re growing cucumbers, molokhia, and melons in it. I’m pretty certain what happened is that seeds germinated from tomatoes that fell off the plants last year, but it’s still pretty crazy. We had a really cold winter last year, so I’m surprised that the seeds survived. I also tilled the soil this spring, but that may have brought the seeds closer to the surface and helped with germination.
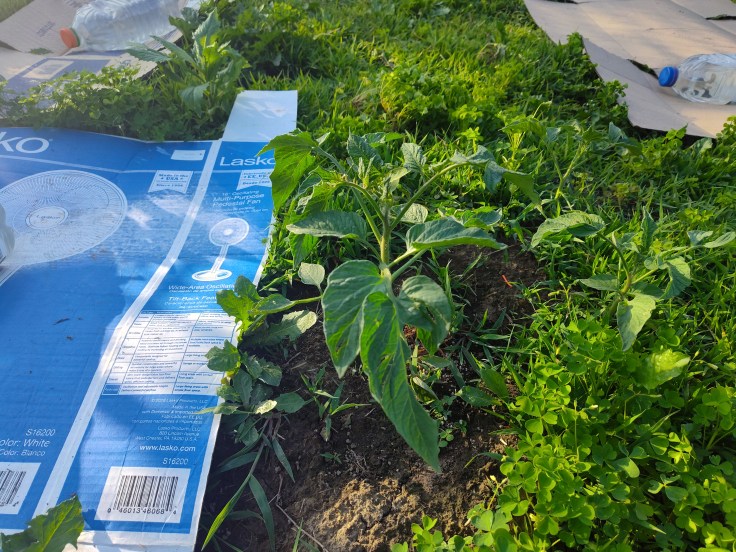
I know that we could have pulled them immediately, but for the most part, they aren’t growing in places where they’ll hinder the growth of our melons, molokhia, and cucumbers, so we’ve let them go. The funny part is not knowing what varieties they are. There appear to be at least three varieties, but until they grow more and start producing fruit, we won’t know what they are. At this point, we’re committed to letting them grow to maturity unless they start to affect the plants we planted this year. The best case is that we have extra tomatoes. The worst case is that they never produce fruit or we have to pull them. It’s a fun journey.
Elsewhere in the garden, some of the plants we intentionally planted have started to put on blossoms. Three of our cucumber plants (the fourth one died) are flowering and have teeny-tiny cucumbers growing behind the flowers. Several of our tomato varieties have blossoms on them, including Large Red, Roma, Heinz, Sub Arctic Plenty, and Little Bing. Also, our first batch of Iroquois Skunk Pole beans is putting on flowers.
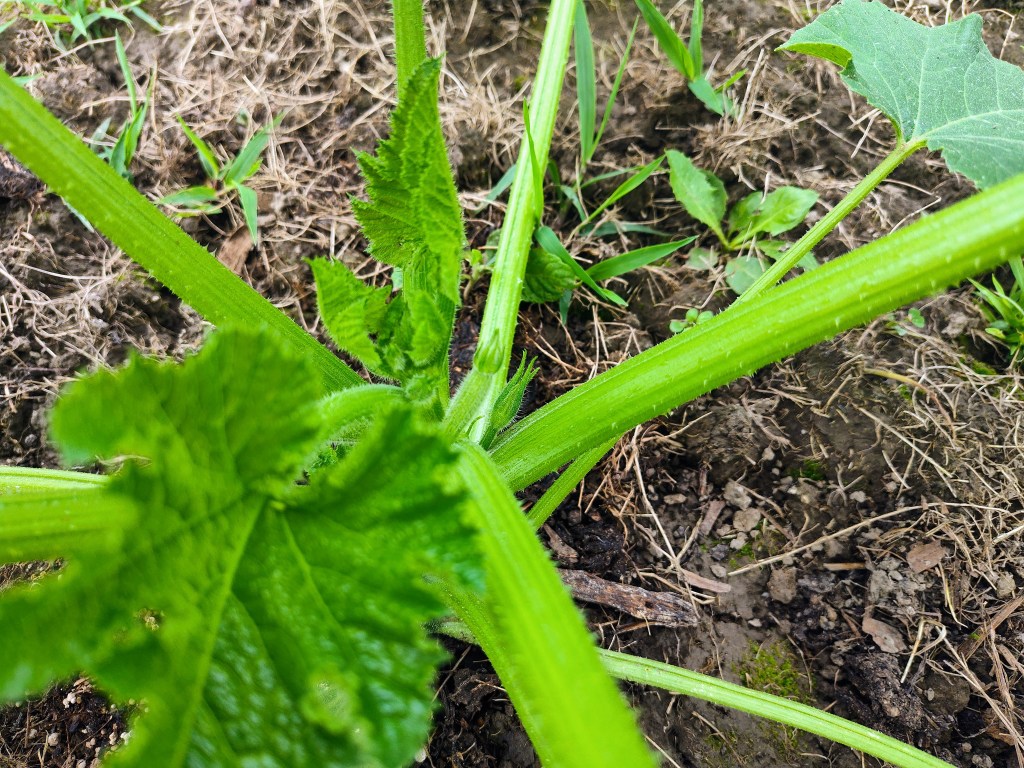
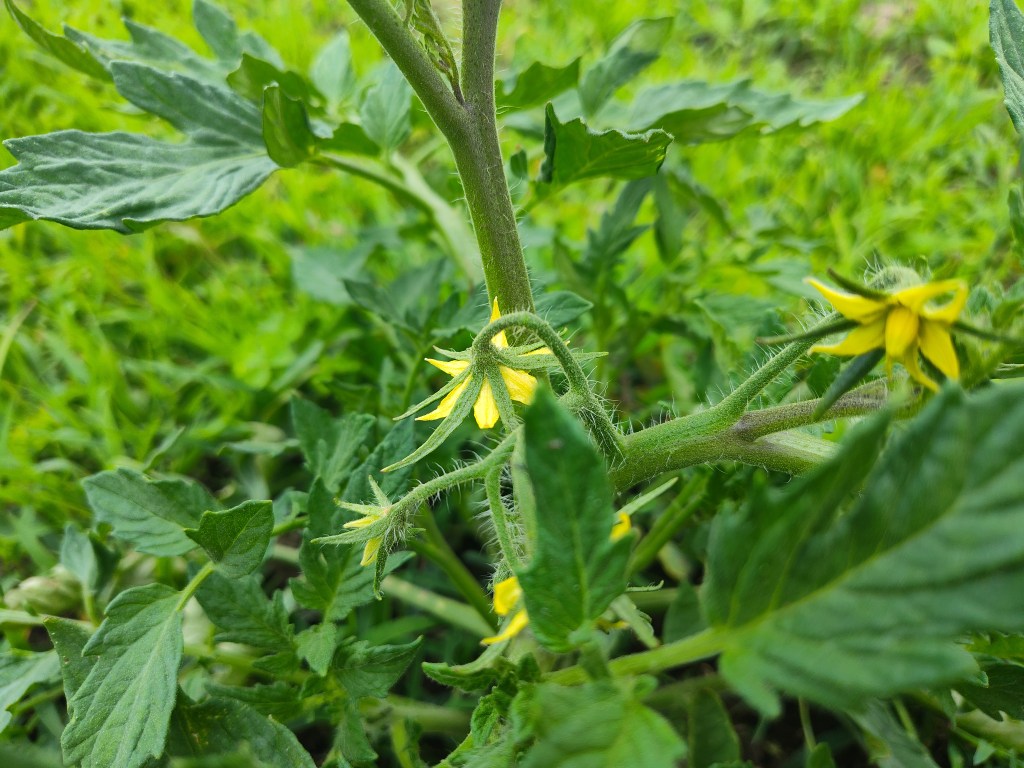
This is very exciting, because I don’t think there are many better things in life than a tomato eaten fresh off the plant. And because of how our pole beans are growing, we should be done harvesting beans from the first batch by the time the other two batches are reaching maturity. I think this is the part of gardening that’s the most fun.
Because two of the final three batches of pole beans are starting to take off, I had to adapt and expand the trellises I built from old Ikea furniture. If you recall, these three planters were originally used for other things: Sour Mexican Gherkin cucumbers, Cherokee Trail of Tears beans, and Grandma Nellie’s Mushroom beans. None of these were successful, so I started Iroquois Skunk Pole beans in all three. These trellises have gotten weird.
On one of them, I took the other side from one of the Ikea chairs, cut it down, and used the curved pieces in opposite directions to get the height where it needed to be. I then used a scrap piece of lumber for stability, added a piece to hold the twine, and tied the twine.
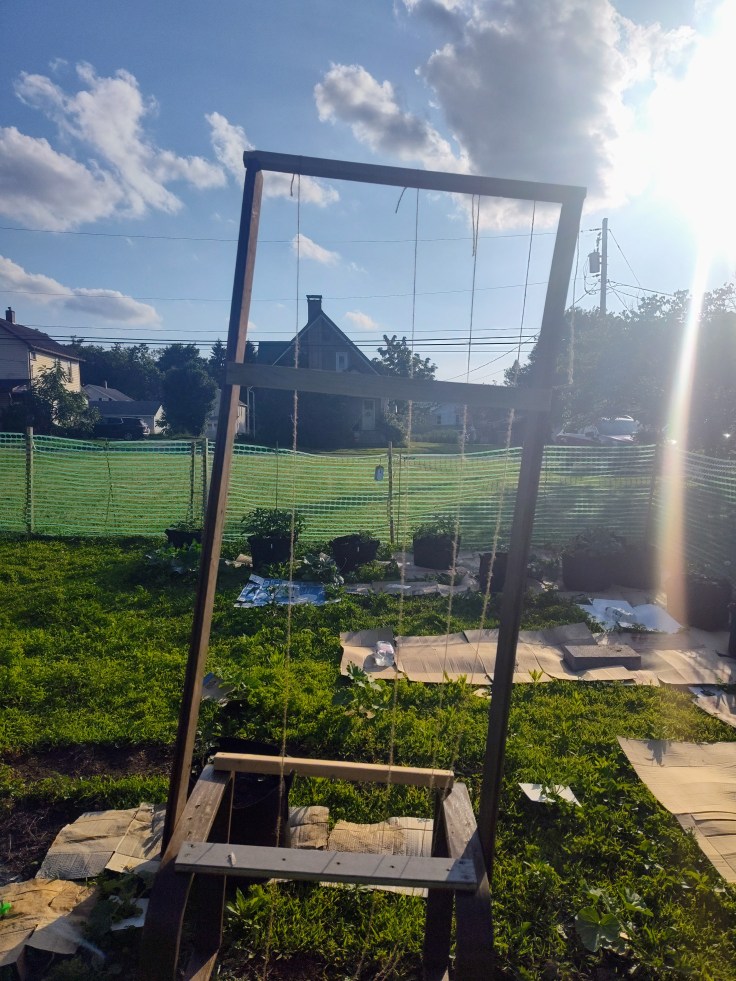
For the other trellis, I attached two pieces of scrap lumber that was in our garage when we bought our house to the existing planter. That got it to the necessary height. I then used a couple of scraps to strengthen the trellis and tied the twine. Both are ready for the plants to climb.
This week, a large portion of the Eastern United States, us included, is under some sort of a heat advisory. Starting tomorrow (Tuesday), through Friday, the high is supposed to be in the mid-to-upper 90s. This is both good and bad. It’s bad because when it’s that hot and humid, being outside isn’t fun. It’s good because our soil needs to dry out a bit, which will benefit our plants. Our pepper plants are looking pretty healthy, but they’re still small because it hasn’t been overly warm to this point. The heat, humidity, and sunlight should go a long way to addressing this problem. My hope is that because of how much rain we’ve gotten, we’ll only need to water once during the heatwave, if at all.
If you’re in an area that’s going to face this heatwave, please stay safe. Drink lots of water, and stay in the shade as much as possible. For your garden, I hope the heat benefits yours as much as we’re hoping it benefits ours. Also, have you ever had rogue plants pop up in garden beds where they don’t belong? Happy gardening!
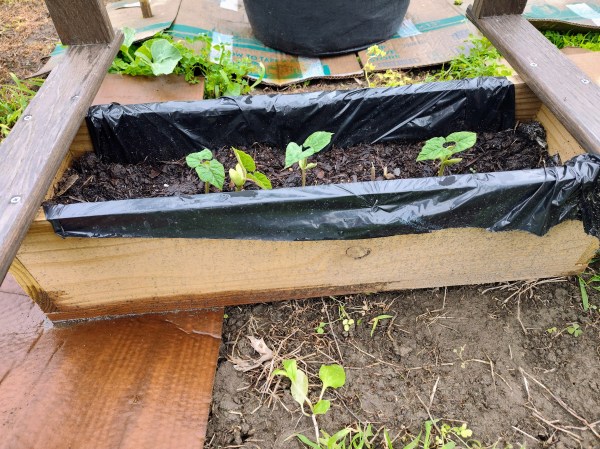
In this week’s update, we had a serious windstorm that tested our fences, in an effort to kill grass in the garden, we moved potato bags, and we finally had bean germination in the planters I built. Let’s dive in!
Last Thursday, we had a pretty strong windstorm that basically lasted all day. There wasn’t a thunderstorm attached to it, but this windstorm came on the heels of lots of rain that softened the soil. The windstorm didn’t have overly strong gusts of 40+ MPH, but it was a steady 15 MPH all day long with gusts around 25 MPH. The long-term consistency of it resulted in the wind working the weaker fence posts and bamboo stakes loose to the point where multiple sections of the fence were bent over and nearly falling on our garden beds. It even broke some of the posts off in the ground, making it impossible to hammer them back in.
I quickly cut and hammered in 6 more of the heavy-duty fence posts I wrote about last week, shoring up the most problematic sections. It’s really cool to watch how these thicker posts can take on the strain of the wind and weight of the fence without struggling. As I was attaching the fence to the posts with zip ties, I noticed that there were places throughout the garden where the fence material was stretching as it battled the wind. I think it was because there was only 1 vertical strip of the fence that was connected to the fence post, so it was carrying all the weight. In these places, I added a second zip tie and made sure that 2 vertical strips were attached. We’ve since had some more wind, and it looks to be doing better.
Since we planted our potatoes, we had the bags positioned at the side of our house. It was a great location because it got sun early in the morning, late in the afternoon, and in the evening. The house still provided shade during the hottest part of the day. They were also able to get adequate rain while being protected from strong winds. Last Friday, the bags were moved into our garden to weigh down the cardboard we placed in the beds to kill grass. Using cardboard as a weed killer is going very well. Within a week, the grass under the cardboard was mostly killed off, with bare soil exposed. What didn’t go as well, though, was the wind blowing the cardboard around the garden.
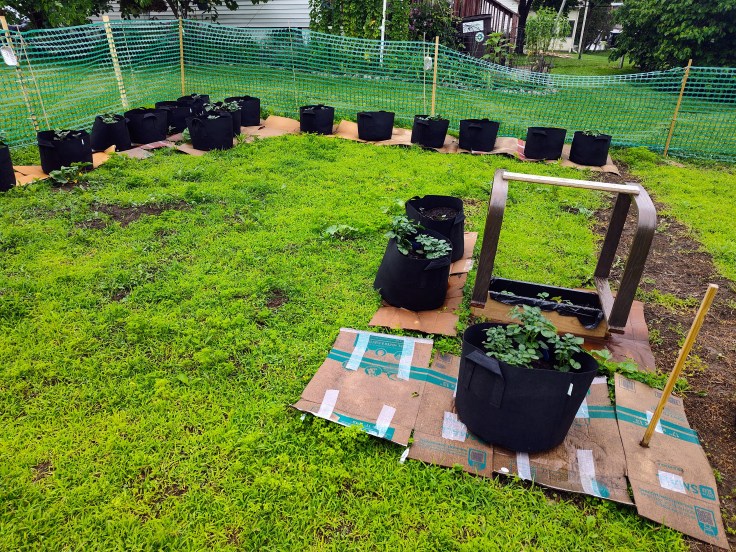
I expected the cardboard to be heavy enough to stay put when it got wet, but that wasn’t the case. The same day that I cut new fence posts, I had to go out and gather the cardboard pieces that were blown around. The potato bags weigh a lot and will prevent the cardboard from being blown around in the future. The bags also look good in the garden, and it’s nice to be able to see all of our plants in one area. We’re also going to be using gallon milk jugs, vinegar bottles, and other used containers that we fill with water to weigh down additional cardboard pieces.
If you’re a regular reader of the blog, you’ll know that we’ve had issues with getting our beans to germinate in planters I built. There are three planters. Originally, one had Cherokee Trail of Tears beans in it, another had Grandma Nellie’s Mushroom beans in it, and the third had Mexican Sour Gherkin cucumbers in it. The beans never germinated, and the cucumber transplanted died. However, in another planter that I built last year, we had successful germination of Iroquois Skunk Pole beans. It was very perplexing. We resowed bean and cucumber seeds in the planters, but again, they failed. Finally, we tried planting in them a third time, but the difference this time is that we planted the Skunk Pole beans, which we had already successfully germinated. This past weekend, they finally germinated.
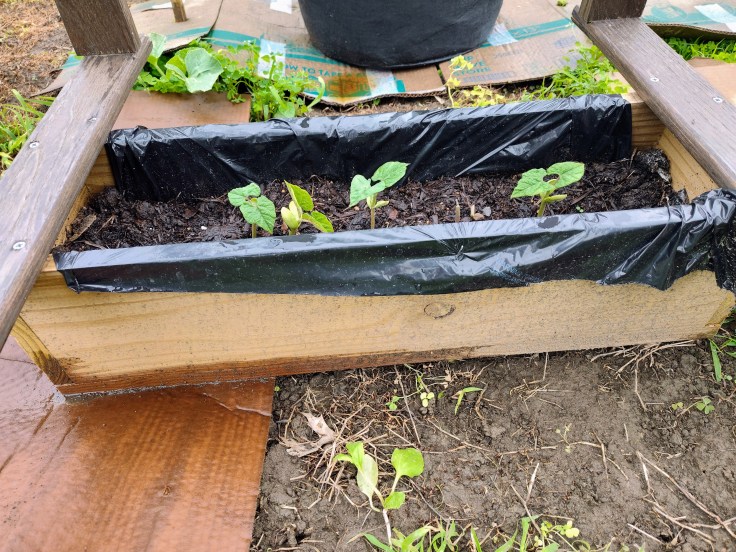
In all three planters, we have bean plants starting to grow, and now we have to figure out the trellising system. The Skunk Pole plants grow very tall (the first plants are roughly 8 feet tall), so we need to build an extension of some sort onto the existing planter so that the plants can thrive. I’m not certain what direction this will take, but I’ll follow up when it’s done. Right now, we’re very excited to have more beans growing.
The second batch of pumpkins, beans, corn, and squash that we sowed are doing great. It’s crazy that we went from roughly a 10-percent germination rate to a 100-percent one with the pumpkins and squash. It doesn’t make any sense. We need to sow more pea seeds when the weather cooperates to get a full row of plants, and closer to the end of the month, the plan is to sow the rest of our sweet corn rows. Happy gardening!
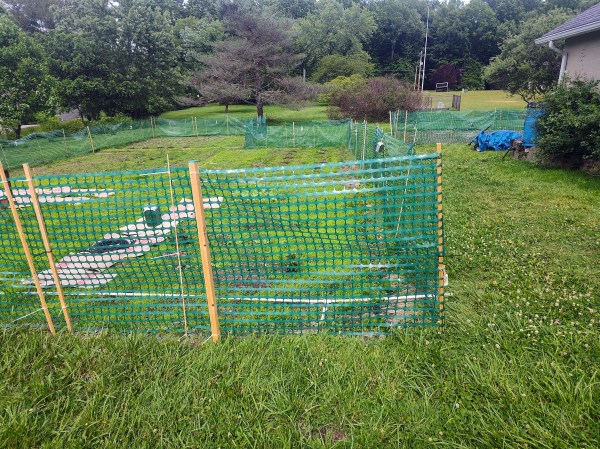
I probably should have written this post before mid-June, but I wanted to gain enough experience with this fencing before giving my thoughts on it. And after using it for a couple of months, I think the time is right. Before introducing this year’s fencing, I want to give a brief overview of what we used last year.
Last year was the first garden at our house, so we had to buy a lot of stuff to get it ready. As a result, we looked for the most affordable fencing option we could find. After considering a few options, we went with rolls of mesh fencing that is designed to prevent deer from getting into orchards. Each roll was 100 feet long and 7 feet tall. We used bamboo poles as the fence posts, and apart from tangling, it was pretty easy to install. And for the first few months, it worked perfectly. It kept most animals out and did its job. However, around mid-to-late August, we started having issues with it. Larger mammals like deer and raccoons were able to break through the fence and get to our corn and melons, which they treated like a buffet. We attempted to fix the holes by patching them with sections of fencing, but that didn’t work. Eventually, we gave up on fixing it and let the animals have their way.
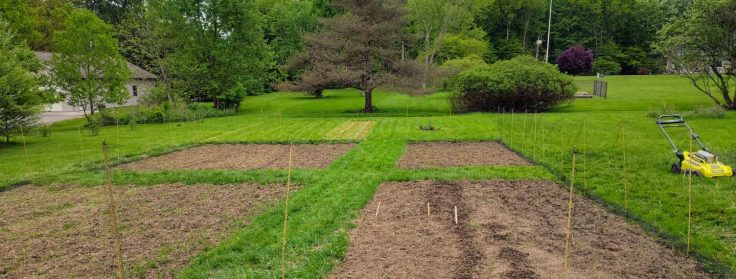
So, even though we bought the fence to be a short-term option, it didn’t last as long as we were hoping it would. It tore easily and got entangled with the grass growing along the bottom, which made pulling it out at the end of the year a nightmare. So, we knew that we’d need something better this year.
We again knew that we weren’t looking for a long-term fencing solution this year. Putting in a permanent fence is quite an investment. We also aren’t sure what we want a fence to look like or if our garden is the size it’s going to be long-term, and we want to upgrade to a permanent fence in sections so that the cost is spread out. So, we needed something that was more durable than the mesh fencing from 2025 but was strong enough to be used multiple years without being permanent. There weren’t a lot of options that fit these needs, so we circled back to something we considered last year: snow fencing.
Snow fencing is also known as construction fencing. It’s often used to prevent snow from drifting across open fields and to block off construction sites. It comes in a variety of colors, including black, orange, and green (ours is green). It’s made of a thick plastic and has roughly 1-inch holes in it to allow air to pass through it.
This fencing interested us because it is 4 feet tall, comes in 100-foot rolls, and is light. It’s also pretty cheap. We bought ours from Lowe’s, where it was cheaper than Amazon, and they were able to ship it faster. For 4 rolls of fencing and a 100-pack of zip ties, it was just over $150. Ironically, this wasn’t much more than we paid for the rolls of deer fencing last year.
Compared to the deer fencing, the snow fencing was very easy to install, although it does require two people. We chose our starting point, started to unroll it, and laid it on the ground around the garden, giving ourselves some extra room. For the posts, we thought we could get away with using lightweight stakes at the corners and “gates” and bamboo poles in between since this is what we used last year. That wasn’t enough to keep the fence upright, so I cut more fence posts out of pressure-treated 2x4s, getting 6 posts out of each board. With each post 5 feet long, they were sunk a foot into the ground. We attached the fence to the posts and bamboo poles with 3 zip ties on each, and I used a staple on the top zip tie to anchor it to the pole/post.
We followed this process around the garden until we finished out a roll or reached the place where we wanted a gate. We wanted the end of one fence roll and the start of another to overlap on one of the bigger posts so that there is plenty of strength. For gates, we used one post for the start of it. This served as a “pivot point” for the fence. A second post was used to establish the end of the gate. At this point, we cut the fencing and installed a third post that acted as the frame for the gate. This is the post that we latch the gate to with a twist tie.
It’s a simple design, and because we had experience installing last year’s fence, we installed this year’s in an hour and a half. There’s no need to be intimidated by this type of fence, and if you buy fence posts, you don’t have to use any saws. It doesn’t tangle when installing, it’s easy to cut with a pair of scissors or a utility knife, and with two people, one person can hold it up while the other zip ties it to the post.
In general, we’ve been very happy using snow fencing for our garden. It was much easier to install than we anticipated. Each roll went further than I expected, so we only used 3 full rolls and a portion of the 4th one even though we expanded our garden this year.
It’s proven to be durable so far. We had a pretty significant thunderstorm last weekend, and the fence withstood it without any damage. That doesn’t mean it’s impermeable, though. There are a couple of places where a rabbit has chewed through the plastic, creating a hole for it to get into the garden. Luckily, it can be fixed, but it is a nuisance.
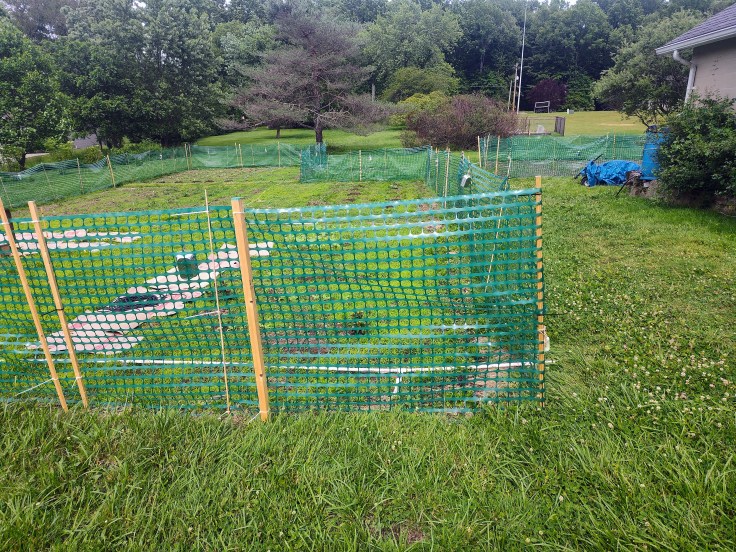
We love how the fence looks. There were some concerns with how it would look in our yard and whether or not it would stick out like a sore thumb. This was a key reason we didn’t go with snow fencing last year. We only thought it came in black and orange, and neither was going to look good. However, prior to buying the fencing this year, we saw the green color in store and were confident that it would blend in with the grass and plants and not be an eyesore. The fence looks like it belongs around our garden. It’s opaque enough that you can see it from inside our house and notice if there are any issues with it while still being transparent enough to see the plants inside.
This brings me to my last takeaway. While still being light, it is much heavier than the deer fencing. Duh, right? We knew it would be heavier, but what we didn’t consider is how this would work with our fence posts. I thought the bamboo poles and lightweight fence posts would be sufficient. That proved to be an error. When we installed the fencing, the ground was soft after we received a lot of rain in April. This made it easy to install the fence posts, but it also meant that the posts and poles worked themselves loose as wind came across our yard. We continued to add more posts, but eventually, we had to upgrade the posts with something much stronger than the small 3/4-inch square posts that I had been creating.
One Saturday afternoon, we came back from eating lunch with Magz’s parents and saw that heavy wind gusts had blown portions of the fence over. I cut a 2×4 in half to make two 1 3/4″ x 1 1/2″ posts that were 5 feet long. Each post was cut to a point, and my father-in-law and I hammered them a foot into the ground before attaching the fence to them. This proved to be the necessary upgrade, as the fence stayed upright through the rest of the gusts we received. I’ve since had to add a couple more of these heavy-duty stakes throughout the garden, but I’m confident that the fence is strong enough to withstand thunderstorms this summer.
We are pleased with our decision to use snow fencing for our garden. It has surpassed all expectations to this point, and I think it was the correct choice for our needs. Only time will tell if it’ll deter deer in late summer and early fall, but for now, it’s been everything we could have hoped for.
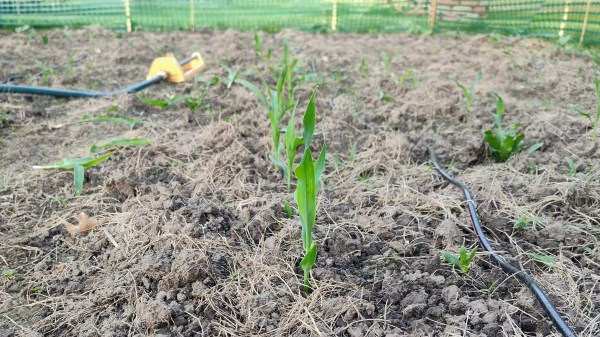
I waited longer to start the weekly garden updates this year than last year, when they began in March. It wasn’t an intentional decision to delay it this year; more so, I was busy and wanted to make sure I had things to write about. So with that in mind, here is the first weekly garden for 2026.
Our garden is doing well as I write this. We’ve had great germination rates, and the plants appear to grow in height day to day. But there are still some seeds that didn’t germinate, leaving sections of rows and individual hills without any plants. Last Friday evening, we went out and filled those missing areas with new seeds. These included beans, corn, squash, and pumpkins. Disappointingly, only one of the planters I made has germinated, despite all the planters being roughly the same size. So, we also resowed seeds in those, choosing to plant our Iroquois Skunk Pole Beans, which have been the only pole beans to germinate thus far.
Later, we’ll need to sow another batch of sweet corn seeds since I only sowed a half-row of each to start to stagger them a bit. We’ll also need to fill in the rows of peas where any failed to germinate from the initial batch. Elsewhere, in the basement, the restarted tomato, pepper, and sunflower seeds are doing very well and should be ready to be transplanted in a couple of weeks.
I’m going to write a full-length post about using aluminum pans in the garden to deter birds and other animals, so I won’t go into too great of detail here. But we bought several packs of disposable aluminum baking pans to hang on our fence. Typically, these are round pie pans, but our Wal-Mart was sold out, so we bought the small loaf pans that are roughly 2 inches by 4 inches.
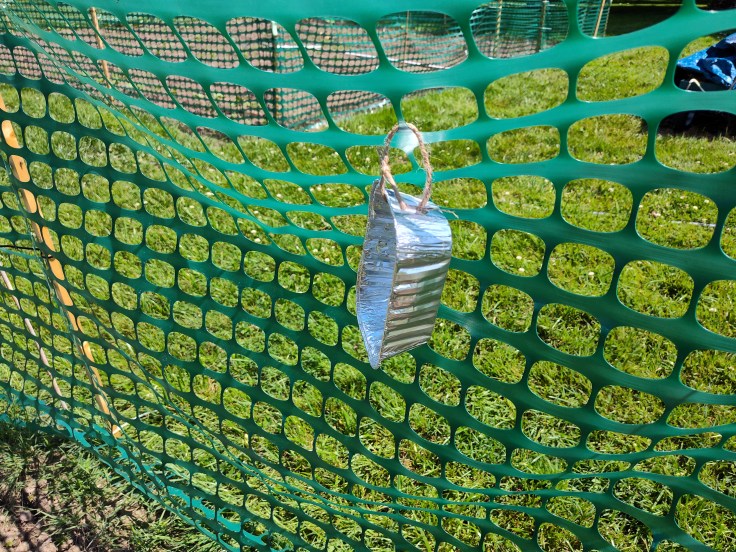
I think the goal is for them to move in the wind and reflect the sunlight to scare birds, but I could be wrong. We’ll see if they work.
Unfortunately, one of our nemeses from last year’s garden is back: grass. I thought that if we had a problem with grass in any of our beds, it was going to be the newest one, since it was still part of the yard last year. The others have gone through two years’ worth of tilling, which I thought was going to do enough to kill off the grass. Plus, I thoroughly sprayed glyphosate on the grass. However, it wasn’t as successful in one of our beds as we would have liked. Currently, there is a layer of grass in the bed we named Beer Talk.
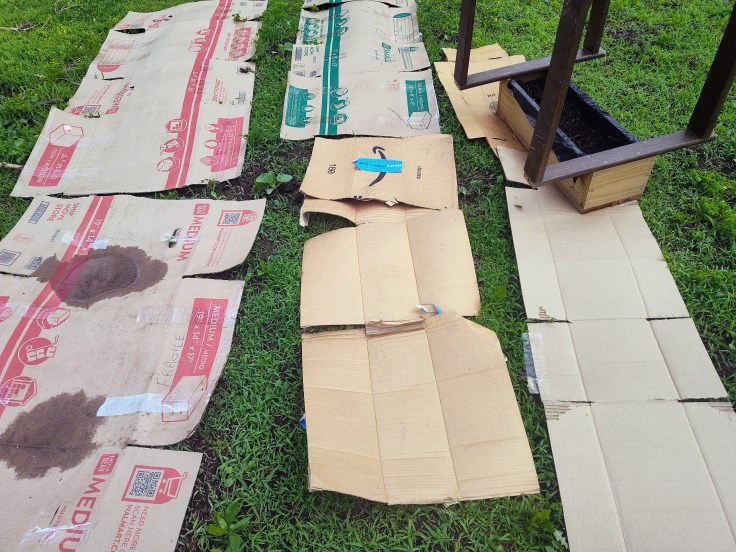
Spraying weed killer in the bed now that there are cucumber, molokhia, and melon plants in it isn’t an option. So, instead, we are addressing it with cardboard in an attempt to smother the grass. It seems to be working, although we have to find a way to prevent the cardboard from getting blown around. I’m also going to write a standalone post on using cardboard in our garden once we’ve had time to see if it’s successful.
We had our first serious thunderstorm of the season last evening. We’ve had lots of rain and some gentle thunderstorms, but yesterday’s storm involved strong winds and a lot of thunder and lightning. The first thunderstorm of the season is always a bit nerve-wracking for me because you aren’t certain if your fences will hold and the plants will survive until it happens. Because we were replacing our fence this year, we weren’t certain how it would fare, but I’m pleased to say that it did well. There was one section where we had to secure a few posts, and we’ll need to upgrade to strong wood in this area, but beyond that, it did great, so we’re pleased. More to come on the fence we switched to this year.
Happy gardening!
I love how cultural and mythical gardening can be. Sure, it is also scientific, and it’s important to understand nutrient requirements and how plants benefit each other when planted in close proximity. But it’s the stories and conversations that really pull me in. Gardening is a very old hobby, with tips and techniques that get passed down from generation to generation. It’s also quite regional, with the climate and environment determining how people garden in that place. And while the basic foundations of gardening remain the same across the decades and regions, there are many intricacies that make gardens unique to a group of people. Combine all of these aspects together, and you have something that is the perfect setting for hacks and tips to be shared with anyone willing (or unwilling to listen).
If you ask 5 people the perfect date to plant peppers or the best way to deal with a specific pest, you may get 5 different answers. It’s unlikely that any of the answers are completely wrong, just that the answer is the result of a person’s background and experiences.
I’ve always enjoyed learning about lore and mythology. Magz and I both studied history in college, and history is full of mythology. It’s important to study because it helps us to better understand cultures. I also love baseball. It’s my favorite sport. It’s full of tall tales and stories that aren’t necessarily 100 percent accurate. Take Babe Ruth “calling his shot” in the 1932 World Series. Did he point before hitting the home run? Absolutely. Was he actually calling his shot, though? Probably not, but it makes a great story.
Gardening is like that. People will tell stories and offer advice that has been passed down through the decades. It often has to do with unique ways to successfully garden that don’t adhere to mainstream versions of doing things. I’m starting a series where I will test some of the popular gardening hacks and myths that I’ve encountered to see if they work. I’m unsure how long this series will be, but I’m excited to see where it takes me. This idea came to me after my dad offered a hack for deterring deer from getting into our garden. That will be the first hack that I tackle. Stay tuned.
Are there any gardening hacks and myths that you’ve been told and find interesting? Are there any hacks that you’ve tried and had success with? I’d love to hear what they are.
We’re growing potatoes again this year after not doing so since 2022. We attempted to grow them last year, but our seed potatoes arrived moldy and rotten. We still tried to plant them, but the wet spring we had killed them before they could grow. We wanted to attempt to grow them again this year, but we didn’t want to grow them in the ground, and we wanted to buy them from a different seed company.
In my post that went over the varieties of potatoes we bought, I mentioned the varieties we’re growing as well as the company we bought from, Urban Farmer. Those potatoes arrived in late April and were in perfect condition. I was surprised at how late they arrived and thought there was a chance they weren’t going to arrive. I eventually emailed the company, and they arrived within a few days of getting a response. Given the condition of the potatoes when they arrived, I’m a fan of not receiving them until late August. It was not nice having to worry if I was properly storing them for a month or so until it was time to transplant.
When we decided we were growing potatoes again this year, we knew that we weren’t going to grow them in the ground. Standing by helplessly as last year’s seed potatoes died in the ground was an awful feeling, and it wasn’t one we want to experience again. Even though the soil is better this year, which would provide a better growing environment for them, we can’t control the weather, and another wet spring could kill another year’s worth of potatoes. That brought us back to our old friend, the container garden.
In 2022, we grew our entire garden in containers, and by containers, I mean 5-gallon buckets and plastic totes. I wrote about our experience in this blog post, so I won’t rehash it here, but it was mostly successful, and I recommend it for anyone who’s limited on space or can’t have a traditional garden. Growing potatoes in them was a success. We grew three varieties in three separate totes and probably harvested between 15 and 20 pounds. For our first time growing potatoes, we were very happy with the results. This year, though, we aren’t growing our potatoes in containers but instead are using grow bags. Don’t get me wrong; the totes worked great, but it was too easy to crowd the potatoes and too heavy to move if we had to relocate them.
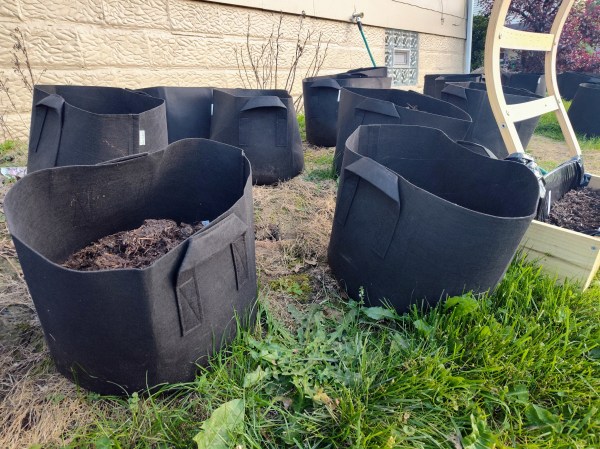
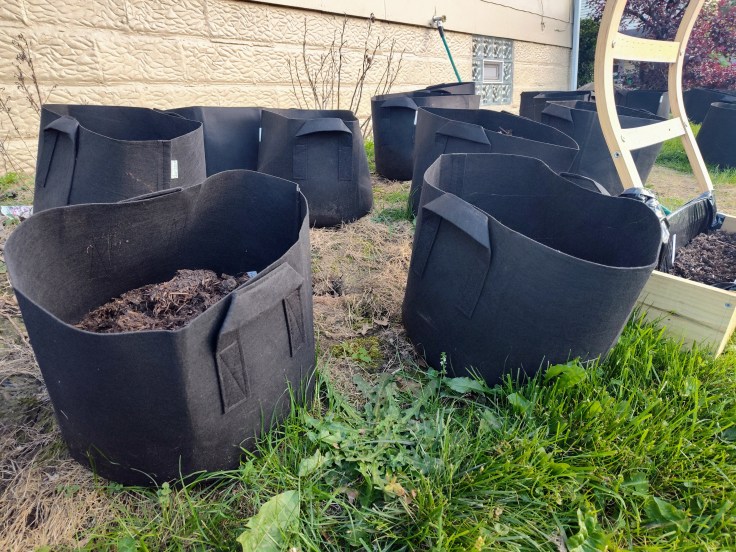
There are numerous sizes of grow bags. We went with the 10-gallon ones, and they came from Amazon. These are the ones we’re using. I picked the 10-gallon bags because they are big enough to hold four pieces of a seed potato and have enough space to hill them as they grow. At the same time, they are small enough that it’ll be easy to move them when they’re full. Grow bags are also great because it’s really hard to overwater what’s growing in them. Made of mesh, they’re breathable and let excess water flow through.
Although there are some grow bags that have flaps on the side that provide easy access to the potatoes when they’re ready to be harvested, ours don’t have that. It is convenient, but I don’t think it’s necessary. It’s easy to pull the plants out to access the ready potatoes, and I prefer to harvest all of them from one bag.
We started with 10 bags, which were a birthday gift from Magz’s parents, but when we started to plant the seed potatoes, we knew we needed more, so we bought another 10-pack, which was the perfect amount for the four varieties we bought.
Growing potatoes in bags couldn’t be simpler. We used a mushroom compost and top soil blend that we bought in bulk from our local Agway and put a layer on the bottom of each bag roughly five inches deep. After that, we applied an all-purpose 5-10-10 fertilizer and mixed it in. The seed potatoes went in next. Whether the seed potatoes need to be cut prior to planting seems to be personal preference, but I like to cut ours as long as each segment has an eye. Any potatoes that only have one eye go in whole. I try to cut the potatoes at least 24 hours in advance of planting them. This allows the potato’s flesh to harden over and develop a skin that protects it as it starts to grow. With the potatoes in the soil, I cover them with a few inches of soil and water them. It’s that simple.
It’s important to use ID tags in the bags if you’re growing multiple varieties to know which type is growing in each bag. This helps to know when the potatoes are early, mid, or late-season varieties and to recognize when each is close to being ready for harvesting. After they’re planted, you just need to pay attention to when the potato plants start to grow. When you start to see the green of the plant breaking through the soil, you want to hill them up with more soil so that the plant is covered. With the bags, we’ll continue to add more soil until the bags are full. At that point, we’ll stop and wait until the plants die off, indicating that they can be harvested.
I feel that using grow bags takes some stress off growing potatoes. Granted, it is a bit more work than planting in the ground, but I think it takes a few years to improve soil to make it suitable for potato growing. Most of our yard is heavy with clay, which compacts and makes it tough to grow tuberous plants, such as carrots, beets, and potatoes. Over time, that should improve, but it’s not where it needs to be yet.
With grow bags, you can buy the perfect soil for potatoes. This blend we bought seems to be advantageous for potatoes, as it’s loose and has the necessary nutrients that help potatoes thrive.
They’re also great because you can’t overwater what’s growing in them. Excess moisture simply drains out. The flip side of this is that you need to water more often than you would in-ground plants, but it’s not a big hassle.
Another reason to use grow bags is that they’re easy to move. Any container is technically able to be relocated, but it becomes a pain once it reaches a certain size and weight. The 10-gallon bags are perfect for this because they never weigh so much that it’s hard to carry them, but they’re still heavy enough to not be blown by the wind.
A major reason we wanted to use grow bags this year is that they’re sustainable. They may not be as sustainable as growing in the ground, but the bags we bought are durable and should last at least a few years. They’re made of a sewn fabric that has some flexibility and won’t rip under normal conditions. They’re much better than the plastic containers we used in the past, which would crack and break within a few months. And when we’re done using them in the fall, they’re easy to clean and store until next spring.
Over time, our goal is to make our garden more aesthetically pleasing. Grow bags contribute to this. They look much better than the totes and buckets we previously used. The bags can be placed together in one location, simulating a garden bed, or can be placed in separate locations as space allows. We currently have ours on the hillside beside our house, and it gives this area of the yard some purpose and beauty.
To wrap up, if you’re on the fence about using grow bags, I would recommend it. Even if you have the space for an in-ground or raised-bed garden, grow bags can be the perfect complementary vessel. They’re affordable (our 10-pack cost $25.99), sustainable, and easy to move around. Have you ever used grow bags for your garden? If so, what has your experience been?
Our irrigation system didn’t work. When I wrote my previous posts on our irrigation system, I hadn’t had the chance to fully test it. All of the PVC components were together, and, I thought, the tubing was ready to be connected once all the holes were drilled. Unfortunately, when we were ready to give it a trial run, there were multiple failure points that I hadn’t planned for. What went wrong, how are we watering our garden this year, and what’s the plan for the irrigation system moving forward? I’m going to answer all those questions.
I wish I could say that only one element of the irrigation system went wrong, but that isn’t the case. There were several things that contributed to it not working.
The tubing we bought for our system didn’t have holes already drilled in it. I wanted to be able to determine how close the holes would be. That alone wouldn’t have been a big deal. But the other issue is that I drilled the holes too big. When we were buying supplies for the system, I grabbed the smallest drill bit at our local Ace Hardware store, which was 1/16″. That is very small when you’re used to drilling holes in wood or metal. The smallest bit I tend to use is 1/8″, which is double the size of the bit from Ace, so I thought it’d work fine.
However, when you’re drilling holes for irrigation, a sixteenth of an inch might as well be a mile. I also drilled through the tubing so that there is a hole on both sides. The goal was to have the tube lay flat and water plants on both sides. The plan and reality were completely different things.
When we hooked the hose to the system, the holes let so much water out that it looked like a fountain, which wasn’t what we were going for. Combined with how close the holes were and that I drilled some before the tubing reached the plants, there was so much pressure loss that the water couldn’t reach the plants at the end of the tube. I attempted to fix this by filling some of the holes with Flex Seal caulking and Gorilla Glue tape, but it hasn’t worked.
Remedy: There are a couple of easy ways to fix this in the future. One is to buy tubing that already has the holes drilled in it. Tubing that is designed for irrigation purposes will have the right-sized holes, and they’ll be correctly spaced. If we don’t want to go that route, I would buy the same tubing I got this year, but I’d use a much smaller drill bit. I think a 1/64″ would probably work. I also wouldn’t drill through both walls of the tubing. Finally, I would lay the tubing out in each garden bed to figure out how much was needed and mark where the plants will start. That way, there aren’t unnecessary holes, which cause a loss of pressure.
I was sort of prepared for this problem, but I didn’t think it would be as large of a problem. I even wrote about water pressure and the role of gravity in my tips post. It quickly became evident that our rain barrel was unable to provide enough pressure to push the water through the irrigation system. Our rain barrel is only a couple of feet higher than our garden beds, so it was only generating a few PSI of pressure, which isn’t enough. Perhaps if the holes in the tubing were smaller and there were fewer of them, it would work for some of the closer beds, but that’s not a guarantee. I thought that the hose bib connected to our hose would provide enough pressure to operate the system, but even that failed thanks to the holes I drilled. Are you sensing a theme?
Remedy: Without fixing or replacing the tubing, there isn’t a remedy that can be applied in the near future. We could build a platform for the rain barrel to get it higher off the ground and generate more pressure, but building a platform to get it high enough would be expensive and potentially dangerous. That isn’t an option we’re interested in pursuing. Another option is to buy an RV pump that could generate pressure for the system. This type of pump typically runs off a 12-volt battery, which would allow us to use solar energy to charge it, but I also think it could be modified to run off AC power via an extension cord.
This problem applies to a few aspects of the irrigation system, and not all of them were the result of an error we made. All of the tubing we bought was supposed to be 1/4″. The first 200 feet that we bought didn’t specify if this was the interior or exterior diameter. I was planning on it being the interior diameter. It turned out to be the exterior diameter. This caused a big problem because the connection I got to go between the PVC pipe and the tubing was based on the tubing having a 1/4″ interior diameter. Now, had I learned this in that first 200-foot section of tubing, it wouldn’t have been a big deal. Unfortunately, though, I didn’t check it until we ordered 600 more feet and drilled holes in all of it.
The worst part of things not being measured correctly or not having their measurements clearly listed is that the last section of tubing we bought had a slightly larger interior diameter than the first two sections. I went back and checked the Amazon listing for it, and it was supposed to be identical to the other sections. I’m unsure what happened, but the clamps we bought didn’t fit this larger interior diameter.
Remedy: I learned that there are reducers for this type of a project that allow you to transition from one size of tubing to another. I just had to find the right one because there are a lot of versions available, all with different measurements. First, I needed to convert all of the measurements into the same system and format. In my situation, I went with standard and decimal points. This made it easy to compare sizes and guarantee that the reducer I bought would fit both sizes of tubing. Eventually, I determined that I needed a 5/32″ x 1/4″ reducer. The 5/32″ side fit the interior diameter of the tubing, and I would need a small section of tubing with a 1/4-inch interior diameter. The goal was to go from the 1/4-inch barbed fitting that was connected to the PVC pipe to the new 1/4-inch interior diameter tubing to the reducer to the tubing we already had. We also needed new hose clamps to fit the 1/4-inch side of the reducer and barbed fitting.
Even though I listed a remedy for each problem in the previous section, you may have guessed that we haven’t fixed our irrigation system so that it can be used this year. That is true. Even after buying the reducer and ensuring that all the components fit, the holes I drilled were too much to overcome for this year’s garden. The tubing won’t go to waste, though. Magz is going to craft something with it. She mentioned a basket that can be used outside, which would be really cool and useful. Meanwhile, the PVC pipe, the connectors, and valves are all able to still be used this year.
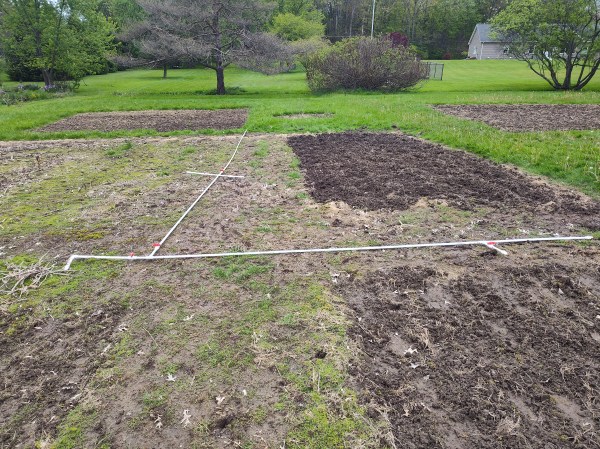
We forgot until about midway through the irrigation project that we have a sprinkler that we previously used to water our container garden in 2022. When we realized that the irrigation system wasn’t going to work, Magz mentioned the possibility of using the sprinkler again. We gave it a go, and it works perfectly. The sprinkler connects to a small section of hose that attaches to one of the PVC fittings we were using for the irrigation system. We’re still able to use the PVC portion of the system, which is great. We connect our garden hose to one of the three hookups we have in our garden beds. We then attach the small hose section and sprinkler closest to the bed(s) we want to water. Once that section is watered, we move the sprinkler by relocating the hose or connecting to a new PVC section. We have to move things around a bit, but it’s still much better than using watering cans for everything, and we can use a lot of the valves to divert water as needed.
It’s not the outcome I had hoped for when I began planning and designing this system, but it is still an efficient way to water everything. And because we weren’t able to use the rain barrel with the irrigation system, we’re using the same water source with the sprinkler. We’re also still going to use the rain barrel by filling cans to water plants in bags or planters.
Absolutely. The failure of the irrigation system for this year’s garden is only going to be a one-year setback. We have the bulk of the materials needed for the system and only need to buy replacement tubing to make it work. I also still believe in the effectiveness of an irrigation system relative to other watering methods. The plan is to either buy pre-drilled irrigation tubing that fits our fittings or buy the same tubing that we did this year but be more intentional with drilling the holes and use a smaller bit. Doing that, along with addressing the water pressure problem, can still see this become a successful and useful system in 2027.
Last evening, we did a walkthrough of our garden, and I was disappointed in myself for not thinking of the sprinkler before I went down the rabbit hole of an irrigation system. Because we were already buying a new fence this year, we could have avoided wasting money on an irrigation system that failed. I voiced that, and Magz is always so good at pulling me out of that mindset and helping me see things more clearly. The truth is that if I didn’t try the irrigation system this year, I probably would have wanted to try it next year. I also think that I would have made the same mistakes next year that I did this year because you can’t learn what doesn’t work until it fails. It would have taken me one round of buying the wrong size of tube to learn what works. And because we did try the irrigation system this year, we have the PVC portion in place, which is how we’re able to connect our hose and sprinkler. Not all is lost just because it didn’t work this time. Happy gardening!

