6 Tips for Building an Irrigation System

Last week, I wrote about building an irrigation system for our garden. In it, I went over the process of designing the system, purchasing the supplies, and putting everything together. I wrote that post before the irrigation tubing was attached to the PVC pipe. Since then, we’ve started to attach the tubing and have learned a lot of things about building an irrigation system, so I thought I’d share some of those lessons.

1.) Buy Extra Pieces

When you’ve designed your system and figured out the pieces you need, buy at least one extra of each joint, elbow, valve, and connection. Also, buy another full section of PVC pipe and an extra 100 feet of the irrigation tubing if you can. It’s similar to any woodworking project: buy at least another full board than you think you’ll need. That way, if something was measured or designed wrong or something was incorrectly cut, you have extras and may be able to avoid another trip to the hardware store or having to place another online order…which brings us to tip #2.

2.) Plan for Extra Trips to the Store

Like any project, it seemed like we never got everything we needed in a trip to the store. Before we began, we understood that we would likely need to make more than one trip since this was a project we had never attempted before, but even I underestimated how much running and how many online orders would be needed. Two Saturdays ago, we picked up the majority of our components, making two separate trips that day. The first trip included buying all the PVC pipe and some of the joints. The second trip was to a different store to buy components that the first store didn’t stock. A third trip was needed to pick up something that needed to be special ordered (and because I forgot a couple of things). That doesn’t even include the multiple Amazon orders we’ve made to buy shutoff valves and irrigation tubing. I thought that 200 feet of tubing would be plenty. It was enough for two beds. We ultimately ordered 600 more feet.

3.) Gravity Is Both an Enemy & a Friend

The plan for our irrigation system was to connect it to our rain barrel and use that water as much as possible. It’s a couple of feet higher than the majority of our garden. This is a good thing. You don’t need a lot of water pressure to move it throughout the irrigation system, and each foot of elevation is roughly equal to 1 psi of pressure. When working properly, we can water our garden without spending any money on water or electricity. That’s the good part of gravity.

That negative part of gravity is that our garden isn’t level, and two of our beds go up in elevation from where the rain barrel sits. I knew this when I designed the system but thought that the pressure would still be enough to overcome the elevation gain. That hasn’t been reality. When using our hose hookup and city water, it’s enough pressure, though, so there’s a solution. We ended up moving the PVC pipe in this section of the garden so that where we connect the hose to the PVC pipe is positioned at the highest point of elevation in the garden. This will help us overcome the elevation problem, but if we still feel like we aren’t getting adequate pressure from the rain barrel, we’ll either elevate the barrel higher by building a stand for it or buy an RV water pump that can be powered via an extension cord or with a simple solar panel setup. If you’re planning to build an irrigation system, never underestimate the elevation changes in your garden relative to your rain barrel if you have one.

4.) Lay Everything Out First

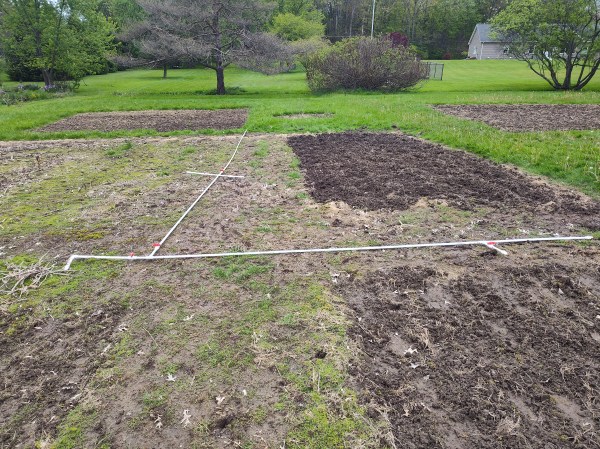
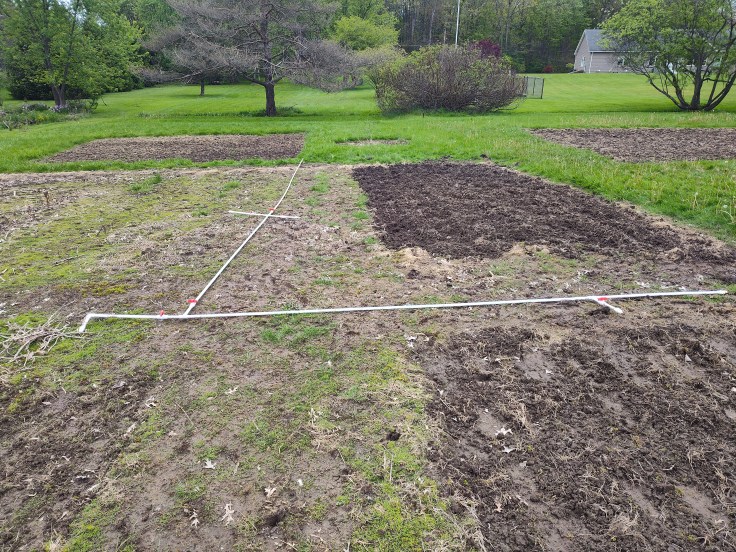
This one may seem obvious, but it’s wise to leave everything disconnected until it’s all laid out and you’re confident in the positioning of everything. It’s tempting to connect components before everything is positioned so that you can see progress, but it’s best to wait. I didn’t do this and have run into some problems as a result. Because the main hookup and PVC section needed to be moved (gravity!), the direction of angles and valves needs to be changed. They started out left and should be flipped to face right. Thankfully, because I didn’t use cement on the joints, it isn’t the end of the world; just a minor annoyance. It still could have been avoided, though.

5.) Have Patience

That dreaded ‘P’ word again. Patience is such a big deal for me (I’m still learning) that I wrote an entire blog post about it last year. In the garden, it seems to be a requirement every step of the way. The same is true with building an irrigation system. Anytime you’re doing something for the first time, you’re going to run into issues. It’s inevitable. In the case of our irrigation system, issues included multiple trips to the store and placing multiple online orders, not accounting enough for gravity, and not having enough time to prep everything before we needed to install the system. Those are frustrations in the moment, but they can be overcome.

6.) Drill Drip Holes Before It’s in the Garden

This was probably the most frustrating aspect of building our irrigation system. I intended to drill all the drip holes on my drill press before the tube was ready to be installed in the garden. That didn’t happen. I ran out of time, and the tubing got tangled, causing a big mess. The result was needing to use my battery-powered drill to add the holes while the tubing was on the ground. It was hot, sweaty, dirty, and difficult to evenly space the holes. I made sure that I drilled the holes ahead of time for the tube in the second bed. It went much easier. The drill press makes it easy to have consistent spacing between the holes, drill the holes in the center of the tubing, and ensure the holes are vertical instead of at an angle. Even without a drill press, drilling the holes anywhere that isn’t the garden or yard is wise. You can get out of the sun or rain, and in general, it makes for a more relaxing experience.

If you’re thinking of building your own irrigation system, I hope these tips help.

Designing and Building an Irrigation System

If you’ve been a reader of the blog for a while, you’ll know that last year’s garden was our first one after we bought her house. We turned a large section of our yard into five garden beds, which was enough work that we never got around to figuring out an efficient way to water everything. We installed a rain barrel that reduced the amount of city water we had to use. It also reduced the amount of walking we had to do, since the rain barrel was close to the garden beds, but we still largely relied on watering cans for the bulk of the watering. It certainly wasn’t the hardest thing ever, but it was quite time-consuming. It took between 45 minutes and an hour to water everything, which got tiring toward the end of summer. It also wasn’t the most efficient use of water, which would be spilled when carried.

We knew that this setup was unsustainable and needed to be improved for this year’s garden. Initially, the conversation was just about getting the water source (hose bib) closer to the garden, making it easier to maneuver the hose around the plants. That remains a long-term goal, but it would have still required us manually watering every plant. The best idea quickly became an irrigation system that allows the water to be directed to the right place, reducing water and time waste. There are kits available from companies such as Drip Depot, but they can get very expensive, with one that would fit our needs costing at least $200. That was more than we wanted to spend, considering it wasn’t customizable. Instead, I set out to design my own.

Designing an Irrigation System

I had two requirements for the irrigation system from the beginning: a standard garden hose needed to be attachable, and it needed to be customizable and adaptable if our layout or needs changed in the future. I was also hoping to be able to buy as many of the items locally as possible, which would help me to visualize things and test connections in person. But before choosing materials, I needed to plan how the water line would go through our garden beds.

Irrigation System, Garden
Irrigation System Schematics

Rigid or Flexible Line?

Every irrigation kit I’ve seen uses flexible tubing for all aspects of it, which probably works well if a garden is small or everything is confined and in close proximity. That wasn’t going to work for us. Most of the flexible tubing used in irrigation systems is 1/4 inch. This size of tube works very well within the beds where water needs to be precisely directed. Anything thicker than 1/4 inch would be difficult to have precision with. Additionally, 1/4-inch tube works because you don’t need to move a large volume of water once it’s already been transported into the garden bed. However, where irrigation kits fail and get too expensive, in my opinion, is getting the water to the individual beds.

You need a 1/2-inch tube to efficiently transport water from the hookup to the beds. Some irrigation kits include a section of 1/2-inch tube, but you’re stuck with a set amount of it that may not meet your needs. Kits with this size of tube in them also get very expensive. So, I decided to MacGyver my own setup and use items you can buy at a hardware store. I have some plumbing experience and felt confident that we could use PVC pipe to carry the water throughout the garden and to the individual beds. I also did some research before starting this project and learned that others have done something similar. I settled on 1/2-inch pipe rather than 3/4-inch pipe because 1/2 inch will carry enough water, and it’ll keep costs low. A 10-foot piece of 1/2-inch PVC costs around $6.70 at our local hardware store. It’s even cheaper at Lowe’s and Home Depot.

The Path

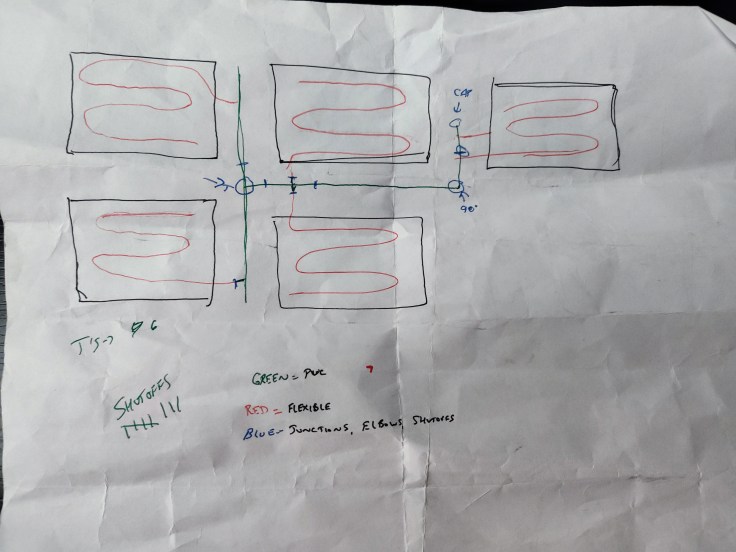
Our garden consists of three sections. The first section has four beds in a 2×2 layout with a walkway between them. There’s a second section of one bed to the back left of the first section. Finally, the third section is behind the garage and consists of one bed. Because of how far apart some of the beds are, there’s no way to run one continuous line. There wouldn’t be enough water pressure for the entire length, and it would lead to overwatering at the beginning and underwatering at the end. Instead, we will need to use shutoff valves to divert the water to the correct beds at a given time. At this point, I started to walk through the garden and sketch out the potential schematics. This is what I came up with:

Figuring out where shutoff valves and joints will go was the most difficult part of the design. The shutoffs are important for diverting the water to the appropriate beds since we will want to water the beds individually to ensure that they’re watered evenly. It means we’ll need a shutoff placed at each bed as well as between them. The one placed at each bed allows water to go into the bed. The valve between each bed prevents water from going too far and forces the water through the open valve. But the shutoff can’t be placed in the main section of PVC. Instead, there has to be a joint and a short section of pipe that leads into the garden bed. It’s in that short section of PVC where the shutoff has to go. The goal of our irrigation system is to place the PVC in the walkways. The PVC will connect to the flexible tubing at each garden bed. The tubing will route up and down the rows in the garden bed, allowing the water to be directed to the root system of each plant. With a rough plan in place, we hopped in our Subaru and headed to the hardware store.

Gathering the Supplies

The night before we went to the store, we took measurements to get a rough idea of how much PVC we would need. It was just short of 60 feet, but knowing that we’d need more for the length between the main section and the beds, we bought seven 10-foot pieces. Besides needing to carry these pieces around the store, this was the easy part. The difficult part was figuring out what pieces we needed and how many of each.

Irrigation system, garden
Irrigation System Pieces

If you’ve never been in the plumbing/PVC section of a hardware store, you’d be shocked at how many joints, collars, connectors, and valves there are. And because they’re all white PVC, they largely look like each other. You have to make sure you’re looking at the right size of joint to confirm it fits the pipe you’re using. Then, you have to check that the connection type is correct. There are two: threaded and slip.

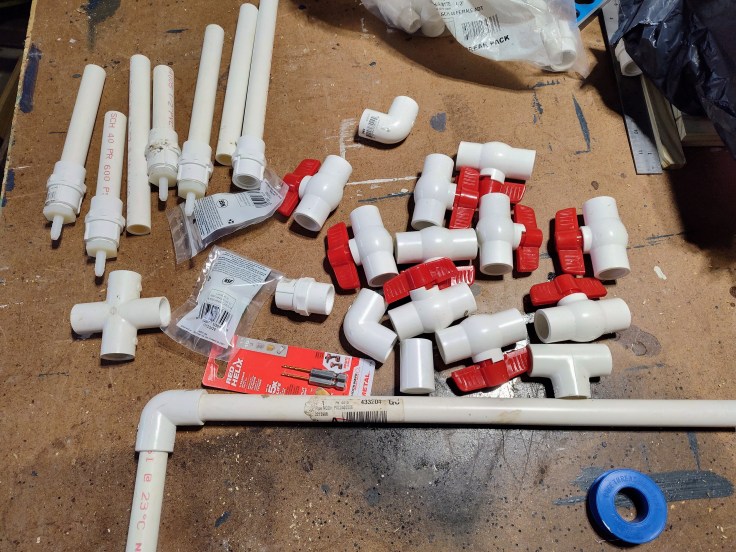
Getting the right connector type is important. Then you have to make sure you’re getting the right joint. There are t-joints, 3-way, 4-way, elbows, and many more. If you get the wrong one, your project likely won’t work. We both knew that gathering all the items was going to take a long time in the store and was likely to take multiple trips. Both proved to be true. Our first trip took about an hour. They had the PVC pipe and joints that we needed, but they didn’t have enough shutoff valves or any pieces that would connect the PVC to our garden hose or to the 1/4-inch irrigation tubing. After transporting the PVC pipes home, which was a funny scene (imagine a Subaru Forester with a section of white PVC hanging out the sunroof like a unicorn), we went to Ace Hardware in search of the remaining items. Ace really is the place with the helpful hardware folks. An employee helped me find the connectors we needed and, as a fellow gardener, was interested in this irrigation plan. Unfortunately, they didn’t have enough of the connectors, but she special ordered them, and they arrived on Monday. That was all well and good, though, because I didn’t have enough t-joints and forgot to grab a collar to connect two PVC sections together. In total, these were all the items we bought:

  • 7 10-foot 1/2-inch PVC pipes. This is the basic Schedule C PVC.
  • 8 t-joints (slip-on)
  • 10 shutoff valves – Purchased on Amazon in a 10-pack. We only need 8 of them, but it was cheaper to buy in bulk.
  • 7 1/2-inch x 1/4-inch nylon barbed hose fitting – These are the pieces that had to be special ordered. These allow us to connect the 1/2-inch PVC pipe to the 1/4-inch irrigation tubing. The barbed ends allow the tubing to connect without the need for a hose clamp.
  • 7 1/2-inch x 1/2-inch connectors – One end is threaded; the other has a slip fitting. Because the barbed hose fitting is threaded on the 1/2-inch end, this piece is what allows the PVC pipe to connect to the barbed hose fitting.
  • 1 4-way connector – This piece has a slip fitting on all four ends.
  • 1 collar – This piece connects two full-length PVC pipes to each other where no joint is located.
  • 2 hose adaptors – These allow us to connect our garden hoses to the system.
  • 200-foot roll of 1/4-inch irrigation tube. This is flexible and doesn’t have holes in it. The holes will be drilled with a 1/16-inch drill bit on my drill press. We may need more of this.
  • Stoppers for the irrigation tube. These will go into the ends of the tubing after it’s been routed through a garden bed. Doing so will create the pressure that forces the water through the holes in the tubing.
  • We may also need some staples or clips to hold the tubing and pipe against the ground.

In total, we spent around $150 for everything, coming in quite a bit lower than the $200 it would have cost to buy a kit.

Building the System

Once you acquire all the components, putting the irrigation system together is as easy as building a K’Nex or Lego set. I laid out the pieces in the garden where I wanted them to go. If the sections of PVC needed to be shortened, I took measurements and cut them on my miter saw. After that, I attached the sections with the appropriate joints. I’m not using cement in this project because I want to be able to take this apart in the fall. It shouldn’t be an issue since the water pressure will be pretty low compared to a house’s plumbing system. The majority of the joints are made with pieces that only need to be slipped together rather than threaded. But for any pieces that were threaded, I used Teflon thread tape to ensure a sealed joint.

With all the pieces laid out and cut to length, it was easy to assemble everything. The structure for every section went like this: Main PVC Section + Joint (4-Way/T) + Small PVC Section + Shutoff Valve + Small PVC Section + Barbed Hose Fitting.

For the irrigation line, I’m drilling a hole every 6 inches, and at the time of writing this, I’ve drilled holes in roughly 5 feet of it. I don’t want to drill any more holes until I know how long each section needs to be.

Here’s the final product. We haven’t tested it yet or attached the irrigation tube to the system. I will write a follow-up post that goes over how well the system works.

Irrigation System, Garden
Irrigation System

Learning to Start Seeds With Calmness

Being completely transparent, I started this post with the intention of writing about my struggles with seed starting and how I’ve been questioning my abilities to do so. Part of that was because I was initially having issues with starting seeds this year. I actually wrote about these problems in a post titled When Is It Time to Restart Seeds? In it, I described the struggles I was having with our pepper seeds. Germination rates were low, which led me to question my ability to start seeds and figure out what went wrong. In that post, I mentioned that I was going to take a patient approach with them and not restart seeds too quickly. I followed that up with a post about how happy I was that I took a patient approach. I let my first set of seeds go for an extra week or so, and the majority of the cells germinated. It was because of this result that the direction of this post has changed.

Success Has Been More Than Patience

Although being patient with our seeds has played a large role in the success we’ve had this year, I think the success is the result of more than simply being patient. That thought stems from a conversation Magz and I recently had. A couple of days ago, I was showing her how successful our starts have been, and she commented that she thinks it has something to do with how calm I’ve been when it comes to this year’s garden.

In the past, I’ve approached pretty much everything with a degree of excitement or agitation. I wasn’t necessarily overly excited or agitated, but I struggled to control my emotions, which resulted in not being chill. When it came to gardening, it led to rushing through things, making mistakes, and working hastily. I’ve tried to have a different approach this year, both because of how poorly certain aspects of last year’s garden went and learning how to manage my emotions better.

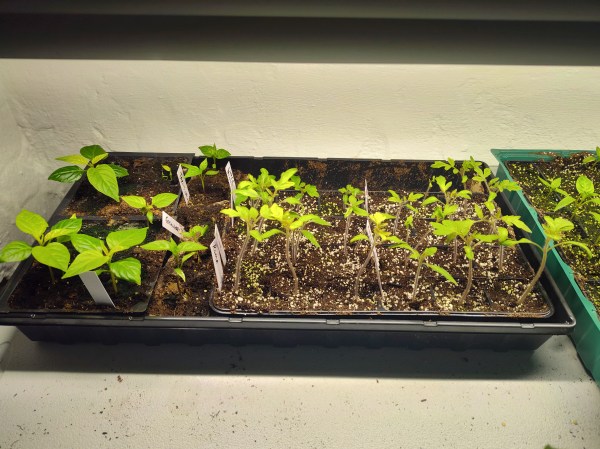
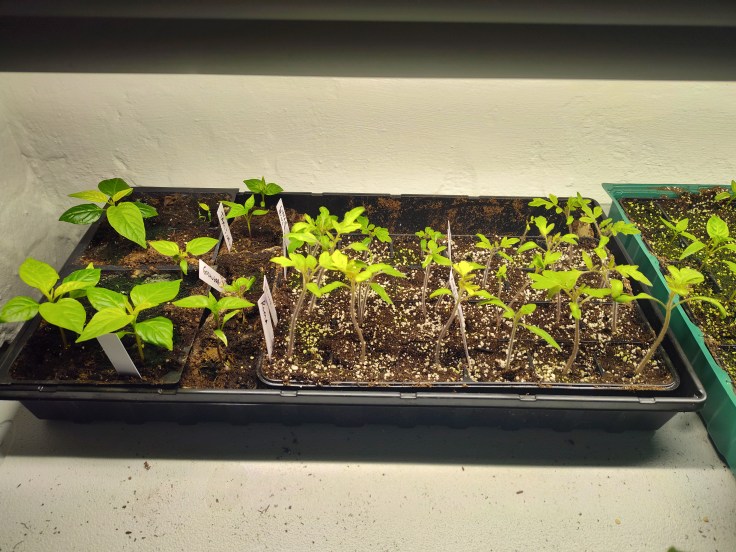
tomatoes, peppers
Our pepper and tomato starts

This change started by delaying the seed-starting process a few weeks. Last year, I started them when the packets said to, which resulted in leggy plants by the time the weather cooperated enough to transplant outside. This year, I nearly started them too late and forgot to buy some of the supplies we needed. But despite those hiccups, the result has been overwhelmingly positive.

What Does Calmness Look Like When Gardening?

This question will likely have a different answer for everyone, but for me, calmness means a few things. The first is approaching every task with the right mindset. That doesn’t mean having to be in a perfect mood all the time, but it does mean that I need to be focused and not sidetracked. I need to be aware of what needs to be done. This allows me to see things clearly, notice when plants are growing or struggling, and address things accordingly. If I’m unfocused when I go downstairs to look at our starts, I may overlook something or do something wrong.

Things are going to go wrong with a garden. It’s a fact. Seeds won’t germinate, transplanting starts will fail, the temperature will be too warm or cold, and you’ll get too much or too little rain. Those are all things that will inevitably happen on a yearly basis. It’s like baseball: a batter can get on base 4 out of 10 plate appearances and be an All-Star or Hall-of-Famer. Failure is part of the game. But when you fail when gardening, you can’t be too hard on yourself or let yourself get too low. Every failure is a learning opportunity to succeed next time. That mindset helps you stay calm, which carries over to the last point.

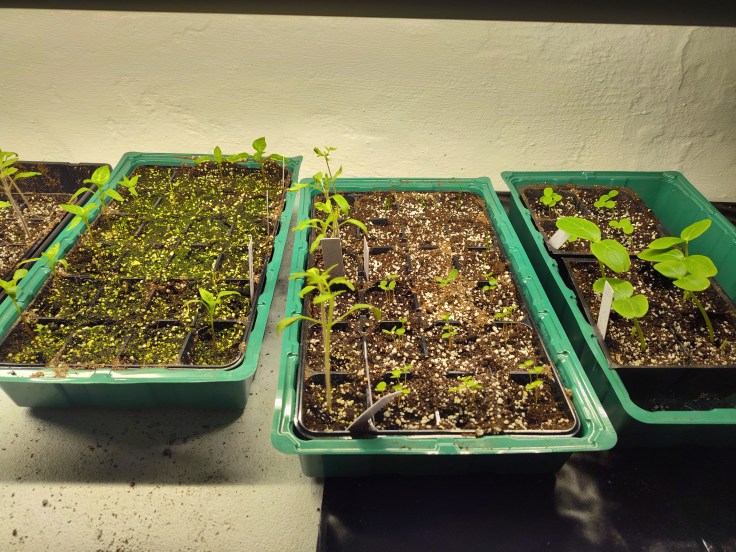
peppers, cucumbers, tomatoes, molokhia, leeks
Pepper, cucumber, tomato, molokhia, and leek starts.

I think it’s important to be gentle. I think it’s important to have gentleness in all areas of life, even though it’s something I struggle with, and considering mainstream society doesn’t promote gentleness, it’s rare to see it in public. But when we act with gentleness or out of love, the reactions are positive. With humans, it can be disarming and lead to real conversations. When gardening, it can result in healthy and productive plants that reach their full potential and provide great yields. To me, being gentle when gardening means having soft hands and being delicate. When I’m starting seeds, I need to be gentle with the seeds, taking care to plant them at the appropriate depth and to not overwater. When transplanting starts, gentleness means supporting the root system so that the plant has the best opportunity to thrive in its new home. When the plant is growing or it’s time to harvest, it means picking when it’s the right time, not letting plants crowd each other, and ensuring that branches aren’t weighed down, causing unnecessary stress.

It may seem crazy, but I think there is something to having a calm demeanor when gardening. I doubt that there’s scientific evidence to back it up, but I’m convinced plants can sense our stress levels when handling them and respond accordingly. It’s similar to animals: they can tell when we aren’t calm. Perhaps we’re rushing through interactions with them or being short. That behavior affects the interaction and relationship. And I don’t think that this mindset needs to stop with animals or plants. If we all took a second to step back, take a deep breath, and treat others with gentleness, we’d be a much happier society.

Most Underrated Gardening Tool

The most underrated and useful gardening tool isn’t a watering can or a trowel. Nor is it a weeder, a hoe, or a fence. In my opinion, the most underrated tool for your garden is a rain boot. I know this to be the case because I didn’t have a pair of rain boots last year, and having them this year has made quite the difference. Here’s why a good pair of rain boots is important and why you should get yourself a pair of them if you don’t already.

Before this spring, I was never a big fan of rain boots and didn’t see a reason to own a pair. When I was a kid, I always had another pair of shoes that served the purpose of rain boots. They were either old shoes that were fine to be destroyed outside, winter boots that could get wet before it warmed up, or water shoes that I wore fishing. It remained that way until this year when Magz suggested that we each get a pair before we started working in the garden.

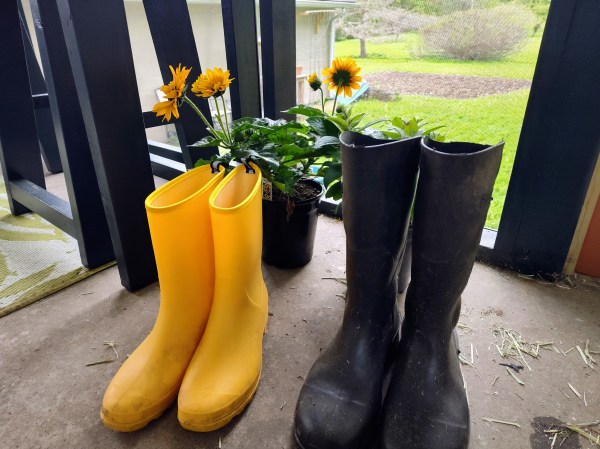
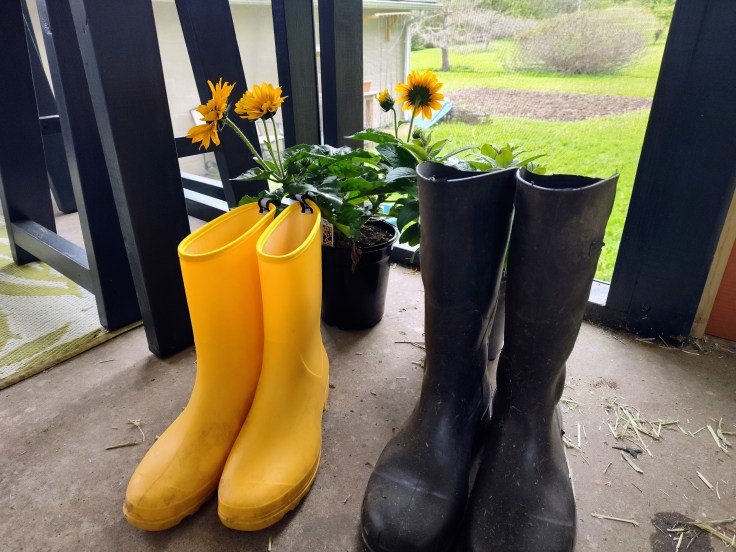
Rain Boots
Our rain boots

At first, I had a difficult time remembering what shoes I wore last year to break ground on the garden and get the soil tilled. But I’m pretty certain it was a pair of Skechers hiking sneakers that I had had for nearly 4 years prior to last summer. I bought them to wear while woodworking, but they got me through so much more, including our move during the summer of 2024. By the time last spring rolled around, they were on their last legs and beginning to fall apart, with their once-aggressive tread worn down to a smooth finish. And while they were designed to be waterproof, they don’t go above my ankles, so deep water puddles and mud are a no-go. Those sneakers got me through all of the work that went into last year’s garden, and I still slip them on to take the garbage out, but I knew that they weren’t going to work for another year of gardening. So, when Magz asked about getting rain boots, I was on board.

Why Are Rain Boots Good Shoes for Gardening?

Rain boots have a lot going on for them. They’re relatively light compared to work boots, are waterproof to a depth equal to the height of the boot, and are easy to clean. They are also affordable relative to other types of work shoes. I’ll break down each of those points here.

  • Although rain boots are heavier than a pair of sneakers or sandals, two types of shoes I’ve been known to wear in the garden, they’re much lighter than a pair of work boots. I used to have a pair of Red Wing boots with the composite toe in them, which were lighter than a steel toe but still much heavier than rain boots. When you’re working on your feet and getting your shoes caked in mud, you want a pair that starts out light so that they’re still manageable when weighed down by mud.
  • Having a waterproof shoe that can handle mud or water to a greater depth than you’ll encounter in your garden is important. I’m unlikely to step into mud or a puddle that’s more than 12 inches deep, but I could in my rain boots, which nearly go up to my knee. There’s security in seeing a section of your garden that’s muddy after a period of rain or the part of your yard that gets swampy and not fearing your socks getting wet.
  • If you’re going to get your shoes dirty, they should also be easy to clean. Rain boots meet that requirement. When you’re done with your project, you can walk over to the hose and spray them off. You can also let the mud dry to be smacked off later. Even the aggressive treads on my boots are easy to clean.
  • Our rain boots were remarkably affordable. They were purchased on Amazon. Mine were $23.99, and Magz’s were $29.99. Now, I know that not all rain boots are this affordable. Muck Boots cost around $100, and Hunter’s can run around $200. But you don’t have to spend that much to get useful rain boots that serve your needs. And if you were to buy another type of work shoe to use in the garden, you’ll likely have to spend at least three times what we paid for our rain boots, and they’re unlikely to perform as well. I purchased a pair of Skechers shoes to replace the old ones, and they are $115 now. And as much as I love wearing them when I’m woodworking or walking in nature, they wouldn’t survive regular wear in the garden.

These four points all support the idea that rain boots are the best shoe for gardening. They’re affordable, durable, lightweight, and easy to clean. Mine aren’t necessarily the most comfortable shoes for long-term wear, but I am confident that if I bought a pair of Dr. Scholl’s inserts, they would be perfect.

The Most Underrated Gardening Tool?

Hopefully, I’ve convinced you that rain boots are potentially the best type of shoe to wear in the garden, but you still may be skeptical that they’re the most underrated or useful gardening tool. Hear me out. Hand tools, like shovels, trowels, weeders, and watering items, are vital to success in the garden and have an impact that is immediately noticeable. Obviously, rain boots don’t have that same level of obvious impact; however, you can wear rain boots when doing any of the jobs in the garden. They can be worn when tilling soil, planting seeds, transplanting starts, weeding, and watering. The right shoe can improve any job, and rain boots have already vastly improved the tilling I’ve done in our garden. I’ve worn them for roughly 10 hours split across five or so days, and I love them.

My feet have remained dry despite working in muddy soil and wet grass. My legs and feet haven’t gotten too warm, which was a concern of mine, yet they provide solid insulation when it’s cold outside. I also love that they can be worn with pants or shorts. I originally bought my rain boots with the plan of only wearing them in the garden. Having had them for a couple of months now, I foresee myself wearing them regularly, even when I’m not in the garden. Obviously, I’ll also wear them when it’s raining, but I can also see myself wearing them in winter. They’ll do well in snow, and their treads will provide traction even when it’s slick. They’re simply a perfect shoe, and the most underrated gardening tool.

Upcycling an Ikea Chair Into a Garden Trellis

In 2021, we bought a pair of Ikea Poang chairs. They’re pretty iconic and are what many people envision when they think about Ikea chairs. We used to sit in them every time we would shop at Ikea and dream of buying them when it made sense. That time came in 2021, and at first, we loved them. However, over time, they lost their luster. They were really low to the ground, making them hard to get out of, and they were narrow, so it was difficult to work on a computer or do anything with your hands, like cross-stitch or knit.

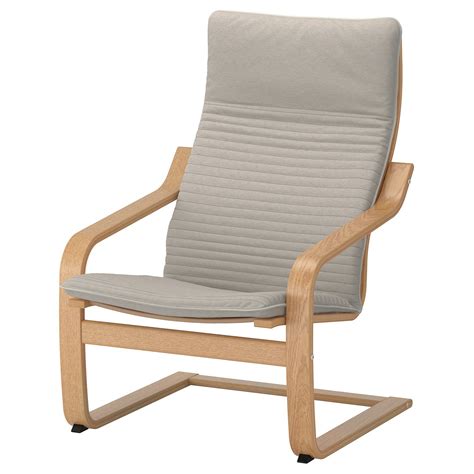
Ikea Poang chair
Ikea Poang chair

After moving in 2024, we decided that these would become outdoor chairs on our porch. Although the chairs weren’t designed to be outdoors, the wood can be treated to resist the weather, and the cushions were brought inside at night. They worked decently well on the porch; however, the same design flaws persisted: too narrow and low. When we built our table and stools, we no longer had a need for the Ikea chairs since the stools are primarily where we sit. And when we want something more “loungey” or have people visiting, we have folding chairs that recline flat. When not in use, they can be folded and stored away, taking up less space than the Ikea chairs. That left us with a decision to be made about the Ikea chairs.

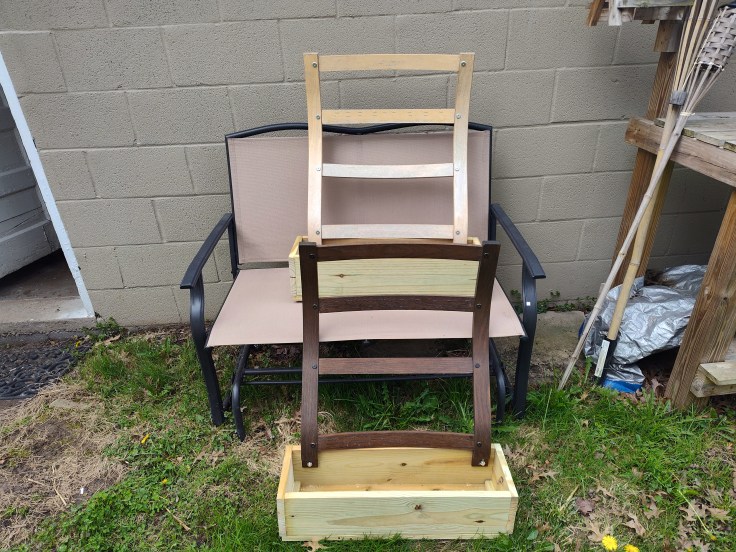
We aren’t people to throw things away unnecessarily, and we didn’t want to donate these chairs because they sat outside for nearly a year. Throughout the entire process, Magz had the idea of trying to use these chairs in our garden. We talked about simply setting a planter where the seat would be and letting nature take over them, as well as cutting out the seat support and growing a plant up from the ground through the chair. Eventually, I had the idea of using the back of the chair as a trellis system. You can’t see it in the above picture, but behind the cushion are two vertical pieces with several horizontal pieces between them, creating a ladder system. That’s essentially what a trellis is anyway. So, with that in mind, I set out to make it all happen.

Disassembly, Design, and Construction

If you’ve ever put together a piece of Ikea furniture, you know that they are all pretty similar. All of the individual wooden (or wood-adjacent) pieces are connected with screws, bolts, or barrel nuts (I had to look up what they’re called). Although assembly can be overly complicated, once you’ve put one piece of Ikea furniture together, you have an idea of how everything goes together. And while durability and longevity aren’t Ikea’s strong points, thankfully, it was a bonus in this case, because as easily as the chairs went together, they came apart.

With the pieces separated, we were left with two cross pieces, the back section that will be used for the trellis, two seat support pieces, and the two large side pieces that comprise the arms and bottoms for each chair. There was a seat section for each chair that was incredibly difficult to pull the staples from. We ended up getting rid of that piece. The back of each chair was the original inspiration for this project, but as I took the chairs apart, I could see ways to use the remaining pieces. The sides can either be cut down for individual lengths of wood or can be transformed into a planter stand. Meanwhile, the cross pieces will be used to build additional planters or in another woodworking project in the future. I typically don’t throw anything away if there’s a possibility that it can be used again.

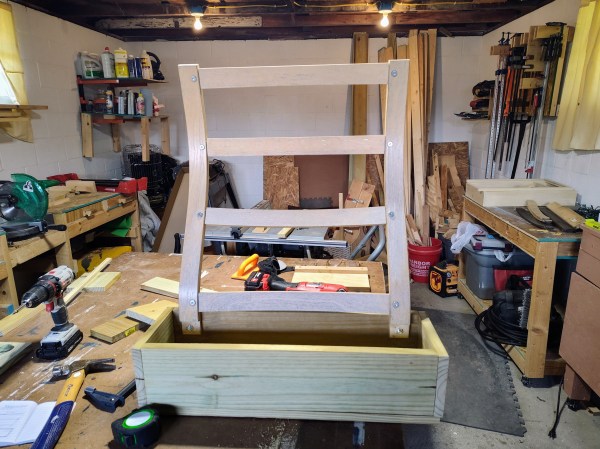
Ikea Poang, Upcycling, Garden Planter
The first upcycle Ikea Poang chair into a garden planter.

Designing the planters for the back pieces was straightforward. I measured the width of them, added two inches, and that was the interior width of the planters. I had a bunch of leftover pressure-treated 1x6s from last year’s porch project. I kept them their full width and cut pieces to length to make the four sides of the planters. Initially, I thought I would need to have two rows of these boards so that each planter was roughly 11 inches tall. However, after attaching the sides for each planter and feeling confident that one row would provide enough dirt and be sturdy enough to not tip over, I kept the planters separate. This was great, because it meant I had two planters mostly finished when I thought I only had one planter halfway done.

With that decision made, I had to figure out the bottom. I did this by using scrap pieces and ripping full-width pieces on the table saw to cover the opening. I also added support pieces for extra attachment points. Also, a note on the connectors I used. For the most part, I used coated exterior 1 1/4-inch screws that went into pre-drilled holes to reduce the likelihood of the wood splitting. This mostly worked; however, there were times when I used exterior brad nails for efficiency and simplicity. I also used outdoor-rated wood glue to hold everything together. I’m confident that these planters are built well and should stay together for the foreseeable future.

Next up was the most complicated part: attaching the back piece to the planter. On the chair, this piece connected to a cross member with a short bolt that screwed into an enclosed nut that was pressed into the back side of the piece. There was no way to reuse this setup with the planter since the bolt was too short. Instead, I determined that a 3/8-inch bolt would go through the existing hole. I managed to clamp the back piece to the planter in order to drill a small pilot hole through the plant. I then drilled that hole out with a bigger bit and ran a zinc-coated bolt through everything and tightened it down with a nut. With both sides connected, I added a screw through both pieces on each side to make sure everything is secure. And with that, it was all done.

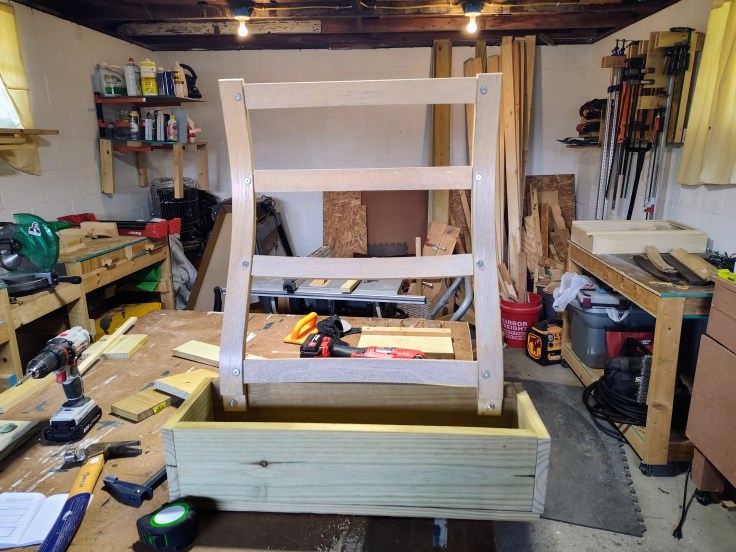
Ikea Poang, Upcycling, Garden Planter
Both upcycled Ikea Poang chair trellis planters.

In total, I think each planter took about two hours, and it was pretty easy to bring this idea to fruition. I’m also very proud of our ability to reuse and upcycle something that a lot of people would have thrown away. I’m really excited to plant in these this year and see how beans or cucumbers will climb the trellis system. I’ll definitely follow up with other posts about how we reuse the other pieces (if they’re used in a garden-related project) as well as how successful these planters are. If you’re interested in doing something like this, don’t be afraid to take a chance and upcycle something into a planter for your garden. It’s a lot of fun and gives your garden extra character.

Let the Dandelions Grow

If your town is like ours, you’ll see a lot of manicured lawns with the grass cut even and low with few dandelions and “unwanted” weeds. In spring when there is ample rainfall, these lawns typically look nice and green; however, in the dog days of summer, the lawns will turn brown and crispy because even though the rainfall has lessened, the mowing must continue. And that doesn’t include the people who pay for lawn care companies to spray harmful chemicals on their yard. When we sit on our back porch and look toward the backyard or I look out the side window when working in my office, I see a lot of yards that don’t fit that manicured vibe, thankfully. I see lawns that are lush, thick, and vibrant green; however, there are multiple varieties of grass and the presence of dandelions to confirm that these lawns are natural. Seeing the difference between manicured and natural lawns is quite a shock, and it makes me question why people hate natural beauty, and namely dandelions, so much.

When I was growing up, I remember people complaining about dandelions in their yards, but they usually didn’t do anything to address them. Now, there are millions (probably billions) of dollars being spent on researching, developing, and advertising products designed to attack “weeds” like dandelions. My question is “Why?”

The Invasive Species Argument

One reason people hate dandelions is that they’re considered weeds, and the most in-tune haters will even describe them as invasive species, but that isn’t the whole truth. While dandelions are not native to North America, that does not mean they’re invasive. Invasive species are plants, insects, animals, etc. that aren’t native and have the ability to take over an ecosystem, wiping out the native species. These species also don’t provide the same benefits that native plants, insects, and animals need.

Dandelions
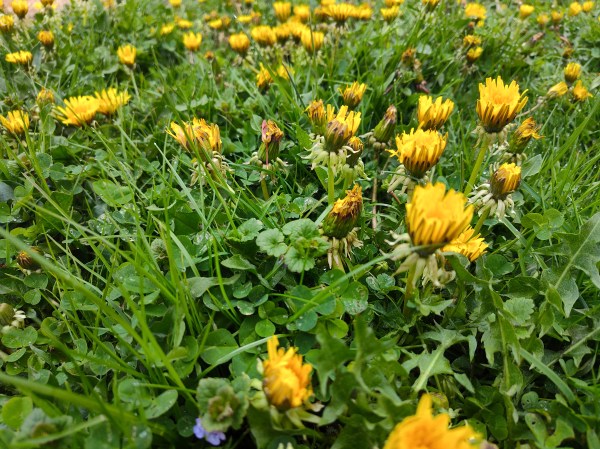
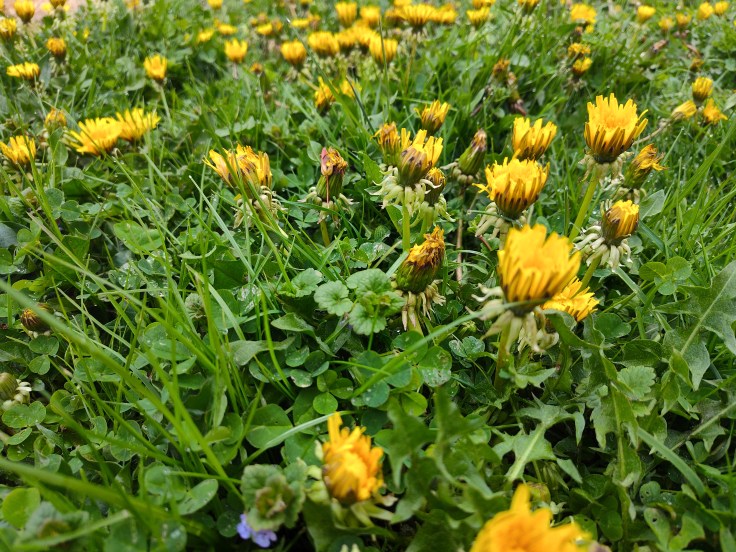
Dandelions in our yard

Currently, there are only two states in the USA—Alaska and Oregon—that consider dandelions to be invasive. For every other state, they’re simply non-native. This means they were introduced to the area but don’t cause the damage that invasive species do. In some cases, these plants can still be detrimental because they may have higher moisture requirements than native plants, causing an imbalance in the ecosystem. But even that isn’t the case with dandelions, but more on that in a bit. So, we can debunk the invasive species argument.

The History of Dandelions

Before looking at some other aspects of the dandelion, I want to first touch on where it originated. Dandelions have been around for thousands of years, originating in Eurasia before coming to North America, most likely in the 17th century on the Mayflower. But don’t think that this was by accident. The Europeans who arrived in America during this time period brought dandelions with them intentionally. That’s because the plant served a key medicinal purpose for them, which is one of its many benefits.

Benefits of Dandelions

Many may think of dandelions as nuisances, but the reality is that there are many benefits to them.

Medicinal

I mentioned earlier that Europeans intentionally brought dandelions with them for their medicinal benefits. And like most natural remedies, their positive effects are often minimized by the medical community. However, the Cleveland Clinic published a blog post in 2021 on the benefits of eating dandelions. In it, they mention that dandelions can be used as a good source of vitamins A, C, and K as well as folate, calcium, and potassium. Research and testing have also shown dandelions to help provide antioxidants, reduce inflammation, manage blood pressure, control blood sugar, and lower cholesterol. And while it hasn’t been confirmed, a research paper written by a biochemistry professor in Poland found that dandelions can help fight cardiovascular disease.

Dandelions can be consumed in a number of ways. The greens are delicious when eaten in a salad or sauteed. The flower petals and roots can be steeped into tea. You can also make wine and jelly from the flowers. In general, you can eat them the same way you do other greens grown in the garden.

Soil Improvements

Even if you don’t like the look of dandelions in your yard, one thing that can’t be denied is how it can improve your soil. Because they have deep, tough taproots, they’re able to break up the soil, allowing plants you want to grow to establish strong root systems. As a result, it could even make sense to intentionally plant dandelions in your garden beds to help your crops grow.

In yards, the deep taproots improve drainage and reduce runoff that often comes with lawns. Grasses, especially non-native varieties, tend to have shallow root systems that don’t absorb rainwater as efficiently as other plants. This leads to runoff, soil degradation, and potential flooding. And if you use herbicides or fertilizers on your lawn, the excess chemicals that aren’t absorbed can run off into streams and harm the drinking water supply.

Pollination

This one is pretty obvious, but dandelions are an important food source for pollinators. This is especially true early in spring when they’re one of the few available food sources until other flowers bloom. With pollinators already struggling to find food due to urbanization and the destruction of our ecosystems, it’s important to provide as much food as possible. I’ve already written about my love of the pollinators here, so it shouldn’t be surprising that I’ll keep dandelions around to help them.

Still Not Convinced?

Even if you don’t like dandelions and would prefer a lawn free of them, please be careful with how you address them. Instead of using herbicides that are harmful to the environment, including wild animals, pets, insects, and our water supply, physically remove them. Mowing them down and deadheading them will prevent the seeds from blowing and spreading once the flower dies. Plus, the pollinators will still have the opportunity to use them as a food source before. But at the end of the day, there isn’t a logical reason to kill them. The benefits greatly outweigh the negatives. Plus, they’re beautiful.

Thankful for a Patient Approach to Peppers

Last week, I wrote a post that posed the question, “When is it time to restart seeds?” The reason for that question was that our pepper seeds were taking forever to germinate and were already past their expected range. In the end, I argued for a patient approach to seed starting and not being too quick to pull the plug before restarting them. But I did write that if our Takii’s New Ace sweet peppers didn’t germinate by this past Sunday, (April 12) I was going to restart them. Thankfully, I was rewarded for this decision, and we saw our first seeds sprout late last week. Additionally, we saw more of our jalapeno, habanero, and Gochugarju peppers sprout. I don’t want to exaggerate the success, though.

Pepper Seeds, Seed Starting Trays
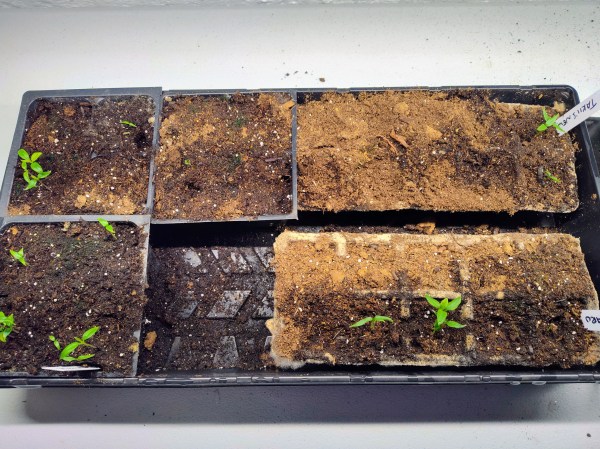
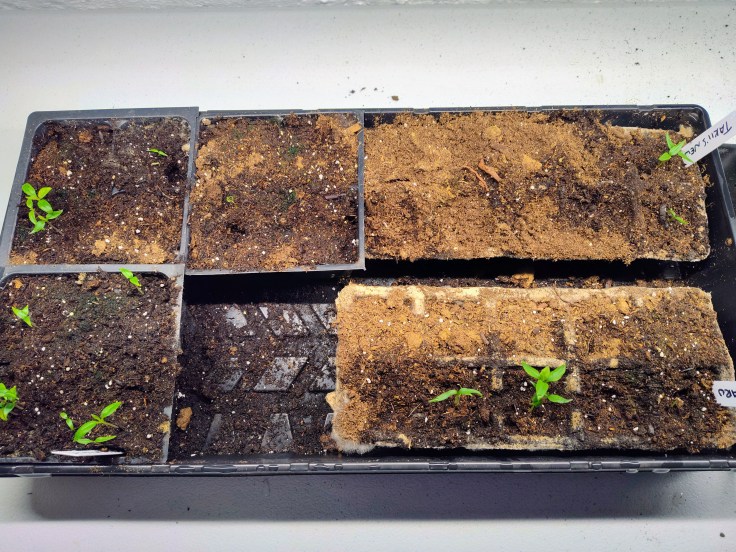
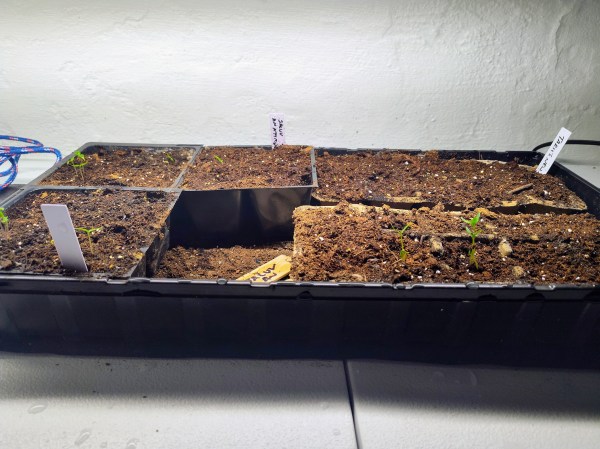
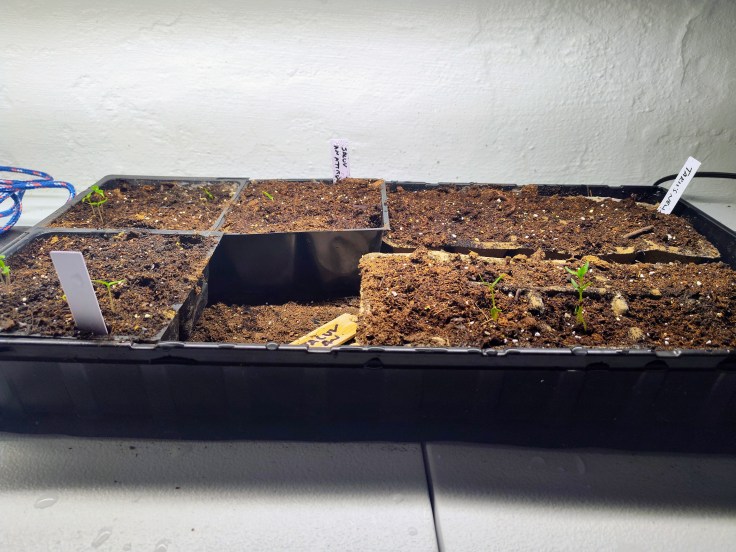
Our pepper seed tray. The left two trays are habaneros, the middle one is jalapenos, the top right is Takii’s New Ace, and the bottom right is Gochugarju.

We are far from a 100 percent germination rate, as only 2 of the 10 Takii’s New Ace, 3 of the 10 Gochugarju, and 8 of the 10 habanero cells succeeded. We did have one jalapeno cell germinate, but it died off pretty quickly. I’m unsure what caused the seeds to fail, but a couple of factors I’ve considered are the use of an old seed-starting mix and inadequate moisture levels. Either way, I addressed both of them with the second batch of seeds I started.

Speaking of starting more seeds, on Monday evening, I started a second batch of pepper seeds, using the rest of the Takii’s New Ace seeds and the majority of the remaining pepper seeds. I believe I started 6 Takii’s New Ace, 8 Gochugarju, and 8 jalapeno cells. I switched to a new bag of seed-starting mix, which I think will yield better results. It’s lighter with more drainage amendments and less debris (twigs, clumped soil, etc.). I also ensured that the seeds and soil were thoroughly moistened and have been keeping the soil damp until the seeds germinate. Finally, I moved the seeds that did succeed off the heat mat to keep the roots from getting too warm.

Lessons Learned

An attitude I want to have with everything I do, gardening included, is learning something and having takeaways. I think it’s an important mindset to have to feel like you haven’t wasted time, which can lead to disappointment. In this case, I learned that having patience with your seeds is the right call. If you have the time, there’s virtually no harm in giving your seeds an extra day or two to germinate before starting over. Giving yourself and your seeds extra time to succeed can have a big payoff down the road. I also learned that it may be best to start with new seed-starting mix each spring. I wanted to use some leftover mix from last year to not be wasteful, but I think it’s best to use new, unopened mix. The old mix can be composted, so it still won’t be wasted.

Finally, I learned that I’m never going to start more than 2 seeds per cell moving forward. I’ve always been a gardener who puts 3 or 4 seeds in each cell to maximize the likelihood that each cell produces a start. However, after having a lot of our pepper seeds fail to germinate this spring, I feel like I wasted a lot of seeds that could have been spread out among more cells. My new approach is going to be using as many cells as I need but using the seeds more efficiently. Please note that this approach will only apply to starting seeds indoors. When direct sowing, I’ll still use 3 or 4 seeds per hole to not waste space in the bed.

When you start seeds, how many seeds do you use per cell? Also, are there any vegetables that you struggle to get started? For me, it’s always peppers.

When Is It Time to Restart Seeds?

I recently wrote that we began starting pepper seeds for our garden. We’re growing four types of peppers this year: Takii’s New Ace bell peppers, Gochugarju hot peppers, Jaluv an Attitude jalapenos, and West Indies habaneros. We started them on Sunday, March 22, and all varieties take 10-14 days to germinate. The jalapeno seeds were the first to germinate, doing so in nine days (March 31), while the habaneros and Gochugarju did so a few days later (April 3). All three were in the germination window. We’re now more than two weeks out since we started the seeds, and the bell peppers have yet to germinate. Additionally, not all of the cells for the other varieties have sprouted. So, that leads me to the question: When do you admit defeat and restart the seeds that haven’t germinated? I don’t have an answer to this question, but I do have some thoughts that I hope will lead me to a reasonable answer. Hopefully, it can give you some pointers too if you’re unsure of when to restart your seeds.

Seed Starting, Pepper Seeds
Our seed-starting trays, with some pepper seeds that have possibly failed to germinate.

I never admit defeat or restart a seed that hasn’t germinated until at least a few days past the days-to-germination range. That range of days is a rough estimation for when you can expect the seeds to sprout. Even in the past few days, some of the cells have sprouted even though we’re beyond the range. Because of that, I try to be careful to never quit on the seeds too fast. At the same time, you want to be careful not to wait too long. The seeds and their subsequent starts need enough time to grow so that they can be transplanted into the garden with enough time to mature and produce fruit. And with a slow-growing vegetable like peppers, it’s a delicate balance.

Another aspect that needs to be considered is how many seeds you have left. In our case, we have leftovers for all of our seeds, but unfortunately, we have the fewest Takii’s New Ace seeds of the four varieties. So, I’ll need to be extra careful with restarting seeds so that we don’t run out with no starts to show for it. Of course, we can always order more seeds, either of the same variety or something different, but I’d prefer not to. It’s another reason I want to give the Takii’s New Ace as much time as possible to germinate.

Finally, the last consideration when deciding if it’s time to restart seeds is space. Do you have enough seed cells and room in your seed-starting trays to restart seeds? This may seem like a small aspect to consider, but restarting seeds does mean using additional seed cells, moving cells around within the trays, and making sure that the newly sown seeds can be on a heat mat while the germinated starts can also be under the grow light. Thankfully, we have plenty of space if we have to restart some seeds; however, that’s not the case for everyone and is something that should be taken into account.

So, what are we going to do? I think I’ve decided to wait it out with the Takii’s New Ace until this weekend. It’s currently a Wednesday, so that’ll give the seeds almost three weeks from the date of sowing to germinate. At that point, I think we can assume that the seeds have failed to germinate. If I do have to restart some seeds, I’m only going to use one seed per cell to not waste any more of them. And of course, I’ll keep you updated on how everything goes.

Seeds of Resistance

In part one of this two-part series, I looked at the history of food and food systems becoming a weapon and tactic in war. This idea of writing this series came to me after I listened to a podcast episode that discussed the horrible circumstances that Palestinian olive growers found themselves in last fall and winter. That, combined with the sad news events coming out of Gaza, led me to explore the conditions people are living in. If you haven’t read part one, I encourage you to do so before moving forward.

In part two, I’m going to go over some examples I’ve found where people display incredible resilience during times of hardship and aggression. I’m also going to look at some vegetables and seeds we can easily obtain and grow in the United States that are the result of people protecting and transporting them.

Resilience in the Face of Hardship

Something that always stands out to me is human resilience in the midst of darkness and hardship. In the wake of natural disasters, people come together to meet needs and rebuild. In situations of persecution, people are able to endure so much more than we think is possible. We’re seeing that in areas where global conflict is taking place.

Refugees & Immigrants Carrying Seeds & Keeping Food Culture Alive

Circling back to seeds and the preservation of food culture, there are many examples of people going to great lengths to keep their culture alive. Sometimes, this happens when immigrants leave their homes to travel for new opportunities. This has always been the case when immigrants arrive in the United States. They bring their recipes, flavors, ingredients, and seeds to have something familiar around them in a new place. Often, people of the same ethnic backgrounds have settled in the same location, which has further helped them preserve their culture. This has resulted in amazing restaurants becoming engrained in communities as well as festivals that celebrate their culture. An example of this is Erie, PA, which is a city of fewer than 100,000 people. Annually, it hosts festivals that celebrate Greek, Italian, Polish, German, Russian, and Irish heritage. Additionally, there is a sizable Nepalese and Indian community, which is reflected in restaurants that serve their cuisine. None of these would be possible if people hadn’t kept their culture alive when moving to a small city in Northwest Pennsylvania.

Other times, groups are forced to leave their homeland with very few possessions in hand. They grab their most important things, which sometimes includes seeds, and hold non-tangible items close to their heart. Many native African vegetables came to the United States this way via the slave trade. Other situations saw Native Americans transport seeds as they were removed from their homeland, and refugees from Asia and North Africa have brought seeds common in their cuisine. As a result, it’s easy to purchase seeds native to other parts of the world, and they’re being selected to grow in a new climate. The ability for immigrants and refugees to grow familiar vegetables in order to cook their culture’s food is vitally important. And we all benefit from a culture that is being strengthened and refined through new additions. After all, the majority of Americans are immigrants in some manner. This also illustrates the importance of seeds and food to a person’s culture.

Palestine Heirloom Seed Library

One way we’re seeing seeds be saved and preserved for the future is through the Palestine Heirloom Seed Library. Earlier, I mentioned that the Palestinian Seed Bank in Hebrom had been attacked and destroyed by Israel. Thankfully, that library wasn’t the only location where Palestinian seeds were being saved. In 2014, the Palestine Heirloom Seed Library was started by a Palestinian woman named Vivien Sansour. The organization’s goal is multifaceted, but the primary work consists of collecting and conserving Palestinian seeds. The seeds are often grown, with the plant producing the next generation of seeds, further ensuring their survival. While some of the work still takes place in Palestine, the library works with partners around the world, including the Experimental Farm Network in Philadelphia to grow seeds and store them in U.S. seed banks. Seed companies within this network, including Philadelphia’s Truelove Seeds, make these seeds available for purchase, allowing refugees around the world to grow seeds they’re familiar with as well as introducing these vegetables to a new generation of people. It was from Truelove Seeds that Magz bought the Molokhia seeds for our garden this year.

An extension of the library is a project called The Traveling Kitchen. As its name suggests, it’s a traveling educational and art experience that creates engaging conversation on the topics of bio-cultural heritage and agrobiodiversity. Part of that consists of educating audience members on the realities of global conflict and its impact on food culture.

Learning About Seeds & Their Growers

I think a smart way to approach anything is to educate oneself on the subject. While it doesn’t seem like there is much an individual can do to make a huge difference when what’s occurring in Palestine is thousands of miles away. But learning about victims’ culture and finding ways to support the people is a step that can go a long way. Listening to podcasts, like Seeds & Their People and Gravy, is a really simple and helpful step.

Telling Their Stories – Seeds & Their People and Gravy

Another area of encouragement that I see is the ways people are exposing what’s going on. I listen to a number of podcasts. Some are faith-related, some cover sports, and others are more historical/social in nature. Two that fit into that last category are Seeds & Their People and Gravy. Seeds & Their People is published by Truelove Seeds and tells the stories of unique seeds and the people who have preserved them to allow them to be grown in the United States. It’s through this podcast that I first learned about Palestinian Molokhia. Magz later came across Truelove and Molokhia when she was searching for flax seeds. She didn’t know that I listened to Truelove’s podcast or that I had listened to an episode dedicated to Molokhia and its path to arriving in the U.S. Other people groups that have had their stories told on the podcast are the Karen from Burma, Iranians, Mexicans, and even people from the Deep South. It’s a fascinating podcast, and I’ve learned so much.

Gravy is a podcast published by the Southern Foodways Alliance and tells the story of the food and people living in the ever-changing South. Some episodes that stand out are the thriving Asian community in Northwest Arkansas and a series dedicated to telling the stories of black farmers who were affected by the Pigford vs. Glickman case. I can’t recommend the episodes enough. Just today, I listened to Gravy’s newest episode about a Georgian restaurant in Pensacola, Florida. The owner and head chef emigrated to the U.S. after the fall of the Soviet Union and has successfully blended Southern cuisine with elements of Georgia. Gravy isn’t solely dedicated to gardening and seeds, but the theme of preserving food culture persists.

Buying Seeds

I think that one way we can make a difference and support people groups being targeted is to learn about their food systems and grow their vegetables if they can be grown in your location. In the United States, many of the vegetables we eat on a regular basis are the result of forced relocation. From Africa, we have yams, okra, rice, peanuts, black-eyed peas, and watermelon that were transported during the African slave trade. From West Asia and the Levant, we have molokhia and many varieties of peppers, cucumbers, eggplants, and tomatoes. From East Asia, we have perilla, radishes, mustards, kabocha, and pepper varieties. We eat many of these in our daily life.

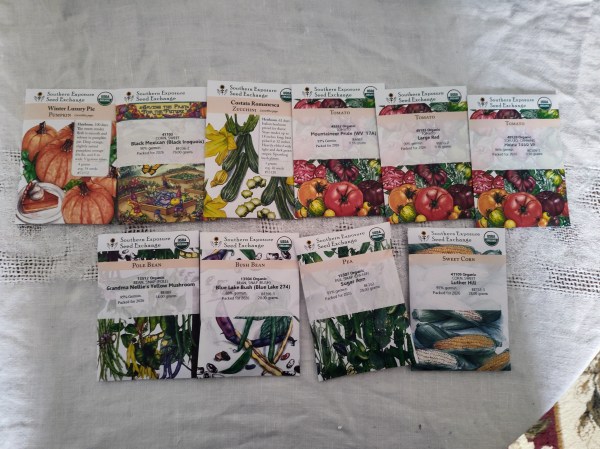
On many seed companies’ websites, there are categories for seeds that are native to different parts of the world. True Love Seeds, for example, has collections for the African Diaspora, East Asia, Seeds of the Levant, South Asia, and Southeast Asia. Buying those seeds helps us to learn about the culture and food systems as well as to support the farmers who keep these seeds alive. In my opinion, any seed company worth its weight will give a percentage or set amount back to these farmers to help them grow or simply maintain their farm. For example, True Love Seeds gives 30 percent of its annual sales back to their growers. That’s important. Other companies that clearly communicate how they support growers are Fedco, Sow True Seeds, Southern Exposure, and High Mowing. That’s not to say that other companies don’t do this, but that these four are transparent.

You can also look for heirloom seeds and seeds that are part of Slow Food’s Ark of Taste. Ark of Taste seeds are ones considered at-risk and must be protected at all costs. Purchasing and growing these seeds helps promote biodiversity and sustainable growing practices. Although there are different definitions, heirloom seeds are ones with an origin that dates back to before hybridization took off. For some, this is at least 50 or 100 years old, and for others, the seeds must have originated before the conclusion of World War II or 1951. The majority of the seeds that we know Native Americans or African slaves transported are heirlooms. Others are the result of immigrants transporting them to the U.S. during the 19th century. Purchasing heirloom seeds as much as you can is never a bad idea.

In the past, Magz and I have bought what I call seeds of resistance because we were intrigued by the vegetable’s characteristics – taste, color, growing habit. As history majors, we’re also motivated to keep history alive, and by buying heirloom seeds with an interesting story, we were doing that. Now, we’re committed to growing these at-risk vegetables. A few seeds that we have bought for past gardens or bought for this year’s garden include the Cherokee Trail of Tears and Iroquois Skunk beans, Hopi Blue corn, Ali Baba watermelon, and Candy Roaster, Yellow Crookneck, and White Scallop squash. All of these varieties have unique histories and stories. It’s pretty fun to participate in that story by growing them.

Where Do We Go From Here?

I set out writing this post wanting to explore the tragic acts taking place in Palestine at the hands of Israel that I label genocide and ethnic cleansing. I achieved that and much more. Through history classes, including one dedicated to genocide, I was aware of the acts that add up to genocide as well as previous instances where genocide occurred, so I was confident that my research would support my take on what’s happening to the Palestinians. I didn’t expect my research to necessarily take me throughout the history of criminalizing starvation and how recently it happened. I was left with a deep sadness at how humans treat each other. When differences are realized, the first instinct is often fighting and conflict. And if that conflict isn’t resolved soon enough, or if the aggressor doesn’t feel like they’re achieving their goal efficiently, they’ll use deplorable acts to find victory. They have no problem dehumanizing other people, and oftentimes, it’s even their goal.

In the United States, we’ve been taught to support Israel no matter what. Even as a Christian raised in the U.S., Israel and the Jewish people are considered sacred. That they’re the ones being attacked and not the aggressors. Yet their acts over the past two years have changed that narrative. By committing acts of genocide against the Palestinians, they’re doing the very same thing that that happened to them in the past and led to the diaspora. And I can’t help but be sad. Warfare is a vicious act, but destroying another culture is deplorable. Targeting food systems is part of the cultural destruction. Food plays a key role in day-to-day life, both because it’s sustenance and nourishment for life and because it connects us to our past and others who share the same background.

So, where do we go from here? I’m not entirely sure. Ideally, we stop treating each other with such disrespect and hatred. Even when we disagree with others, we see them as humans worthy of respect and compassion. We don’t attempt to cleanse their culture from society. Unfortunately, humans are evil and act sinful, so it’s unlikely that we stop treating each other so poorly short of an act of God. In the meantime, I think we continue to share information when we learn it, we reach out and help people as we can, we educate ourselves, we act out of compassion instead of hatred, and we refuse to accept the status quo.

I know that this post was way out of the norm for me, and it wasn’t overly related to gardening, but I felt that it was important to discuss. Silence only continues the evil. If you were unaware or unfamiliar with the situation, I hope this was enlightening and eye-opening. In the meantime, I encourage you to check out the links in this post and listen to some of the podcasts I mentioned.
Changing Our Seed-Starting Setup & Getting Started

I’ve been working on being more chill and relaxed with the garden this year, which is good. However, I became so relaxed that seed starting snuck up on me. I was casually looking at seeds last week and realized that our pepper seeds should have been started a couple of weeks ago. Oops… Part of it was intentional, though, because we were unable to get our starts in the ground on time last year due to weather, so many of them got leggy and died. As a result, we pushed back starting seeds by a couple of weeks to prevent that from happening.

I was also quite chill with our supplies. I had assumed that we had plenty of seed-starting cells and starting mix but learned on Saturday that we had 14 cells/pods and a partial bag of starting mix. Over the weekend, I worked on getting our new seed-starting setup organized, which consisted of using one of the collapsible waterproof plastic tables we have and installing the new grow light we bought. Previously, we had used a wooden door/table that was in our basement when we bought our house. It worked well for the first year of seed starting, but upgrading it was a priority. The plastic table is nice because it’s waterproof and easy to clean.

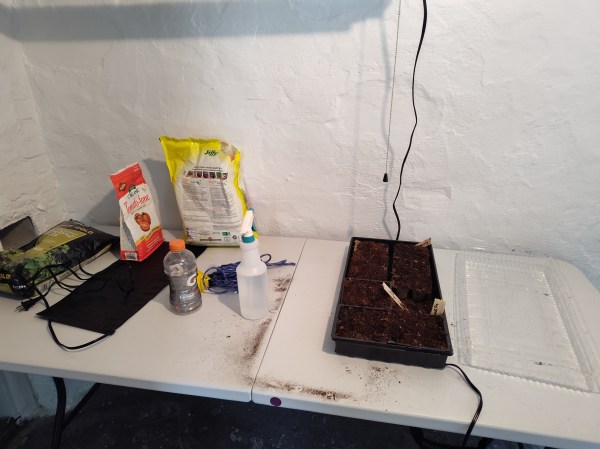
For a grow light, we had previously used the style of light that clamps on the side of a table and has three “necks” that can be moved and angled to cover the starts as needed. This year, I bought a four-foot shop light from Harbor Freight for less than $20. It’s 5500 lumens, can be linked to identical lights, and uses very little electricity. It can also be raised and lowered to match the height of your starts. It’s a much more economical way to get UVs onto your plants than buying a dedicated grow light. Here’s a picture of our setup:

Seed starting, gardening
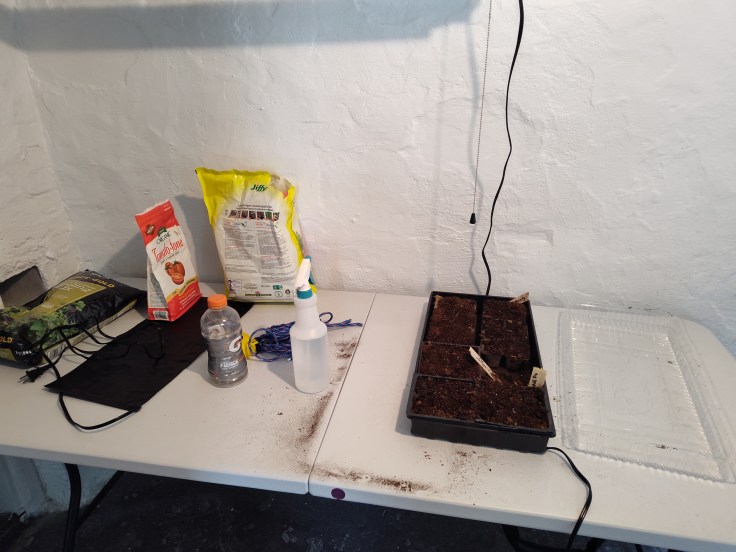
Our 2026 seed-starting setup

You can’t really see the light in this image, but it’s just out of frame. I currently have one heat mat plugged in, since there’s only one tray being used at this time. I need to grab an adapter so that I can plug in the second mat and the grow light. I think this setup will be more successful than last year’s. I like that there’s a dedicated table and that the setup is in its own room rather than under the stairs.

What Seeds Did We Start?

I mentioned it above, but we got our pepper seeds going. We have four varieties: Takii’s New Ace bell peppers, Gochugarju hot peppers, West Indies Habaneros, and Jaluv an Attitude jalapenos. They’re supposed to take 10-14 days to germinate, so we’ve got a lot of waiting. Next up will be our tomatoes and possibly some melons and cucumbers in the coming weeks. But before then, we need to grab more seeding-starting cells. Have you started any of your seeds yet?

Create a website or blog at WordPress.com

Up ↑