

Did you know, that through simple measurements, reference photos, and a few tools, you can draft your own clothes? Not just a t-shirt or a circle skirt, but big projects!
That’s how I have made some of my most ambitious projects, no patterns required!
What is Pattern Drafting?
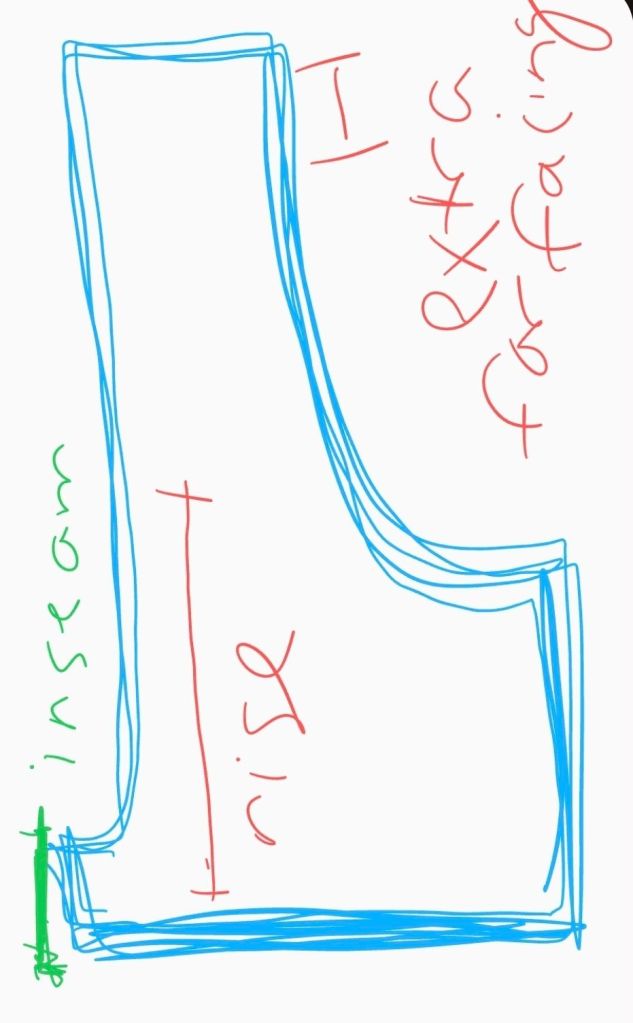
A pattern can be easily made with a tape measure, pencil, and the key places to measure. For my overalls, I was most concerned with the width of the bib, the length of the rise from the top of the bib to the crotch curve, the width of the hip from the center of your body to the end of your hip. You can also measure the circumference of your hips but I think having separate measurments for the front of the pants compared to the back of the pants. The back is usually wider.

For the overalls, I worked in four pieces. Front left, front right, back right, and back left. To do this I marked out the front left and front right on the fabric, accounting for the crotch seam which is part of the leg. I added a 2-3 inches to the width of the hip measurement of each of the four pieces to make the curve with my french curve.
When planning pants, keep in mind that you don’t need as much inseam as you think to make shorts. What you will need is a long rise because you can always cut more, so be cautious and double check the measurments of your rise.
Now for the bib, the top portion of the overalls, I plotted the width of the bib above the pants portion and with pencil I carefully drew a tapered curve upward. I cut this extra long to have excess fabric to fold over to make the facing. This fabric is like a lining for the top of the bib, the part you are most likely to see.
Always use pencil or a tailors chalk and take your time. Using a mock up fabric is a great idea to get the cut right. After repeating this for both front pieces, remember to adjust the width of the hip for the seat of your pants, all while remembering to account for the french curve line of the inseam.
After cutting all for pieces you will need to set aside fabric for pockets, I added 5 to mine. A bib pocket, two side-front pockets, and two back pockets. You will need fabric for the straps, measure accordingly based on the height of the bib, over your shoulder and to the back bib, remembering to add more length to tie.

Next is scrap scavenging! You will need small pieces for the loops to tie the straps around on the front bib. This will call for two loops. You will also need bias tape sized pieces to finish the edges of the overalls on the bib. Finally, save some fabric for the button flies on either side of the overall legs to help you get in and out of the garment.
It’s a lot of information to sift through but I hope this small tutorial will help you sew overalls if you wish with free instructions. I will be following up with a second post that explains the order of operation, to make sense of all these pieces, to help these fabric pieces transform into a wearable garment you can enjoy!
