#75 – Caron Blossom Cake Blunder

A very silly but confounding thing happened yesterday as I was in the homestretch of my current crochet project. It is something that has never happened to me before. I was stumped. What happened you ask?

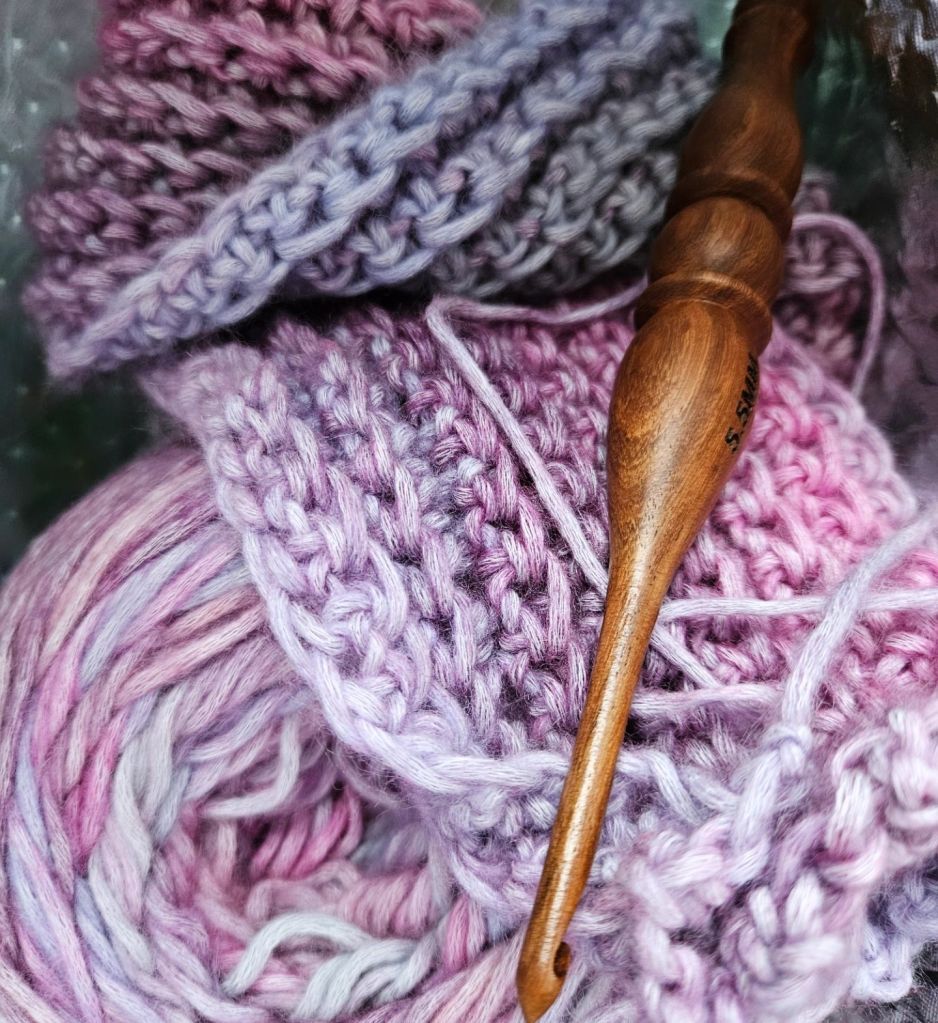
Well, I’m crocheting my first cardigan and to do this I decided to use Caron Blossom Cakes, specifically three cakes in the colorway Blossom. It’s a lovely tonal yarn with hints of sakura, periwinkle, and hydrangea blooms. 

This fiber is one of the first affordable yarns to bring me joy in this confusing time of losing Joann. (Thankfully, Big Twist has been saved!) The Caron Cakes were the the buzz of Michael’s, drawing me in for a hope that I’d find a new favorite, and truly I have. This yarn is stunning. Soft to the touch, a half and half blend of cotton and acrylic. It never splits due to its structure which has made my first big project with a crochet hook a delightful experience.

When I first bought the yarn I was being cautious, purchasing the yarn on a bogo sale. I bought 3 cakes containing 481 yards of worsted weight yarn – enough for a sweater. Honestly this was far too scant of a amount, as time will prove. My intial plan was to make a skirt, but as it usually goes will my projects, I call an audible and make something new.

This should have been enough yarn, but I made the decision to oversize this cardigan and pick up more yarn if neccessary – and it was! Yesterday, I finished the body of the cardigan and began my final steps – the sleeves. To my shock I realized, the body panels had consumed 1 2/3 of the cakes. Leaving 1 1/3 cakes left for the sleeves, and these sleeves were going to be long. Much longer than I planned!

I usually knit my sweaters with a drop shoulder to shorten the sleeve length I have to knit because sleeves are so boring to knit! And they eat up yarn beyond my expectation everytime. To my horror, the sleeves were inset, not off the shoulder!

Not only would I have to knit the whole length, oversized, but I would need to using my new crochet skills to employ shoulder shaping – something I still get stuck on knitting. I quickly pulled up the yarn on my phone and was hit with a one-two-three punch – Blossom was out of stock, it was a Michael’s exclusive, and it is discontinued!

I was stunned! Like how do all those things happen right as I ran put of yarn?! 😲

I’ve been knitting since 2013, consistently since 2020 and I have never had a yarn disappear like this. On top of losing Sully last week, I was spiraling. I always have a plan for my knits, a yarn back up plan to piece in yarn if needed, but this project I wanted to be special. All in one color, like a “real” fiber artist. I was putting far too much pressure on this garment.

I’ve seen so many small businesses and artists this week, speak out about how the tariffs are effecting their businesses. Some are seeing 50% of their income being held hostage as the new rules are unclear. It’s left this dark, frustrating haze in my mind, like we’re in the final act of a Totally Spies episode and the evil genius might win.

I went to my stash and found that it was not what I thought it was either. I had a stash of final Joann yarn that I bought almost a year ago, left in my closet after the news with colors I didn’t remember and with less skeins than I recalled. Yeah it was, another pothole in the road. But dang, what is the point of creativity if you give up?

Some of the most beautiful garments were made with limitations. Why can’t I am for such success? I create on a budget, and I enjoy being a scrappy fiber artist – why change my approach now just because August has been heavy? Never give up!

I Learned How to Crochet

The 2020s have brought many trends and crafts to my attention, but the one craft that has caught my attention, and kept me craving the ability to do it, has been crochet. I love the loops, the lace holes/open weave of its stitching structure, the texture, the projects’ talented crocheters’ design, and most importantly, the granny square projects! I am a colorful knitter, and the granny square scratches that artistic place in my brain. It brings me instant happiness.

In Spring 2024, I made my first attempt to crochet, and it was doomed from the start. I bought a cheap hook, neither ergonomic nor very hooked. The hook failed over and over again to grab the loops. The yarn over motion became yarn slip away, which made the process of learning how to execute crochet stitches dang near impossible! I was busy, not in the headspace to learn a new skill. My frazzled mind became evident in my tight, tortured stitches so snug the hook would not easily pull up a loop. So I set aside my desire for crochet for over a year.

During that time, I recentered my mind and learned new skills that I can see now, in hindsight, that made learning crochet in July 2025 so much easier! I slowed down my sewing and focused on fiber arts, mainly knitting, in the year that followed. During this year of reset, I tried new things that prepared me to be a better student of crochet. I knit socks, I learned colorwork, circular knitting, and explored new fibers and stitches. I learned how to work with my tension, and adapt to a looser weave for colorwork and circular knitting. I learned how to pick up stitches and new ways to construct knit garments. I suspended what I thought yarn crafting was, opening my mind to new techniques, which I believe prepared me to learn a completely different approach – crochet.

Why is crochet such a big jump from knitting? Well, I think for me, because I learned knitting first, my muscle memory was guiding my approach. My brain was shifting into its comfort zone when I would pick up that first crochet hook and reject the notion of using one tool, instead of two needles. My thinking was rigid, just as it was when I first began my language learning journey into the world of Japanese. When learning, we have to hold what we know and what we have done loosely, all while inviting a new guest to the party. A teachable spirit is really a mind of hospitality for the new skill.

I think a good teacher and good exposure also help. When I first tried to learn in 2024, I went to a former neighbor who crocheted and asked her for advice. She let me borrow a book, but didn’t offer much more than that. Although we were in the same town, on the same street, we never crafted together, and when I asked for advice when I got stuck, but she didn’t respond. It sucked. This time around, I went to a tried and true source – TLYarnCrafts, the wonderful Toni Lipsey. Her tutorials saved me when I got overwhelmed by the instructions in my library book. My library was a great source of inspiration, though – I borrowed ‘A Modern Guide to Granny Squares’ by Celine Semaan and Leonie Morgan. This book helped me understand the magic loop and had lovely diagrams to get me started.

Three other crafters who helped me get excited to crochet are YouTube creators – Lizfoolery, Blondie Knots, and Mark Vogel. Mark’s recent granny square vest project was so lovely, I was determined to learn crochet just to make that piece. But it’s not just wearables that have motivated me. I want to make a seashell basket, a flower bookmark, a fish potholder, a pie purse, and blankets! The classic Chevron to replace the one that my great-grandma made, which was lost in 2021, and the star blanket by Betty McKnit. I have also downloaded the hexi-granny cardigan pattern from TLYarnCrafts for a fun, cool weather wearable.

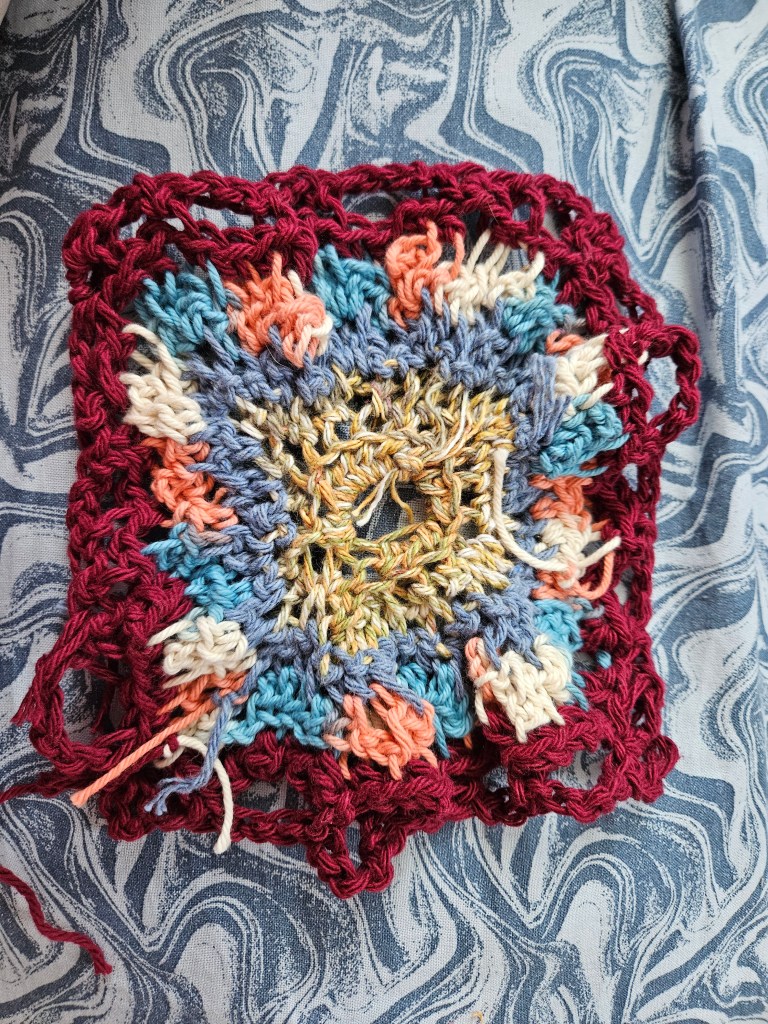
To wrap up, I’ve been crocheting for two weeks now and have made two wonky granny squares, a pair of crochet stays/vest that is 90% done, and a sweater that is cast on with a few inches complete. It feels surreal and also so natural. I love crocheting! Maybe because it is new to me, but I look forward to getting a few rows done each day. It’s become my fun crafting, where I can relax and get lost in the rhythm of loops and yarning over.

Have you ever crocheted? What helped you get through the process of beginning to do the thing? I hope you have a lovely day, dear reader. Thanks for spending a little time here with me in this [I hope] cozy corner of the internet. You make these little moments of reflection an exciting part of my making process. ❤

Can I Make Mid-Size Overalls from 1 Yard of Fabric?

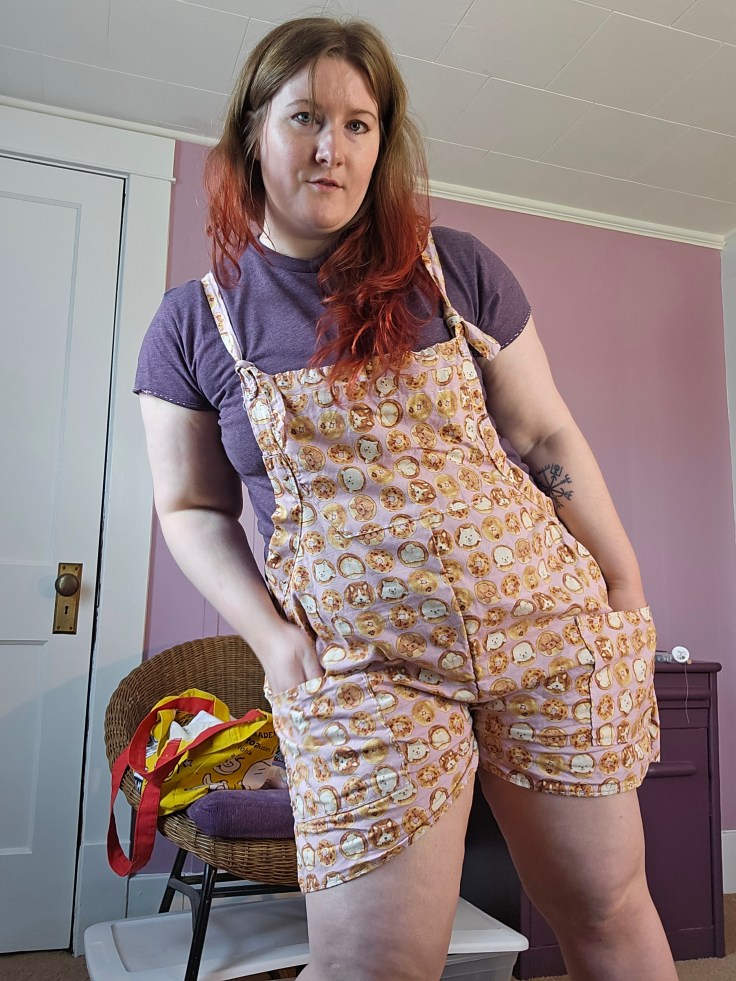
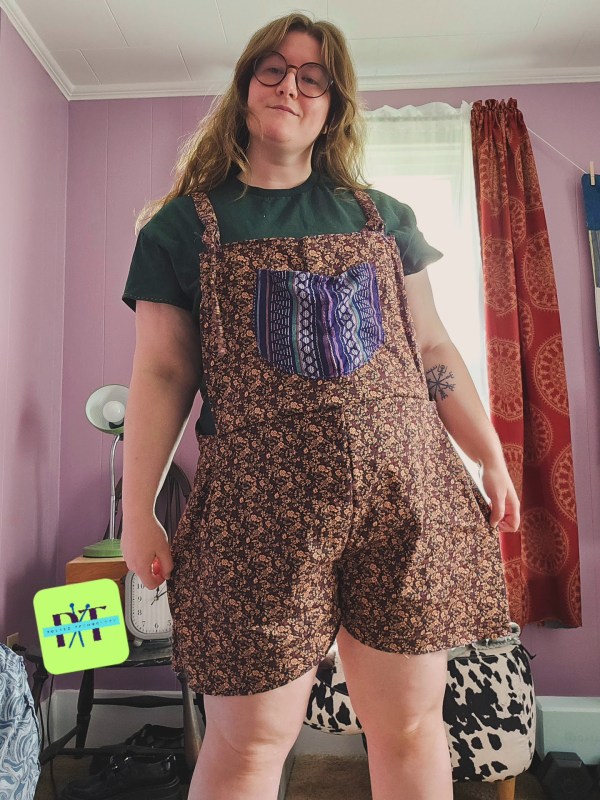
Do you ever think of something you’ve accomplished and wonder if you could do it even smaller? Well, I set a challenge for myself. A year ago, I wrote about creating a summer dress with a button-front from less than 1.5 yards of fabric. That post inspired this one, as this summer I was able to squeak out a pair of shortalls (overall shorts) from a yard of 59″ stretch twill from Mood Fabrics. This was not my first overall attempt, but I think my most ambitious because this yardage was for a pair of shorts with some abundant pockets, but I changed my mind after seeing a variety of overalls styled for spring and summer. I’ve owned this style before in denim. My favorite version I’ve purchased was a pair of vintage ’90s denim shortalls that were baggy and breathable for those swampy summer days. The more fitted versions I’ve found in stores in recent years are not my cup of tea, because for me, overalls are best when they are oversized.

When I cut these overalls out, I had just completed my draft of an overalls pattern from 2 yards of 44″ cotton twill from Kokka Fabrics, and I was itching to make more without fabric shopping, so I went for a dig in my fabric/yarn closet. It’s more of an antique clothing press, to be fair. This is where I found my gold – 1 yard of 59″ across cotton twill in a fun pattern, sturdy enough for a bottom weight garment with just enough fabric to cut the shorts, the bib, the straps. That was all I could muster for sure. I set aside the project and got to work on my Kokka Fabric project, which taught me so many things about sewing overalls that I had overlooked in past attempts.

Firstly, the back bib is not a rectangle. Secondly, a facing for the bib makes the project feel more professional. Thirdly, the buttons on the side need to be properly assembled with the fly for the right stability. Finishing the edges with twill tape made from the project’s fabric helped create a crisp look. Fourth, the overalls need pockets in order for the garment to sit well on the body. Lastly, I did not accomplish these with my 1-yard of fabric overalls. I took some shortcuts.

I ran out of fabric for the pockets, the fly, and the twill tape. To remedy this, I kept the shape to a romper style and less of a traditional overall. The bib is rectangular on both the front and back. The pockets were added from a previous project; I upcycled shorts into pockets. The side does not have any fastening, instead I sewed up the seam and let the boxy cut of the shorts and stretch of the fabric help me compensate for my lack of fabric.

So if this project is a pair of overalls that is not a traditional overall, but more of a romper, why am I writing about this?

Well, because the finished product is a wonderfully comfortable garment, practical for many things – gardening, sewing, cooking, knitting, farmers market, apple picking, cleaning, walking in the woods, going to the beach, etc – and I made it without being an expert. I made this garment through hand sewing, so you don’t even need a sewing machine if it’s out of your current budget. I purchased this fabric on sale for 10 USD/yard. I used less than a spool of thread, and repurposed the pockets from an item in my closet that I didn’t want to wear anymore. Have you seen the price of overalls? They are expensive, even the short version. A low-quality version will still set you back 30 USD.

I made these with 10 USD of fabric for a midsize frame, so this is accessible to all of us, not just the slim people. A lot of popular and cheap DIYs on the internet are made for very small bodies, which makes me nervous that if I try it, it will be expensive, but this wasn’t. Making these overalls was incredibly rewarding, too. These aren’t even the best pair I’ve made this summer, I’ll share the other ones soon! But these ones will have a special place in my heart because they are unique, comfortable, and made with my own hands. So if you have an idea of how you could make something by hand, make it happen! It’s a lot easier than you think, a great learning experience, and there are tons of resources here online to help you succeed!

Flannel Upcycling | Making A Vest

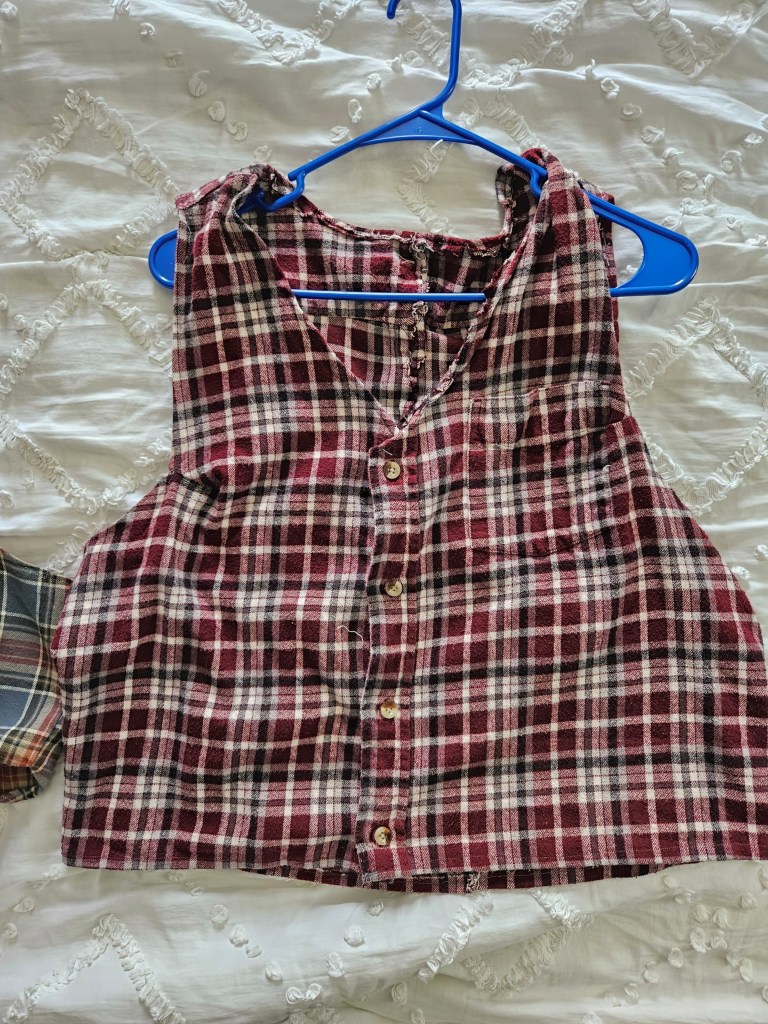
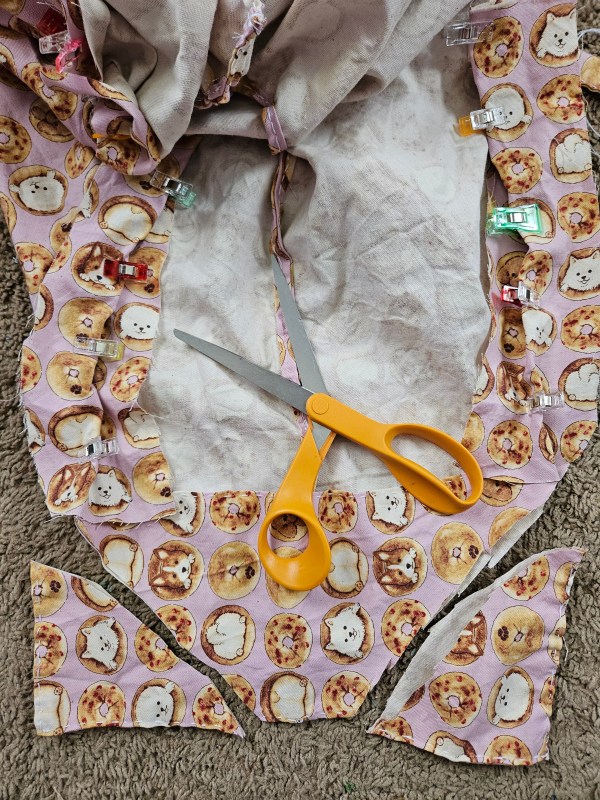
Last summer, I wanted to introduce vests into my wardrobe. I have made vests before for Kyle, but have not sewn a vest for myself before; I have knit them. Because this was a spontaneous idea, I needed to be budget-conscious and find a way to use what I had to make a vest. So I went to my closet and got creative! I had a few flannels in my closet that were hanging there, waiting for me to wear them, but I didn’t. That’s when I looked at the shirts closely – there was a button placket, shoulder yoke, and a sturdy fabric, with room to crop them. I saw the vest within the shirt, so I grabbed my scissors—and was a bit too zealous with the first one! Don’t be like me, have a plan. So how did I make this upcycle work? And what did I learn from my failed attempt?

Shoulder Seams, Yoke, and Waist Length

The crucial points of cutting, I would say, are being aware of the shoulder seams, accounting for the back yoke width, and properly measuring your waist length for a proper fit.

  • Shoulder seams on a flannel are boxy and loose. To achieve the set-in sleeve opening that accentuates and reveals the shirt underneath, you need to cut away the shoulder line – but not too much. Be mindful of how far into the shoulder you plan to cut, so that you are left with a proportional line.
  • The shoulder yoke is a technique used to tailor the shoulder line, while leaving the fabric below the shoulder loose. As a result, there will be more fabric on the back of the vest, which may affect the fit of the arm openings and possibly require a dart to remedy the loose fabric. If not, the back will gape open, looking awkward and like a mistake. A vest should hug the body, be tailored, or else the upcycle will look exactly like you cut up a flannel.
  • The length of the vest determines the style and balance of an outfit. One of my vests I cut too short, and this limits how I can wear it. I find it cuts me off in a regency high-waisted fashion that is fine when I wear it with a high-waisted skirt, but with pants or my linen Darcy shirt, it’s awkward. The other vest was cropped, in a careful fashion, ending at my hip and balancing my body line like a well-tailored garment. It’s far more versatile.
  • Cutting the neckline is crucial. For the front, a tapered cut to the button placket provides the classic look. Be careful not to cut too low for a historical silhouette. Also, remember not to cut the back the same as the front! I made this mistake and had to sew the cut portion back into my vest. This should be a crew neck line, straight across, with a slight dip in the middle for comfort.

Why a Flannel Shirt?

I chose flannel shirts as my medium to work with for three specific reasons. The first one I already mentioned – cost. We had just moved into our house and paid quarterly taxes. The vests were not a necessity, just a whim, so it made sense to me to take an existing item, I didn’t wear to create something I would wear. It’s funny how the sustainable option is sometimes the free option too. Secondly, flannel is a sturdy fabric, appropriate for the structure of the vest, that could be sewn without the addition of a lining, which I could add later if I wished, when I was more comfortable spending money on fabric. Thirdly, flannel is a classic pattern that reminded me of the woven woolen coating fabrics that vests have been sewn with for centuries, so it was a good match! I hope this inspires you to repurpose items you have to make something new! For the rest of the flannel, the pieces I cut away, like the sleeves, stay tuned to see what I did with those. It’s one of my favorite makes. 🙂

Designing Clothing That Fluctuates With You

This is inspired by a discussion from Maybe Bre, which made me reflect on something I hadn’t discussed before. As well as my own experience wearing clothing, as a garden-variety human who loves fashion but doesn’t always enjoy how our clothing is made.

By this, I mean the patterns and fastening of our modern times. The zipper is a wonderful thing, and so is the structured waistband. I love them in jeans because denim that isn’t compromised by stretch is a rugged and sturdy garment that isn’t a piece that conforms to you; your body is housed within the trousers. I feel the same way about a structured coat. In doing so, I buy these pieces oversized for comfort, which leaves me with a garment that most of the time doesn’t technically fit me. If I did buy it to fit me right now, there is no guarantee that over many decades it would continue to fit me – I’ve been burned before by this problem. Hence, all my “staple, investment pieces” from college no longer live in my closet because they are no longer my size. If I had planned ahead and bought them a bit oversized, they might still be with me, but they wouldn’t have “fit” me at the time.

My problem with clothing is becoming clear, isn’t it? I desire longevity and wearability from clothing, in a way that is not offered off the rack. I desire my clothes to grow and shrink with me, depending on how my body changes over time. This has been my design focus in the last few years as I have placed myself in the driver’s seat of my wardrobe through the process of sewing and knitting.

My idea is not innovative; it is historical. Clothing, because it was so expensive and hard to make, was more adaptable in the past. Fastenings such as tie waist, lacing, and buttons with multiple sizes of tightness were common because clothing was not as easy or cheap, and they were not seen as disposable or replaceable. Changing fashions came with garment reworks, ye olde upcycling as it were. This is what I desire: the ability to change the fit of my garment.

I recently figured out how to sew with elastic, which is a game-changer for shorts and gathered sleeve hems! Before this, though, I was making most of my bottomweight garments with tie waists or several options of buttons to let the garment adjust to the needs of the day, I’ve also sewed with intentional relaxed fit, initially due to a lack of tailoring skill but over time it has been to allow wiggle room in pieces I have spent days or weeks of my life crafting.

Being present in the making process has taught me to treat my clothing with more respect, even when it is time to discard the current version of it for something more useful. I’ve stopped donating as much, decluttering, and rebuying, to be honest, to be more intentional with the garment and its life cycle. I am the one who brought it to life, I can’t simply consume and discard it like it is nothing. I am deprogramming my brain from decades of fast fashion insanity.

I believe if clothing were made with this design philosophy, that clothing would fluctuate with you over time, I believe we would enjoy wearing our clothing more because instead of buying stretch fabric everything, we could still wear good natural fibers, maybe a bit bulkier than spandex and less figure hugging and lurex denim, but would be better for the humans and the planet. Style and substance, as they say on the Great British Baking Show!

Ideas for Summer Stashbusting Projects

As a yarn enthusiast, sometimes I have many skeins of different yarn that I don’t know what to do with. This happens when I buy sale yarn, find unexpected yarn secondhand, or buy too much of one color for a project. Purchasing the right yardage is definitely a learning process!

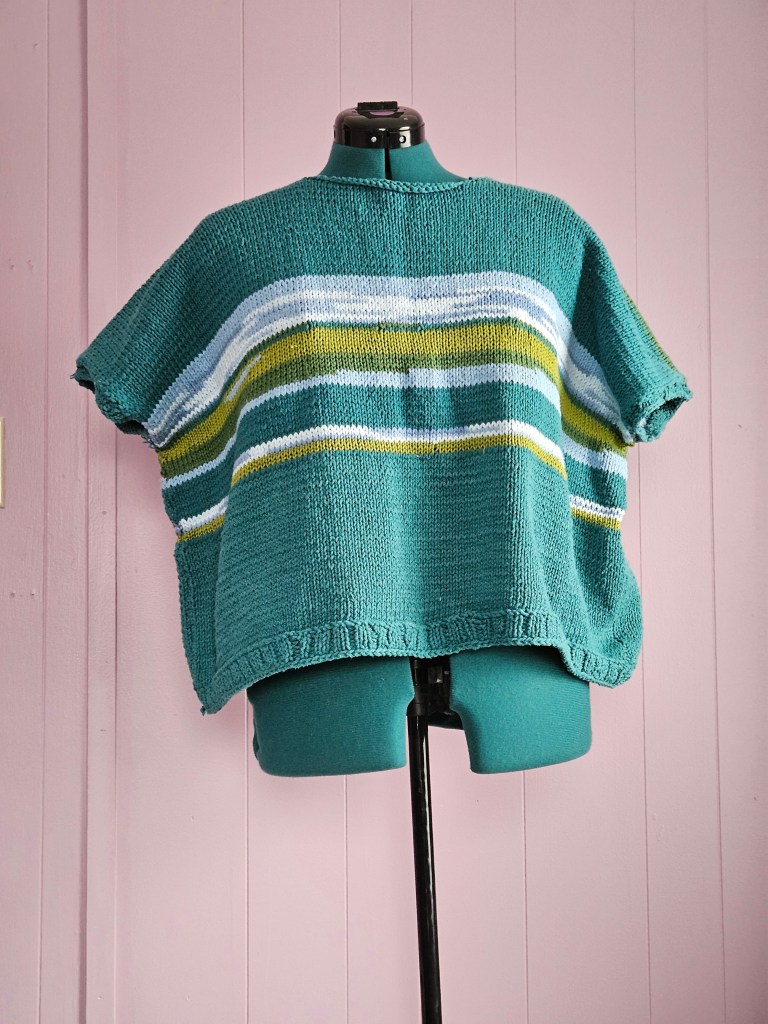
So, how can you make your yarn stash go further and use up those skeins you don’t know what to do with? An easy fix I’ve found is to get really scrappy, lean into stripes, experiment with colorwork, and my new favorite – blending yarn by holding two strands of different yarn, even variegated yarn, to make something fresh and inspiring! This has helped me need to destash, donate, or feel weighed down by my yarn inventory.

Once you have a color story, what do you stitch up? There are the tried and true tanks, tote bags, and scrappy cardigans, but what about something outside the box?

  • Baskets
  • Small Storage Bags with Zipper
  • Shorts
  • Sailor Collar
  • Overalls
  • Mini Skirts
  • Koozies
  • Tapestry

I get stuck in the idea of knitting as wearables, but it can be used to make so many things, and at the end of the project, you’ll have something truly unique from your own hands!

One of the most satisfying ways I have found to use up random yarn is colorwork. Hints of color with scrap that add a touch of whimsy? Sign me up!

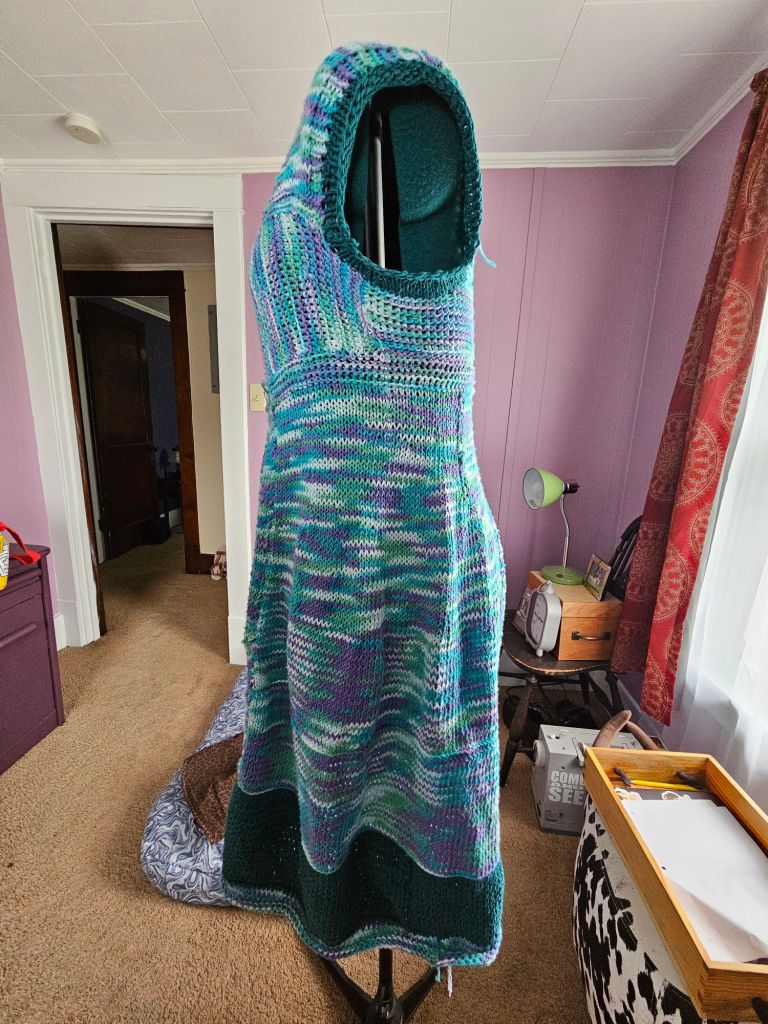
Knitting a Dress for the First Time

Knitting a dress, how hard can it be right? It was actually pretty managable garment as an intermediate knitter. I would not recommend unless you have made a sweater before but would definitely recommend knitting a dress if you want a soft and stretchy garment that hugs you!

Inspiration

I have made plenty of dresses over the past 5 years, but they have all been cut and sewn from fabric. Knitting kicks it up a notch, asking you to assemble the dress, but make the fabric to boot. I thought it would be silly to try until I discovered some lovely crochet designers on You Tube who make with imagination!

I was inspired by Mama Gwen of TL Yarn Crafts to give designing a knit dress a try. She makes such beautiful dresses all from self-drafted patterns in knit and crochet. Along with Dana from Blondie Knots. Her Coachella scrap two piece outfit helped me have the boost of confidence to try something new.

Materials

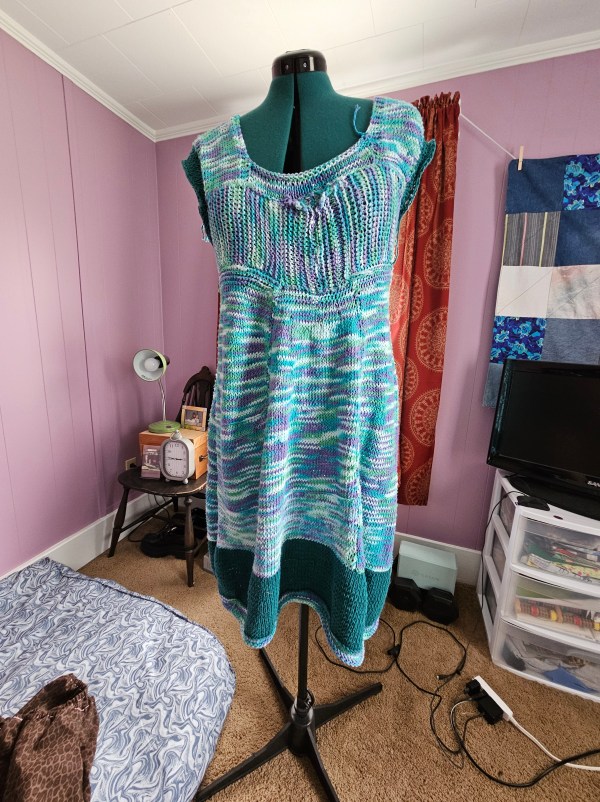
Last summer at Joann, before the shenanigans began, I purchased 14 Big Twist Cotton 50g skeins on a sale with the intention of knitting a top. Many months later, this yarn was sitting in my stash with my mind uncertain if the punchy color changing yarn was my cup of tea for a cotton knit top. But a dress? Yes, that could work. Did I have enough yarn though? I’d have to make it so because there was no more being sold.

Because of the circumstances, I decided this dress would be my goodbye to Big Twist.

Design

I knew from sewing, my design would need to be a dress that was either tubular or empire waist to suit my body shape. I decided to knit this on US 7 needles, straight needles. Sometimes I would shift to circular, but this was not knit in the round. With the combination of yarn minders, a measuring tape and patience this dress came together!

To start I knew I wanted the bodice to be the anchor I worked out from so I cast on stitches to work horizontally. From the bodice, I then added one strap to plan the width and placement of the top. I was uncertain how much yardage the skirt would consume, therefore I paused to determine sleeves later.

My plan for the skirt was to knit a section by casting on the bottom of the bodice, adding stitches to increase width until I finished a skein. Repeat and fill out the row by picking up stitches to join the sections vertically into a tube. I continued on, and on  until weeks later I had a skirt but panicked that I was not going to achieve my desired length and second sleeve!

I decided to pull a teal yarn from my Landscape Painting with Yarn project. This hue pulled the cool tones into harmony in a pleasing way. I used two skeins of this teal color and then finished with the original Water Lily tonal yarn. I finished the second sleeve and tried on the piece with relative ease. There was one fit issue – plunging neckline. But it was a lovely, cozy knit from scratch dress!

The final touches to this project were addressing the neckline and the sleeves which were set too deep. I cast on to the neckline to fill in the gap and provided structure to the straps with several rows of decreases to give the dress a cap sleeve befitting my vision.

Final Thoughts

I am definitely making more dresses with knit! It’s far more pleasant than sewing if you want a comfy yet elegant style. You have both control of the drape and the fabric design. It’s your world, as Bob Ross would say.

This project was more than a goodbye to Big Twist, it was a new chapter for me. I began this journey 5 years ago to learn how to make and now I feel empowered by knowing I can make my own clothes, not just with fabric but with skeins of yarn and needles. It has been a wonderful journey of discovery!

If you want to knit a dress, I’d say go for it! If you’re a beginner, make one but not as your first project – you will be overwhelmed by the sheer amount of time this project took. It was weeks of work that as a beginner, would have scared me. In time I know you can do it though! ❤

Playing Animal Crossing Has Improved My Style

As a kid, one of my favorite pastimes was designing. I loved the fashion styling flash games from Lizzie McGuire and My Scene. I designed my own catalog of clothes for a made-up brand with my friends in 4th grade, illustrating with my school supplies and piecing it together with scrap paper. Mary-Kate and Ashley’s movies captured my imagination through their use of clothes to characterize each sister’s personality.

That’s So Raven enveloped me in imagination, not from her psychic abilities, no, Raven Baxter’s closet pulled me in! Raven’s room was a stunner as well, like Zenon Kar’s space station cabin, and my Fashion Polly’s colorful playsets that folded out like Richard Hammond’s caravan. My friends and I discovered shows like What Not To Wear and Trading Spaces, which launched my sketches from clothing brands to interior design. I had a notebook full of room drawings. There were designs with slides, hammock beds, and intricate themes. I drew a Survivor-themed room with a tribal council area on the lower level, an outer space room with circular windows and futuristic lighting, even a beach room with a lofted bed, sunset paint scheme, and a pool placed in the middle of the floor. I wish I knew what happened to these sketches; it’s been such a long time.

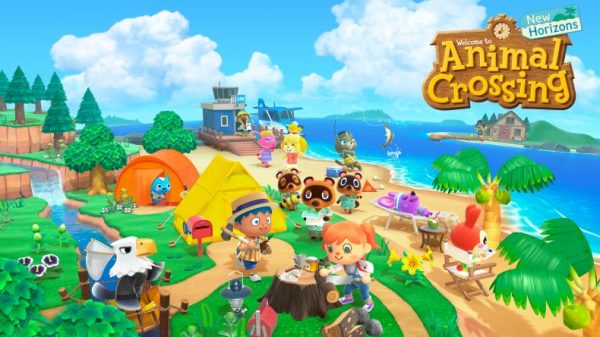
When I discovered Animal Crossing in 2020, I was curious what the fuss was about, and later the next year, we bought a Nintendo Switch, opening a world of design I thought was lost to childhood. I was thrilled! Animal Crossing New Horizons debuted in March 2020, and because of the unique time, it had a huge following for its charming island life. You begin your game landing on a deserted island as part of a Nook Inc. Getaway Package, and assist Tom Nook in developing the island with the help of Timmy, Tommy, Dodo Airlines, Blathers, Isabelle, and the villagers who move to the island with you.

But what about the fashion and the home decor? This game first places you in a tent that you upgrade into a house, with subsequent expansions costing large sums, but with a relaxed payment policy. You also gain the ability to design custom things with Nook Mile redemption upgrades, craft unique recipes from resources on the island, and buy items from Nook’s Cranny and clothing items from Able Sisters. A ridiculous amount of my gameplay, even years later, comes from pairing and collecting new clothing items for my character to wear on her adventures. This game loves coordination!

As a player who is well-versed in the Animal Crossing fashion catalog, I wait and anticipate finding my favorite pieces with each new island. The game has four seasons, with clothing corresponding to the season at play, including specialty garments for holidays. Currently, as I play in June, it’s wedding season and Able Sisters is selling traditional Japanese wedding attire, Nook Shopping is selling Father’s Day items, and International Children’s Day pieces, which include a paper crown that is oh so cute!

How has this impacted my own personal style, though? Well, it has brought me back to the mindset of creating a full look. Working from home or working in professional painting at jobsites for most of my adult life has killed the style I used to have. I no longer felt the need to put together a look, but instead I got used to throwing on pieces and wearing things for function, not fashion. But that’s not who I really am, just what the environment of life drifted me into. I was missing intentionality, Animal Crossing lit that spark once again. My little character doesn’t just get dressed to do life; she wears a head-to-toe look with hats, bags, glasses, specialty socks, clever shoes, cute tools, and interestingly paired garments. This game got me out of jeans and a t-shirt, or a hoodie and leggings, because this game has trousers in many fabrics and shapes, shorts in colorful prints, skirts in a bouquet of fancy, coats, hats a plenty, tops that span the seasons – it’s a blast to explore! There are dresses – modern and traditional. I can where a kimono! I change her outfit at least once, maybe three times a session. You can also curate hairstyles and experiment with colors.

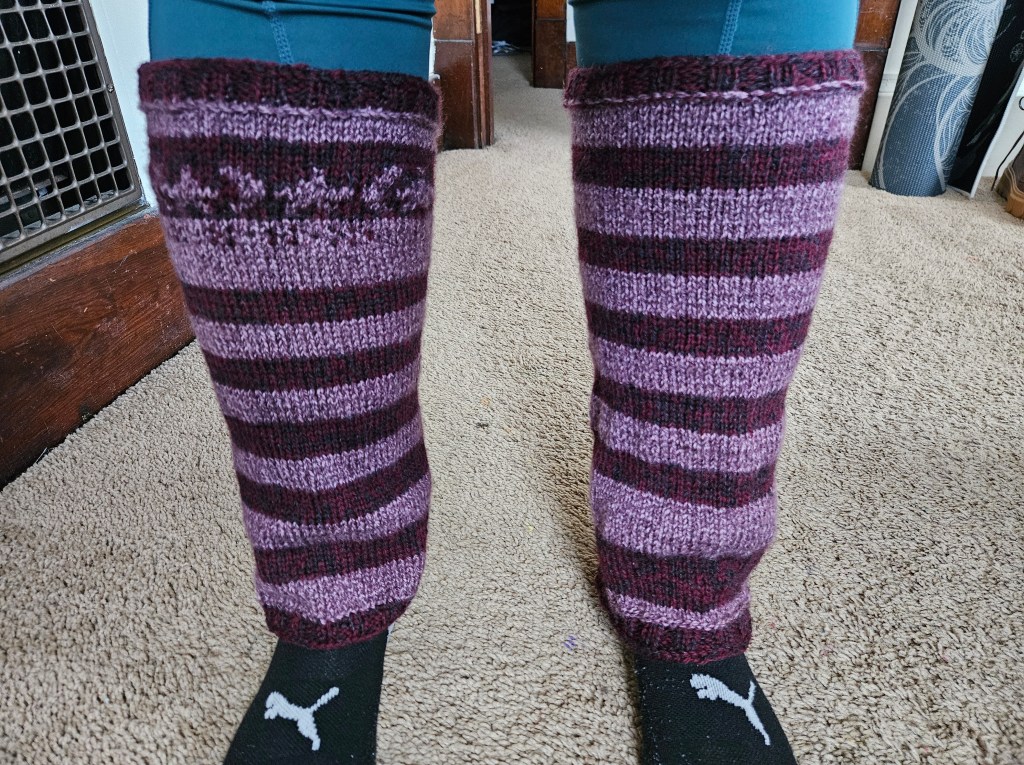
This exercise has shown me that pink hair is something I’d like to try. It’s my most-used fashion color. It has inspired me to introduce cute socks of varying heights and weights to my wardrobe, even making some of them. I’ve started wearing hats anytime I leave the house – it pulls the look together! My taste in bags has changed; no longer an option for a sleek purse that looks designer, instead give me a duck bag with feet. I love colorful knitwear, flowing skirts, and shoes that are beyond my comfort zone of boots and Converse. Taking those moments in the game to pair weird combinations together has positively impacted my design sensibility. When I plan a sewing or knitting project, I take into account what I’ve learned from dressing up my character, seeking to inject the whimsy and delightful wares of Animal Crossing into my real-life closet. I’m not the only one; I’ve seen this across Pinterest, YouTube, and Instagram.

But what about interior design? Well, this game not only presents the opportunity to design your house and the island, but you can also download Happy Home Paradise to design vacation homes for clients. This has really challenged me in a fun sandbox way to care about how a room is put together. I’ve become far more intentional about my furniture layout, what types of pieces I want to bring into my space, and how I want to pair pieces for a style that tells a story.

Buying a house last year was the icing on the cake of this new foray into design, as we have painted rooms and dug the garden beds, I’ve felt like it is Animal Crossing come to life. I have this canvas to put my stamp on. Moving from rented landlord-beige homes to a space where we can be colorful, it has shown me that the little details do make a space more welcoming and conducive for creating. The simple act of moving our dining room table from one side of the room to the center, allowing for walkways on either side, has made the room a place I want to be instead of a place I pass through. By filling the empty gaps of cabinets in our kitchen with tables, shelves, and a microwave stand, we have transformed the empty space into a room that feels complete. The simple change of painting my sewing room lavender created an entire mood, a calming and happy vibe that makes me excited to work within those four walls. The garden beds and the screened-in porch have been works of dimension, the outdoor space has useful and designated spaces for us to use that make it more beautiful and purposeful.

I am filled with a sense of possibility again, like the girl who sketched those rooms in a notebook, instead of a person muddling through life. In this time when we feel burned out by AI and stale creativity, it’s been electric to feel the sparks of imagination. The crafting aspect of the game has inspired me to be more creative in my own house. We repurpose, re-finish, and build things in our house from scratch. Because of life’s twists and turns, I have a lot of second-hand pieces that at first felt like a let down, like I was poor, but now I see them as incredibly meaningful items that I have the pleasure of caring for in my home. The game’s customization tools, such as kits for sale or the custom services of Cyrus, demonstrate how a coat of paint truly pulls a room together without buying something new.

Did I think when I purchased Animal Crossing New Horizons that I would see an impact on my own design sensibility? Not at all, but it has been the gift that keeps on giving. It’s an incredibly cozy game, full of wonder that I have grown fond of, year over year. Four years later, I still look forward to running around the island, hunting for recipes, wishing on shooting stars, and besting those pesky Happy Home Academy judges. I hope that I never lose my zeal for dress up and design because it is such a fun little way to relax in this wild and wacky world.
I Made Furniture From Fabric Scraps

Do you ever look at an item you want to buy and think, how hard can that be to make? Well, that’s exactly how we got here.

Floor Culture

I’ve been moving my sewing room around, I took down my sewing table and moved to the floor. Which I know sounds extreme, but seriously, sitting on the floor is underated. My back and hips don’t get tight and my posture is improving. In the West, I think we have been foolish to move away from sitting on the floor and should acknowledge how wise other cultures are to sit on the floor for health and posture.

I have a wicker chair that is good for sitting in when I want a break from the floor, but what I was missing was an in between piece of furniture that I could move depending on my needs. I settled on a floor cushion that could be used as a seat, a workspace, folded up in a cushion or rolled into the corner for yoga to add more stretch breaks to my life.

Quick Fix

But here’s the catch, I decided I needed this piece of furniture on a whim and that’s what I am trying to remove from my purchasing decisions – less impulse purchases. I want to become less of a consumer and use what I have, so I thought could I make what I want? Similar cushions for sale online were 100-400 USD and with the tarriffs looming, I was feeling a bit nervous to buy something.

But then I remembered my Mom made a pouf, she knit the cover. I’d watched Morgan Donner make things from her scrap and fashion a mattress from braided fabric. I had also begun saving my fabric scraps and sorting them into bags that were taking over my crafting closet. I just had to settle on the cover fabric and design.

Design and Materials

A large rectangle seemed like the ticket with corners I could sew crisply and easily stuff at the end. There was this one extra wide cut of fabric I bought from Joann’s last summer which caught my eye. It’s a fabric I bought because I enjoyed the design but didn’t want to wear it. It looks a bit like denim and had a lovely swirl pattern that I thought, would compliment the lavender paint of the room. With the fabric sorted, it was time to tackle the pattern and stuffing!

I measured the fabric into two large rectangles and four slimmer sections to form the sides. These I sewed inside out to leave only one end open to stuff. I sewed this by hand over the course of a day, I’d say in total the sewing portion of this project was the easiest part. What lay ahead next was tricky, blister inducing  and stressful.

Stuffing and Scraps

I had bags upon bags of scrap fabric in varying sized pieces ready to be repurposed into stuffing, but the thing with fabric cabbage is that it’s not uniform. Which means there will be a lot of cuts to make. This I foolishly chose to do with my old fabric scissors, instead of using my rotary cutter and mat. I wish I had. The repetitive cutting motion wore a blister on my thumb and aggrevated an old injury on my finger joint.

My hands were tired, weak, and wrecked by the end of day one. Worse the cushion was 1/3 full. Not what I was expecting! How could it take that much stuffing?! With my bags of fabric scraps depleted, I moved on to new sources of cushion comfort. Such as yarn that I was given secondhand, which I had no creative plan for. This yarn was a super bulky, acrylic yarn, about 300 yards left, and perfectly fluffy for stuffing. I cut this into pieces and carried on auditing my stash.

I repurposed some old clotbes into stuffing, a blanket Mia’s little bunny chompers had chewed into swiss cheese, and more leftover yarn floating around my sewing room. Yet, I still lacked the floof I was after so I broke down and browsed the interweb. I knew polyfill was an option, but it’s also polyester and the point of this was to repurpose and use up things, not go to Walmart for polyfill, which happened to stretch very little. When I made a bolster pillow for our couch out of an old sheet, I went through 5+ bags of it. Whuch made me wonder, are there alternatives to polyfill on the market? There are! I found a small business, selling cotton filling that shipped. This got me to comfortable fluff, I still need a bit more but I’m going to revisit it later.

Voila! A piece of furniture made (mostly) from what I had in my house that used up some trash in the process. I am pleased. 😁

My 2025 So Far Has Been A Creative Slump

I can’t believe it’s May already, I’ve been so busy with our garden project and a follow up project of screening in our back porch, distracted by Joann’s closure and the evil running rampant in our world that I have been on a slow creative trajectory, and its really catching up to me!

Upcycling, Alterations, Mending

As of late, the bulk of my sewing projects have been preservation, updates, or reworking the garment into something new. In mid-winter, I decided to tailor every t-shirt in my closet. This meant I would be hemming every shirt to end above my hip and bringing the end of the sleeve upward, to end higher on my arm, which is more flattering to my vertical line. I’ve had to repair a few garments and mend some older pieces. I’ve also been taking some of my clothes in and tearing them apart to be upcycled into new projects I can’t wait to share. That I thought I already shared. This leads me to the next point: I have a backlog of projects I held back last fall.

The Head Games of Content

I still battle imposter syndrome, and in doing so, last year, feared that I would run out of ideas. So I slowed down my posting to keep these good ideas and projects in the tank for a rainy day, and instead of this giving me the freedom to create and write without pressure this gave my type-B nature and out to avoid writing, because I had the ideas, and so I sat on them and now it is almost a year later, without these projects having their time to shine. Grinding it out on Instagram last year definitely took my focus from me, and then these constant recession fears have kept me in a place of fear, which has stifled my desire to create, in case I can’t buy more materials in the future. I worry too much. Writing for two years, on this site, led me to a sophomoric slump heading into 2025. I lost the urgency to keep going and backslid into complacency and a lack of creativity. I have also transitioned into a slower creative process in hopes of gaining that spark again!

Hand Sewing 2: Electric Boogaloo

When I began sewing in 2020, I did so through sewing by hand through the tutorials of Bernadette Banner. I did this for two years and then acquired my Heavy Duty Singer, which I switched to using exclusively from the end of 2022 through the beginning of 2025. But this year, I am having some struggles with my sewing machine. I love the speed at which you can make things, but I fear that this boost in speed has dampened my craftsmanship.

When I was sewing by hand, I had the time to consider the project and to ponder where the design was going to lead me. With my sewing machine, I have fallen into a bad habit of making without pausing to ponder. I also started designing simpler, easier-to-sew garments for efficiency instead of art. But speaking of efficiency, I don’t think sewing machines are as efficient as we make them out to be. Mine is quite finicky. It eats fabric and thread. I go through the thread considerably quicker using my Singer than I do by hand. I have to rip seams and sew again, many times, because the machine messed up a stitch or skipped stitches altogether, and I’m tired of it. So my machine and I are taking some time apart.

Slow and Steady, A Life of WIPs

And so, here I am months later with a few finished garments, many WIPs, and a better life balance. Including a refreshed creative well. The time spent working outside with Kyle crafting our screened porch, tilling garden beds, painting, upcycling furniture, studying Japanese, drawing, reading, exercising, etc, has been a wonderful way to remember why I love creating. I find knitting to be my happy place. For a week, I barely knitted, and my mind was filled with far more rage without the needles weaving yarn into cloth. I’ve come to a place in my sewing journey where I want to learn and be ambitious again. I’ve filled my closet with good handmade pieces, but I want to create exceptional, one-of-a-kind things.

I have learned that knitting is my favorite mode of creation, and sewing is the freedom to make what I don’t want to buy or can’t find offered. The process is just as important as the final product, as trite as that is, creation and crafting are where we thrive, not consuming. I find moments of calm in working with my hands and feel satisfaction in stepping away to old creative haunts, like painting or gardening. I think the slump was an important part of growing. I hope that you find creative refreshment and know that you are loved. Stay safe out there, these are dangerous times, and know that I care about you all very much.

Create a website or blog at WordPress.com

Up ↑