Potato Technology’s 2024 Autumn Winter Collection

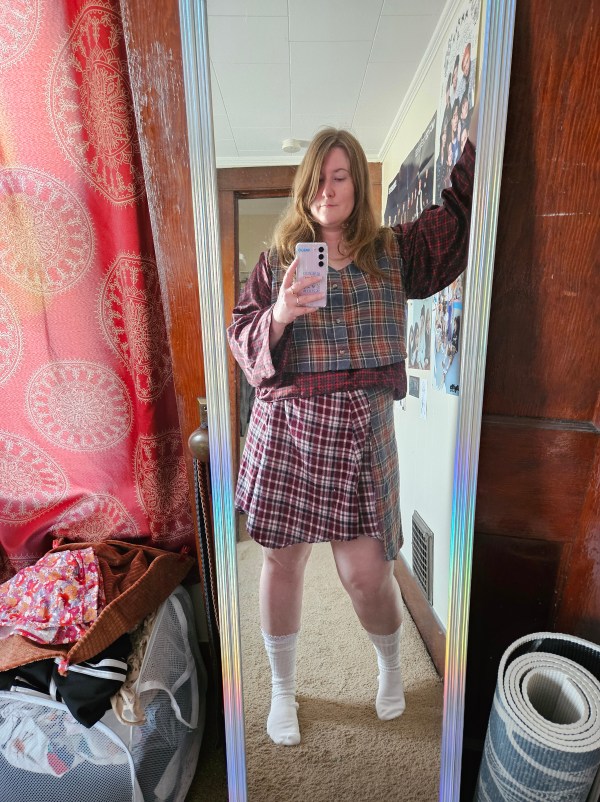
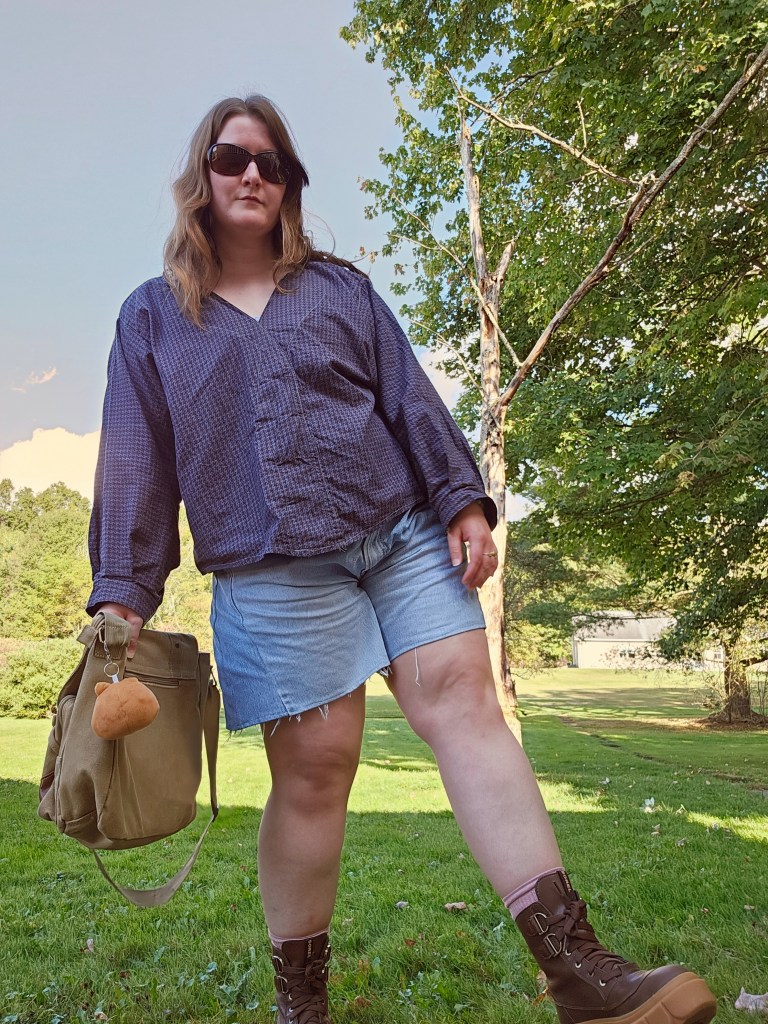
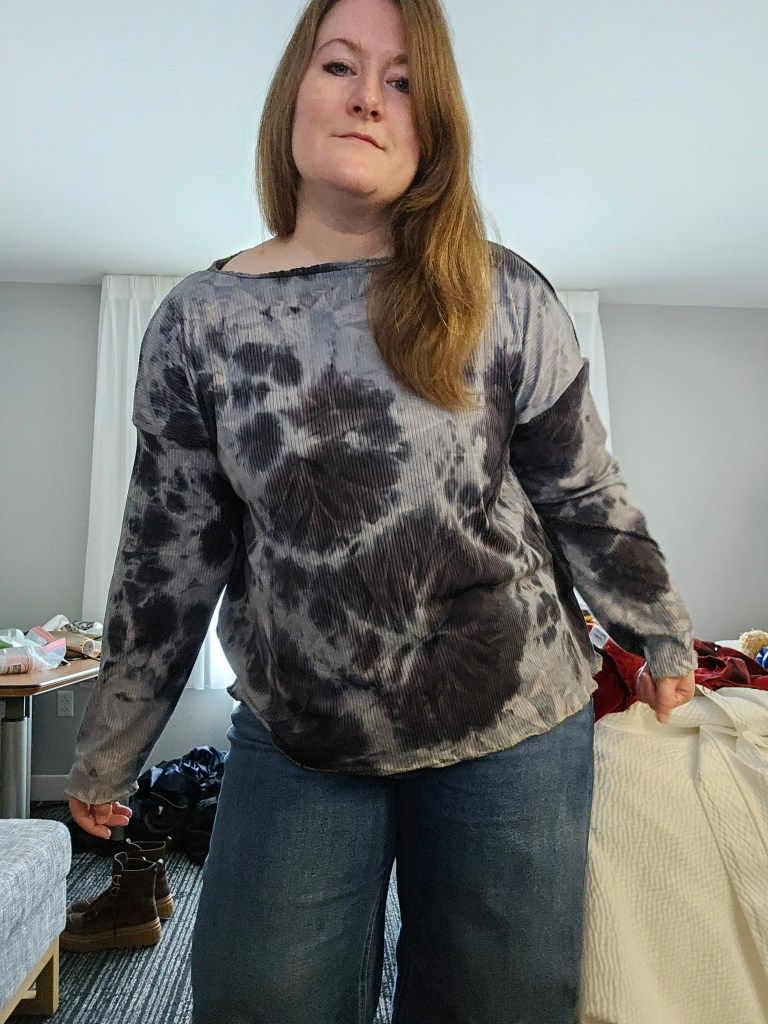
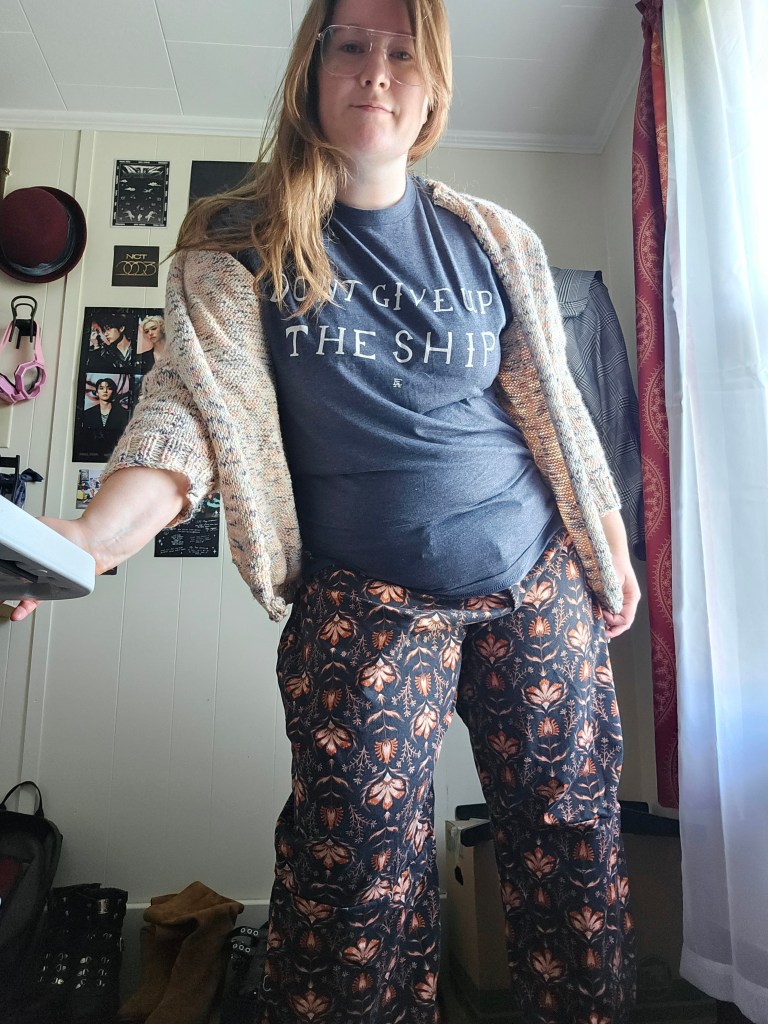
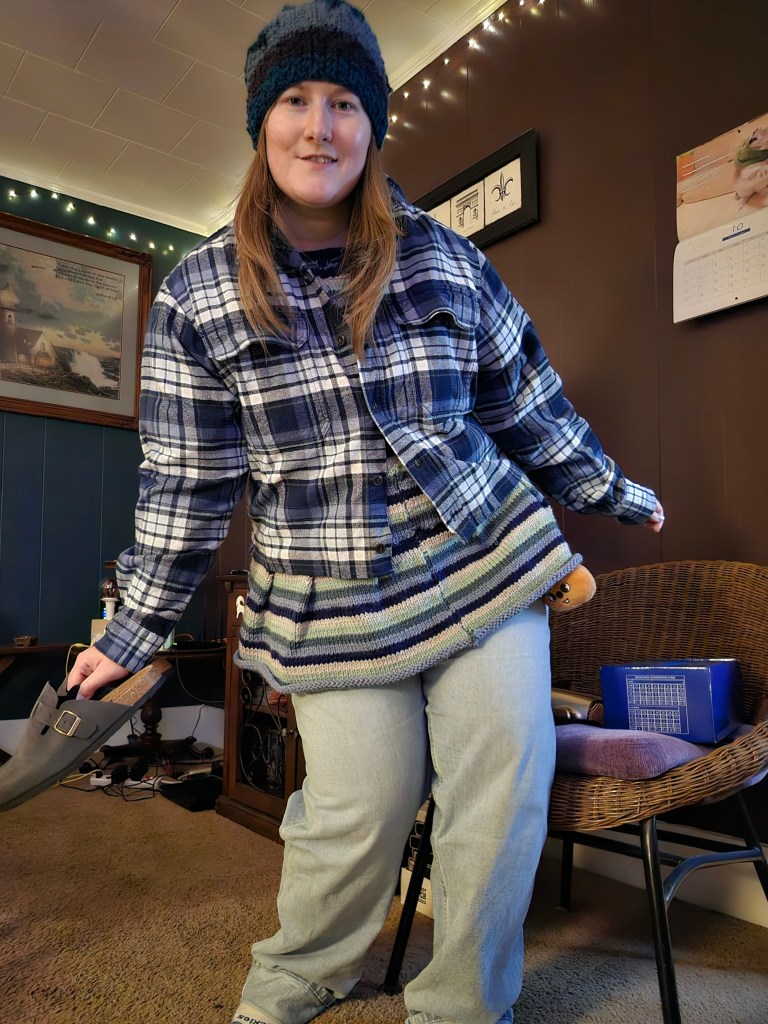
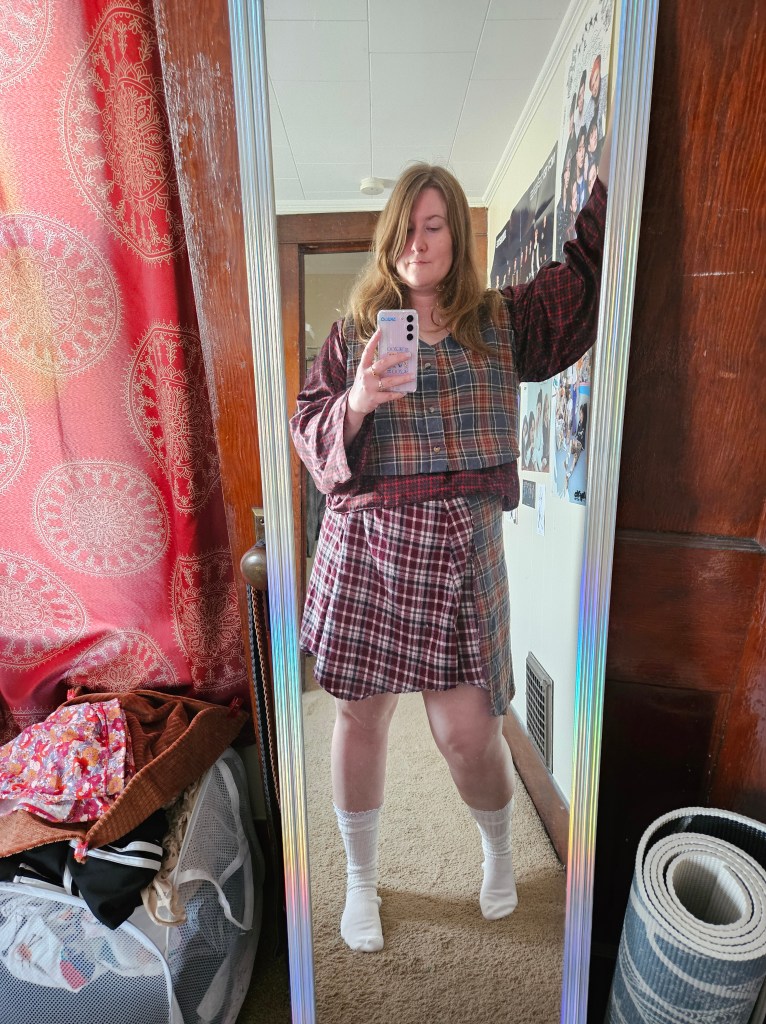
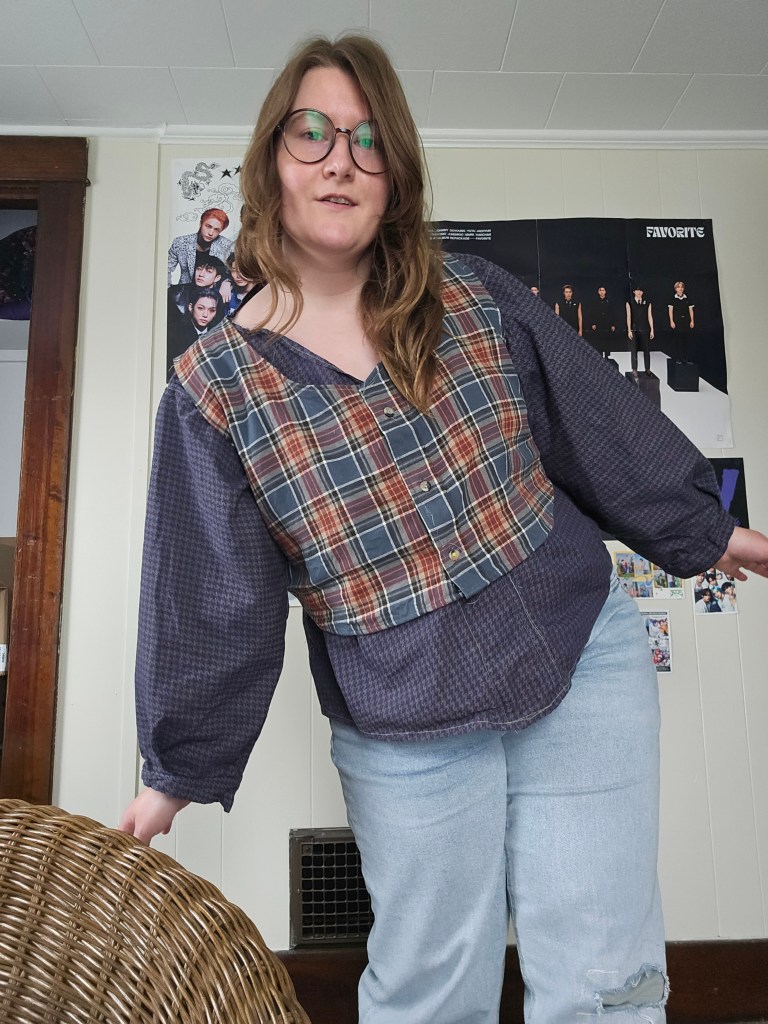
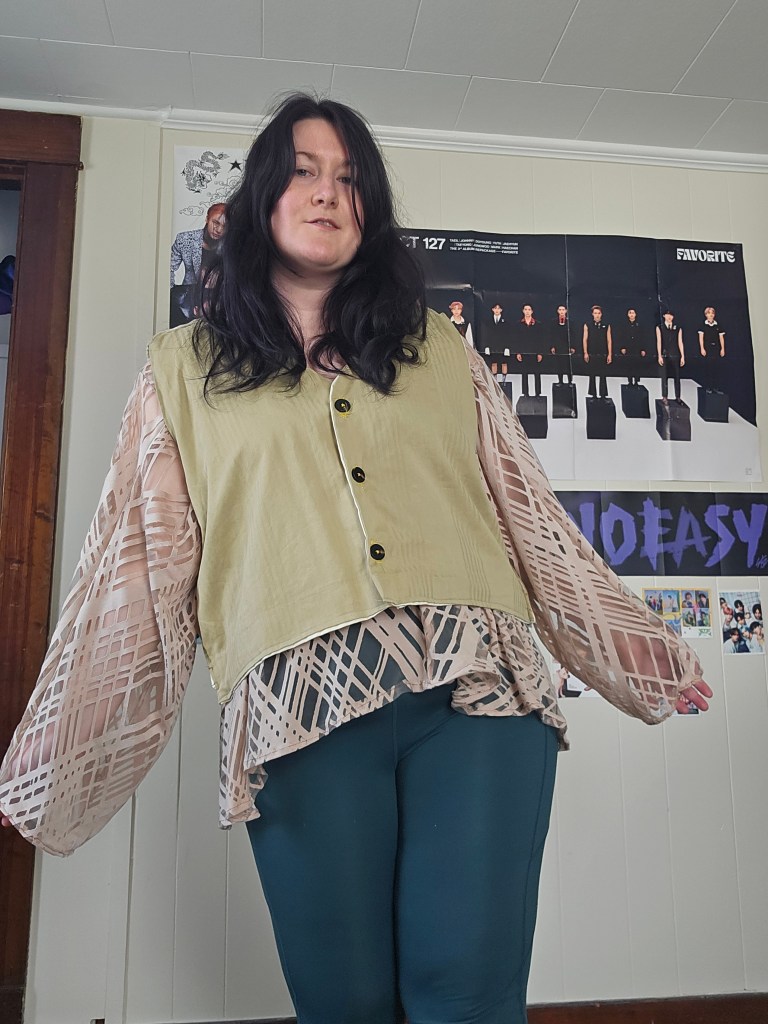
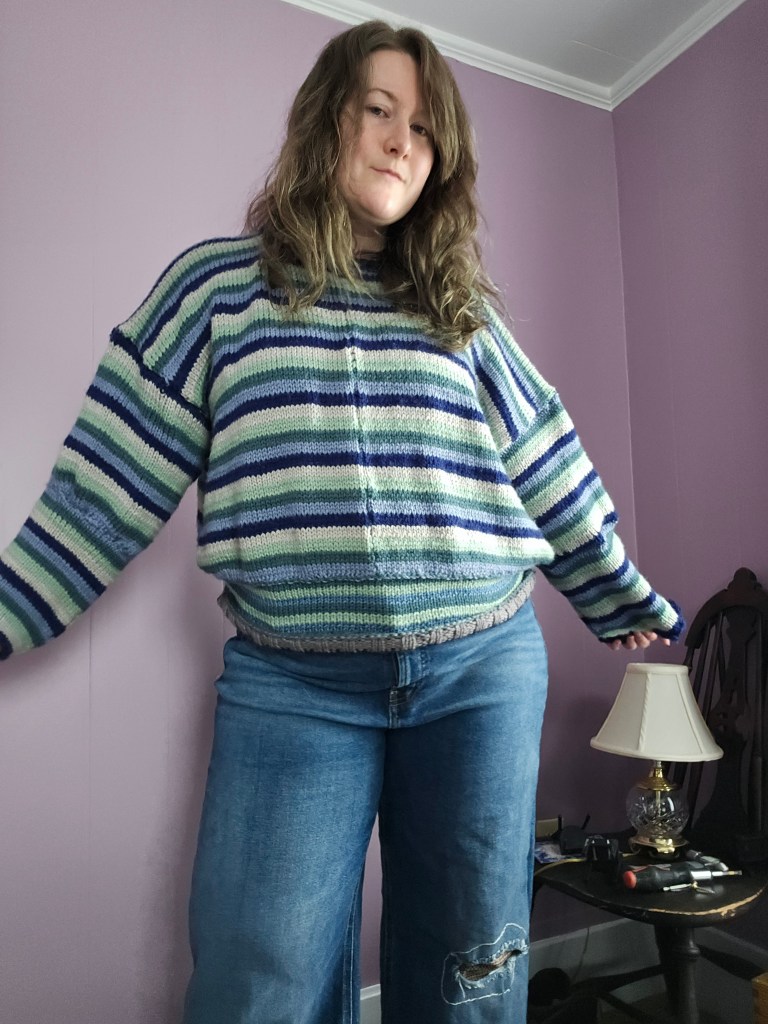
This collection was about upcycling, trying new techniques, and making things that expressed what I like wearing based on previous designs I have made, but with a twist. The items I designed were 75% sourced from existing materials. They were upcycled from items in my closet, hand-me-downs from my mom or grandparents. They were made from destashed yarn I acquired or fabric that had been in my stash for a long time. I focused more on creating with natural materials like wool, linen and as always, I love cotton.

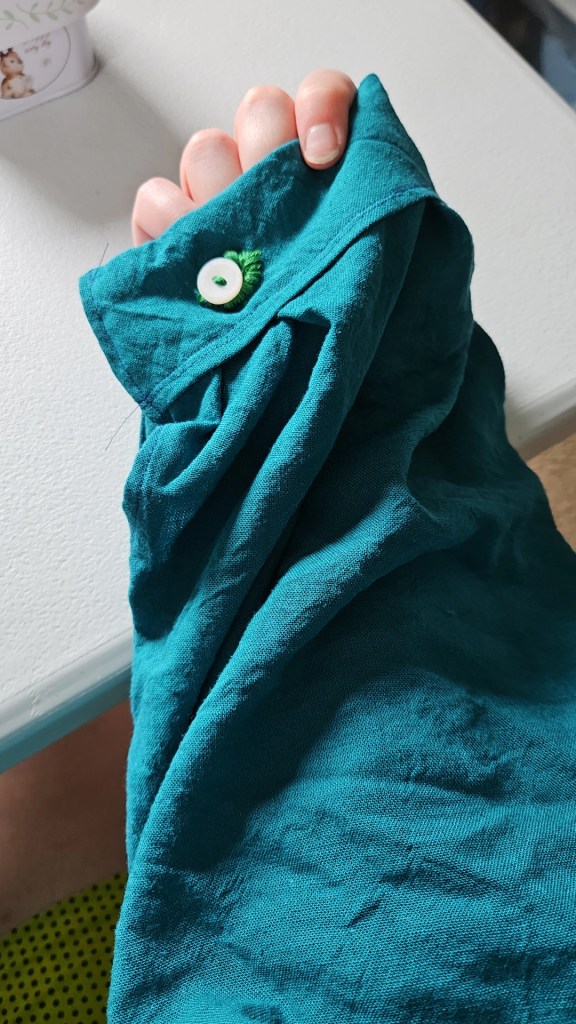
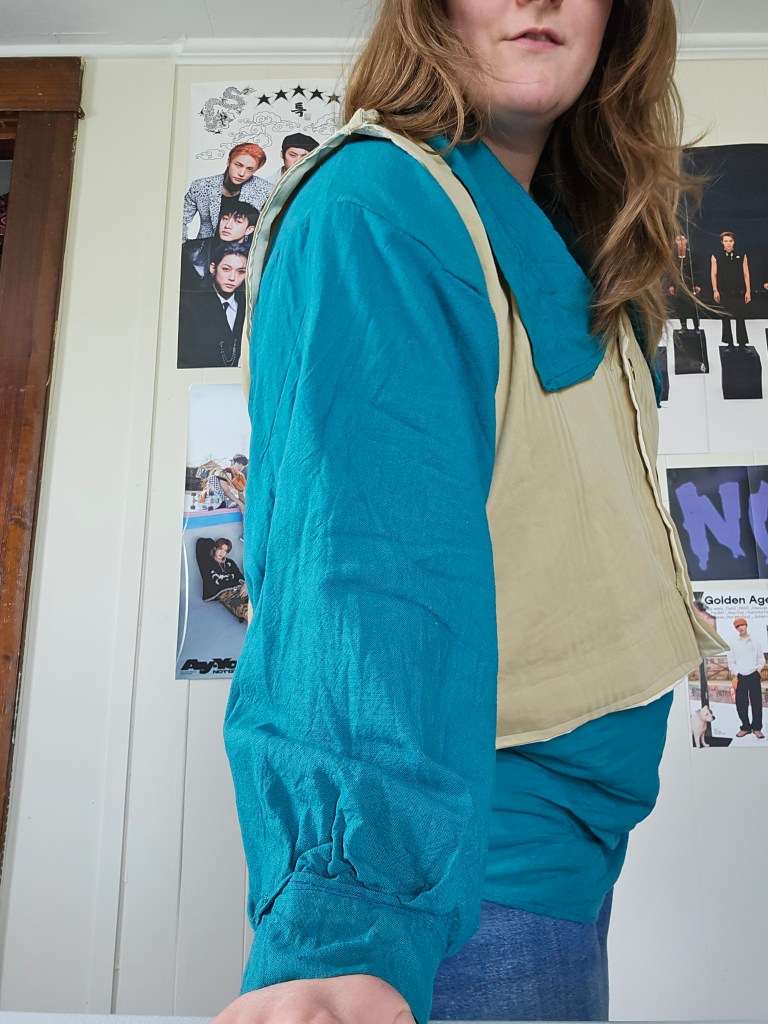
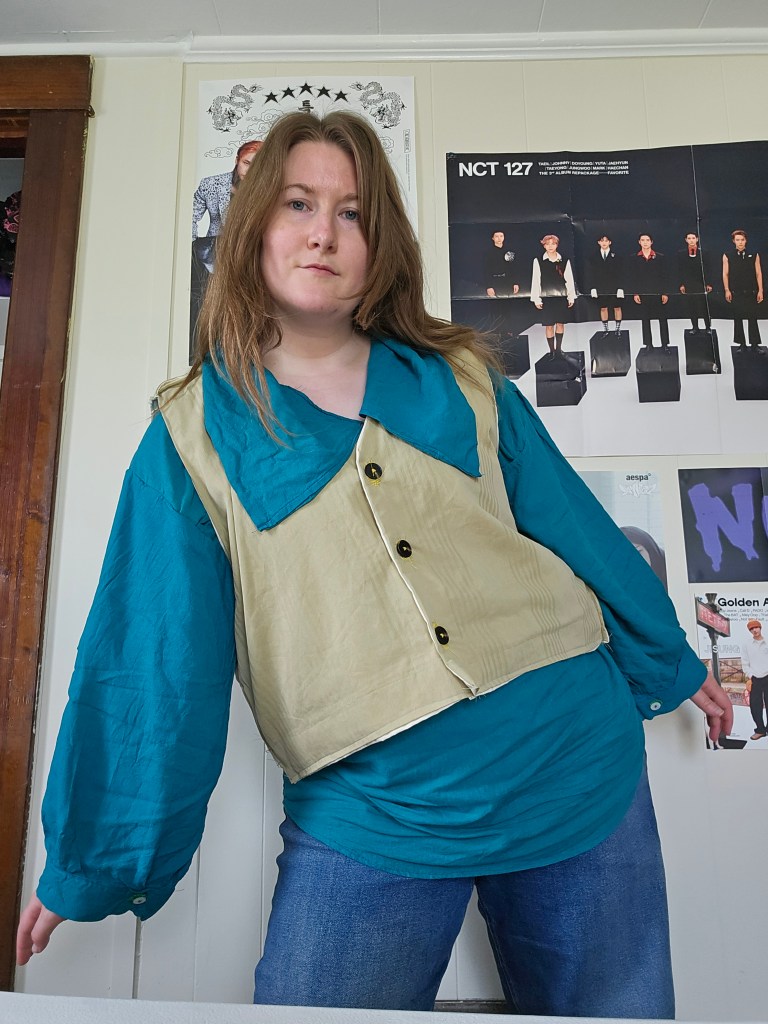
Vests were made from pillow cases and flannels. I re-worked a sweater from the existing sweater and leftover yarn. I dyed denim, deconstructed denim, and made some interesting new shorts and skirts. I combined leftover flannel from Christmas stockings to create a plaid and denim kilt. I used the cut-off sleeves of flannels from my vest projects to create a skirt from four flannel sleeves. I dove deeper into the world of trousers with two new patterns – a floral and railroad stripe. With each pair, I experimented with fastenings and pockets. I constructed my first “Mr. Darcy” shirt from teal linen using Bernadette Banner’s instructions for the body. I put my own spin on the collar, choosing a wider collar similar to a sailor collar that is popular in anime and J-fashion.

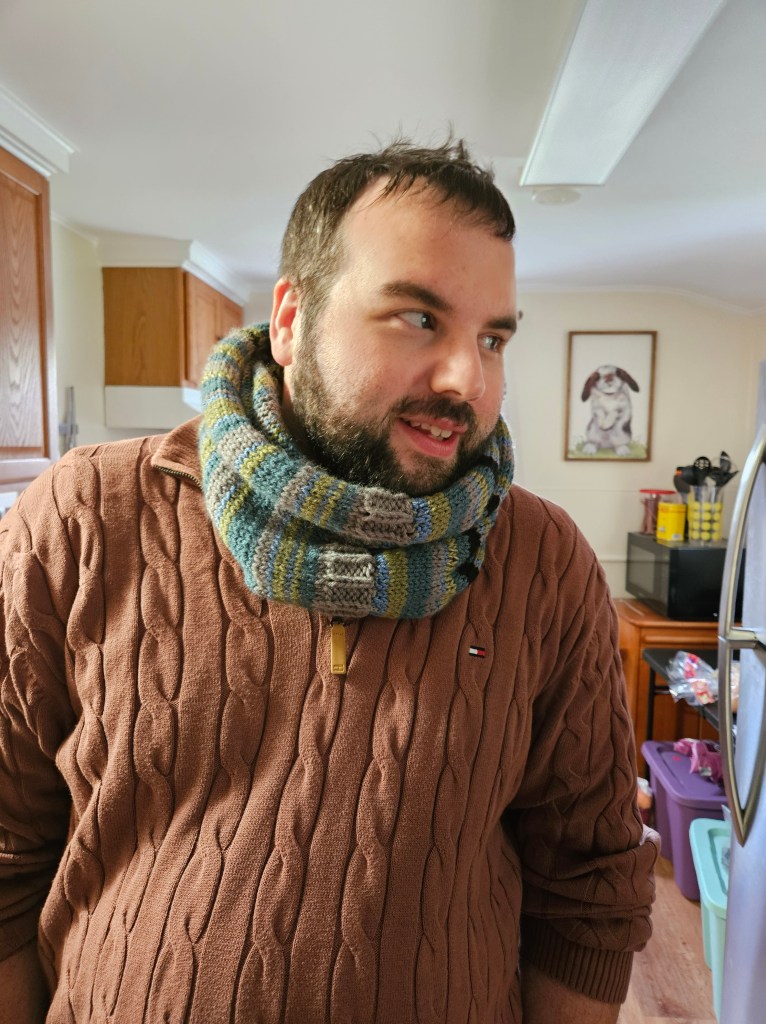
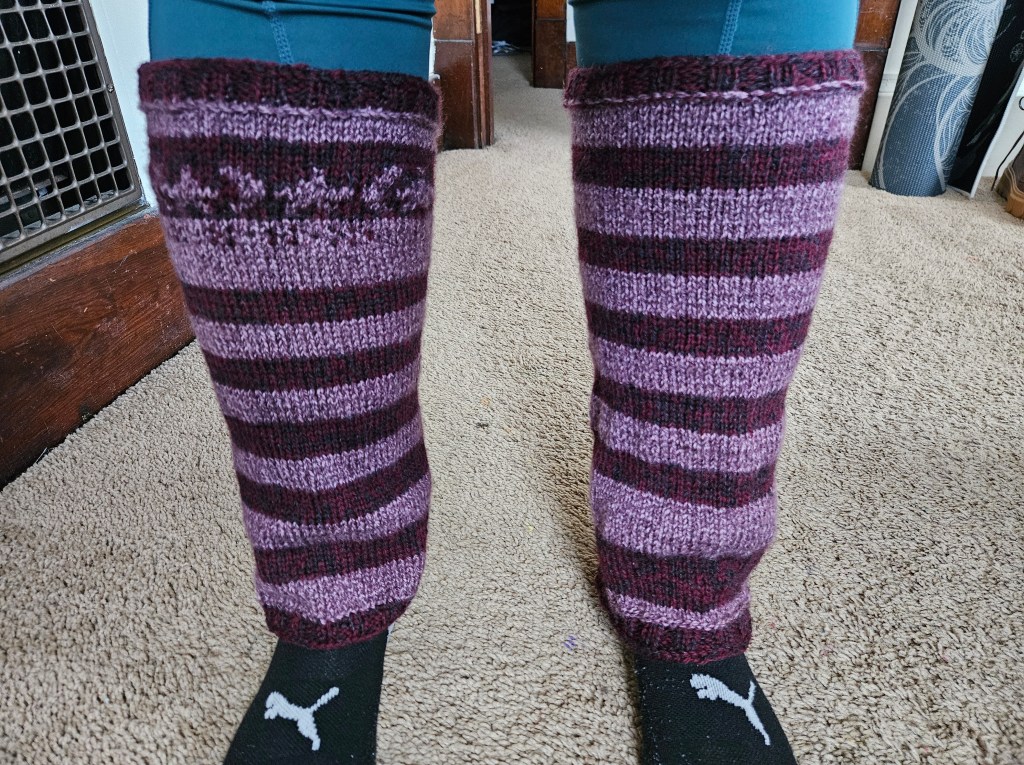
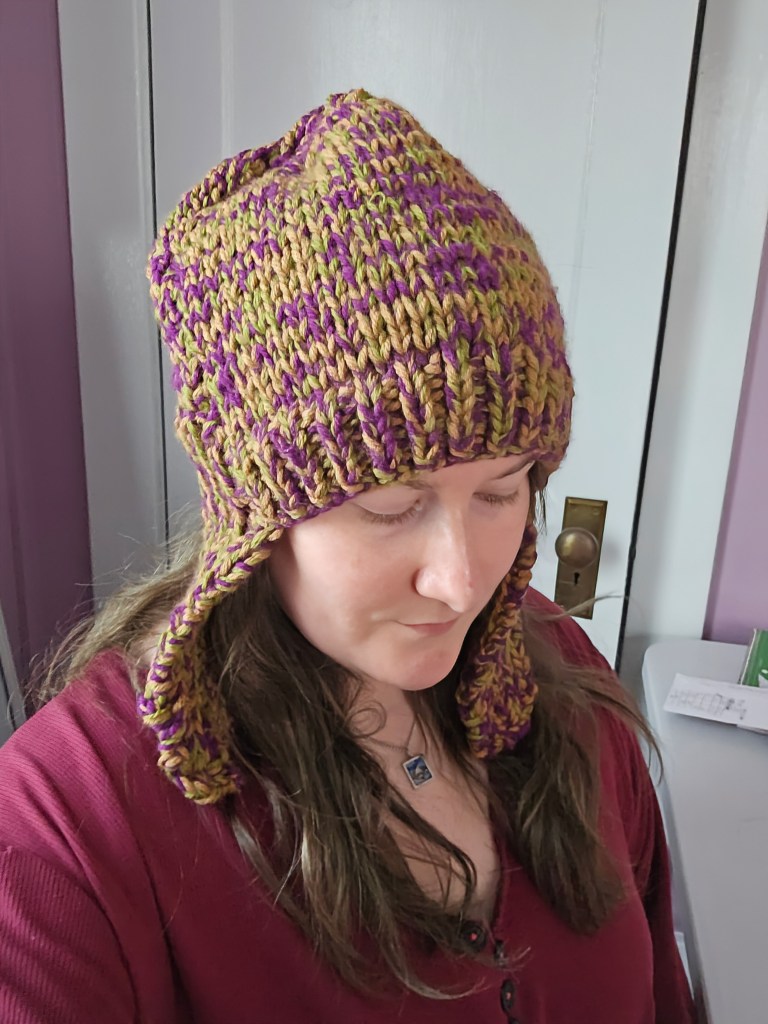
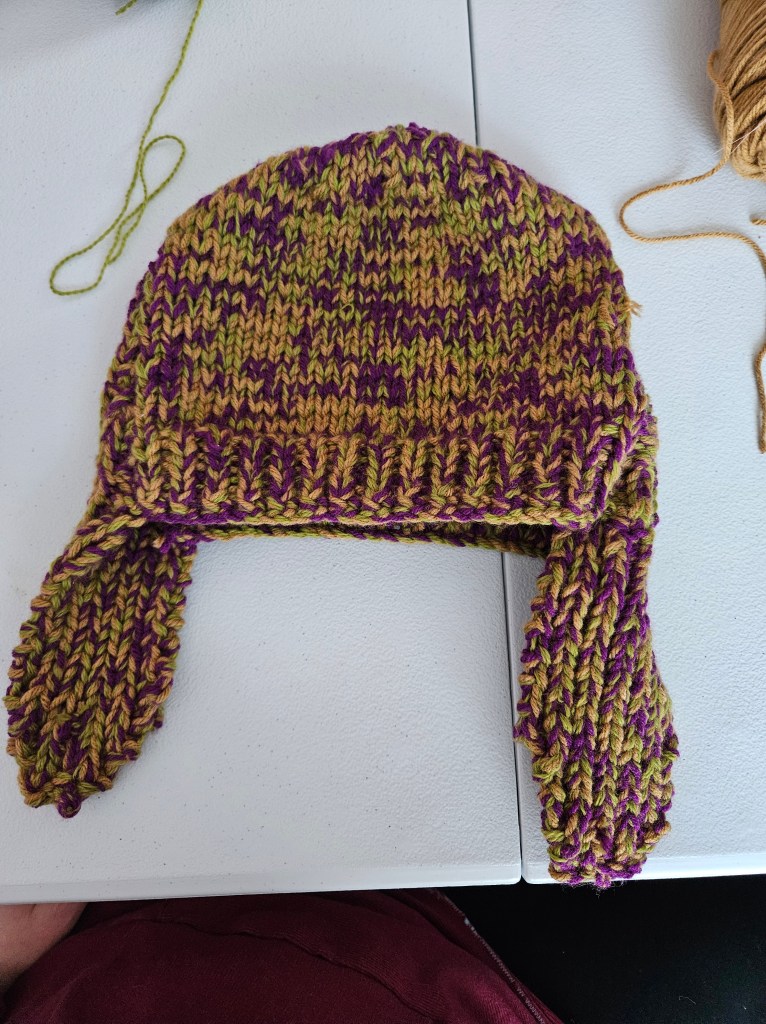
This was the first season I experimented with colorwork in knitting. I made a knit star motif hat from yarn that was leftover from my Magic of Scrap Yarn Cardigan. I made leg warmers, a squirrel motif mitten, and a melange of acrylic and wool to create this ear flap hat that reminds me of medieval European helmets. Although this season of creation was chaotic, I’m not sure if I even included all the projects I worked on, it was a time of great learning. It taught me that fashion design is more than taking raw material and cutting it into a new form.

Great design utilizes new and old. Fashion is about reusing, not wasting, and making things beautiful with careful craftsmanship. It does not mean it needs to be expensive, or need to be made by a great master couturier, it just needs to serve a purpose. We have lost sight of the purpose of fashion, but these projects of upcycling have reminded me that fashion is more than shopping, it is more than consumption, it is about the materials, the vision, the function.

My Three Favorite Sewing Tools

What are three objects you couldn’t live without?

I’m modifying this prompt slightly to focus on one aspect of my life – sewing. These are the three tools I can’t imagine working without. After four to five years of sewing clothes and trying out various tools and techniques, these are the cream of the crop for me. This is my just opinion. Depending on your sewing style and personality, this list would probably change. I’m sure if I was a sewist who went to design school, I would also have a different list.

Fabric Clips –

When I started sewing, I had no idea fabric clips were an option. I bought a Dritz tin of straight pins and a pin cushion. This is where things began to get uncomfortable. No matter how careful I am when I use pins, I stick myself. When I use pins for a fitting, the pins slip out of the fabric and scratch my skin. I find the pin tins spill easily which is terrifying if you don’t notice it because you are then surrounded by pins in a spill around your feet. When I found fabric clips, my sewing experience improved 180 degrees. I don’t get stuck and the clips stay in place. I can try things on my body and the dress form, without the discomfort of pins sticking or the annoyance of the pins slipping out of place.

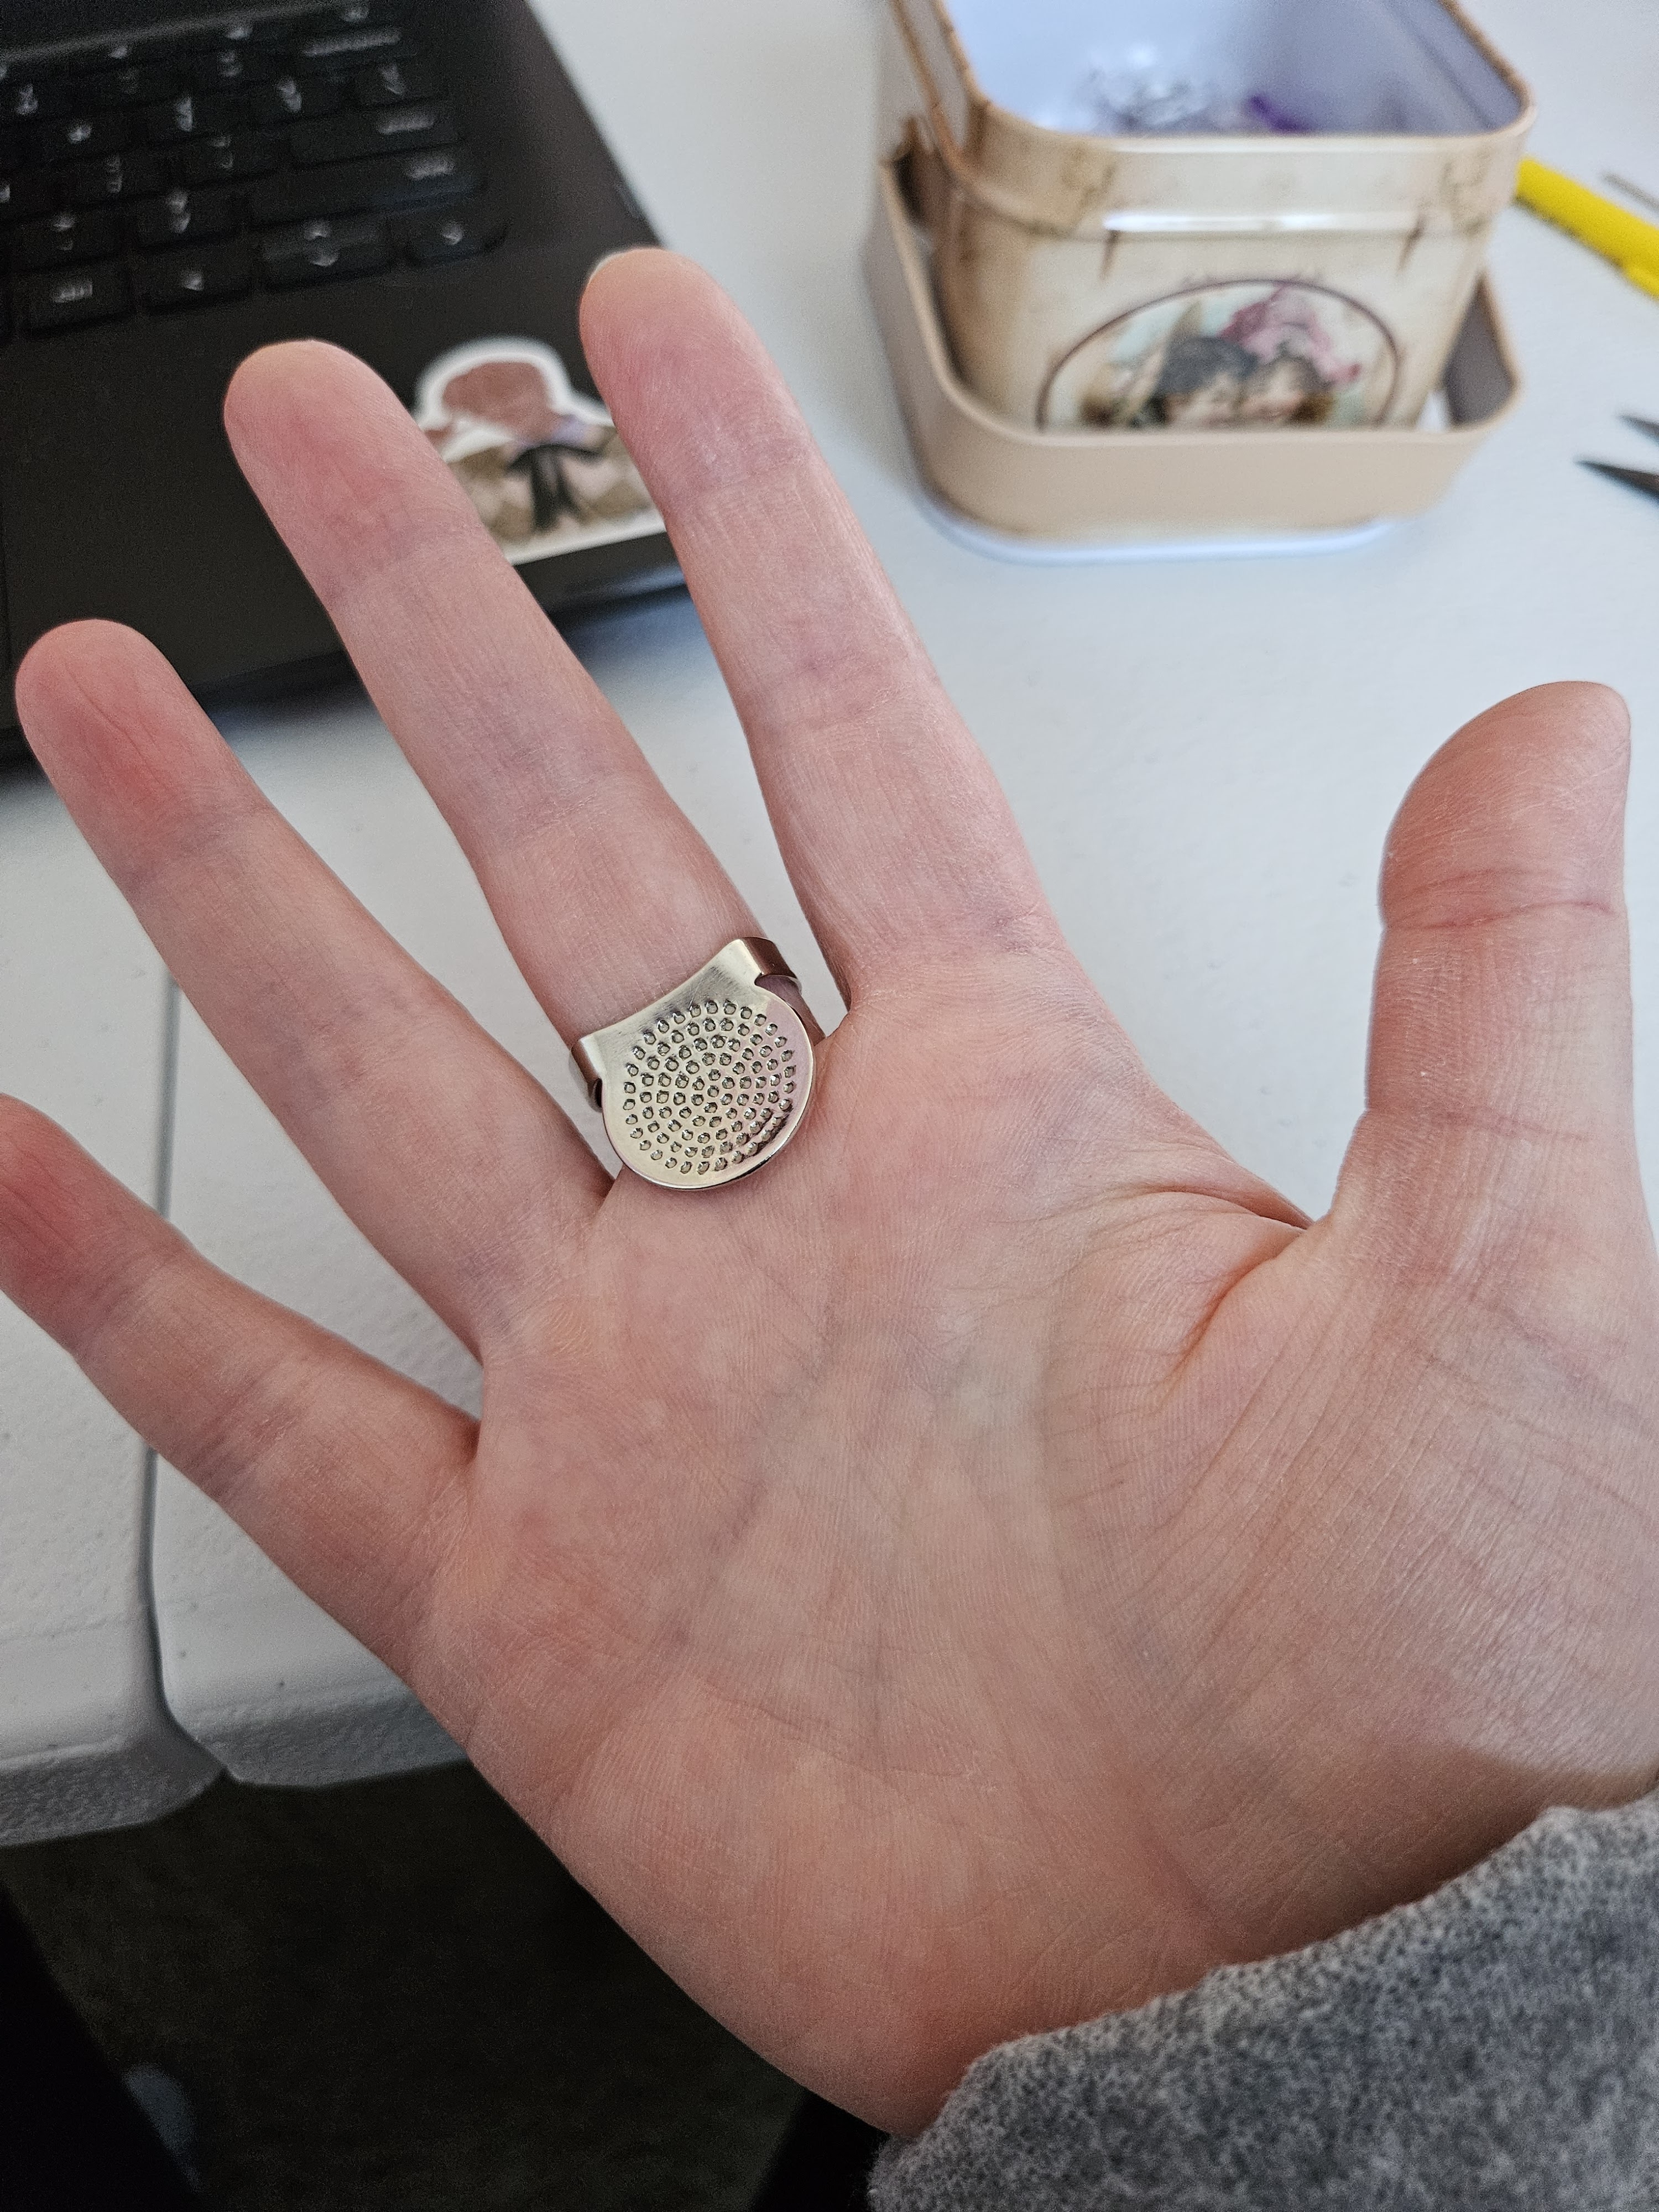
Sashiko Adjustable Ring Thimble –

I’ve tried two kinds of thimbles. The first was the cylindrical metal thimble, which I found hard to use. It fell off my finger or I simply struggled to find the correct finger to place it on for my sewing. I tried another metal thimble that looks like a fencing mask, with an adjustable back. It stayed on my finger just fine. I could make it tighter or looser or move it to a different finger but it still felt odd. I noticed the thimble wasn’t providing the support I needed to push the needle through the tough fabric and in turn, was putting stress on my finger joints.

I was introduced to the Sashiko-style ring plate thimble through the account Geri In Stitches and was hooked. The idea of pushing the needle through dense layers by the palm of your hand instead of your fingertip made more logical sense. This has transformed my hand-sewing experience! I can sew longer without hand fatigue. The ring is comfortable. I hardly notice I’m wearing it until I’ve walked into another room with the thimble still in my hand. This is a Japanese thimble, for the sashiko technique, I am using it for general sewing, but the thimble and sashiko have a rich history of their own that you should check out.

Hand Sewing Needles –

I started my sewing journey by hand sewing before I purchased a Singer Heavy Duty Sewing Machine in 2022. It was my preferred method until my hands started showing stress and my mind was fed with how long garments were taking on a deadline. The switch to a machine was fantastic! I quality garments quickly. The only wrinkle was sewing machine maintenance and gremlins in the machine. Sometimes machines have attitudes. Sometimes you can’t get in sync without your equipment. Sometimes you drop the small screws into the machine and you are in a panic. It’s a wonderful asset but also a source of great frustration for me. For that reason, hand-sewing needles will always be by my side because they are easier to manage, and sometimes you and your machine need some therapy. Also, some projects call for the delicacy of hand sewing. It’s an art form that cannot be fully eclipsed by the machine. For example, how can you attach a button or hook and eye closure without a hand-sewing needle? It’s best to keep them handy.

Remaking My First Sewing Project Four Years Later

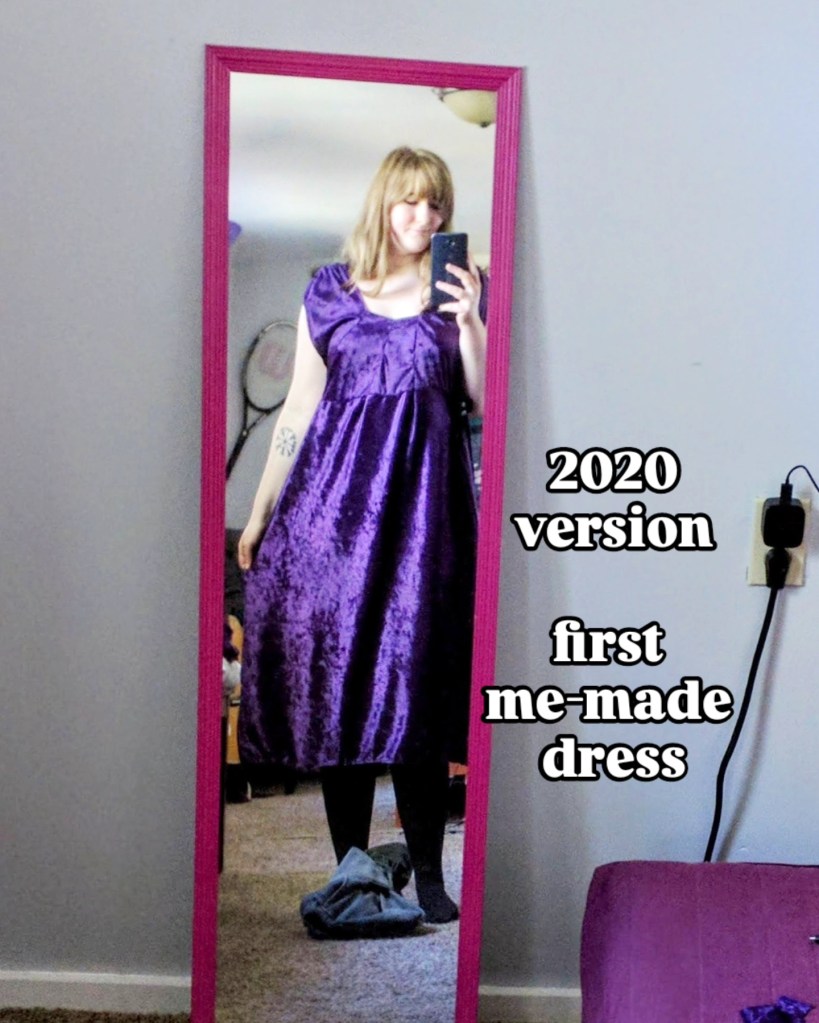
Last September, I felt this aching in my creative heart to make what I didn’t make well the first go around. A project that some would say was insane to attempt as a beginner because of the difficult nature of velvet and the frustration that is sewing with stretch fabric. The dress pictured below was my first wearable garment. I saw the same purple stretch fabric on sale for Halloween at my local Joann’s and my heart skipped a beat. It still exists – I could try again!

You see the first dress I made was constructed so poorly that I ended up cutting it down into a skirt because I was embarrassed to continue wearing it out. After all, the bodice was bunching up and gathered strangely in the back. I lacked the confidence to keep going and try to alter the dress for success. I see now that it would have been an easy make to take out the gathers and bunches of fabric for clean seams, but that kind of thought came with trial and error. I needed a bit more experience and patience to make it right, and at the time in 2020, my younger self was not willing to wait.

But what if I am living in the past? My mind thought, maybe I should let it be and let the dress be a learning experience. I put the purple velvet down and left it, it was not on sale, it would be a sizeable impulse purchase at 15.99 a yard for 4 yards. I can’t justify 60 USD for a passing whim, that would be a poor use of money. So I left the daydream and moved on. Still thinking about that fabric. Another few weeks passed, finding myself in my local Joann’s again. It was my favorite place to explore. I went to the shopping plaza over the weekend where Joann’s remains live boarded up with the lights still on. It was eerie. I found myself thinking about what was blocked off inside? Was the fabric slumbering in the bolts, waiting to be made into something new? Would the yarn ever find a home in a fiber artist’s hands? It felt like a mistake, a bad dream, but it was not. It is over and now it is just a memory.

Anyway, on the second trip to Joann’s during the Halloween sales, I found my purple beloved. The bolt was still full, now marked down to 7 USD a yard. But this time I couldn’t get the project out of my mind. I’m glad I did give in to the creative urge or this project would be left without an ending. At the time, I had no idea Joann’s was going to go under. I thought I had plenty of time to remake this when in reality the window was closing. As I worked on this dress in 2025, I followed Joann’s story with frustration and weight of expectation. This remake is the final try, for this fabric I will never find again.

I made a different dress from the original and that surprised me. I believed going into the remake project that I would duplicate the same dress but with better technique. Instead, it was a project of feel. This time, I had a dress form I could drape the garment on. I had fabric clips with securely held the the slippery fabric together while on the dress form or for a quick test of fit on my own form. This time I understood proportion and where this dress would fit into my wardrobe instead of making a dress that only went with my moto jacket. I reinforced the shoulders and was thoughtful about my stitching, to make the garment strong. I added darts to pull the dress in where it was fitting baggy instead of leaving it like a velvet sack.

It became something new and I am okay with that. None of us are the same as we were years ago, we grow and evolve with every passing year. Making a dress for now, with the spirit and the fabric of my first garment, but with a new neckline and a new fit I think is an inevitability of learning and growth. I had the patience this time to try on the dress, mark what was not fitting right, and go back to work until it was correct. That was not something I was willing to do when I started, because it was all so new and confusing, but with time and practice, those new concepts became a familiar old friend. Like this tan carpet. It wasn’t until I looked at the 2020 mirror photo and the 2025 mirror photo that I saw it. The carpet in the house we bought looks just like the carpet in our apartment in Meadville. How random is that?

I have one more section of the purple velvet left over that I plan to make something with, possibly a mini dress, a blouse, or maybe a jacket. I think knowing this fabric is a relic now, makes me feel unwilling to finish this scrap project, because once it is done. I’m going to feel like my time experimenting with fabric from my first craft store is done. A chapter of my sewing life is over, and I hate saying goodbye. I’m a sentimental person. When things end, I take it hard. I dwell on the loss and muse on it. It might be unhealthy. It certainly makes life harder as a person who wants to keep things alive that are gone, it’s why I think I was drawn to study history in college.

As I keep making things, some of these projects become an archive of crafting past. What are some things in your own life that have moved from the present to part of your past? Does it surprise you to consider these things as your history instead of your current story? Thank you, reader, for joining me again down this sewing memory lane. I hope you have a wonderful day!

Character Design: Mabel Mora and Her Sweaters

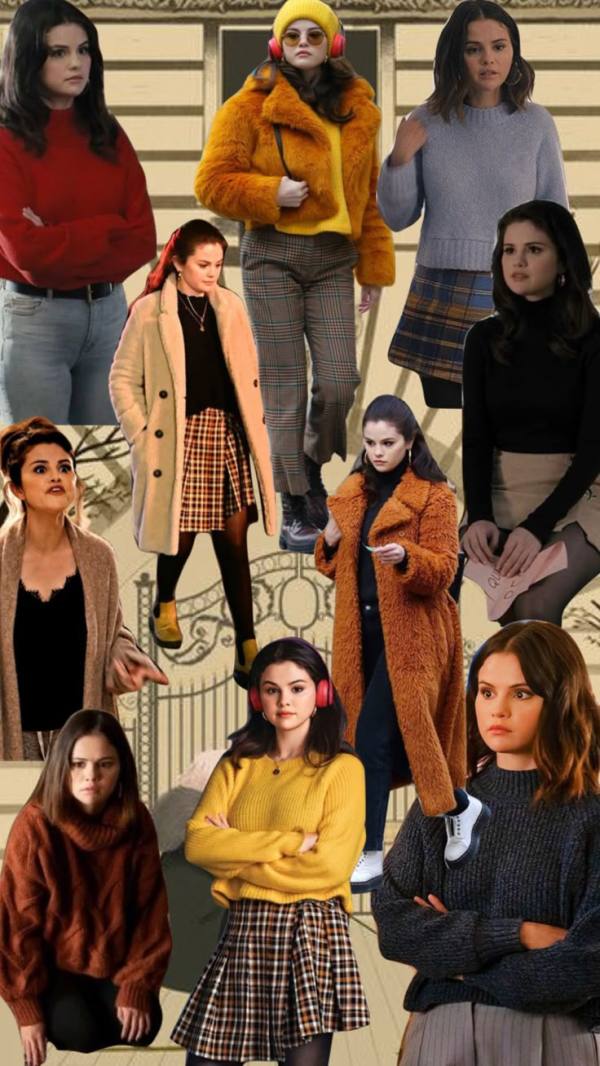
Going into the show, Only Murders in the Building, I knew the concept of the show was intriguing. It’s set in New York City, in a classic building, where whodunnit murders take place which the trio solve through their of the time true-crime podcast. The age difference between Selena Gomez and the other two leads Martin Short and Steve Martin gave the story layers from the trailer alone. I was pleasantly surprised by the character design and the costuming which layered depth to each character’s story, like a real person would express through the clothing items they choose.

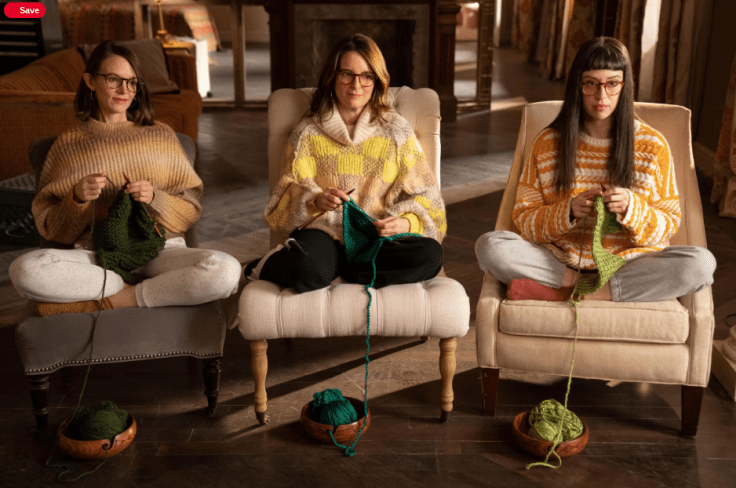
The most relatable to my taste is Mabel Mora because she not only “knits” as a plot device for “Bloody Mabel” but also wears clothing that looks like someone who knits. Her knitwear throughout season one looks like pieces made by someone who enjoys knitting. They are not your typical off-the-rack sweaters and appear to be knit by hand instead of machine. What makes it feel real to me is the weight of the yarn compared to the knitting needles shown in her apartment. The needle she says would be her self-defense weapon of choice is a thicker needle, for bulky weight yarn. My guess would be somewhere between a size 11 and size 13 needle which is appropriate for bulkier projects.

The wooden knitting bowls, the needles, and the unusual designs of the sweaters featured in this scene speak to the craftsmanship of a hand-knit sweater and place Mabel’s knitting needle in her world. They appear to be knitting which is not always the case in TV shows or movies that feature acts of knitting, the best example of this being Gromit from the Wallace and Gromit series.

Although we don’t see this craft as often in Mabel’s scenes as we see her paint or sketch, the evidence of this hobby is peppered throughout the show from her infamous dream, her carrying the needle in her bag when she jumps tie-dye guy or what lands her the moniker “Bloody Mabel” in season two. Movies and TV shows of the last five years have fallen into a telling not showing manner of character development. For example, in the 2022 remake of Persuasion, Anne Elliot breaks the fourth wall to tell views that she and Frederick Wentworth are “exes” instead of developing the story through interactions, long drawn-out glances as we see in Emma (2020), or Pride and Prejudice (2005 & 1995).

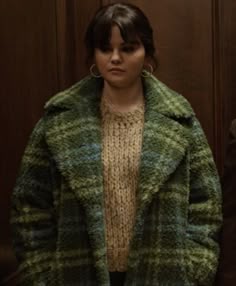
Only Murders in the Building did not take the bait, and instead showed what a 20-something knitter would wear in New York City winter – her handmade sweaters made with yarn colors that look like you could buy them from your local yarn shop. It was a clever character hobby to give Mabel as knitting was growing in popularity with people my age and beyond in the last decade, truly exploding in popularity with the rise of crochet in the 2020s. Every sweater she wears in seasons one and two looks like something you could find a pattern for on the site Ravelry.

It was such a great way to add nuance to Mabel’s character, because how many characters in TV shows knit that aren’t older? She’s a girl with a troubled and complex history, you would expect her to be a party girl or have a dark streak, like the characters of Effie Stonem, Serena Van Der Woodsen, or Jenny Humphrey, but instead, she paints, she knits, she is relatable in a plot that can be quite over the top compared to reality. Mabel is a character I can relate to, which pulled me in from the start to a show that doesn’t feel like it is a modern TV show because of how thoughtful the writing is. It never feels like a cash grab and that has given me hope that maybe this time of reboots and CGI reliance will go out of fashion for stories that once again feel handmade, like a good hand-knit sweater.

Have you watched Only Murders in the Building? Did you like it?

Magic of Scrap Yarn Cardigan

I was gifted a set of skeins. This yarn lot was made from peruvian wool, bulky weight in shades of slate gray, purple, and navy. It was some yardage but not enough to know what to use it for. 500-600 yards always trip me up. It’s close enough to be a garment so my mind wanders down that path, but too much to be an accessory, unless its a really extra, truly special accessory. I used to knit big scarves like that. I think maybe I got burnt out? Or maybe the scarf as a project feels like I am staying stagnant, not trying hard enough to make? I’m uncertain why I see it from a view point of melancholy.

Around the same time I was also passed down other bulky weight yarn, a green and red acrylic, a bright blue of wool-acrylic blend, and an olive green much chunkier fiber of many balls of yarn. More than I knew what to with. They were all random, similar im weight, and sort of related in color story. Aside from the red, the red was too bold.

Have you ever seen those absolutely scrappy sweaters? Those ones, usually worn by someone in Copenhagen or another chic city where the handknit garment is exquisitely random? A varied and unplanned web of yarn scraps, carefully made into a uniform pullover or cardigan. I love them. I pin them to boards. I save the posts. They fill the void of completeness of most projects, whether fabric or yarn, because they gobble up the bits left over, like a quilt, to rid the maker of left over yarn without wasting it.

So I made one.

Checker Board Pants: Making Pants From Your Favorite Jeans

In 2024, I was inspired to start making pants. I had attempted making pants before and they were successful but I struggled to make them feel like more than just a pair of lounge pants. Part of this was caused by not choosing a good bottom-weight fabric, and instead opting for a lightweight summer cotton that draped beautifully but didn’t give me that tailored look. I also tried an ill-fated scuba fabric in 2023 that crashed and burned because my thread tension was off. Enter this checkerboard denim print I purchased at Hobby Lobby. It was denim but lighter, not too heavy to be a problem for my sewing machine. But how would I find the right pattern?

I had a pants pattern in my stash for menswear trousers, that I considered using on this project. It’s a solid pattern and would make a straight-fit pair of jeans, maybe not the style I was going for though. I considered buying a new pattern, but then I fretted that the pattern would fit me weirdly or might not fit at all. The current style in 2024 still featured that tapered-in waist on pants that favor an hourglass figure, not my rectangle athletic build, so should I risk it? A big reason I chose to make pants in the first place was that I was sick of shopping and trying on pants that made me feel weird about my body. The men’s section was my go-to for their up-and-down pattern cutting, compared to the extreme tapering and high waist silhouette of women’s pants. Even low rise was stuck in mid-rise inseam, not the true low waist inseam I was accustomed to in the 2000s and early 2010s that helped me find good-fitting jeans because they favored my shape not the post-bbl world of fashion. I digress, my point is that buying a pattern someone else drafted felt like a risk because the fit is such a personalized thing.

My solution was to take a pair of pants in my wardrobe that I liked the fit of and to trace that pair of pants to gauge the shape. I did this with a pair of jeans that were high waist but had a nice loose fit through the hip and leg for the K-pop-inspired baggy jeans style I was interested in making with this 1990s Vans checker board print. This worked swimmingly! So much so that I traced the jeans onto a piece of brown craft paper for a quick pattern to reach for on future projects.

I chose to record this project, start to finish in video from instead of video to have a memory of how I did this to learn for myself and remember what I did but to also inspire others to try this. Pants are intimidating, especially from a paper or PDF pattern. The written instructions and diagrams have puzzled me in past projects but truly, pants are simple once you see how its done. I wanted to help others feel that freedom to create because at least in my American fashion market, fast fashion has destroyed the craftsmanship of pants and standardized sizing. I referenced this in a previous post, Shaping Up where I had to confront the dressing room terror of things not fitting and seeking to not be defined by my jeans size, when trends and pattern cutting shape shift sizes, but to take control of it on my end and get healthier in 2023.

This pants project was one of the most challenging and rewarding projects of 2024. I faced my fear of sewing denim, inserting pockets, and fastenings. I chose to not attempt a fly into I had more pants sewing experience, instead I planned to make what I knew I could achieve under my skill set. I opted for a side closer with a drawstring to have an adjustable fit since the denim had zero stretch. The denim containing no stretch was a feature I sought because I believed it would be easier to work with as it was my first project of this kind, and I wanted a crisp tailoring from the woven fabric. A key thing to note is that the jeans I used for my template also are non-stretch denim. For an accurate this is paramount or else the project will not work. Either you will cut your project too large or too small. It is also essential to leave a seam allowance on your pattern pieces. When self-drafting it is your responsibility to take charge of the seam allowances and plan ahead.

I messed this up with the crotch line and had to make a quick fix. My fix was a diamond gusset. Popular in women’s leggings, this diamond gusset shape piece allows for greater mobility while maintaining the strength of the seams.

The second challenge I faced was the problem of a narrow bolt and an all-over pattern. This fabric was quite narrow and because I was cautious with my seam allowance, I cut my pieces large. This meant that I was not cutting from the longest side, but the most wide. The pattern pieces were cut out missing length on the leg. My solution was to add on to the bottom and pattern match. It’s easier to match than people say, it just takes patience and intentional sewing. I’m pleased with how seamlessly I got my pieces to match up.

The pockets were a challenge. How do you place them? How do you insert them with strength so the pockets can be used without pulling the pants down or ripping? I chose to place them angled on the sides, aligned with my hips so that they would be practical and not create weird bunching at the front of the pants. No wonky crotch fit here!

Would you make your own pants? I hope I inspired you to get creative and go for it if you are sewing-inclined. Thanks, reader, for joining me once again on this quest to grow my fashion design skills. Have a wonderful day!

Hot Air Balloon Knit Hat

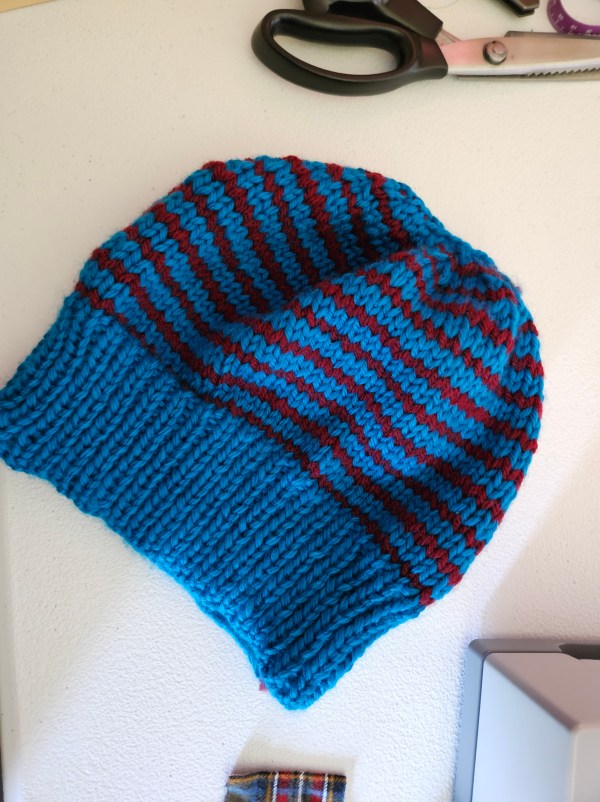
Do you ever pick up a knit object and the fiber feels buttery soft? That’s exactly how this cerulean blue yarn feels to the touch. It is a bulky weight yarn blend of super wash Australian wool and acrylic fibers. It’s a yarn that I believe has been discontinued by Knit Picks but I hope they bring it back because no project has been a joy to knit up like this one. It glided across my needles! It’s one of the reasons I chose to knit this fiber into a hat that would be soft and warm on my head. It’s cozy. Another reason was because this skein of yarn was a destash from my mom, there was only one skein so I decided to make it the focus of one small project.
I’m not very good at using one solid color throughout my projects so I paired this was a Brava bulky in red also from Knit Picks to add visual interest to the hat. I think it looks like a hot air balloon from an illustrated book. An imagination filled tale, like how the heffalumps and woosels turn into hot air balloons during Winnie the Pooh’s trippy dream during the flood. I love how bright the contrast is between the delicate red lines and the vivid water-like blue. It has a bit of the Apres-ski vibe with the vivid color story of the late 80s and early 90s.

I made this knit hat on size 10 bamboo straight needles in two pieces that I seamed together. I made the decision to construct this hat using two pieces because I had not made a hat in over a year and felt a bit rusty. I also wanted control of the taper of the crown, without needing to also refamiliarize myself with circulars or double-pointed needles. I made this hat in August 2024 and I was coming off the big move into the storage unit for two weeks and then into the new house. To be honest, I was feeling a bit creatively stir crazy from the busy summer. I’ve learned a lot since I made this from my dabbling with sock knitting and could confidently make this now with a different construction, but as a quick beginner project or knitting warm up when you’re feeling rusty it’s an easy to make project. I believe I made this over one weekend, potentially one day? I can’t remember how focused I was.

You will need a tape measure or a knit hat that fits you the way you would like your hat to fit for reference. Cast on stitches according to your head size for one half of your head. Knit ribbed stitches for 3 inches and then switch to stockinette for the rest of the hat. Switch yarn at the end of rows and don’t decrease too quickly. I’ve made this mistake before. You will need the width across your crown to join at the top and you can decrease quickly at the end so be filled with care as you taper and don’t hesitate to frog and try again for the right fit. Adding a safety line where you plan to unravel your project to, is a huge life saver! Mirror your second side and stitch the two halves together with a tapestry needle. An easy knitting project that is useful and can help you practice skills like purling, ribbing, yarn over decreases, crown shaping, and yarn tension.

#67 – Decorating, Snow, and Small Upgrades

Christmas knitting is full swing and I am yet again behind! This happens every year to me. Oh well. But, this is one of my favorite seasons of the year and I wanted to share some tidbits that have made this year a little merrier.

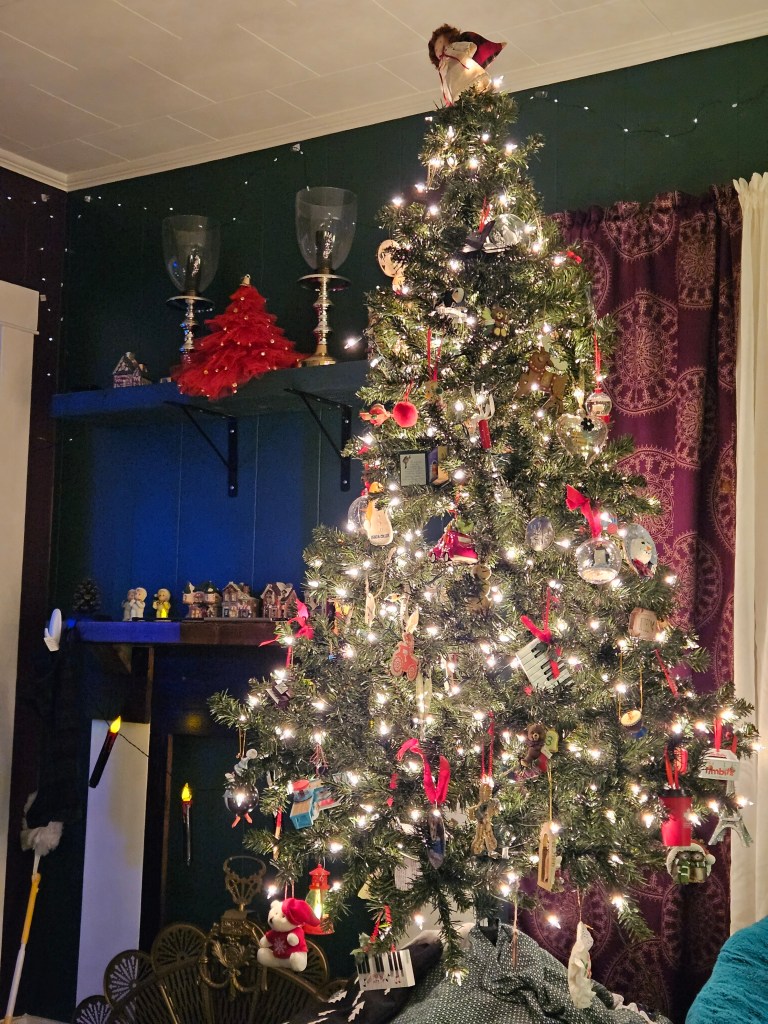
This is the first Christmas in our house. It was special moment unboxing our decorations that have moved with us from apartment to apartment that can now be rested here. Some are heirloom pieces that lived a life long before I was born, such as the nativity my Grandma cast in the 1970s. Others are ornaments given by piano students.

The Christmas village was my mom’s and I remember putting it out in on the third floor, our little apartment within my grandparents’ house. I can’t believe the journey it has been on with me through my life. I am also excited to have a staircase to decorate with garland like my mom and Grandma have done each Christmas. It makes it feel like home.

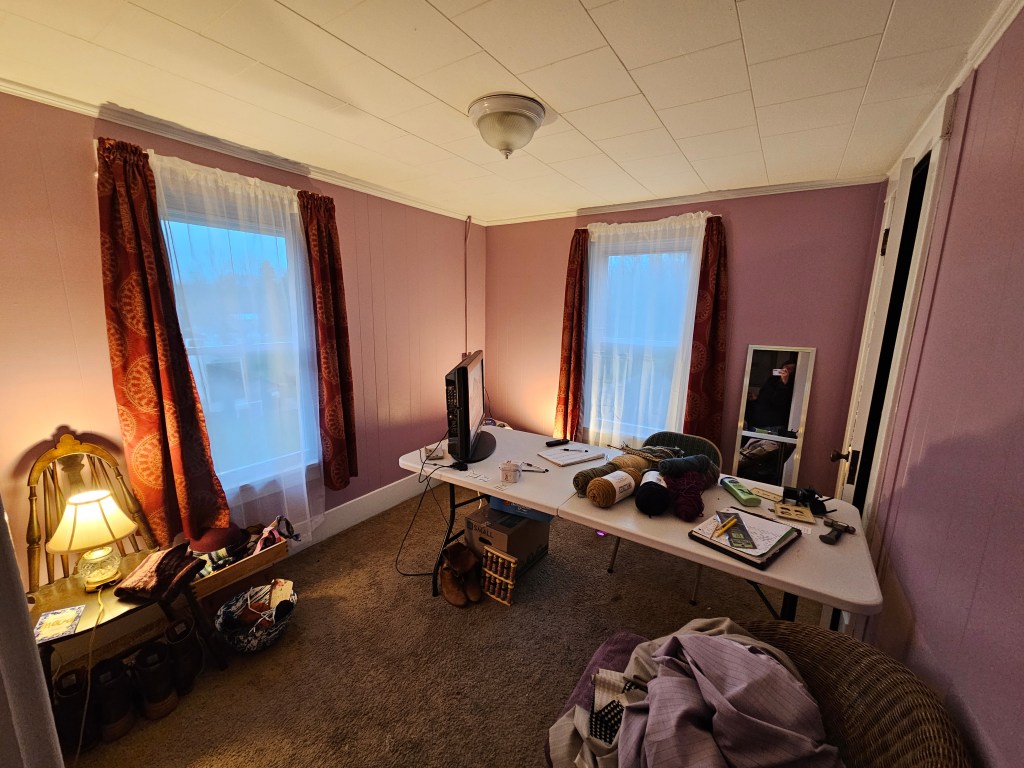
The next thing that has filled this time with joy, has been the fresh paint of my sewing room. Kyle graciously primed the woodwork and painted this room while I was sick. It satisfyingly looks like the color scheme of my bedroom at my mom’s before an ice dam melted through my ceiling in 2015, destroying it. I’ve missed this mauve-lavender color. I took the opportunity to rest my Stray Kids, NCT, and Aespa posters. I like the minimalist cozy atmosphere this room radiates now with this simple makeover. It was a room I kinda hated before with its janky woodwork and boring walls. Now it looks complete!

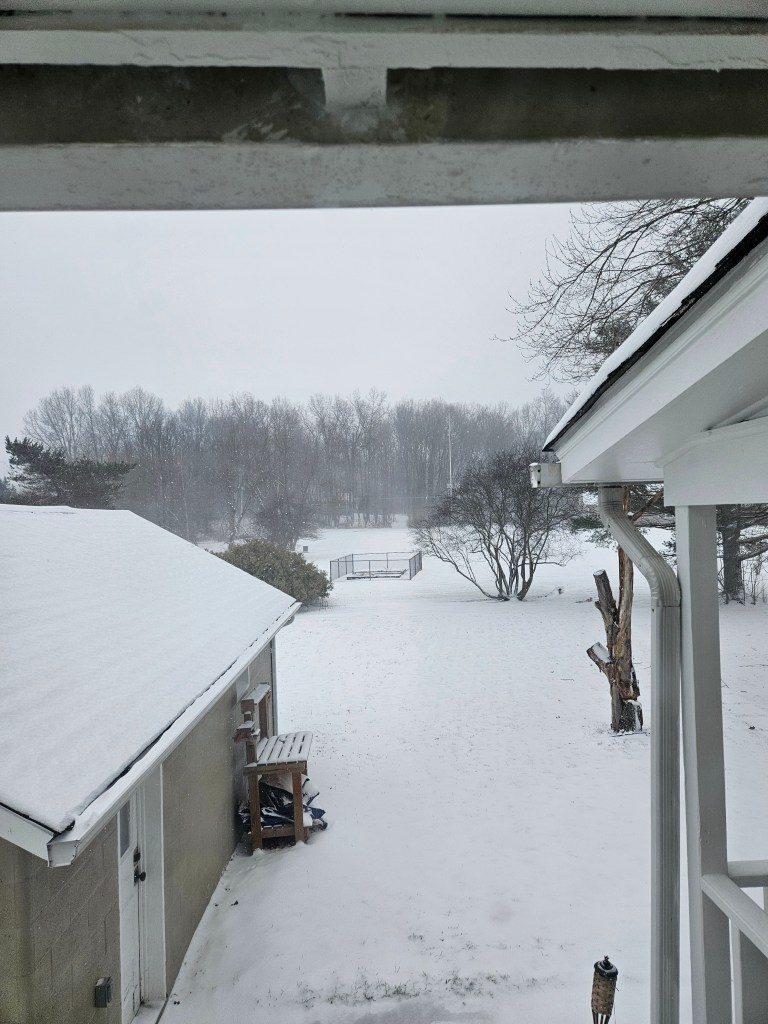
We’ve been blessed with a little lake effect snow and it has been a marshmallow world. The views here become serene and open without the leaves. Some may see this as bleak but I love the transformation of snow and the peaceful slumber of the nature for the winter months. I hope we get more moments like this.

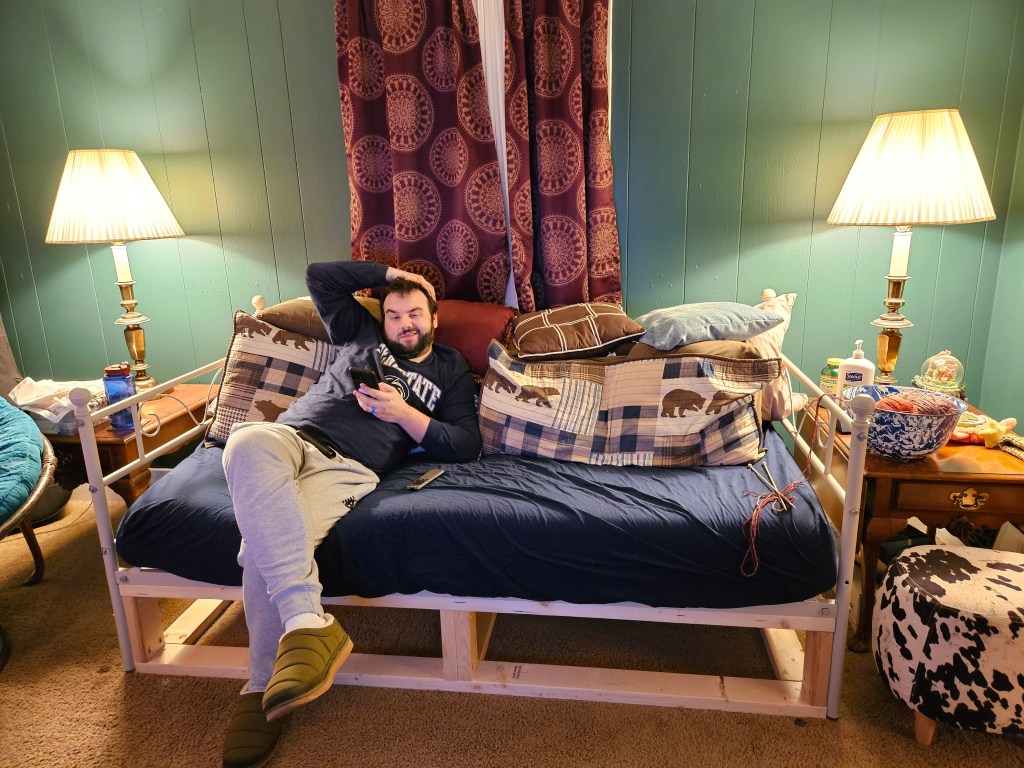
Lastly, we made some upgrades to our first floor before Thanksgiving. Our daybed’s framework broke. Instead of buying new furniture, Kyle set to work on designing a whole new base frame for the couch, complete with storage drawers! We also updated our front door with stained glass window film. Cheap? Yes, but, it allowed us to remove the broken blind that was an eyesore while maintaing privacy until we decide on a permanent solution for this door.

At 20 USD it was an affordable way to create character to a pretty ugly door. We’re making slow progress on updating the house, but as time goes by I realize, it’s part of the fun and changing everything all at once, if we had the money (which we don’t) would be pretty boring! Anyways, I hope wherever you are you have a lovely day and thanks for stopping by my little blog. Now, time to get back to Christmas knitting. I can’t wait to show you what I’m making! 😁

Bunny Plush Keychain

Recently, I shared a Knit Star Plush Keychain Pattern, but that wasn’t the only keychain I’ve been working on. Behold, a knit bunny keychain made from repurposed fabric! This keychain was inspired by my Skzoo Quokka plush keychain which I have styled on my purse and belt loop. I was tempted to buy more as this trend has been all over my feed this year, but that’s unrealistic. So I thought, in Jeremy Clarkson fashion, how hard could it be?

This key chain was made by repurposing a pair of underwear, that was weirdly made without any stretch. They had no purpose but to be trashed, which I didn’t want to do because they were brand new and I liked the pattern and color story. So I wondered, could I translate this to a plushie and I could make this plushie into a keychain without buying any materials beyond the keychain hardware? The answer is yes!

I used a pen to draw pattern pieces onto the underwear by designating the fabric into four ear-pieces, two head-pieces, and a rectangle piece that would be used to connect the keychain hardware. The rest of the fabric was cut into small cut pieces that would be used as the stuffing. This worked like a dream!

I chose to sew this item by hand because of the small nature of the project. The pieces were too small and delicate to sew by machine with any semblance of control or care. It was a quick make and took one day to complete. I sewed 90% of the ears, turned them right side out, stuffed them, and then set the ears aside. Next, I repeated this process with the circle for the head and stuffed it. When I was certain that all the stuffing was divided between the three pieces adequately, I sewed closed the ears and head. Next, I attached the ears to the head. Finally, I sewed the rectangle and threaded it through the loop of the keychain before attaching it to the bunny plushie. I opted for an abstract look so I did not decorate the bunny plush with a face, therefore if it spins around it doesn’t matter what side is facing out.

Overall, this was a quick and thrifty project with the hardware coming in a pack of two for $2.99. I used the other clip on the knit star plush project. This type of plushie could be made with any scrap fabric you have and could be adapted into other animals. It would be an easy DIY gift too!

Knit Star Keychain Pattern

Back in the spring, I had this grand idea that I would learn how to crochet. I had a friend who crocheted next door, I had recently found TL Yarn Crafts on YouTube. Toni made it look so fun. I was enamored by what I saw others creating with crochet hooks. Crochet rose in mainstream popularity again through 2020 and beyond in 2024.

My Impression of Crochet

The internet is chock full of crochet plushies, dresses, sweaters, bags – you name it you can crochet it. I didn’t see this kind of creativity from my corner of the knitting internet. I had this impression that knitters were serious and crocheters were mavericks. So the hook was calling to me.

I bought a crochet hook and spent a few weeks watching videos, perusing a book my neighbor lent me, and getting the hook into some loops. It’s a weird transition from knitting. I apparatus from two is a change. There is a posture, one hand, and yarn holding. There is a new way to keep yarn tension, and there are a lot of new stitches. There was more emphasis on turning your work than the orientation of the wrong side and right side. Single crochet and double crochet were not a one-for-one of knit and purl. That surprised me.

Granny squares were a bit more involved than I expected. It’s an art form that deserves respect. I definitely respect it. It kept me back, I had the tightest tension and felt like I had never done yarn crafting before. I was shocked, shouldn’t this be a piece of cake? I’ve been knitting off and on since 2012. Yeah, it’s not that simple.

Fluff Around and Find Out

To be honest, the way that I learn best is to just go for it, and doing these basic crochet stitches on a project that was a rectangle, all while it looked like a tattered mess was discouraging. I wanted to make one of the little plushies or shapes that seemed to be a sculpture that only crochet could create. But I was seriously not getting it. So I paused and thought about it. Is there any way to apply this creative point of you, the sculpting of yarn that only crochet can, but try it with knitting needles?

This might seem weird to consider if you don’t knit or crochet but the processes seem vastly different to me. There’s a strategy to knitting. You have to do things in stages, like knitting a section and transferring stitches to a stitch minder or picking up stitches that were bound off or are just part of a knit edge. While crocheting builds on itself and is an amorphous thing that is truly sculpting and adding as you go.

So I decided, what if I made something with the sculpting element of crochet but with knitting steps. I decided on a star as you can see above that was crafted out of multiple knit sections that were stitched together. This pattern has a lot of little steps but I think it was effective.

Star Knitting Pattern

Star Point Diamond – Row 1: Cast on, Knit 1, Row 2: Purl 1, Add Stitch, Row 3: Knit 2, Add Stitch, Row 4: Purl 3, Add Stitch, Row 5: Knit 4, Add Stitch, Row 6: Purl 5, Row 7: Knit 4, Decrease 1, Row 8: Purl 3, Decrease 1, Row 9: Knit 2, Decrease 1, Row 10: Purl 1, Decrease 1, Row 11: Knit 1 and Bind Off.

Repeat four times until five are made. Then using a tapestry needle, join the five points together at the center so that you have the base for a star, then join the sides of the diamonds together so that you have a flat star. Repeat the whole process one more time so that you have two flat stars and then sew them together with the tapestry needle.

So now that you have a star what can you do with it? I had planned originally to make a star garland for Christmas, but then the Fire Nation attacked and I had to move.

So we pivot to the bag decoration trend of 2024. This is a combination I’d say of Kpop, Xiaohongshu style trends, and the Japanese Ita bag becoming popular in the West. If you would like to learn more about Ita bags, I would highly recommend Addy’s video on YouTube. And these little stars in the original green and its pink starfish cousin have made excellent DIY plushie keychains.

Finished Product Used as a Keychain

Final Thoughts

I think creativity is about experimentation and learning as you go. I think sometimes it is important to do it the normal way and other times it is more satisfying to try a new method, a new medium, and make something you may not have thought you could. I still have incredible respect for crochet and I also think knitting has more potential than I thought. I have also learned that if a key chain or other small trinkets are not specifically branded I should try making them before I buy. It’s a great way to use up materials in my stash, level up my skills, and keep my consumption down and my wallet happier.

Create a website or blog at WordPress.com

Up ↑