
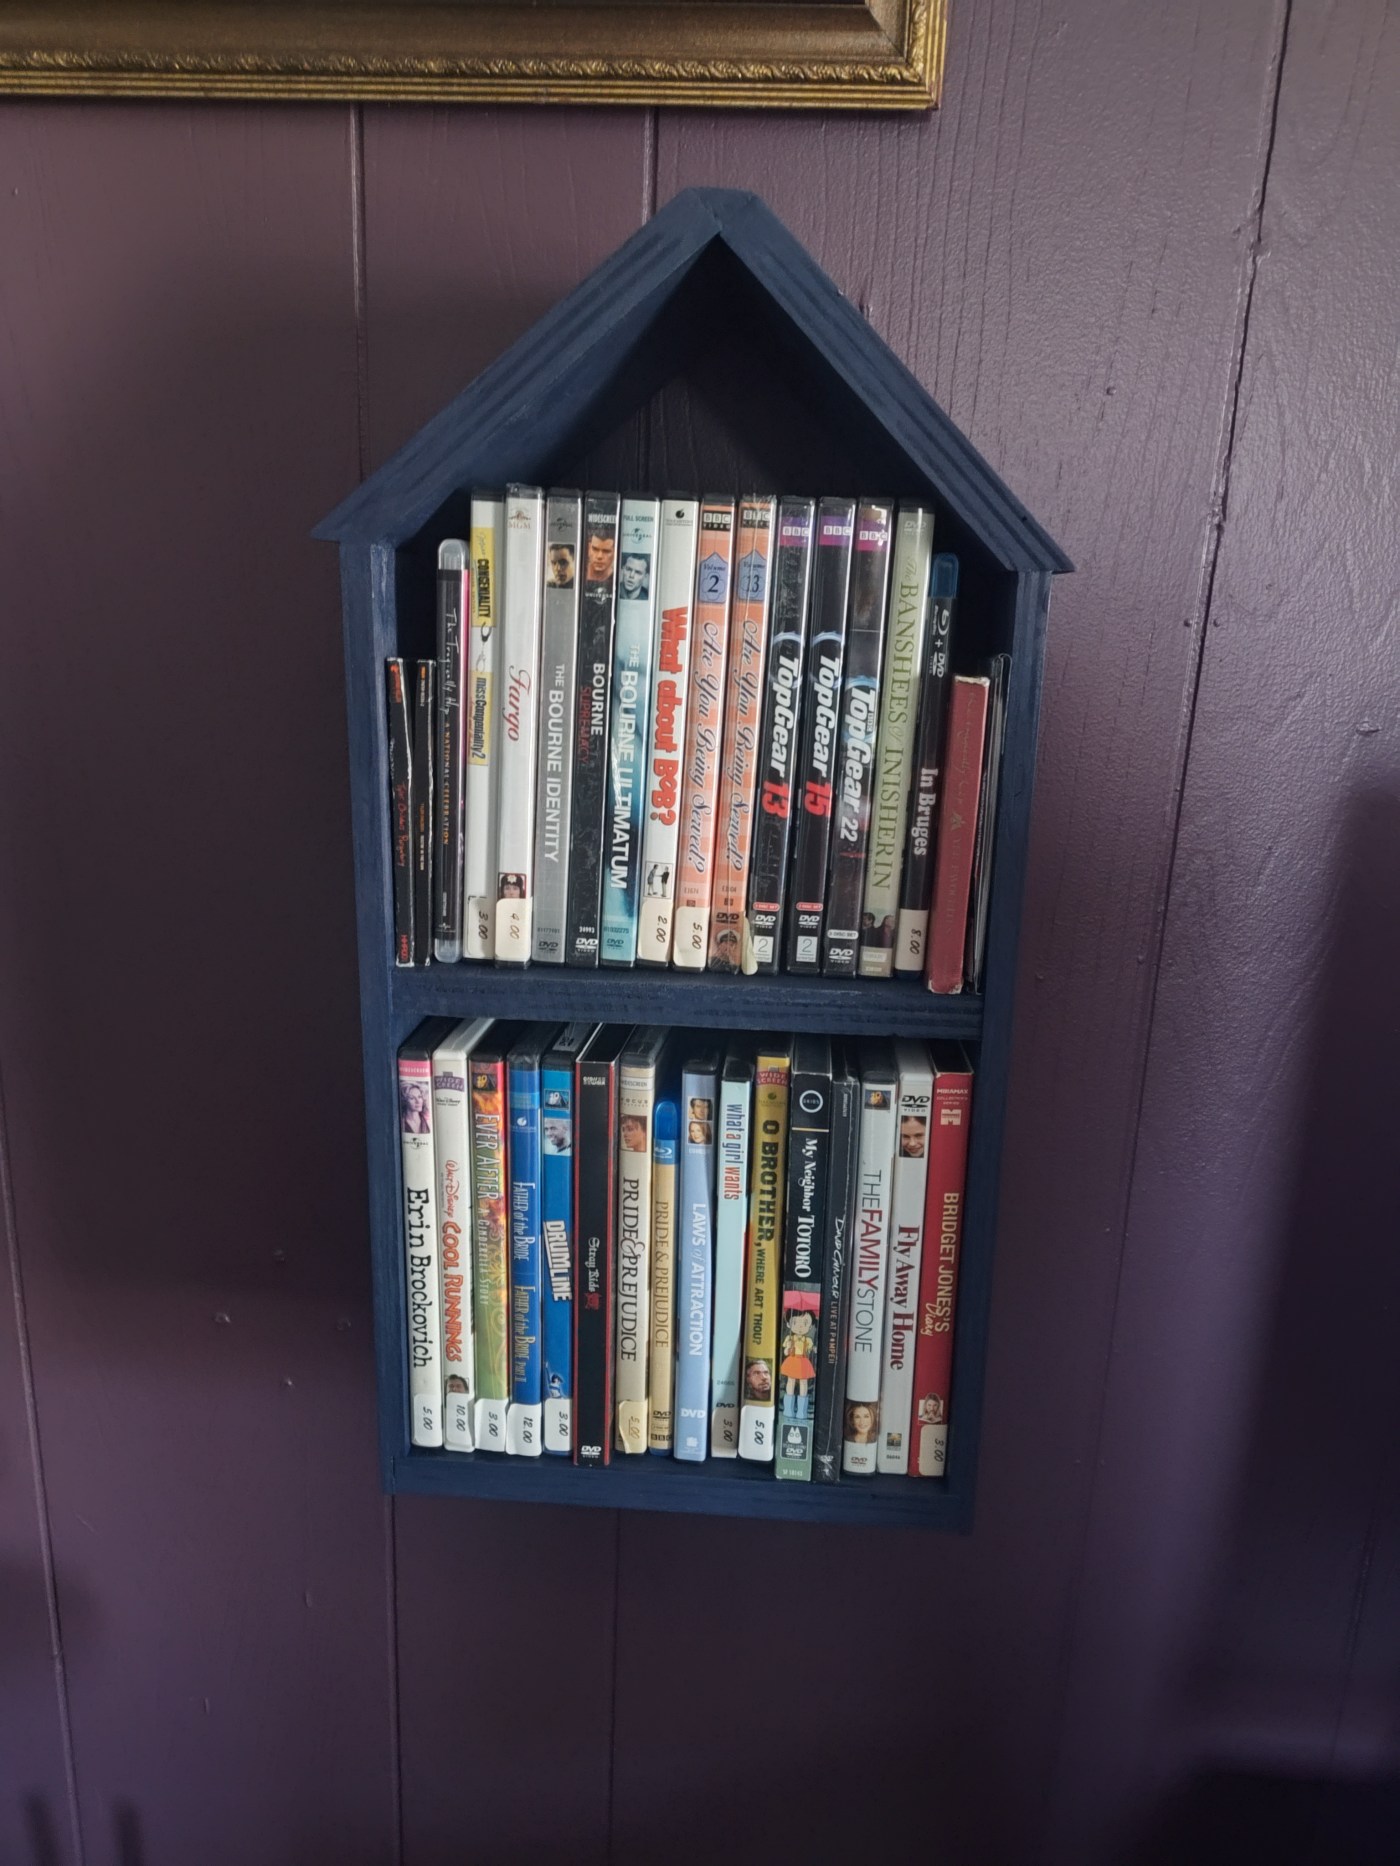
Carrying on my foray into shelf designing and building, I follow up my recent dimensional shelf with one I’m calling Birds Can Read? I don’t know the answer to that question, and we’re actually using this shelf to hold DVDs and CDs, so perhaps I should call it The Byrds, The Yardbirds, and The Birds. Those are some pretty weird references, but the first two are rock bands from the 1960s, and The Birds was a Hitchcock movie. But even calling it a birdhouse-inspired bookshelf is a bit of a stretch. It has the general shape of a birdhouse, but it’s open in the front. Still, I love the design and how much whimsy it’s brought to our living room. Plus, it’s enabled us to store quite a few DVDs and CDs, freeing up some room on our main bookcase.
Inspiration Behind the Design & Building the Shelf
I’ve been looking for quirky ways to add more shelves to our house. I could easily build or buy brackets and set a piece of wood across them, but I want something more aesthetic and creative than that. When I was doing the initial research for shelf designs, I stumbled across someone using a normal-size birdhouse to hold a couple of books and thought it was cute. Thankfully, Magz did too, so I began to work on the design, building upon the original inspiration photo.
I knew that I wanted my design to be larger than a standard birdhouse because I wanted the shelf to be able to hold a decent amount of stuff. I also felt that using a design like this to store DVDs, video games, and CDs made the most sense since they mostly have a standard sizing, and many could fit on one shelf. I took the dimensions of a DVD case and worked that into sections of 3/4-inch and 1/2-inch plywood that I had lying around, realizing that I had enough plywood to build a two-story birdhouse.
I used the two longest pieces of 1/2-inch plywood as the sides of the house and sections of 3/4-inch plywood for the two shelves and the roof pieces. I cut a rabbet groove into the bottom of the side pieces to receive the lower shelf, giving extra glue surfaces on each end. The top shelf is glued and nailed with a simple butt joint. The roof proved to be tricky because it’s a triangle, but I only knew one side’s dimensions at the beginning. After trying to work back through the Pythagorean Theorem to little success, I decided to go with the trial-and-error method, which eventually worked. I am really pleased with how the roof looks. I found a small cut-off section that perfectly fit the two “side” pieces of the roof, and the finished product looks great.
To hang the shelf on the wall, I attached two small strips of wood on the underside of each shelf. I drilled holes into each strip that are large enough to fit screws for wall anchors. To complete the shelf, we chose a dark blue color and went with Red Apple craft paint because it’s cheap and will work perfectly for this use. After two coats, it was ready to be hung.
The shelf is hung on one of our living room walls, and it is a perfect fit for the place we chose. It’s close to our TV and DVD player. The blue paint pops out from the wine-colored wall, and it has accomplished everything we wanted it to. It holds enough movies and music to free space on our bookcase while still being small enough that it looks like a piece of art.
Final Thoughts & Areas of Improvement
I like the finished product enough and had such a great time designing and building this shelf that I want to build more. That doesn’t mean we’ll have duplicate shelves, but I’d like to use this shelf as the foundation and build upon it. Perhaps that means a simple color or dimension change, but it could also go as far as adding a door or adding design elements to make it even more whimsical. We’ve been watching a lot of videos from the Living Big in a Tiny House and Exploring Alternatives YouTube channels, and the best homes are full of whimsy and give off fairy vibes. We’d like more of that in our house, and this bookshelf brings those vibes. Adding more whimsical design details would accomplish this to an even greater degree.
There aren’t any aspects of this project that I would improve besides making cleaner cuts and having a nicer finish, but those tend to come with repetition. Something I’m considering adding to this first shelf is a place to hold our DVD player since it’s currently sitting on a stack of books we have. The player won’t fit in our TV stand, so it’d be nice to have the player higher off the ground. So, we’ll see if that happens. With this project wrapped up, I’m continuing my pursuit of shelves, with the next one going to be my first attempt at hexagonal shelves.


Leave a Reply