
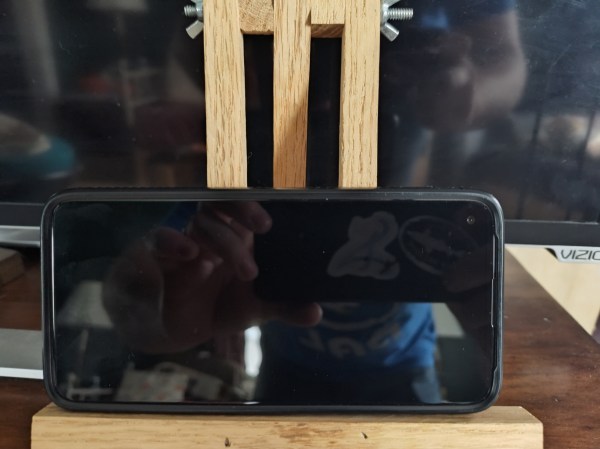
I’m sure most have experienced the frustration of trying to watch something on a phone and either struggling to find something to prop it against or having that item not work, causing your phone to fall over. Magz and I often watch things on our phones during the day and used to experience the annoyance described above. Back in 2022 or 2023, Magz was using her sewing machine a lot, and it would cause the table she would use to bounce, toppling her phone. She knew she wanted something stable enough to withstand the sewing machine’s bounce but compact enough to be easily stowed away when not in use.
My solution? A mini easel, which fit all her needs. With a triangular base, an easel is sturdy even when the surface it’s on is jostled or the easel is bumped into. Easels are also compact. The pivot point at the top allows it to be folded flat and put away.
I spent time studying large easels that hold canvases to figure out the general design. I then took measurements of her phone and scaled everything down from the large easel to ensure that the scale remains intact. Here’s what I came up with.
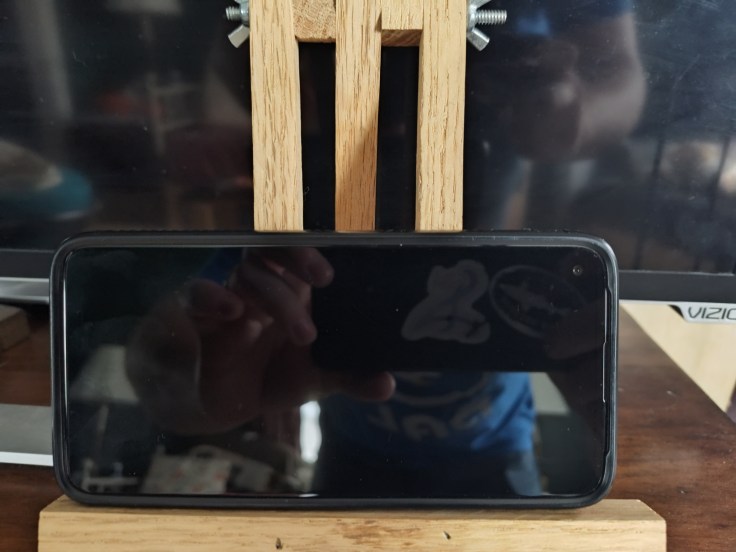
It was really easy to make. I used scrap wood I had, ripped everything down to a half-inch wide, and then cut everything to length. The two front legs are the same length, and the back one is a half-inch shorter. The horizontal brace is about an inch longer than her phone is. I also added two spacers between the legs to help with opening and closing. Finally, I bought a section of threaded quarter-inch stainless steel rod and two wing nuts. The wing nuts are nice because you can loosen and tighten them to hold the easel in place. I’m really proud of this design, and it’s worked perfectly for Magz’s needs. The biggest issue is that I never built a second one for myself. I can’t remember if I didn’t think I’d use one or if there was another reason, but I didn’t make another.
Building a Second (Different) Easel
After three or four years of having my phone fall or be in the way of my monitor, I decided to finally build myself a phone easel. Even though I didn’t remember all the details of building Magz’s easel, it was easy to take the measurements off hers and build mine the same way. I once again used scrap wood and cut everything to the same length and width. However, a problem arose when I started to assemble everything: I didn’t have anymore wing nuts for the threaded rod that holds everything together. I also didn’t want to go to the local hardware store to buy them, so I quickly pivoted and came up with an alternative.
This spring, I took two Ikea chairs apart and built gardening trellises with them. On those chairs, the arms are attached to the main frame with bolts that are threaded for about an inch and twist into a female version, and everything is tightened with allen wrenches. They were a bit longer than I needed, and because the threads didn’t run the full length of the bolt, I couldn’t cut them down. Instead, I cut additional spacers for the easel. That fixed one issue. The other issue was that the bolt was thicker than the rod, so I had to use a larger drill bit. Plus, because the female end was wider still, I used an even larger bit but only drilled into the right leg a length equal to the female end. In the end, everything went together and works well. Here’s the final product:
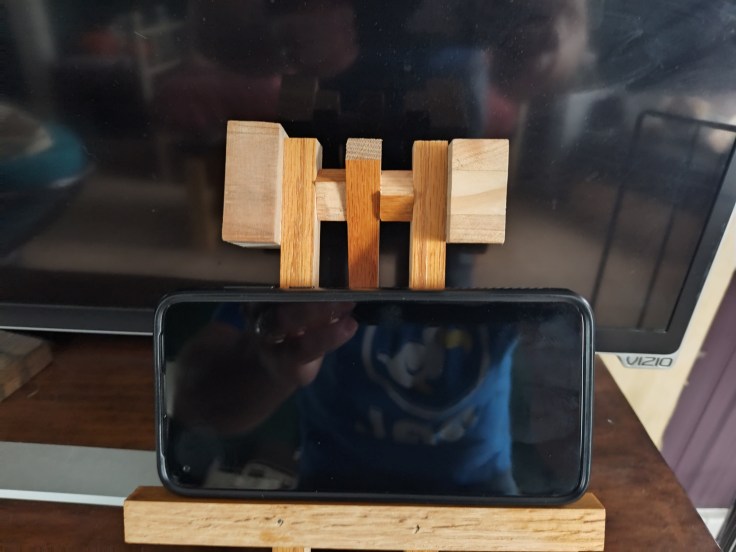
I’m not as happy with this one. Having to think on my feet to address the lack of wing nuts changed the aesthetics of the easel in a way that I’m not that happy with. Even though it looks artistic, it doesn’t have the refined look of Magz’s easel. I do think that the extra spacers on the outside of the legs are pretty cool because it was wood that I joined together, but I may still change it in the future. Ultimately, though, it works and does its job, so I can’t be too frustrated with it.
I really enjoy working on these small woodworking projects. They’re quick and generally have a lot of room for error. This is also a project I’d probably consider making as presents or selling in the future if that happens. If you’re a woodworker and are interested in more details about these and how I made them, please don’t hesitate to leave a comment.

