When I put this jacket top on for the first time, the finished piece, I felt this sense of completeness. What I used to sketch, what I would aspire to be, the aesthetics I was drawn to during those formative years of finding my personal style in the late 2000s and early 2010s before life got a bit weird, this was the type of fashion I wanted to be a part of. It’s the kind of thing I’ve been waiting for my skills to develop to reach the imagination held inside. Waiting for the chance to express itself in more than paper and pen, in thread and fabric and form!
My early projects were a product of the times, a year spent online instead of in the world, historical fashion, cottage core, and dark academia, but not the personal style I had cultivated. Big projects were hard, blazers seemed impossible. But they are so iconic. I crave structured pieces like that in my wardrobe, I mean I wrote an entire essay on the jackets and structured fashion that is the Don’t Stop Music Video by Ateez. That is 4 minutes of glorious outerwear inspiration!
This project at times seemed borderline cursed. I cut this jacket out the day I screwed up my tweed coat and notched lapel pattern by forgetting to mirror the pieces. Not the best start to a day of design work, but perseverance and clear-headedness prevailed to keep this pattern on track. But then, it sat in my stash waiting for me to get started. I hid from it in case I failed it.
One day, I put the pieces on the form and began to pin. The lines of a jacket, structured shoulders, and excess fabric hang around the collar, waiting for the traditional form to take shape. I pinned it exactly how I thought I wanted it, and the sewing process made a few edits for me and my plan. My machine took the lead and created the happy accident, the darts around the neckline. The collar was inserted with more attitude than my intention but I prefer the edge, the little twist on the blazer that has become the Marguerite Jacket.
With the wide lapels, I pinned them back against the jacket to create these triangle shapes on the body of the jacket top. I decided to lean into the attitude of the silhouette to add an exposed zipper and black buttons for a bit of a British punk little spice. I anchored the collar down in the front, balancing the chaos and structure into a garment that walks the line between blouse and blazer. It’s comfy, it’s fun, it’s versatile. I’ve styled it with flare, baggy jeans as pictured. I’ve styled it as a blazer over a cocktail-style dress. I know it will be fun to try it out over cargo pants, skirts, shorts, etc. I look forward to it! I also look forward to wear my designs evolve from here as moving forward I plan to become more cohesive in my aesthetics and collections.
The sweater vest. It was on my radar but did not become an item I dreamed of until I saw a lookbook from Steal the Spotlight styling Friends-inspired outfits, inspired by Chandler, the sweater vest king. I continued down the rabbit hole and to Katie’s K-pop Comeback Fashion review and I was done for. K-pop fashion, Korean fashion, and the sweater vest were a layering piece I knew I was going to make. Maybe it is the color combinations or the accessories, but how these sweater vests are styled across different boyband concepts just got me. It felt fresh and fun, not preppy or stuffy.
A year later, I was ready to tackle this project. After making a few sweater projects, and learning how to pattern from garment construction, I felt like I had a good understanding of the shape needed to make the sweater. At Joann’s, I found a non-wool tweed yarn and I knew this was the yarn I wanted to start with. It looked like garments I love from Irish Aran Jumpers and was a way to bridge my heritage and this new world I was exploring through K-pop. I like the garments I design to have a story and intentionality behind them.
The New Technique
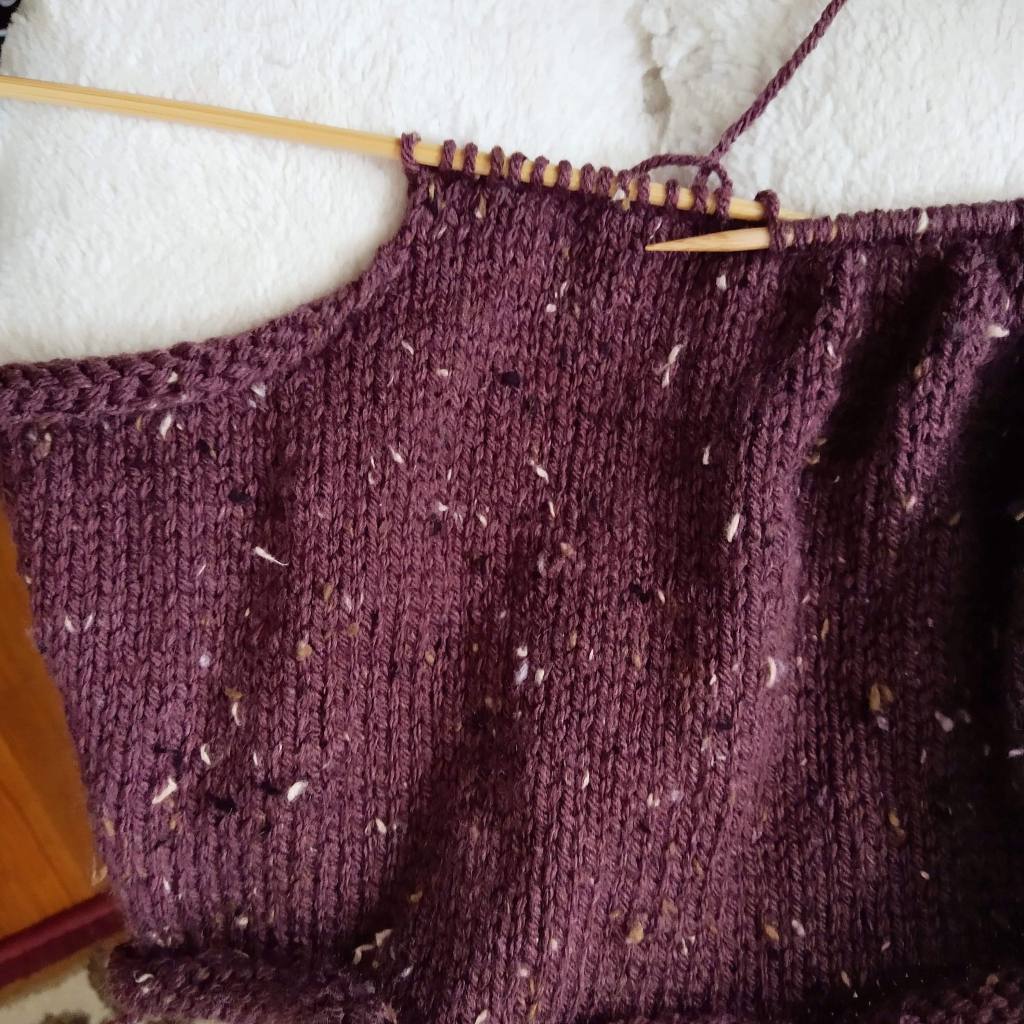
With US Size 8 needles in hand and one skein of Big Twist tweed yarn awaiting a new form, I began by casting on 65 stitches. Working my way up I did the basic knit-purl stitch and gradually binding off on either side when I reached my desired length for the armhole. I chose to make a cropped sweater vest to accentuate my waist and break up my long torso. The big moment though came when I did some research and made the decision to branch out and knit the shoulder and neckline on two sets of needles. This required knitting, casting off in the middle, and continuing to knit on a second set of needles. It worked!
Learning new techniques is always worth the time and the trial because eventually it clicks and you have something new, you didn’t think you could do, but you can!
Making two instead of four pieces on my straight needles was a time-saver! Honestly, I see why having a teachable spirit is important in all aspects of life because I thought I had a good technique before, but dang, two pieces are such a better experience. Four pieces was a mental game, and I got bored. Hence why my previous sweater projects have taken months and months, and months because I distract myself with palette cleanser projects and then avoid finishing the four-piece projects.
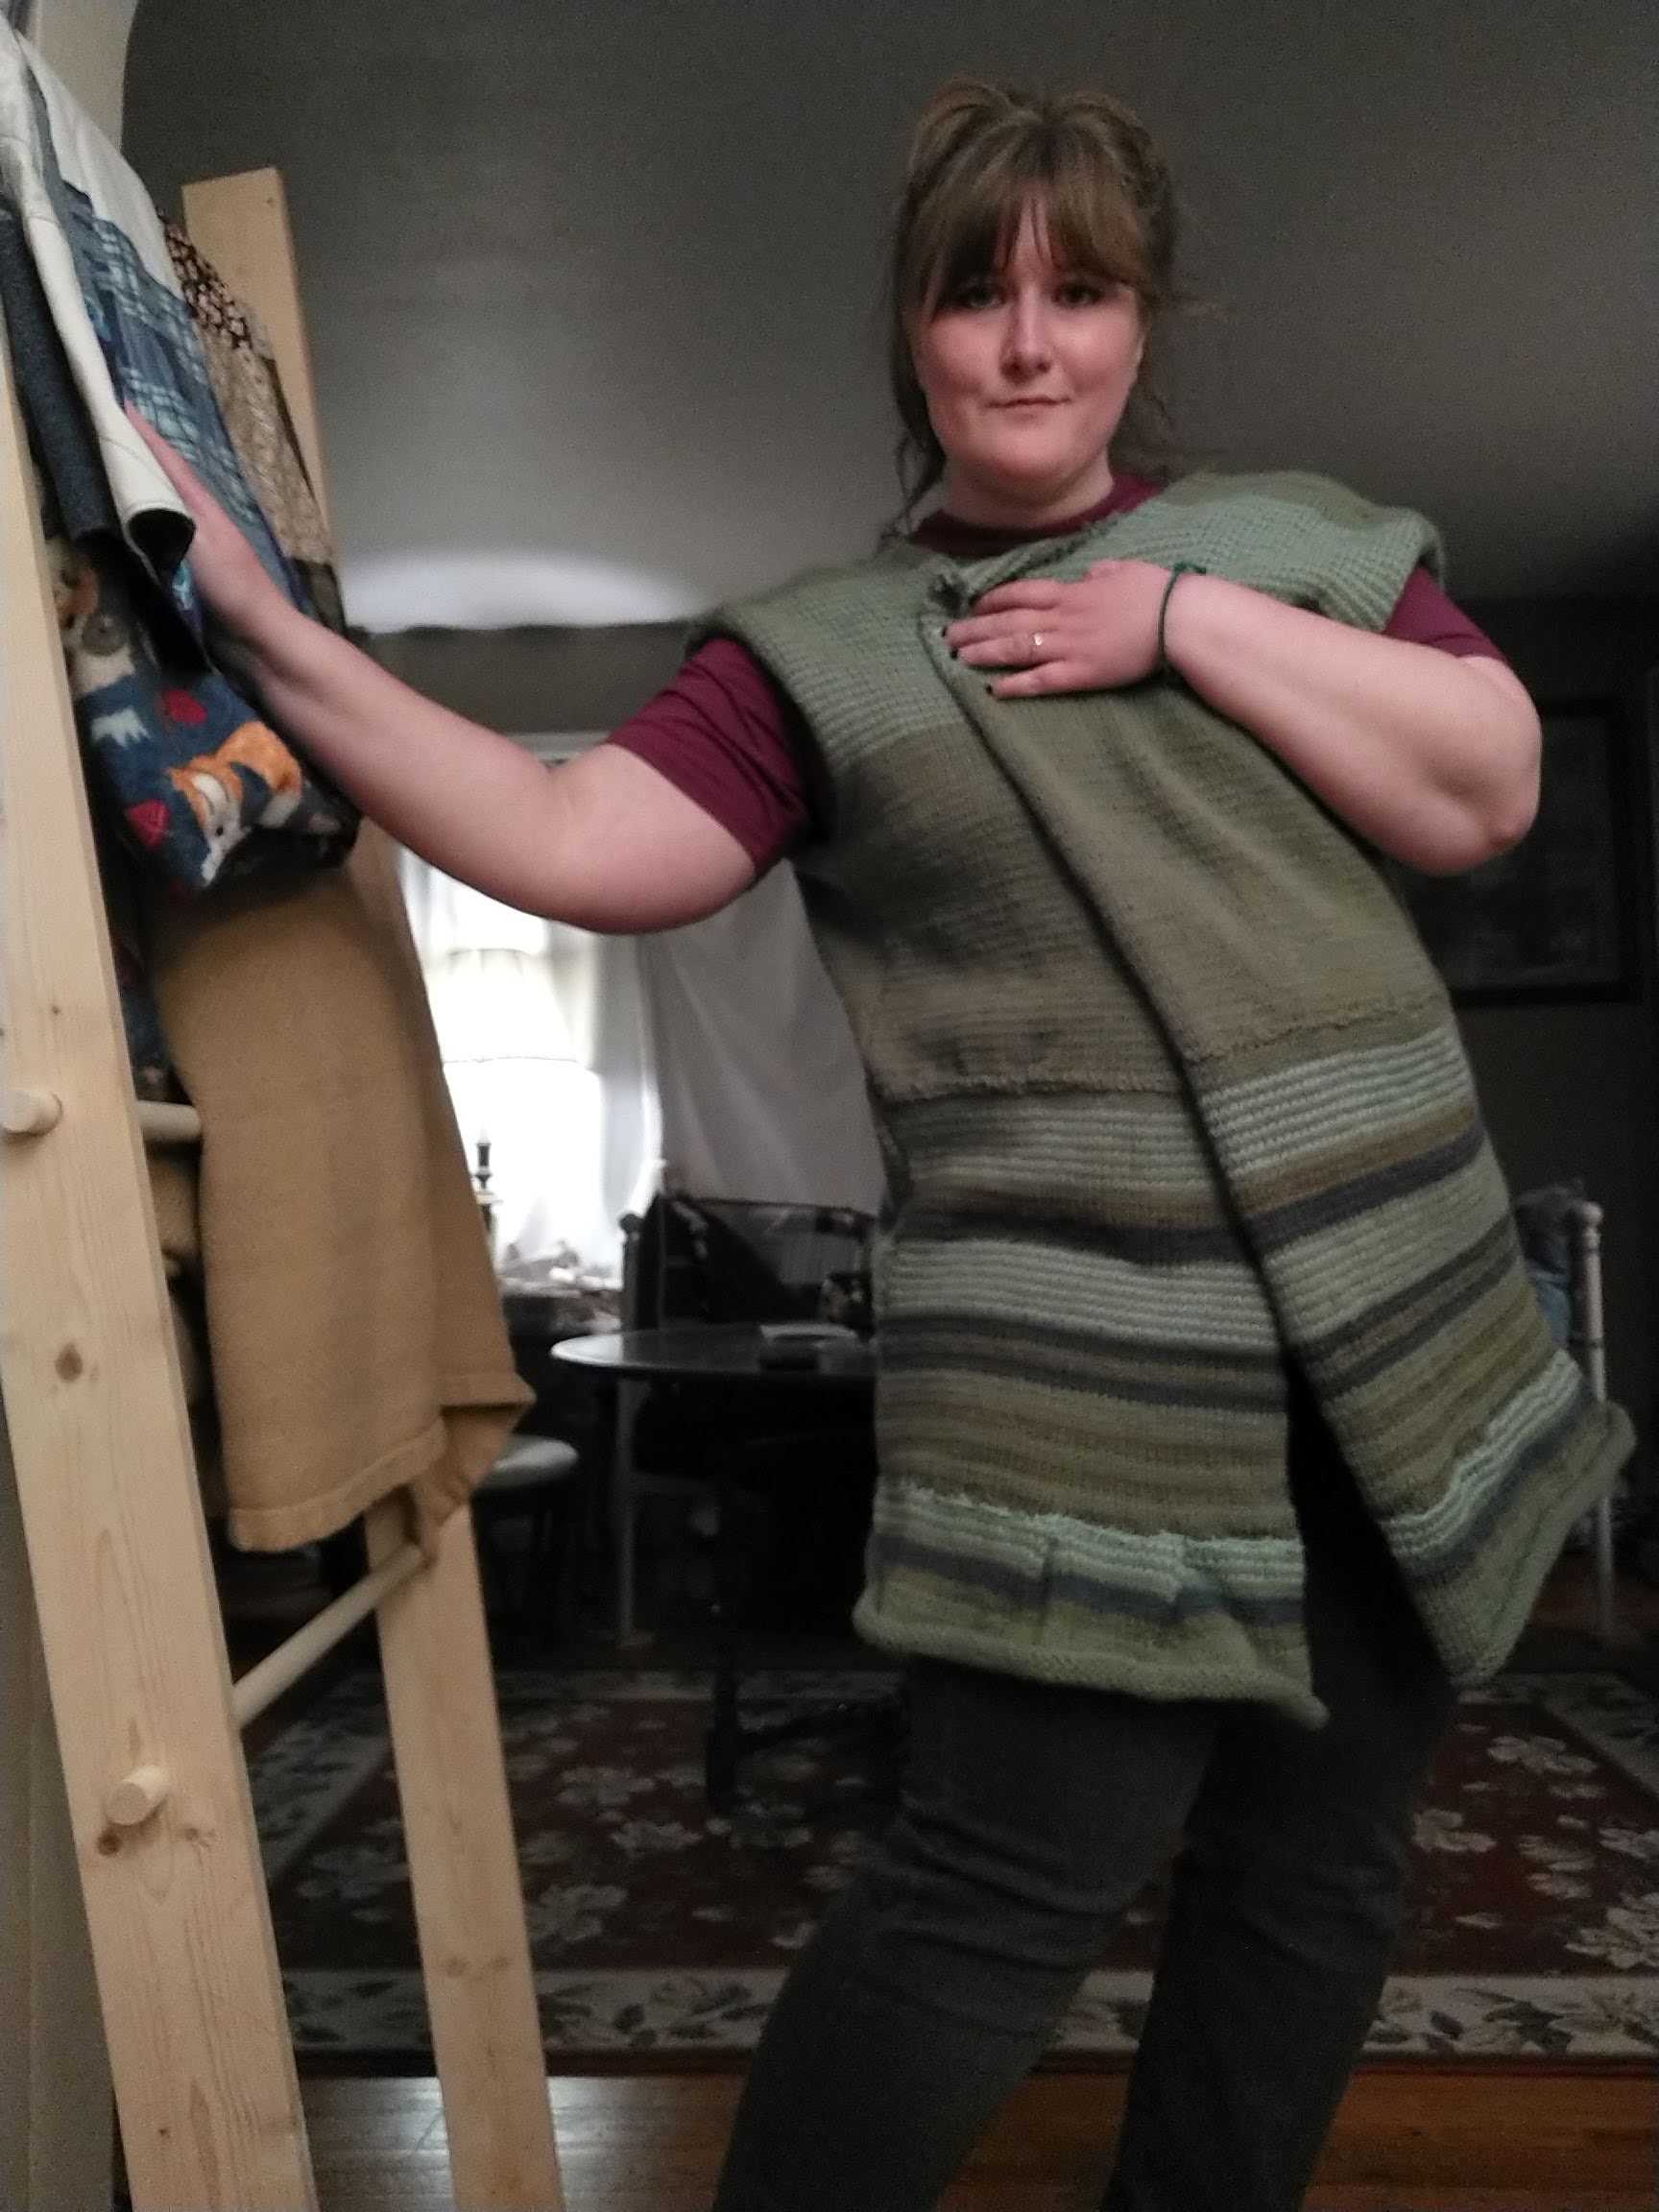
Afterward, I sewed the two pieces together and knit two 65-stitch pieces of ribbed trim for the bottom. I liked how rustic the sweater looked without the ribbing on the neckline and armholes. It looks like an old-fashioned piece, and a bit like armor. Which is cool.
Sweater Vest Fits of 2023
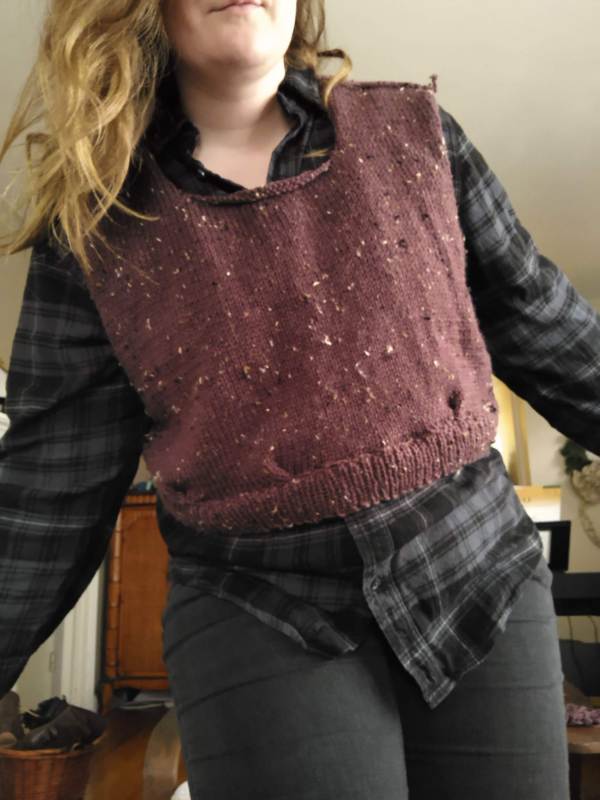
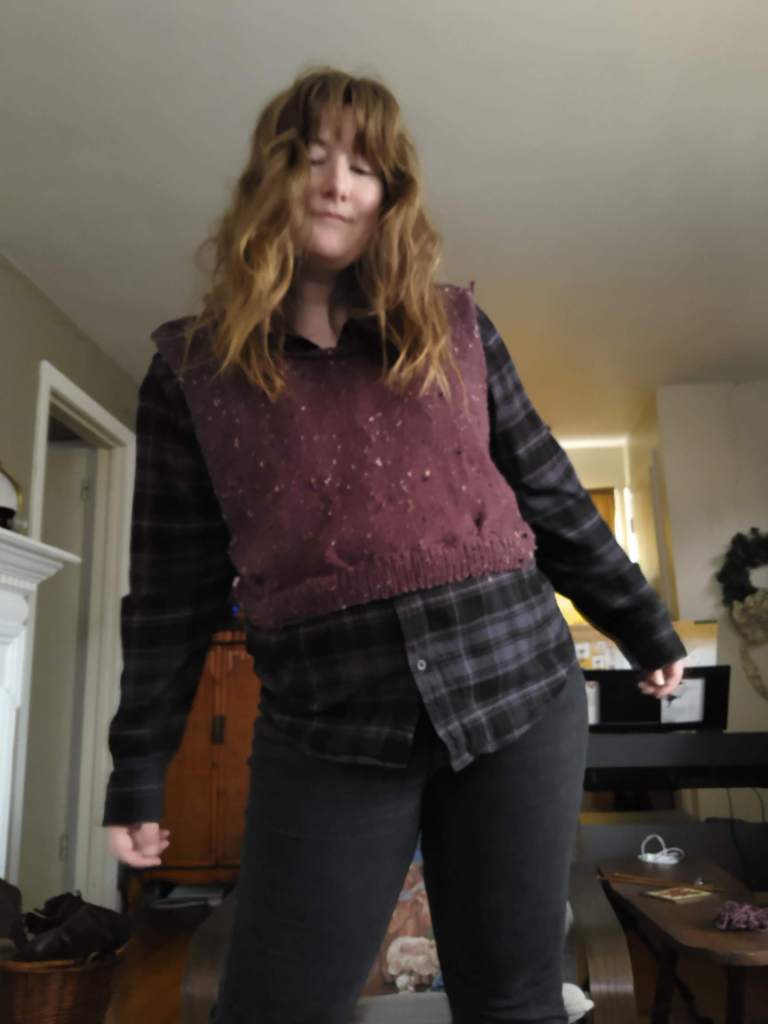
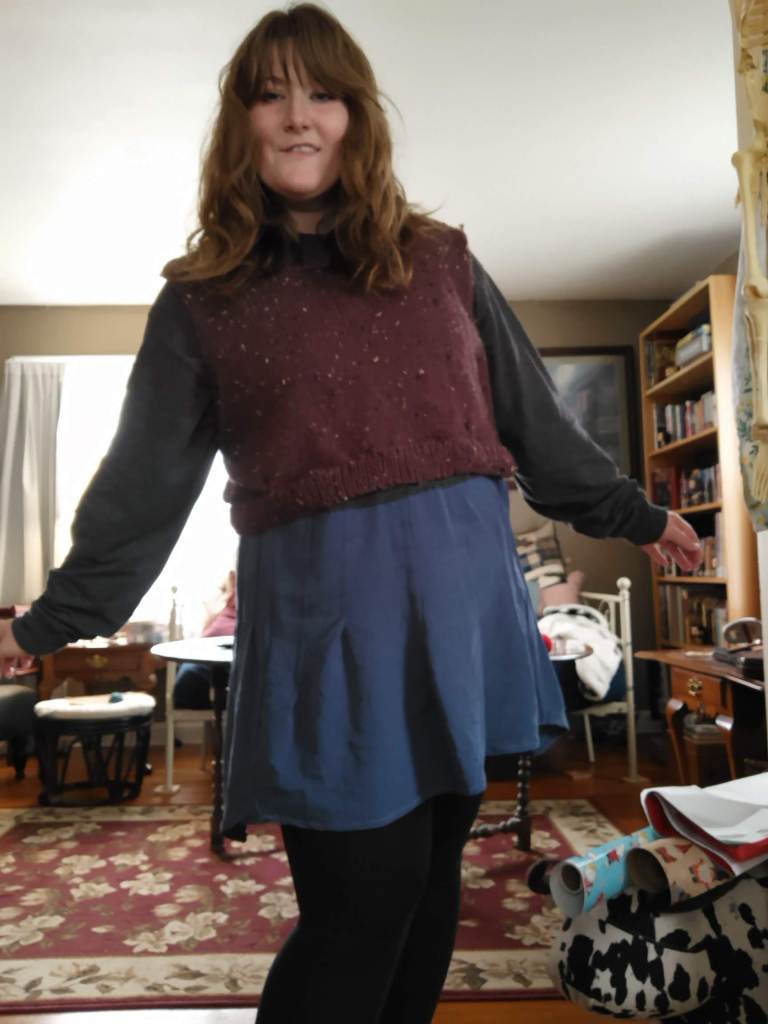
This is how I have styled the finished garment so far! I like it over my black flannel and charcoal jeans for a moody look. It styled surprisingly well over this DIY project where I added a flared skirt to a cropped graphic long-sleeve shirt. This is where I saw the armor aesthetic come through. In 2024 I look forward to playing around with it even more!
Some things I plan on either finding or making, are basic layers I can wear under this vest. Currently, I have my flannels, that random diy-tunic, and maybe some long-sleeve tees but I’m not certain if they are long enough to layer out the bottom of the vest. This is the struggle of adding a brand new item to your wardrobe – how do you integrate it and style it well without buying a bunch of new things? Yeah, I’m figuring that out and until I do it’s going to be some time before I think I can make a truly amazing outfit with this piece. But I’d rather do this responsibly and be a patient person instead of draining my bank account for instant gratification. (Age has done me well in that respect because I used to do the opposite!)
2024 Project Update:
Since finishing the garment, I have either lost weight or the vest has stretched a bit from wear and one wash. It was not sitting well on my waist anymore but ballooning out so I took it in. I took it in at the arm hole seams and gradually took in the waist at the back so the garment has a back center seam which is not the look I was going for but the fit is on point again. Lastly, I knit another section of ribbed trim to lengthen the garment to keep it from riding up, in doing so I made the ribbed trim addition of 60 or 55 stitches, I forgot to take note when I made it, to pull the waist in even more. I like the fit and plan to make another version of this garment with a smaller adjusted pattern.
What I’ve wanted since I started my sewing journey was to be able to wear a head-to-toe outfit of my designs. Now have I technically done this before wearing a dress I made? Yes, but a higher level of skill is needed to wear an entire outfit of sportswear separates, crafted with my own self-drafted patterns. This was the level up in my sewing I wanted and in Fall 2023, I achieved it!
Lightweight Corduroy Trousers
In Trying Something New – Hot Pink Scuba Fabric I mentioned I was working on a trouser pattern, and although the pink scuba pants didn’t work I learned an important lesson about designing pants – fabric choice! I revised my trouser pattern, referencing the dimensions of one of my existing pants in my closet and chose a better fabric. This paisley pattern corduroy is lightweight and strong, with a bit of stretch. This fabric took the stitches far more effectively than the scuba. The weave is different and therefore the stitches did not have to cut through and pull through the fabric as it did with the scuba’s texture. Lightweight corduroy gave me the drape I wanted with the opacity and structure I was looking for. Hopefully, the longevity too!
I’ve worn these pants three times and they are going strong. I’ve even altered them to take the waist and add a zipper fly and they fit excellently. In addition to the trousers, I crafted a matching belt and belt loops to adjust the waist as needed.
Recreating a VS Cowl Neck Sweater
I had a favorite sweater in college from Victoria’s Secret. It was a black drapey knit sweater, boxy shaped, and featured an exaggerated cowl neck that could be worn off the shoulder. I wore it for a long time until I lost it and I haven’t quite found another one like it. I wanted to make a 2023 version of it that bridged the gap between sweater and sweatshirt.
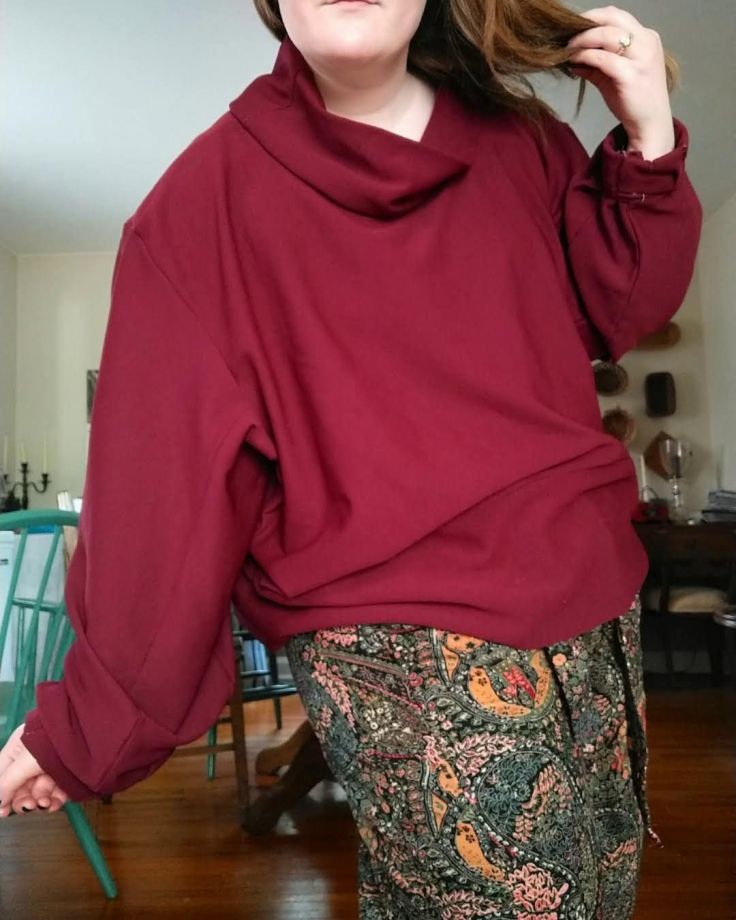
Enter this cranberry stretch fabric that was warm but with a texture that looked like a sweatshirt. I went into the unknown and decided to make a cowl neck for the first time and I’d say it turned out just as I wished. I don’t like wearing things off the shoulder anymore therefore I made the cowl neck opening smaller than the inspiration piece. I added cuffs as a cuffed bottom to encourage the garment to hang in a boxy fit but not ride up as I move through out my day. It does as it is asked. I’ve worn this piece with jeans, leggings, and these corduroy pants and I have to say it’s pretty dang versatile.
The only thing I wish I could change is the few sections of seam where I was fighting with my sewing machine. I had a mishap with a stitch and had to stitch rip the seam. Unfortunately I caught a small piece of the fabric and caused damage to the cuff. Other than that unfortunate event, I’m properly chuffed. These two pieces moved my sewing skills and design portfolio in the direction I am aiming for – tailoring, construction, bigger projects, head-to-toe looks.
To develop a pattern I could rely on I’ve been studying mittens. Different shapes, proportions, and ribbed versus knit-purl have been tested to see what I like to wear and make. It’s been a fun journey! A journey where I’ve learned how pattern development involves skill refinement.
October 2022
The brown mitten was developed first. It was a project on a whim to make better hand-warming devices than I had before. In the Fall and Winter of 2021, I made mittens out of cheap, bulky weight yarn that while soft looked like whales breaching out of the water instead of hand-shaped mittens. They lacked dexterity, polish, and honestly, lacked taste. They were ill-fitting because they were a prototype and I tried wearing them but tossed them at the end of the season to try again. Enter the brown mitten.
The brown mitten had a good shape. It was created from a worsted weight yarn on size 7 needles compared to the previous bulky yarn on size 11. The brown had even stitches, warmth, and potential! I got so excited that I forgot to write my project notes and boldly decided to make the second one later. This never happened. This mitten floated in my cold-weather accessory bin until I let it go.
August 2023
Next, I worked on the black rib knit mitten. Instead of a knit-purl structure I made a crucial error and decided to make the entire mitten, not just the cuff, with a rib knit. Why was this an error? Well, the tension across the yarn was stiff and this made the mitten difficult to wear. It also looked messy because I had to reduce my stitches to achieve that curved shape at the top. When you are developing a pattern you are improvising and experimenting so as you can guess my reduction led to uneven ribbing and wonky texture.
It was not my best work and harkened back to that weird breaching whale shape. Not a fan!
September 2023
The Blue Sheep mittens were a wonderful delight! I picked up a blue tweed yarn at Joann’s on a sale and began making things that made me happy, like this recreation of my Blarney Woolen Mills gloves from the early 2000s. My mom and I bought matching sheep gloves in this color when we visited in 2001. As they wore out we repurchased them online until Blarney Woolen Mills stopped offering them.
I don’t currently have the understanding of how to make gloves so I tried recreating them in mitten form. They worked well except for the fact that I made them too wide at the top and too short at the bottom. I added a piece at the bottom to make the cuff longer. The little sheep brought me so much joy! Unfortunately, I forgot to take notes on this one too, and was unable to make a matching one. I recreated the blue tweed mittens in another batch that I scaled too big and passed them on to my husband because they were simply too big for my hands.
November 2023
The hot pink mittens are my gold standard. The fit is sublime. The shape is lovely and yes I took notes and changed my order of construction in order to make mittens that match in size and shape. I now knit the mitts first, so four in total, then the cuffs, and lastly the thumb pieces. Then I sew them together at the same time. This system works. The proportions are perfect for my hands and have truly saved this study of mittens from feeling like a multi-year flop!
Project Takeaways
Always take notes of your stitch count and needle size to make the project repeatable!
Never stop between mittens, trust me you will not go back to finish the second.
Cute details like sheep or other motifs are kind of awesome! I plan to experiment with this technique in the future.
Reduction speed will affect the shape and potential wonkiness of the mitten, proceed with caution.
Mittens are actually a great beginner project. They are quick and easy.
Whenever I am feeling a bit glum, I think of baking. I learned this from my Grandma. Her mom, who lost her parents at a young age and grew up quite poor would make herself “feel” rich by baking a cake.
I think this is such a sweet sentiment to hold because baking is something you can do with a little money or a lot of money. You can make something for yourself for a little pick me up or can brighten someone else’s day. It is shareable, communal, and made with love.
Baking is a moment of connection for me. A connection through the generations. So much about our present world is different from what it has been in the past, except for food. Food bridges those time gaps.
It even bridges distance and time. As I baked last Monday evening, on the other end of the phone my sister-in-law had just finished baking her own cookies and was making dinner. It was like we were together in a shared experience.
Mixing, resting, rolling. The process of rolling the dough to a thin layer, dunking the shaped cutter in flour, and pressing a new image into the dough was timeless. I could have been four or fourteen or thirty and made these cookies with my mom. We always did every year, every Christmas time. I sent her pictures of the cookies and we reminisced about years past.
The dough, the cookie dough reminds me of meals at Eat’n Park and their free smiley cookies. It’s childhood, cozy in a bite. It makes me feel rich in memories and moments spent with people I love.
Baking is my cozy corner of retreat, cut-out cookies my warm fuzzy blanket. I think that is what makes The Great British Bake Off irresistible. What a wonderful place of solace in a gloomy world.
Thank you, dear reader, for spending time with me today. I wish you love and comfort wherever you are.
This was my most ambitious project yet and I’m happy to say it’s done! And on schedule too because the deadline in my head was by the end of 2023. I didn’t think I would get there, especially with other projects, but it happened!
It’s funkier than I first designed, and it’s also a dress now which is fun and unique to my wardrobe. I don’t have any sweater tunics or dresses like this. I’m excited to play around with styling this piece as winter is yet to come. It’s still autumn technically which makes me want to jump for joy because I’ll be able to enjoy this piece all season long instead of partially or not at all like some of my former projects.
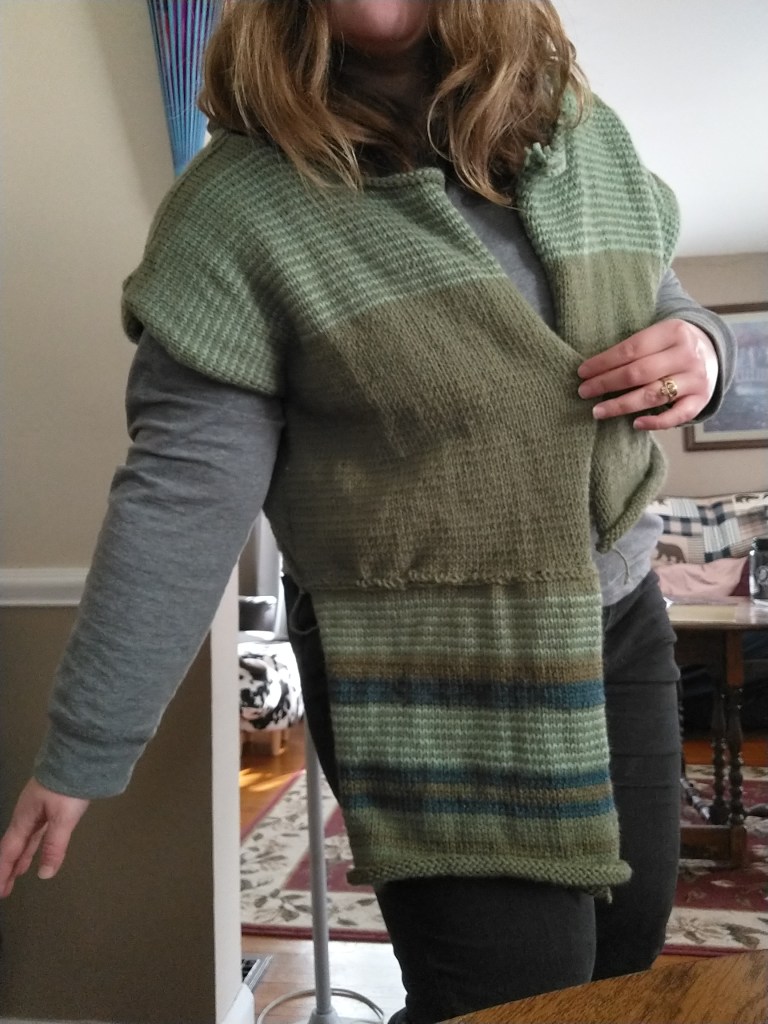
I’m currently working on a big knitwear design project. Probably the most ambitious project that I have taken on yet in my time designing knitwear and fabricating sweaters. It is a sweater coat with varying stripes that I have knit in sections over the past few months. I’m currently three months into this project, and per my working style, I’ve worked on smaller projects alongside this big project to keep me stimulated and my motivation high.
This was my progress at the end of September. I had the entire bodice done and sewn together at the shoulder seams, back seam, and under the arms until the point of the sleeve opening. Because I sew, this process of knitting makes more sense to my creative brain than the knitting in the round process. If this type of knitting drives you nuts, it’s only going to get worse so I warned you. 🙂
September Progress
October Progress
In October, I honestly futzed around with the hood and collar and that was about it. I knit one other body panel so two out of four were done and drafted collar and hood patterns, over and over again. I initially expected to make more progress in October and to have just the sleeves left going into November. That didn’t happen.
It was that dang collar and hood section, that kept me in this place of indecision and design frustration. I initially made a collar with a normal stitch, not a ribbed which looks a bit cleaner. I think I was concerned about the collar looking cohesive and was afraid that a solid collar in rib instead of a knit-purl stitch with a stripe would look less cohesive. It looked odd actually. The stripe was good, but the flat collar which began to roll on the end looked ineffectual for a collar. After I sewed it in I carefully cut the collar away which was discouraging from a progress perspective, until I realized the stitched of the collar remained (because I was afraid of snipping the wrong yarn and destroying the shoulders) and the neck opening had this lovely fit and structure now. The shoulders were slightly gathered up to the neck opening and the fit was fantastic now! It just needed a new collar.
I had an idea – what if instead of a collar I went straight to a hood. I had been watching a lot of Gilmore Girls throughout October, seasons four and five to be exact which spanned the years of 2003-2005, peak 2000s fashion. And you know what was popular during this time? The duster! I had an idea, what if the hood was just one piece of this puzzle, what if I made it longer, much longer, added a hood, a rib trim around all the edges with a button closure! A funky duster the likes of Sookie, the Olsen twins, Lindsay Lohan, and even Lorelai herself would have worn during this time.
I knew I wanted to keep the stripe theme going, something that looked labor-intensive and expensive, like a bohemian duster or sweater coat that would be featured in an Anthropologie campaign. I wanted the hood to carry on that stripe motif to make it feel integral to the garment, not an add-on.
Last October, I learned how to draft hood shapes for several outerwear pieces that I crafted for my loved ones as a part of my Potato Technology’s Autumn/Winter 2022 Collection so I am pretty comfortable with the shape and sizing scale for a hood on an outerwear garment. The thing I underestimated though was how tricky it would be to form the hood as I went, as you do with knitting, instead of cutting the hood shape out of fabric. This kicked my butt. I spent a weekend making one half of a hood out of yarn and it was so cursed. When I took it off the needles it didn’t look like the hoods I had created out of fabric and thread. It was lumpy, too short, and not going to work for what I needed.
Once again, I got my scissors out cut the bind off loose, and proceeded to wind the yarn back into a ball. That is when I decided I had to move on to a new section of the project, for my own sanity. Because I still didn’t know how the hood became misshapen in the fabrication process. None of it made sense. Going straight back into making a new hood when I didn’t know how to solve the problem would be a waste of time and resources. I only have one set of size 7 needles, there was no need to tie them up in another likely failed attempt.
I pivoted to the the length of the duster. To make the bottom have more structure I decided to knit this section in two pieces.
November’s Progress (11/16)
This was a good move. I made the first half 30 stitches wider than the previous body panels to create some drape around the hips and the results are cute. The sweater has this sophisticated little flare that accentuates the waist – I was not expecting that! 🙂
With this step in the right direction, I got to work and powered through the last two body panels and the second flare panel at the bottom. It was a lot of work but only took two weeks to complete with focus, stretching, and snacks.
I have a tendency to let the garment lead me. I like to see how the fabric or yarn responds to the vision I have in my head and adjust the design accordingly to the way the project is coming together. The flared panels at the bottom of the sweater inspired me to pivot again, to step back from the hood and long duster to a sweater coat cardigan that could be buttoned into a sweater dress if I would be inclined to wear it as such.
That’s where it stands now. I began drafting a sleeve and designing the color work I had planned for the stripes before I continued any further because I could change my mind and add more length. The hood is out through, it’s just not the vibe.
When will this project be done? I sure hope by the end of 2023, but we shall see.
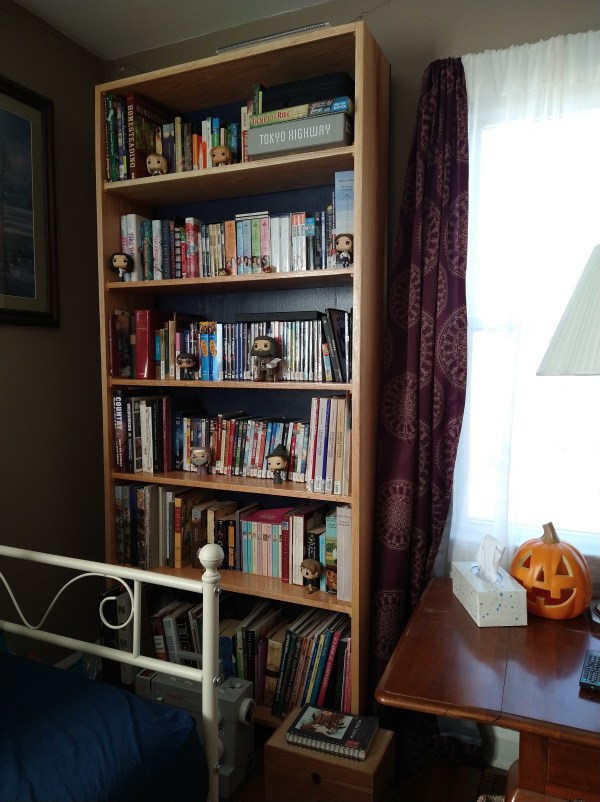
Last night my husband and I added an exciting new addition to our home, a rather large and fantastically sturdy bookcase, crafted with love by his own two hands.
It is 7 feet tall. As the pieces began to form the bookcase shape out in his shop, it was intimidating to think about how we were getting it in the house. Not because it was large beyond the doorway or Kyle hadn’t measured and planned the design to fit in our house, but instead who was going to help us carry this?
It looked heavy and ominous. Quite tall. I used to have more upper body strength from working manual labor jobs when I was younger but I lost it over time. I’ve learned that toning and building muscle seem to require more nuance than just practice and I was not doing the latter. Recently when we have carried things, my arms have been noodles, my strength as effective as trying to herd squirrels.
But I was pleasantly surprised, not because I magically became buff or someone else appeared to carry that thing up the stairs and into the house. Wall pilates came in clutch.
See there was an important building block I forgot about where true strength lies in your foundation, which is made ready through discipline. All those I got!
I mentioned in #34 – Shaping Up that I was getting serious about toning my waist for real this time. In doing so I have challenged myself to do at least one minute wall sit and one minute of planks per day. I’ve been doing this for over two months and have added wall pilates and deep-core training along the way. I’ve made my foundation strong by training my legs and my core, which blew me away last night because I think I lifted properly for the first time in my life.
It was all legs and core, my back and my arms didn’t hurt for a second. This is a first! And actually, I was able to shift the empty bookcase a bit on my own. This has shown me that like in everything in life preparation does make the difference. It’s important to keep up with my routine, even when I don’t feel like doing it because I’m busy. This training and discipline have positively affected my ability to do things before I even knew what was ahead of me! I was so relieved to be able to help him instead of having to ask my stepdad or brother-in-law.
I am quite pleased by both the results of deep core training and more importantly how lovely this bookcase looks in our house. He did a fantastic job!
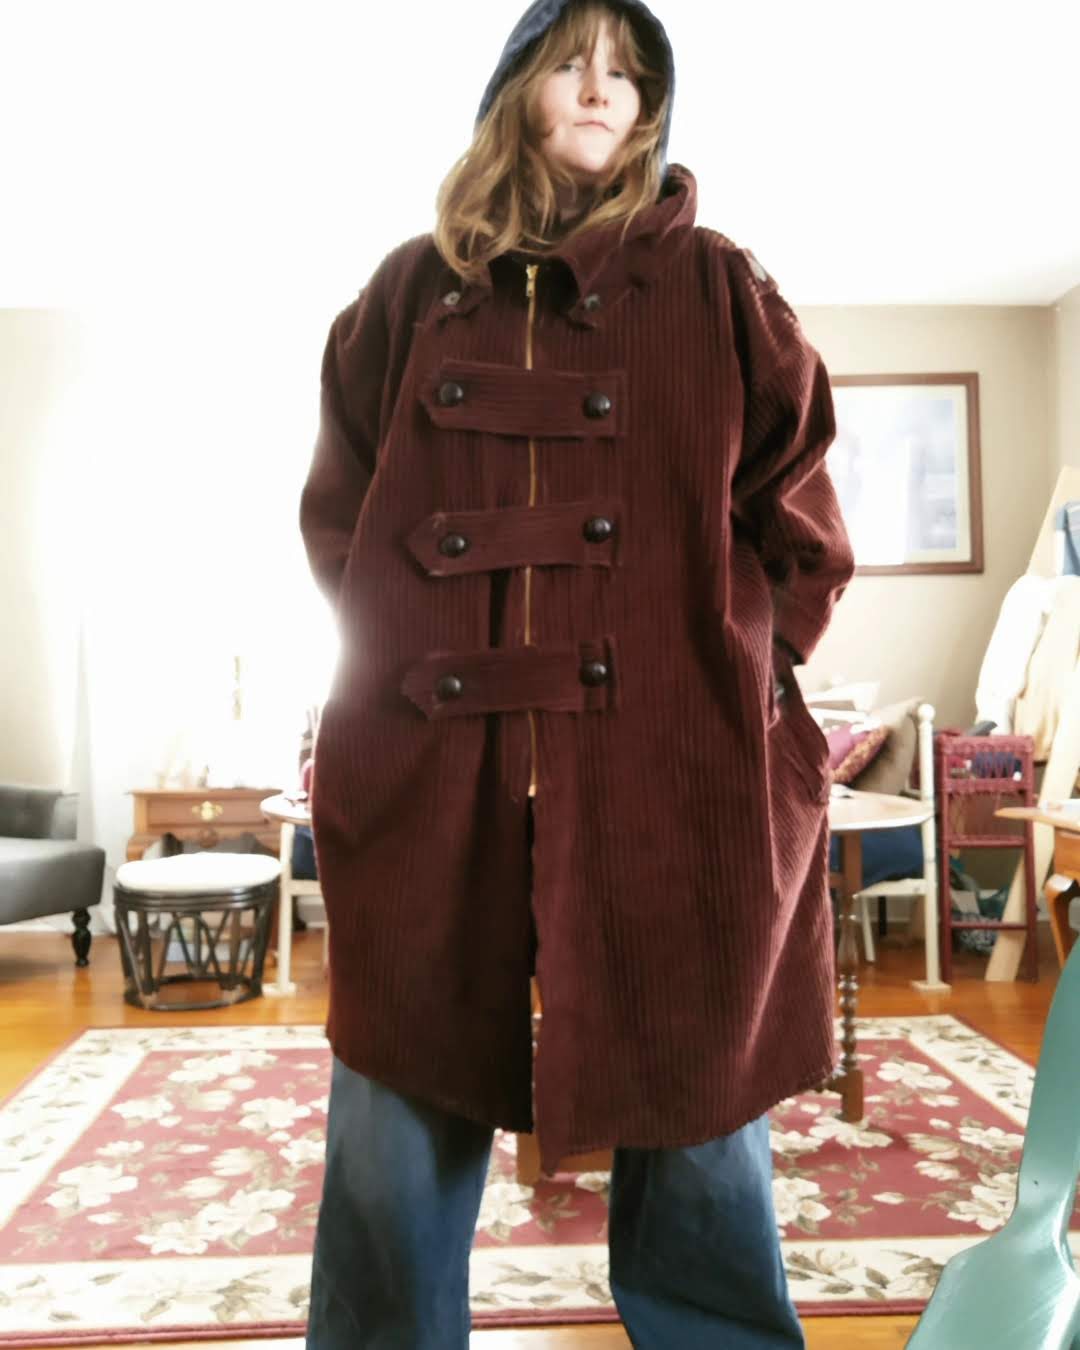
After a wear test this past weekend I realized my Jack Sparrow-inspired coat needed a few more touches to truly pop. Including accessories which will be coming soon. As for the coat, it was missing that polish, you know? So I took the belt and chopped it into five rectangles to make the button tabs and the pocket flaps. I also added more buttons! Two more styles, actually. I added leather-inspired buttons for the chest tabs and a tortoiseshell set to the lapels and the pockets. The pockets have closing buttons for security which was desperately needed because I was close to losing my phone on Saturday due to those gaping pockets. For only having the yardage from the belt to work with this turned out well. Is it a complete project? Time will tell. 🙂