Using Snow Fencing for Our Garden

I probably should have written this post before mid-June, but I wanted to gain enough experience with this fencing before giving my thoughts on it. And after using it for a couple of months, I think the time is right. Before introducing this year’s fencing, I want to give a brief overview of what we used last year.

Using Deer Fencing in 2025

Last year was the first garden at our house, so we had to buy a lot of stuff to get it ready. As a result, we looked for the most affordable fencing option we could find. After considering a few options, we went with rolls of mesh fencing that is designed to prevent deer from getting into orchards. Each roll was 100 feet long and 7 feet tall. We used bamboo poles as the fence posts, and apart from tangling, it was pretty easy to install. And for the first few months, it worked perfectly. It kept most animals out and did its job. However, around mid-to-late August, we started having issues with it. Larger mammals like deer and raccoons were able to break through the fence and get to our corn and melons, which they treated like a buffet. We attempted to fix the holes by patching them with sections of fencing, but that didn’t work. Eventually, we gave up on fixing it and let the animals have their way.

Fence, Garden Beds
Installed fences

So, even though we bought the fence to be a short-term option, it didn’t last as long as we were hoping it would. It tore easily and got entangled with the grass growing along the bottom, which made pulling it out at the end of the year a nightmare. So, we knew that we’d need something better this year.

What Is Snow Fencing?

We again knew that we weren’t looking for a long-term fencing solution this year. Putting in a permanent fence is quite an investment. We also aren’t sure what we want a fence to look like or if our garden is the size it’s going to be long-term, and we want to upgrade to a permanent fence in sections so that the cost is spread out. So, we needed something that was more durable than the mesh fencing from 2025 but was strong enough to be used multiple years without being permanent. There weren’t a lot of options that fit these needs, so we circled back to something we considered last year: snow fencing.

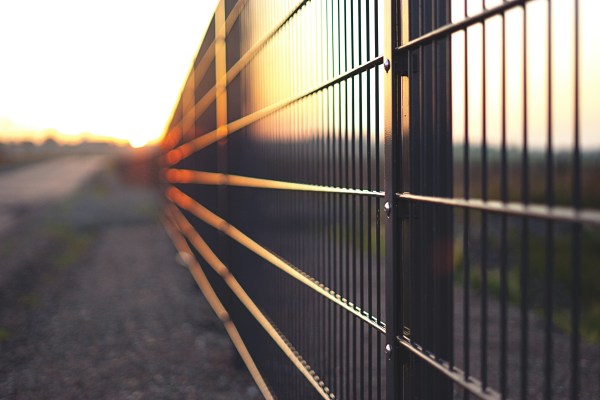
Snow fencing is also known as construction fencing. It’s often used to prevent snow from drifting across open fields and to block off construction sites. It comes in a variety of colors, including black, orange, and green (ours is green). It’s made of a thick plastic and has roughly 1-inch holes in it to allow air to pass through it.

This fencing interested us because it is 4 feet tall, comes in 100-foot rolls, and is light. It’s also pretty cheap. We bought ours from Lowe’s, where it was cheaper than Amazon, and they were able to ship it faster. For 4 rolls of fencing and a 100-pack of zip ties, it was just over $150. Ironically, this wasn’t much more than we paid for the rolls of deer fencing last year.

How Hard Is It to Install?

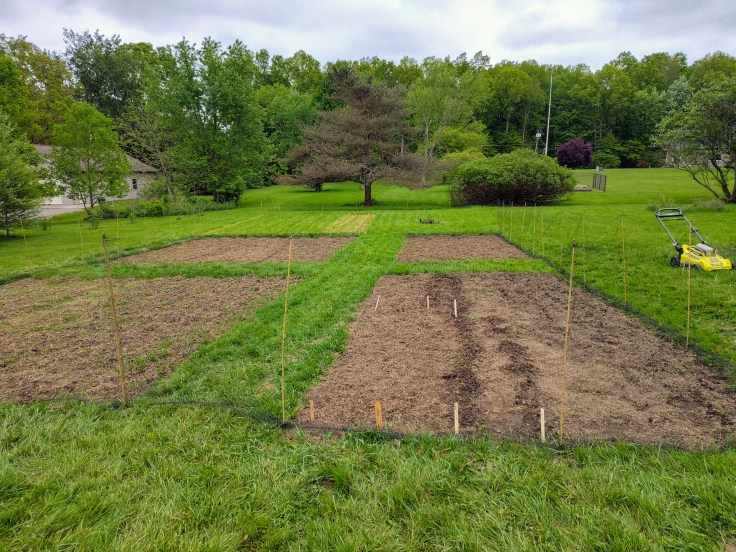
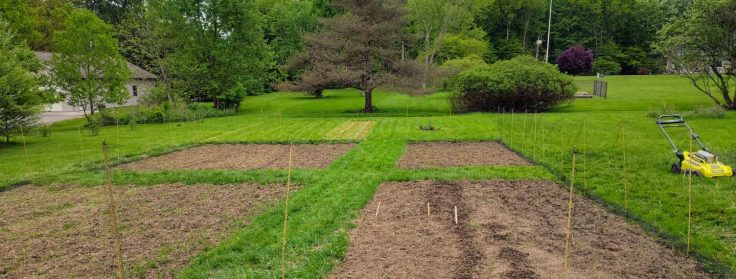
Compared to the deer fencing, the snow fencing was very easy to install, although it does require two people. We chose our starting point, started to unroll it, and laid it on the ground around the garden, giving ourselves some extra room. For the posts, we thought we could get away with using lightweight stakes at the corners and “gates” and bamboo poles in between since this is what we used last year. That wasn’t enough to keep the fence upright, so I cut more fence posts out of pressure-treated 2x4s, getting 6 posts out of each board. With each post 5 feet long, they were sunk a foot into the ground. We attached the fence to the posts and bamboo poles with 3 zip ties on each, and I used a staple on the top zip tie to anchor it to the pole/post.

We followed this process around the garden until we finished out a roll or reached the place where we wanted a gate. We wanted the end of one fence roll and the start of another to overlap on one of the bigger posts so that there is plenty of strength. For gates, we used one post for the start of it. This served as a “pivot point” for the fence. A second post was used to establish the end of the gate. At this point, we cut the fencing and installed a third post that acted as the frame for the gate. This is the post that we latch the gate to with a twist tie.

It’s a simple design, and because we had experience installing last year’s fence, we installed this year’s in an hour and a half. There’s no need to be intimidated by this type of fence, and if you buy fence posts, you don’t have to use any saws. It doesn’t tangle when installing, it’s easy to cut with a pair of scissors or a utility knife, and with two people, one person can hold it up while the other zip ties it to the post.

Our Experience With Snow Fencing

In general, we’ve been very happy using snow fencing for our garden. It was much easier to install than we anticipated. Each roll went further than I expected, so we only used 3 full rolls and a portion of the 4th one even though we expanded our garden this year.

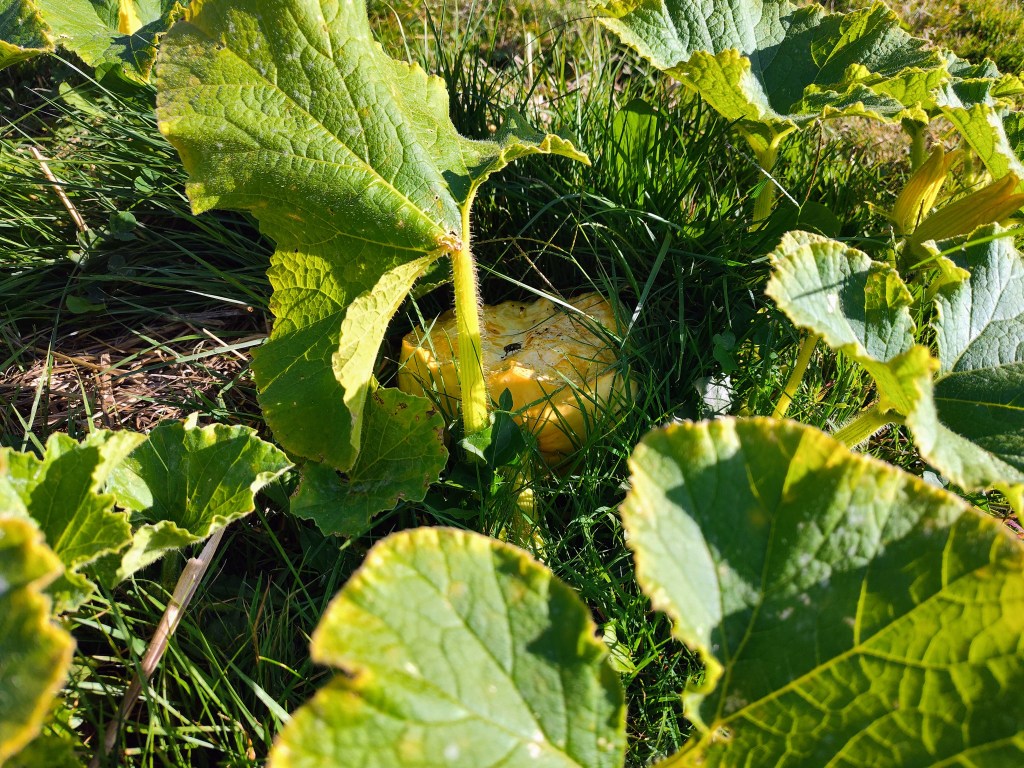
It’s proven to be durable so far. We had a pretty significant thunderstorm last weekend, and the fence withstood it without any damage. That doesn’t mean it’s impermeable, though. There are a couple of places where a rabbit has chewed through the plastic, creating a hole for it to get into the garden. Luckily, it can be fixed, but it is a nuisance.

Garden Fence, Snow Fence
Our 2026 garden fence.

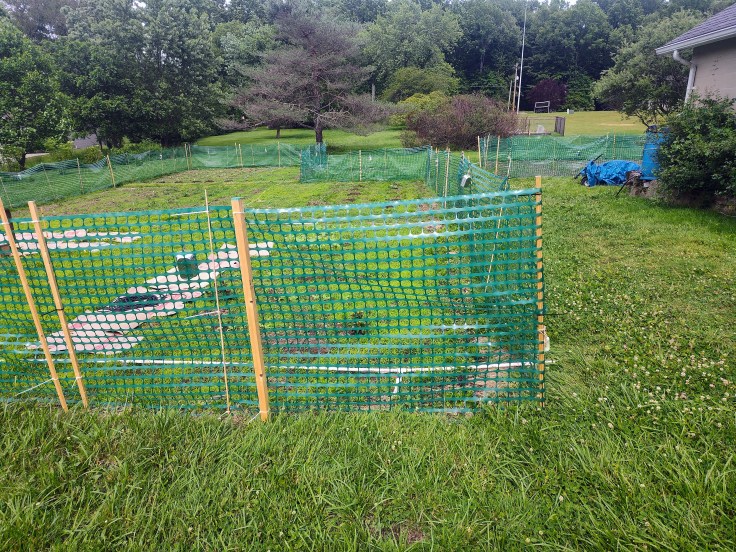
We love how the fence looks. There were some concerns with how it would look in our yard and whether or not it would stick out like a sore thumb. This was a key reason we didn’t go with snow fencing last year. We only thought it came in black and orange, and neither was going to look good. However, prior to buying the fencing this year, we saw the green color in store and were confident that it would blend in with the grass and plants and not be an eyesore. The fence looks like it belongs around our garden. It’s opaque enough that you can see it from inside our house and notice if there are any issues with it while still being transparent enough to see the plants inside.

This brings me to my last takeaway. While still being light, it is much heavier than the deer fencing. Duh, right? We knew it would be heavier, but what we didn’t consider is how this would work with our fence posts. I thought the bamboo poles and lightweight fence posts would be sufficient. That proved to be an error. When we installed the fencing, the ground was soft after we received a lot of rain in April. This made it easy to install the fence posts, but it also meant that the posts and poles worked themselves loose as wind came across our yard. We continued to add more posts, but eventually, we had to upgrade the posts with something much stronger than the small 3/4-inch square posts that I had been creating.

One Saturday afternoon, we came back from eating lunch with Magz’s parents and saw that heavy wind gusts had blown portions of the fence over. I cut a 2×4 in half to make two 1 3/4″ x 1 1/2″ posts that were 5 feet long. Each post was cut to a point, and my father-in-law and I hammered them a foot into the ground before attaching the fence to them. This proved to be the necessary upgrade, as the fence stayed upright through the rest of the gusts we received. I’ve since had to add a couple more of these heavy-duty stakes throughout the garden, but I’m confident that the fence is strong enough to withstand thunderstorms this summer.

We are pleased with our decision to use snow fencing for our garden. It has surpassed all expectations to this point, and I think it was the correct choice for our needs. Only time will tell if it’ll deter deer in late summer and early fall, but for now, it’s been everything we could have hoped for.

Animals Are Getting Into the Garden

Our fence has become somewhat problematic over the past month or so, and animals are either taking advantage of it or are the cause of it. In the spring, I wrote about the fence we bought and how we reached that decision. We ended up buying deer fencing that is typically used in orchards to protect the fruit trees. It is seven feet tall, although we folded it over, so it is only about 4 1/2 feet, comes in 100-foot rolls, and only costs $23 per roll. We were able to fence in our entire garden for less than $200, including the bamboo stakes. We bought it with the intention of it being a short-term solution that we can upgrade over time. And for the first three and a half months, it was perfect.

Deer didn’t try to breach it, and rabbits didn’t burrow under it. In general, it worked better than expected, and any issues we had were self-inflicted. It’s relatively easy to overstretch and tear the material, and you have to be careful to not get too close to it when walking near it, as your shoes can get caught in it. But beyond that, it survived heavy winds, driving rains, swampy ground, and general ignorance. That was until about mid-August, when we started to notice that something was getting at our corn stalks.

Deer? Raccoons? Squirrels?

I first began to notice evidence of animals around our garden in July when I saw raccoon poop in the grass outside the fence. I didn’t think much of it, though, since they weren’t getting through the fence. Fast-forward to mid-August, and we started to notice that some of our corn was being eaten and stalks were showing signs of stress. At the same time, our sunflower plants were decapitated not long after the heads began to form. It only got worse from there.

Nearly entire ears of corn were consumed, while others were being torn from the stalk. From the outside of the fence, an animal was pulling our tall Blue Hopi corn stalks to bend down on the fence, reducing its height from 4 1/2 feet to about 3 1/2 feet. Elsewhere, we were seeing bite marks in some of our remaining cucumbers, our melons, and one of our pumpkins. And the worst part was that the animals weren’t eating the entire vegetable. They were taking a single bite and leaving it on the ground. And how did these thieves gain access? Flaws in the fence were the main culprit, and the evidence was everywhere.

It started with small horizontal tears or cuts in the fence that left the top intact and the bottom hanging, exposing an access point that is just big enough for a raccoon to climb through. In other areas, the zip ties, staples, and twist ties we used to connect the fence to the stakes failed, causing the fence to fall down. This meant that entire sections of the fence were reduced to a height of 2 1/2 feet, or plenty low enough for a deer to hop over. Finally, some of the stakes started to bend or angle, which also lowered the fence’s height. I’m not 100 percent certain of the cause, but my theories are animals pushing on them, plant vines growing against the fence and putting strain on the stakes, and the lack of rain not keeping the stakes in the ground as deep as they should be. In general, it’s become a mess.

Thankfully, it appears that the crims are simply raccoons, deer, and squirrels, or just your average neighborhood scoundrels. They don’t do a lot of damage. Funny enough, I think the squirrels are the most annoying of the trio. Even with an upgraded fence, they can climb up and over to gain access.

Upgrading Security

Given that this year’s fence was only intended to be a short-term solution, we’re unsurprised and undeterred by the animals. It may be a bit demoralizing, but luckily, there are ways to remedy it for next year. We’re already discussing how we can improve some of the fencing. While we likely won’t upgrade all the fencing for next year’s garden, we can upgrade it a little at a time. Even improving the fence for individual beds will make a difference. We’ll likely go with some type of chicken wire that is metal. We’re also going to upgrade the stakes with pressure-treated 2x4s that I’ll cut down to the appropriate width/height. Something else we can do is spray plants with a hot pepper solution that will deter animals from wanting the food. It’s not a permanent solution, as it needs to be reapplied after rain, but it’s organic and tested.

Ultimately, there’s only so much we can do. We’re growing vegetables in an area with a lot of animals. It’s a blessing to not live in an urban setting, which means we occasionally have to deal with animals. I’m also choosing to take it as a compliment that the animals want our food. Sure, they could have just eaten forageables, but they’re choosing to eat what we grow, and that’s pretty cool. And we are a big fan of animals, after all.

Have you had problems with animals getting into your garden? If so, what vegetables were they most drawn to and what steps did you take to prevent it from happening again?

Weekly Update #10 – Installing Our Fence, Exploring Greenhouses, and Planting Flowers

In this week’s update, the rest of our fence materials arrived, and we were able to install it around the majority of our garden beds. We also visited two local-ish greenhouses on Saturday and Sunday. This is our first chance to buy flowers to decorate our yard since we bought our house last year, and we’re taking advantage of it. After we bought the flowers, we spent some time this weekend planting the majority of the flowers we got.

Installing Our Fence

If you’ve been following the blog for a bit, you’ll know that we recently decided on the type of fence we’re using with our garden and purchased the materials we needed. As a refresher, we are using an extruded plastic mesh fence that is often used at orchards to prevent deer from getting to their fruit trees. Our fence came in 7-foot x 100-foot rolls and included zip ties and ground staples for anchoring. We bought 5-foot bamboo stakes in a pack of 50 that we attached the fence to.

Fence, Garden Beds
Installed fences

The stakes went into the ground 8 inches, giving us roughly 50 inches above the ground. We placed a stake every 5 feet and used 3 zip ties per stake to attach the fence. We then put a garden staple between the stakes to anchor the fence to the ground. In general, it was a great process, and I think we made the right decision. It took about 45 minutes to install the stakes and another 45 to attach the fence. We were surprised by how easy it was to unfold the fence since it was folded into fourths. We also didn’t have too much of an issue with the fence stakes pulling over as we tensioned the fence.

We know that this fence won’t keep out everything, and a deer could jump it if it really wanted to. But at the same time, we’re pleased with how durable and affordable it is. We would definitely recommend it to anyone looking for a cost-effective garden fence option, especially if you’re planning to upgrade it in a year or two. As an aside, we initially planned to put a smaller fence around each of our individual garden beds but ultimately went with one big fence to simplify things.

Greenhouse Exploration

This weekend was highlighted by visiting two greenhouses in our area. Both are family owned and have been in operation for over 80 years. Actually, one has been in business since 1919. Between the two greenhouses, we bought quite a few plants, including hibiscus, salvia, and begonia. The majority of them are perennials that can overwinter here. We also bought a few annuals and wildflower seeds for our furthest back flower bed. Almost all of the flowers and seeds we bought are pollinators.

Flowers
Flowers

Finally, we also bought a few vegetable starts. They are either plants that we didn’t have seeds for or really like the vegetable and wanted to ensure we had a great start to build upon in case we have trouble transplanting our starts. We also bought two cilantro plants to keep Mia (our bunny) in a constant supply.

After we got back from the greenhouses on Saturday and Sunday, we planted some of the flowers but still have a few that need to be transplanted. The weather was uncooperative both days, with a cold front coming through our area, which has led to cool weather, cloudy skies, and wind. It’s not a lot of fun out in the garden when it’s that windy and cold, so we planted the flowers we could and will handle the rest over the coming days.

Up Next

With the fence up, we are finally comfortable with planting most of our remaining vegetable seeds and transplanting our starts. The starts have been on our screened-in porch hardening off so that they won’t experience shock when transplanted into the ground. With the fence up, the risk of little critters getting to the plants has dropped considerably. We’re going to start transplanting our starts today.

We have been having successful germination of the seeds that Magz directly sowed last week. All of the greens and brassicas have germinated, while the root crops (carrots, beets, parsnips, and radishes) should germinate sometime this week. Once the rest of our seeds are planted and the starts have been transplanted, we’re going to start some more seeds inside to increase our potential yield, get our potatoes into the ground, and finish the last two garden beds. At that point, all of the prep work will be done…finally.

How is your garden coming along this year? Have you been able to get your seeds or plants in the ground yet? We’d love to hear from you. Thanks for reading. Happy gardening!

Weekly Garden Update #8 – Choosing a Fence

While we’re waiting for the ground to dry out so that we can direct sow some seeds and dig the rest of our garden beds, we realized that we need to figure out how we’re going to keep critters out of our veggies. Where we live, the most problematic animals are deer and rabbits. We definitely have squirrels and birds, but we aren’t going to keep them out.

We’ve always known that we’re going to need a fence, but reaching the point where we need to pick out the one we want to use snuck up on us. Ideally, we would have a limitless budget to pick a fence option that works and is pleasing to the eye. However, that isn’t the case, and choosing an option that is cost-effective is a top priority. I’m going to use this week’s update to discuss what fence option we’re going to use and how we reached that decision.

Short-Term, Not Long-Term

Because we don’t have a limitless budget to build or purchase our dream fence this year, we recognize that the fence we get this year isn’t the one we’ll have forever. There’s a good chance we’ll begin upgrading our fence as soon as next year. But that doesn’t mean we want to buy something that is completely disposable or junk. We don’t need a permanent solution at this time, though. We also want the fence to be minimal and not an eyesore, which removes some of the more expensive and permanent options.

What We Considered

Let’s start by discussing the fence styles we knew wouldn’t be possibilities given our budget and desires for an aesthetically pleasing fence.

  • Wood fencing – picket fencing is beautiful and iconic, but it’s also expensive ($60 for an 8-foot section of 6-foot-tall panel), regardless of whether or not you’re buying the panels or just the materials to build everything yourself. Also, because we need a fence that’s high enough to keep deer out, a picket fence gives off a vibe that you don’t want your neighbors to see what you’re doing. Rather unfriendly.
  • Vinyl fencing – see above, only more expensive ($109 for an 8-foot section of 6-foot-tall panel).
  • Metal fencing – not only is it very expensive ($152 for a 6-foot section of a 6-foot-tall panel), but it also wouldn’t successfully keep the critters out. Deer may not be able to jump it, but rabbits can hop through the spaces.
  • Chain link fencing – this fencing is very expensive ($139 for a 50-foot roll of 6-foot-tall fence), and it also doesn’t create the vibe we’re looking for. It looks like playground fencing and is anything but minimally intrusive. Our neighbors use this type of fencing for their garden beds, and it doesn’t look natural or happy. It also doesn’t work well because rabbits have learned to dig under it.
Fence
Photo by Simon Maage on Unsplash

Now for the types of fencing we did consider:

  • Rolled metal fencing – this can be either the chicken wire style with hexagonal openings or the welded type with square openings, but I’m including both in this. It’s pretty affordable (a 150-foot roll of 5-foot fencing can be purchased for $61), relatively easy to install, and successful at keeping the critters out. It can also be used for plants to climb. As a bonus, it looks pretty good.
  • Rolled plastic fencing – this can be called multiple things, including poultry fencing. It has 3/4-inch openings, is pretty durable, and easy to install. It’s decently affordable ($33 for a 25-foot roll of 4-foot-tall fence). It’s also green, so it blends in with the surrounding nature and doesn’t look out of place.
  • Construction barrier – this is exactly what it sounds like. It’s the plastic fencing that goes up around construction sites to prevent people from trespassing. It’s often found in orange, but you can find it in green. It’s pretty similar to snow fencing. It’s decently affordable ($45 for a 100-foot roll of 4-foot-tall fence) and very durable, but is an eyesore. The orange was a non-starter, but even the green looks out of place.
  • Deer fencing – this is also called extruded mesh rolled fencing. It is largely used to prevent deer from getting to orchard trees. It’s not overly durable, but there are many examples of people successfully using it to protect their gardens. It is extremely affordable ($23 for a 100-foot roll of 7-foot-tall fence).

What Did We Choose?

In the end, we’re choosing the deer fencing. It provides us with the ideal blend of price, size of roll, and attractiveness. We’re going to need somewhere between 600 and 700 feet of fencing. The deer fencing is less than $200 in total, while some of the others are well over $300. Because we needed to buy so much stuff to get our garden started this season and we screened in our back porch this year, we wanted to keep costs down where possible.

This deer fencing will not last forever, but we’re okay with that. If it breaks down or gets torn, we can replace it. We are also confident that if we take our time with installing it, it can last longer than expected. We can also repurpose the fencing in the future by using it as netting to protect plants from birds. Since it’s so easy to set up and tear down, this type of fencing will also allow us to replace it with long-term solutions a little at a time. Similarly, at the end of the season, we’ll be able to take the fence down and store it. We’ll let you know how installing it went and what we think of it throughout the growing season. Happy gardening.

Create a website or blog at WordPress.com

Up ↑