In last week’s post, I wrote about changes that we’re making to our garden for 2026, which are largely the result of the chameleon plant spreading in one of our garden beds. The chameleon plant is an invasive species that is native to Southeast Asia, and once it gets established in an area, it’s very difficult to kill. Learning about this plant led me to become more curious about other invasive species and, more importantly, Pennsylvania’s native plants.
Native plants are important to an area’s ecosystem because they keep the natural environment in a delicate balance. Native plants are adapted to the local soil and growing conditions. In the case of Pennsylvania, they’re also frost-resistant and can handle periods of drought and excess moisture. Native plants also provide food for birds and pollinators. They require little maintenance once they are established and are vital to the region’s biodiversity.
Pennsylvania’s Department of Conservation and Natural Resources (DCNR) website says that there are roughly 2,100 native plants species in the Commonwealth. By the year 2000, five percent of the state’s native plant species had been eliminated and another 25 percent were at risk of going extinct. Meanwhile, at the turn of the century, there were 1,300 non-native plant species, which represented 37 percent of the state’s total plant species. And the sad part is that this number has only grown since 2000 as more invasive species are added to people’s gardens.
I have been interested in native plant species without realizing it for a long time. I spent a lot of time outside and in the woods growing up, and I also did a lot of hiking and mountain biking from middle school through college. Spending that much time in nature allows you to recognize plants that you regularly see even if you aren’t looking for them. Plants like Mountain Laurel and Elderberry bushes stand out. Trees also begin to be recognizable as bark and leaf characteristics start to become familiar.
In middle school, two things happened that began to increase my interest in nature and native plants. The first was a middle school science project that required finding Pennsylvania tree species and documenting their leaves. The second was borrowing a book on edible plant species. This came after going on a week-long backpacking trip and seeing Wild Carrot and berry bushes along the trail. It sparked my interest and I began foraging for wild edibles around my dad’s house.
I’ve written about this in previous posts, but I’m passionate about stopping the destruction of nature and the environment. We’ve made a lot of decisions over the past few centuries that have destroyed thousands of acres of forests and native grassland in the name of progress. We’ve stripped the soil of its nutrients, cut down millions of trees, and polluted our waterways. Some have been working hard to reverse this trend, but there will always be “leaders” who are willing to sacrifice the environment for financial growth.
Long-Term Project
This is the start of a long-term research project where I learn about our state’s native plants and how we can have more of them on our property. Our goal is to have our yard become a Certified Wildlife Habitat, which requires having native plants that create safe and beneficial environments for local wildlife. By learning about Pennsylvania’s native plants, we can identify any that are already on our property and learn about others that would thrive so that we can introduce them in the future. I was hoping that my research would lead to me learning about native vegetables that the Native Americans grew, but I only found the well-known Three Sisters of squash, corn, and beans.
Many of the other vegetables we grow were introduced after Europeans arrived. Because of that, a follow-up article will be coming that researches what people groups introduced specific vegetables and if the vegetables that are typically grown in Pennsylvania originally came from the most common immigrant groups who came to the state. For now, though, here are the commonwealth’s native plants.
Pennsylvania’s Native Plants
Trees
Shrubs
Ferns
Perennials/Vines
Alternate-Leaved Pagoda
American Hazlenut
Bloodroot
Alumroot
Black Birch
Arrowwood
Christmas Fern
Beardtongue
Black Gum
Beaked Hazlenut
Cinnamon Fern
Bee Balm
Chestnut Oak
Big Bluestem
False Solomon’s Seal
Black Cohosh
Eastern Hemlock
Black Chokeberry
Lady Fern
Black-Eyed Susan
Eastern Red Cedar
Black Willow
May Apple
Blue Cohosh
Eastern White Pine
Blackhawk
Ostrich Fern
Boneset
Green Ash
Buttonbush
Partridge Berry
Butterfly Weed
Hackberry
Chokeberry
Riverbank Wild Rye
Cardinal Flower
Hop Hornbeam
Highbush Blueberry
Royal Fern
Dutchman’s Breeches
Hornbeam
Indian Grass
Stonecrop
Foam Flower
Mockernut Hickory
Little Bluestem
Virginia Wild Rye
Garden Phlox
Pin Oak
Lowbush Blueberry
White Goldenrod
Golden Ragwort
Quaking Aspen
Maple-Leaved Viburnum
Zigzag Goldenrod
Goldenrod
Red Bud
Mountain Laurel
Great Blue Labelia
Red Maple
New Jersey Tea
Great Solomon’s Seal
Red Oak
Ninebark
Jacob’s Ladder
River Birch
Pinxter Flower
Joe Pye Weed
Sassafras
Purple Lovegrass
Marsh Marigold
Service Berry
Red Elderberry
Milkweed
Sugar Maple
Red Osier Dogwood
Monkey Flower
Sycamore
Rose Bay
New England Aster
Tulip Poplar
Silky Dogwood
New York Ironweed
White Ash
Silky Willow
Oxeye Sunflower
White Oak
Smooth Alder
Sneezeweed
Wild Plum
Spice Bush
Sundrops
Sweetfern
Tall Meadow Rue
Switch Grass
Trumpet Creeper Vine
Wild Hydrangea
Turtlehead
Winterberry
Virginia Bluebells
Witch Hazel
Virginia Creeper Vine
White Snakeroot
White Wood Aster
Wild Blue Phlox
Wild Columbine
Wild Geranium
Wild Ginger
Wild Sweet William
When I walk around our property and look at the plants and trees, we have few, if any, native plants. It’s clear that the previous owner(s) were not focused on native plants and healthy biodiversity. In addition to the chameleon plants, we have Snowberry bushes, some type of dwarf Holly Bush, and an ornamental tree. While the Snowberry is native to the United States, it is not native to Pennsylvania. Holly is another plant that can be native to the U.S., but because there are a bunch of varieties, including dwarf ones that have been bred to restrict size, most aren’t native. That’s the case with the one in front of our house. Finally, we have one tree on our property at this time. It’s a short, ornamental tree that is certainly not native.
When we bought our house, there were woody shrubs on one side of the house as well as one crab apple tree and an out-of-control lilac bush in the strip of land between the sidewalk and road. They were planted by the borough years ago, but they were partially dead and hadn’t been pruned or maintained in years. We took those down earlier this year.
We have no other trees or plants on the property other than the ones we planted in the spring and what we had in the garden. Our neighbors have done an excellent job of planting beautiful trees and flowers, with the majority of the trees and perennial plants being native. When I look out our windows, I see a couple of poplar trees, several hazelnut trees, and multiple berry bushes. Elsewhere around us, we can see a lot of evergreen trees and many oak and maple trees. Pennsylvania has a lot of trees, and it’s easy to see a variety of native species by keeping your eyes open as you walk or drive around.
Are any of Pennsylvania’s native plants native to where you’re from? What are your thoughts on native vs. invasive species?
Writing about the garden in fall with winter on the way has been more difficult than I anticipated. I’ve been busy with painting my office, work, planning some woodworking projects, and trying to relax some. My plan is to write posts during the gardening “offseason” that require research, like the one last week about the accuracy of first and last frost dates. But this week, time got away from me a bit, and I didn’t start on anything. Instead, I decided that I’ll go over some of the changes that we’re planning for next year’s garden.
Converting the Space by Our Porch Into a Container Garden
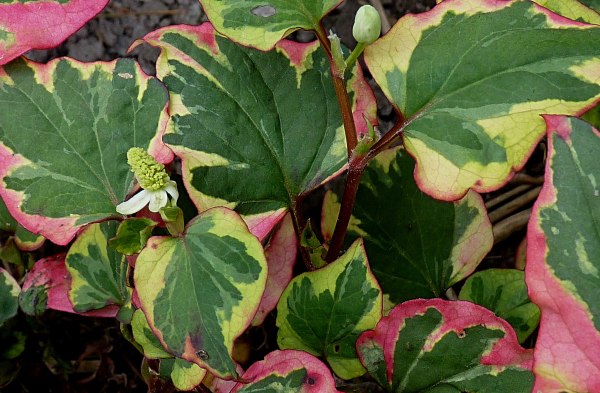
There is an area off our back porch that has dirt in it and is bordered by rocks and landscape timbers. I don’t think that the previous owner or the tenant who lived in the house ever attempted to grow vegetables or flowers in the bed because the soil is poor quality and shallow. Also, at some point, someone planted a chameleon plant there, and it has taken over the entire area. If you’re unfamiliar with the chameleon plant, it’s an invasive species that grows native in Southeast Asia. People used to plant it a lot because it can grow in virtually any condition and has pretty flowers. However, it also takes over everything because its rhizomes spread underground, making it difficult to kill.
Chameleon Plant (Jamain, CC BY-SA 3.0 , via Wikimedia Commons)
Magz and I have disliked this plant since we bought our house and learned what the plant is. Last summer, I thought I could kill it with a string trimmer, but that only temporarily slowed its spread and released a smell that can only be described as disgusting. This year, we took a different tactic by using chemicals. Round Up and other common herbicides didn’t work. We learned that a combination of Dawn dishwashing liquid, salt, and concentrated white vinegar may work, but it didn’t. We eventually bought glyphosate, which was impactful. It actually kills the leaves and the root system, and we got it under control enough that we thought we could plant vegetables in it. Late in summer, we tried to plant some squash and pumpkins in there, but that didn’t prove to be successful, as the chameleon plant came back since we couldn’t continue to spray it with glyphosate. That leads us to where we’re currently at.
Originally, I thought that the best plan was to build up the retaining wall and rock border, kill the chameleon plant, lay down some landscaping plastic, and bring in fresh soil to plant in. Magz had a much better idea given how much soil that would take and still not knowing if the chameleon plant would eventually reappear. Her idea is to kill the chameleon plant and lay down landscaping plastic, but then, instead of bringing in soil, we buy gravel/small stone to pour on top of the plastic. With the plastic fully covered, we will then buy containers to grow potatoes in.
This will allow us to still use that space without needing to worry about the soil quality or if we’ll ever be able to grow in it. We also will get to grow potatoes again, which we struggled with this year and had none to harvest. We’ll also be able to use a space that was previously unusable and make it beautiful, similar to English gardens. The area gets plenty of sunlight, so nearly every type of vegetable can grow there. We also have some outdoor furniture that we’d like to have in this area where we could sit and read a book or simply relax.
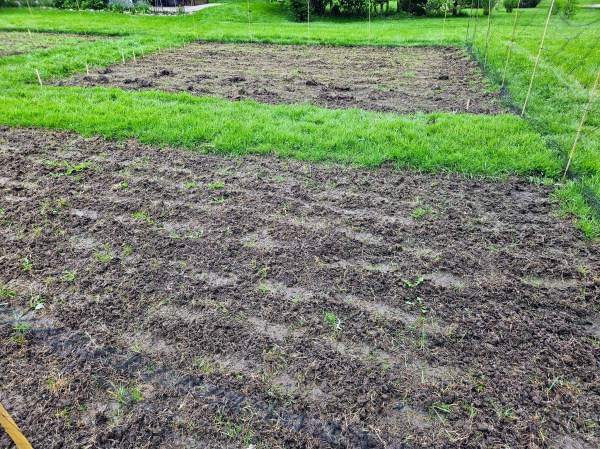
Adding Another Garden Bed & Potentially Adjusting Our Existing Beds
We still have plans to expand our garden for next year. This year’s garden consisted of two large gardening areas with five beds. Next year, we want to expand the one area to add a fifth bed to it. Our yard is still a bit larger than we’d like it to be, and there are plenty of additional vegetables that we want to try growing as well as some that we want to grow more of. We also want to have our property be a certified wildlife habitat, which requires having a lot of natural plants that benefit pollinators, birds, and mammals. Additionally, we want to grow flax as part of the PA Flax Project with the goal of regrowing the textile industry in our state. With flax, we can harvest the fibers that get spun into linen, which is one of the best wearable fabrics.
Our original plans for this year’s garden consisted of having this extra garden bed, but we ran out of time. It’ll be a lot easier to create this new bed with the other ones already established. We’re going to get started on creating this bed as soon as this week once a shipment of glyphosate arrives. We attempted to buy it locally, but our town’s Tractor Supply was all out for some reason (even though they had plenty of Christmas decorations to buy). Once it arrives, we’ll spray the area for the new bed as well as the existing beds in order to finally kill all the grass that we battled this year. We want to finally have the grass knocked down so that we only see soil.
The other thing we discussed is converting one of our existing beds into a raised bed. The drainage in that bed is poor, and when we get a lot of rain, it gets swampy. With a raised bed, we can eliminate that problem. However, it does require railroad ties to establish the bed’s boundaries, so we’ll see if we want to spend that money next year or let it go another year.
So, those are our plans for changing how we grow things moving forward. We want to more effectively and efficiently grow vegetables, and we feel this will help accomplish that goal. Do you make a lot of changes to your garden on a yearly basis? Have you had any experience with the chameleon plant, or is there another intrusive plant that gives you fits?
Gardeners often pay attention to their area’s first and last frost dates. They help determine when you should plant seeds or transplant starts, especially those sensitive to cool temperatures, and how long of a growing season you have. The Farmer’s Almanac has always been the go-to source for this information, which is how we learned that our average last frost date is May 15 and the average first frost is October 7. With the garden being done for the year, something I’ve been pondering is how accurate these dates are.
Photo by Caleb Stokes on Unsplash
Mathematically, these averages are correct. Farmer’s Almanac and other sources likely use the same data I found from NOAA, which has historical data for their weather stations. With that data, it’s pretty easy to determine the average across a set of numbers. What I wanted to know is how often the first frost occurs before October 7 and the last frost after May 15.
For my purposes, I used a threshold of 35 degrees Fahrenheit. While people usually think of frosts occurring at 32 degrees Fahrenheit, tissue damage in plants can happen a few degrees warmer. Plus, the temperature is often lower at the ground than what the weather stations show. Here is a table with the results:
Year
Last Frost
Temp (F)
First Frost
Temp (F)
2025
Jun-3
34
Sep-9
35
2024
May-12
35
Oct-11
33
2023
May-18
35
Oct-10
33
2022
May-8
33
Oct-9
31
2021
May-15
33
Oct-19
34
2020
May-14
28
Sep-19
32
2019
May-16
33
Oct-13
33
2018
May-2
30
Oct-14
35
2017
May-16
34
Oct-1
32
2016
May-16
32
Oct-10
35
2015
May-15
35
Oct-18
32
2014
May-19
35
Oct-26
30
2013
May-27
35
Sep-25
35
2012
May-18
35
Oct-8
32
2011
May-10
34
Oct-23
33
2010
May-10
29
Oct-12
33
2009
May-19
31
Oct-6
35
2008
May-23
34
Oct-4
35
2007
May-13
35
Oct-27
35
2006
May-23
32
Oct-12
33
2005
May-9
34
Oct-28
33
2004
May-5
35
Oct-4
34
2003
Apr-26
30
Oct-2
30
2002
May-22
29
Oct-7
34
2001
May-31
35
Oct-7
31
2000
May-16
35
Sep-28
30
Takeaways
In the past 25 years, the last frost of the spring occurred after May 15 on 14 occasions. It occurred before that date 10 times. It also fell perfectly on May 15 twice.
The first frost of the fall took place after October 7 in 14 years and before October 7 on 9 occasions. It happened on October 7 twice.
The last frost of spring had a temperature at or below freezing (32) 8 times, while the first frost of fall was below that threshold in 9 years. Most recently, those occurred in October 2022 and May 2020.
The coldest temperature for the first frost was 30 degrees in 2000, 2003, and 2014. For the last frost it was 28 in 2020.
This year has been one of the weirdest in recent memory. The last frost was on June 3, and the first frost was on September 9.
After tracking each year’s data since 2000, I looked at some outliers dating back to 1949, the first year that temperature data was recorded for this weather station.
The latest last frost of the spring occurred on June 26, 1979, while the earliest last frost was on April 28, 1953. The temperature was 35 degrees both times. The April 28 date is actually later than the earliest last frost recorded in the table above, which took place on April 26, 2003.
The earliest first frost of the fall occurred on August 15, 1963, when the temperature dipped to 34 degrees. The latest first frost was on October 22, 1962. It was 35 degrees that day. August 15 is much earlier than any of the past 25 years; however, we had a first frost later than October 22 five times since 2000.
What Can We Learn?
Beyond the obvious realization that the average first and last frost dates for your area are mathematically accurate, there’s only so much importance that should be placed on them. It’s good to know when the averages are, but I think they should be treated as rough estimates rather than set in stone specific dates. Each year brings temperatures and growing conditions, so it’s important to be flexible. This past spring, we had to wait until late June to plant some things because of how wet and cool it was. You can typically get a feel for how spring is going to go early in the year and can get a read on if the average start date will be accurate that year.
I loved looking at this data, and it was fun to remember why primary sources were so much fun to work with when performing historical research. After I wrapped up looking at this data, I started tinkering with precipitation data, specifically first and last snowfall dates, and may look into that more as a fun side project. In general, NOAA’s historical climate data will be something I regularly visit. Did you find this information interesting? Have you found that your area’s first and last frost average frost dates hold true on an annual basis?
For those unfamiliar with him, Jeremy Clarkson is a well-known British TV presenter most famous for his work in the automotive journalist industry. His role as co-creator and host of the Top Gear reboot from 2002 to 2015 relaunched the show and made it a global hit. In 2015, he was fired from the show, and together with co-hosts Richard Hammond and James May, he launched The Grand Tour on Amazon Prime, which debuted in 2016. That series ran for six series before concluding in 2024.
In the background of his career as a TV presenter, Clarkson owned a 1,000-acre working farm in the Cotswolds that he purchased in 2008. Until 2019, he had a contract Farmer running the farm, but that changed when the farmer retired, which led to Clarkson taking over the farm and launching Clarkson’s Farm, also on Amazon Prime, in 2021. Four seasons of the show have aired thus far, with the most recent debuting in May 2025. A fifth series has been ordered, with filming likely done by this time in preparation for a May 2026 premiere.
Lessons Learned From Clarkson’s Farm
When Clarkson’s Farm premiered in June 2021, which covered the 2019-2020 farming season, Jeremy had zero farming experience. Previously, he lived in the farmhouse on the estate and allowed a farm manager to handle everything on the farm. He had to buy equipment, hire farmhands, and learn to operate everything. While it is a loosely-scripted TV series, it is non-fiction and filmed in a documentary style. Plus, because of Jeremy’s honesty, which he’s always been known for, you know you’re getting the truth. He isn’t trying to sugarcoat anything. Due to that, his ambitions, successes, and failures, of which there are plenty, teach you the viewer a lot as Jeremy learns.
Everything Is Farmable
In season 3, Jeremy has the idea of making money from the non-arable portions of his farm. This means turning to the areas that don’t have fields in them and aren’t used for animals. He begins harvesting the blackberries that naturally grow on the property and he buys piglets that can live in the woods on terrain that is too steep to plant in. It’s a reminder that you don’t need the perfectly groomed and idyllic land to grow things. Plants will grow in less-than-perfect soil, and some of the sweetest fruit grows naturally and in the harshest conditions, if you’re willing to go after it.
Farming Struggles
Season 1 starts a trend that has continued in every season: Farming is really hard, and there’s a lot that’s out of farmers’ hands. Weather plays a major role in their livelihood and can dictate a farm’s survival if there are consecutive years of poor weather. At different points, Jeremy has to do with record-breaking floods and historical droughts. Extended cool periods restrict plant growth, while lengthy warm periods scorch them.
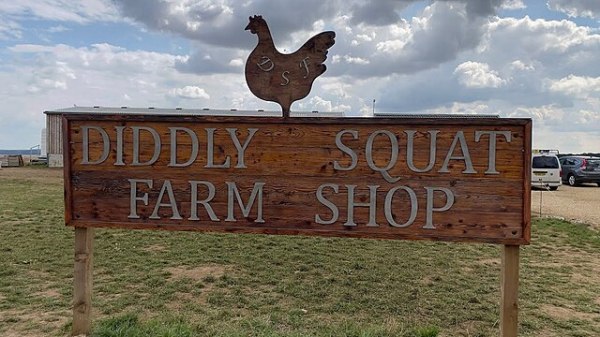
Diddly Squat Farm (aka Jeremy Clarkson’s farm) [kTb, CC BY 3.0 , via Wikimedia Commons]
Aside from weather, there are the emotions that come with becoming attached to animals that have to be butchered or die from natural causes. You always think about how the meat industry is a business, but if you have a heart, like many farmers do, it crushes them each time animals have to be delivered to the abattoir.
Additionally, equipment breaks and needs to be fixed or replaced, prices fluctuate due to global events (natural or political), and governments make decisions that affect your ability to purchase and sell products. It’s not an easy business, but most farmers stick with it because they’re passionate about it.
Gardening this year showed us just a hint of how difficult growing your own food can be. Some of our plants never grew because of the wet spring we had. Then, the summer brought extended periods of drought that stripped the soil of its moisture. It was hard to keep up with everything while also managing life. I can’t imagine how difficult it must be for farmers on a much larger scale.
Sacrificing Production for Long-Term Viability
In seasons 1 and 3, Jeremy makes two decisions that result in a short-term sacrifice with the goal of establishing long-term viability and success. Season 1 consisted of him planting native wildflowers in portions of his arable land to attract pollinators. He also let these areas go unmaintained to allow animals to establish habitats.
In season 3, he brought in well-known musician-turned-farmer Andy Cato who has established a business built on regenerative farming that replenishes soil nutrients while also producing a sellable crop. Much to the disbelief of Jeremy’s farm manager, Kaleb Cooper, Jeremy stuck with this plan, sacrificing that year’s profit potential in order to rebuild the soil that had been stripped of its nutrients following years of commercial farming practices.
Both decisions represented the importance of exchanging short-term opportunities for long-term potential. By dedicating a portion of his land to native growth and flowers, he willingly gave up the possibility of planting a grain that could be sold. It’s similar to season 3. While he still grew a sellable crop, it wasn’t as lucrative as selling a commonly-grown crop, such as rapeseed, wheat, or barley. However, the benefit of reestablishing nutrients in the soil was more important to Jeremy.
Learning New Skills Can Be Difficult
I believe Jeremy was 60 when Clarkson’s Farm debuted. He had spent the majority of his life behind the wheel of cars. He had no idea how to operate tractors, reverse trailers, raise and lower plows, or fill a spreader with seed. There was a major learning curve, especially for someone who has been very successful in his previous endeavors. Thankfully, he surrounded himself with people who do know what they are doing and taught him, albeit with a bit of sarcasm and attitude. He also humbled himself, which was a new path for someone who was famous for his smug face on Top Gear. Eventually, by the end of season 4, Jeremy actually had an idea of what he was doing. He could generally attach a trailer to a tractor by himself and knew what was happening on his farm.
It’s a reminder that regardless of how much experience you have in a field, it’s always difficult to learn a new skill or hobby. In our garden this year, I learned a lot even though I had gardened in the past. We planted vegetables we hadn’t grown before, experienced insects that we hadn’t encountered, and in-ground gardening brought with it new struggles not found with container gardening.
Impact of Clarkson’s Farm
Bringing Attention to the Farmer’s Struggle
With this show, Jeremy has used his massive platform to draw attention to how badly farmers struggle to make it. I think a lot of people believe that farmers have an idealistic agrarian lifestyle that consists of planting in the spring, harvesting in the fall, a bit of fertilizing in between, and being around animals. But that’s not the case. With so many aspects of their lives out of their hands, they are left at the mercy of the weather, economy, governments, and even global pandemics. One bad decision can lead to them losing their farm. They often can’t take risks because the potential to lose everything is too great. A disease can spread throughout their herd of animals and wipe out an entire year’s worth of income. Yes, there is insurance for these kinds of events, but they aren’t guaranteed to pay full value and can take a long time to pay out.
The Importance of Our Food System & How Fragile it Is
By watching Clarkson’s Farm, you realize how delicate our food system is. We have a great system of trade and infrastructure that allows countries to obtain raw materials grown on the other side of the world. But it’s also a system that can easily become imbalanced. One year of bad weather can result in a nation needing to import wheat for flour rather than growing it domestically. An idiot’s war in Ukraine can upset the world’s food security and lead to scarcity in developing nations.
Thus, it’s important to be able to grow stuff domestically when we can while also accepting that we live in a global society now where nations are dependent upon each other. As much as certain people like to complain about how much we import in the United States, we also export a lot of raw materials and goods. A drought in California or the temperature staying below freezing in Florida can upset the world’s agricultural market. It’s extra important to consider what we as individuals and families can grow. It also reflects the importance of having our own gardens when possible. And remember that when a natural disaster occurs or a weather pattern changes, it’s not the farmer’s fault that the prices fluctuate. Most of that is out of their control, and they certainly aren’t seeing an increase in their income.
Governments Set Farmers up to Fail
An unexpected part of the show is Jeremy, Kaleb, and Charlie Ireland’s encounters with the local and federal governments in the United Kingdom. Most of the show so far has featured Jeremy getting told “no” by the local council for everything plan he tries to implement. Restaurant? No. Farm shop? No. Pub? No. It’s like the council doesn’t want to generate revenue for the local community and district. On the federal level, they have to deal with the fallout of Brexit and the UK needing to develop domestic sources of food or pay more than they were before to import the food. The government promised subsidies to British farmers, but that money went away in 2024.
In the United States, the story is the same. The typical farmer has long struggled for survival. Dairy farmers barely make any money for their milk, and it leads to many converting to beef farming. They’re forced to plant corn for ethanol production rather than feed for their animals. Trump’s idiotic “leadership” has led to an increase in the cost of fertilizer and other farm chemicals because many of them are produced outside the U.S. Then, he doubled down on it by cutting or reducing most government aid programs.
Oh, and it gets better because of his decision to round up and deport immigrants who have been peacefully living in the U.S. for years. Those immigrants are often ones that farmers need as hands to operate their farms because Americans are usually too good for that kind of work. Those immigrants are the ones that we were told would be safe because they’re peaceful. It was just another lie that has resulted in Americans being victimized. Tariffs were supposed to result in other countries buying the vegetables we grow here, especially soybeans, but recent articles I’ve read have said that also hasn’t come to fruition. In fact, it’s worse than it was last year. Trump’s tariffs have led to retaliatory tariffs by China, resulting in them no longer buying our soybeans. Those farmers grew a crop that is no longer selling. At every turn, governments are making decisions that hurt their farmers. Leaders may say that they’re trying to help the farmers, but look at their actions. They speak much louder than words.
Clarkson’s Farm Has Been a Roaring Success
In the years since the show debuted, Jeremy has been honored numerous times by the British Farming Society. He has won awards for his work to bring attention to British farmers and the environment they find themselves in. It’s clear that he’s having an impact on the people who matter: the farmers themselves. He’s quick to point out that he is lucky to have other revenue streams, including the show itself, as well as the amount he earned from previous work. Most farmers have that opportunity or savings to fall back on. At the end of season 1, he gave the honest assessment that the farm couldn’t have continued without those other income sources.
A lot of people hate Jeremy Clarkson due to his brashness and how opinionated he is. But he has always been honest, even if you don’t like his delivery. That transparency is really refreshing in a society where things are masked and people make content just to generate clicks and views. Jeremy has become the voice of the farmer in the United Kingdom, and here in the United States, I think we should adopt him as ours as well. He speaks the truth and his dedication to finding innovative ways to farm is inspiration. I know that after watching the show, I wanted to do everything I could to be more agrarian. Gardening isn’t farming, but it’s at least related to it. They’re cousins. If you haven’t watched Clarkson’s Farm, I urge you to give it a go. It’s not a glamorous portrayal by any means, but it’s honest. And that’s what we need right now.
Growing up, one of my favorite video games was John Deere: American Farmer. Released in 2004 on PC, it allowed you to take ownership of a farm and operate it with the goal of expanding and making a profit. You were able to pick your location in the United States, buy your machinery and attachments (all John Deere, of course), and plan out your fields. You also could buy animals to raise. If I remember correctly, there were cows and pigs, but there may have been more. You were able to pick what crops to plant, but the biggest downside was not driving the machinery. Instead, you selected the field, the job (planting, fertilizing, harvesting, etc.), and which farmhand you wanted to perform the work. After that, you essentially “ran” it, and the non-playable character (NPC) did all the actual work.
I have very fond memories of playing that game, but I think I only played it for a year before moving (literally) and moving on to other video games. But I think playing that game was an important part of growing up. It greatly shaped the types of video games I enjoy in that I don’t like first-person shooter or online games. I would much rather play sports games or ones with long storylines. In fact, I’ve only owned one Call of Duty game in my life, and it was over 10 years ago. I’ve never played Battlefront, and the last military-style game I really enjoyed was Medal of Honor: Rising Sun, which came out in 2003. I enjoy games that have replayability and are even a bit repetitive, such as MLB the Show.
The other thing I learned from playing John Deere: American Farmer is that I enjoy games that are rooted in real life. Granted, I’ve never been a farmer (although I did work on a dairy farm when I was 15), but I have always enjoyed animals, planting, and growing things. The game also looked like everything around me, where there were countless fields and farms. It felt relatable, realistic, and achievable. There wasn’t any stress when playing the game. Instead, it was calm and relaxing. It’s what I would describe as a cozy game, although I’m unsure the term existed at the time.
Cozy Games
Cozy games are great if you enjoy playing video games as an escape and don’t want a lot of stress, fighting, and action when playing. Instead of intricate levels or storylines that require a lot of decisions and quick reactions, cozy games are often more open-ended and allow you to progress at your desired pace. I first started hearing this term in 2020 during COVID, and I think it’s obvious why. People were looking for an escape from reality, especially when they were stuck at home during lockdown, and a game like Animal Crossing: New Horizons was perfect for this. But, if you look back, earlier games fell into this category, including other installments in the Animal Crossing franchise, all The Sims versions, and many simulator games (Roller Coaster Tycoon, Zoo Tycoon, Sim City, Flight Simulator, etc.). By default, these games were able to be as complex or simple as you wanted.
I played most of these growing up, but I largely stopped in high school. However, in 2019, Sims 4 arrived on my radar after many YouTubers started making playthrough videos of it. We bought a copy for the PS4 and dedicated many hours to it, but it didn’t feel cozy. The game could still be played cozily, but most of the playthrough videos were dedicated to challenges (100 Baby Challenge, Rags to Riches, survival challenges, etc.), which made the game feel rushed and stressful. There were also plenty of ways to make the game dark and sinister, which goes against the cozy game ideal.
In 2021, we moved and bought the Animal Crossing edition Nintendo Switch that November. Magz had been introduced to the series in 2020 when New Horizons was released and was really interested in all the coziness that came with it. At the same time, I was looking for something equally cozy and remembered playing John Deere: American Farmer. I searched to see if there were updates in recent years (there weren’t) and looked for similar games in the same genre. That’s how I stumbled upon Farming Simulator, which met all the criteria I had: cozy, immersive, and could be played on the PS4. FS22 had just been released in November 2021, so I was able to get the previous version (FS19) at a great price when we bought the Switch. And it’s at this time, that I want to transition into a common theme of Animal Crossing and Farming Simulator: gardening/growing food. While not the sole focus for either game, both series dedicate a lot of time and attention to gardening or growing food, and gardening has become a popular theme in many games, especially in recent cozy games.
Gardening/Farming in Video Games
While farming in video games is really popular now, it’s far from a new thing. John Deere: American Farmer dates back to 2004, and the first Farming Simulator game was released in 2008. I even think about Farmville, which was played through Facebook and was released in 2009. While I played the game, I don’t remember a lot about it, but I do know it was massively popular.
Other video games with a farming element are Fields of Mistria, Roots of Pacha, and Wanderstop. I haven’t played any of these, but the reviews are great, and they’re very popular. Instead, I want to discuss three farming/gardening games that I have played and talk about what makes them great as well as areas of improvement. Lastly, I’m going to talk about how realistic each is.
Farming Simulator
I have only played one installment of this series: Farming Simulator 19. Giants, the game’s developer, tends to release a new one every two years; however, they’ve gone three years between the last three installments. I have watched people play both FS22 and FS25, so even though I haven’t played them, I feel pretty familiar with the series and its recent releases. Farming Simulator is a pretty great representation of farming. I know that I titled this post “Gardening in Video Games” and that it’s gone in a farming direction, but I think any game where you can grow crops on a small scale qualifies.
Best Qualities
Mods: Even though you only start with a few maps and a select number of tractors, combines, machinery, etc., the game’s mod library/community provides nearly endless possibilities. If there’s a tractor being used on a farm somewhere in the world, there’s a good chance it’ll make its way into the game. The best example for this was being able to buy Jeremy Clarkson’s Lamborghini tractor from Clarkson’s Farm. It’s not one of the most popular tractors used by farmers, but because he used it, it was modded into the game. The maps are another great example. In FS19, you start with one European and one North American map. Both are pretty good, but you quickly become bored with only two options. In the mod library, you can find maps from many European countries and US states. While not necessarily designed to perfectly replicate a specific town, it’s fun playing on a map that closely resembles where you live or a place you enjoy.
Complete Freedom: Farming Simulator gives you the freedom to do pretty much whatever you want. You can create fields where they previously didn’t exist, establish thick forests for logging, and become a dairy or sheep farmer if you want to raise animals. You don’t have to play a set storyline and can stick with a map for as long as you want. Because there are no goals or requirements, you have the freedom to determine what is success.
Driving Machinery: The coolest part of Farming Simulator is the ability to drive tractors, combines, excavators, and other pieces of machinery that most people will never have the chance to operate. When cultivating a field or spreading fertilizer, you have to manually raise and lower the cultivator and engage/disengage the muck spreader to not cause problems. It makes you feel like you’re really controlling the equipment.
Seasons: By default, Farming Simulator doesn’t have seasons; however, since FS19, there has been a mod to add them. You can adjust the season length from one day per month to eight days. Seasons give the game an extra touch of reality since crops have to be planted in the spring and harvested before winter, like real life.
Worst Qualities
“Helpers”:Farming Simulator has NPCs that you can hire to help do work in the fields. Setting it up is pretty easy; however, they rarely do the work as effectively as you expect. The helpers will get lost in the fields, are easily impeded by non-existent obstacles, and don’t complete the task before saying they’re done. They’re meant to be beneficial, but they only get in the way and distract you.
Repetition: It doesn’t take long for the game to become a bit repetitive. You do the same tasks (plow, cultivate, plant, fertilize, and harvest) on repeat. This is made better with the Seasons mod, but it still feels repetitive. There are animals that can be raised, but taking care of them requires the same repeated tasks.
Lack of Improvements: A big issue that Farming Simulator has had is that there are few improvements between the games. FS22 added some pretty interesting productions to the game, but that was about it. There are many crops that players would like to see in the game, but they remain absent.
Terrain Problems: This could also fall into the Lack of Improvements section, but Giants has forever struggled to make the terrain look real, especially when it’s being dug for crops or modified to level the ground. Tire marks from the equipment also never look real.
How Realistic Is It?
Fairly realistic in that you get to use equipment modeled after real-life examples and they all operate a bit different. With Seasons enabled, you have to operate within the growing parameters and can only grow what works in each season and climate. The things that are unrealistic include how quickly/slowly your vehicles consume fuel, the lack of damage, the monetary structure, and how animals are handled. I also wish that you could do some of the smaller jobs that happen on farms in the game. Things like leading the animals out of the barn and into the fields or feeding the calves would be really fun.
In general, my experience with Farming Simulator has been good, even though I haven’t played it in at couple of years. The repetition led me to become burnt out on it. I also grew frustrated with the controls on the console version, as they are finicky. That leads me to another improvement that could be made: make the console-playing experience better. That said, I do recommend playing it.
Score: 6/10
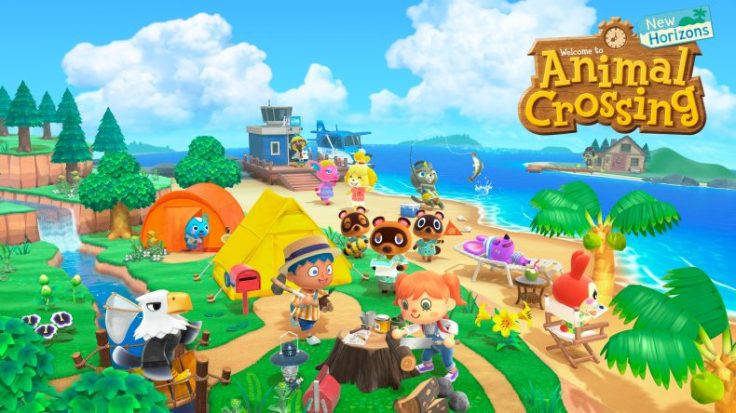
Animal Crossing: New Horizons
New Horizons is the first game in the Animal Crossing series that either of us have played, and I know that farming wasn’t part of previous games or this one when it was originally released. But I am glad they added it, because it brings something extra to the game. Farming isn’t too serious in ACNH. You get seeds or starts depending on the vegetable, dig a hole, and plant it. You water it every day, and after three days, the vegetables will be full grown and ripe. You harvest them, and the plant continues to produce indefinitely. It’s very simple, but it’s incredibly calming to see your character whip his or her watering can around. It takes an already cozy style of game and somehow makes it cozier. The only stressful part is when your watering can breaks in the middle of watering.
Best Qualities
Variety: For a game that isn’t solely a farming game, ACNH has a surprising amount of vegetables that you can grow. These are tomatoes, carrots, potatoes, wheat, sugarcane, and three colors of pumpkins. I was surprised the first time I learned that there are so many different vegetables that can be grown. And the best part is that they all can be used in different crafting recipes, some are used in cooking, while others are used to make furniture or decorations.
Simplicity: Because farming only plays a small role in ACNH, it’s not a complex process, which is great. It’s a series that’s designed to be played by people of all ages. You simply plant, water them every day it doesn’t rain, and harvest. That’s it. There are no fertilizers to worry about, and all vegetables grow in all seasons.
Graphics: I was blown away by the graphics of ACNH when I first saw Magz play it. I didn’t really have any expectations (high or low) for the game’s visuals, so I was shocked that it was so stunning. It’s not 3D, but everything has depth. My favorite thing is how the trees, weeds, and plants will sway when it’s windy or how you can see the plants glisten after you water them.
Worst Qualities
Would love to see more vegetables: I mentioned how happy I was with the variety of vegetables, but would love for there to be even more varieties. I’d love to be able to grow corn, beets, broccoli, and cabbage. It’d be a lot of fun to see how these vegetables would be modeled as well as the crafting recipes that would come with them.
How Realistic Is It?
It’s not at all. Plants don’t reach full maturity from seed in three days. Pumpkins, wheat, and carrots don’t continue to grow once you harvest them. You also can’t grow tomatoes, a plant that doesn’t tolerate cold weather, in winter. But that’s not the point of ACNH. It’s meant to be a lighthearted, fun, and enjoyable game. And I love it for that. I think it’s brought me the most happiness of any game I’ve ever played. You can play it for 10 minutes or two hours. If you’re down or in a bad mood, it’ll lift you up. It’s pure joy.
Score: 10/10
Stardew Valley
I came to Stardew Valley nearly 10 years after it was released in 2016. Magz bought it in (I think) 2023 and took a bit to really get into it. She eventually fell in love with the game and would have difficulty putting the Switch down when she played, and I had no idea what was happening. I didn’t understand what the mine levels were, how difficult fishing was, or who Haley is and why she’s so mean at the beginning of the game. After watching videos of people playing it, I downloaded the game in Dec. 2024 and spent a lot of hours playing it around Christmas. I quickly realized why everyone loves it. It’s immersive, entertaining, creative, can be quite difficult at times, and gives you a ton of freedom. What ConcernedApe continues to do with the game is amazing, and all the updates are free.
Farming plays a large role in the game, although you can farm as little or as much as you want. You have a farming skill that is developed as you harvest crops and interact with your animals. You can go through the entire game and beat the main storyline by not farming, but it’s definitely a better experience when you farm.
It isn’t difficult to farm in Stardew Valley, but it does require a lot of planning and thought. You manually hoe the plot you want to plant in. You buy your seeds at the town’s general store or use ones that you find throughout the world or are gifted. You can also purchase or craft fertilizers to improve the quality of your crop. Once a seed is planted, it needs to be watered every day to achieve the highest quality. Then, once the vegetable is mature, you harvest it and either wait for new vegetables to grow or plant something new.
Best Qualities
Freedom: By far, the best thing about Stardew Valley is the freedom you have. While there is a main storyline that you should play to reach 100% completion and to experience everything the game offers, it isn’t required. You can choose to focus on farming, mining, fishing, or foraging. I’ve reached 100% on Red Dead Redepemption 2, which is supposed to take well over 100 hours to complete, and Stardew Valley blows it away.
Variety: There are roughly 50 crops you can plant in Stardew Valley, ranging from items commonly found in real life (corn, beets, etc.) to some that I’d consider fantasy (powdermelon and ancient fruit). Each type has a season (or two) in which it can be grown as well as the number of days it requires to reach maturity. You can also grow giant versions of some varieties, and each will have quality levels (regular, silver, gold, and iridium). Vegetables are used in crafting recipes, can be given as gifts, and need to be used in pursuit of beating the main storyline. Oh, and this doesn’t even include the variety of fish you can catch or gems you can find when mining.
Tools don’t break or wear out: In ACNH, tools eventually fail, forcing you to craft or purchase a replacement. And while I know each tool lasts a set number of uses, it feels as though they always fail at the most inopportune time. In Stardew Valley, that doesn’t happen. You are given the following tools to start: axe, pickaxe, watering can, and hoe. These can all be upgraded, which allows you to do more and use less energy in the process.
ConcernedApe’s dedication: The game’s developer, Eric Barone (aka ConcernedApe), has poured his heart and soul into the game. He released the game independently after working on it for more than four years and continues to release updates that improve the game all these years later. He listens to the game’s fans when working on updates, and you can tell that he genuinely cares about the game, unlike a lot of developers.
Worst Qualities
Not always relaxing:Stardew Valley is a wonderful game, but it isn’t relaxing at all times the way ACNH is. The mines, and especially the skull cavern and Ginger Island volcano, can be very stressful and difficult. Time can also make the game not relaxing. Time is always advancing unless you’re in your storage or are crafting. A full day takes 14 minutes of real-life time without pauses, and you have to be in bed by 2:00 a.m. or you will pass out, which can lead to you losing items in your backpack. You also have to monitor your energy level, because if is depleted, you’ll pass out. All of this means you have to plan out your day to ensure you get everything accomplished while not taking too much time or using too much energy. It can be a lot.
Can cause eye strain: This may be a personal issue, but Stardew Valley strains my eye worse than any other game. I think it has to do with the default contrast levels of the graphics as well as the pixelated graphics. It means I can only play the game for a couple of hours at a time without stopping, which isn’t a bad thing, but it is more tiring than other games.
How Realistic Is It?
Stardew Valley doesn’t use a real-world clock, but a year in the game is divided into four 28-day seasons. Each season has four weeks of seven days. The seasons are like real life (spring, summer, fall, winter), and in all but winter, there are season-specific vegetables/fruit that can be grown. Those are all quite realistic for a game that has monsters and has fantasy elements. I also love that your energy gets consumed as you perform tasks or engage in combat. Finally, I like that you have to use hand tools. It’s so much more engaging and fun than using large pieces of machinery.
Score: 9/10
Do you have a favorite video game, farming or other genre? If so, I’d love to hear about it. Have you played one of the games discussed in this post?
Something I struggle with is not falling into the trap of comparison. Whether it’s people I know or people I’ll never meet, I find it easy to compare myself to them if there are any similarities. And I think social media is a major factor in creating an environment where we compare ourselves to others. Now, comparing yourself to others isn’t always a bad thing. It can help us set goals for ourselves when done in a healthy manner. However, too often, when it comes to social media, it’s rarely healthy. Social media platforms, such as Instagram, are designed to only tell part of the story. We either don’t get to see the entire story and all the work that goes into achieving something, or the achievement itself is misleading. Either way, it’s not good.
Unfortunately, two of my favorite hobbies, gardening and woodworking, tend to be full of comparison and even being bad about yourself. With woodworking, you can get caught up in the size of a person’s shop, the quality (and price) of the tools they have, and the type of wood they can work with. I don’t remember my dad or grandfather ever working with quarter-sawn white oak, but that’s the bulk of what you see YouTube, HGTV, and Instagram woodworkers use. Most people can’t afford that quality of lumber. When it comes to tools, I don’t know many people who can afford to outfit their shop with Festool, whose most basic sander will set you back $300, but that’s what you see a lot on TV and the Internet. It’s easy to tell yourself that you don’t need those tools, but when a project doesn’t turn out as well as the media personality’s does, you can quickly point to your cheaper tools as the culprit. The reality, though, is that the tools don’t maker the woodworker; the person does. We don’t see how many failed attempts went into a project before the successful final product. We also don’t know all the years a person put into the profession or hobby before working up to the expensive tools and materials.
Gardening is the same: If you want the best results from the start, you’ll want to pay to have all new soil brought in to amend what currently exists or buy the best materials to create an above-ground garden. You’ll also want to have the strongest and tallest fence to prevent animals from gaining access to your plants. And don’t forget to have an automatic watering setup that measures soil moisture and waters the plants as necessary. And when you look at Pinterest or read a gardening magazine, you’ll find the most beautiful gardens that are absent of weeds. If you’re like me, your first thought will be “Why doesn’t mine look like that?” Rationally, I know it’s because that garden that probably existed for years and has been the result of small improvements on an annual basis. But still, we don’t know that, and the standalone image is unlikely to tell that story.
Focus on the Successes
I don’t know where you’re at with your garden or other hobbies, but please know that you are doing very well and should be proud of everything you’ve accomplished. If it was your first year gardening and all you harvested was a single tomato, celebrate it. Feeding, watering, and caring for a tomato plant long enough to reach maturity isn’t easy. If you’re a mature gardener who’s struggled with carrots and finally got to eat one out of your garden, be thrilled. You put in a lot of work for that one carrot, and that shouldn’t be taken lightly. In your mind, it may not be as impressive as Instagram handle 123’s harvest, but who cares? They aren’t you, and you aren’t them. Both are okay. We don’t know the background that’s allowed them to achieve their success. They could be veteran gardeners with years of experience. They could also be commercial gardeners with a personal page. Or, they may not be gardeners at all and are simply posing with someone else’s harvest and garden. I never want that to be the case, but the sad reality is that it does happen.
Be Comfortable With Small Improvements
After you begin to appreciate the successes you have each year, I think it’s okay to start focusing on improvements that can be made moving forward. It can be an achievable goal, such as trying a new vegetable or seed variety that you’re curious about. It could also be finding ways to improve your soil drainage or become more efficient at watering. Perhaps you can work toward buying a new piece of equipment each spring that will lead to more success.
We’ve been working to put all these into practice. We had pretty good success with our plants this year, but one of our goals for next year is to have more melons and pumpkins reach maturity. I also want to find a way to make watering more seamless and efficient. The majority of our watering was done with cans, and it would be nice to have a setup that used soaker hoses attached to a single hookup. Finally, we want to improve our fence system. Ours worked pretty well for the first year and was never meant to be a long-term solution. But we also know that we likely won’t be able to upgrade all of it for next year, especially if we do want a forever solution that doesn’t need to be upgraded again in five years. That means upgrading it a little at a time. Maybe, we’ll upgrade one or two beds at a time so that in a few years, the entire garden will have a fence that is deer-proof and structurally sound.
Reaching that decision and mindset hasn’t been easy. I’ve mentioned before that I’m an impatient person by nature and struggle to take things slowly. My default is to find a remedy for the failed fence immediately, but that isn’t feasible. To upgrade all the fence for next year would be a substantial investment or would mean buying another short-term stopgap that would result in failure again. Instead, I’ve focused on what will be the best long-term investment and use the fewest resources while not spreading ourselves too thin. That means upgrading the fence little by little until it’s all improved. It will also mean that we’ll have some breaches in the fence until it’s all upgraded, but that’s okay. We’ll navigate that just like we did this year.
Find Joy Where You’re At
To wrap it up, I want to circle back to being happy where you’re at. It’s important to find joy in our current situation. Sure, it’d be great to have all the best tools at the start of something, but there’s little gratification in that. Working with what you can afford at a given time will help you appreciate the higher quality items when you can upgrade in the future. You can also be amazed at how much ingenuity you have when you are working with “starter” tools.
For example, I began woodworking with a used compact Craftsman table saw. It had a plastic basic that twisted when I ran a board through it. It was a bit scary, but I was able to build a serving tray with it that Magz still uses. I’ve since upgraded to a larger, more powerful Rigid saw that is capable of doing a lot more work, but I wouldn’t have appreciated how nice it is had I not used the Craftsman saw. Eventually, I want to upgrade to a cabinet table saw that can do even more, and I know that I’ll appreciate that one because I’ve worked with my current one for at least three years.
Squeezing everything you can out of what you have is an important mindset to have even though it’s in sharp contrast to the current mindset of many people. It’s fun to be countercultural in that way. It’s also why we aren’t rushing to spend a bunch of money in our garden when what we have serves us well and instead can slowly upgrade things.
I’ve written a few times about how peaceful gardening and being in the garden can be. Escaping from technology, surrounding yourself with nature, and being fully present with your plants has nothing but a positive effect on your life. But that doesn’t mean it is a perfect prescription for everything in life, and this summer, I found myself battling mental health problems that the garden alone couldn’t solve.
This post will be a bit different from what I typically write here, but I think it’s important to share. As a guy, there’s often a stigma surrounding mental health and attempting to get help (or at least that’s the case in the United States). This is a little bit about recognizing that I needed help and how it’s going so far.
Owning a House & Having a Garden Were What I Always Wanted
Buying our own house and having a yard big enough for a large in-ground garden were two goals I’ve had for a few years. When we were in the house we previously rented, I always said that it was going to be the last place we rented. I knew that only so much of that was in our control, but I was hopeful. The opportunity presented itself after three years, which was earlier than we would have liked, but with much prayer, help, and perseverance, we stuck with it. After signing all the paperwork and moving in, there was great excitement, but I still didn’t feel as happy as I probably should have. When last winter arrived, I was very happy and excited to be planning our first garden. I was also happy early in spring to be digging new garden beds, which I wrote about in great depth. But something still wasn’t right.
Feeling Off
Even in the midst of all the excitement that comes with gardening, I found myself being frustrated, irritable, and angry at the drop of a hat. Even in situations where I should have been happy, such as planting seeds, I was getting overly upset at little things. For example, if I put too many seeds in one area, I would beat myself up. That alone isn’t the worst thing; however, it affected my mood and how I interacted with those around me, including Magz. I would be short in how I communicated with her and have an edge to my voice.
I also began putting unnecessary pressure on things. I constantly focused on what was going wrong with the garden or what work needed to be done next instead of enjoying our successes or taking breaks. Weeds needed to be pulled and fertilizer needed to be added regardless of the temperature or UV index. This led to me being outside in the afternoon on hot, sunny days when the temperature was above 90 degrees. That work didn’t need to be done at that exact moment, but I felt like it had to. Worse yet, was that I passively applied that same standard to Magz. She asked me if I needed help or would be disappointed if she didn’t help (even though I know that she doesn’t do as well as I do in hot weather). I would tell her no, but when I came back inside, I would either act like I just did the hardest work anyone has ever done or would hold a grudge over it.
The last things I noticed were regularly being tired even after getting a good night’s sleep, no longer being interested in hobbies or activities I like, being moody, struggling to make decisions, and feeling as though I couldn’t hold conversations. In general, I felt depressed and down. Magz regularly asked me what was wrong, but I couldn’t pinpoint anything and just said that I felt off. Eventually, this led to us fighting pretty regularly and me not feeling confident in my ability to get out of the fight. I just felt paralyzed in my own mind and body. Finally, in July, I realized that I needed help. Mentally, I was at rock bottom, but I didn’t know what to do. I wasn’t interested in doing in-person therapy because I struggle to open up to people in person right away. Through our insurance, I found numerous services that provide virtual therapy, and the best part was that I could apply filters to find someone I was comfortable with.
Finding a Therapist, First Sessions & Progress
I wanted a therapist who is a Christian and a man. I didn’t feel comfortable talking to a woman in that situation, and I wanted a Christian counselor because I felt that it would be important to have a similar faith background. Within an hour, I found someone I was interested in, scheduled an appointment, and filled out the initial consultation. In a week or so, I had my first session, which was quite awkward.
Prior to this, I had never sought help from a therapist, although I should have. My parents’ divorce, multiple traumatic incidents, and some general emotional events that I never dealt with were all examples of times that I should have spoken to someone. Because of that, I had no idea of what to expect. I originally thought that I’d be “healed” in five or so sessions and didn’t want to drag this thing out. Boy, was I wrong. The first session was a basic “get to know” Kyle meeting where we went over my expectations and goals, and I began to tell him about my background and why I was there. Besides the goals and expectations, that’s actually how my first few sessions went, and I’ve only recently started to move beyond the intake portion of therapy, but I’m seeing real progress.
My therapist has given me the tools needed to process and react to situations and events that trigger me. I didn’t know it, but my ability to handle triggering situations in a healthy manner was basically stripped down to zero. I would overreact to everything and be unaware of how my body and mind were reacting to situations in the moment. Not recognizing this, I would respond to lies that I was telling myself, and situations would blow up. These new tools helped me slow everything down, recognize the emotions and bodily reactions I was experiencing in a given moment, and process them so that I could have a healthy reaction that was rooted in reality instead of falsehood.
What I’ve Learned
I’ve learned so many things from therapy. One is that it’s okay to admit that you need help. That’s a cliché, but it’s true. Not being okay is okay, but you don’t want to stay there. The second thing is that it’s really easy to fall into bad patterns of mental health. I never intended to develop poor reactions to events. It was a slow process that happened over time. The third thing is that developing healthy patterns takes a lot of work. You have to rewire how your mind responds to situations. You’ll have setbacks, which can be disheartening, but it’s important to stick with it. And the last thing is that it’s all worth it. It’s a time and financial commitment, and it’s also going to hurt if you allow yourself to be transparent with your therapist, but being healthy again is completely worth it.
And one more thing. Let’s call it an honorable mention. And this is for my fellow Christians who are having mental health struggles: Don’t let anyone tell you that your struggles are the result of not praying enough or that you don’t have enough faith. God is able to do anything and can solve a person’s struggles without any effort from us. But sometimes, it’s important that we put in the work, meet with a professional, and be able to process what’s causing our struggles.
Don’t Be Afraid to Get Help & Learning to Love Life Again
I started this post by talking about the stigma surrounding men and their mental health. Society is a much safer space for guys to have serious conversations about their mental health, but the sigma is still present. There are plenty of men (and women) who think guys are weak for seeking help with their mental health. If you’re struggling with mental health and would like to speak to someone but are concerned about how someone would view you, you owe it to yourself to get yourself help. Oftentimes, people aren’t as abrasive as we think they’ll be. But if you have a friend who would make fun of you or speak negatively of you wanting to get yourself help, you deserve better friends.
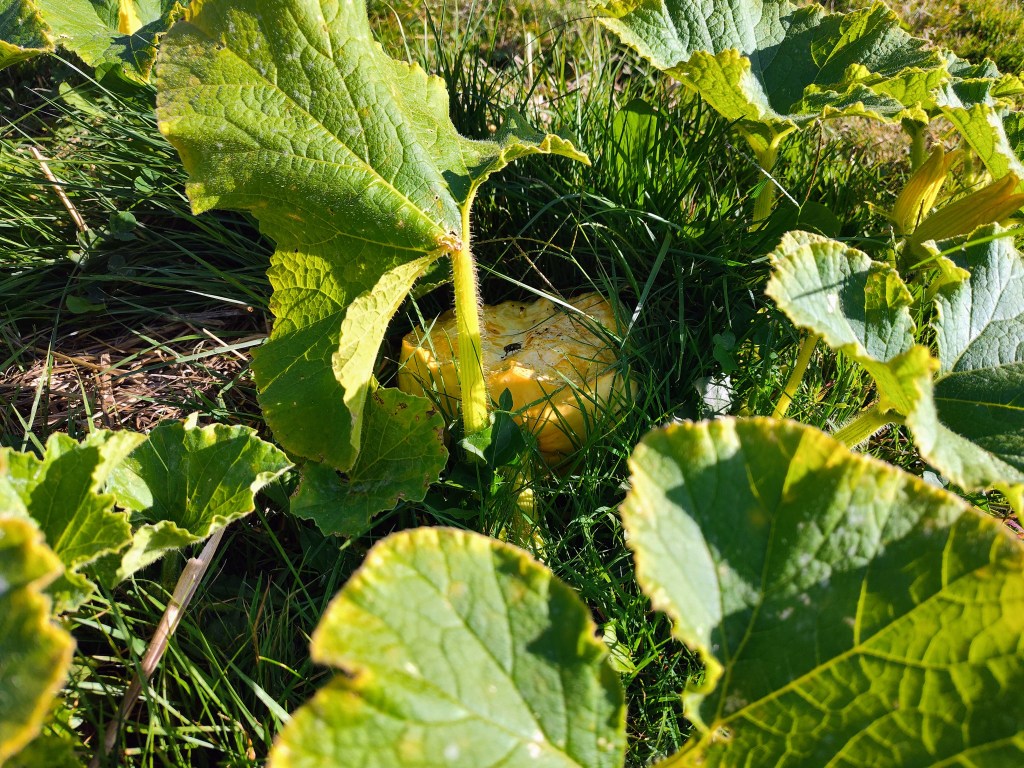
Now, let’s get this back to the garden. I struggled to find joy in the garden in spring and early summer. That began to change after talking to my therapist. It wasn’t instantaneous, but in August, I began to feel like myself again. I began to let the little things that went wrong in the garden go. We could only do so much to prevent the deer and other critters from getting into the garden, and it was wonderful to walk the garden and see the progress of our pumpkins. I also began to find joy in my favorite hobbies. I started the coffee table project and finished it in a (personal) record amount of time. Things are really beginning to look up, and I feel optimistic for the first time in a long time. I hope that if you are struggling with your mental health that you find someone you feel safe with and help yourself. You owe it to yourself. Your life is invaluable, and you deserve to live it to its fullest.
Our garden is on its last legs, with only our pumpkins left to grow. It’s weird to look outside and see our dried-out corn stalks that are now tan and rustic-looking, squash plants that are withering because there are no more fruit to produce, and Queen Aliquippa tomatoes that have turned a warm yellow color. Last week, I wrote an article about learning to appreciate all the seasons and all that they offer, but even in that appreciation, I’m feeling immense sadness knowing that we’ll be tearing down this year’s garden in the coming weeks.
This Garden Will Never Exist Again
There will always be some common threads across the different years’ gardens. We’ll always grow tomatoes, cucumbers, squash, melons, and corn. We’ll even grow some of the same varieties each year. Despite that, future gardens will never be the same as this year’s. Plants won’t be in the same spot even if they’re in the same bed and growing conditions will mean that plants will grow faster or slower in future years.
Something that surprised me this year is that gardens and plants take on unique characteristics. For example, we learned which sections of the garden will quickly flood if there’s a lot of rain and which ones dry out the quickest. We also learned which vines went to which plants, even as they overlapped and tangled. Finally, we learned when it was time to be concerned about a plant’s leaves wilting due to disease or lack of water and when it was because of afternoon heat and sun. Some of these characteristics will be repeated in the future, but we’ll have to approach each garden with fresh eyes and be willing to learn.
Memories
Something that surprises me is feeling sad about the memories made in this garden going away. It’s similar to a trip or time period that you didn’t want to end. It could be a great vacation that you looked forward to for a long time or being in college with friends that you won’t see as often after graduation. Because this was our first in-ground garden, as well as the first one at our own home, we made a lot of memories in it. Magz and I spent so much time working side by side, prepping it and then planting in it. Here are a couple that stand out.
The first goes back to winter when our seed catalogs arrived. There was one night, in particular, when we were both lying on the floor of our living room with our rabbit, Mia. The TV was off, and only the minimum amount of lights were on. We both had a pen and were circling seeds we were interested in as we were reading them to each other. We’ll likely do that every year, but there’s extra importance because this was our first year doing it. And there’s always something special about the first time doing anything, just like the Kenny Chesney song said.
The second memory is working beside each other as we planted seeds outside. While I’ve fallen down the path (or dark well) of taking everything too seriously, Magz has always been great at having fun, no matter what we’re doing. That was the case with planting seeds. I would fuss over making sure that the holes were all the same depth and were spaced correctly, while she was much more relaxed about it. Ultimately, the seeds she planted grew just as well as the ones I did. It taught me a lot, and that memory will stick with me.
The third memory is a joint one. It’s the first vegetable we harvested from the garden and the first pot of pasta sauce we made solely with our tomatoes. I believe that the first thing we pulled from the garden was a burpless cucumber. It was from a plant that was gifted to us, and we didn’t think it would reach maturity, but it did. We simply sliced and ate it by itself, but it was delicious. Then, in August, we finally harvested enough tomatoes at the same time to make a pot of pasta sauce for spaghetti. That was the proudest I’ve ever been in a garden. I know that I’ve talked about being proud of the melons we grew, but being able to eat 100 percent homemade pasta sauce was amazing. In that moment, I felt such relief, knowing that all the work and effort had paid off in something. We made two or three more pots of sauce after that first one, but none tasted as good as the first batch. And I don’t think another batch ever will.
Hard Work
The last reason that saying goodbye to this year’s garden is proving to be difficult is because of all the hard work we put into it. As I mentioned above, the hard work was absolutely worth it, but knowing that we have to tear it down and put in more hard work next year is definitely sad. While we don’t have to start over from scratch, we still have to address the grass problem and upgrade our fence. Ideally, I think we’d love to not have to repeat some of the same hard work moving forward, but that isn’t the case. It’s not a big deal, but it’s still a source of sadness.
Looking Forward to Next Year’s Garden
In spite of the sadness, I’m already looking forward to next year’s garden. I can’t wait to apply the lessons learned this year to future gardens. I’m also excited to make more memories and in general, be in a healthier headspace to start the garden than I was this year. We accomplished so much this year, and I know that the future only holds more, yet we still mourn this year’s garden going away.
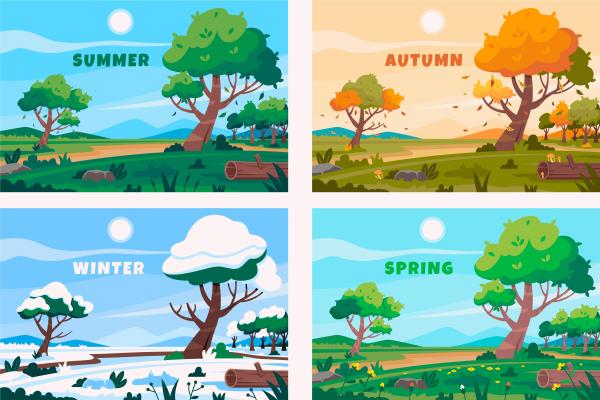
In the past, I have always looked forward to fall, so much so that I would wish for an early end to summer. In fact, that was the case with every season. Toward the end of fall, when all the leaves were off the trees, I wanted snow on the ground. When the bitter cold and iciness of February arrived, I couldn’t wait for the first hint of warm spring days. Then, after several months of rain and muddy ground, it was time for warm summer nights. In general, I have always been someone who looked to the next thing and struggled to appreciate the present moment. But that all changed this year, and the garden is a big reason why. Here are the reasons I’ve learned to appreciate each season, along with lyrics from songs that remind me of the season.
Spring
Let “hallelujahs” flow like a river We’re coming back to life Reaching towards the light Your love is like springtime
Chris Renzema, “Springtime”
Spring has always been a season of excitement for me. When I was a kid, it meant getting back onto the baseball diamond. As an adult, spring has taken on a deeper meaning, but the first hint of warmth in the air still lets me know that baseball season is upon us. In general, the first February or March day when the sun simply feels warmer than it has since October or November is welcomed. The length and intensity of winter will determine just how happy I am for that first hint of warmth. Last winter was a harsh one, so spring felt like a long-lost friend.
Along with the warm temperatures come rain showers and longer days, which soon give us the first signs of life from the soil. Typically, the first flowers we’ll see are the crocus and daffodil. Ironically, neither of these is native to North America. These flowers indicate that gardening season isn’t too far away, and that it’s time to start seeds, either outdoors for the hardiest of plants or indoors for the tender ones. Spring is a time of renewal and looking forward to what’s ahead.
For my song, I went with Springtime by Chris Renzema, who is one of my favorite Christian music artists. It’s a song about the renewal that Jesus’ sacrifice brings. Earlier in the chorus, he sings: “‘Cause death is dead and gone with the winter.” Is there anything more relatable in spring than that?
Summer
Still we sing with our heroes, 33 rounds per minute We’re never going home until the sun says we’re finished I’ll love you forever if I ever love at all Wild hearts, blue jeans, & white t-shirts
The Gaslight Anthem, “Blue Jeans & White T-Shirts”
Summer has been both a season I despise and one that I love. I’ve despised the heat, humidity, lack of air conditioning, and oppressive sun at various points, but I’ve also loved what comes with summer: beach trips, campfires, being outdoors, and fishing. This summer has been the first one where I think I’ve cherished every moment of it and haven’t been ready for it to end.
To me, summer represents the continuation of warm weather that starts in spring. It brings with it sunshine and warm nights that are perfect for sitting on the porch late into the evening. I’ve also (re)learned to love thunderstorms. I’m not a fan of the intense thunderstorms that bring a lot of lightning and wind, but I love the ones that produce steady rain and rolling thunder. It is one of the most peaceful weather events we get. In the garden, summer is a season of rapid growth. Plants will double in size in a week, and blossoms will produce fruit that will display each variety’s unique qualities. Eventually, this will lead to harvesting, and there’s nothing better than eating entire meals from the garden.
In general, summer is a time of production, which can be beneficial and problematic for me, as someone who loves being busy. I love being outside in the garden or in my shop woodworking. But by the end of summer, which is where we are as I write this, I’m ready for some rest that we find in fall and winter.
Picking a summer song wasn’t easy, as there are plenty to choose from. Take country music, for example, where nearly every song during the 2010s was summer-focused in some manner. I ultimately went with “Blue Jeans & White T-Shirts” by The Gaslight Anthem, which is a rock band from New Jersey. A lot of the songs from their ’59 Sound album focus on summer, the beach, and the boardwalk. Blue Jeans & White T-Shirts perfectly encapsulates the feeling of summer, and the final lines of the song are:
Sleep on the beach if we ain’t got a ride Sleep on the beach all night
Fall/Autumn
When I close my eyes I see you No matter where I am I can smell your perfume through these whisperin’ pines I’m with your ghost again It’s a shame about the weather But I know soon we’ll be together And I can’t wait ’til then I can’t wait ’til then
Zac Brown Band, “Colder Weather”
Autumn has regularly been my favorite season. It represented a return to my college campus, friends, football, and general happiness. And while some of those items have changed, fall is still my favorite season. For me, it now means a slowdown after the busyness and productivity of summer. With shorter days, plants and the lawn don’t grow as fast and need less maintenance, which creates more time to work on hobbies and do fun fall activities, like apple picking and pumpkin carving.
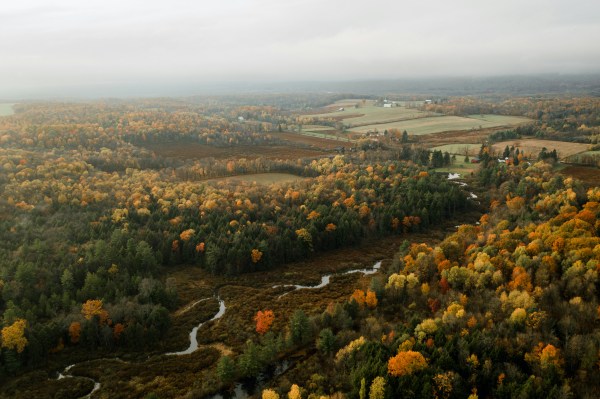
Other things that make me think about fall are cool weather, jackets, sweaters/hoodies, jeans, and boots, which are my favorite clothing items. And I certainly can’t overlook fall foliage and drives to see the leaves. Pennsylvania is one of the best states in the country for leaf peeping due to the diverse tree species we have. This leads to red, yellow, and orange leaves peaking at different times.
Even though autumn is my favorite season, it was not an easy season to pick a song for. There is only one song I like that specifically mentions autumn or fall in the title, and it’s by The Gaslight Anthem, and I didn’t want to repeat artists. Instead, I went with the Zac Brown Band’s Colder Weather. I think the song is meant to be more about winter than fall, but the line “I can smell your perfume through these whisperin’ pines” always reminds me of fall and the quiet sounds that come with it.
Winter
And in the winter night sky, ships are sailing Looking down on these bright blue city lights And they won’t wait, and they won’t wait, and they won’t wait We’re here to stay, we’re here to stay, we’re here to stay
Of Monsters and Men, “King and Lionheart”
A lot of people in Pennsylvania hate winter and see it as something that must be endured to enjoy the other seasons. I choose to enjoy winter. I have always loved snow and enjoy pretty much everything about it. I also don’t mind the cold weather and find it refreshing. There’s nothing like the crispness of winter air and just how fresh it feels compared to the other seasons.
Winter is a time of rest for me. Aside from clearing snow, there often isn’t a lot that can be done outside. I usually try to do some woodworking, but even that takes a pause if it’s really cold out. The time of rest is so nice, and after working hard from spring through fall, it’s earned. I also love the quiet of winter. Everything about it is quieter than in the other seasons. Snow makes very little noise, and when there is a snowstorm, people are less likely to be on the roads, so that noise is reduced as well. One noise I do like in winter is the squeaking of footsteps in the snow when it’s really cold. If you’ve never experienced it, here’s what it sounds like:
It can only happen when the temperature is below 14 degrees Fahrenheit, as above that temperature, your shoes will melt the snow as it’s getting compressed. I have many memories of being outside in winter and that being the only sound. It’s peaceful, eerie, and wonderful.
I would be remiss if I didn’t include hot chocolate and baking among my favorite things of winter. I love drinking hot chocolate on cold winter nights, and baking is one of my favorite activities. My preference is cookies, but I’m a fan of baking all kinds of goodies. We recently found an older Betty Crocker cookie book and plan to bake our way through it this fall and winter. Finally, winter is when we begin looking forward to the next year’s garden. We’ll request new seed catalogs, plan out our garden, and order seeds. The break helps me to appreciate all that the garden provides, and I start to get excited for the upcoming garden in January when the cold really starts to set in.
For winter’s song, I didn’t want to go with a Christmas song. Instead, I went with a song from Of Monsters and Men, an Icelandic band. And who better to write about winter than people from Iceland?
Appreciating All the Seasons
Appreciating every season isn’t about loving all aspects of it. For example, I get tired of the mud that comes with spring, summer droughts, the dreary skies of fall and winter, and the ice of winter. But those aren’t enough to get me to hate a season or wish it would preemptively end. Instead, I try to enjoy the general positives from start to finish of each season and squeeze every last ounce of joy from it. I’m writing this as we only have three days of summer left and am filled with sadness and excitement. I’m sad that summer’s end means saying goodbye to our garden and all the fresh vegetables it brought us. But I’m also excited to see our pumpkins ripening and can’t wait to pick more apples. Life is great, but it’s also short, and modern society rushes everything. Let’s slow down and really enjoy what we have when we’re in the moment.
Our fence has become somewhat problematic over the past month or so, and animals are either taking advantage of it or are the cause of it. In the spring, I wrote about the fence we bought and how we reached that decision. We ended up buying deer fencing that is typically used in orchards to protect the fruit trees. It is seven feet tall, although we folded it over, so it is only about 4 1/2 feet, comes in 100-foot rolls, and only costs $23 per roll. We were able to fence in our entire garden for less than $200, including the bamboo stakes. We bought it with the intention of it being a short-term solution that we can upgrade over time. And for the first three and a half months, it was perfect.
Deer didn’t try to breach it, and rabbits didn’t burrow under it. In general, it worked better than expected, and any issues we had were self-inflicted. It’s relatively easy to overstretch and tear the material, and you have to be careful to not get too close to it when walking near it, as your shoes can get caught in it. But beyond that, it survived heavy winds, driving rains, swampy ground, and general ignorance. That was until about mid-August, when we started to notice that something was getting at our corn stalks.
Deer? Raccoons? Squirrels?
I first began to notice evidence of animals around our garden in July when I saw raccoon poop in the grass outside the fence. I didn’t think much of it, though, since they weren’t getting through the fence. Fast-forward to mid-August, and we started to notice that some of our corn was being eaten and stalks were showing signs of stress. At the same time, our sunflower plants were decapitated not long after the heads began to form. It only got worse from there.
Nearly entire ears of corn were consumed, while others were being torn from the stalk. From the outside of the fence, an animal was pulling our tall Blue Hopi corn stalks to bend down on the fence, reducing its height from 4 1/2 feet to about 3 1/2 feet. Elsewhere, we were seeing bite marks in some of our remaining cucumbers, our melons, and one of our pumpkins. And the worst part was that the animals weren’t eating the entire vegetable. They were taking a single bite and leaving it on the ground. And how did these thieves gain access? Flaws in the fence were the main culprit, and the evidence was everywhere.
It started with small horizontal tears or cuts in the fence that left the top intact and the bottom hanging, exposing an access point that is just big enough for a raccoon to climb through. In other areas, the zip ties, staples, and twist ties we used to connect the fence to the stakes failed, causing the fence to fall down. This meant that entire sections of the fence were reduced to a height of 2 1/2 feet, or plenty low enough for a deer to hop over. Finally, some of the stakes started to bend or angle, which also lowered the fence’s height. I’m not 100 percent certain of the cause, but my theories are animals pushing on them, plant vines growing against the fence and putting strain on the stakes, and the lack of rain not keeping the stakes in the ground as deep as they should be. In general, it’s become a mess.
Thankfully, it appears that the crims are simply raccoons, deer, and squirrels, or just your average neighborhood scoundrels. They don’t do a lot of damage. Funny enough, I think the squirrels are the most annoying of the trio. Even with an upgraded fence, they can climb up and over to gain access.
Upgrading Security
Given that this year’s fence was only intended to be a short-term solution, we’re unsurprised and undeterred by the animals. It may be a bit demoralizing, but luckily, there are ways to remedy it for next year. We’re already discussing how we can improve some of the fencing. While we likely won’t upgrade all the fencing for next year’s garden, we can upgrade it a little at a time. Even improving the fence for individual beds will make a difference. We’ll likely go with some type of chicken wire that is metal. We’re also going to upgrade the stakes with pressure-treated 2x4s that I’ll cut down to the appropriate width/height. Something else we can do is spray plants with a hot pepper solution that will deter animals from wanting the food. It’s not a permanent solution, as it needs to be reapplied after rain, but it’s organic and tested.
Ultimately, there’s only so much we can do. We’re growing vegetables in an area with a lot of animals. It’s a blessing to not live in an urban setting, which means we occasionally have to deal with animals. I’m also choosing to take it as a compliment that the animals want our food. Sure, they could have just eaten forageables, but they’re choosing to eat what we grow, and that’s pretty cool. And we are a big fan of animals, after all.
Have you had problems with animals getting into your garden? If so, what vegetables were they most drawn to and what steps did you take to prevent it from happening again?