Socks: An Update

Several months ago, I started a new side quest in knitting – making socks. It’s a windy and treacherous climb, fraught with new equipment and an entirely new approach from a garment like a sweater. At the beginning it’s like casting on a mitten or a small hat, yet as time goes on you realize you are somewhere between a knitter and a sculptor, looking for the heel shape in your amphorous block of yarn. It is the most challenging garment I’ve made, culminating in going over the waterfall, at least that’s what turning the heel felt like at times.

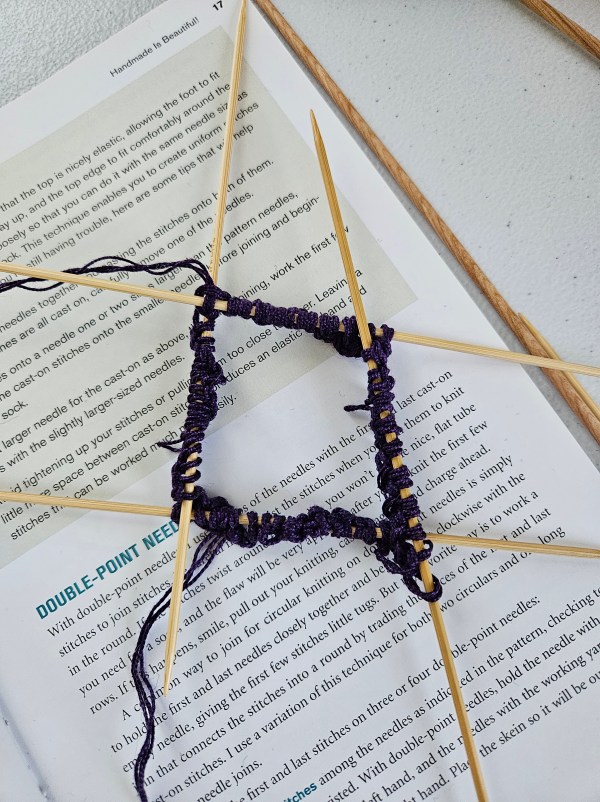
What makes this ubiquitous garment so hard to learn? It’s a project of multi-tasking, like dribbling a basketball and moving at the same time. You are not only knitting a pattern – a sock, but you are also learning it on a new court – double pointed needles or with a magic loop configuration on circular knitting needles. There is also the third option, the one I leaned on when I was baffled by hitting gauge on my project and fed up with ripping out my progress over and over, knit flat tube socks that are sewn together to form the tubular shape.

My first two completed sets of socks were made this way, with straight needles to help me process all I was learning from these new techniques. It was the confidence boost I needed to keep going and finish the sock. I get overwhelmed in new projects when nothing is familiar but taking one part, flat knitting, and keeping that as the control part of the experiment let me knit and see how it should look and feel when the socks are completed. To better understand what I was working towards on double pointed needles or circular needles. Flat knitting also gave me the chance to try something I’ve never done before as a knitter, I cast on two socks at a time on my needles. It was incredibly satisfying to finish each sock at the same time!

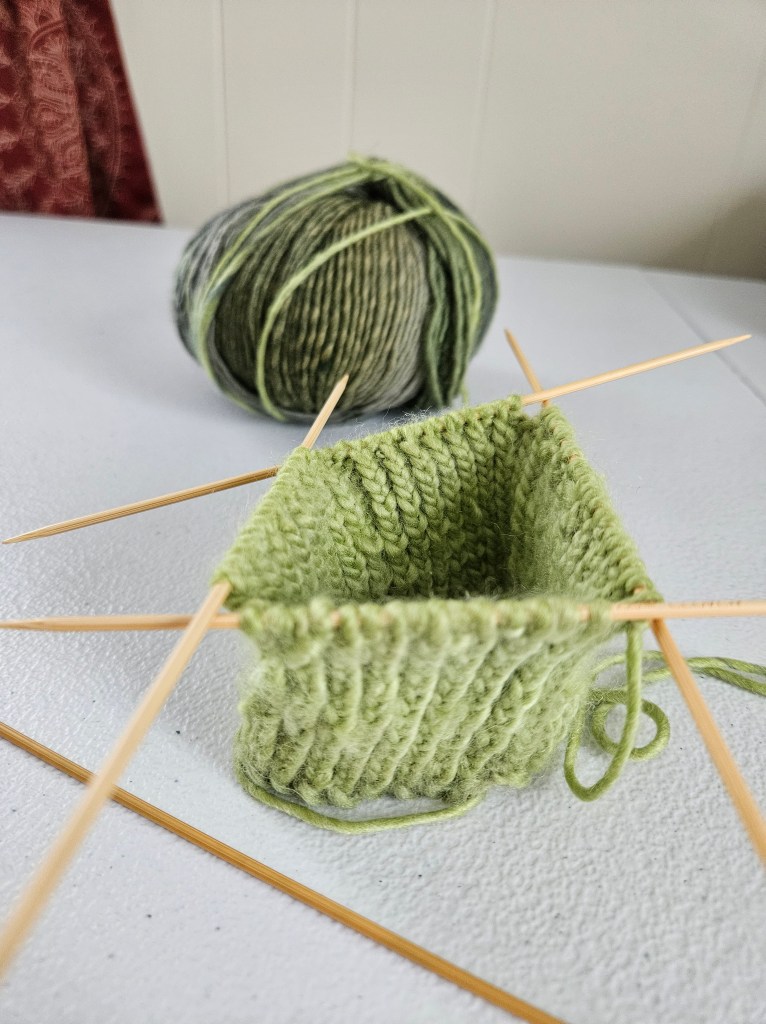
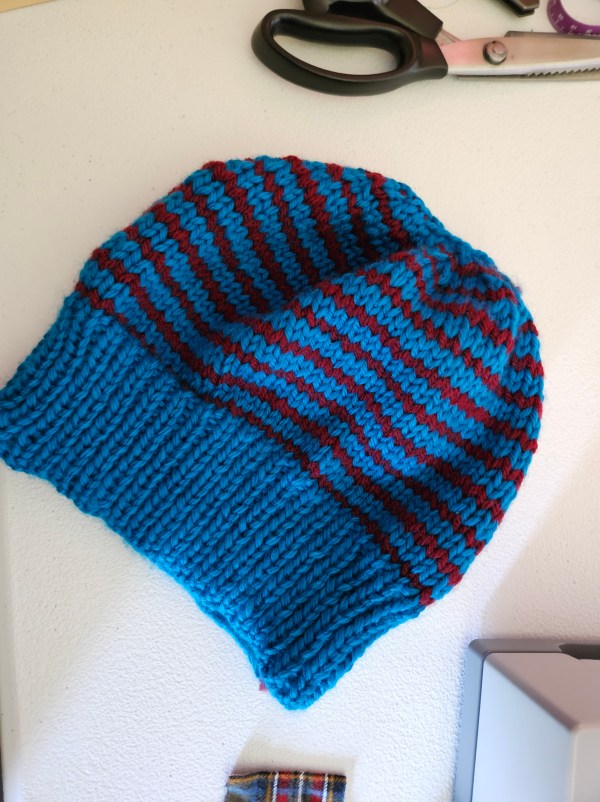
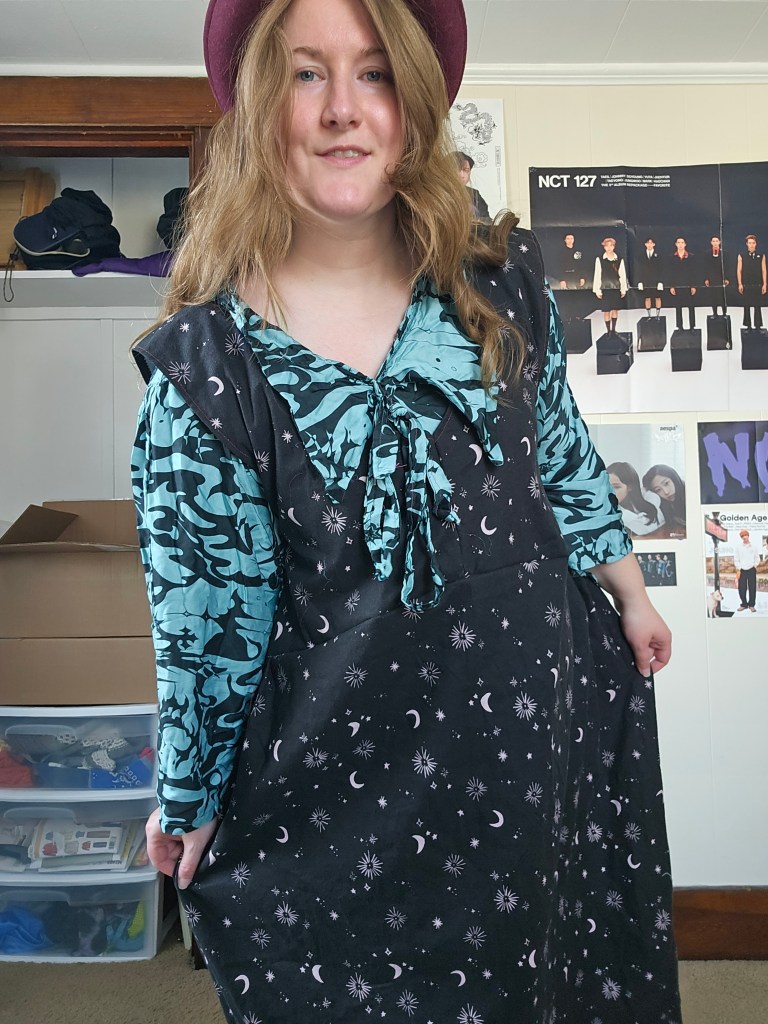
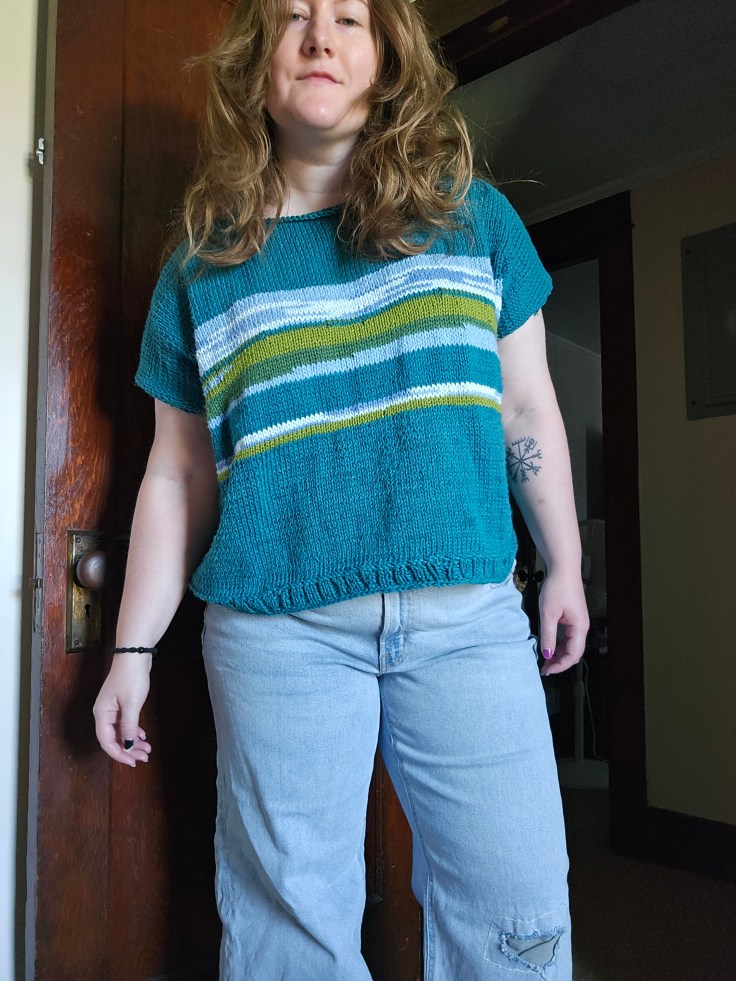
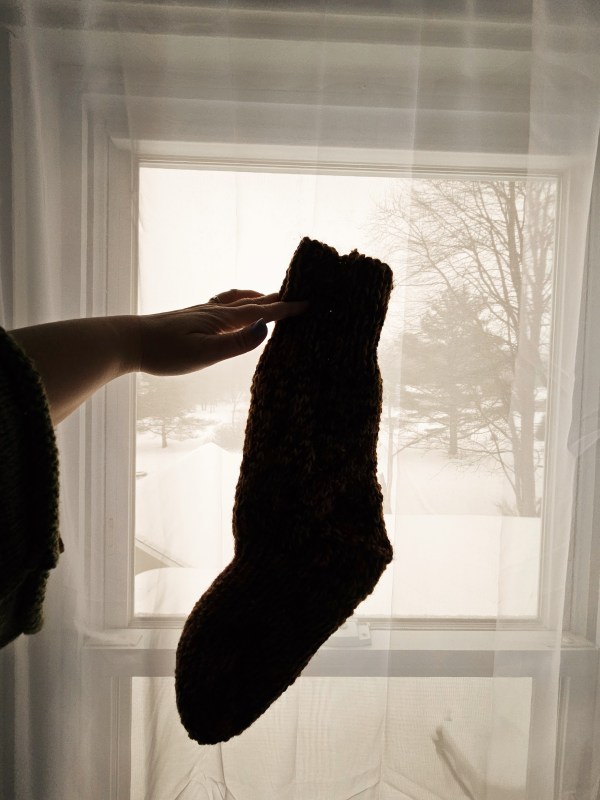
With this new found confidence I carried on and cast back onto the straight needles, making a brown pair of socks from recycled acrylic that wash and wear well. These green socks above are a blend that is mostly wool with a hint of acrylic in the yarn and they are hand wash or steam only for me. I wash them gently with either shampoo or conditioner in the sink, carefully to prevent felting. For my next project I wanted to explore fiber content, so I cast on a sock with three strands – two fingering weight wool and one acrylic. I chose this composition to test wear and washability, to make these a sock I could worry less about washing yet would insulate my foot, this was during a month long stretch of cold weather, dipping into the negatives fahrenheit so my mind was on cold weather. I decided to make these chunky socks into a sock I would use to insulate my L.L.Bean duck boots which are waterproof but are canvas, not insulated at all. They are a boot I want to wear for cold weather and snow, but they make my feet cold even with two pairs of socks.

As I got to the heel portion, I knit these socks cuff down, I made a last second decision and transfered my project to my round needles, joining the row into a round a stitches. With my heel turning reference book in hand I began turning that heel! It wasn’t as bad as I thought it would be! I don’t think I executed it perfectly, but I conquered a fear. Now, the tough part of the process is that my handwork for circular knitting is subpar. I hold my stitches too tight and the tension hurts my fingers the longer I knit on a project. The only way to improve this is to keep practicing, yet I don’t want to practice. The second sock is cast on but I have yet to make progress on project because I am dreading the circular process and those tight stitches that come from inexperience.

Is this sock the best fitting sock I’ve ever made? Yes! Is it better than store bought ones? A 1000% yes, and I’m a novice so they are going to get better with practice. It’s an art form we wear everyday without thought, but it is truly a sculpture of yarn. Next time you put on a sock, have a moment of appreciation for the geometry, the symmetry, and the sculpture adorning your foot.

Checker Board Pants: Making Pants From Your Favorite Jeans

In 2024, I was inspired to start making pants. I had attempted making pants before and they were successful but I struggled to make them feel like more than just a pair of lounge pants. Part of this was caused by not choosing a good bottom-weight fabric, and instead opting for a lightweight summer cotton that draped beautifully but didn’t give me that tailored look. I also tried an ill-fated scuba fabric in 2023 that crashed and burned because my thread tension was off. Enter this checkerboard denim print I purchased at Hobby Lobby. It was denim but lighter, not too heavy to be a problem for my sewing machine. But how would I find the right pattern?

I had a pants pattern in my stash for menswear trousers, that I considered using on this project. It’s a solid pattern and would make a straight-fit pair of jeans, maybe not the style I was going for though. I considered buying a new pattern, but then I fretted that the pattern would fit me weirdly or might not fit at all. The current style in 2024 still featured that tapered-in waist on pants that favor an hourglass figure, not my rectangle athletic build, so should I risk it? A big reason I chose to make pants in the first place was that I was sick of shopping and trying on pants that made me feel weird about my body. The men’s section was my go-to for their up-and-down pattern cutting, compared to the extreme tapering and high waist silhouette of women’s pants. Even low rise was stuck in mid-rise inseam, not the true low waist inseam I was accustomed to in the 2000s and early 2010s that helped me find good-fitting jeans because they favored my shape not the post-bbl world of fashion. I digress, my point is that buying a pattern someone else drafted felt like a risk because the fit is such a personalized thing.

My solution was to take a pair of pants in my wardrobe that I liked the fit of and to trace that pair of pants to gauge the shape. I did this with a pair of jeans that were high waist but had a nice loose fit through the hip and leg for the K-pop-inspired baggy jeans style I was interested in making with this 1990s Vans checker board print. This worked swimmingly! So much so that I traced the jeans onto a piece of brown craft paper for a quick pattern to reach for on future projects.

I chose to record this project, start to finish in video from instead of video to have a memory of how I did this to learn for myself and remember what I did but to also inspire others to try this. Pants are intimidating, especially from a paper or PDF pattern. The written instructions and diagrams have puzzled me in past projects but truly, pants are simple once you see how its done. I wanted to help others feel that freedom to create because at least in my American fashion market, fast fashion has destroyed the craftsmanship of pants and standardized sizing. I referenced this in a previous post, Shaping Up where I had to confront the dressing room terror of things not fitting and seeking to not be defined by my jeans size, when trends and pattern cutting shape shift sizes, but to take control of it on my end and get healthier in 2023.

This pants project was one of the most challenging and rewarding projects of 2024. I faced my fear of sewing denim, inserting pockets, and fastenings. I chose to not attempt a fly into I had more pants sewing experience, instead I planned to make what I knew I could achieve under my skill set. I opted for a side closer with a drawstring to have an adjustable fit since the denim had zero stretch. The denim containing no stretch was a feature I sought because I believed it would be easier to work with as it was my first project of this kind, and I wanted a crisp tailoring from the woven fabric. A key thing to note is that the jeans I used for my template also are non-stretch denim. For an accurate this is paramount or else the project will not work. Either you will cut your project too large or too small. It is also essential to leave a seam allowance on your pattern pieces. When self-drafting it is your responsibility to take charge of the seam allowances and plan ahead.

I messed this up with the crotch line and had to make a quick fix. My fix was a diamond gusset. Popular in women’s leggings, this diamond gusset shape piece allows for greater mobility while maintaining the strength of the seams.

The second challenge I faced was the problem of a narrow bolt and an all-over pattern. This fabric was quite narrow and because I was cautious with my seam allowance, I cut my pieces large. This meant that I was not cutting from the longest side, but the most wide. The pattern pieces were cut out missing length on the leg. My solution was to add on to the bottom and pattern match. It’s easier to match than people say, it just takes patience and intentional sewing. I’m pleased with how seamlessly I got my pieces to match up.

The pockets were a challenge. How do you place them? How do you insert them with strength so the pockets can be used without pulling the pants down or ripping? I chose to place them angled on the sides, aligned with my hips so that they would be practical and not create weird bunching at the front of the pants. No wonky crotch fit here!

Would you make your own pants? I hope I inspired you to get creative and go for it if you are sewing-inclined. Thanks, reader, for joining me once again on this quest to grow my fashion design skills. Have a wonderful day!

Hot Air Balloon Knit Hat

Do you ever pick up a knit object and the fiber feels buttery soft? That’s exactly how this cerulean blue yarn feels to the touch. It is a bulky weight yarn blend of super wash Australian wool and acrylic fibers. It’s a yarn that I believe has been discontinued by Knit Picks but I hope they bring it back because no project has been a joy to knit up like this one. It glided across my needles! It’s one of the reasons I chose to knit this fiber into a hat that would be soft and warm on my head. It’s cozy. Another reason was because this skein of yarn was a destash from my mom, there was only one skein so I decided to make it the focus of one small project.

I’m not very good at using one solid color throughout my projects so I paired this was a Brava bulky in red also from Knit Picks to add visual interest to the hat. I think it looks like a hot air balloon from an illustrated book. An imagination filled tale, like how the heffalumps and woosels turn into hot air balloons during Winnie the Pooh’s trippy dream during the flood. I love how bright the contrast is between the delicate red lines and the vivid water-like blue. It has a bit of the Apres-ski vibe with the vivid color story of the late 80s and early 90s.

I made this knit hat on size 10 bamboo straight needles in two pieces that I seamed together. I made the decision to construct this hat using two pieces because I had not made a hat in over a year and felt a bit rusty. I also wanted control of the taper of the crown, without needing to also refamiliarize myself with circulars or double-pointed needles. I made this hat in August 2024 and I was coming off the big move into the storage unit for two weeks and then into the new house. To be honest, I was feeling a bit creatively stir crazy from the busy summer. I’ve learned a lot since I made this from my dabbling with sock knitting and could confidently make this now with a different construction, but as a quick beginner project or knitting warm up when you’re feeling rusty it’s an easy to make project. I believe I made this over one weekend, potentially one day? I can’t remember how focused I was.

You will need a tape measure or a knit hat that fits you the way you would like your hat to fit for reference. Cast on stitches according to your head size for one half of your head. Knit ribbed stitches for 3 inches and then switch to stockinette for the rest of the hat. Switch yarn at the end of rows and don’t decrease too quickly. I’ve made this mistake before. You will need the width across your crown to join at the top and you can decrease quickly at the end so be filled with care as you taper and don’t hesitate to frog and try again for the right fit. Adding a safety line where you plan to unravel your project to, is a huge life saver! Mirror your second side and stitch the two halves together with a tapestry needle. An easy knitting project that is useful and can help you practice skills like purling, ribbing, yarn over decreases, crown shaping, and yarn tension.

Bunny Plush Keychain

Recently, I shared a Knit Star Plush Keychain Pattern, but that wasn’t the only keychain I’ve been working on. Behold, a knit bunny keychain made from repurposed fabric! This keychain was inspired by my Skzoo Quokka plush keychain which I have styled on my purse and belt loop. I was tempted to buy more as this trend has been all over my feed this year, but that’s unrealistic. So I thought, in Jeremy Clarkson fashion, how hard could it be?

This key chain was made by repurposing a pair of underwear, that was weirdly made without any stretch. They had no purpose but to be trashed, which I didn’t want to do because they were brand new and I liked the pattern and color story. So I wondered, could I translate this to a plushie and I could make this plushie into a keychain without buying any materials beyond the keychain hardware? The answer is yes!

I used a pen to draw pattern pieces onto the underwear by designating the fabric into four ear-pieces, two head-pieces, and a rectangle piece that would be used to connect the keychain hardware. The rest of the fabric was cut into small cut pieces that would be used as the stuffing. This worked like a dream!

I chose to sew this item by hand because of the small nature of the project. The pieces were too small and delicate to sew by machine with any semblance of control or care. It was a quick make and took one day to complete. I sewed 90% of the ears, turned them right side out, stuffed them, and then set the ears aside. Next, I repeated this process with the circle for the head and stuffed it. When I was certain that all the stuffing was divided between the three pieces adequately, I sewed closed the ears and head. Next, I attached the ears to the head. Finally, I sewed the rectangle and threaded it through the loop of the keychain before attaching it to the bunny plushie. I opted for an abstract look so I did not decorate the bunny plush with a face, therefore if it spins around it doesn’t matter what side is facing out.

Overall, this was a quick and thrifty project with the hardware coming in a pack of two for $2.99. I used the other clip on the knit star plush project. This type of plushie could be made with any scrap fabric you have and could be adapted into other animals. It would be an easy DIY gift too!

Were My 2024 Fashion Predictions Accurate?

At the beginning of January 2024, I made a post for fun predicting what I thought would become popular trends in 2024. Now that it’s December, how well did I do? I accurately guessed 6 out of 10 of the predictions I made! So what were these trends that I predicted and what did I get wrong? Let’s jump in!

Gameday Outfits

The NFL had a moment this year with the spotlight of Taylor Swift and Travis Kelce, and her gameday outfits became a source of public fascination. This created a wave of gameday outfit inspiration online, sparked by Blokecore in 2023. This carried on through WAG fashion and trickled into the mainstream. The Paris Olympics created fashion buzz, as did the movie Challengers. There was a rising fascination for F1 in the US. Not to mention the popularity of the team-branded baseball cap and Adidas soccer shorts paired with a button-down shirt. This one was a big deal and was unifying to be honest because who doesn’t like at least one of these sporting events? There is something for everyone.

Patches and Visible Mending

This definitely became a trend as DIY fashion and upcycling continue to grow in popularity online for sustainability and creative expression. Mending and learning to sew continues to rise in popularity as people choose to opt out of the fast fashion loop in search of clothing that will last all while standing out in a crowd. I think we can agree there was a hive mind within fashion since the Tik-Tok “core” aesthetics took off at the beginning of the decade and we are all looking for original ideas again.

Colorful Knit Accessories

Similarly, knitting along with crochet has continued to grow in popularity as hobbies and as a way to create DIY fashion by hand. It was so popular that chatGPT patterns and AI-created crochet and knit images cluttered the creative space. With Balletcore being popular, so were leg warmers and slouchy socks. Fingerless gloves, colorful hats, and brightly colored vests made 2024 what it was – a fiber artist paradise.

Exaggerated Tailoring

This was seen on the runway, with tailoring having a moment with trousers, vests, and blazers finding popularity once again. Dramatic shapes were popular on the runway. I also saw vests and dramatic trouser shapes in mainstream stores. I think this should always be in style so let’s keep in that way fashion trends. It’s a classic.

Resurgence of the Flip Flops

Yes, these were hailed the “It girl” shoe of the summer after Gisele Bundchen (yes I know I’m missing the umlauts) was seen wearing them. The specific flip-flop brand Havaianas, was the iconic style of 2024, but luxury brands tried to corner that market with $900+ flip-flops. I think it makes sense for these to come around again after how long the Birkenstock sandal has been the favorite choice, followed by Tevas, it’s the next logical evolution from clunky to delicate. Personally, all three of these drive my feet nuts but I’d probably choose the Teva for comfort or flip-flops for sheer chillness. Flip-flops were also worn by athletes at the Paris 2024 games.

Jersey Shore Nostalgia

Indeed Ed Hardy and Von Dutch did trend again this year! Mainly with teens and tweens, but this styling returned to the runway with Kim Petras’ Spring 2024 collection which featured Ed Hardy’s iconic designs. I’m excited for this era of fashion to return because I enjoyed the late 2000s-early 2010s fashion and the over-the-top spectacle of it. I’m certainly more for this than the mob wife styling of early 2024.

Parasols for Sun Relief

This one I thought, was a long shot but it made sense for it to become a trend because of how practical they are while protecting skin from UV damage. They are technically better for the planet than single-use sunscreen. I was not wrong. This market is projected to grow from 2024-2032 as the parasol or sun umbrella market is anticipated to grow globally. In 2024, there was significant growth as a trend for Japanese men. That’s a result! 🙂

What Did I Miss the Mark On?

  • ARMY-core was not a thing even though all BTS members were in the military this year, no trends emerged from this across the K-pop sphere. The only popular examples of camo I saw were from Chappell Roan’s ‘Midwest Princess’ camo hats from her tour and the Harris-Walz campaign hats which copied the same style.
  • Gilded Age Finery did not take off like I hoped. The only instances I found were Bad Bunny’s Met Gala look and Paris Fashion Week using late Victorian and Regency era opulence as inspiration for glamour.
  • Bonnets this was a flop except for two key shifts. One I hope I explain right because I am not familiar with the hair culture. According to a few articles I found black men styled bonnets as a protective hair style in 2024. Secondly, hats became popular again with rope hats and pillbox styles being the most talked about.
  • Cosmic Cowboy or Sailor Cowboy would have been accurate if I had dropped the qualifiers. Cowboy was the most iconic aesthetic of this year with cowboy styling, media, and country music being a key player in pop culture. Americana in general had a moment which is odd but hopefully a turning point for unification in my divided land.

What were your favorite style moments of 2024? And did you participate in any of these trends?

Knit Star Keychain Pattern

Back in the spring, I had this grand idea that I would learn how to crochet. I had a friend who crocheted next door, I had recently found TL Yarn Crafts on YouTube. Toni made it look so fun. I was enamored by what I saw others creating with crochet hooks. Crochet rose in mainstream popularity again through 2020 and beyond in 2024.

My Impression of Crochet

The internet is chock full of crochet plushies, dresses, sweaters, bags – you name it you can crochet it. I didn’t see this kind of creativity from my corner of the knitting internet. I had this impression that knitters were serious and crocheters were mavericks. So the hook was calling to me.

I bought a crochet hook and spent a few weeks watching videos, perusing a book my neighbor lent me, and getting the hook into some loops. It’s a weird transition from knitting. I apparatus from two is a change. There is a posture, one hand, and yarn holding. There is a new way to keep yarn tension, and there are a lot of new stitches. There was more emphasis on turning your work than the orientation of the wrong side and right side. Single crochet and double crochet were not a one-for-one of knit and purl. That surprised me.

Granny squares were a bit more involved than I expected. It’s an art form that deserves respect. I definitely respect it. It kept me back, I had the tightest tension and felt like I had never done yarn crafting before. I was shocked, shouldn’t this be a piece of cake? I’ve been knitting off and on since 2012. Yeah, it’s not that simple.

Fluff Around and Find Out

To be honest, the way that I learn best is to just go for it, and doing these basic crochet stitches on a project that was a rectangle, all while it looked like a tattered mess was discouraging. I wanted to make one of the little plushies or shapes that seemed to be a sculpture that only crochet could create. But I was seriously not getting it. So I paused and thought about it. Is there any way to apply this creative point of you, the sculpting of yarn that only crochet can, but try it with knitting needles?

This might seem weird to consider if you don’t knit or crochet but the processes seem vastly different to me. There’s a strategy to knitting. You have to do things in stages, like knitting a section and transferring stitches to a stitch minder or picking up stitches that were bound off or are just part of a knit edge. While crocheting builds on itself and is an amorphous thing that is truly sculpting and adding as you go.

So I decided, what if I made something with the sculpting element of crochet but with knitting steps. I decided on a star as you can see above that was crafted out of multiple knit sections that were stitched together. This pattern has a lot of little steps but I think it was effective.

Star Knitting Pattern

Star Point Diamond – Row 1: Cast on, Knit 1, Row 2: Purl 1, Add Stitch, Row 3: Knit 2, Add Stitch, Row 4: Purl 3, Add Stitch, Row 5: Knit 4, Add Stitch, Row 6: Purl 5, Row 7: Knit 4, Decrease 1, Row 8: Purl 3, Decrease 1, Row 9: Knit 2, Decrease 1, Row 10: Purl 1, Decrease 1, Row 11: Knit 1 and Bind Off.

Repeat four times until five are made. Then using a tapestry needle, join the five points together at the center so that you have the base for a star, then join the sides of the diamonds together so that you have a flat star. Repeat the whole process one more time so that you have two flat stars and then sew them together with the tapestry needle.

So now that you have a star what can you do with it? I had planned originally to make a star garland for Christmas, but then the Fire Nation attacked and I had to move.

So we pivot to the bag decoration trend of 2024. This is a combination I’d say of Kpop, Xiaohongshu style trends, and the Japanese Ita bag becoming popular in the West. If you would like to learn more about Ita bags, I would highly recommend Addy’s video on YouTube. And these little stars in the original green and its pink starfish cousin have made excellent DIY plushie keychains.

Finished Product Used as a Keychain

Final Thoughts

I think creativity is about experimentation and learning as you go. I think sometimes it is important to do it the normal way and other times it is more satisfying to try a new method, a new medium, and make something you may not have thought you could. I still have incredible respect for crochet and I also think knitting has more potential than I thought. I have also learned that if a key chain or other small trinkets are not specifically branded I should try making them before I buy. It’s a great way to use up materials in my stash, level up my skills, and keep my consumption down and my wallet happier.

Socks, A Journey

Today I completed the most stressful cast on of my knitting life, casting on a sock. This was with three strands of lace weight yarn and four double pointed needles, size US 1. Why double pointed needles? Why not! It got me out of my comfort zone and pushed me to be a focused, careful knitter with dexterity and cultivated patience for myself, the materials, and the technique.

Once the first round was joined, I felt the tension coursing through my body settle, like a war had been won in needles and yarn.

How will my first sock turn out? Who knows, but I’m optimistic. I have a sock knitting book, a step-by-step pattern, and properly gauged materials. I’d like to have cute socks to wear, the ruffly kind so here goes nothing! 😃

Sewing Stretch Fabric Struggles

Do you ever spend time learning a skill just to forget it when you need to use it? That’s me. That’s how I sew stretch fabric on my machine. I just jump in and completely forget that I need to first properly adjust the tension and stitch type or else mayhem ensues. Mayhem like my machine having a nice little snack on my fabric.

Sometimes the machine gets extra bold and drags the hem under into the bobbin’s domain, jamming the machine. This is what I am talking about:

In the moment of panic, when I realize the fabric is stuck down in the machine a few thoughts dance through my mind.

  • Why didn’t you sew this by hand?!
  • You did it, you finally broke the machine you maniac!!
  • It’s ripped to shreds, isn’t it? The whole project might be gone in a moment.
  • This machine hates me. How do other people sew so effortlessly??

But it’s not the machine’s fault and it’s not the fabric that caused this, and it’s not even my fault. It’s morally neutral, it’s an accident and a learning experience to grow from!

As I was writing this, I caught myself crafting sentences to describe the situation with very negative and demeaning language towards myself for making a simple mistake. (A mistake that once I freed the fabric from the machine, I corrected and carried on to make the finished garment. The tight thread tension actually made a happy accident, a lettuce edge hem.)

It is not something that I should hold with such severity against myself that I internally tell myself I am an idiot, a lousy sewist, or useless.

Because how would I respond to hearing someone say that to another person? I would be disappointed in the speaker and make them stop.

How would I respond if I spoke with such aggression to another person? I would be ashamed.

I am learning through these sewing setbacks to temper the internal monologue and be a more gentle and loving person towards myself, to maintain better mental health, and establish the practice in my mind so that I can be a source of gentleness and kindness to others.

How do you speak towards yourself and others when they make a mistake?

Landscape Painting with Yarn

This year I’ve been looking for ways to use my stash as completely as possible and use up what I have to make new fibers and new projects. One way I accomplished this was through color palette knitting and through the stripe hype sweater. But another project idea I had this summer was to try minimal colorwork knitting by “painting” with yarn through a mix of new cotton yarn I purchased and yarn extras my mom passed onto me. This helped stretch the teal cotton yarn I bought, underestimating how much I needed to make a t-shirt. It was an opportunity to make a “graphic print” t-shirt out of yarn, something I didn’t have in my wardrobe, but sounded like a fun piece to wear.

These are the yarns I decided to use for the landscape painting section of the garment. Cotton yarn that was originally purchased by my mom to create handknit dishcloths in a color selection of blue, green, and pooling gray-to-white-to-blue, a lime green cotton-bamboo yarn, and the teal cotton I purchased. The pooling yarn was perfect for the clouds. Each side of the garment is unique because of this pooling yarn like a real sky. The plain blue was used for water, the dark green for a marshy grown-up bank, and the lime green for sunkissed meadows of grass. The teal was used for a distant tree line that was framed by the clouds.

I opted to make this oversized with a short sleeve opening, somewhere between a vest and a t-shirt because I haven’t decided how I want to wear this. As a t-shirt of course but do I want this to be a layering piece in the cooler months of the year? Or do I want to make detachable sleeves? That is something I am still milling over in my mind. I did split the back of the piece in a moment of indecision, where I thought it would be cute to make it a short-sleeved button cardigan. I may do this in the future. I opted to keep the t-shirt structure for simplicity and the ability to wear it more quickly. I was impatient to wear it.

I love projects that utilize things I already own and use techniques I haven’t tried before. Since this project I’ve begun to learn proper colorwork knitting, it’s been fun. Thank goodness for YouTube and knitting books to make the complicated things, like learning how to switch colors, feel approachable!

How have you been expressing your creativity this week? Do you like getting crafty? Are you a knitter and have you tried colorwork knitting before?

Create a website or blog at WordPress.com

Up ↑