To continue my 2024 yarn stash-busting, I got a little creative with my process. I present this little mint-colored star! I’m so proud of her. I made this intending to make multiple stars to decorate my new noise-canceling headphones.
I didn’t have high hopes when I started this project because well, I don’t see many small objects being created through knit, it’s usually crochet. But I decided to give the technique a go, why not?
It turned out to be a fun little project that gives me joy each time I look at it. To start, I cast on one stitch, next row expand to two, next three, then four, and onto five. I knit another row of five and began reducing. I reduced one stitch on each row until I was back to one. Time to cast off.
You are left with a diamond. I made four more of these diamonds. Next, it was time to sew them together into a star shape. I joined the ends at the center and anchored the edges together to make the star. I repeated the entire process until I had two stars.
Finally, I sewed them together, with the sewing sides on the inside, and finished sides out. It actually worked! It even looked like my crochet reference photo!
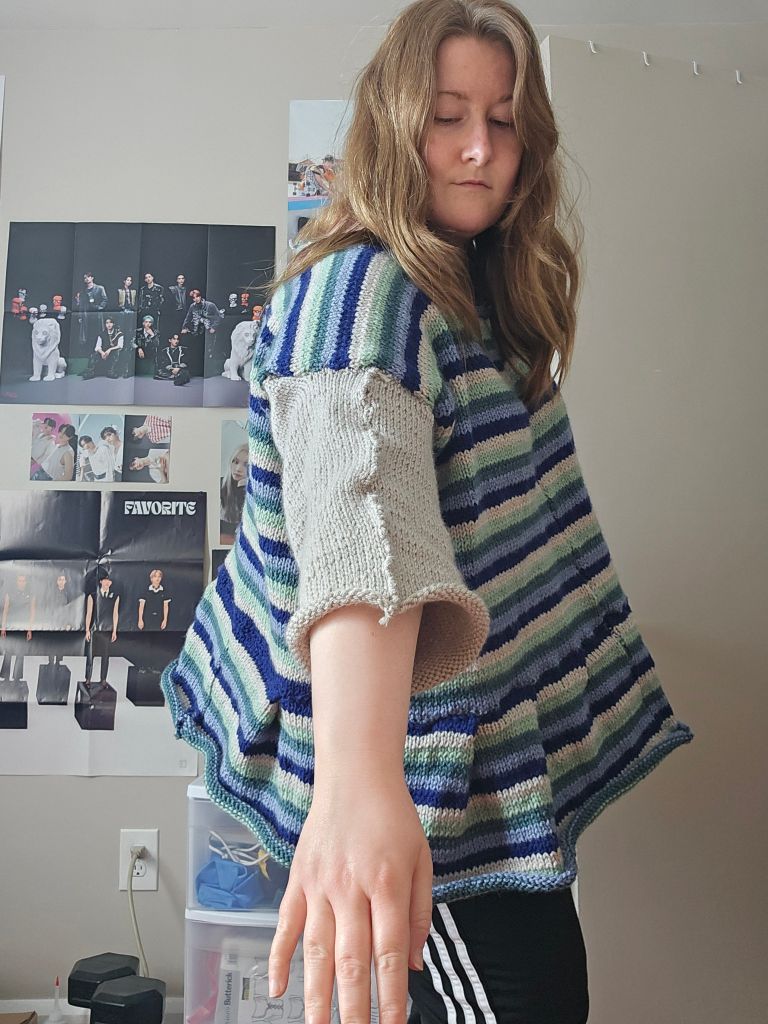
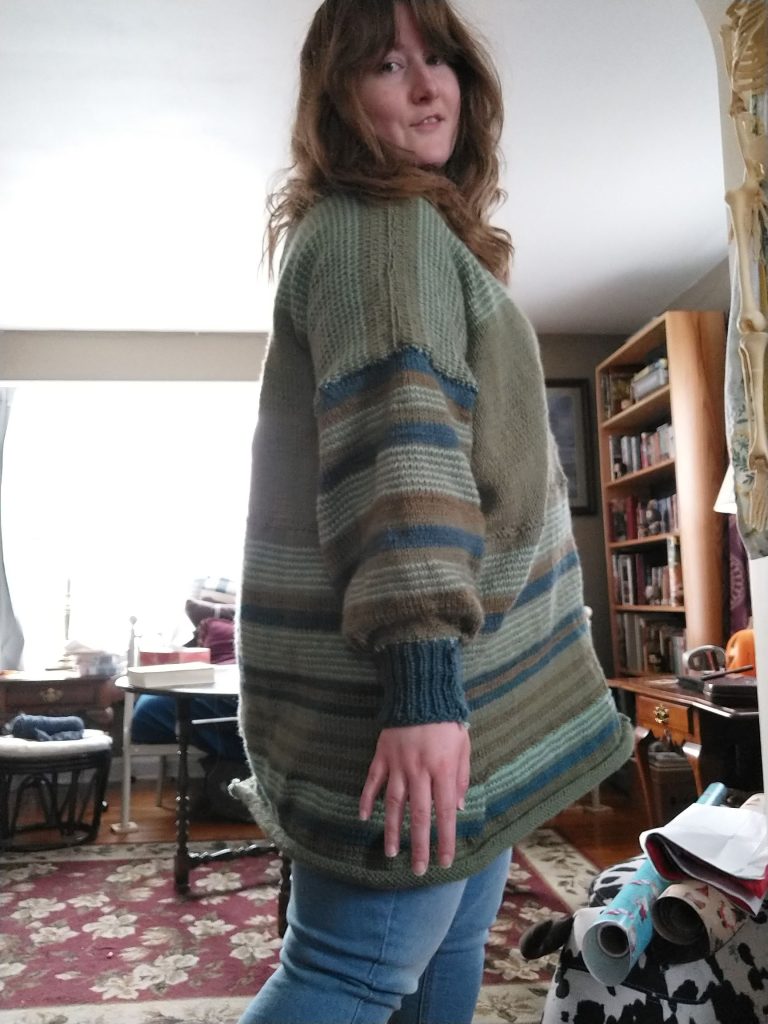
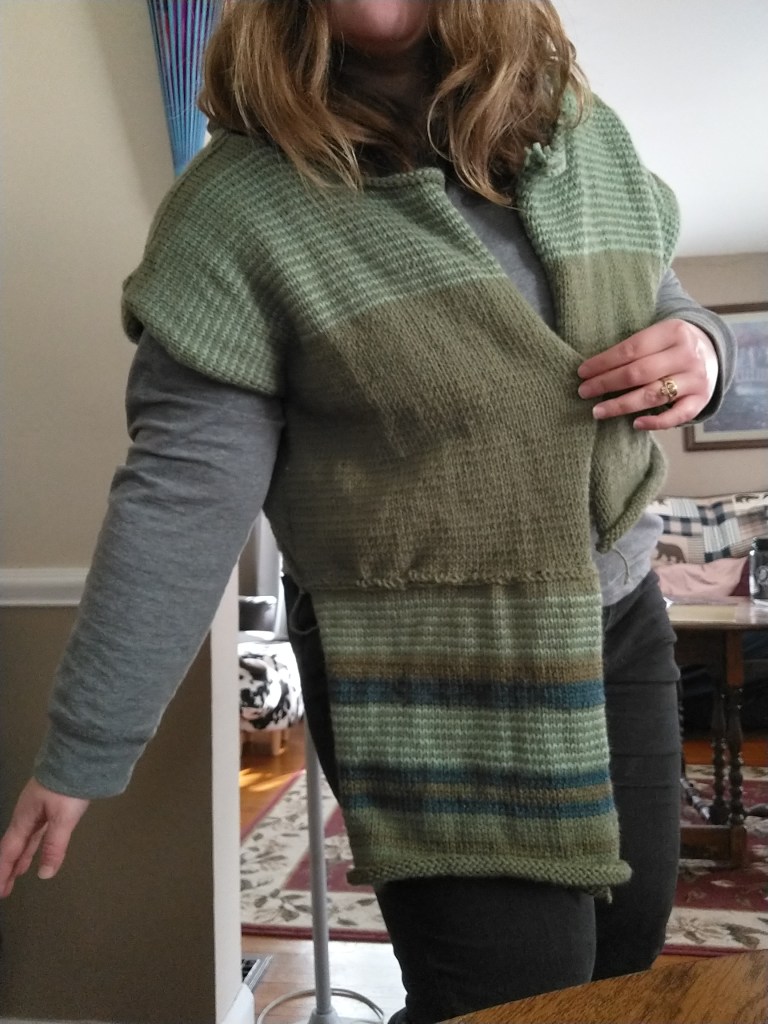
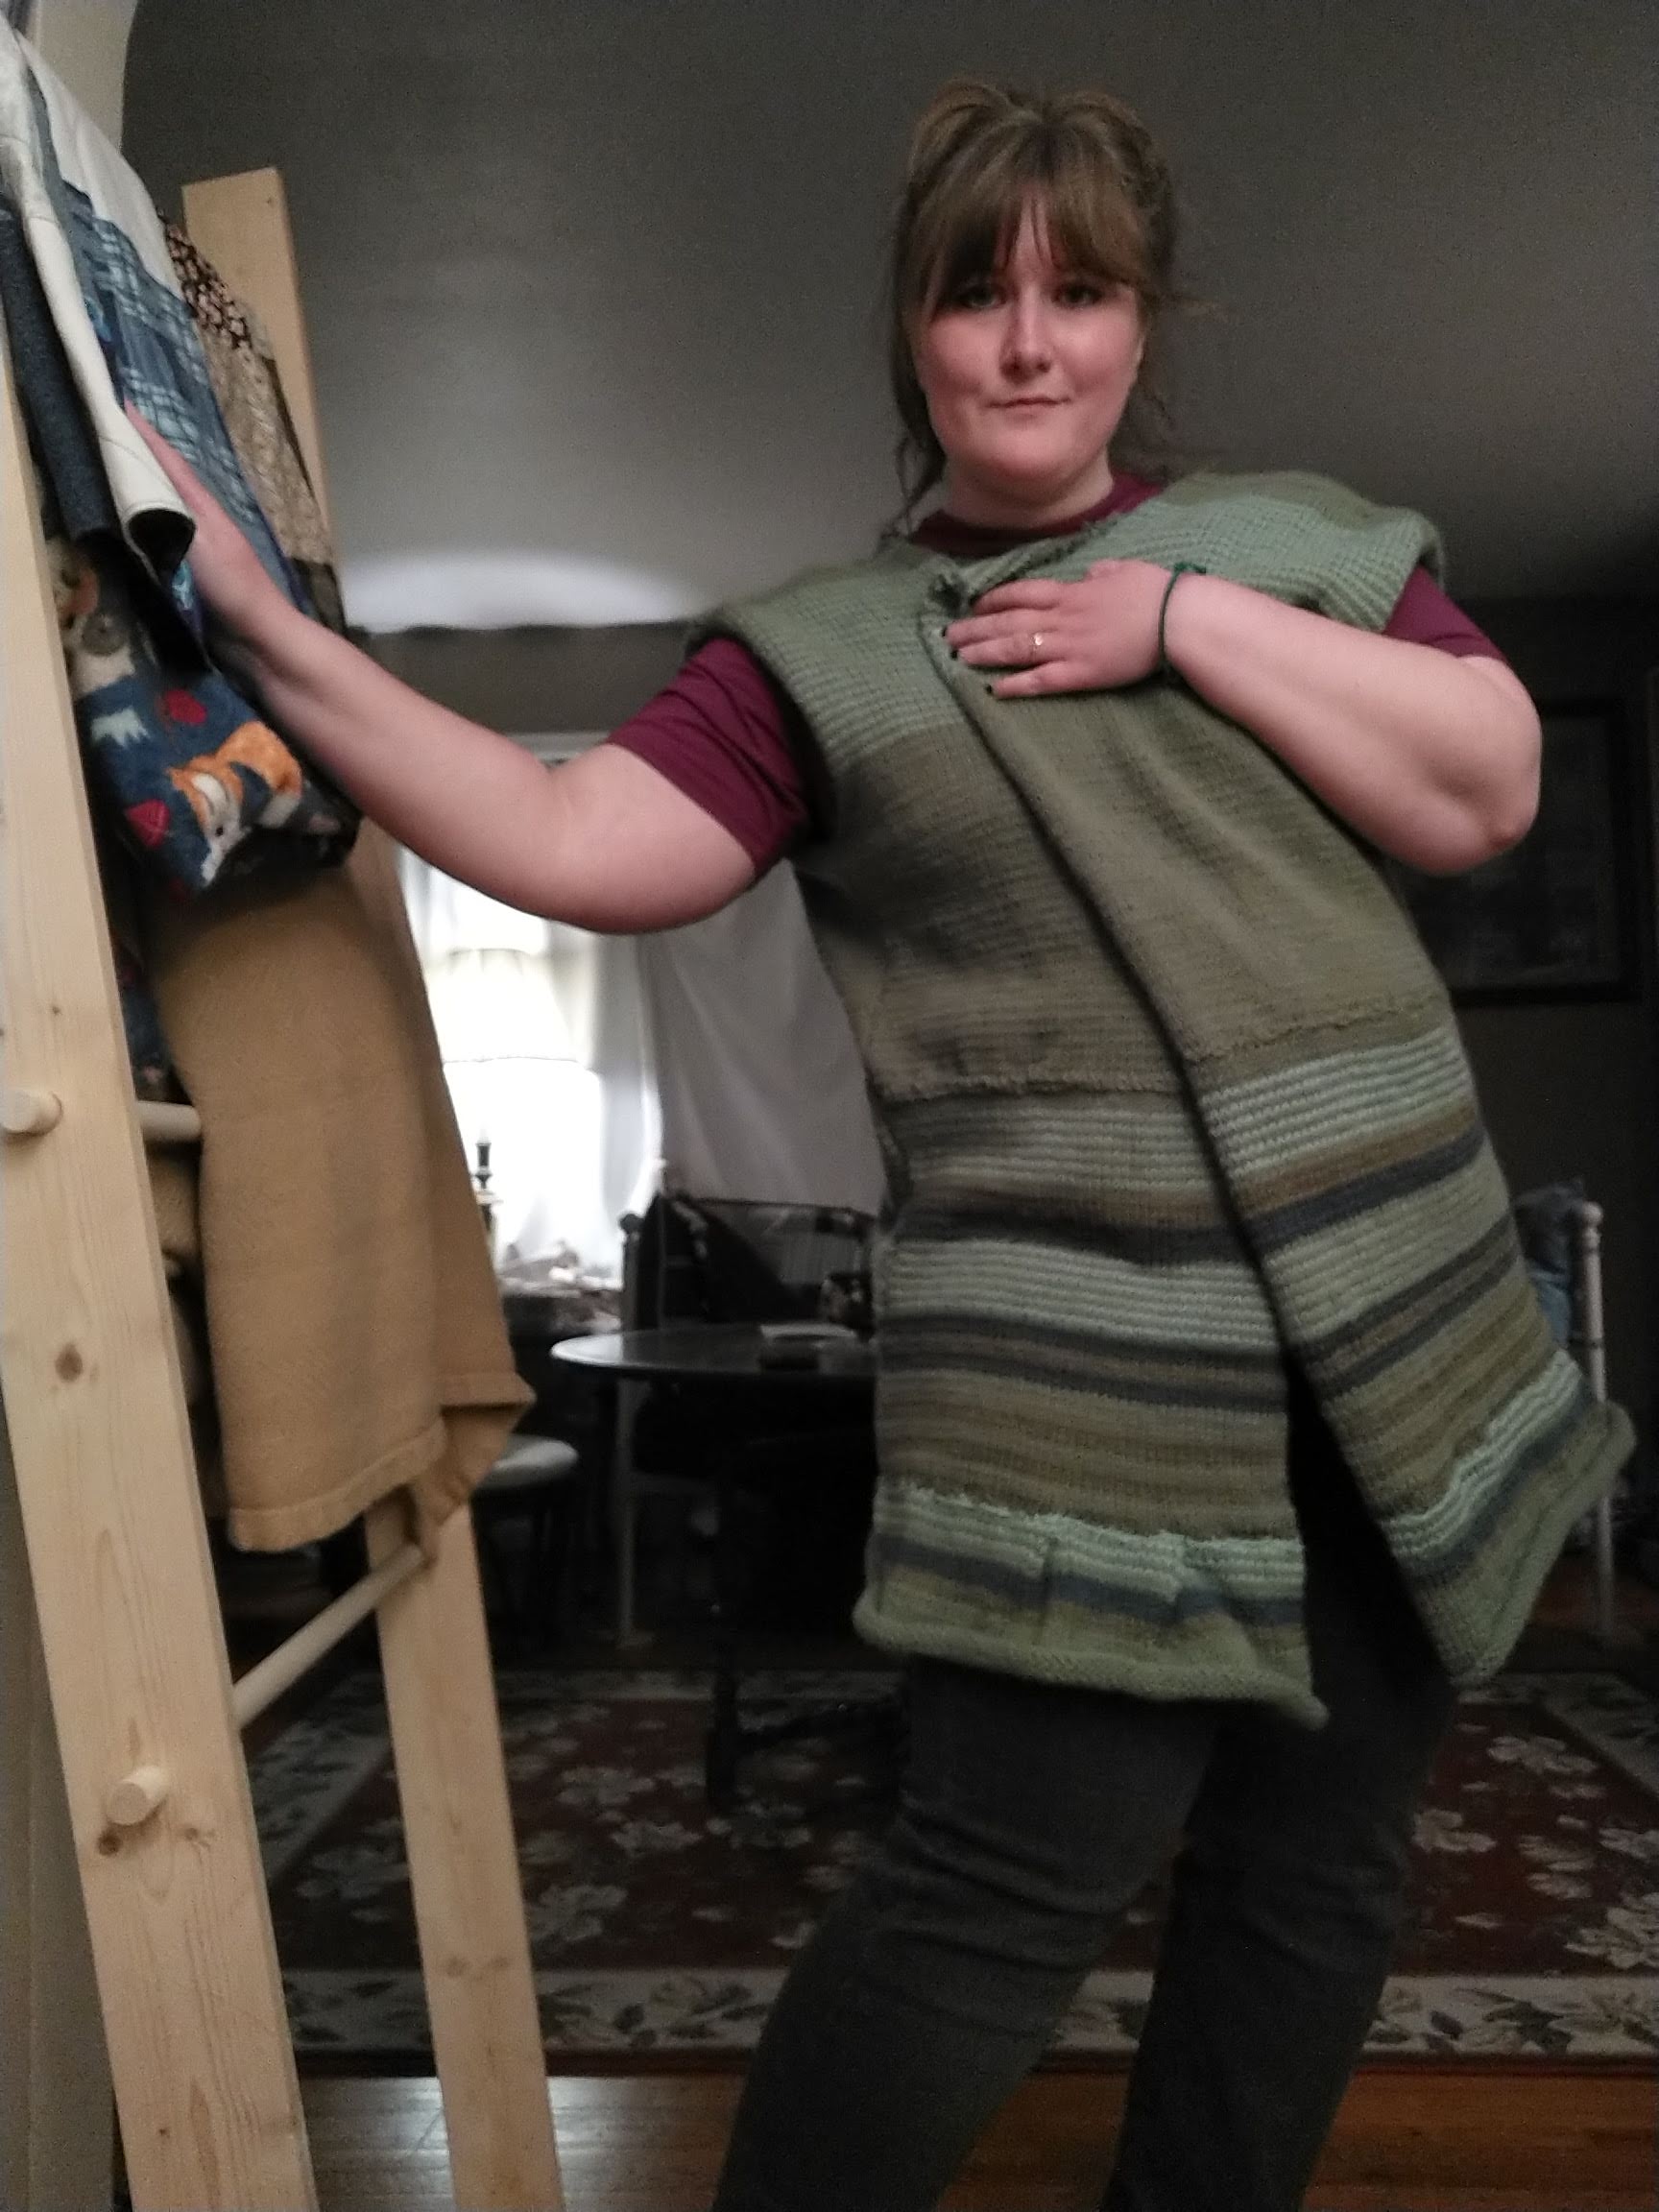
A goal I have in 2024, is to go through my yarn stash and use what I have to create unexpected pieces. A lot of my yarn has been sitting on my yarn shelf for a year so I decided to try a new approach to my design process – to create a garment from a color palette. I chose these five yarns to make a striped and joyful sweater that encapsulates the coolness of a winter landscape, yet the minty green hints at the spring yet to come.
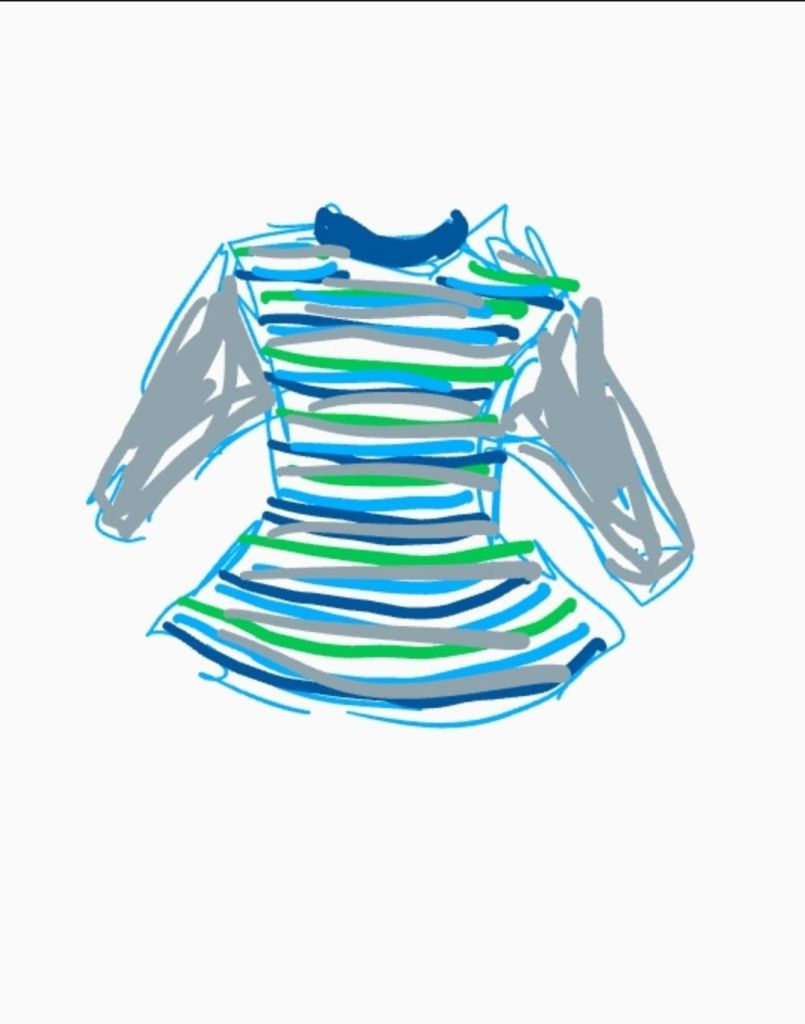
This project was a journey! I didn’t quite know where it was going to end up. At first, my plan was to make a striped cardigan, but I worried about the sleeves. I thought the stripes would be too busy if carried on to the arms. I also had fears of playing yarn chicken. So I pivoted to an unusual piece because of how cool the bodice looked over a t-shirt. In the climate I live in there is no reason to wear an acrylic yarn vest over a t-shirt, but I couldn’t get the image of that out of my mind, so I made a “t-shirt” looking sleeve with the light gray yarn. For length and a bit of vintage flair, I added a peplum that took this piece to a place of whimsy that brings me joy.
When I look at this piece, I smile. When I wear this piece, I am filled with joy and sunshine. It is the first piece of knitwear I have designed that I think would show wonderfully on the runway and that is freaking cool! Lastly, I added a navy blue collar to the neck opening and gathered the neckline slightly so that it sat on my shoulders properly. The peplum was knit in two pieces where I continued the pattern and knit the sections wider than I needed to pleat it. Now that I’ve blocked the piece in the dryer it floats over the body and looks so effortlessly.
A new technique I used for this sweater was to knit one side at a time. I knit I believe 60 stitches across and began my striping pattern, switching colors after three rows. Next, I bound off stitches at my desired armhole position and carried on to the neckline where I again bound off stitches which made the shoulder more narrow than the rest of the garment. I then continued to knit down the back of the piece, mirroring the neckline by casting on a new row. I continued on to the armhole where I again, cast on more stitches and then followed the piece down to match the length of the front.
I did this a second time on the other side, mirroring the original. It is important to make sure you are mirroring so that the two pieces will match up knit side + knit side or else one side will be inside out – which is easier to do than you think! I ruined a previous project by doing that and had no choice but to rip it out. That’s okay! It’s all a part of the learning process!
If you’re a knitter or crocheter, I hope this project inspires you to get creative with your stash and make something out of the box. Or if you’re an artist, a maker, or just a human reading this, get creative with what you have! It is a fun journey. Thanks for taking time with me today! I hope you know that you are worthy, you are loved, and you are special to me. Until next time ❤
To start the path of becoming a knitwear designer, I first had to quit knitting, totally walking away from it to understand that it was something I was passionate enough to keep growing, pursue, and be willing to fail at to create something beautiful. Sometimes personal growth requires surrendering your plan to find the plan you were called to follow.
These pieces were made two years apart and yet I think they fit seamlessly together even though they were not planned. None of my knitting pieces from 2023 onward were planned because I decided to quit knitting in 2021 and was feeling pretty lost and frustrated in 2022. Knitting became a place of competition with my mom, a comparison with more advanced knitters, and a direct competitor to my sewing process.
It took a while for me to see this skill as an art form instead of a distraction. An extension of fashion design, storytelling, and fiber art. These forms are symbiotic, yet the way I was approaching it created struggle in my mind and it wasn’t until I made peace with the process that I could see how this was a way to continue self-expression and design.
It took being willing to approach knitting the way I feel comfortable instead of the way others feel comfortable, like knitting on straight needles, and taking the scenic route in my knitting technique to learn and improve. I had to accept that my pieces were going to look different because my approach was different than how I was being taught. Because of my background in art and sewing, I think about garment creation as I would in sewing. Knitting is the opposite, instead of cutting shapes out of a whole, you are making the whole shape out of nothing, it’s a brain teaser. It was at least until I took time to think about it.
After I completed the scarf, I put my needles away, donated my excess yarn stash, and walked away. For a year, I didn’t want to knit. I wasn’t inspired, I wasn’t interested. But at that time, I was designing with fabric. I was tailoring and learning how to read patterns. That’s when it clicked. All of it clicked.
It wasn’t that I couldn’t figure out knitting, I needed a better approach! My brain needed time to process the knowledge that I was learning from sewing and knitting. My mind was figuring out what kind of story it wanted to tell. Making a collection in 2022 for my family and friends got the ball rolling in my mind. I realized it wouldn’t be that difficult to be a successful knitter, I just needed to be a knitwear designer and go that extra step to create my own pattern and my own plan. Knitting hadn’t clicked before because I was trying to be like other knitters, instead of experimenting and finding my own style.
Just like personal style, creative writing, and art, you have to find your thing! The process may not feel like progress and that is where falling in love with the process is such an important piece of the puzzle. I have a passion for designing clothing, I’ve had it my whole life, but I was divorcing clothing from knitwear because I was not pushing myself to make clothing. Once I got serious and dove into making an actual garment it transformed my perspective. They are the same just different approaches. One does not need to be a distraction from the other, they can work in sync. That’s when the light bulb went off in my mind – so can accessories. Layers are little things that make a piece pop. If I am going to go all in for design, then a symbiotic relationship between what I design with thread and what I design with yarn must play off of each other. This is how I realized being a knitwear designer was as much a part of me as being a fashion designer, a sewist, an artist, and a writer.
Stray Kids. More specifically, Felix’s hat on stage at the Music Bank Paris performance in 2023 and Hyunjin’s striped crochet beanie during a video in 2023.
The Plan
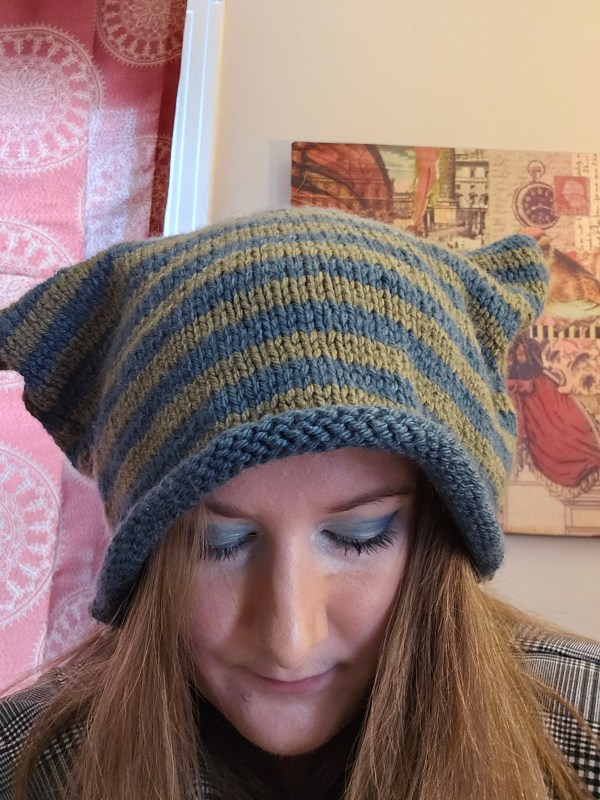
It seemed simple at first glance but then again, new knitting patterns can be a bit confusing so I did research, to be safe. The cat ear is a corner and the point or drape, depending on the structure of your beanie is created by the length of the hat horizontally across. Once I understood that the shape would be determined by these top corners it was easy to jump in!
So I cast on 50 stitches on size 8 needles with worsted-weight acrylic yarn (I’m allergic to wool) and alternated between olive green and teal every three rows. After 55 rows, I cast off and sewed the two panels together to form this lovely cat-ear beanie. Honestly, such a fun and easy project once the ear structure clicked. 🙂 I’d say if you are an intermediate knitter you could make this over a weekend for sure, potentially in 24 hours if you were in a super rush. As a beginner, I’d say give yourself a week and take your time to keep the stitches even across. Sew up the sides and top with a tapestry needle.
I think the trickiest part was choosing what colors of yarn to use for the striped pattern. I didn’t want to make an exact copy this time, well I couldn’t anyway because I don’t currently crochet, but I wanted to use a unique color palette from my existing stash. These colors are some of my favorites in my stash. I’ve found the color story versatile to style with both cool and warm-toned accessories. I think the earth tones help keep it neutral. I love it and reach for it the most out of all the hats I’ve made in 2023.
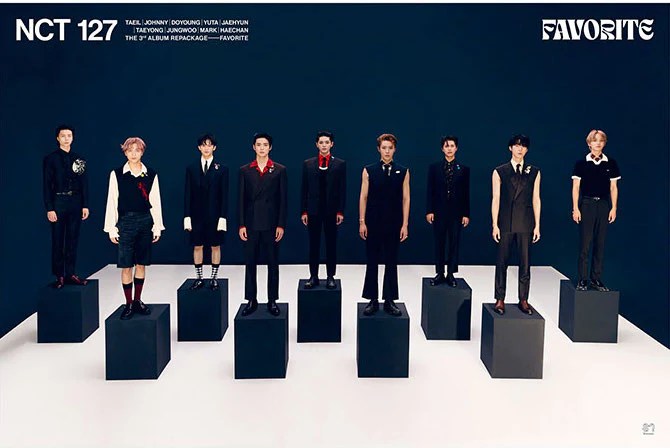
The sweater vest. It was on my radar but did not become an item I dreamed of until I saw a lookbook from Steal the Spotlight styling Friends-inspired outfits, inspired by Chandler, the sweater vest king. I continued down the rabbit hole and to Katie’s K-pop Comeback Fashion review and I was done for. K-pop fashion, Korean fashion, and the sweater vest were a layering piece I knew I was going to make. Maybe it is the color combinations or the accessories, but how these sweater vests are styled across different boyband concepts just got me. It felt fresh and fun, not preppy or stuffy.
A year later, I was ready to tackle this project. After making a few sweater projects, and learning how to pattern from garment construction, I felt like I had a good understanding of the shape needed to make the sweater. At Joann’s, I found a non-wool tweed yarn and I knew this was the yarn I wanted to start with. It looked like garments I love from Irish Aran Jumpers and was a way to bridge my heritage and this new world I was exploring through K-pop. I like the garments I design to have a story and intentionality behind them.
The New Technique
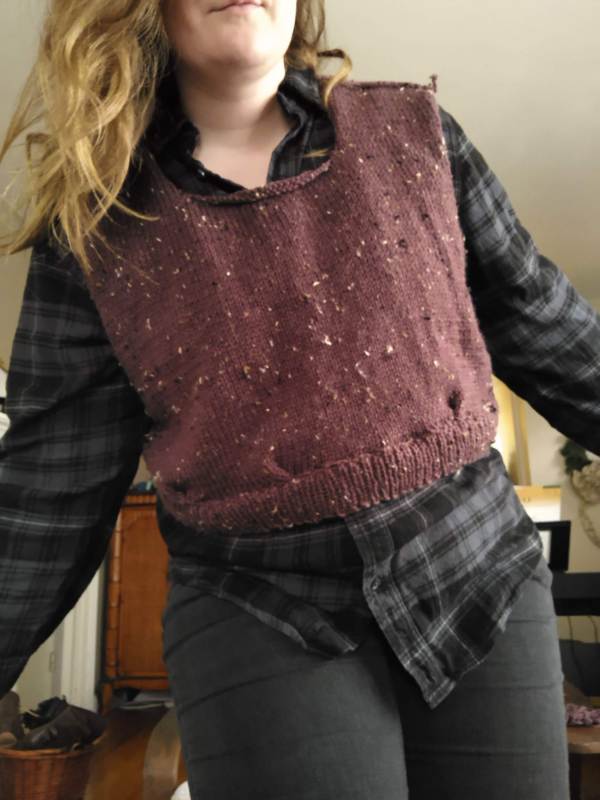
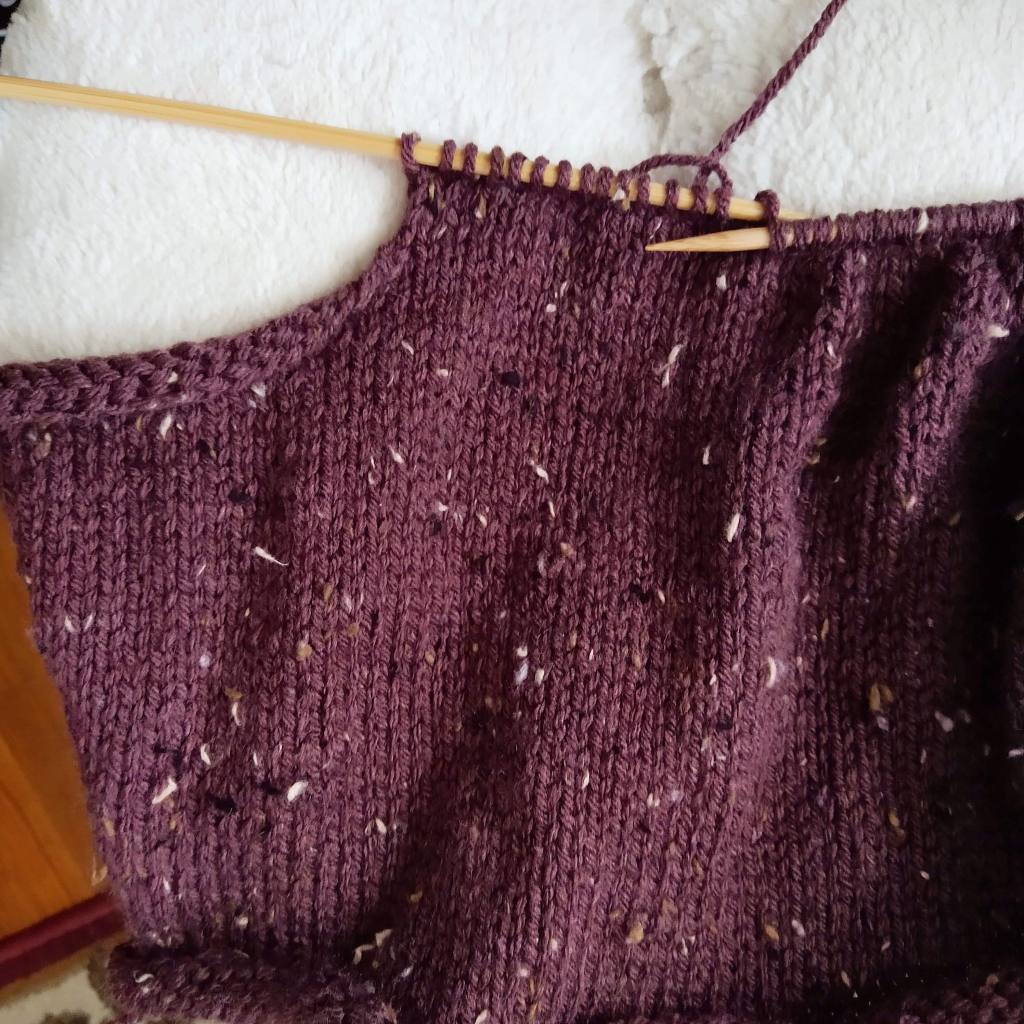
With US Size 8 needles in hand and one skein of Big Twist tweed yarn awaiting a new form, I began by casting on 65 stitches. Working my way up I did the basic knit-purl stitch and gradually binding off on either side when I reached my desired length for the armhole. I chose to make a cropped sweater vest to accentuate my waist and break up my long torso. The big moment though came when I did some research and made the decision to branch out and knit the shoulder and neckline on two sets of needles. This required knitting, casting off in the middle, and continuing to knit on a second set of needles. It worked!
Learning new techniques is always worth the time and the trial because eventually it clicks and you have something new, you didn’t think you could do, but you can!
Making two instead of four pieces on my straight needles was a time-saver! Honestly, I see why having a teachable spirit is important in all aspects of life because I thought I had a good technique before, but dang, two pieces are such a better experience. Four pieces was a mental game, and I got bored. Hence why my previous sweater projects have taken months and months, and months because I distract myself with palette cleanser projects and then avoid finishing the four-piece projects.
Afterward, I sewed the two pieces together and knit two 65-stitch pieces of ribbed trim for the bottom. I liked how rustic the sweater looked without the ribbing on the neckline and armholes. It looks like an old-fashioned piece, and a bit like armor. Which is cool.
Sweater Vest Fits of 2023
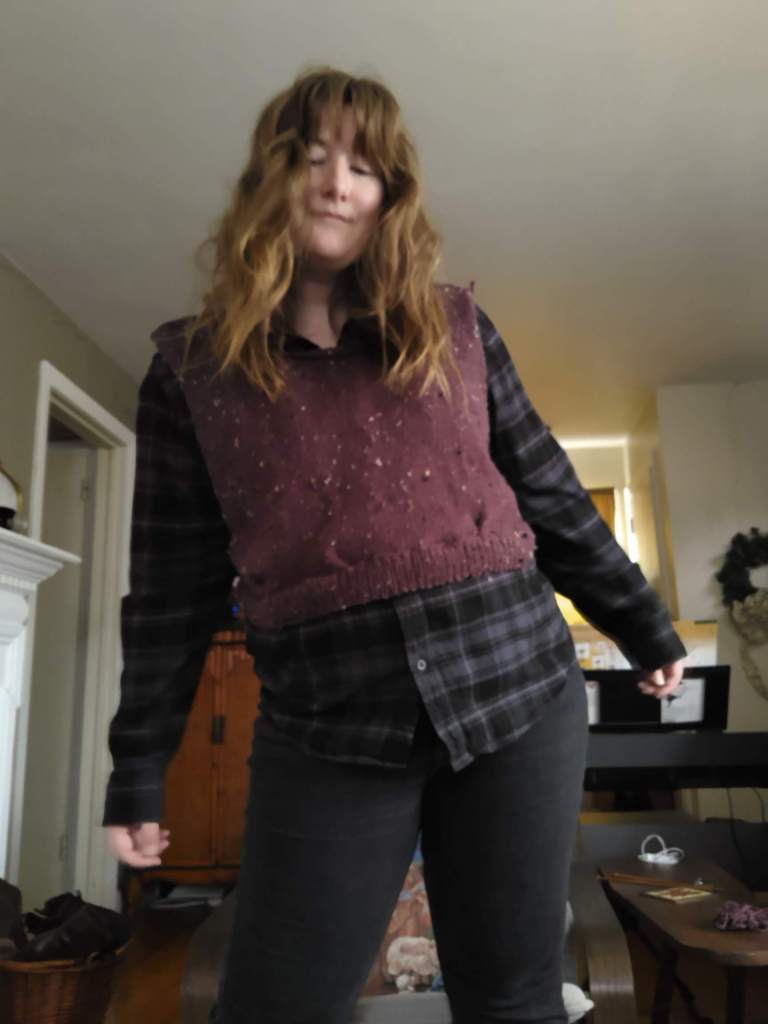
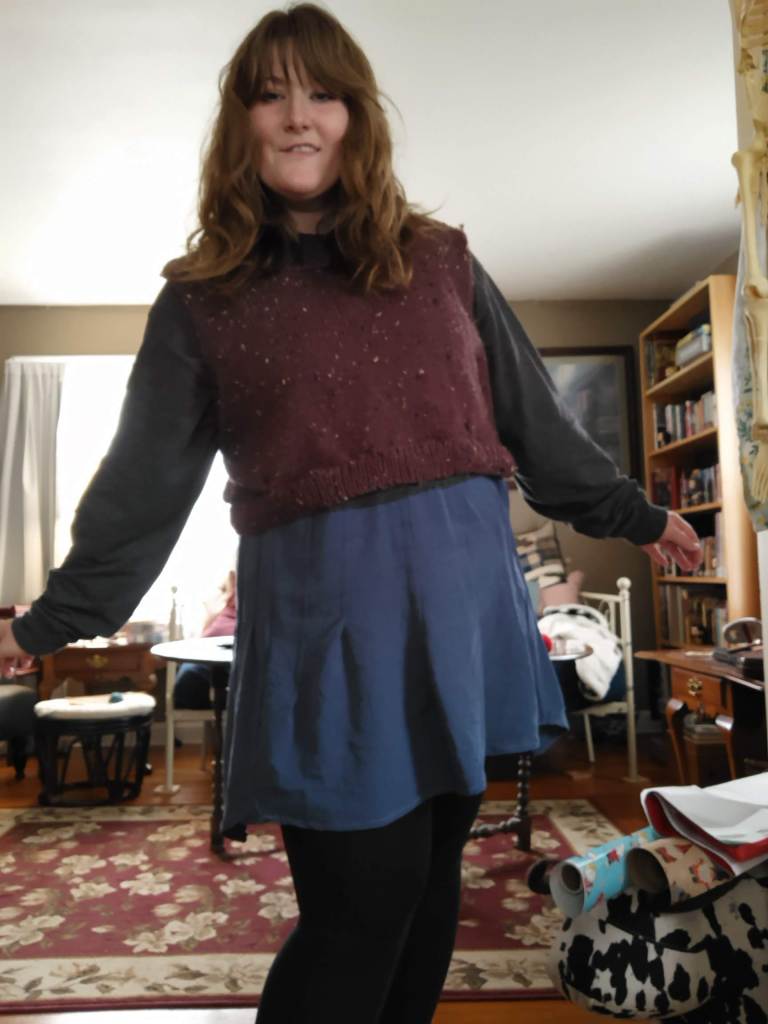
This is how I have styled the finished garment so far! I like it over my black flannel and charcoal jeans for a moody look. It styled surprisingly well over this DIY project where I added a flared skirt to a cropped graphic long-sleeve shirt. This is where I saw the armor aesthetic come through. In 2024 I look forward to playing around with it even more!
Some things I plan on either finding or making, are basic layers I can wear under this vest. Currently, I have my flannels, that random diy-tunic, and maybe some long-sleeve tees but I’m not certain if they are long enough to layer out the bottom of the vest. This is the struggle of adding a brand new item to your wardrobe – how do you integrate it and style it well without buying a bunch of new things? Yeah, I’m figuring that out and until I do it’s going to be some time before I think I can make a truly amazing outfit with this piece. But I’d rather do this responsibly and be a patient person instead of draining my bank account for instant gratification. (Age has done me well in that respect because I used to do the opposite!)
2024 Project Update:
Since finishing the garment, I have either lost weight or the vest has stretched a bit from wear and one wash. It was not sitting well on my waist anymore but ballooning out so I took it in. I took it in at the arm hole seams and gradually took in the waist at the back so the garment has a back center seam which is not the look I was going for but the fit is on point again. Lastly, I knit another section of ribbed trim to lengthen the garment to keep it from riding up, in doing so I made the ribbed trim addition of 60 or 55 stitches, I forgot to take note when I made it, to pull the waist in even more. I like the fit and plan to make another version of this garment with a smaller adjusted pattern.
I smell snow. An iconic line from a one-of-a-kind character, in a show that successfully captured the magic of winter despite being filled in southern California. They have me fooled every time!
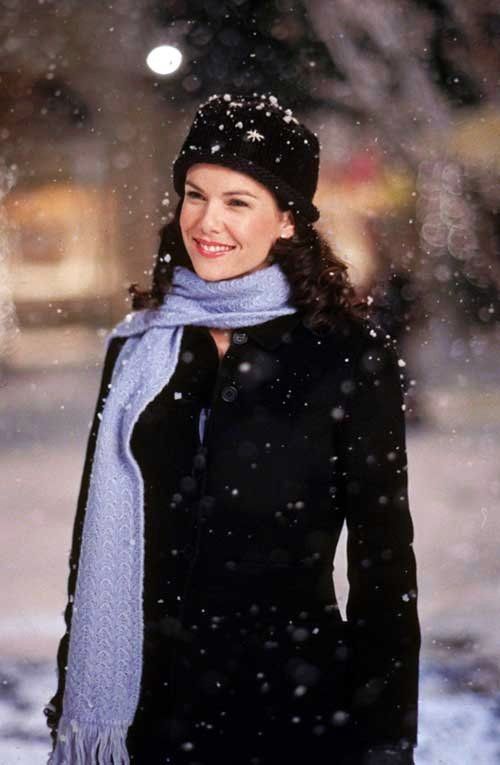
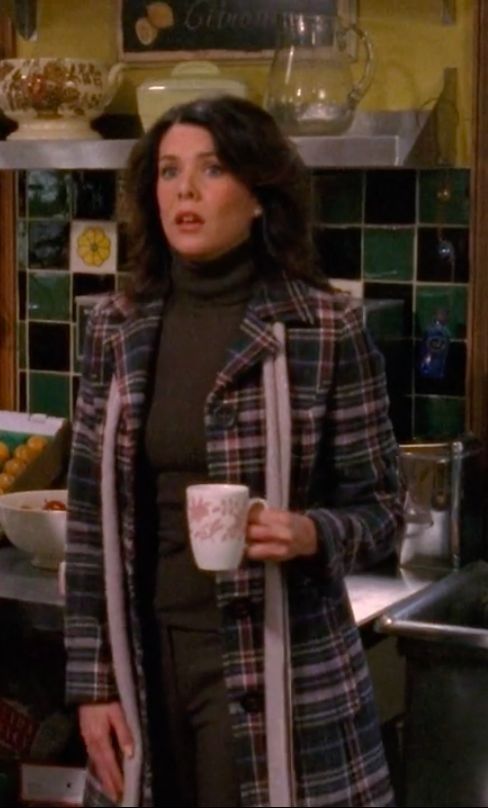
Gilmore Girls has some of the most inspiring winter fashion of any show I’ve watched! I get excited as the temperature drops each fall because I know it’s almost coat season, hat season, scarf season, etc. From season one onward, Lorelai’s love for winter is magnetic! She has a passion for the flakey white accumulation, wrapped up in the atmosphere of cozy nights, and of course her cold weather accessories. She shares this dynamic winter wardrobe with Rory who can rock a good scarf with the best of them.
These items are not just layers or bulk, they are a canvas upon which to paint and express who the characters are by what they wear. They are sentences without words. Personality in yarn. A conversation starter, or simply a colorful way to brighten the gloomy and the gray. A bright point in our day. When I was thinking about adding a new cold-weather accessory to my wardrobe this was my ethos. It had to be special, something I would treasure and wear until it fell apart.
The Plan
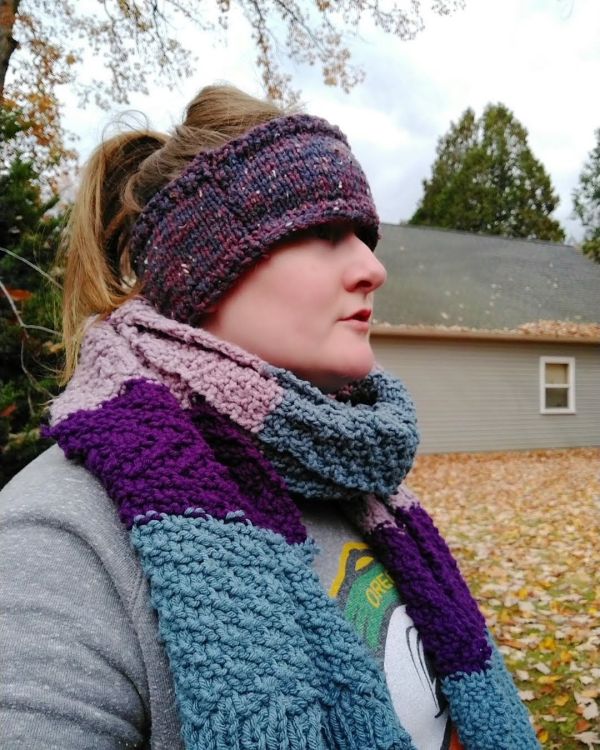
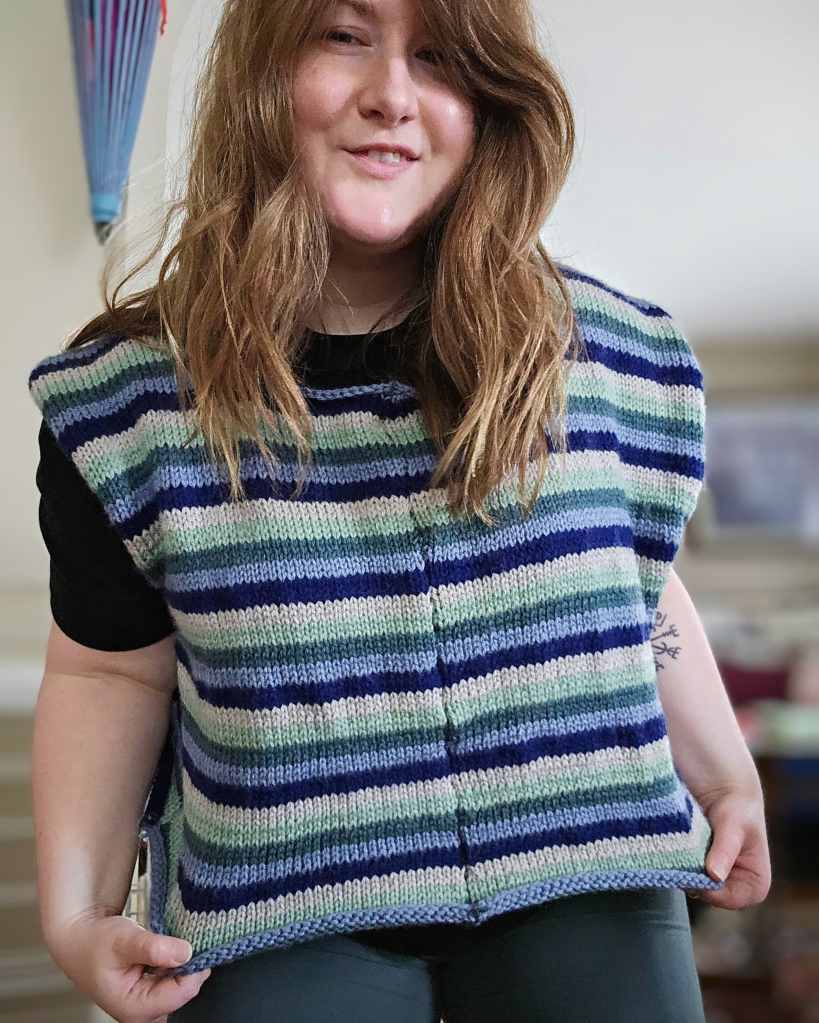
My goal for this winter season was to make a striped, colorful, skinny scarf in the early 2000s, aka prime Gilmore style. To accomplish this I thought I would need a myriad of colorful yarns. You can see from my inspiration photos above, there is a lot of color. In my extant garments from that time in my life, there was also a lot of color. My skinny scarves from Aeropostale in the early 2000s were blended with a myriad of shades, but to my surprise, when I began to work on this project, a small color palette of three produced the most impact.
The Pattern:
On US 8 needles with worsted weight yarn, knit for 40 stitches, purl 40 stitches, and swap colors every 2 rows. To a desired length, I believe my finished product is around 48 inches. If you make one, I wish you happy knitting!
To develop a pattern I could rely on I’ve been studying mittens. Different shapes, proportions, and ribbed versus knit-purl have been tested to see what I like to wear and make. It’s been a fun journey! A journey where I’ve learned how pattern development involves skill refinement.
October 2022
The brown mitten was developed first. It was a project on a whim to make better hand-warming devices than I had before. In the Fall and Winter of 2021, I made mittens out of cheap, bulky weight yarn that while soft looked like whales breaching out of the water instead of hand-shaped mittens. They lacked dexterity, polish, and honestly, lacked taste. They were ill-fitting because they were a prototype and I tried wearing them but tossed them at the end of the season to try again. Enter the brown mitten.
The brown mitten had a good shape. It was created from a worsted weight yarn on size 7 needles compared to the previous bulky yarn on size 11. The brown had even stitches, warmth, and potential! I got so excited that I forgot to write my project notes and boldly decided to make the second one later. This never happened. This mitten floated in my cold-weather accessory bin until I let it go.
August 2023
Next, I worked on the black rib knit mitten. Instead of a knit-purl structure I made a crucial error and decided to make the entire mitten, not just the cuff, with a rib knit. Why was this an error? Well, the tension across the yarn was stiff and this made the mitten difficult to wear. It also looked messy because I had to reduce my stitches to achieve that curved shape at the top. When you are developing a pattern you are improvising and experimenting so as you can guess my reduction led to uneven ribbing and wonky texture.
It was not my best work and harkened back to that weird breaching whale shape. Not a fan!
September 2023
The Blue Sheep mittens were a wonderful delight! I picked up a blue tweed yarn at Joann’s on a sale and began making things that made me happy, like this recreation of my Blarney Woolen Mills gloves from the early 2000s. My mom and I bought matching sheep gloves in this color when we visited in 2001. As they wore out we repurchased them online until Blarney Woolen Mills stopped offering them.
I don’t currently have the understanding of how to make gloves so I tried recreating them in mitten form. They worked well except for the fact that I made them too wide at the top and too short at the bottom. I added a piece at the bottom to make the cuff longer. The little sheep brought me so much joy! Unfortunately, I forgot to take notes on this one too, and was unable to make a matching one. I recreated the blue tweed mittens in another batch that I scaled too big and passed them on to my husband because they were simply too big for my hands.
November 2023
The hot pink mittens are my gold standard. The fit is sublime. The shape is lovely and yes I took notes and changed my order of construction in order to make mittens that match in size and shape. I now knit the mitts first, so four in total, then the cuffs, and lastly the thumb pieces. Then I sew them together at the same time. This system works. The proportions are perfect for my hands and have truly saved this study of mittens from feeling like a multi-year flop!
Project Takeaways
Always take notes of your stitch count and needle size to make the project repeatable!
Never stop between mittens, trust me you will not go back to finish the second.
Cute details like sheep or other motifs are kind of awesome! I plan to experiment with this technique in the future.
Reduction speed will affect the shape and potential wonkiness of the mitten, proceed with caution.
Mittens are actually a great beginner project. They are quick and easy.
This was my most ambitious project yet and I’m happy to say it’s done! And on schedule too because the deadline in my head was by the end of 2023. I didn’t think I would get there, especially with other projects, but it happened!
It’s funkier than I first designed, and it’s also a dress now which is fun and unique to my wardrobe. I don’t have any sweater tunics or dresses like this. I’m excited to play around with styling this piece as winter is yet to come. It’s still autumn technically which makes me want to jump for joy because I’ll be able to enjoy this piece all season long instead of partially or not at all like some of my former projects.
I’m currently working on a big knitwear design project. Probably the most ambitious project that I have taken on yet in my time designing knitwear and fabricating sweaters. It is a sweater coat with varying stripes that I have knit in sections over the past few months. I’m currently three months into this project, and per my working style, I’ve worked on smaller projects alongside this big project to keep me stimulated and my motivation high.
This was my progress at the end of September. I had the entire bodice done and sewn together at the shoulder seams, back seam, and under the arms until the point of the sleeve opening. Because I sew, this process of knitting makes more sense to my creative brain than the knitting in the round process. If this type of knitting drives you nuts, it’s only going to get worse so I warned you. 🙂
September Progress
October Progress
In October, I honestly futzed around with the hood and collar and that was about it. I knit one other body panel so two out of four were done and drafted collar and hood patterns, over and over again. I initially expected to make more progress in October and to have just the sleeves left going into November. That didn’t happen.
It was that dang collar and hood section, that kept me in this place of indecision and design frustration. I initially made a collar with a normal stitch, not a ribbed which looks a bit cleaner. I think I was concerned about the collar looking cohesive and was afraid that a solid collar in rib instead of a knit-purl stitch with a stripe would look less cohesive. It looked odd actually. The stripe was good, but the flat collar which began to roll on the end looked ineffectual for a collar. After I sewed it in I carefully cut the collar away which was discouraging from a progress perspective, until I realized the stitched of the collar remained (because I was afraid of snipping the wrong yarn and destroying the shoulders) and the neck opening had this lovely fit and structure now. The shoulders were slightly gathered up to the neck opening and the fit was fantastic now! It just needed a new collar.
I had an idea – what if instead of a collar I went straight to a hood. I had been watching a lot of Gilmore Girls throughout October, seasons four and five to be exact which spanned the years of 2003-2005, peak 2000s fashion. And you know what was popular during this time? The duster! I had an idea, what if the hood was just one piece of this puzzle, what if I made it longer, much longer, added a hood, a rib trim around all the edges with a button closure! A funky duster the likes of Sookie, the Olsen twins, Lindsay Lohan, and even Lorelai herself would have worn during this time.
I knew I wanted to keep the stripe theme going, something that looked labor-intensive and expensive, like a bohemian duster or sweater coat that would be featured in an Anthropologie campaign. I wanted the hood to carry on that stripe motif to make it feel integral to the garment, not an add-on.
Last October, I learned how to draft hood shapes for several outerwear pieces that I crafted for my loved ones as a part of my Potato Technology’s Autumn/Winter 2022 Collection so I am pretty comfortable with the shape and sizing scale for a hood on an outerwear garment. The thing I underestimated though was how tricky it would be to form the hood as I went, as you do with knitting, instead of cutting the hood shape out of fabric. This kicked my butt. I spent a weekend making one half of a hood out of yarn and it was so cursed. When I took it off the needles it didn’t look like the hoods I had created out of fabric and thread. It was lumpy, too short, and not going to work for what I needed.
Once again, I got my scissors out cut the bind off loose, and proceeded to wind the yarn back into a ball. That is when I decided I had to move on to a new section of the project, for my own sanity. Because I still didn’t know how the hood became misshapen in the fabrication process. None of it made sense. Going straight back into making a new hood when I didn’t know how to solve the problem would be a waste of time and resources. I only have one set of size 7 needles, there was no need to tie them up in another likely failed attempt.
I pivoted to the the length of the duster. To make the bottom have more structure I decided to knit this section in two pieces.
November’s Progress (11/16)
This was a good move. I made the first half 30 stitches wider than the previous body panels to create some drape around the hips and the results are cute. The sweater has this sophisticated little flare that accentuates the waist – I was not expecting that! 🙂
With this step in the right direction, I got to work and powered through the last two body panels and the second flare panel at the bottom. It was a lot of work but only took two weeks to complete with focus, stretching, and snacks.
I have a tendency to let the garment lead me. I like to see how the fabric or yarn responds to the vision I have in my head and adjust the design accordingly to the way the project is coming together. The flared panels at the bottom of the sweater inspired me to pivot again, to step back from the hood and long duster to a sweater coat cardigan that could be buttoned into a sweater dress if I would be inclined to wear it as such.
That’s where it stands now. I began drafting a sleeve and designing the color work I had planned for the stripes before I continued any further because I could change my mind and add more length. The hood is out through, it’s just not the vibe.
When will this project be done? I sure hope by the end of 2023, but we shall see.
This is a project purely inspired by Stray Kids and their Los Angeles shows from their 2023 Maniac Tour. I was fangirling hard for these hats, and so are a lot of people because even with a high price tag the hats have been sold out. I really wanted one that would emulate the joy that these hats create in my heart and so I decided to try making one. Now, I’m recreating what I can see in the image and because I am not using a pattern, I have no idea if my dimensions are correct at all. That part actually makes me feel better about recreating the Loverboy Bunny hat because I will have to put my own spin on it!
The Inspiration
Adorable, right? Their stylist killed it. I love how cartoonish the hat is yet at the same time it feels wearable and is warm. A casual staple for a maximalist. The middle photo is from the Maniac M/V which I forgot Seungmin wore this hat in the video. I probably have been wanting this hat for a year and a half without realizing it because I was obsessed with the fashion of the Maniac video in 2022.
The Process
This was not an easy thing to figure out. I referenced photos of Stray Kids members on stage and the actual photos on Loverboy’s site. I made the mistake of including the Amazon knockoff as a reference because the ears are far skinnier. I used the knockoff ears as a guide for my first attempt and finished two ears before realizing they were too narrow. Therefore I cut the knot and frogged my way back to a ball of yarn. Three attempts later I determined the correct ear width. Yes, four attempts. At times this project felt cursed!
I decided to rib knit the ears for two reasons, it was accurate to the original and I would not have to double layer the ears because the tension of the knit would help the ears to lay flat instead of rolling and losing the bunny ear effect. I wanted the ears to have a lightness to them so that they would move with me and even blow in the wind behind me like Lee Know. I have wanted to be a Leebit through this project, maybe that’s why this project was so chaotic.
The hat itself was a different story! This was the easiest process I’ve ever had with the hat and it by far took the least amount of time and fits me quite well. I made note of how wide the pattern was to be able to replicate this style of the hat again in future projects. Possibly another Loverboy hat.
Wrap Up
Overall I’m thrilled with how this turned out! It’s exactly what I was imagining and I am so happy when I wear it. Bunnies are a favorite animal of mine, especially lop-eared rabbits. I like the chaos of the ears and how they drape from the hat crown. I think I will get a lot of wear out of this. I’m looking forward to the cool weather to continue to style this into a look. Because of the reference, it also feels like a piece of merch from the band. I still regret not finding a way to see the Maniac world tour but it just wasn’t the time to go. The Oddinary comeback was my first experience and it remains a favorite for me.
If you have a crazy idea, go for it. You may just make something or make a memory that you will absolutely love. Now I’m going to try to make a mooncake for the first time. Until we meet again.