My Experience with PDF Sewing Patterns

Earlier this year, when I was planning what I wanted to make as additions to my wardrobe I found a brown, I believe it is taffeta fabric, in my stash. I’ve been at a loss of what to do with it since I got it because it’s so different than what I usually sew with, but that’s a good thing! I know it will push me out of my comfort zone with its hue and shiny finish, so I want that garment to be special when I finally make something out of it. I do not want a repeat of the pink scuba pants!

I’ve pondered using it as a lining fabric for my pirate coat, I’ve also considered using it as an underlayer for a sheer fabric I have in my stash, etc. So far nothing felt right, aside from an idea I saw while watching one of my favorite sewing channels on YouTube. She makes fabulous dresses from self-drafted, big four paper patterns, and buys indie PDF sewing patterns that all turn out so lovely, I want to try them all.

So on a whim, I went first to Mood Fabrics’ Sewciety page to see what they had to offer in their free selection and eventually found myself on Etsy, looking at the exact dress pattern she made on a video I was watching. Spontaneously, I clicked purchase on a dress pattern and clicked instant download. A dress, I thought, that would be perfect! I can style it up and down, in heat and in snow, it will be my go-to piece! To quote Lee Corso, not so fast!

It was mighty easy, but also mighty paper-hungry. This was something I was not expecting. You see, as far as PDF patterns go, I knew they required printing, but I always thought it was like 10 pages max. It seemed like something that would be straightforward. You know what I mean? To my surprise, it was 29 pages of just the pattern plus 5 more pages for the instruction and sizing. Um, holy lots of ink!

Yeah, I was not expecting that from my first one. So I looked more closely at the Mood patterns I was browsing to see if those would be any better and I saw another flaw in my plan, the patterns specifically from Mood use a ridiculous amount of yardage. Like a mini dress was calling for 5 yards of 57″ across the fabric. I can make a mini dress in 3 yards or less. Is this just a ploy to sell fabric? Mood Fabrics’ average price is USD 14-18 per yard, multiplied by 5 and it is beginning to be a very expensive project if you follow the fabric suggestions. I have a lot of questions now.

But anyway, I went back to the Etsy PDF pattern and decided to throw caution to the wind and begin printing. And print we did! The gentle hum of the printer slider traveling to and through filled the room, with the chorus of the squeaky paper roller delivering page upon page of freshly printed pattern sections to be cut out and taped, onto the desk. As I sat, staring at the screen, I began to get fidgety. I began to look around the room and stare at my computer screen, eventually perusing the listing again, and I noticed one small potential problem in this plan. As the pattern maker was an American, I thought for sure the sizing would be in US sizes, but alas the numbers on the chart were slightly askew from the standard. And I realized two things I would have to face, comparing the yardage to the pattern and taking my measurements to determine my size.

It was a slip dress, so the 3.5 yards I had available on the opaque fabric seemed like an obvious choice. There certainly would be enough, surely there would be enough, but oh no, there wasn’t. The pattern wanted more. I also grabbed the measuring tape and prepared for battle because no matter how badly I didn’t want to care what those numbers said. Those numbers always intimidate me. So with butterflies in my stomach, I grabbed the tape measure and learned that it wasn’t going to be my weight that would keep me from being able to make this but my literal body proportions. My frame. My long torso. My straight up-and-down waist.

I didn’t fit into any size proportions, none. Going up or going down a size was all off. As the freshly-inked paper kept rolling off the presses I felt stress, uncertainty, and frustration at myself for being such a novice thinking this would be easy!

But why isn’t it simple? When I buy paper patterns from the big four it is simple! When I’ve looked at vintage patterns, yes there is a little bit of knowledge needed to understand the sizing – your measurements – but other than that simple! Was I really going to have to pattern hack or pattern grade specific pieces on this paid-for, already drafted pattern? Was it basically going to be as complicated as making my own from scratch?

In that moment, I was incredibly humbled. Here I was learning to sew, designing my own clothes, I want to turn it into a business with the most logical option seeming to be PDF sewing patterns, but my word, this is a tough product to produce! This is incredibly more difficult than I imagined and I don’t think this is how I want to contribute to fashion space. Because not only do you have to make the pattern, the instructions, and go through testing, but I think on a PDF format, if you don’t have a vast size range or even a curvy or athletic build variation, I don’t think the pattern is being done properly.

I could not make the slip dress pattern work because it was cut for an hourglass shape and I have a straight up and down waist, no matter how skinny I get, it’s never going to fit me properly without alterations to the lines of the dress. That discouraged me. I stopped the printing and chose to call it a mulligan. The same issues with standard sizing hit me like a wall in a place I never expected.

What the answer is, I don’t know. But I do know I think the PDF pattern market may be the same ship different day repackaged in a way that creates more work and potentially less waste? On that, I’m not convinced because it is so much ink and paper. I don’t know. It still felt like a lot of consumption was happening. It’s a shame. I feel like I accomplished nothing in the long run. I believe I’ve found a problem I’d like to address if/when I ever figure out how to make my own patterns. Thankfully there are a lot of creative people in this world who may be developing the solution already. I hope so.

What about you? Have you purchased an indie PDF sewing pattern? Were you pleased? Did you feel like it was easier than buying paper patterns or self-drafting? Thanks again for spending time with me today, dear reader. I hope you have a lovely day. ❤

A Strawberry Dress for 2024

In 2020, the Strawberry Dress by Lirika Matoshi blew up in popularity becoming one of the most iconic garments from the year. It still remains in my head when I think of a strawberry dress, a garment I wish to buy because it is so joyful. But at USD 490 it’s a bit out of the question for my budget at this time. Although I wish, it isn’t going to happen. But it has become an aspirational garment for me as a designer. I hope to make something with the same amount of joy, attention to detail, and iconic statement!

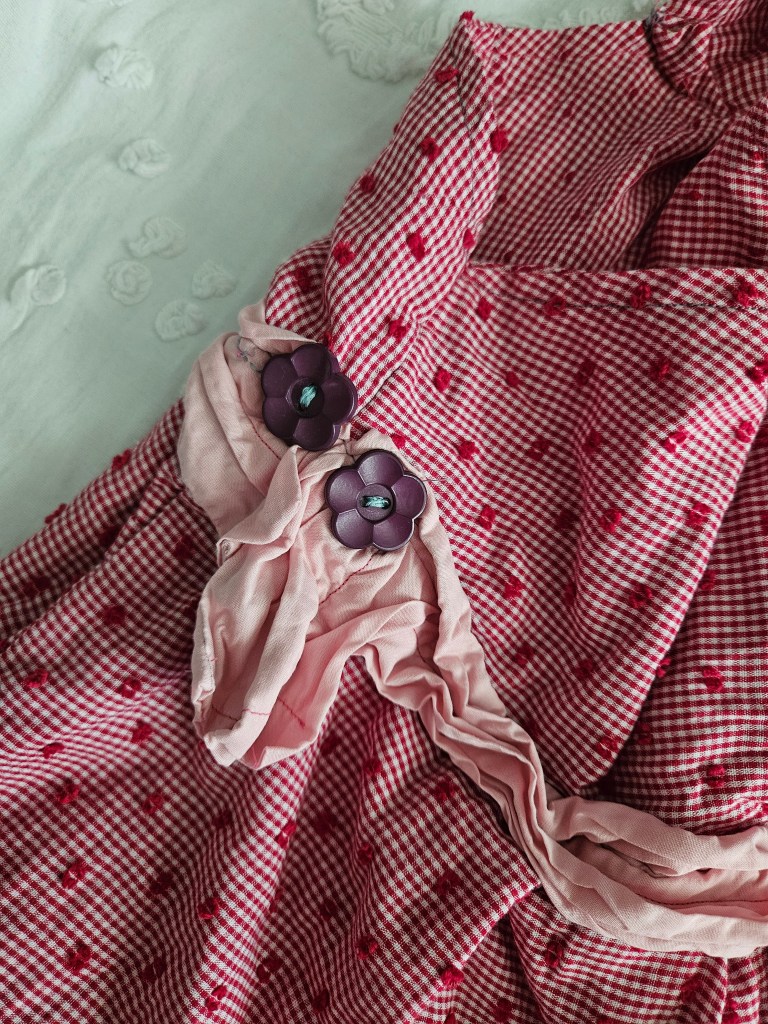
So when I was digging in my fabric stash this winter and found this interesting Swiss dot gingham, light pink trim, and flower buttons I knew one thing I had to make – my own take on a “strawberry” and “Sakura blossom” inspired dress.

Potato Technology: Back to Basics Collection

Almond Ribbed Wrap Top

Materials: 1.5 yards of stretch knit jersey. A remnant cut of fabric. This pattern was self-drafted by draping on myself and adjusting the lines with pen marking. As this was the first garment in this series, there was more trial and error with cutting pieces out of the fabric to reduce waste.

Inspiration: I was inspired by the iconic 1970s wrap dress, designed by Diane Von Furstenburg. I originally planned a wrap dress but scrapped the plan due to a lack of fabric. Because of this, there was probably 1/8 of a yard of fabric left over. With more practice, I’d like to reduce that amount to smaller pieces of scrap leftover.

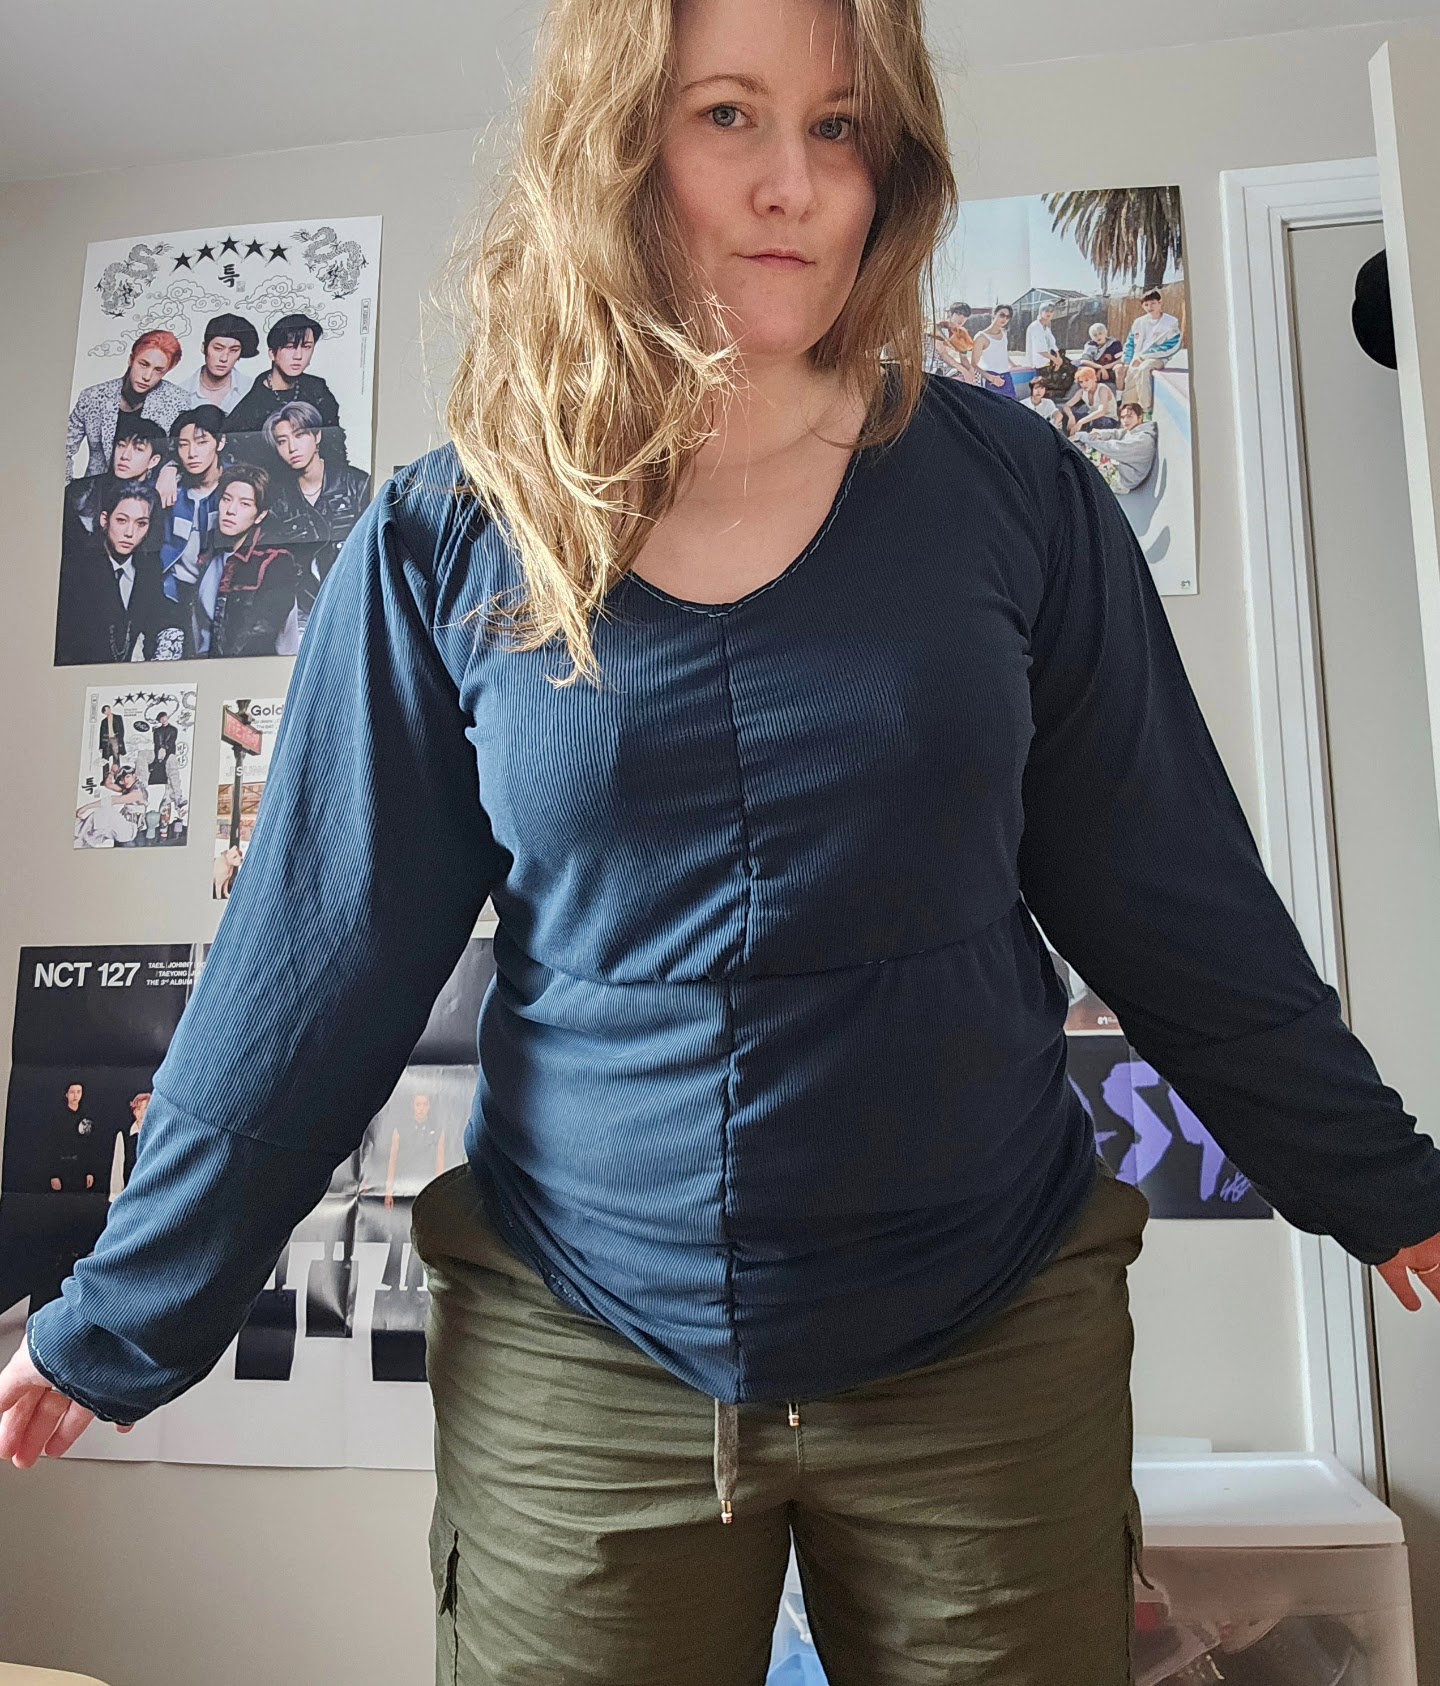
Cherry Henley Ribbed Top

Materials: 2 yards of stretch knit jersey and 6 buttons. It is a heavier weight jersey and feels like a light sweater. This was a remnant cut. I developed my first official bodice pattern from this process.

Inspiration: 1900s men’s buttoned henley baselayer tops from the gold rush era in the United States. Think “old western” dramas, Deadwood, or Red Dead Redemption. I cut it oversized to carry the theme of it being a men’s garment. During the cutting process, I was able to utilize almost all the fabric with only 2-inch scraps being left over.

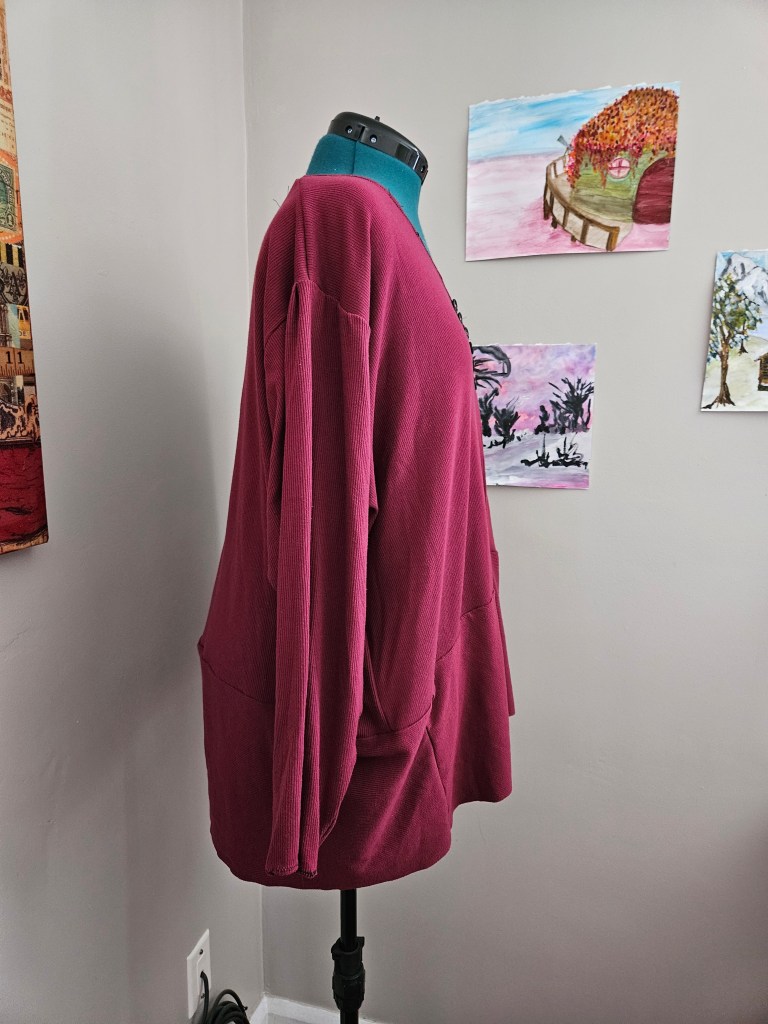
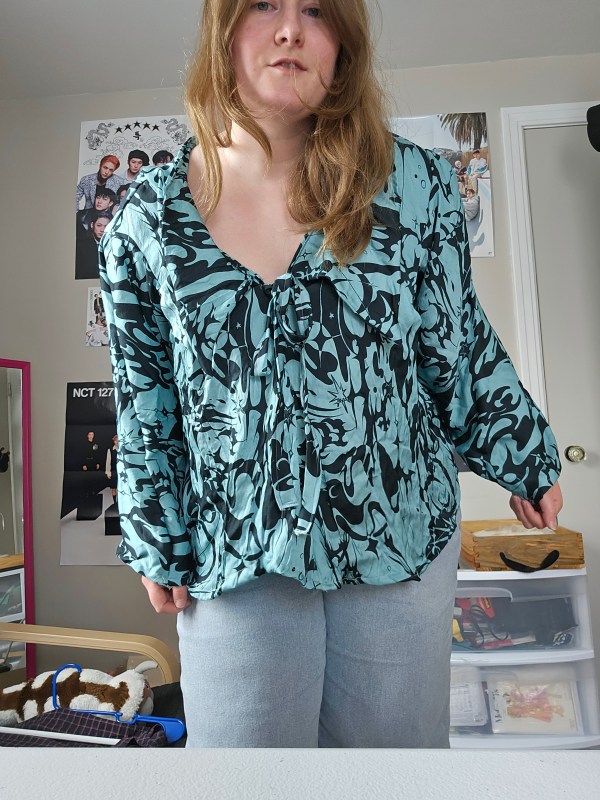
Stormy Seas V-Neck Tunic Top

Materials: 2 yards of stretch knit jersey. To utilize as much of the fabric as possible, I chose to get creative with my pattern cutting. To do this, I pieced together the bottom and portions of the sleeves to use up almost all of the remnant, with 2in or less scrap pieces left over.

Inspiration: I was inspired by the design lines of early medieval tunics. I like the simplicity of the lines and the lengthening effect it has on my proportions. For more information about Viking Age tunics, I recommend checking out Project Broad Axe for historical recreations and additional background on the history of Viking Age tunics.

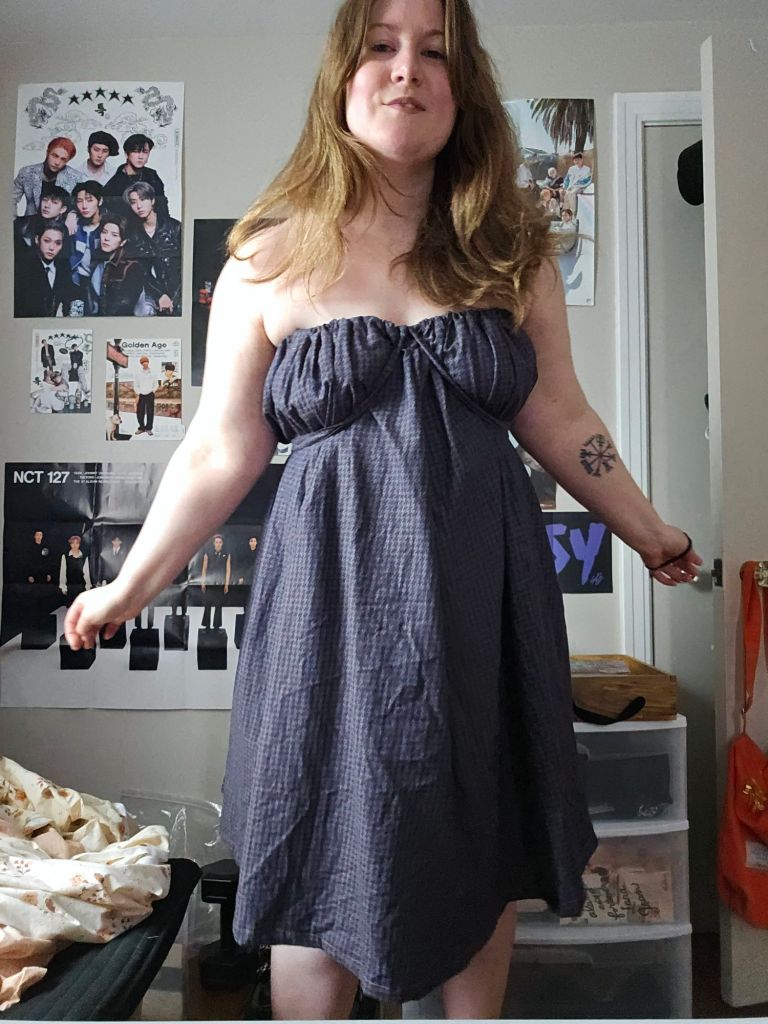
Getting Creative with My Stash: The Black Raspberry Slip Dress

I’ve been challenging myself to be a more frugal sewist this year, using up my stash of fabric and resisting buying fabric that catches my eye. It has been harder than I thought. Mood Fabrics is pretty relentless with its advertisements, Hobby Lobby’s every two-week fabric sale calls, and Joann Fabrics sends me flyers and coupons on the regular, but I had this feeling I needed to be more budget-conscious this year and it is starting to make sense why (more on that later).

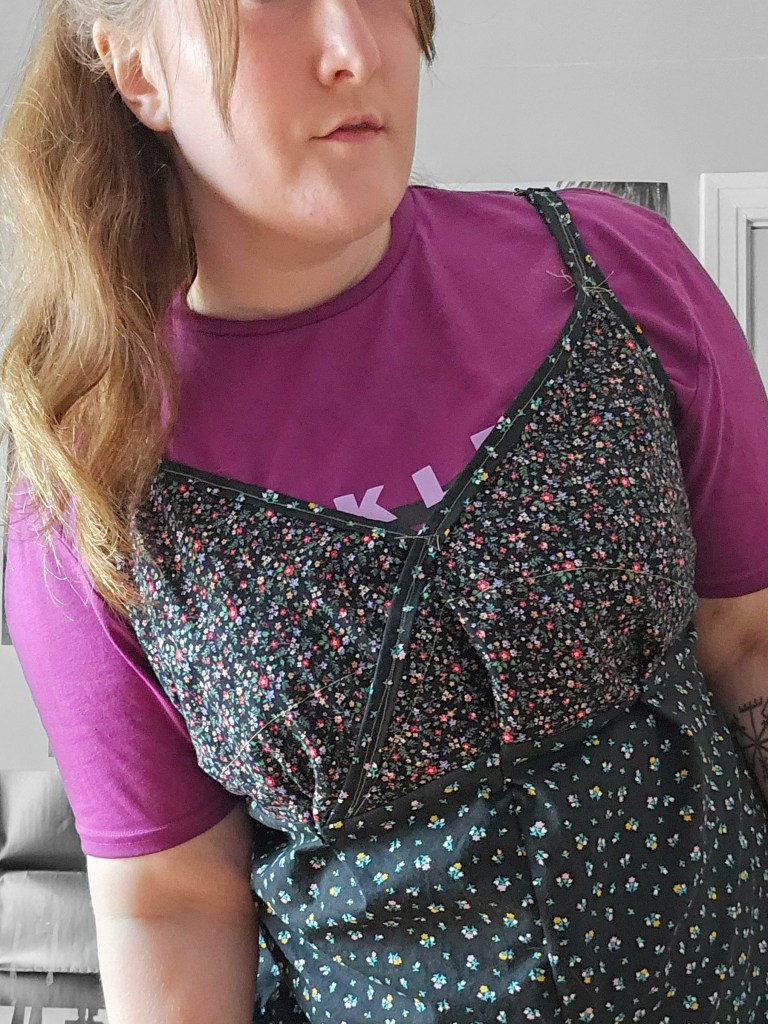
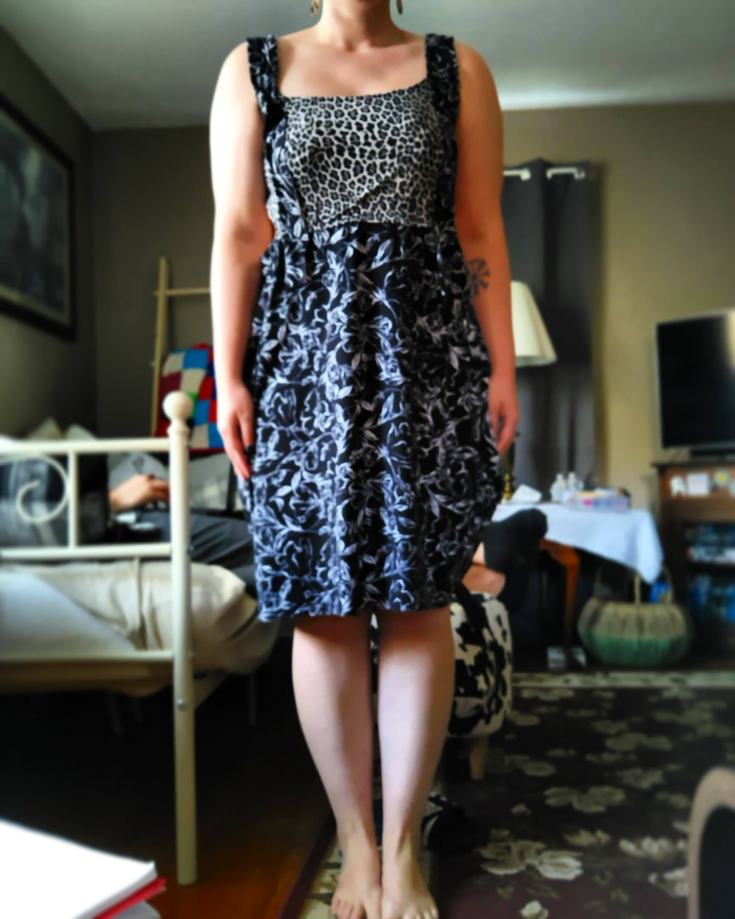
To do this, I rolled up my sleeves and dug into my storage closet, to my Gram’s quilting fabric stash and got creative. These two fabrics spoke to me, but the yardage of the ditzy floral was small maybe a half yard? This is the most frustrating thing about using deadstock fabrics, vintage or remnants, you get the yardage left and that’s that. I wanted to play around with bias tape finishing with a contrast fabric, which I thought the black floral would compliment the ditzy floral. Originally my plan was to make a camisole top, but the more I thought about I questioned if I would wear it and with what? Instead, I pivoted and used the rest of the black floral to lengthen the top into a dress. To keep it cohesive I color-blocked the fabrics – black floral straps, ditzy floral bodice, black floral skirt, and lower ditzy floral skirt.

This was a new style for me, I usually stick to one fabric but this was fun and from this experience, I feel more inspired to design garments from a scrapy style. It opens up a whole crayon box of possibilities for remnants, smaller yardage purchases, pattern mixing, and contrast piping! This is going to be a fun new world!

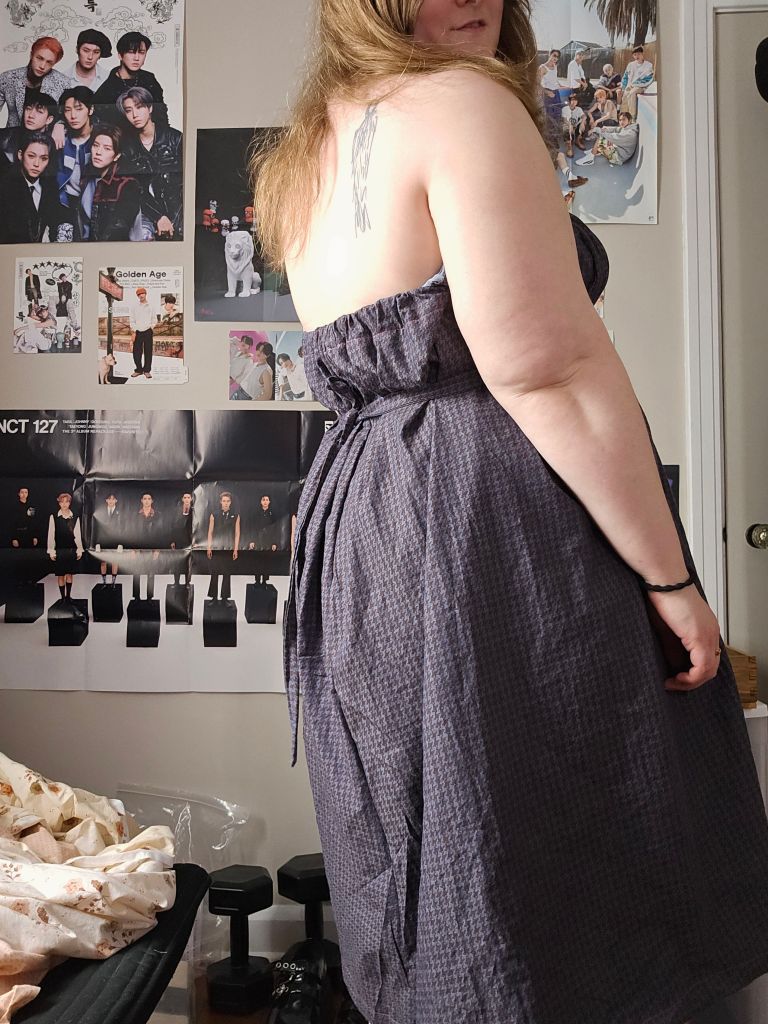
I decided to draft my own pattern for this dress by draping the bodice on the form. I created the straps by joining the pieces of bias tape at the top of the triangle bust piece for a seamless transition and to add strength. I added a side zipper to tailor the garment closer to the body but account for the zero amount of stretch in this fabric. It reminds me of a slip dress but I feel more comfortable in it because it is a cotton fabric. There is more structure and opacity. The dress has a more casual vibe where I can style it with a t-shirt underneath if I desire to.

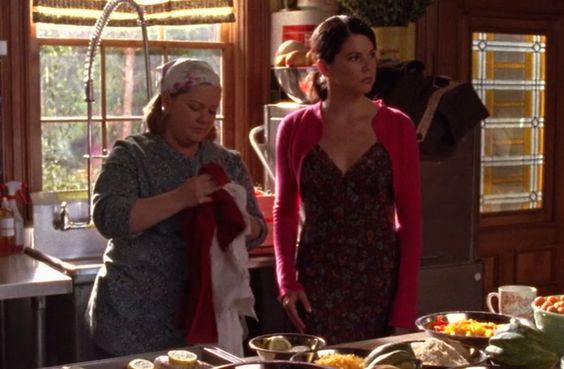
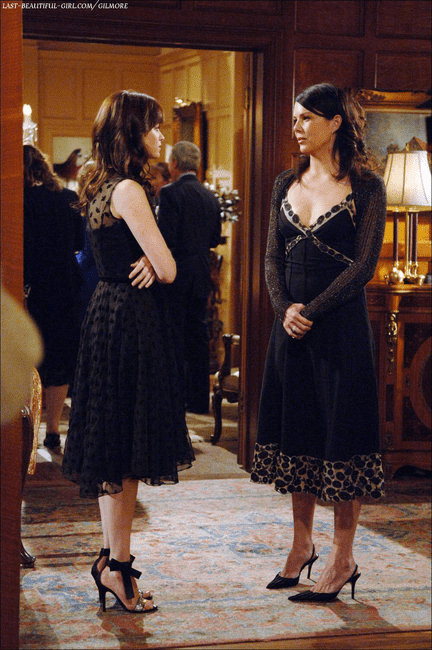
I think subconsciously, I was inspired by Lorelai Gilmore’s dress styling in these episodes. I love her style and I have found that the styles she wears on the show suit my body type and personality more than Rory’s dresses. It’s a dress style I hope to experiment with more by using different fabrics and textures.

Garments I Want to Try Making Again

Two summers ago, in 2022, I tried my hand at making dresses and separates with some mixed results. Some pieces I loved but had fit issues, some were poorly constructed and just fell apart, and some were made with the wrong materials for the project and were doomed to fail from the start. But as a new sewist who is self-taught, it was the only way I was going to learn, by experimenting and making and then doing it all over again.

In 2024, I’ve seen a huge jump in my skill level. I’m beginning to feel comfortable with the craft and I’m wiser about my fabric choices, which makes me think about these former projects. Could I make a better version of them? Have I leveled up my skills enough to do these projects justice and have them in my closet for years to come?

The Blanket Dress

Original Materials: Cotton Flannel, Satin Blanket Edging

Issues: Sleeves fall down and fabric stretches with wear. Not enough structure and bad pattern matching.

2024 Plan: Choose a cotton shirting with more body and keep the plaid pattern or if I stuck with the light cotton flannel, I would add a lining to give structure. Pattern match when cutting out pieces because I can tell I didn’t try at all! Add tie to the back shoulders to keep the sleeves on my shoulders. Add a button placket or zipper to fit the dress to my body better. I would make the bodice even, because I can see how each side of it is a different length.

Will I make this again? Most likely! It is one of my favorite pieces from my early designs.

Amalfi Coast Girl Slip Dress

Original Materials: A very lightweight polyester silk that I found on clearance at Joann Fabrics.

Issues: Very thin, made me paranoid. Being a slip dress I felt uncomfortable, like I forgot to get dressed.

2024 Plan: Lining! I would line this 100% now because that was just silly. I would pick a better fabric though, this one was hot and difficult to sew. I would also fix the bunching in the skirt and fit the bodice better because it looks messy.

Would I make this again? Yes! Potentially this summer if I find the right fabric.

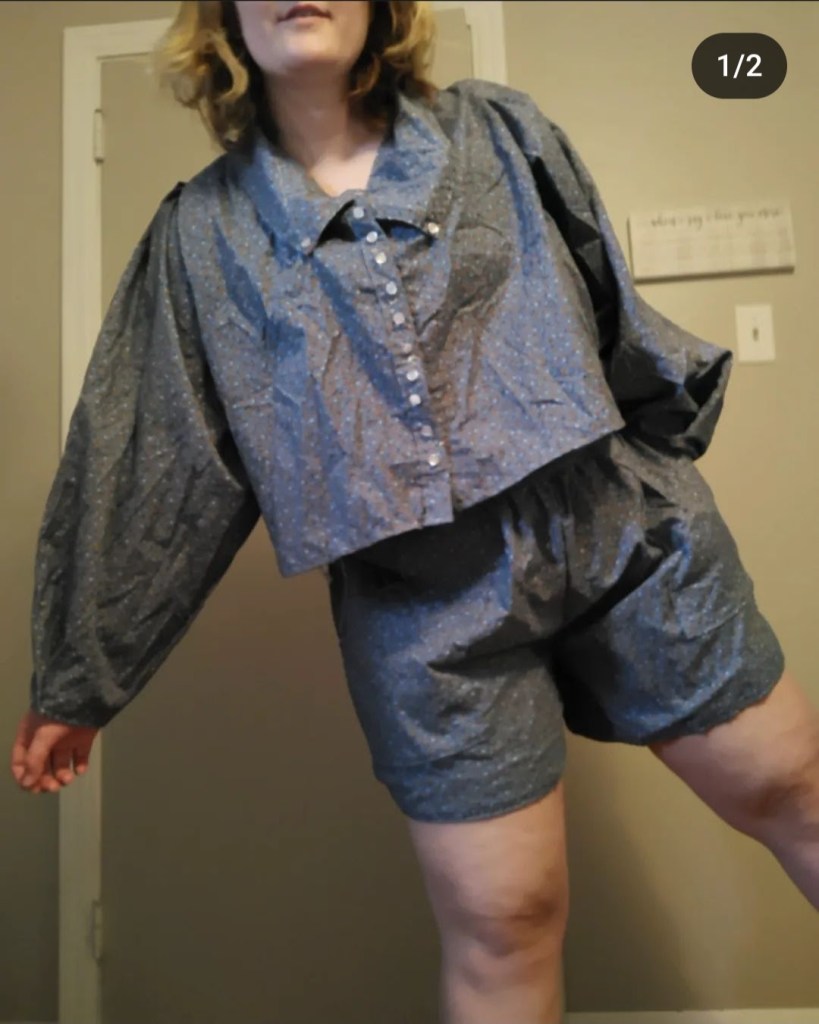
“Linen” Two Piece Set

Original Materials: Vintage Quilting Cotton from my Gram’s stash. Snaps and buttons (because button holes scared me).

Issues: Not real buttons, this was a hassle. The shirt was a bit short and too boxy. The shorts were an absolute mess because I didn’t have a french curve or a proper pattern to make shorts from. The seat was too narrow and the the rise too short, the waist band I didn’t fold over so it provided no structure. A side zip and snaps were an okay closure but they never felt truly secure.

2024: I would buy the cotton gauze fabric or buy linen for the look I wanted. The quilting cotton made this feel like pajamas and it made a little unsure about wearing it out. I would make a proper fitting pair of shorts this time and a real button holes. Other than that, I’m quite pleased with my original idea.

Would I make this again? Yes, it was chic and comfy, if only it had been constructed better I may still have it.

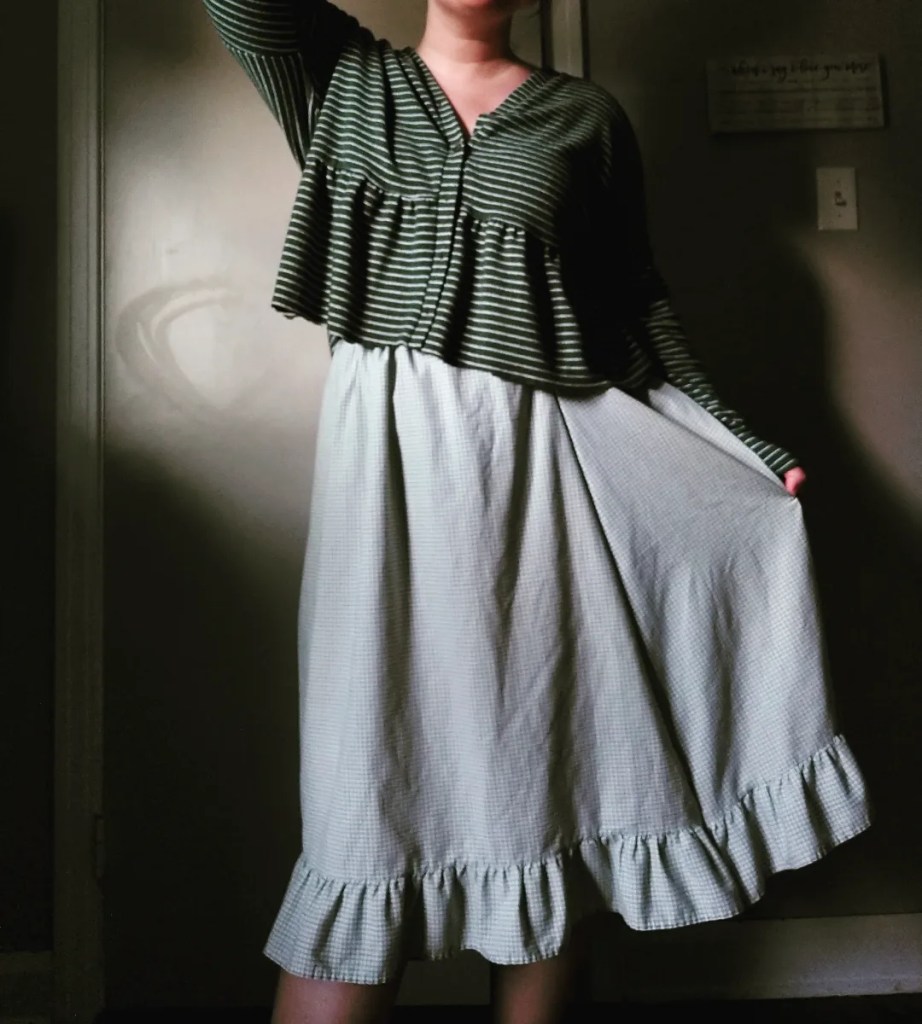
Cropped Cardigan and Ruffle Skirt

Original Materials: Two upcycled pillow cases and a hand-me-down dress I cropped into a cardigan.

Issues: The pillowcase was stained and see through. The cardigan was made from a fast fashion piece that was terrible quality that made it feel weird on the skin. I like the appearance of this look more than I did wearing it.

2024 Plan: Opaque quilting cotton or shirting to feel comfortable. Knit the cardigan in a cotton yarn or a linen yarn to make it versatile for Spring, Summer, and Fall.

Would I make this again? Yes, it’s already on my to do list. I would wear this for so many things.

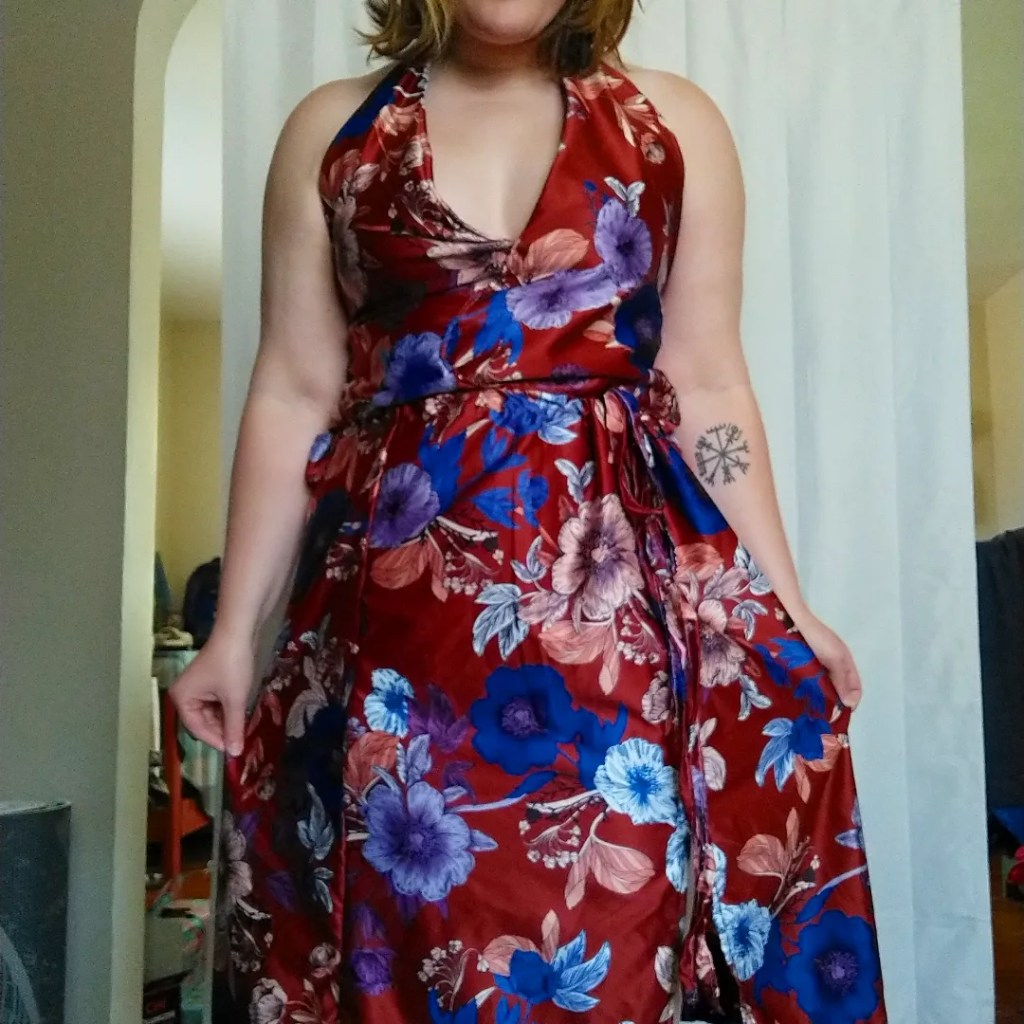
Silk-ish Halter and Wrap Skirt

Original Materials: A satin polyester from Joann Fabrics. Snaps and a tie made from the fabric.

Issues: My halter top gaped, it was poorly draped and did not feel secure at the back snaps or neck snaps. The skirt did not have enough volume. I didn’t feel like myself in it.

2024 Plan: I would properly drape the bodice and add bust cups potentially to the top. I would also not make it a two piece look because I wouldn’t wear the pieces separately. The fabric was nice and I would use something like it again, although I would love for it to not be polyester.

Would I make it again? No, it doesn’t fit into my wardrobe. I would use a similar fabric again for a dress, but not a halter dress.

1990’s Inspired Princess Seam Dress

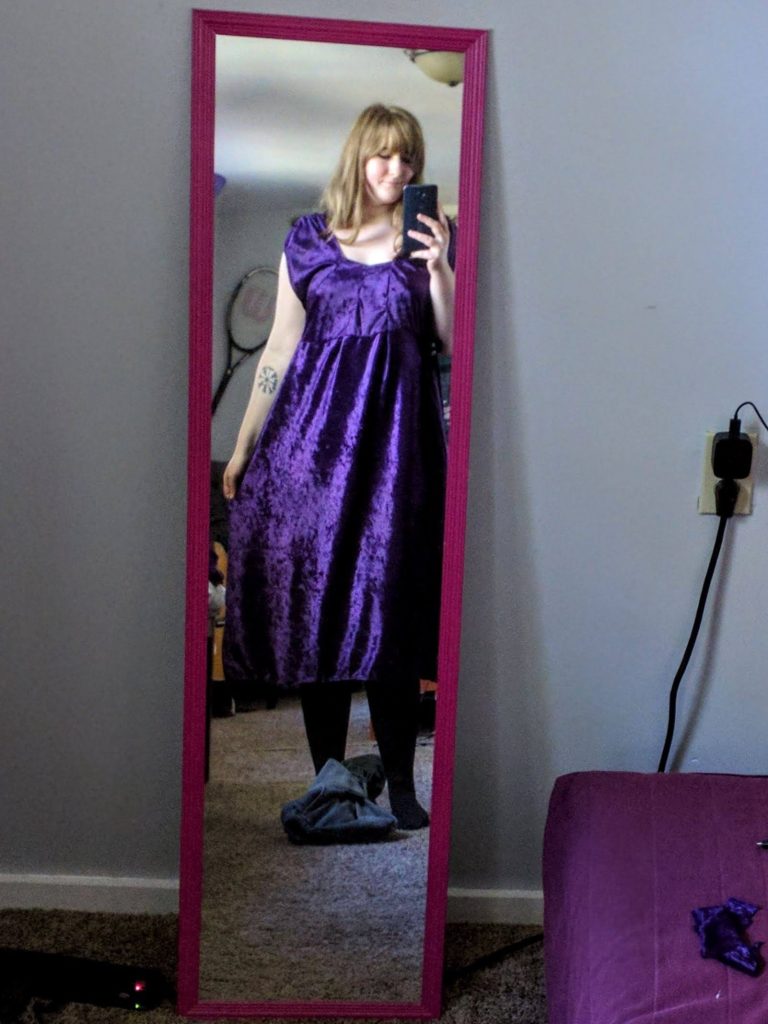
When we were living in Meadville in 2019 and I was getting into thrifting, I found a lovely 1990s dark purple velvet princess seam dress. It was longsleeved and midi length with a scoop neck and stretchy velvet knit that draped lovely from the waist. I could tell from the label it was vintage. It had a different attitude. The dress reminded me of dresses I wore as a kid that were so special yet accessible.

I was thrilled. It was a comfy dress that I would style with lace-up boots, tights or leggings, and a moto jacket. It made me feel special during a period of my life where nothing felt that special. In 2019, I was bored, stuck in a dead-end job, looking for a new purpose, navigating some drama with my dysfunctional family, and getting used to a new city. It was a weird time.

Over the years my body changed and I donated it back but it continued to live in my head, wishing that I had kept it, so much so that the first dress I ever designed was a recreation of the piece which I talked about in #3 – First Sewing Project. Comparing the pieces I made side by side, I can see the growth in my skills and understanding of fabric which makes me pleased to see.

The left dress nailed the color but everything else about it was jacked up. The sleeves were poofy, and the skirt and bodice were draped well but I know the construction was questionable because it was the second item I sewed ever. I think if I can find this fabric again I’d like to recreate it with my current skill set. The dress on the right I cut out with my own drafted pattern piece based on my measurements. I cut it out in two pieces and sewed it with a zig-zag stitch with medium to low tension and tapered the waist with four princess seam darts. I also reinforced the shoulder with a second layer of fabric that anchored the shoulder seam.

I think I’m going to get a lot of wear out of out of my new princess seam dress. I’ve worn this dress over a few days when my local weather shifted from a warm stretch of 70 degrees Fahrenheit to a rainy, cool 50s and 40s. Because this dress is a polyester stretch knit jersey yet is lightweight, it was comfortable on a warm day. Yet when it cooled down I was able to pop on a sweater and found it easy to style with a pair of boots.

With a sweater, this dress looked like a skirt and it has transformed my approach to how I want to wear my clothing. It may seem elemental, but I’ve usually been a pants and top girl in the winter reserving dresses for the summer, but as my style evolves I’m finding that layering and pattern clashing is something I feel most like myself in.

Long story short, my new me-made dress has surpassed my love for the original, thrifted dress. I love the animal print and the fact that this was a remnant fabric from Walmart yet I believe looks like it came from a higher-end fabric store.

I’m excited to continue designing items in this silhouette and utilizing my own paper patterns which has been a huge step in achieving my vision for the garments I make. I’ve also been working in a lot of stretch fabric this year to gain more knowledge and improve my skills to keep growing as a designer. Without the practice and determination to keep going, not to mention patience because mastering any skill takes so much longer than the internet wants us to believe, this would be a different dress. It would not fit me well, it would not be constructed well, it may not have even made it through the sewing process, and would have been scrapped.

That is why practice is so important. And you know what the real big moments are? Not just your successes but being able to look back at the failures, and the mistakes, and see how far you have come. Such as this dress that I made in 2021, which although the design was cute, fell apart because I didn’t understand how to properly construct stretch fabric nor did I understand how to choose the right fabric for a garment for it to be successful. But now I get it and now I understand how to fix it and if I decide to remake it, I could! And that brings me a whole lot of joy!

Using Stretch Fabric and A New Technique

Stretch fabric and I have been at odds since I began sewing. I fight with it during the cutting process. The pins slip out while sewing. I’ve cut on the wrong stretchway and ended up with ill-fitting items and not enough scrap to fix it. My Heavy Duty Singer sewing machine which is named, Señor Senior Singer, tends to eat my flimsy knit fabric and lightweight gauze projects, dragging them underneath to jam the machine, and ripping the fabric in the process!

It’s overall been a losing battle, so much so that I have been wary to purchase stretch fabric unless it is on a ridiculous clearance sale because my patience is shot.

This is literally how I feel when the fabric gets trapped under the needle plate and the only way to jailbreak it is to rip it. It drives me bonkers! Why must it keep eating the nice fabric I cut, pinned, and draped into this beautiful form. Was it done so that you, my sewing machine could devour it like a snack?! I digress.

This is where I had to humble myself, accept that something was missing in my technique, and do some research. It turns out I needed to change my approach, which is progress! I first, took a break from my machine sewing, because we needed some relationship counseling at this point, and returned back to hand sewing. I took an approach that matched the speed of a tortoise, sewing small pieces together each day. Work on it no longer than 90 minutes or give my fingers a break or the tendonitis returns in my knuckles. It was tough to keep myself to this snail’s pace of a schedule. It took a week to sew one shirt. That is incredibly slow, even for me when I was hand sewing, but it allowed me to remember, and appreciate, why my relationship with my sewing machine is important. And why I needed my technique to change because this pace drove me mad.

It turns out the secret fix to my woes was adjusting my tensioner on the machine way down, like below five to a section of the dial I didn’t realize actually existed. I thought this would make my garments flimsy but instead, it allowed my fabric to feed under the needle without getting gobbled up.

Secondly, I needed to begin seams about an inch or two away from the edge and sew from there, backtracking at the end to finish the seam. This allowed the fabric to have a tail that guided it over top of the needle plate as I started sewing instead of getting drug underneath by the needle.

Lastly, Kyle helped me add some structure to my sewing table, by adding support under the middle of the table directly under my machine to keep the machine from vibrating and bouncing my seams into nonsensical shapes. I purchased an anti-vibration mat for my machine to sit up on and a matching anti-slip mat for the pedal to have more control and finesse in my sewing, instead of chasing my pedal with my foot.

It was a night and day difference. Dare I say fun? Yes, it made sewing the stretch fabric and the light flimsy fabric a blast. A quick, neat seam was no problem in my sewing studio now!

Here’s the result of my new-found knowledge – four new properly sewn stretch garments that make me feel properly chuffed! The moral of this story is to not give up but to have a teachable spirit when life throws you some curve balls. There is always room to grow and improve if we are willing to seek out the wisdom.

#48 – Craft Paper

An item that I added to my sewing tools in 2024 is brown craft paper and it has been a game changer! It’s not only transformed my creative process but has helped me create new garments that fit me better with less fabric waste. How cool is that?

Learning is Hardwork

As with every new skill, the first phase of creating is messy and full of flaws, this was my creative process. You have to start and in starting you are an imperfect sewist, fitting and pattern cutting are tricky and this really bothered me to accept. I like getting things right the first time. Learning to accept that this was going to be a journey, was frustrating at first. I have a vision in my head but I can’t always execute the vision at this stage. These things are part of the learning process, like using existing patterns to learn the techniques and accepting that things are going to fit poorly until I can learn to tailor them. Which is happening! With each garment I make, I can see a progression toward the goal, slow and steady but still moving forward.

But there has been a process I did not expect and that is making pieces with my silhouette and my body type in mind, not just my measurements. Things I want to make may not look fantastic on my proportions. That was a time of trial and error in my creative process that I wasn’t expecting because when you go to a store and try on clothing, the design decisions are already made and you only have to decide on which silhouette you would like to choose. But with fashion design, self-drafting patterns in particular, I realized what was going to make me happy was experimentation. Trying a little bit of everything and playing around with different styles to see what I liked and what looked good on my body.

Sometimes just an inch here, a lowered line there, a rise adjustment, or nipping in a shoulder can transform a project from a flop to a success. It’s subtle yet effective and a skill I see you are only capable of learning from experience, either from your own by the process of being self-taught or from the instruction of more skilled designers. It is sculptural, artistic, and honestly sometimes like architecture or construction. It may be fabric and tread but the same principles apply. The foundation is crucial, and the foundation of any garment is the fabric and how you cut it.

Enter the Craft Paper

How do you replicate a project that works? You need a template, a jig, or a blueprint. A pattern. I thought that understanding the dimensions alone would suffice when I am cutting, but there is nothing like having the template to keep my cutlines accurate for curves and hem allowance. It takes the guesswork out of this process which if you are cutting blind is like a chess match with the fabric and your memory of what you have made before. It’s too difficult so I needed to work smarter and make my own pattern pieces out of paper. There were two tops that I had designed that fit me quite well out of a stretch knit and before they were properly sewn together, I took the pins out and traced them onto my craft paper.

Two bodice types – one scoop neck, one v-neck, and one sleeve template. From this inexpensive paper I have found a cipher to make things with more finesse. A tried and true bodice and sleeve that can be used for tops or dresses. A foundation to build upon that has streamlined my making process. You don’t have to be an expert at your craft to make a template, I thought I had to reach mastery before I was worthy to do this, it is simply part of the making process to make things with excellence in mind.

Fix On

I’ve watched a few creators for too long without questioning why “good enough” was their motto. I in turn also fell back on this type of approach to my designs as I learned because learning is hard work. Striving to be better is not fun, it’s maintaining a critical eye and raising your standards for yourself. In this sewing journey of learning and making, instant gratification and impatience are my Achilles heel. I want to do things quickly because everything is done quickly now. I get stuck in that loop of making more, making faster, chasing after goals, and feeling left behind because I am still not selling my patterns or garments, still.

But “good enough” is fine for Youtubers who have an established brand and following, but that’s not going to get me anywhere near my goals of design. I have to continually “fix on” as Mingi says, to the goal ahead and stop paying attention to what others have done to achieve their success. They are already in that space and that is the path their life has taken, I have to find my own thing and continue to work hard.

I’m sharing this to encourage you dear reader to not settle and to challenge yourself to be your own person. I believe that God gave you unique talents and has a plan tailor-made for your life so fight the hive mind of our current world and do the strange thing – work hard, strive for excellence, and be uniquely you! I hope that wherever you are today you remember that you are special, you are loved, and that you have potential for excellence. No matter what has happened in your life and how gray the skies are above you, there is still hope for a future.

Create a website or blog at WordPress.com

Up ↑