Project Runway, I Have Notes

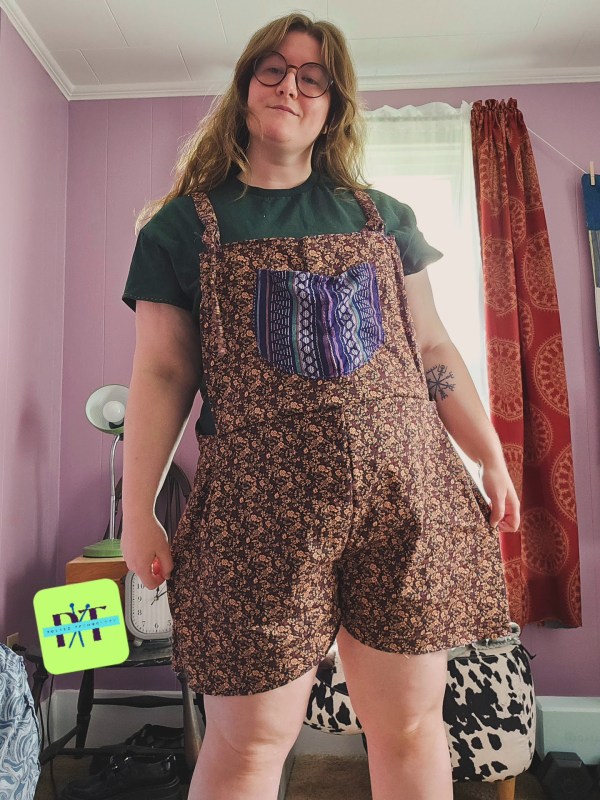
In August, Project Runway returned under a new network and reshuffled the format, hosts, and challenges to make a show I think was actually okay. Compared to where the show was left on Bravo in 2023, I think bringing back Heidi Klum was a good choice compared to the choice of Karlie Kloss, whom I didn’t see as an appropriate casting choice for a role that requires personality and colorfulness. It was boring. So were the new judges. The only new casting decision I was excited about at the time was Christian Siriano, my ult bias from the original show. So what was the good and the not-so-good, in my opinion, of season 21? And how has the show changed, for the better, yet in some ways, become less about fashion? These are my thoughts on my beloved Project Runway in 2025.

The Evolution of Project Runway

The original show premiered on Bravo in 2004 with host Heidi Klum, mentor Tim Gunn, and judges Nina Garcia and Michael Kors. It was filmed in NYC, at Parsons The New School for Design, where Tim was on staff, and the competition culminated in three finalists showing their work at NYFW Bryant Park. This format remained for the first five seasons, season four featuring Christian Siriano, who won his season.

After season 5, the show switched networks to Lifetime, where it remained until season 17. This change for season 6 also changed the location, with the show being filmed in Los Angeles at the FIDM campus until the finale, which was held at NYFW. Season 7 returned to Parsons and NYC, where the show stayed the course until season 11, when Zac Posen replaced Michael Kors. Zac Posen, Nina Garcia, Tim Gunn, and Heidi Klum remained through season 16.

Because of Harvey Swinestein being a producer of the show, and #Metoo movement addressing his depravity, Project Runway changed hands and returned to Bravo for season 17, sans the original cast. Karlie Kloss was the new Heidi, Christian Siriano the new Tim, and the judges were swapped for Elaine Welteroth and Brandon Maxwell.

The show remained this way through season 20, until the show changed again, switching to Freeform as its network, returning Heidi Klum to the host position, retaining Christian Siriano as mentor, and returning Nina Garcia to judge, with a new addition of Law Roach as the second judge. It’s a lot of change.

The Three Fashion Musketeers

When Project Runway moved back to Bravo in 2019, it was not the only fashion competition show in the American market; Netflix launched Next in Fashion for two seasons. Finally, Tim Gunn and Heidi Klum launched their own show on Amazon Prime, called Making the Cut, which was the equivalent of the original trio of Top Gear UK launching The Grand Tour on Amazon.

In my memory, from watching these three shows, Project Runway felt like a shell, undercut by Making the Cut, but losing the carefree fun of what Next in Fashion captured with hosts Alexa Chung and Tan France. All this change made me question what was the purpose of these shows anymore? With the rise of fast fashion and social media, it seemed like a relic. I could watch fashion design content on YouTube with varying points of view, to decide for myself what I thought was good fashion. Why would I care about the judges or the magazines anymore?

Project Runway in 2025

So now, six years later, what did the new Project Runway feel like? To be honest, it doesn’t have its own identity anymore, in my opinion. This could easily be RuPaul’s Drag Race with the amount of drama they packed into these episodes. The original format of challenge, runway, judging, and elimination was gone. Now you find out who goes home next week, which was unnecessary for me. I am tuning in each week, don’t make me have to, I want to, so just tell me who goes home so that the point of the show doesn’t seem like it’s an MTV reality show. It was hard to remember what challenge they were judging from last week. In some ways, I didn’t care; I just wanted the new challenge to be presented.

The contestants fought a lot, with Jesus and Veejay being a near constant. It was too much, and that leads me into one of my biggest gripes with the new season of the show. The editing was off. When Veejay was announced as the season 21 winner, I was confused. The final two eliminations before the finale were also edited strangely, because each time it seemed as though they were not going to keep Veejay, the judges’ critiques reflected this, and so it created this uncomfortable tension for the final three episodes, where it seemed like they were keeping Veejay in the competition so that she would become the first trans winner because of all the fighting.

That frustrated me because Veejay was doing good work, but then why make it seem like she was at the bottom, if the judges saw her work in high regard? It was really awkward. So was the out-of-control arguing between Veejay and the Estrada brothers, which I think the producers wrongfully kept in for a toxic series of episodes that is problematic, and I thought was manipulative. I wish for everyone’s sake that they would have paused the competition in a Tim Gunn fashion to unify the contestants again, because I liked this group of people. I can see where Jesus was coming from, and I can understand how bullying from the past can bring up past hurt, like Veejay expressed.

This is where the show shifted for me into a trash television show, such as Teen Mom, The Challenge, Real Housewives, or Keeping up with the Kardashians. Finally, the omission of NYFW for a quick 6-piece collection immediately after filming the bulk of the show felt lame. Every collection for me was a letdown, and this was the production’s fault once again. 8 out of 9 challenges were one-day challenges, so every other day, they were creating a brand new garment; it’s a recipe for burnout and mediocrity. The final runway show was like a fart instead of a spectacle of creativity, and it was underwhelming.

I hope they get a bigger budget for season 22 because the show has captured its thing again, but the finale and shift to the focus on drama over scenes from the workroom was a poor choice in my opinion. When I think of good reality competitions that have carried on throughout the decades, Survivor and Great British Baking Show are great examples that I may dive into in a part two.

Have you ever watched Project Runway? Did you think it was about planes? That’s what I first thought when I heard about the show in the mid-2000s.

I Am My Own Crafting Worst Enemy

This is an unplanned part three of my “Drafting Shortalls From Scratch” because I did not succeed in making my overalls for winter. Although I have made shortalls twice this summer, a few silly, but very human mistakes, led to the project going awry. This is what I think went wrong:

  • Flew too close to the sun when tailoring
  • Planning < No Plan
  • Lack of Focus
  • Measure Once, Cuss Twice
  • I kinda hate sewing when it feels this hard
  • Putting too much pressure on myself
  • Not Buying Enough Fabric
  • Not Mocking Up
  • Not using my Patterns when I’m stuck
  • Research the Basics

It’s so easy to think we’ve got this and be too confident when going into a project. With knitting, this approach of fearlessness had led to some great projects, but with sewing, this artistic type of approach crashes and burns. Sewing is fabrication, as weird as that sounds. I think I was prepared to sew such complex tailoring projects, such as my shortalls, this summer, because I spent the spring building a screened-in porch with Kyle. Woodworking is very similar to sewing, I learned! It is about measuring, planning, creating things in a specific order, and constructing something that is built to last. When we started working on the porch, I never imagined how much it would teach me about garment construction. But it gave me a template to focus on. Who knew that woodworking would be such an inspirational experience for me?

So why am I sharing this? I am really struggling to accept that sewing is not coming easily to me; no matter how much I practice, it continues to challenge me. I’d like to invite you to join me in not giving up on those things in our lives that are hard.

Part Two: Sewing Overalls Step by Step

I’ve been looking at how to make a custom overalls pattern, based on drafting techniques, which I began with this post: Drafting Shortalls from Scratch. But how to construct them? Well, that’s what I plan to explore today! To do this, yesterday, I cut out another pair of overalls, this time for the fall-winter-spring season, to retrace my steps.

Step One

With your pieces cut out according to your measurements, you should have four leg pieces – two front and two back. The next two bib pieces should be cut out, with the back piece cut a bit differently to accommodate the straps. This is to anchor the straps at the middle of your shoulders to keep the overalls securely on your frame.

Step Two

I like to begin with the pants or shorts portion of an overall project, because they are foundational to the silhouette. I like to pin the leg pieces together to try on before sewing. Remember to leave several inches of the outer thigh seams pinned for the flies and buttons.

Once you know that the pieces will fit, with seam allowance accounted for, I begin sewing the leg pieces together, leaving out the crotch seam and the top part of the inseam, to attach the two pieces as one pair of pants. After these have been sewn together and I have tried them on, I will move on to the bib.

Step Three

For less bulk, I like to cut the seams of the crotch portion and leg seams that will join together, with pinking shears, to make my hems less thick. This lets the sewing machine, or your hand sewing needle, pass through the seam with ease, and is more comfortable to wear.

How do you join pants? Well, you leave the top of the inseam open so that those two inseams will line up together, making the two legs join at the top where the pelvis is. Remember this is a bifurcated garment, so you want your final shape to be two tubes, joined to make one tube at the top. I’ve messed this up several times; it’s okay even if you sew it wrong the first thousand times. That is what mockups and seam rippers are for!

Step Four

For the bib of these overalls pictured above, they were cut into short pieces, so I just had to join these pieces together. I added a facing to the inside of the bibs, which is just a piece of the fabric’s right side facing inside, so that the bibs are finished cleaner around the neckline.

I inserted the straps between the facing and the bib for a clean and secure stitch. The straps were finished with a loop on either side of the front bib to tie around, instead of the metal fastenings. I was inspired by Lucy and Yak Dungarees.

Step Five

The final touches are the bias tape, the side buttons, and the five pockets. I find the bias tape the most mundane thing; therefore, I choose to do that next, which is a 1-2″ ribbon of the fabric used to finish the raw edges still exposed on the sides.

Step Six

Next, I created the flies on either side by folding over the fabric to make the button placket and button hole placket. This was planned out when I cut out the overalls. After making the button holes and finishing them with either the machine or by hand, I mark out on the other side where the holes overlap to mark for buttons.

Step Seven

Finally, I sew the pockets. I chose a large, half-rounded bib pocket on the front, two smaller rectangle pockets on the backside, and medium side pockets sewn across the hip. Next? Enjoy your creation and feel a sense of accomplishment. You did something hard, and probably felt lost at times, but you persevered to learn a new skill. It’s not cringeworthy to try. So go for it! ❤

Drafting Shortalls from Scratch

Did you know, that through simple measurements,  reference photos, and a few tools, you can draft your own clothes? Not just a t-shirt or a circle skirt, but big projects!

That’s how I have made some of my most ambitious projects, no patterns required!

What is Pattern Drafting?

A pattern can be easily made with a tape measure, pencil, and the key places to measure. For my overalls, I was most concerned with the width of the bib, the length of the rise from the top of the bib to the crotch curve, the width of the hip from the center of your body to the end of your hip. You can also measure the circumference of your hips but I think having separate measurments for the front of the pants compared to the back of the pants. The back is usually wider.

For the overalls, I worked in four pieces. Front left, front right, back right, and back left. To do this I marked out the front left and front right on the fabric, accounting for the crotch seam which is part of the leg. I added a 2-3 inches to the width of the hip measurement of each of the four pieces to make the curve with my french curve.

When planning pants, keep in mind that you don’t need as much inseam as you think to make shorts. What you will need is a long rise because you can always cut more, so be cautious and double check the measurments of your rise.

Now for the bib, the top portion of the overalls, I plotted the width of the bib above the pants portion and with pencil I carefully drew a tapered curve upward. I cut this extra long to have excess fabric to fold over to make the facing. This fabric is like a lining for the top of the bib, the part you are most likely to see.

Always use pencil or a tailors chalk and take your time. Using a mock up fabric is a great idea to get the cut right. After repeating this for both front pieces, remember to adjust the width of the hip for the seat of your pants, all while remembering to account for the french curve line of the inseam.

After cutting all for pieces you will need to set aside fabric for pockets, I added 5 to mine. A bib pocket, two side-front pockets, and two back pockets. You will need fabric for the straps, measure accordingly based on the height of the bib, over your shoulder and to the back bib, remembering to add more length to tie.

Next is scrap scavenging! You will need small pieces for the loops to tie the straps around on the front bib. This will call for two loops. You will also need bias tape sized pieces to finish the edges of the overalls on the bib. Finally, save some fabric for the button flies on either side of the overall legs to help you get in and out of the garment.

It’s a lot of information to sift through but I hope this small tutorial will help you sew overalls if you wish with free instructions. I will be following up with a second post that explains the order of operation, to make sense of all these pieces, to help these fabric pieces transform into a wearable garment you can enjoy!

Upcycling Pillowcases into a Vest and Skirt

What if the clothing we wear is more than just a garment, but connects us to the fibers of our being?

What if a pillowcase, from a loved one no longer here with you, could be more than just an item cluttering your closet? How could you repurpose it so the memories can walk with you in the new days ahead. All while the smell of their laundry detergent, and their home, so distinct to your senses, that being near it makes you feel comfort.

That is what this project is to me. More than an upcycle, or a thrifty hack, but a way to process feelings. Find a way forward. So the things left behind, that remind of what is missing, can do more than drown us in memory and stuff, but become a tangible way of healing.

#73 – Welcome, Again!

A lot has changed in the 2 years since this blog was launched, and I thought, it might be time to update my introduction.

In 2023, my plan was to finding a new landing place for me to explore writing again, after Muirin Project, my blog from 2016-2019. I wanted to showcase my novel, catalog my knitting and sewing journey, journal my bible study, and share my love for creative expression in many artistic mediums.

Now I have added some new things to the mix – Japanese learning, Kpop, garment workers/conscious consumption, and most excitingly: gardening! Which welcomed my husband to the site to share his experiences with gardening and bring awareness to why natural ecosystems, seed saving, and eating local matter. He is also preparing to share his other favorite hobby – woodworking.

Now, for something I question – should I change the site name? I am uncertain for SEO purposes and the likelihood of broken links. I don’t think it is wise. But this site is so much more than just my work, it is the harmonizing voices of myself and Kyle which is how I think the world becomes a better place – working together. Let’s keep the honmoon sealed. ❤

Can I Make Mid-Size Overalls from 1 Yard of Fabric?

Do you ever think of something you’ve accomplished and wonder if you could do it even smaller? Well, I set a challenge for myself. A year ago, I wrote about creating a summer dress with a button-front from less than 1.5 yards of fabric. That post inspired this one, as this summer I was able to squeak out a pair of shortalls (overall shorts) from a yard of 59″ stretch twill from Mood Fabrics. This was not my first overall attempt, but I think my most ambitious because this yardage was for a pair of shorts with some abundant pockets, but I changed my mind after seeing a variety of overalls styled for spring and summer. I’ve owned this style before in denim. My favorite version I’ve purchased was a pair of vintage ’90s denim shortalls that were baggy and breathable for those swampy summer days. The more fitted versions I’ve found in stores in recent years are not my cup of tea, because for me, overalls are best when they are oversized.

When I cut these overalls out, I had just completed my draft of an overalls pattern from 2 yards of 44″ cotton twill from Kokka Fabrics, and I was itching to make more without fabric shopping, so I went for a dig in my fabric/yarn closet. It’s more of an antique clothing press, to be fair. This is where I found my gold – 1 yard of 59″ across cotton twill in a fun pattern, sturdy enough for a bottom weight garment with just enough fabric to cut the shorts, the bib, the straps. That was all I could muster for sure. I set aside the project and got to work on my Kokka Fabric project, which taught me so many things about sewing overalls that I had overlooked in past attempts.

Firstly, the back bib is not a rectangle. Secondly, a facing for the bib makes the project feel more professional. Thirdly, the buttons on the side need to be properly assembled with the fly for the right stability. Finishing the edges with twill tape made from the project’s fabric helped create a crisp look. Fourth, the overalls need pockets in order for the garment to sit well on the body. Lastly, I did not accomplish these with my 1-yard of fabric overalls. I took some shortcuts.

I ran out of fabric for the pockets, the fly, and the twill tape. To remedy this, I kept the shape to a romper style and less of a traditional overall. The bib is rectangular on both the front and back. The pockets were added from a previous project; I upcycled shorts into pockets. The side does not have any fastening, instead I sewed up the seam and let the boxy cut of the shorts and stretch of the fabric help me compensate for my lack of fabric.

So if this project is a pair of overalls that is not a traditional overall, but more of a romper, why am I writing about this?

Well, because the finished product is a wonderfully comfortable garment, practical for many things – gardening, sewing, cooking, knitting, farmers market, apple picking, cleaning, walking in the woods, going to the beach, etc – and I made it without being an expert. I made this garment through hand sewing, so you don’t even need a sewing machine if it’s out of your current budget. I purchased this fabric on sale for 10 USD/yard. I used less than a spool of thread, and repurposed the pockets from an item in my closet that I didn’t want to wear anymore. Have you seen the price of overalls? They are expensive, even the short version. A low-quality version will still set you back 30 USD.

I made these with 10 USD of fabric for a midsize frame, so this is accessible to all of us, not just the slim people. A lot of popular and cheap DIYs on the internet are made for very small bodies, which makes me nervous that if I try it, it will be expensive, but this wasn’t. Making these overalls was incredibly rewarding, too. These aren’t even the best pair I’ve made this summer, I’ll share the other ones soon! But these ones will have a special place in my heart because they are unique, comfortable, and made with my own hands. So if you have an idea of how you could make something by hand, make it happen! It’s a lot easier than you think, a great learning experience, and there are tons of resources here online to help you succeed!

Flannel Upcycling | Making A Vest

Last summer, I wanted to introduce vests into my wardrobe. I have made vests before for Kyle, but have not sewn a vest for myself before; I have knit them. Because this was a spontaneous idea, I needed to be budget-conscious and find a way to use what I had to make a vest. So I went to my closet and got creative! I had a few flannels in my closet that were hanging there, waiting for me to wear them, but I didn’t. That’s when I looked at the shirts closely – there was a button placket, shoulder yoke, and a sturdy fabric, with room to crop them. I saw the vest within the shirt, so I grabbed my scissors—and was a bit too zealous with the first one! Don’t be like me, have a plan. So how did I make this upcycle work? And what did I learn from my failed attempt?

Shoulder Seams, Yoke, and Waist Length

The crucial points of cutting, I would say, are being aware of the shoulder seams, accounting for the back yoke width, and properly measuring your waist length for a proper fit.

  • Shoulder seams on a flannel are boxy and loose. To achieve the set-in sleeve opening that accentuates and reveals the shirt underneath, you need to cut away the shoulder line – but not too much. Be mindful of how far into the shoulder you plan to cut, so that you are left with a proportional line.
  • The shoulder yoke is a technique used to tailor the shoulder line, while leaving the fabric below the shoulder loose. As a result, there will be more fabric on the back of the vest, which may affect the fit of the arm openings and possibly require a dart to remedy the loose fabric. If not, the back will gape open, looking awkward and like a mistake. A vest should hug the body, be tailored, or else the upcycle will look exactly like you cut up a flannel.
  • The length of the vest determines the style and balance of an outfit. One of my vests I cut too short, and this limits how I can wear it. I find it cuts me off in a regency high-waisted fashion that is fine when I wear it with a high-waisted skirt, but with pants or my linen Darcy shirt, it’s awkward. The other vest was cropped, in a careful fashion, ending at my hip and balancing my body line like a well-tailored garment. It’s far more versatile.
  • Cutting the neckline is crucial. For the front, a tapered cut to the button placket provides the classic look. Be careful not to cut too low for a historical silhouette. Also, remember not to cut the back the same as the front! I made this mistake and had to sew the cut portion back into my vest. This should be a crew neck line, straight across, with a slight dip in the middle for comfort.

Why a Flannel Shirt?

I chose flannel shirts as my medium to work with for three specific reasons. The first one I already mentioned – cost. We had just moved into our house and paid quarterly taxes. The vests were not a necessity, just a whim, so it made sense to me to take an existing item, I didn’t wear to create something I would wear. It’s funny how the sustainable option is sometimes the free option too. Secondly, flannel is a sturdy fabric, appropriate for the structure of the vest, that could be sewn without the addition of a lining, which I could add later if I wished, when I was more comfortable spending money on fabric. Thirdly, flannel is a classic pattern that reminded me of the woven woolen coating fabrics that vests have been sewn with for centuries, so it was a good match! I hope this inspires you to repurpose items you have to make something new! For the rest of the flannel, the pieces I cut away, like the sleeves, stay tuned to see what I did with those. It’s one of my favorite makes. 🙂

Designing Clothing That Fluctuates With You

This is inspired by a discussion from Maybe Bre, which made me reflect on something I hadn’t discussed before. As well as my own experience wearing clothing, as a garden-variety human who loves fashion but doesn’t always enjoy how our clothing is made.

By this, I mean the patterns and fastening of our modern times. The zipper is a wonderful thing, and so is the structured waistband. I love them in jeans because denim that isn’t compromised by stretch is a rugged and sturdy garment that isn’t a piece that conforms to you; your body is housed within the trousers. I feel the same way about a structured coat. In doing so, I buy these pieces oversized for comfort, which leaves me with a garment that most of the time doesn’t technically fit me. If I did buy it to fit me right now, there is no guarantee that over many decades it would continue to fit me – I’ve been burned before by this problem. Hence, all my “staple, investment pieces” from college no longer live in my closet because they are no longer my size. If I had planned ahead and bought them a bit oversized, they might still be with me, but they wouldn’t have “fit” me at the time.

My problem with clothing is becoming clear, isn’t it? I desire longevity and wearability from clothing, in a way that is not offered off the rack. I desire my clothes to grow and shrink with me, depending on how my body changes over time. This has been my design focus in the last few years as I have placed myself in the driver’s seat of my wardrobe through the process of sewing and knitting.

My idea is not innovative; it is historical. Clothing, because it was so expensive and hard to make, was more adaptable in the past. Fastenings such as tie waist, lacing, and buttons with multiple sizes of tightness were common because clothing was not as easy or cheap, and they were not seen as disposable or replaceable. Changing fashions came with garment reworks, ye olde upcycling as it were. This is what I desire: the ability to change the fit of my garment.

I recently figured out how to sew with elastic, which is a game-changer for shorts and gathered sleeve hems! Before this, though, I was making most of my bottomweight garments with tie waists or several options of buttons to let the garment adjust to the needs of the day, I’ve also sewed with intentional relaxed fit, initially due to a lack of tailoring skill but over time it has been to allow wiggle room in pieces I have spent days or weeks of my life crafting.

Being present in the making process has taught me to treat my clothing with more respect, even when it is time to discard the current version of it for something more useful. I’ve stopped donating as much, decluttering, and rebuying, to be honest, to be more intentional with the garment and its life cycle. I am the one who brought it to life, I can’t simply consume and discard it like it is nothing. I am deprogramming my brain from decades of fast fashion insanity.

I believe if clothing were made with this design philosophy, that clothing would fluctuate with you over time, I believe we would enjoy wearing our clothing more because instead of buying stretch fabric everything, we could still wear good natural fibers, maybe a bit bulkier than spandex and less figure hugging and lurex denim, but would be better for the humans and the planet. Style and substance, as they say on the Great British Baking Show!

Will I Wear a Knit T-Shirt?

I asked myself this question last summer with genuine uncertainty. Knitting is such a cold-weather medium that a knit made to be breathable and light for warm weather seemed, well, a bit like an impractical fashion piece. I think this is an important question to ask of ourselves before we jump on a trend. Whether it is to buy a knit t-shirt or to handknit (which means you are dedicating weeks of work to a project), having the right expectation matters. Trying on a knit t-shirt beforehand helped me visualize what I was in for. Knitwear for all seasons is currently having a moment even in ready-to-wear, which makes this a great time to go try on a piece before committing to a big project.

Wearing my Grandma’s cotton knit t-shirts, although they were two sizes too small, helped me visualize knit as a process to make a fabric instead of a woolly winter garment. That’s what makes knitting and crochet extraordinary skills; they are versatile. The fiber maketh the project. The stitch maketh the airflow. Lacey, open weave? Fantastic for hot and humid days. Not so much for a pair of mittens. 

To remedy this, I think fiber acquaintance is a fantastic way to learn whether a knit t-shirt is right for you. When I began knitting in 2012, I knew there was wool yarn and acrylic yarn. That was it. However, there is actually a rainbow of fiber waiting to be discovered, and the lineup sure has expanded in the last 13 years!

Cotton

Linen

Bamboo

Hemp

Pineapple

Lyocell

Rayon

Yak

Alpaca

Camel

Mohair

Cashmere

Silk

Did you know that wool has two unique properties? It helps you regulate temperature and is naturally antibacterial/antimicrobial; therefore, it inhibits bacterial growth naturally on the fiber and prevents odors, which is why it is such a great sock material! Although I wouldn’t recommend wool for summer tops, it is a remarkable fiber. There are two fibers, though, that are breathable and naturally don’t let bacteria and microbes hang around – it’s linen and silk! For fiber education and the chance to feel these materials, I recommend finding a friendly local yarn shop and talking to the experts.

Finally, I do have one possible hiccup with my current selection of hand-knit t-shirts. I can’t wear them in 85 degrees Fahrenheit weather and above with humidity, but I do believe a knit tank would fix this problem, and a lacey stitch technique in future projects will solve this. I don’t like sweating a lot in my handknits, and because I was learning with my first few tees, the knitted cotton fabric is a bit bulky. That’s my error. You know what is so cool about knitting, though? You can unravel the finished garments and try again, so I can rework these finished garments in the future. Anyway, I hope you will consider the knit t-shirt as a warm weather staple in your wardrobe, it’s a lovely way to use crochet and knitting all year round!

Create a website or blog at WordPress.com

Up ↑