Pivot! An Important Sewing Skill

Okay, as a millennial, I can’t hear the word pivot without thinking of this scene from Friends. But, silliness aside, Ross was correct; you have to pivot and pivot well. The longer I sew, the more agitated I get when I make foolish cutting or measuring mistakes in my garments. Like my shortalls from last year, I tried them on over the weekend because it is feeling warm and springlike here, and I was shocked by how poorly I fit the shorts. The top portion of the shorts fits excellently, but not the shorts. No one wants weird bunching when it comes to shorts, and that was exactly the problem!

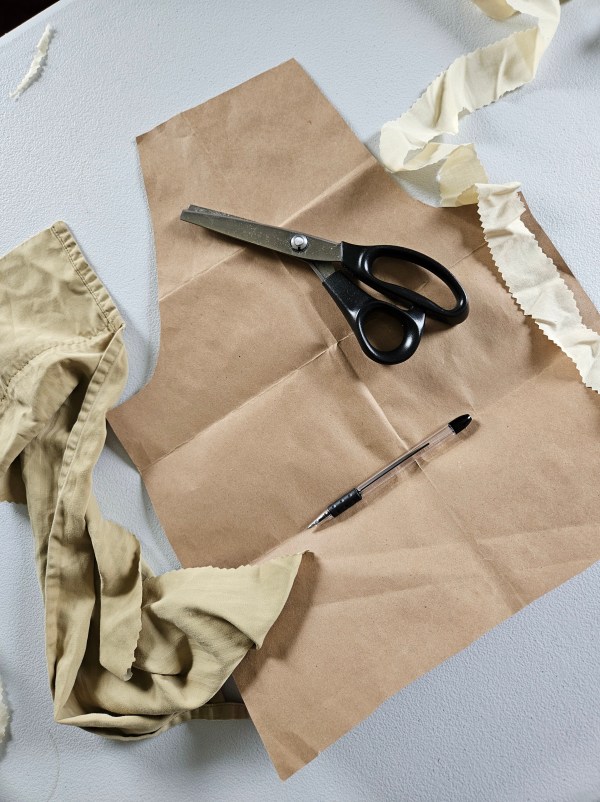
At first, I went through the stages of grief – denial, anger, bargaining, depression, and finally acceptance that no matter how delusional I chose to be, these shortalls are uncomfortable. I would not wear them. This made me feel so many regrets. The pink overalls I drafted completely from scratch, using a special fabric featuring corgis and bread from a Japanese fabric brand called Kokka Fabric, sourced from my local fabric shop, Firecracker Fabrics. The second pair was cobbled together as a challenge of fabric and repurposing. The fabric was 1 yard of 59″ cotton twill from Mood Fabrics, and the pockets were sourced from a pair of shorts in my closet. I refused to scrap these. But what could I do to fix these? With all the patterns at play, adding in a new fabric sounded scary. Cutting these into bags or future quilting projects was throwing in the towel too soon for me.

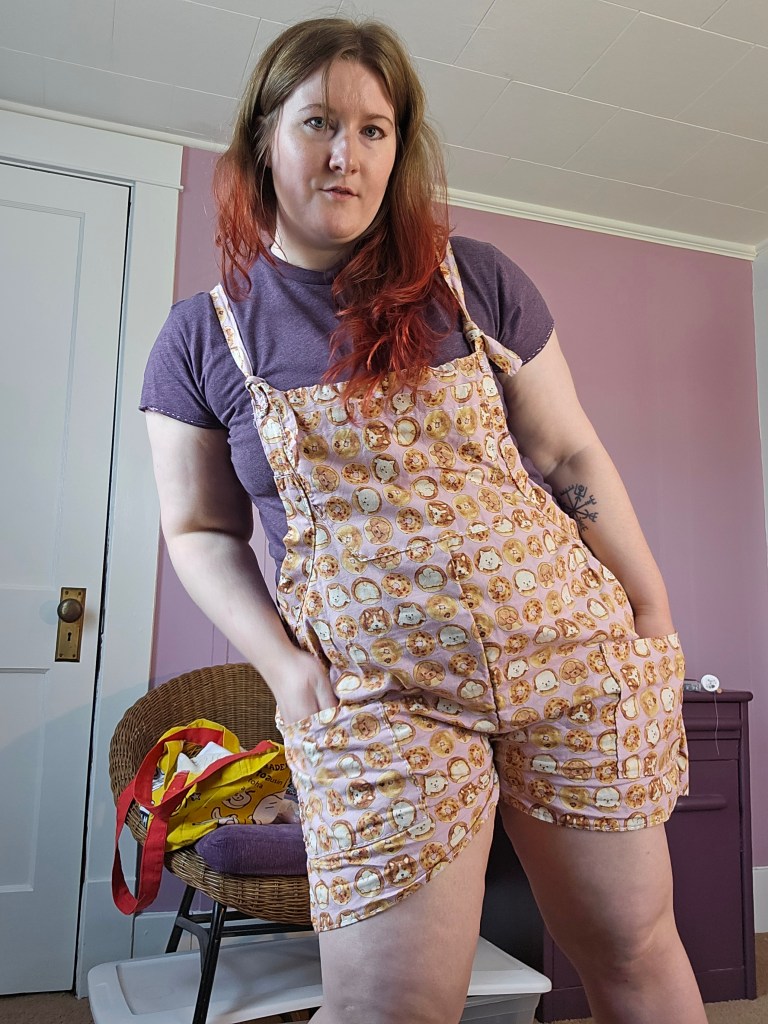
My solution came to me one night, as I was washing my face; I didn’t have to make a drastic change. I had to address the problem – the way I cut the curve of the pants. I could remove the section that divided the fabric into legs, and transform the shortalls into pinafore dresses with a few cuts and stitches! It was a success! The shorts are now a skirt, by cutting away the curved line and sewing a straight seam on the back and front of the skirt. I also made a quick swap to the back bib of the brown floral pair, adjusting the square bib to the triangle shape of the pink ones. This adjusted the fit of the dress in an excellent way. The purpose of the triangle, I believe, from the fit change on my garment is to eliminate gapping between your shirt and the back bib, so the fit follows the line of your body.

Now, sewing is not the only place to pivot, obviously. Problem-solving is a fundamental part of the creative process. Projects rarely work out the way you want, from knitting to cooking to building a piece of furniture. In this fast fashion, consume and donate, culture poisoning my country’s culture, we are losing the art of problem-solving. This has been exacerbated by the rise of AI and ChatGPT. Why think at all? Why imagine, ponder, or research? Why try if you aren’t going to get “expert” results? That is what the rise of optimization culture is creating: the fear of trying. But you have to try to become an expert. AI is not an expert; it is a thief, stealing the knowledge of humans who have spent years and decades striving to know, unafraid to try and fail. It’s literally the scientific method. So if you are an impressionable person, who is growing up in this current era, don’t give up your creative ability for AI to do it for you. You will lose crucial thinking and creative skills if you don’t exercise your mind and problem-solve on your own. Just do it.

A Simple Denim Upcycling Project for Beginners

What do we do when an item of clothing doesn’t fit? Rehoming is always a good idea, but here is another one – upcycling. What if you could transform that garment into another garment you will wear? Here’s an easy upcycle using one pair of jeans.

The Process

To begin, I cut off the legs of the denim above the knee. This was important. To hem the denim to the same length, including the excess fabric needed to fold over for a waistband, the leg section needed to be longer than what was cropped.

I carefully cut open the side seams, avoiding both the pocket and the rivets. The belt loops were set aside for later.

I then cut the leg pieces to the proper width, adjusting the fit with try ons, before sewing. The top of the section was hemmed for a waistband and the bottom hemmed with the rest of the short.

I sewed this very carefully with my machine. I did break a needle but, it happens just use caution and wear glasses to protect those eyeballs. Always know where your fingers are too when using a sewing machine.

Next I repaired the worn denim around the belt loops and attached the cut off belt loops to a new section and tada: you have a new pair of shorts for summer!

Sewing Stretch Fabric Struggles

Do you ever spend time learning a skill just to forget it when you need to use it? That’s me. That’s how I sew stretch fabric on my machine. I just jump in and completely forget that I need to first properly adjust the tension and stitch type or else mayhem ensues. Mayhem like my machine having a nice little snack on my fabric.

Sometimes the machine gets extra bold and drags the hem under into the bobbin’s domain, jamming the machine. This is what I am talking about:

In the moment of panic, when I realize the fabric is stuck down in the machine a few thoughts dance through my mind.

  • Why didn’t you sew this by hand?!
  • You did it, you finally broke the machine you maniac!!
  • It’s ripped to shreds, isn’t it? The whole project might be gone in a moment.
  • This machine hates me. How do other people sew so effortlessly??

But it’s not the machine’s fault and it’s not the fabric that caused this, and it’s not even my fault. It’s morally neutral, it’s an accident and a learning experience to grow from!

As I was writing this, I caught myself crafting sentences to describe the situation with very negative and demeaning language towards myself for making a simple mistake. (A mistake that once I freed the fabric from the machine, I corrected and carried on to make the finished garment. The tight thread tension actually made a happy accident, a lettuce edge hem.)

It is not something that I should hold with such severity against myself that I internally tell myself I am an idiot, a lousy sewist, or useless.

Because how would I respond to hearing someone say that to another person? I would be disappointed in the speaker and make them stop.

How would I respond if I spoke with such aggression to another person? I would be ashamed.

I am learning through these sewing setbacks to temper the internal monologue and be a more gentle and loving person towards myself, to maintain better mental health, and establish the practice in my mind so that I can be a source of gentleness and kindness to others.

How do you speak towards yourself and others when they make a mistake?

How to Make Curved Seams Lay Flat

When I first heard of making small snipping cuts into the curves of seams for necklines and arm openings, I thought this was a bunch of nonsense. An extra step that only overachieving sewing people do. But once I gave it a try – there was night and day difference with how non-stretch fabrics draped against the form. The comfort and fit has been a level up to professional feeling. It’s totally worth it and I can’t believe I was stubbornly against putting the extra effort in. Looking back, there were definitely projects I made that I didn’t like because the neckline and arm openings fit wonky. If only I had tried this weird sounding hack.

In the curve of seams, make a very small cut in the seam allowance, not the actual part of the seam you are going to sew. For structural integrity that’s important. You don’t want your seam to have a cut or it will rip. The cuts in the seam allowance give the illusion of stretch and help the non-stretch fabric curve without warping the line of the curve. It creates shape without bulk and proper fit. The quality of a garment, I’m learning is not the fabric quality alone, it’s the planning and care put into the construction. Proper pattern cutting can make or break the fit of the look you are going for.

Create a website or blog at WordPress.com

Up ↑