To continue my 2024 yarn stash-busting, I got a little creative with my process. I present this little mint-colored star! I’m so proud of her. I made this intending to make multiple stars to decorate my new noise-canceling headphones.
I didn’t have high hopes when I started this project because well, I don’t see many small objects being created through knit, it’s usually crochet. But I decided to give the technique a go, why not?
It turned out to be a fun little project that gives me joy each time I look at it. To start, I cast on one stitch, next row expand to two, next three, then four, and onto five. I knit another row of five and began reducing. I reduced one stitch on each row until I was back to one. Time to cast off.
You are left with a diamond. I made four more of these diamonds. Next, it was time to sew them together into a star shape. I joined the ends at the center and anchored the edges together to make the star. I repeated the entire process until I had two stars.
Finally, I sewed them together, with the sewing sides on the inside, and finished sides out. It actually worked! It even looked like my crochet reference photo!
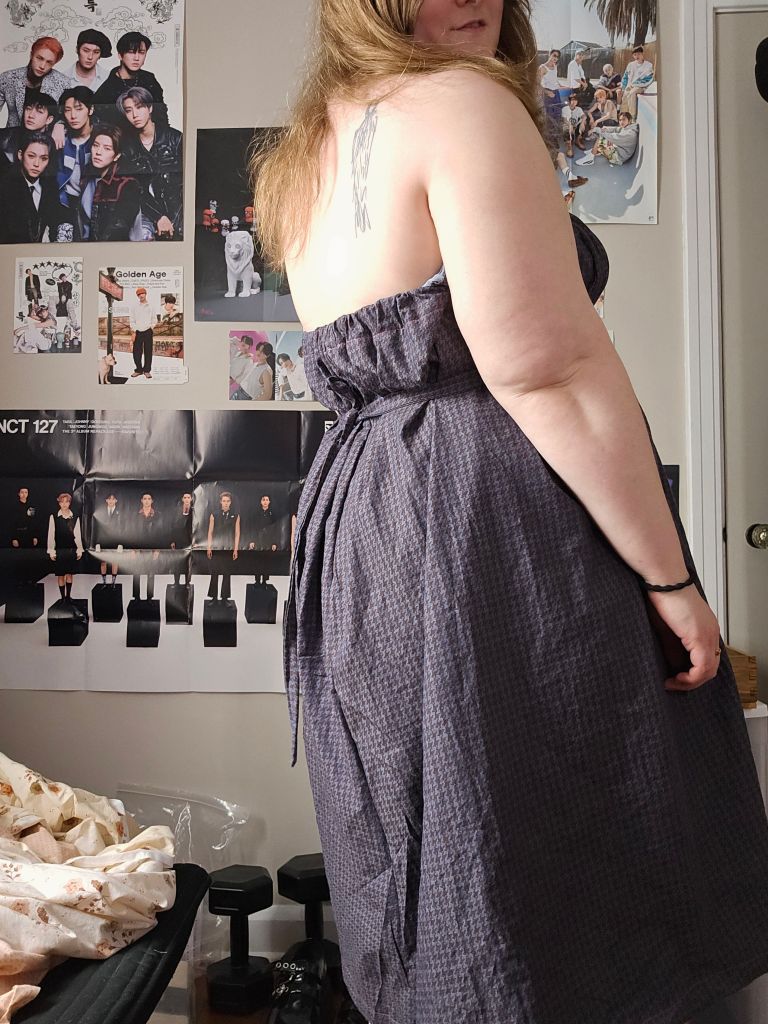
I’ve been challenging myself to be a more frugal sewist this year, using up my stash of fabric and resisting buying fabric that catches my eye. It has been harder than I thought. Mood Fabrics is pretty relentless with its advertisements, Hobby Lobby’s every two-week fabric sale calls, and Joann Fabrics sends me flyers and coupons on the regular, but I had this feeling I needed to be more budget-conscious this year and it is starting to make sense why (more on that later).
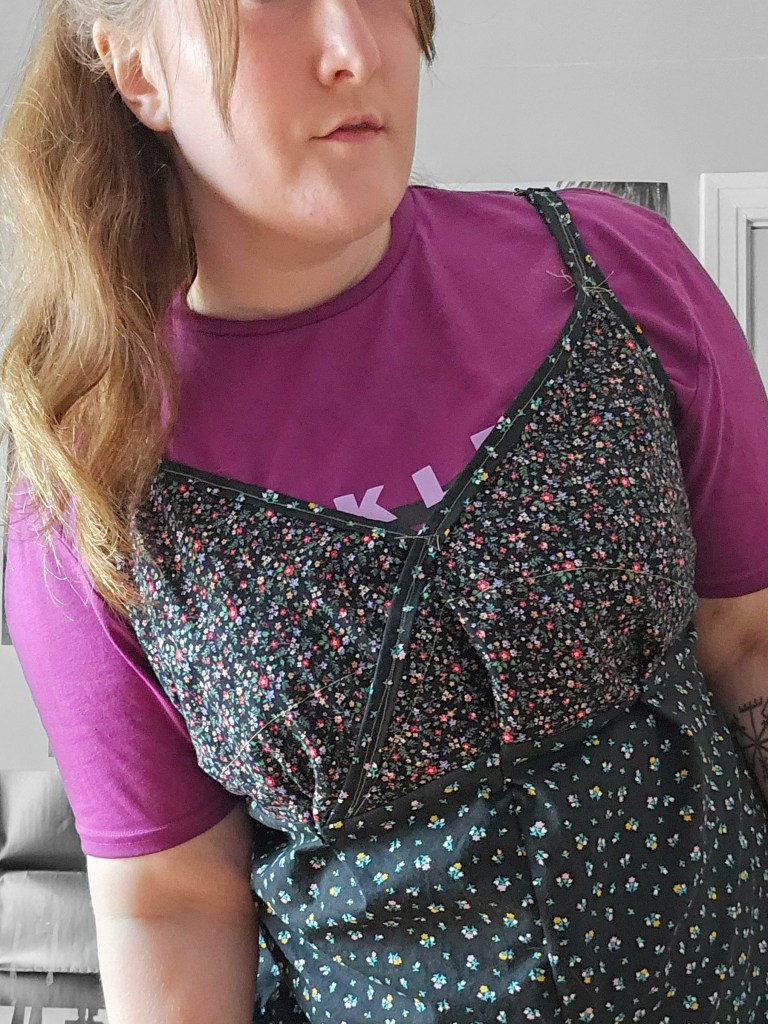
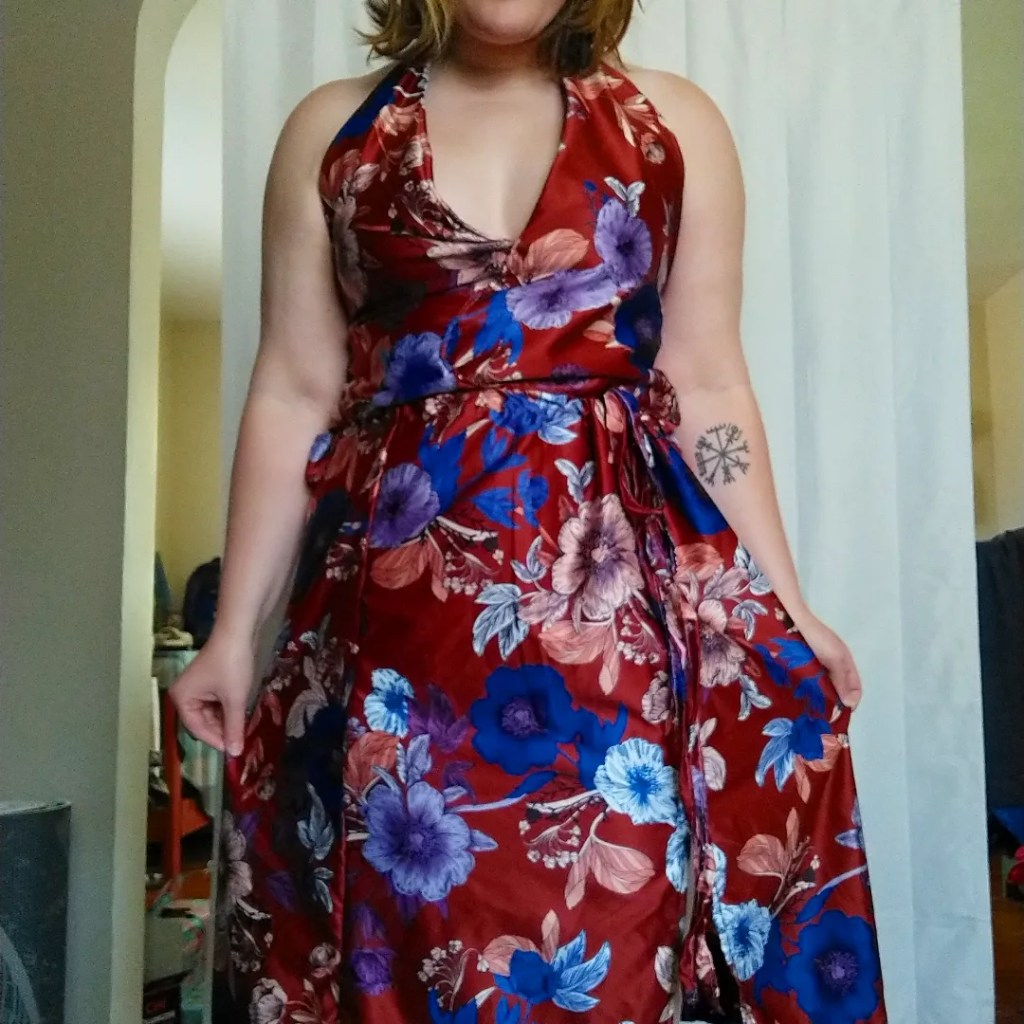
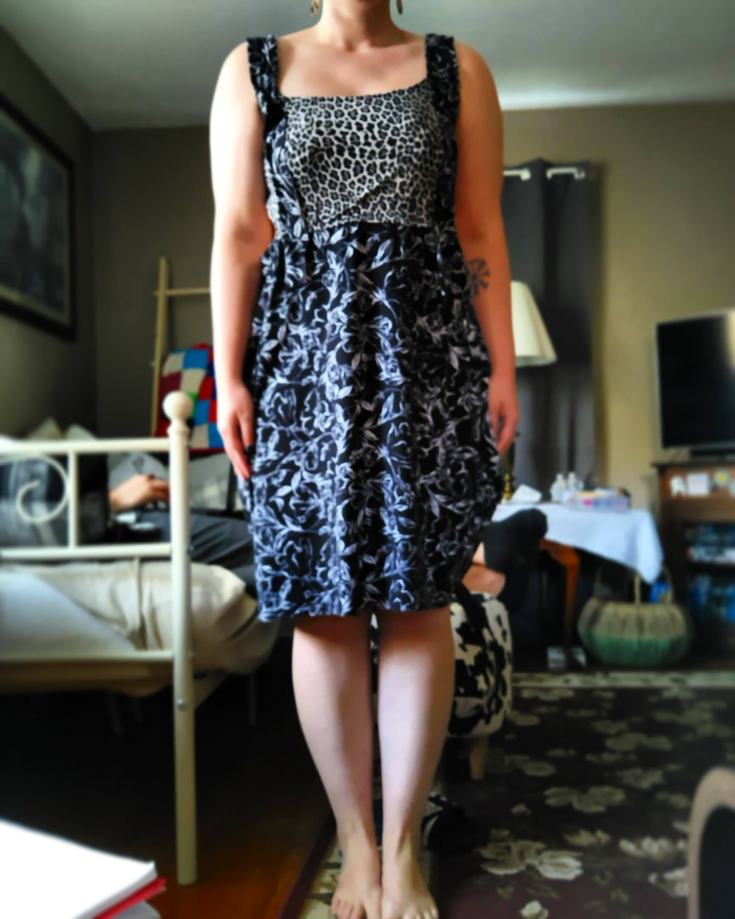
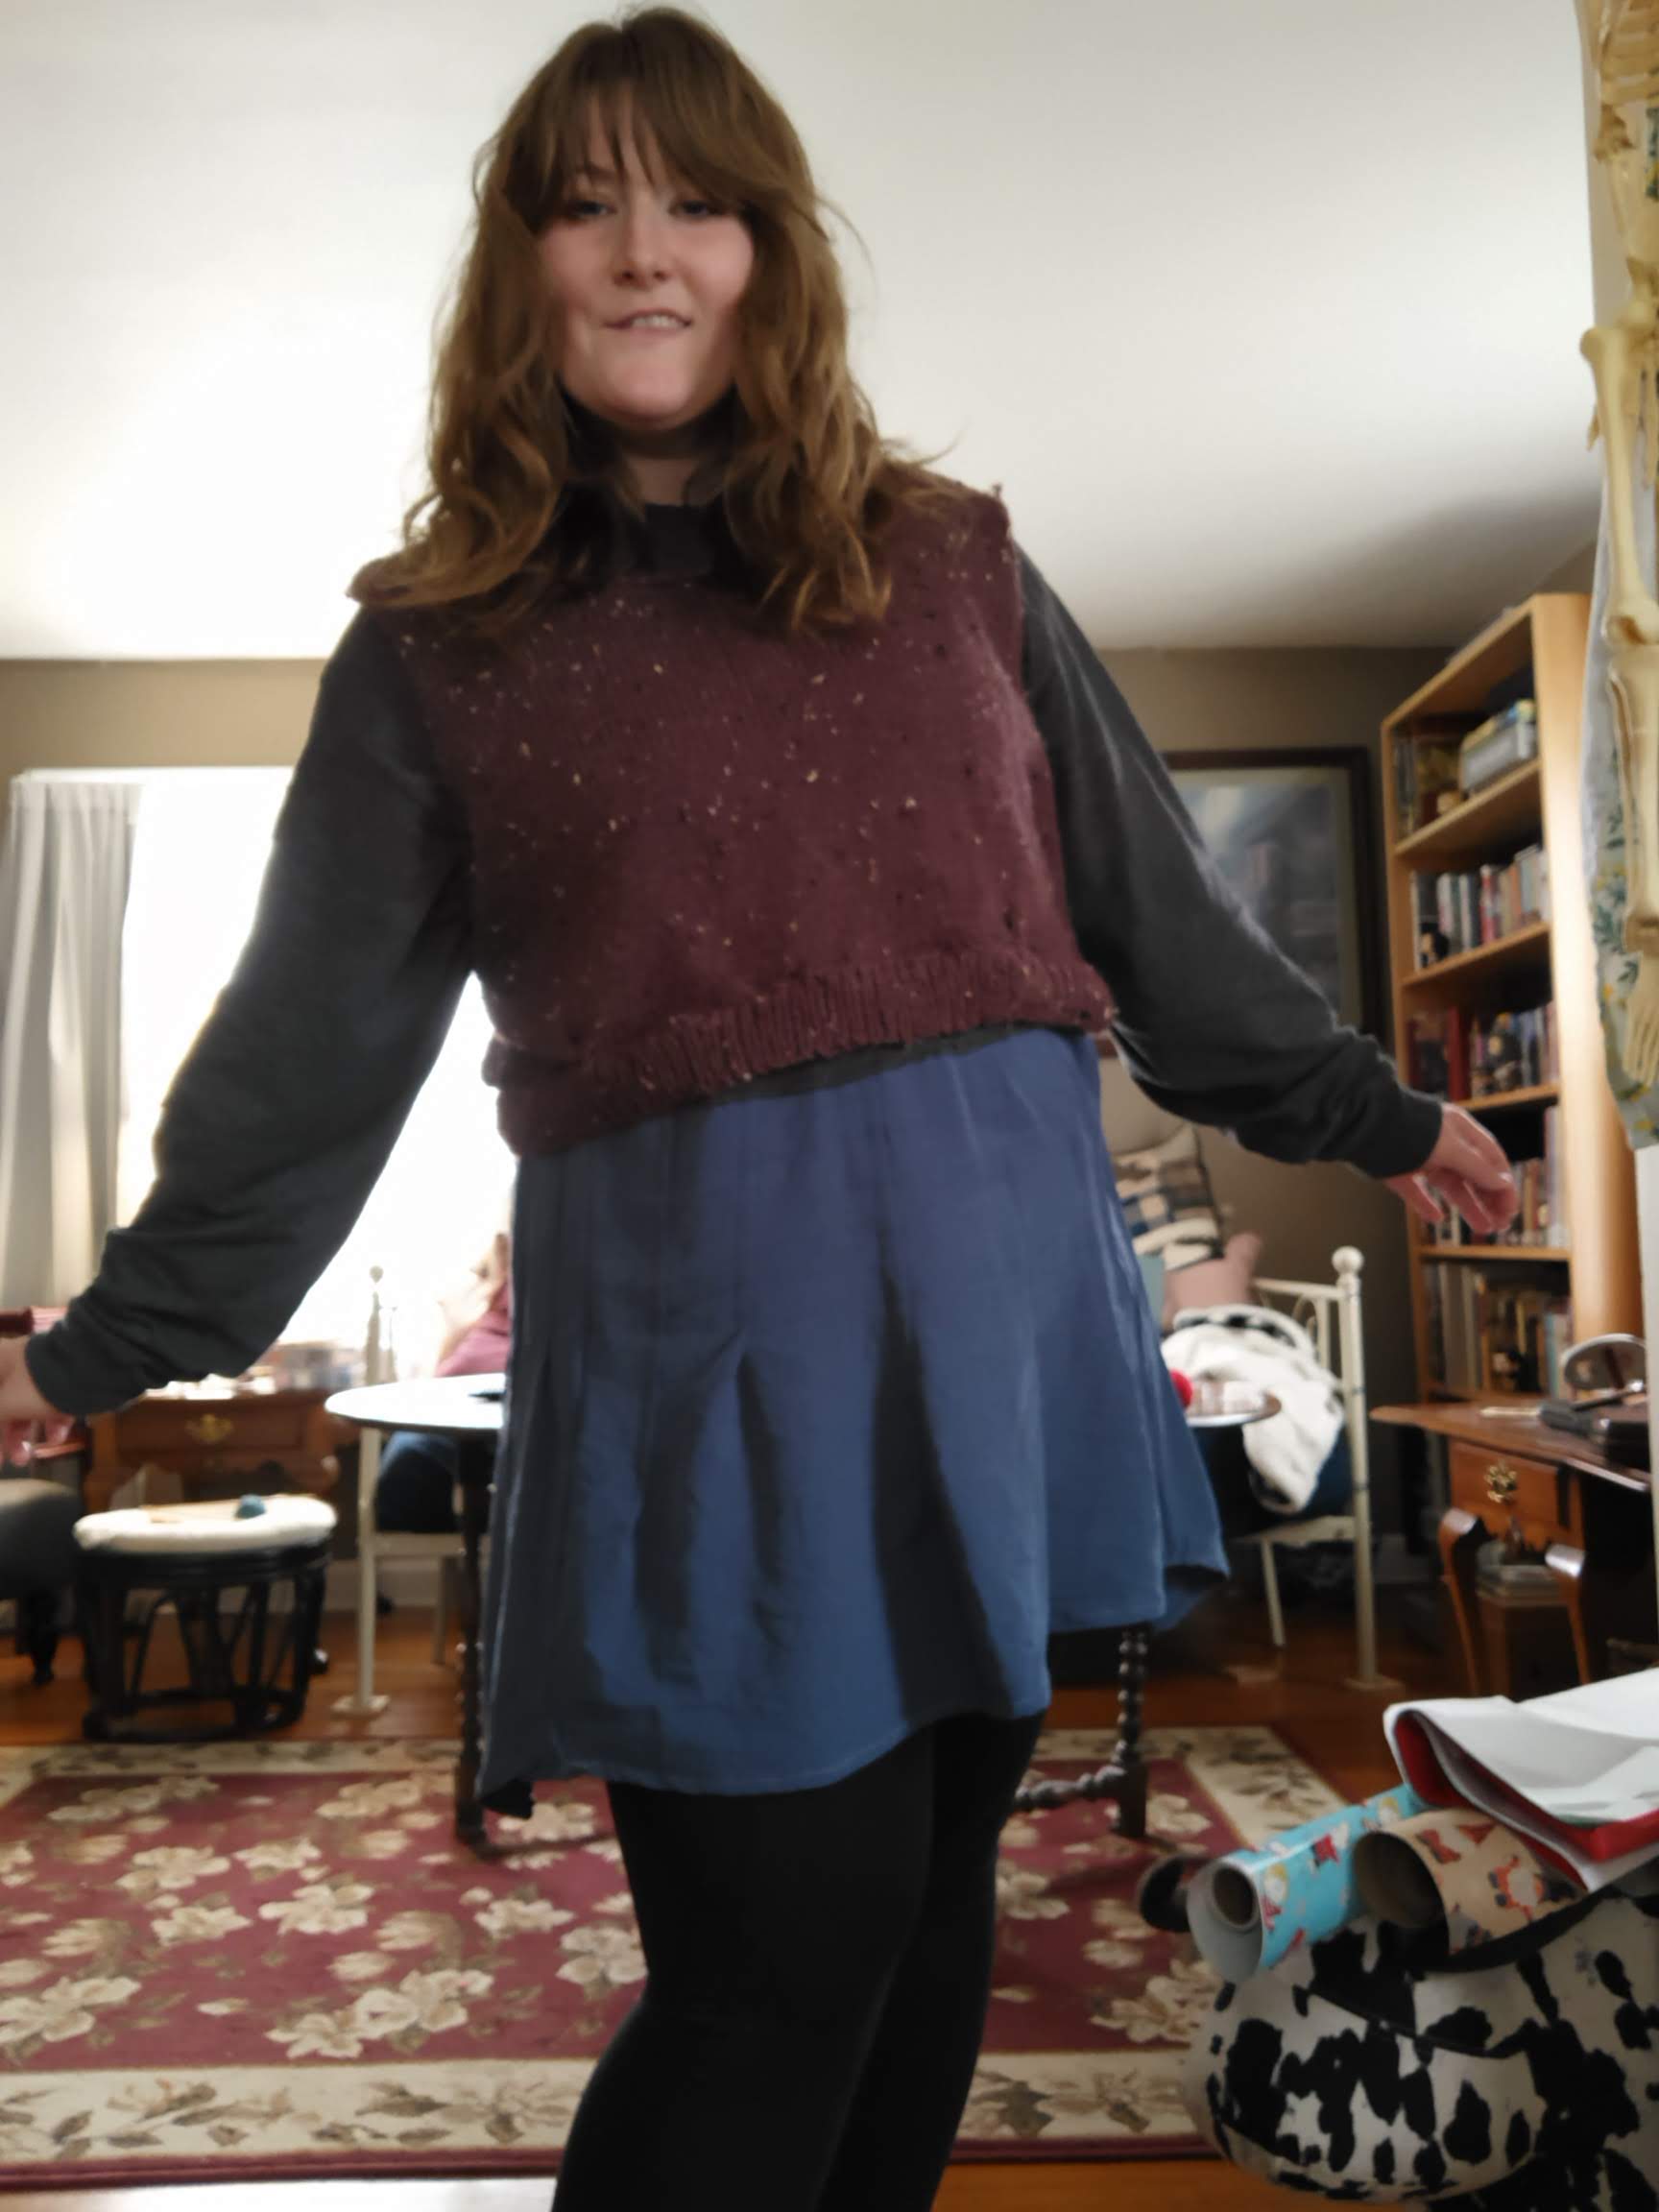
To do this, I rolled up my sleeves and dug into my storage closet, to my Gram’s quilting fabric stash and got creative. These two fabrics spoke to me, but the yardage of the ditzy floral was small maybe a half yard? This is the most frustrating thing about using deadstock fabrics, vintage or remnants, you get the yardage left and that’s that. I wanted to play around with bias tape finishing with a contrast fabric, which I thought the black floral would compliment the ditzy floral. Originally my plan was to make a camisole top, but the more I thought about I questioned if I would wear it and with what? Instead, I pivoted and used the rest of the black floral to lengthen the top into a dress. To keep it cohesive I color-blocked the fabrics – black floral straps, ditzy floral bodice, black floral skirt, and lower ditzy floral skirt.
This was a new style for me, I usually stick to one fabric but this was fun and from this experience, I feel more inspired to design garments from a scrapy style. It opens up a whole crayon box of possibilities for remnants, smaller yardage purchases, pattern mixing, and contrast piping! This is going to be a fun new world!
I decided to draft my own pattern for this dress by draping the bodice on the form. I created the straps by joining the pieces of bias tape at the top of the triangle bust piece for a seamless transition and to add strength. I added a side zipper to tailor the garment closer to the body but account for the zero amount of stretch in this fabric. It reminds me of a slip dress but I feel more comfortable in it because it is a cotton fabric. There is more structure and opacity. The dress has a more casual vibe where I can style it with a t-shirt underneath if I desire to.
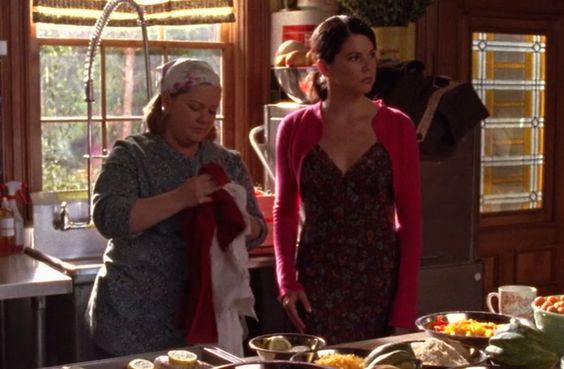
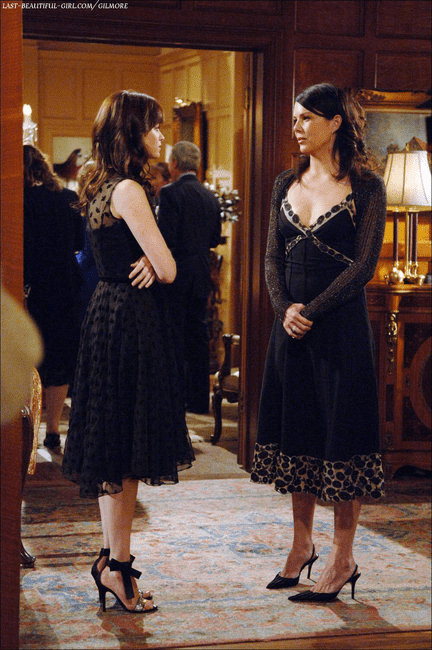
I think subconsciously, I was inspired by Lorelai Gilmore’s dress styling in these episodes. I love her style and I have found that the styles she wears on the show suit my body type and personality more than Rory’s dresses. It’s a dress style I hope to experiment with more by using different fabrics and textures.
Two summers ago, in 2022, I tried my hand at making dresses and separates with some mixed results. Some pieces I loved but had fit issues, some were poorly constructed and just fell apart, and some were made with the wrong materials for the project and were doomed to fail from the start. But as a new sewist who is self-taught, it was the only way I was going to learn, by experimenting and making and then doing it all over again.
In 2024, I’ve seen a huge jump in my skill level. I’m beginning to feel comfortable with the craft and I’m wiser about my fabric choices, which makes me think about these former projects. Could I make a better version of them? Have I leveled up my skills enough to do these projects justice and have them in my closet for years to come?
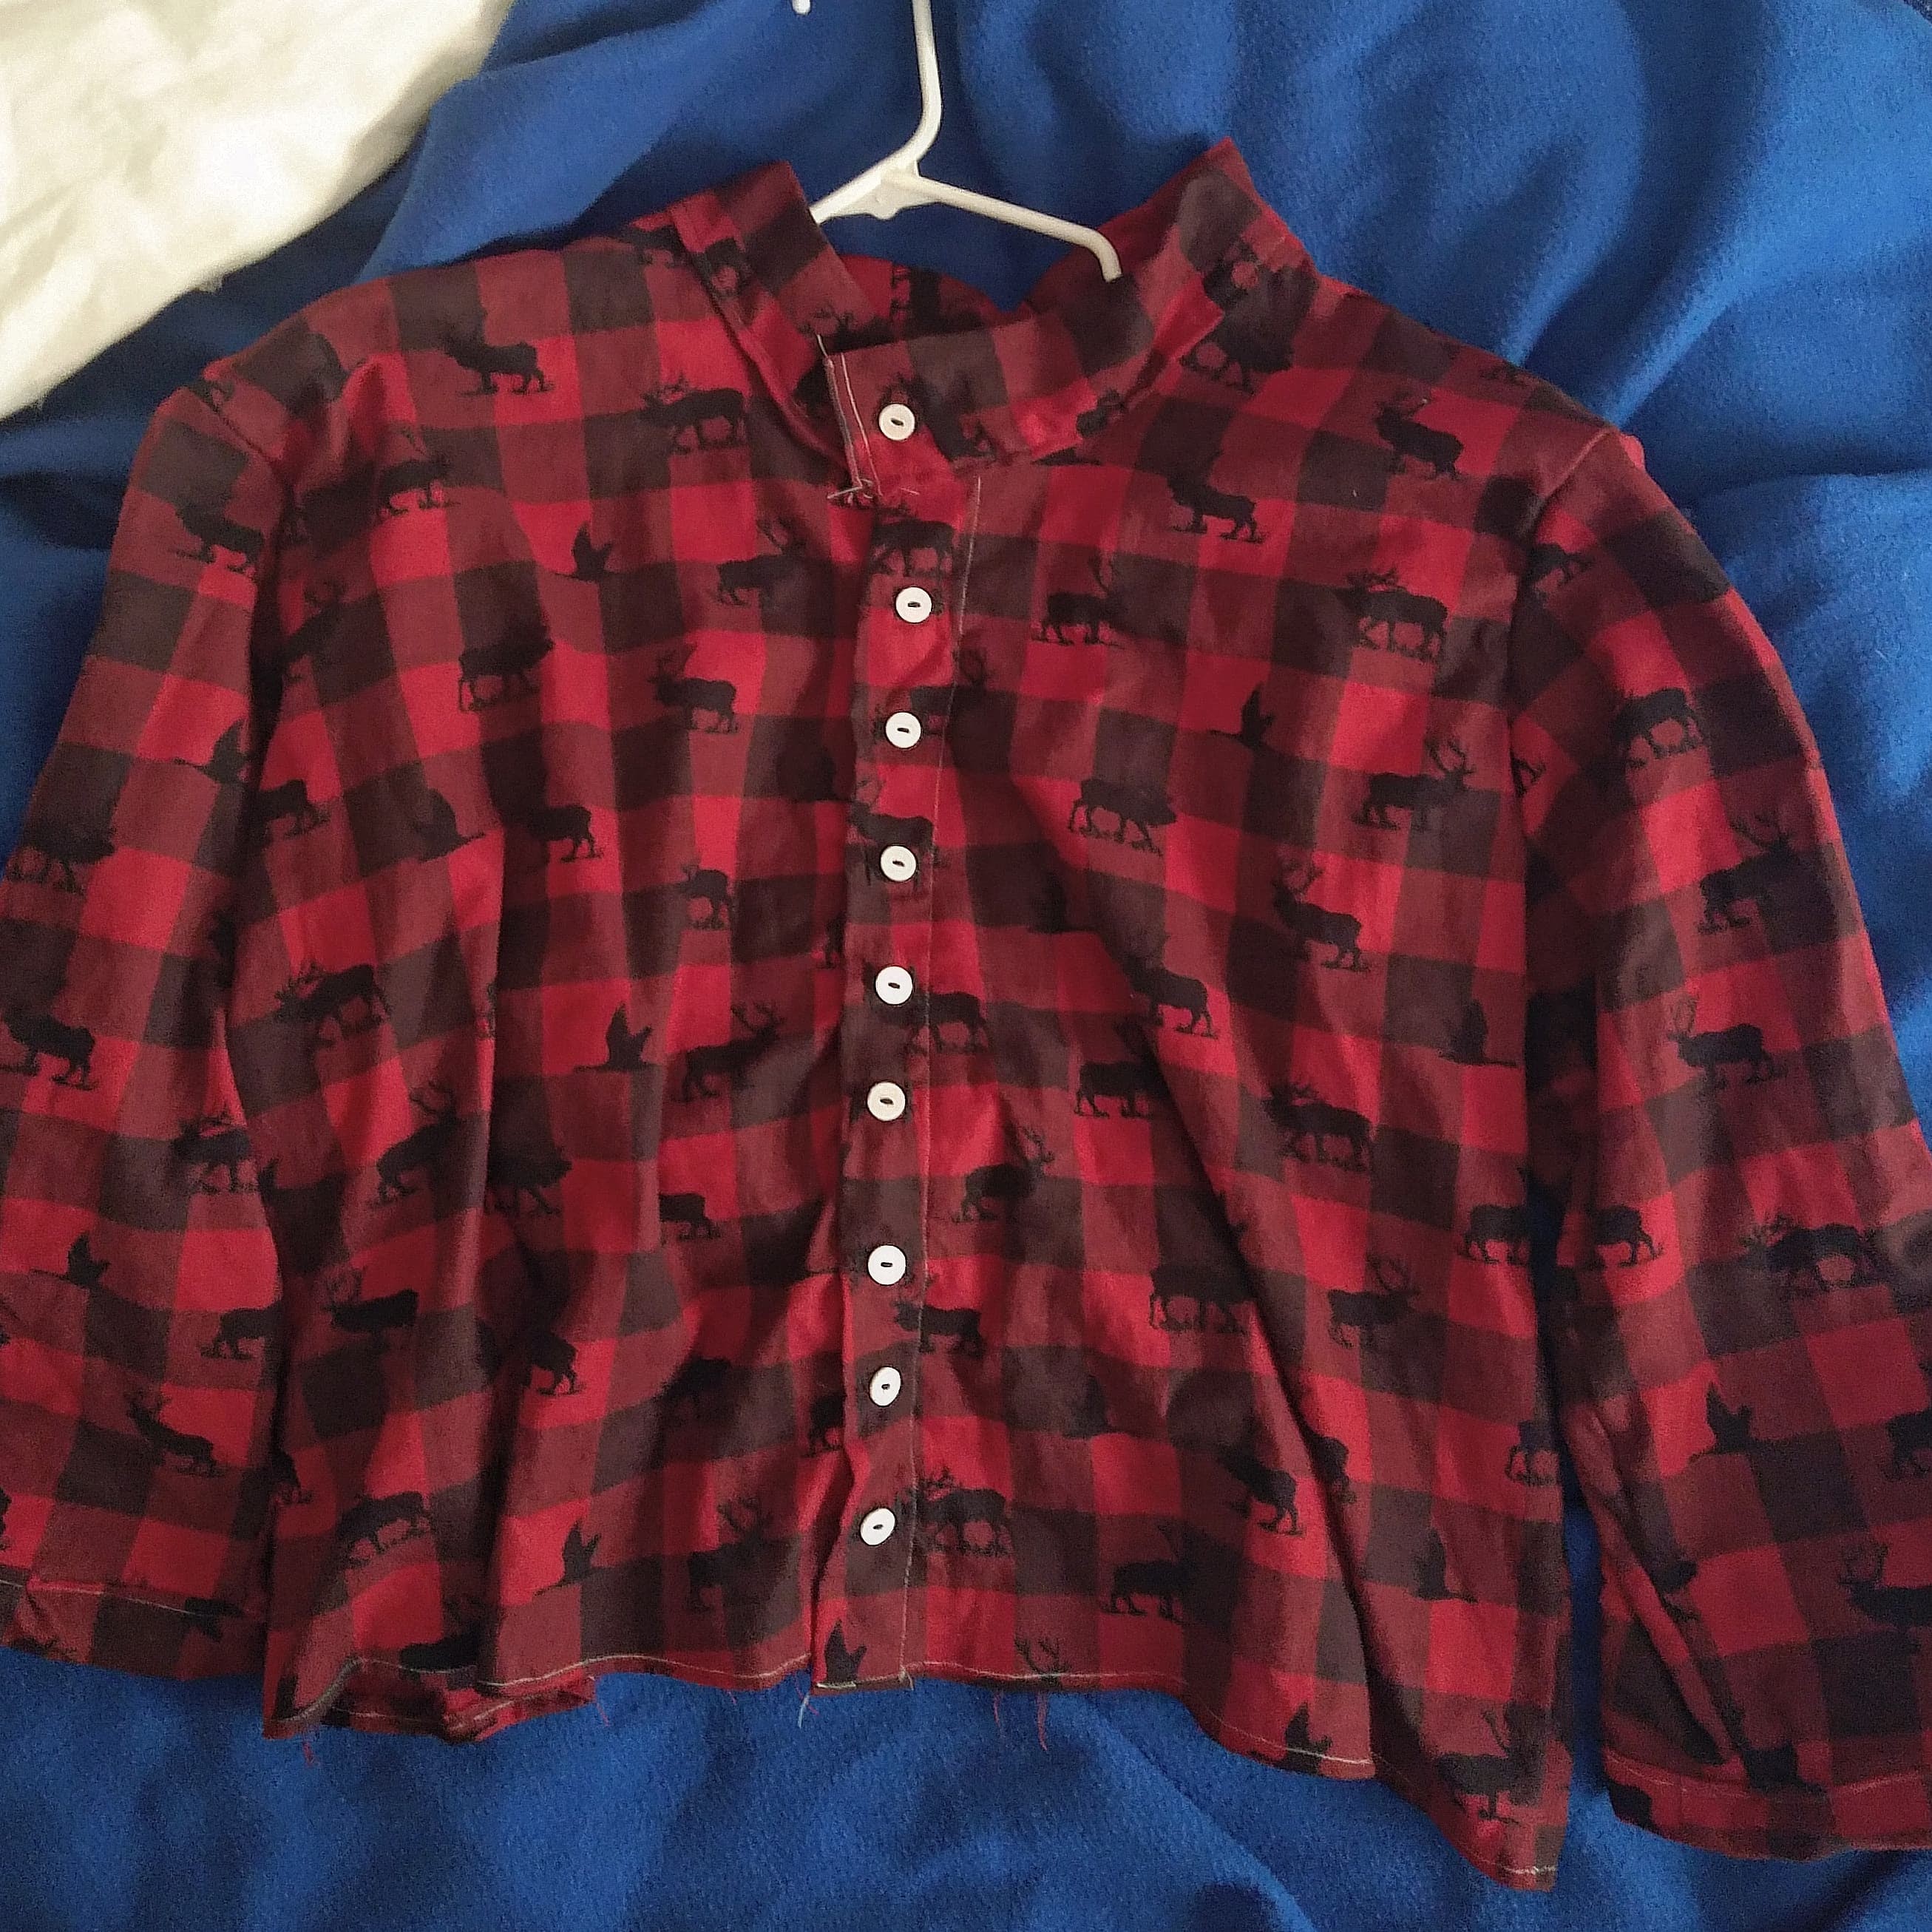
The Blanket Dress
Original Materials: Cotton Flannel, Satin Blanket Edging
Issues: Sleeves fall down and fabric stretches with wear. Not enough structure and bad pattern matching.
2024 Plan: Choose a cotton shirting with more body and keep the plaid pattern or if I stuck with the light cotton flannel, I would add a lining to give structure. Pattern match when cutting out pieces because I can tell I didn’t try at all! Add tie to the back shoulders to keep the sleeves on my shoulders. Add a button placket or zipper to fit the dress to my body better. I would make the bodice even, because I can see how each side of it is a different length.
Will I make this again? Most likely! It is one of my favorite pieces from my early designs.
Amalfi Coast Girl Slip Dress
Original Materials: A very lightweight polyester silk that I found on clearance at Joann Fabrics.
Issues: Very thin, made me paranoid. Being a slip dress I felt uncomfortable, like I forgot to get dressed.
2024 Plan: Lining! I would line this 100% now because that was just silly. I would pick a better fabric though, this one was hot and difficult to sew. I would also fix the bunching in the skirt and fit the bodice better because it looks messy.
Would I make this again? Yes! Potentially this summer if I find the right fabric.
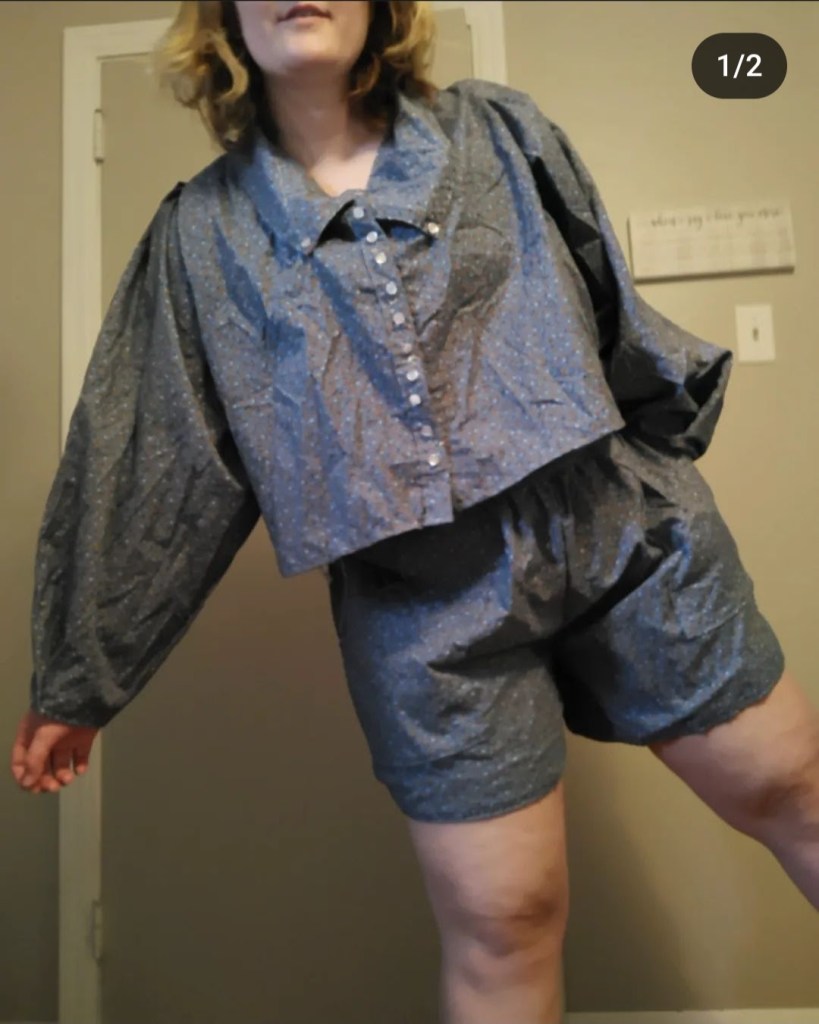
“Linen” Two Piece Set
Original Materials: Vintage Quilting Cotton from my Gram’s stash. Snaps and buttons (because button holes scared me).
Issues: Not real buttons, this was a hassle. The shirt was a bit short and too boxy. The shorts were an absolute mess because I didn’t have a french curve or a proper pattern to make shorts from. The seat was too narrow and the the rise too short, the waist band I didn’t fold over so it provided no structure. A side zip and snaps were an okay closure but they never felt truly secure.
2024: I would buy the cotton gauze fabric or buy linen for the look I wanted. The quilting cotton made this feel like pajamas and it made a little unsure about wearing it out. I would make a proper fitting pair of shorts this time and a real button holes. Other than that, I’m quite pleased with my original idea.
Would I make this again? Yes, it was chic and comfy, if only it had been constructed better I may still have it.
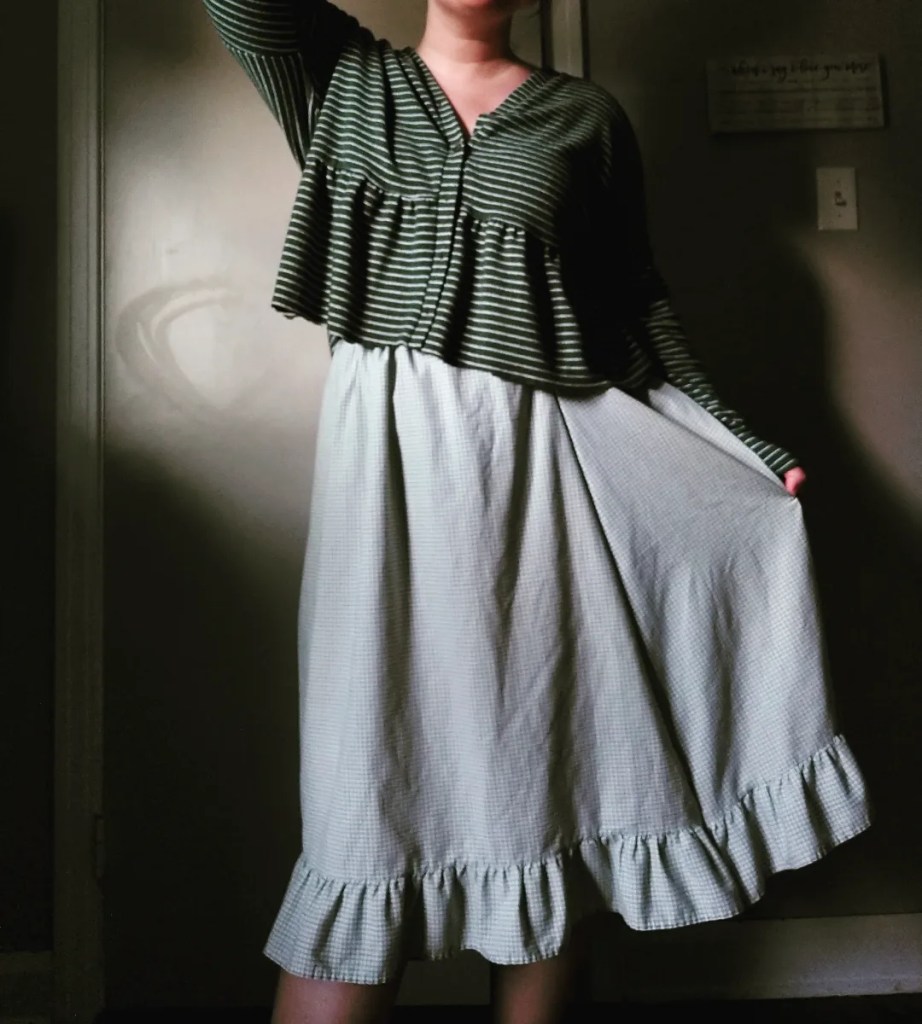
Cropped Cardigan and Ruffle Skirt
Original Materials: Two upcycled pillow cases and a hand-me-down dress I cropped into a cardigan.
Issues: The pillowcase was stained and see through. The cardigan was made from a fast fashion piece that was terrible quality that made it feel weird on the skin. I like the appearance of this look more than I did wearing it.
2024 Plan: Opaque quilting cotton or shirting to feel comfortable. Knit the cardigan in a cotton yarn or a linen yarn to make it versatile for Spring, Summer, and Fall.
Would I make this again? Yes, it’s already on my to do list. I would wear this for so many things.
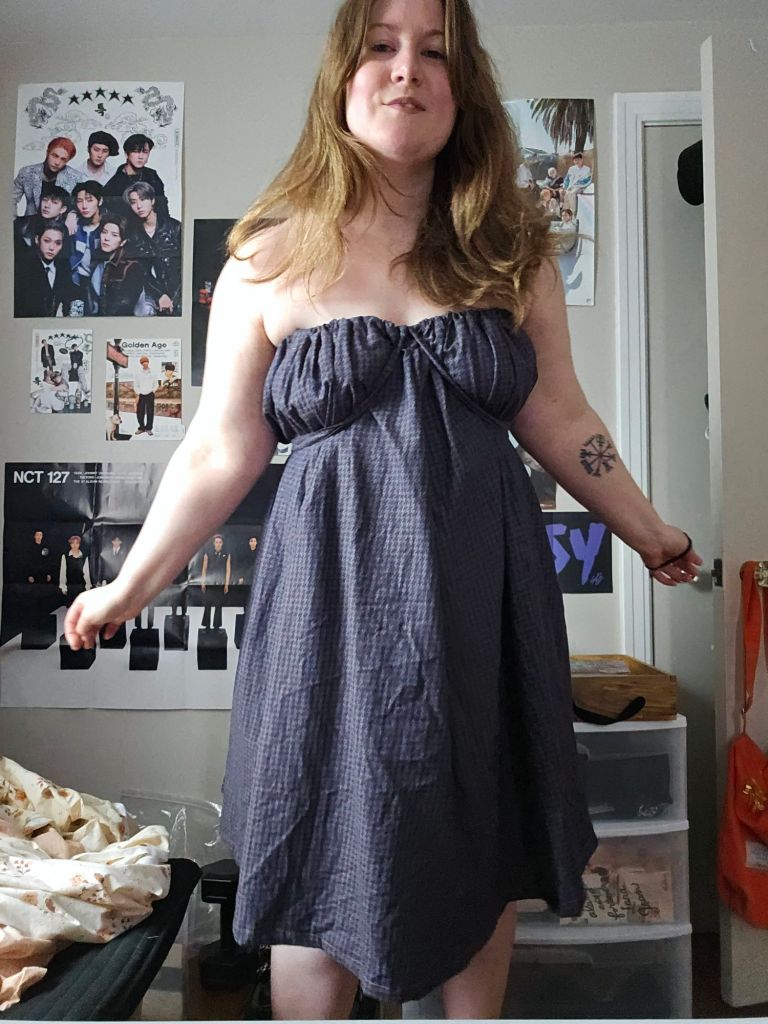
Silk-ish Halter and Wrap Skirt
Original Materials: A satin polyester from Joann Fabrics. Snaps and a tie made from the fabric.
Issues: My halter top gaped, it was poorly draped and did not feel secure at the back snaps or neck snaps. The skirt did not have enough volume. I didn’t feel like myself in it.
2024 Plan: I would properly drape the bodice and add bust cups potentially to the top. I would also not make it a two piece look because I wouldn’t wear the pieces separately. The fabric was nice and I would use something like it again, although I would love for it to not be polyester.
Would I make it again? No, it doesn’t fit into my wardrobe. I would use a similar fabric again for a dress, but not a halter dress.
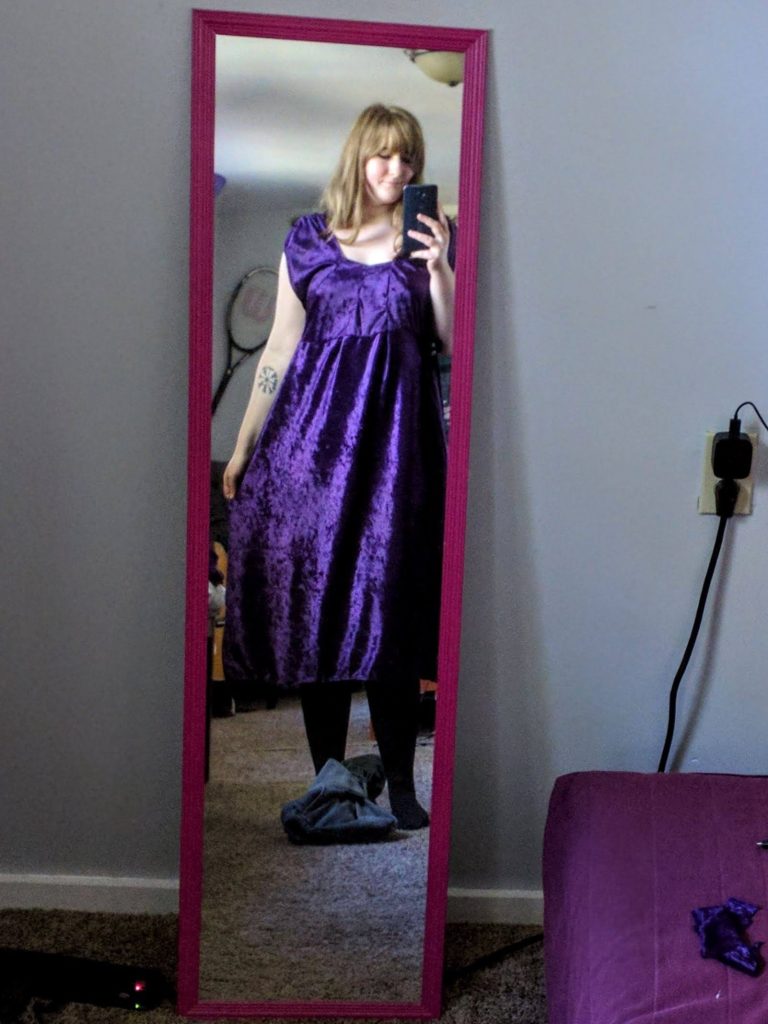
When we were living in Meadville in 2019 and I was getting into thrifting, I found a lovely 1990s dark purple velvet princess seam dress. It was longsleeved and midi length with a scoop neck and stretchy velvet knit that draped lovely from the waist. I could tell from the label it was vintage. It had a different attitude. The dress reminded me of dresses I wore as a kid that were so special yet accessible.
I was thrilled. It was a comfy dress that I would style with lace-up boots, tights or leggings, and a moto jacket. It made me feel special during a period of my life where nothing felt that special. In 2019, I was bored, stuck in a dead-end job, looking for a new purpose, navigating some drama with my dysfunctional family, and getting used to a new city. It was a weird time.
Over the years my body changed and I donated it back but it continued to live in my head, wishing that I had kept it, so much so that the first dress I ever designed was a recreation of the piece which I talked about in #3 – First Sewing Project. Comparing the pieces I made side by side, I can see the growth in my skills and understanding of fabric which makes me pleased to see.
October 2020March 2024
The left dress nailed the color but everything else about it was jacked up. The sleeves were poofy, and the skirt and bodice were draped well but I know the construction was questionable because it was the second item I sewed ever. I think if I can find this fabric again I’d like to recreate it with my current skill set. The dress on the right I cut out with my own drafted pattern piece based on my measurements. I cut it out in two pieces and sewed it with a zig-zag stitch with medium to low tension and tapered the waist with four princess seam darts. I also reinforced the shoulder with a second layer of fabric that anchored the shoulder seam.
I think I’m going to get a lot of wear out of out of my new princess seam dress. I’ve worn this dress over a few days when my local weather shifted from a warm stretch of 70 degrees Fahrenheit to a rainy, cool 50s and 40s. Because this dress is a polyester stretch knit jersey yet is lightweight, it was comfortable on a warm day. Yet when it cooled down I was able to pop on a sweater and found it easy to style with a pair of boots.
With a sweater, this dress looked like a skirt and it has transformed my approach to how I want to wear my clothing. It may seem elemental, but I’ve usually been a pants and top girl in the winter reserving dresses for the summer, but as my style evolves I’m finding that layering and pattern clashing is something I feel most like myself in.
Long story short, my new me-made dress has surpassed my love for the original, thrifted dress. I love the animal print and the fact that this was a remnant fabric from Walmart yet I believe looks like it came from a higher-end fabric store.
I’m excited to continue designing items in this silhouette and utilizing my own paper patterns which has been a huge step in achieving my vision for the garments I make. I’ve also been working in a lot of stretch fabric this year to gain more knowledge and improve my skills to keep growing as a designer. Without the practice and determination to keep going, not to mention patience because mastering any skill takes so much longer than the internet wants us to believe, this would be a different dress. It would not fit me well, it would not be constructed well, it may not have even made it through the sewing process, and would have been scrapped.
That is why practice is so important. And you know what the real big moments are? Not just your successes but being able to look back at the failures, and the mistakes, and see how far you have come. Such as this dress that I made in 2021, which although the design was cute, fell apart because I didn’t understand how to properly construct stretch fabric nor did I understand how to choose the right fabric for a garment for it to be successful. But now I get it and now I understand how to fix it and if I decide to remake it, I could! And that brings me a whole lot of joy!
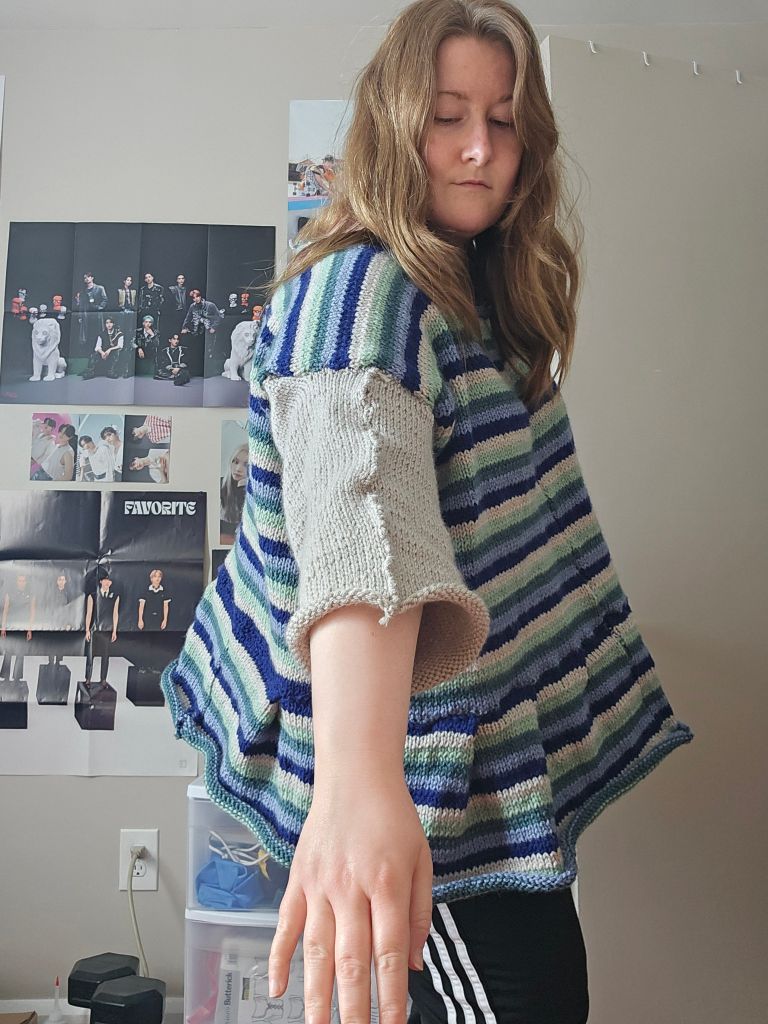
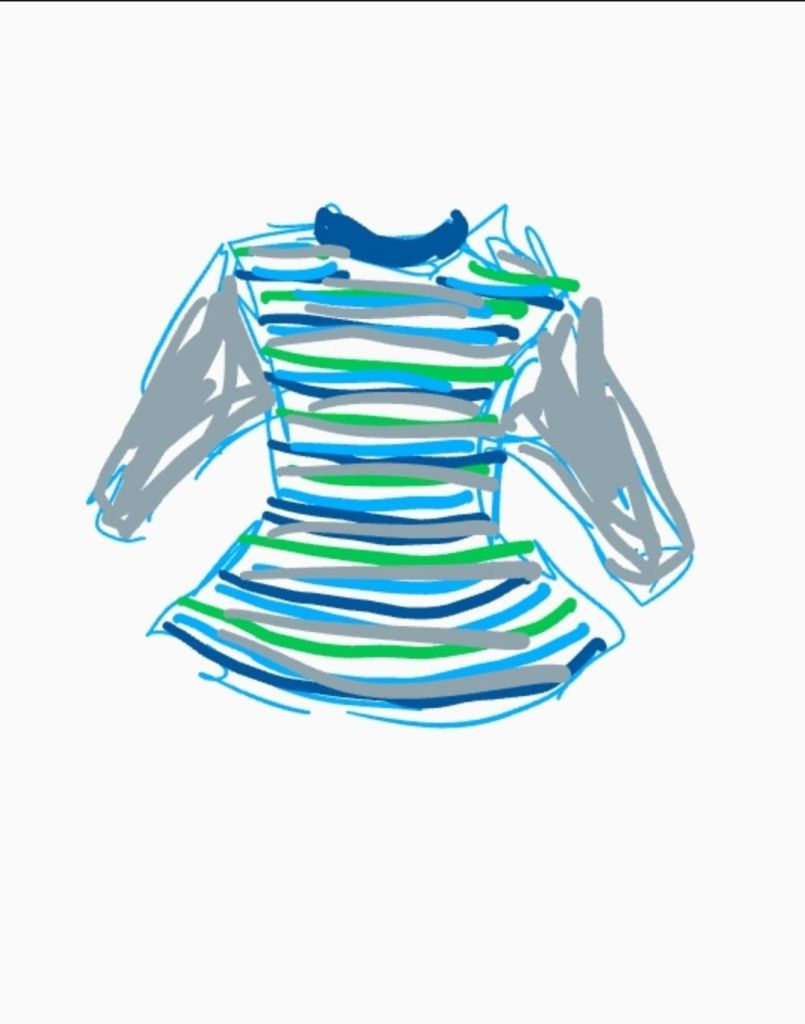
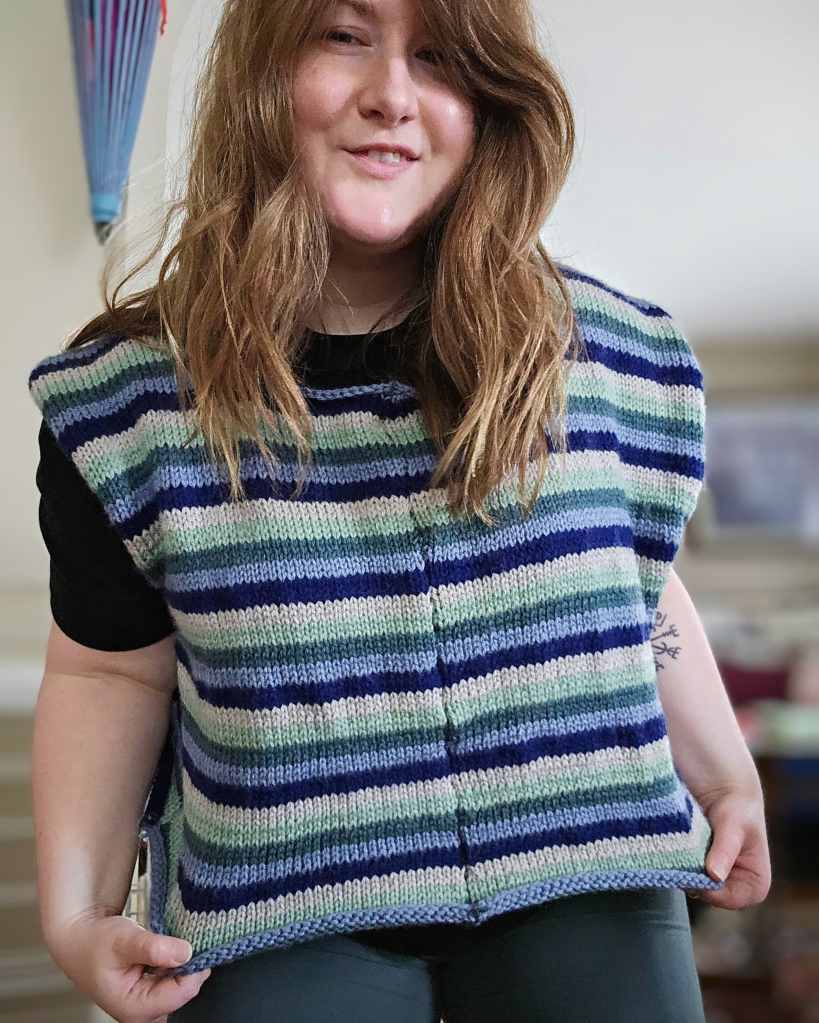
A goal I have in 2024, is to go through my yarn stash and use what I have to create unexpected pieces. A lot of my yarn has been sitting on my yarn shelf for a year so I decided to try a new approach to my design process – to create a garment from a color palette. I chose these five yarns to make a striped and joyful sweater that encapsulates the coolness of a winter landscape, yet the minty green hints at the spring yet to come.
This project was a journey! I didn’t quite know where it was going to end up. At first, my plan was to make a striped cardigan, but I worried about the sleeves. I thought the stripes would be too busy if carried on to the arms. I also had fears of playing yarn chicken. So I pivoted to an unusual piece because of how cool the bodice looked over a t-shirt. In the climate I live in there is no reason to wear an acrylic yarn vest over a t-shirt, but I couldn’t get the image of that out of my mind, so I made a “t-shirt” looking sleeve with the light gray yarn. For length and a bit of vintage flair, I added a peplum that took this piece to a place of whimsy that brings me joy.
When I look at this piece, I smile. When I wear this piece, I am filled with joy and sunshine. It is the first piece of knitwear I have designed that I think would show wonderfully on the runway and that is freaking cool! Lastly, I added a navy blue collar to the neck opening and gathered the neckline slightly so that it sat on my shoulders properly. The peplum was knit in two pieces where I continued the pattern and knit the sections wider than I needed to pleat it. Now that I’ve blocked the piece in the dryer it floats over the body and looks so effortlessly.
A new technique I used for this sweater was to knit one side at a time. I knit I believe 60 stitches across and began my striping pattern, switching colors after three rows. Next, I bound off stitches at my desired armhole position and carried on to the neckline where I again bound off stitches which made the shoulder more narrow than the rest of the garment. I then continued to knit down the back of the piece, mirroring the neckline by casting on a new row. I continued on to the armhole where I again, cast on more stitches and then followed the piece down to match the length of the front.
I did this a second time on the other side, mirroring the original. It is important to make sure you are mirroring so that the two pieces will match up knit side + knit side or else one side will be inside out – which is easier to do than you think! I ruined a previous project by doing that and had no choice but to rip it out. That’s okay! It’s all a part of the learning process!
If you’re a knitter or crocheter, I hope this project inspires you to get creative with your stash and make something out of the box. Or if you’re an artist, a maker, or just a human reading this, get creative with what you have! It is a fun journey. Thanks for taking time with me today! I hope you know that you are worthy, you are loved, and you are special to me. Until next time ❤
To start the path of becoming a knitwear designer, I first had to quit knitting, totally walking away from it to understand that it was something I was passionate enough to keep growing, pursue, and be willing to fail at to create something beautiful. Sometimes personal growth requires surrendering your plan to find the plan you were called to follow.
These pieces were made two years apart and yet I think they fit seamlessly together even though they were not planned. None of my knitting pieces from 2023 onward were planned because I decided to quit knitting in 2021 and was feeling pretty lost and frustrated in 2022. Knitting became a place of competition with my mom, a comparison with more advanced knitters, and a direct competitor to my sewing process.
It took a while for me to see this skill as an art form instead of a distraction. An extension of fashion design, storytelling, and fiber art. These forms are symbiotic, yet the way I was approaching it created struggle in my mind and it wasn’t until I made peace with the process that I could see how this was a way to continue self-expression and design.
It took being willing to approach knitting the way I feel comfortable instead of the way others feel comfortable, like knitting on straight needles, and taking the scenic route in my knitting technique to learn and improve. I had to accept that my pieces were going to look different because my approach was different than how I was being taught. Because of my background in art and sewing, I think about garment creation as I would in sewing. Knitting is the opposite, instead of cutting shapes out of a whole, you are making the whole shape out of nothing, it’s a brain teaser. It was at least until I took time to think about it.
After I completed the scarf, I put my needles away, donated my excess yarn stash, and walked away. For a year, I didn’t want to knit. I wasn’t inspired, I wasn’t interested. But at that time, I was designing with fabric. I was tailoring and learning how to read patterns. That’s when it clicked. All of it clicked.
It wasn’t that I couldn’t figure out knitting, I needed a better approach! My brain needed time to process the knowledge that I was learning from sewing and knitting. My mind was figuring out what kind of story it wanted to tell. Making a collection in 2022 for my family and friends got the ball rolling in my mind. I realized it wouldn’t be that difficult to be a successful knitter, I just needed to be a knitwear designer and go that extra step to create my own pattern and my own plan. Knitting hadn’t clicked before because I was trying to be like other knitters, instead of experimenting and finding my own style.
Just like personal style, creative writing, and art, you have to find your thing! The process may not feel like progress and that is where falling in love with the process is such an important piece of the puzzle. I have a passion for designing clothing, I’ve had it my whole life, but I was divorcing clothing from knitwear because I was not pushing myself to make clothing. Once I got serious and dove into making an actual garment it transformed my perspective. They are the same just different approaches. One does not need to be a distraction from the other, they can work in sync. That’s when the light bulb went off in my mind – so can accessories. Layers are little things that make a piece pop. If I am going to go all in for design, then a symbiotic relationship between what I design with thread and what I design with yarn must play off of each other. This is how I realized being a knitwear designer was as much a part of me as being a fashion designer, a sewist, an artist, and a writer.
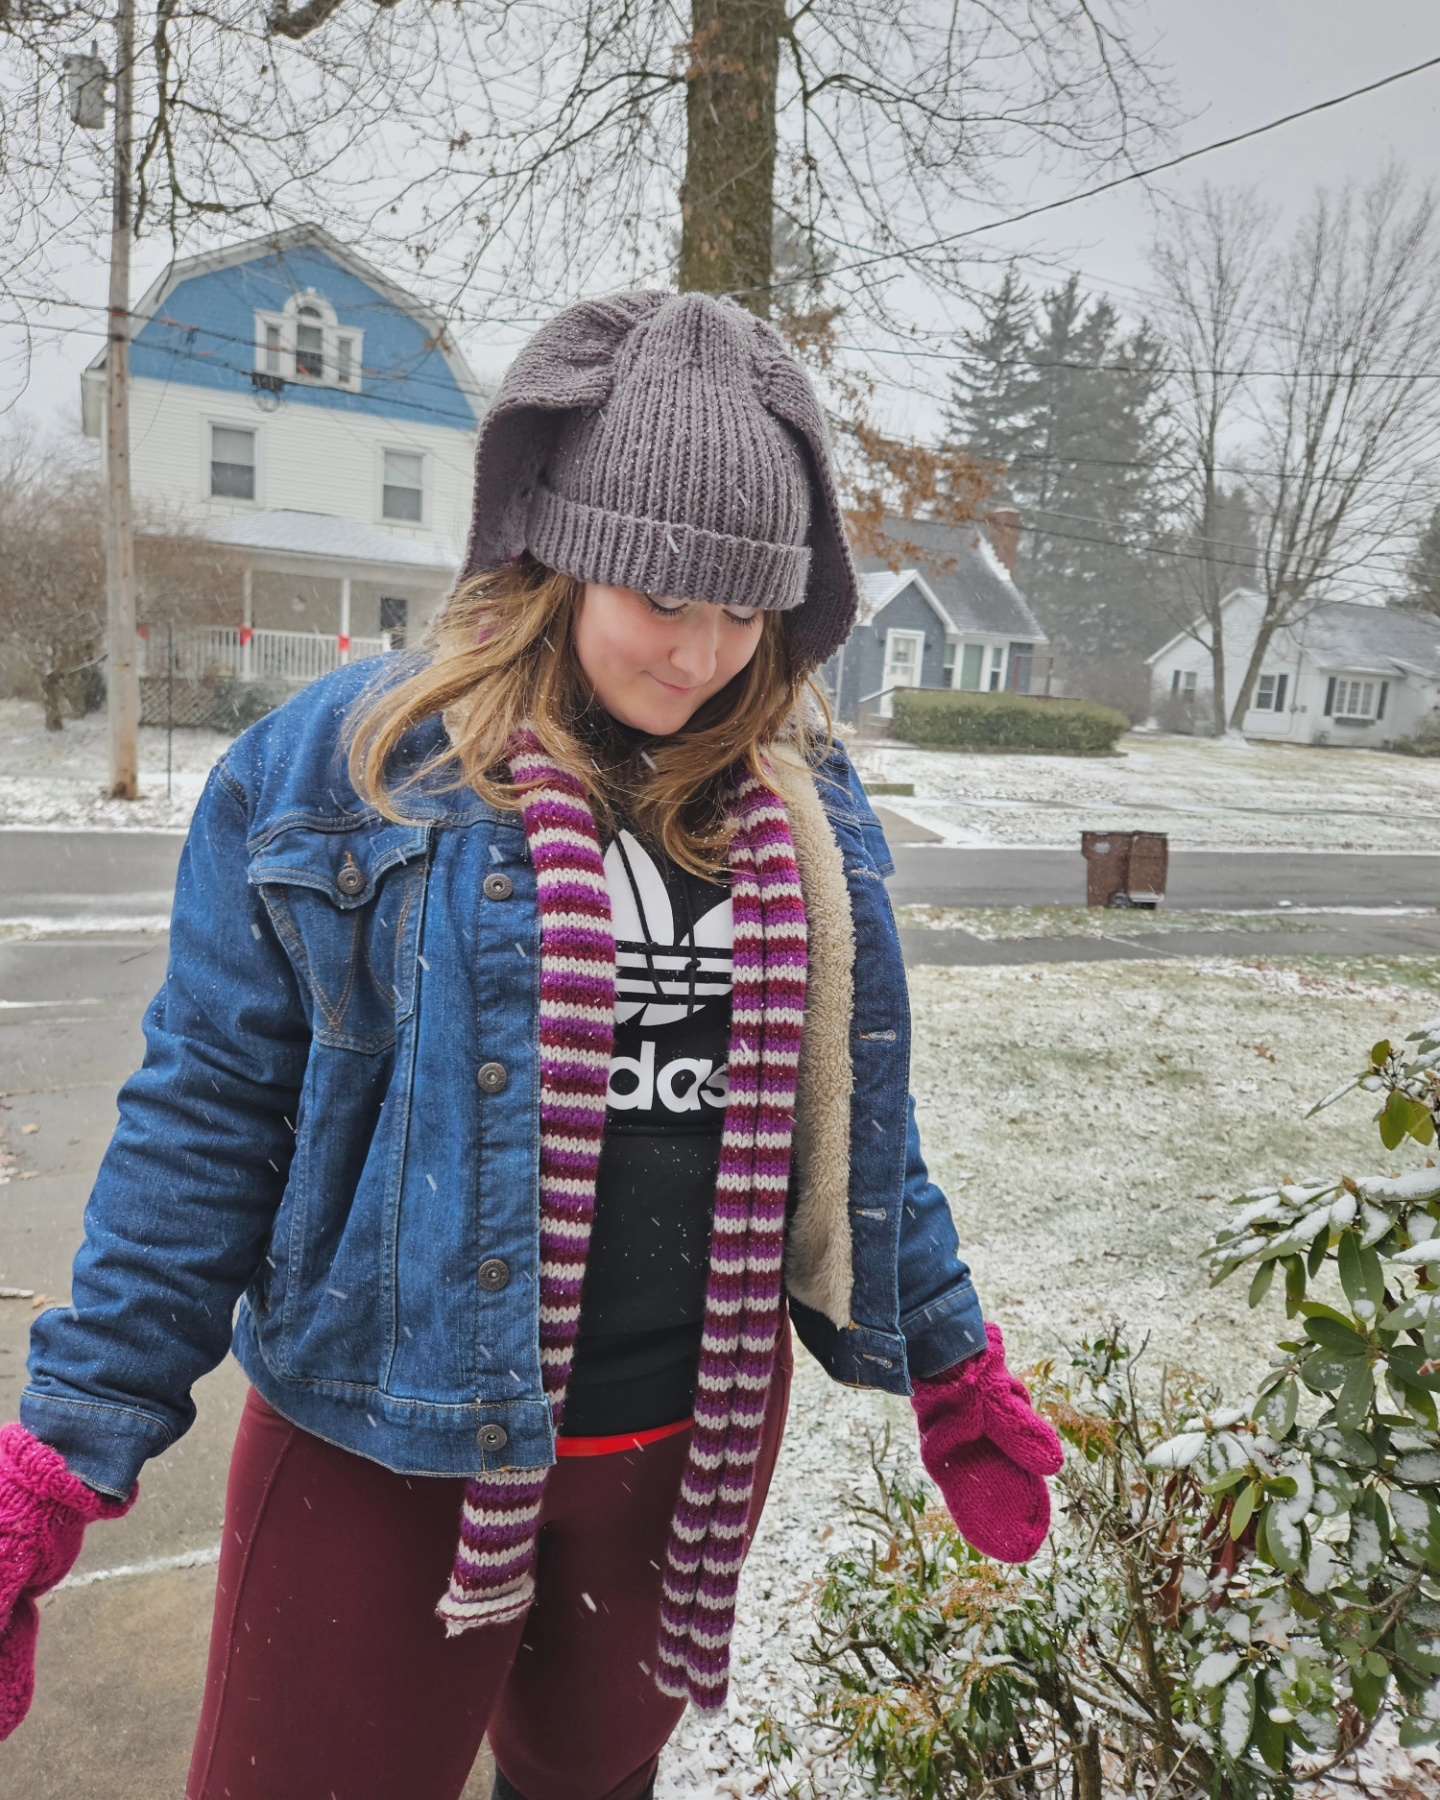
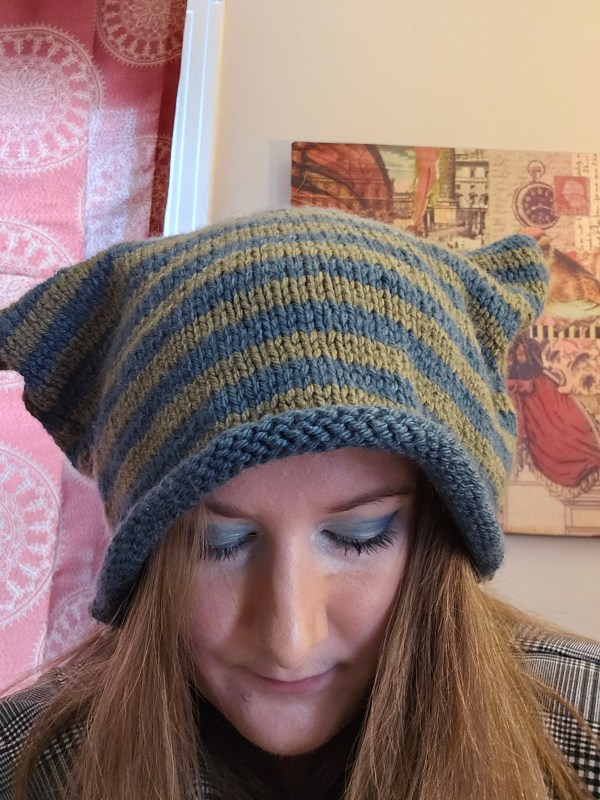
Stray Kids. More specifically, Felix’s hat on stage at the Music Bank Paris performance in 2023 and Hyunjin’s striped crochet beanie during a video in 2023.
The Plan
It seemed simple at first glance but then again, new knitting patterns can be a bit confusing so I did research, to be safe. The cat ear is a corner and the point or drape, depending on the structure of your beanie is created by the length of the hat horizontally across. Once I understood that the shape would be determined by these top corners it was easy to jump in!
So I cast on 50 stitches on size 8 needles with worsted-weight acrylic yarn (I’m allergic to wool) and alternated between olive green and teal every three rows. After 55 rows, I cast off and sewed the two panels together to form this lovely cat-ear beanie. Honestly, such a fun and easy project once the ear structure clicked. 🙂 I’d say if you are an intermediate knitter you could make this over a weekend for sure, potentially in 24 hours if you were in a super rush. As a beginner, I’d say give yourself a week and take your time to keep the stitches even across. Sew up the sides and top with a tapestry needle.
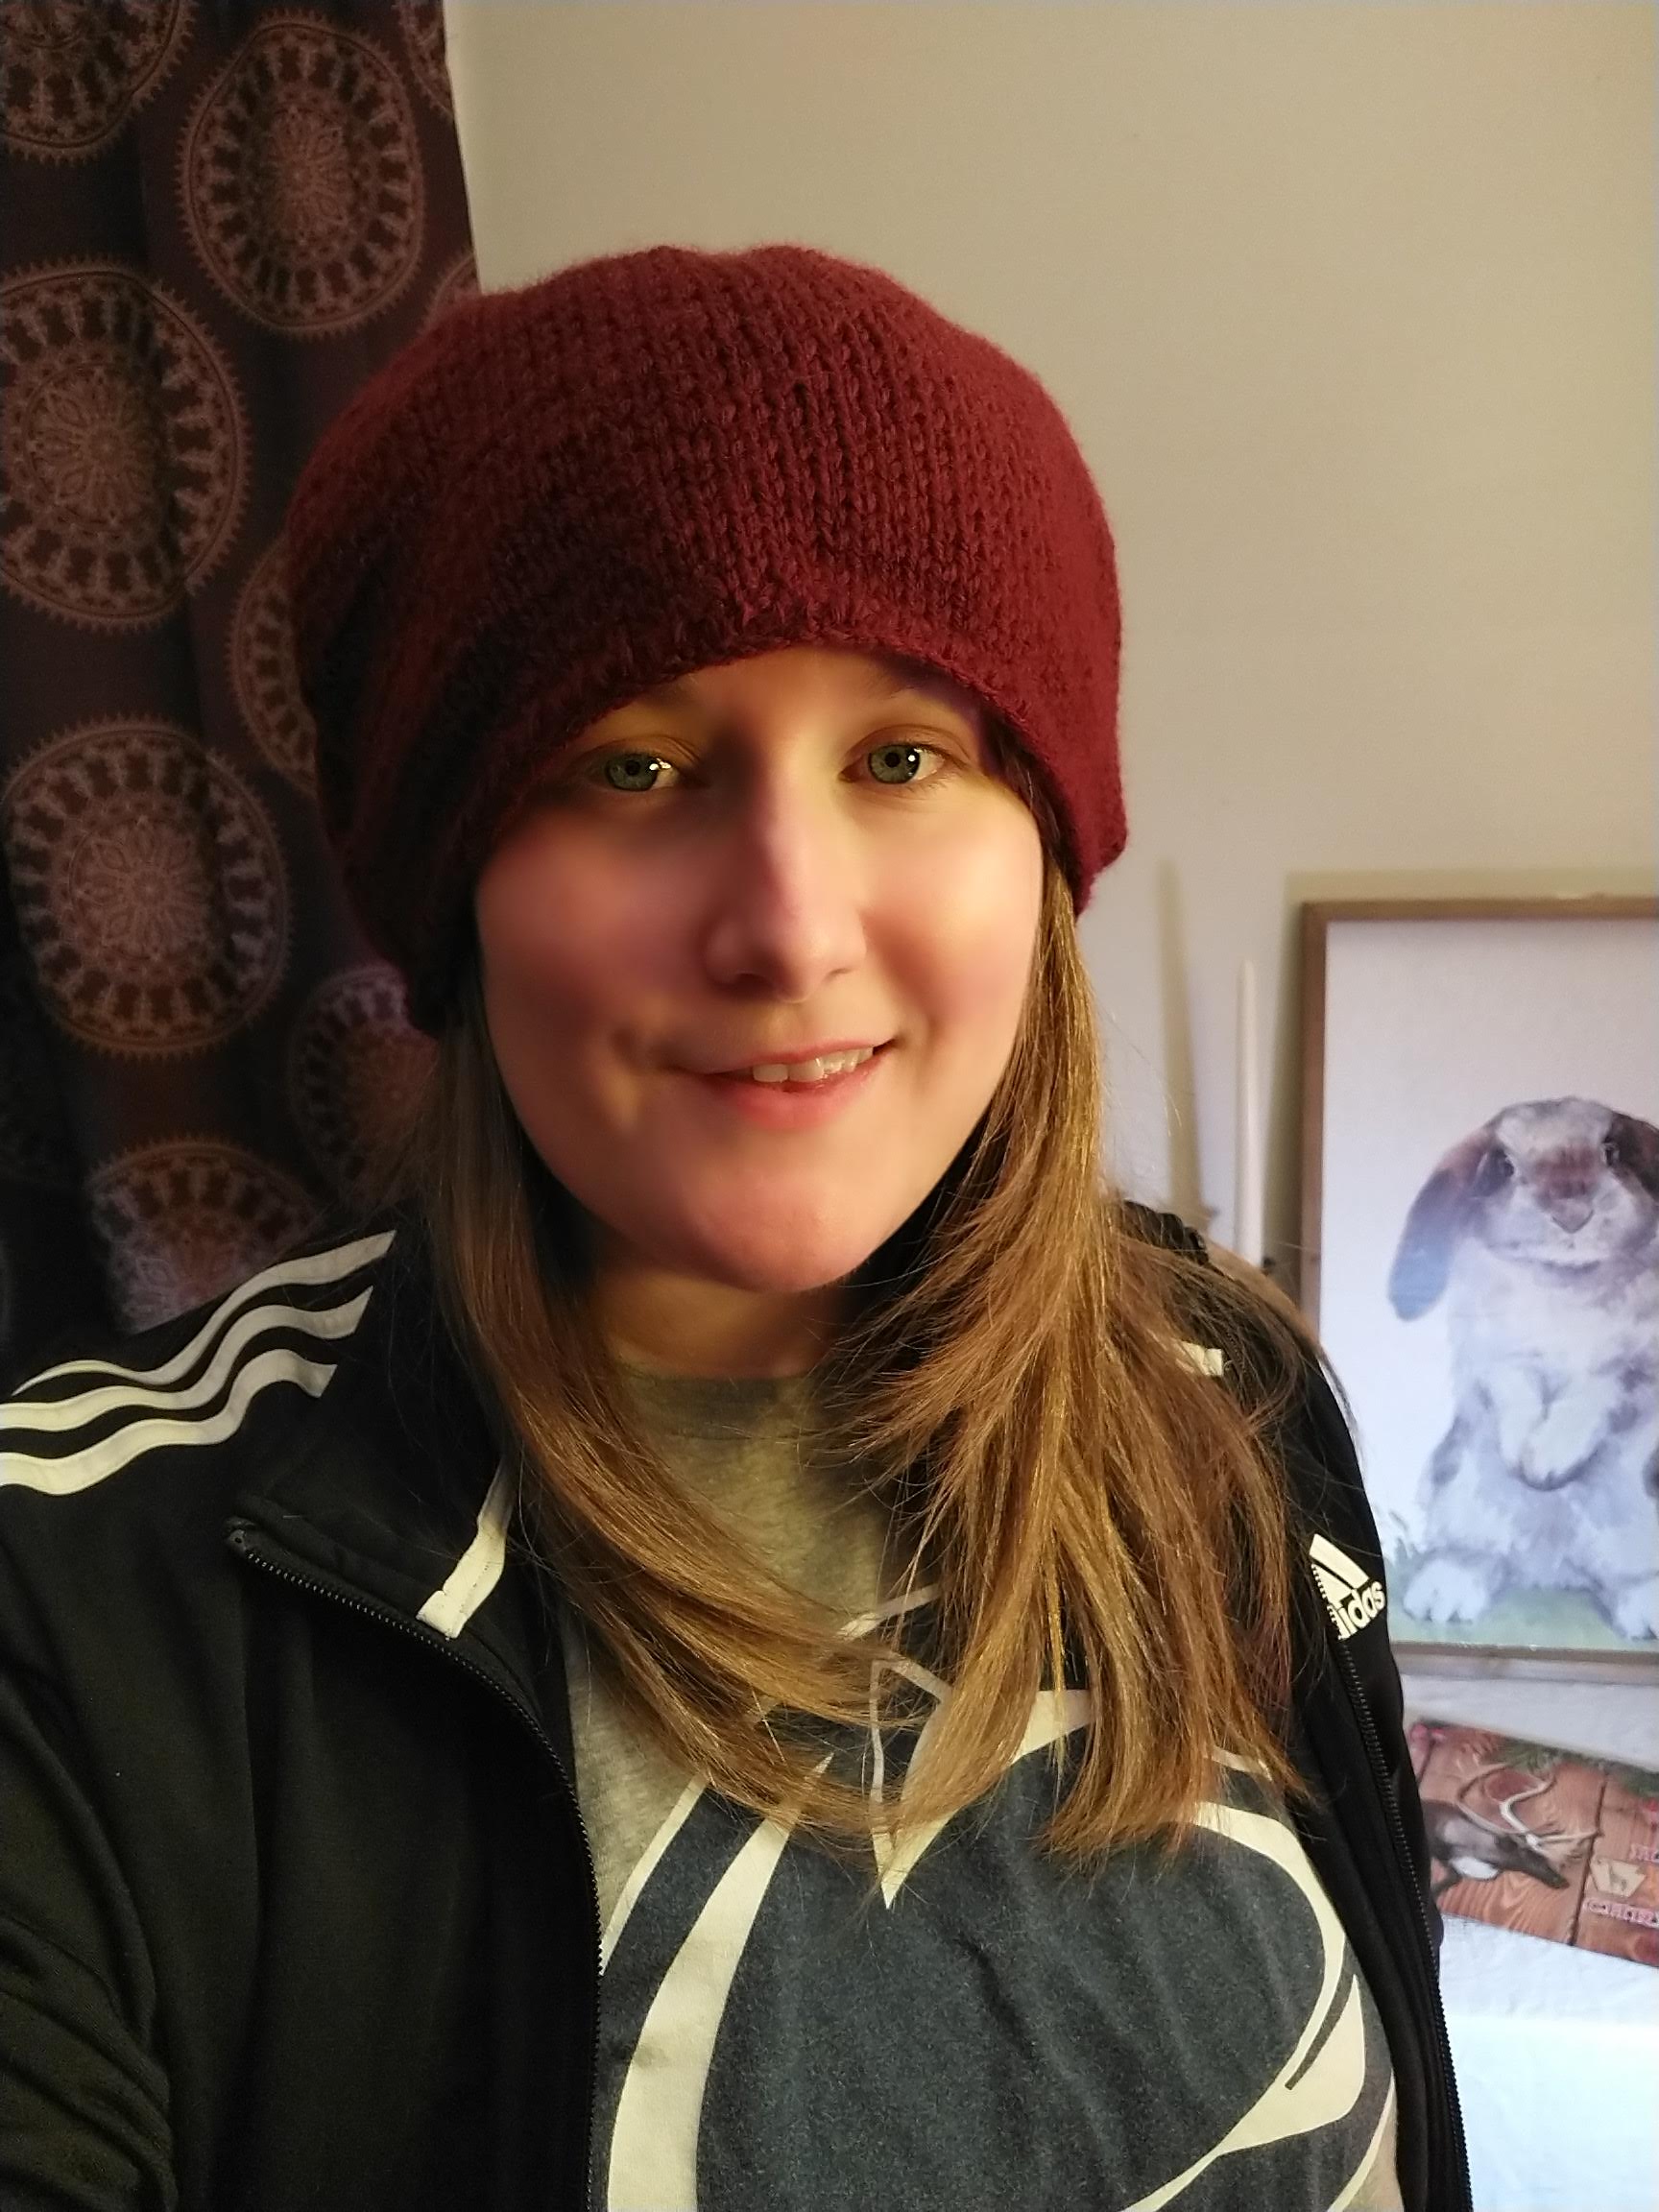
I think the trickiest part was choosing what colors of yarn to use for the striped pattern. I didn’t want to make an exact copy this time, well I couldn’t anyway because I don’t currently crochet, but I wanted to use a unique color palette from my existing stash. These colors are some of my favorites in my stash. I’ve found the color story versatile to style with both cool and warm-toned accessories. I think the earth tones help keep it neutral. I love it and reach for it the most out of all the hats I’ve made in 2023.