It’s Okay to Admit You Don’t Like It

A place I didn’t expect to reach this year, was the mental head space of dislike for a dream I’ve had for most of my life. Now could it be burnout and I just need a break? Probably. But I also think it might a healthy thing to acknowledge something you thought you would love, may not actually bring you joy as you wished.

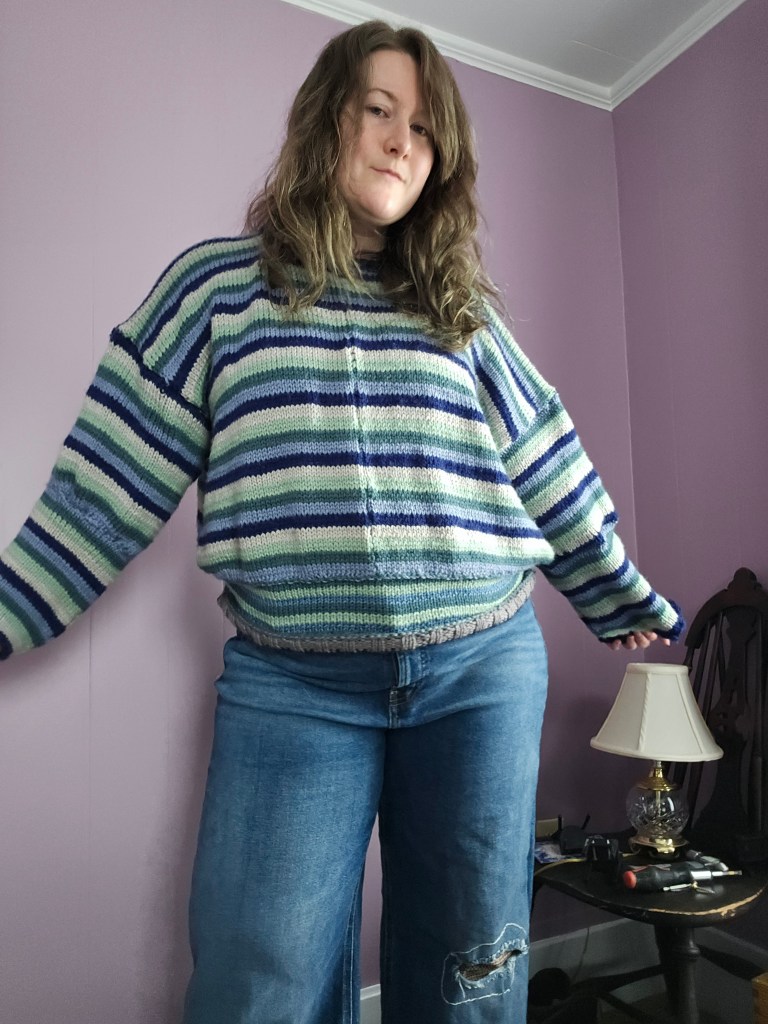
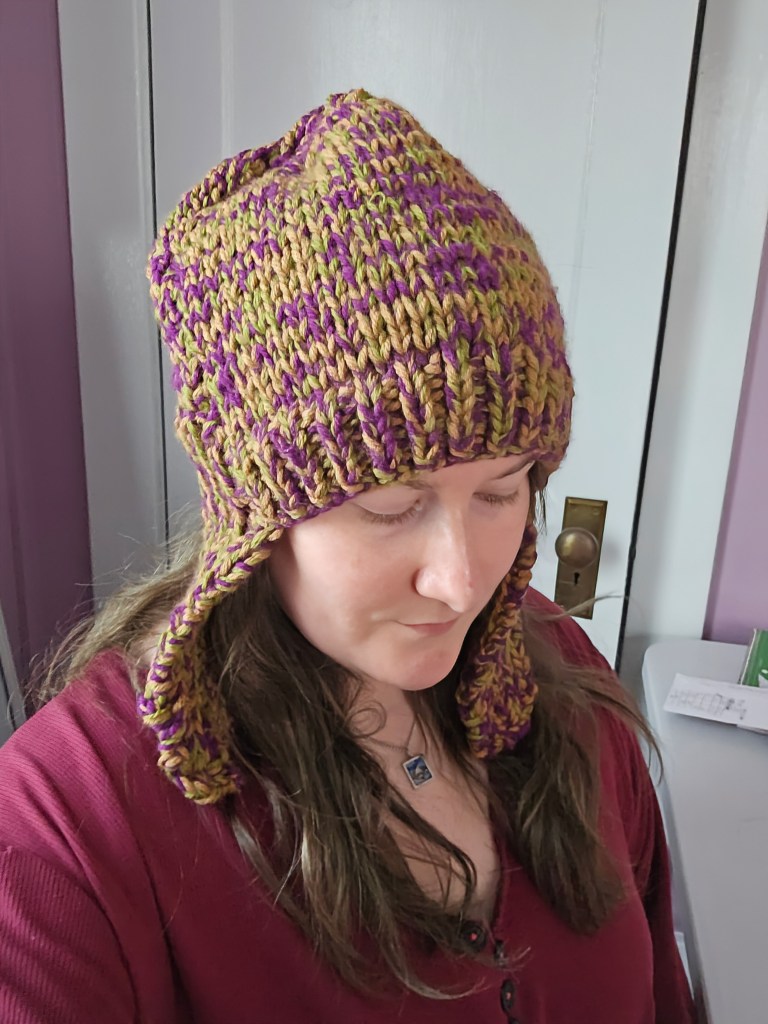
What am I talking about? Sewing. I don’t like sewing as much as I want to. It is tedious, extremely complicated, and requires a level of patience I lack. I’ve been a sewist for 5 years now. I devoted a large amount of my time over the past five years to the study of garment construction, and I realized that it is not my medium, yarn is, and its not a failure to admit I don’t like sewing as much as knitting and crochet.

I think I have known this for about a year, yet refused to verbalize my feeling because it felt like I failed the one thing I always wanted to do. But why is that a failure?

Just because it’s not my passion, doesn’t mean I am going to stop sewing. I think having this space to put less pressure on it to be “my thing” could make me enjoy it more!

Because then I am free to create, to fail, to be a slow learner, to take breaks from sewing when I am ready to cry. I don’t have to feel pressured to get my skills up to par for selling my work. I don’t have to feel pressure to design my own patterns or build a business on sewing. I can go back to basics of what has always been at my core – art. I am an artist, I don’t set out to be, but I know its there inside me too afraid to commit to the bit.

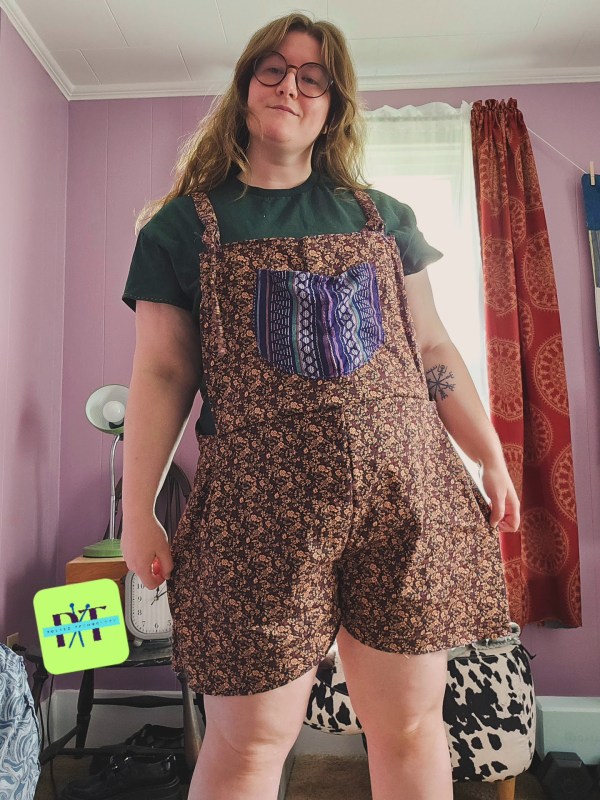
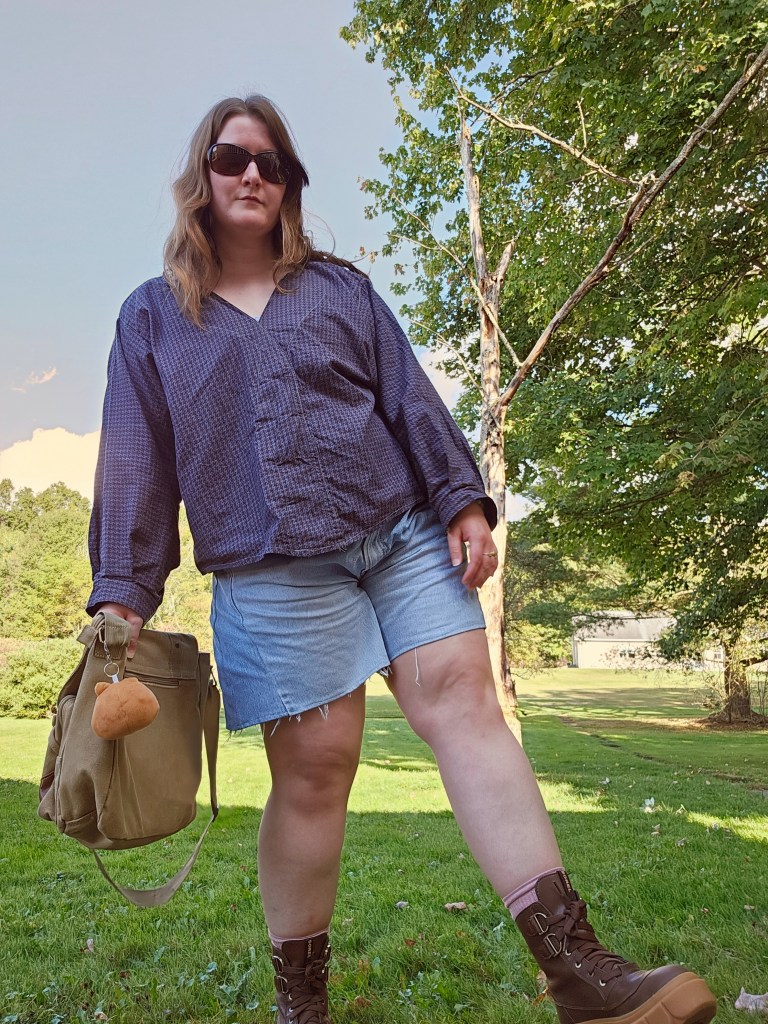
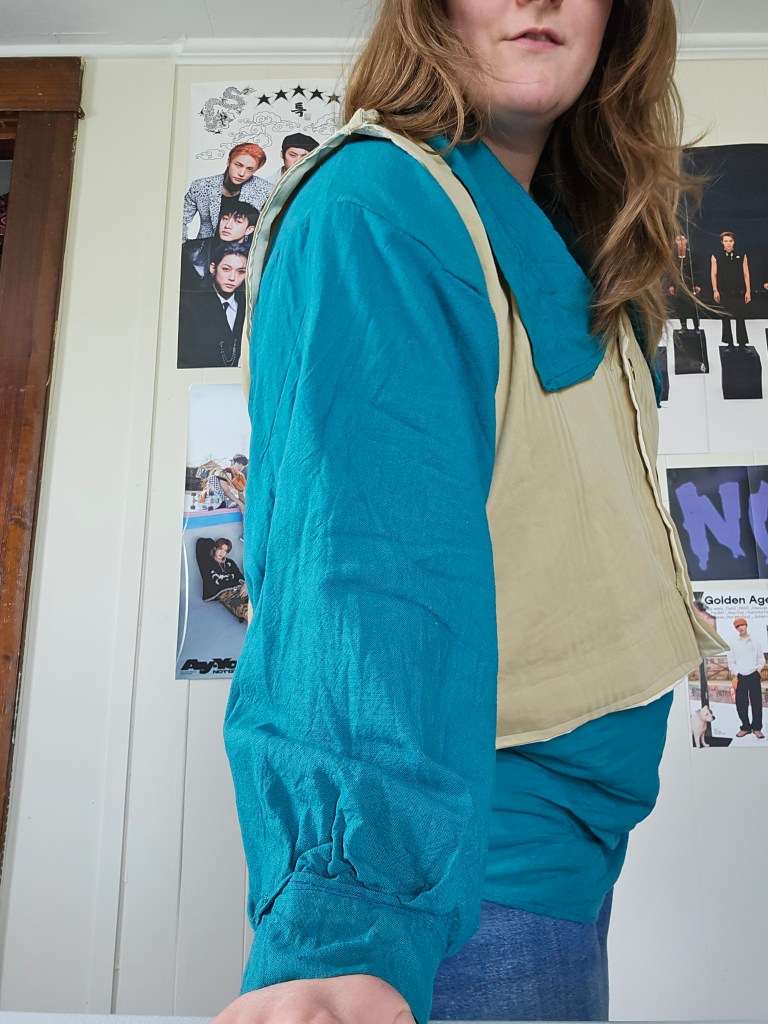
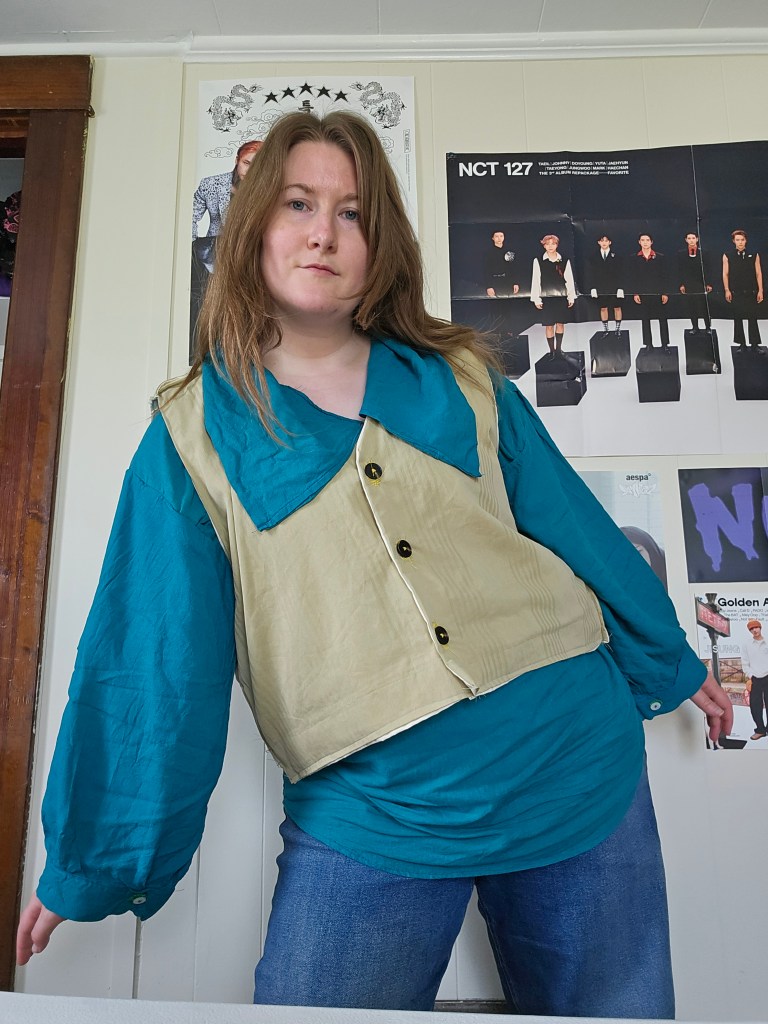
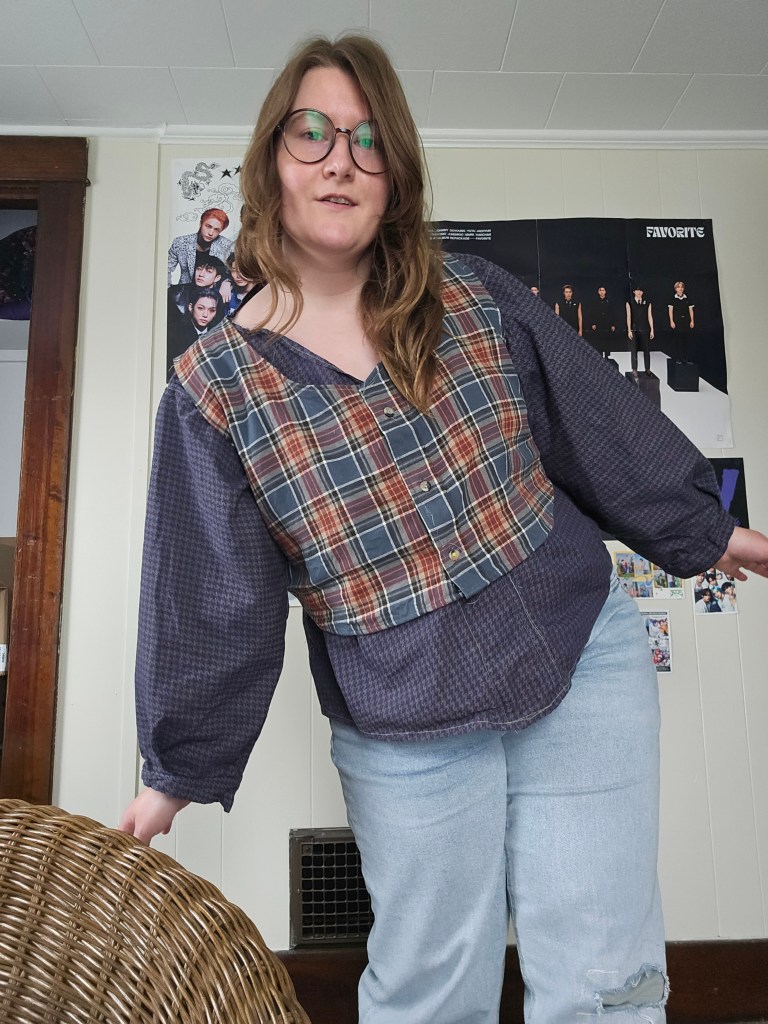
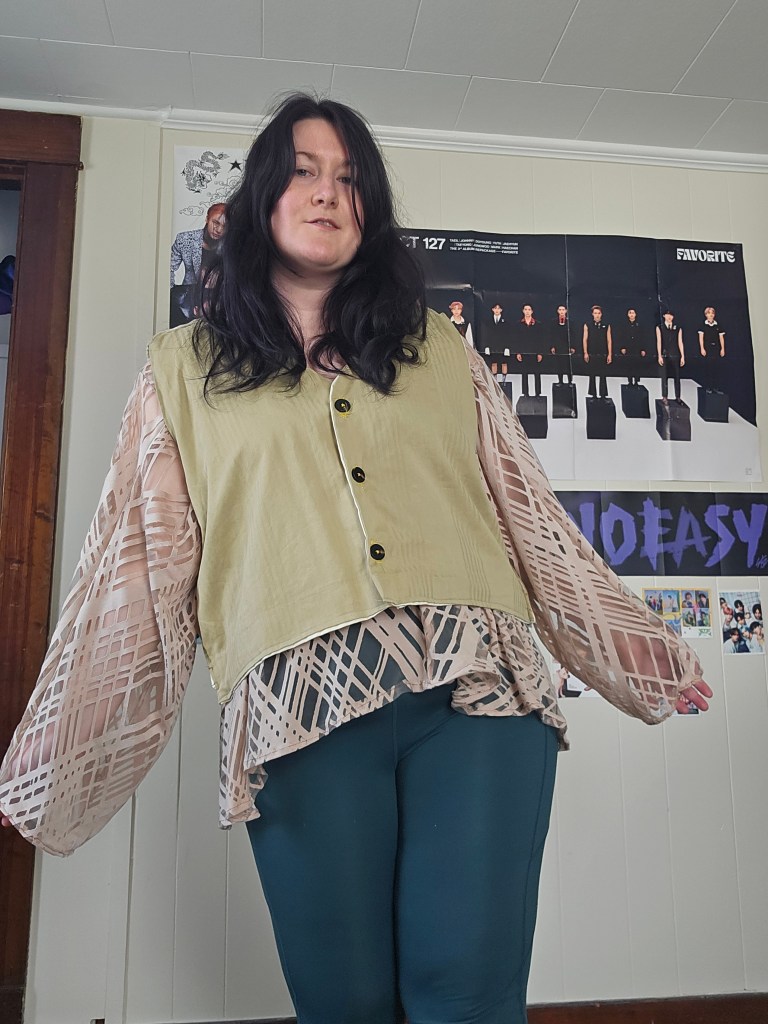
I love what sewing brings me. It’s a fantastic skill to have. I can design my own clothing made to measure and that is luxurious even if my sewing skills are mid.

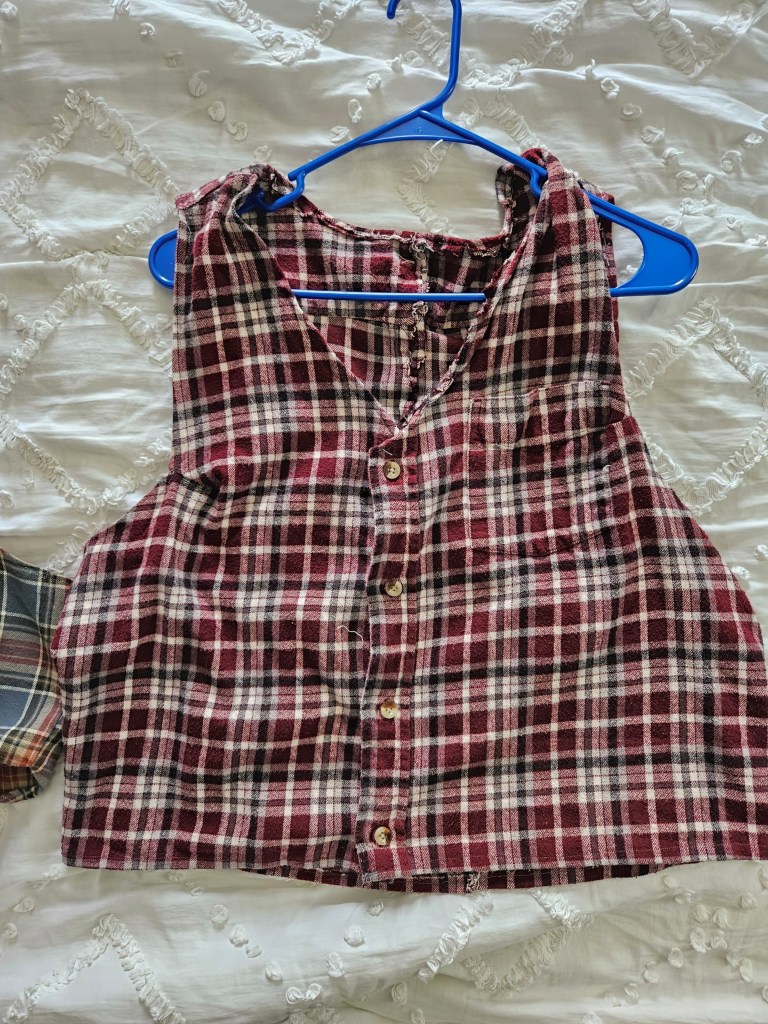
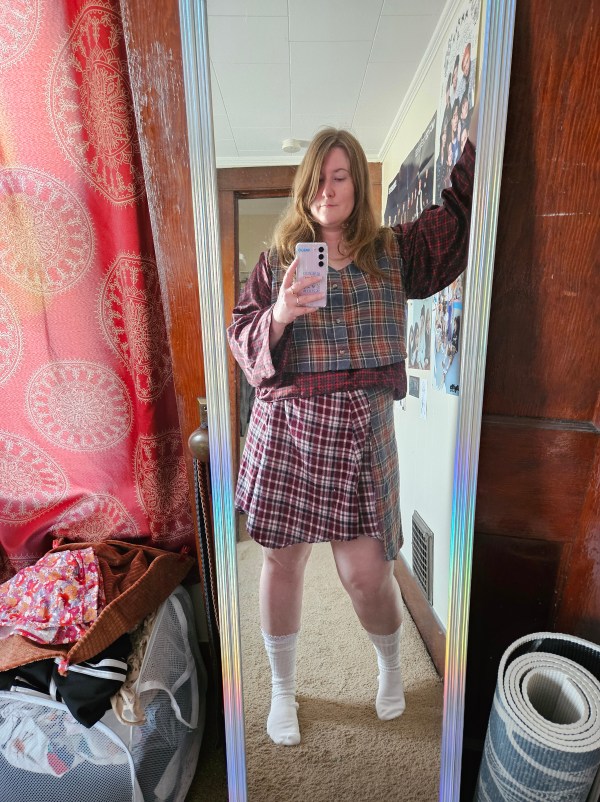
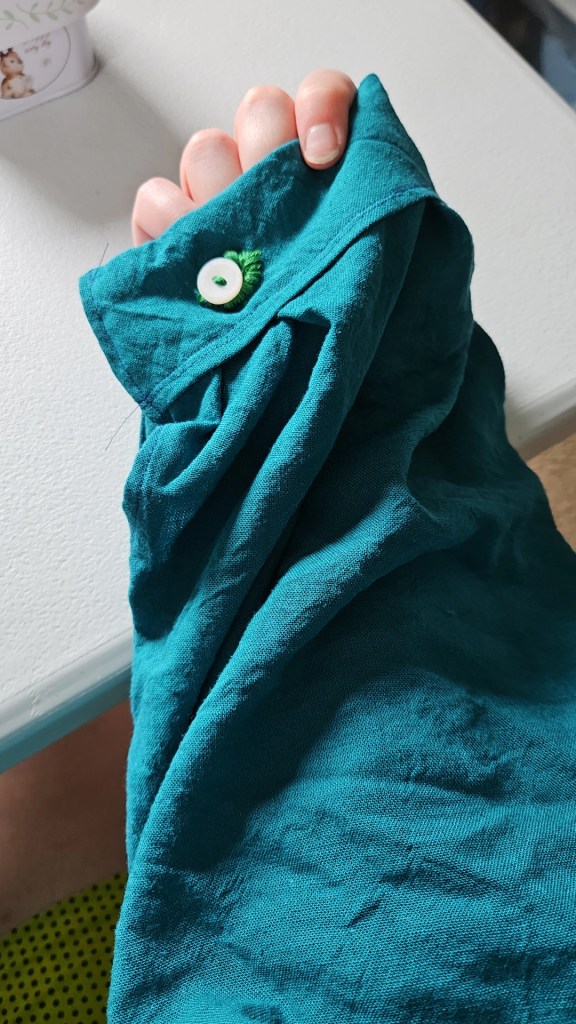
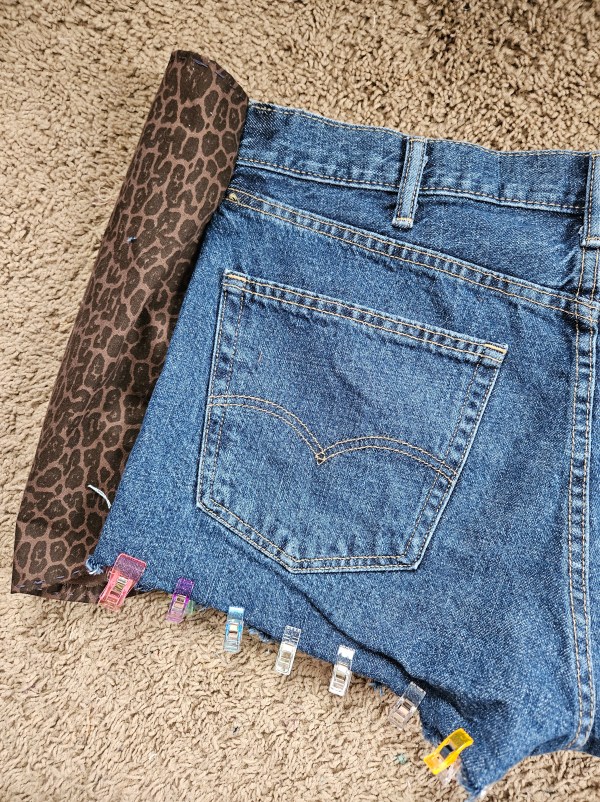
I can experiement with my style through upcycling. I love how I can recycle and repurpose fabric instead of donating. That is a important part of comsumption. We buy and buy but don’t think about the life cycle of the garment, but with needle and thread you can leave the buy and declutter cycle.

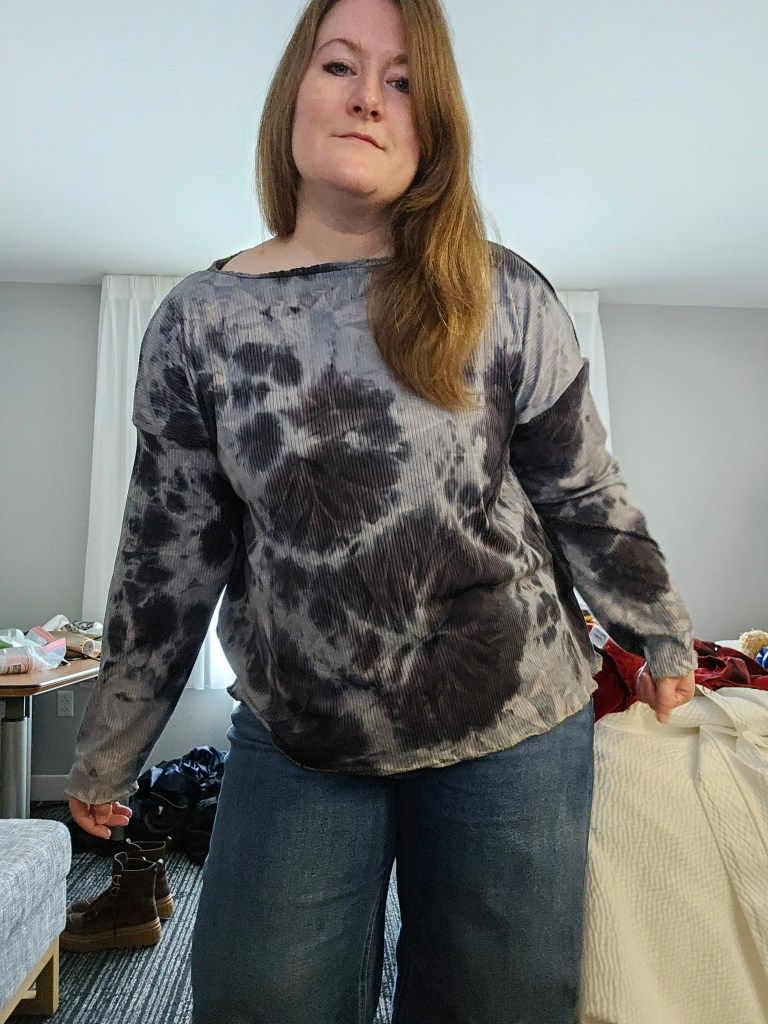
Sewing has taught me to be a wiser comsumer as well. I buy garments that I can’t sew. Complex garments. I also price compare fabric against pieces in store to figure out what is more cost effective to sew. Such as buying a 6.99/yard, one yard cut of cotton jersey to make one long sleeve basic tee. You can buy these from retailers for 35 USD compared to sewing one for 7 USD.

It’s not always cheaper, but sometimes it is and that is a huge win!

Finally, by allowing myself to feel these feelings, my hope is that I will be free to explore and create unencombered by goals of monetizing my hobby, instead that I enjoy the creative process again.

Have you ever tried sewing? Did you find it challenging?

Upcycling Pillowcases into a Vest and Skirt

What if the clothing we wear is more than just a garment, but connects us to the fibers of our being?

What if a pillowcase, from a loved one no longer here with you, could be more than just an item cluttering your closet? How could you repurpose it so the memories can walk with you in the new days ahead. All while the smell of their laundry detergent, and their home, so distinct to your senses, that being near it makes you feel comfort.

That is what this project is to me. More than an upcycle, or a thrifty hack, but a way to process feelings. Find a way forward. So the things left behind, that remind of what is missing, can do more than drown us in memory and stuff, but become a tangible way of healing.

Can I Make Mid-Size Overalls from 1 Yard of Fabric?

Do you ever think of something you’ve accomplished and wonder if you could do it even smaller? Well, I set a challenge for myself. A year ago, I wrote about creating a summer dress with a button-front from less than 1.5 yards of fabric. That post inspired this one, as this summer I was able to squeak out a pair of shortalls (overall shorts) from a yard of 59″ stretch twill from Mood Fabrics. This was not my first overall attempt, but I think my most ambitious because this yardage was for a pair of shorts with some abundant pockets, but I changed my mind after seeing a variety of overalls styled for spring and summer. I’ve owned this style before in denim. My favorite version I’ve purchased was a pair of vintage ’90s denim shortalls that were baggy and breathable for those swampy summer days. The more fitted versions I’ve found in stores in recent years are not my cup of tea, because for me, overalls are best when they are oversized.

When I cut these overalls out, I had just completed my draft of an overalls pattern from 2 yards of 44″ cotton twill from Kokka Fabrics, and I was itching to make more without fabric shopping, so I went for a dig in my fabric/yarn closet. It’s more of an antique clothing press, to be fair. This is where I found my gold – 1 yard of 59″ across cotton twill in a fun pattern, sturdy enough for a bottom weight garment with just enough fabric to cut the shorts, the bib, the straps. That was all I could muster for sure. I set aside the project and got to work on my Kokka Fabric project, which taught me so many things about sewing overalls that I had overlooked in past attempts.

Firstly, the back bib is not a rectangle. Secondly, a facing for the bib makes the project feel more professional. Thirdly, the buttons on the side need to be properly assembled with the fly for the right stability. Finishing the edges with twill tape made from the project’s fabric helped create a crisp look. Fourth, the overalls need pockets in order for the garment to sit well on the body. Lastly, I did not accomplish these with my 1-yard of fabric overalls. I took some shortcuts.

I ran out of fabric for the pockets, the fly, and the twill tape. To remedy this, I kept the shape to a romper style and less of a traditional overall. The bib is rectangular on both the front and back. The pockets were added from a previous project; I upcycled shorts into pockets. The side does not have any fastening, instead I sewed up the seam and let the boxy cut of the shorts and stretch of the fabric help me compensate for my lack of fabric.

So if this project is a pair of overalls that is not a traditional overall, but more of a romper, why am I writing about this?

Well, because the finished product is a wonderfully comfortable garment, practical for many things – gardening, sewing, cooking, knitting, farmers market, apple picking, cleaning, walking in the woods, going to the beach, etc – and I made it without being an expert. I made this garment through hand sewing, so you don’t even need a sewing machine if it’s out of your current budget. I purchased this fabric on sale for 10 USD/yard. I used less than a spool of thread, and repurposed the pockets from an item in my closet that I didn’t want to wear anymore. Have you seen the price of overalls? They are expensive, even the short version. A low-quality version will still set you back 30 USD.

I made these with 10 USD of fabric for a midsize frame, so this is accessible to all of us, not just the slim people. A lot of popular and cheap DIYs on the internet are made for very small bodies, which makes me nervous that if I try it, it will be expensive, but this wasn’t. Making these overalls was incredibly rewarding, too. These aren’t even the best pair I’ve made this summer, I’ll share the other ones soon! But these ones will have a special place in my heart because they are unique, comfortable, and made with my own hands. So if you have an idea of how you could make something by hand, make it happen! It’s a lot easier than you think, a great learning experience, and there are tons of resources here online to help you succeed!

Flannel Upcycling | Making A Vest

Last summer, I wanted to introduce vests into my wardrobe. I have made vests before for Kyle, but have not sewn a vest for myself before; I have knit them. Because this was a spontaneous idea, I needed to be budget-conscious and find a way to use what I had to make a vest. So I went to my closet and got creative! I had a few flannels in my closet that were hanging there, waiting for me to wear them, but I didn’t. That’s when I looked at the shirts closely – there was a button placket, shoulder yoke, and a sturdy fabric, with room to crop them. I saw the vest within the shirt, so I grabbed my scissors—and was a bit too zealous with the first one! Don’t be like me, have a plan. So how did I make this upcycle work? And what did I learn from my failed attempt?

Shoulder Seams, Yoke, and Waist Length

The crucial points of cutting, I would say, are being aware of the shoulder seams, accounting for the back yoke width, and properly measuring your waist length for a proper fit.

  • Shoulder seams on a flannel are boxy and loose. To achieve the set-in sleeve opening that accentuates and reveals the shirt underneath, you need to cut away the shoulder line – but not too much. Be mindful of how far into the shoulder you plan to cut, so that you are left with a proportional line.
  • The shoulder yoke is a technique used to tailor the shoulder line, while leaving the fabric below the shoulder loose. As a result, there will be more fabric on the back of the vest, which may affect the fit of the arm openings and possibly require a dart to remedy the loose fabric. If not, the back will gape open, looking awkward and like a mistake. A vest should hug the body, be tailored, or else the upcycle will look exactly like you cut up a flannel.
  • The length of the vest determines the style and balance of an outfit. One of my vests I cut too short, and this limits how I can wear it. I find it cuts me off in a regency high-waisted fashion that is fine when I wear it with a high-waisted skirt, but with pants or my linen Darcy shirt, it’s awkward. The other vest was cropped, in a careful fashion, ending at my hip and balancing my body line like a well-tailored garment. It’s far more versatile.
  • Cutting the neckline is crucial. For the front, a tapered cut to the button placket provides the classic look. Be careful not to cut too low for a historical silhouette. Also, remember not to cut the back the same as the front! I made this mistake and had to sew the cut portion back into my vest. This should be a crew neck line, straight across, with a slight dip in the middle for comfort.

Why a Flannel Shirt?

I chose flannel shirts as my medium to work with for three specific reasons. The first one I already mentioned – cost. We had just moved into our house and paid quarterly taxes. The vests were not a necessity, just a whim, so it made sense to me to take an existing item, I didn’t wear to create something I would wear. It’s funny how the sustainable option is sometimes the free option too. Secondly, flannel is a sturdy fabric, appropriate for the structure of the vest, that could be sewn without the addition of a lining, which I could add later if I wished, when I was more comfortable spending money on fabric. Thirdly, flannel is a classic pattern that reminded me of the woven woolen coating fabrics that vests have been sewn with for centuries, so it was a good match! I hope this inspires you to repurpose items you have to make something new! For the rest of the flannel, the pieces I cut away, like the sleeves, stay tuned to see what I did with those. It’s one of my favorite makes. 🙂

A Simple Denim Upcycling Project for Beginners

What do we do when an item of clothing doesn’t fit? Rehoming is always a good idea, but here is another one – upcycling. What if you could transform that garment into another garment you will wear? Here’s an easy upcycle using one pair of jeans.

The Process

To begin, I cut off the legs of the denim above the knee. This was important. To hem the denim to the same length, including the excess fabric needed to fold over for a waistband, the leg section needed to be longer than what was cropped.

I carefully cut open the side seams, avoiding both the pocket and the rivets. The belt loops were set aside for later.

I then cut the leg pieces to the proper width, adjusting the fit with try ons, before sewing. The top of the section was hemmed for a waistband and the bottom hemmed with the rest of the short.

I sewed this very carefully with my machine. I did break a needle but, it happens just use caution and wear glasses to protect those eyeballs. Always know where your fingers are too when using a sewing machine.

Next I repaired the worn denim around the belt loops and attached the cut off belt loops to a new section and tada: you have a new pair of shorts for summer!

I Made Furniture From Fabric Scraps

Do you ever look at an item you want to buy and think, how hard can that be to make? Well, that’s exactly how we got here.

Floor Culture

I’ve been moving my sewing room around, I took down my sewing table and moved to the floor. Which I know sounds extreme, but seriously, sitting on the floor is underated. My back and hips don’t get tight and my posture is improving. In the West, I think we have been foolish to move away from sitting on the floor and should acknowledge how wise other cultures are to sit on the floor for health and posture.

I have a wicker chair that is good for sitting in when I want a break from the floor, but what I was missing was an in between piece of furniture that I could move depending on my needs. I settled on a floor cushion that could be used as a seat, a workspace, folded up in a cushion or rolled into the corner for yoga to add more stretch breaks to my life.

Quick Fix

But here’s the catch, I decided I needed this piece of furniture on a whim and that’s what I am trying to remove from my purchasing decisions – less impulse purchases. I want to become less of a consumer and use what I have, so I thought could I make what I want? Similar cushions for sale online were 100-400 USD and with the tarriffs looming, I was feeling a bit nervous to buy something.

But then I remembered my Mom made a pouf, she knit the cover. I’d watched Morgan Donner make things from her scrap and fashion a mattress from braided fabric. I had also begun saving my fabric scraps and sorting them into bags that were taking over my crafting closet. I just had to settle on the cover fabric and design.

Design and Materials

A large rectangle seemed like the ticket with corners I could sew crisply and easily stuff at the end. There was this one extra wide cut of fabric I bought from Joann’s last summer which caught my eye. It’s a fabric I bought because I enjoyed the design but didn’t want to wear it. It looks a bit like denim and had a lovely swirl pattern that I thought, would compliment the lavender paint of the room. With the fabric sorted, it was time to tackle the pattern and stuffing!

I measured the fabric into two large rectangles and four slimmer sections to form the sides. These I sewed inside out to leave only one end open to stuff. I sewed this by hand over the course of a day, I’d say in total the sewing portion of this project was the easiest part. What lay ahead next was tricky, blister inducing  and stressful.

Stuffing and Scraps

I had bags upon bags of scrap fabric in varying sized pieces ready to be repurposed into stuffing, but the thing with fabric cabbage is that it’s not uniform. Which means there will be a lot of cuts to make. This I foolishly chose to do with my old fabric scissors, instead of using my rotary cutter and mat. I wish I had. The repetitive cutting motion wore a blister on my thumb and aggrevated an old injury on my finger joint.

My hands were tired, weak, and wrecked by the end of day one. Worse the cushion was 1/3 full. Not what I was expecting! How could it take that much stuffing?! With my bags of fabric scraps depleted, I moved on to new sources of cushion comfort. Such as yarn that I was given secondhand, which I had no creative plan for. This yarn was a super bulky, acrylic yarn, about 300 yards left, and perfectly fluffy for stuffing. I cut this into pieces and carried on auditing my stash.

I repurposed some old clotbes into stuffing, a blanket Mia’s little bunny chompers had chewed into swiss cheese, and more leftover yarn floating around my sewing room. Yet, I still lacked the floof I was after so I broke down and browsed the interweb. I knew polyfill was an option, but it’s also polyester and the point of this was to repurpose and use up things, not go to Walmart for polyfill, which happened to stretch very little. When I made a bolster pillow for our couch out of an old sheet, I went through 5+ bags of it. Whuch made me wonder, are there alternatives to polyfill on the market? There are! I found a small business, selling cotton filling that shipped. This got me to comfortable fluff, I still need a bit more but I’m going to revisit it later.

Voila! A piece of furniture made (mostly) from what I had in my house that used up some trash in the process. I am pleased. 😁

Potato Technology’s 2024 Autumn Winter Collection

This collection was about upcycling, trying new techniques, and making things that expressed what I like wearing based on previous designs I have made, but with a twist. The items I designed were 75% sourced from existing materials. They were upcycled from items in my closet, hand-me-downs from my mom or grandparents. They were made from destashed yarn I acquired or fabric that had been in my stash for a long time. I focused more on creating with natural materials like wool, linen and as always, I love cotton.

Vests were made from pillow cases and flannels. I re-worked a sweater from the existing sweater and leftover yarn. I dyed denim, deconstructed denim, and made some interesting new shorts and skirts. I combined leftover flannel from Christmas stockings to create a plaid and denim kilt. I used the cut-off sleeves of flannels from my vest projects to create a skirt from four flannel sleeves. I dove deeper into the world of trousers with two new patterns – a floral and railroad stripe. With each pair, I experimented with fastenings and pockets. I constructed my first “Mr. Darcy” shirt from teal linen using Bernadette Banner’s instructions for the body. I put my own spin on the collar, choosing a wider collar similar to a sailor collar that is popular in anime and J-fashion.

This was the first season I experimented with colorwork in knitting. I made a knit star motif hat from yarn that was leftover from my Magic of Scrap Yarn Cardigan. I made leg warmers, a squirrel motif mitten, and a melange of acrylic and wool to create this ear flap hat that reminds me of medieval European helmets. Although this season of creation was chaotic, I’m not sure if I even included all the projects I worked on, it was a time of great learning. It taught me that fashion design is more than taking raw material and cutting it into a new form.

Great design utilizes new and old. Fashion is about reusing, not wasting, and making things beautiful with careful craftsmanship. It does not mean it needs to be expensive, or need to be made by a great master couturier, it just needs to serve a purpose. We have lost sight of the purpose of fashion, but these projects of upcycling have reminded me that fashion is more than shopping, it is more than consumption, it is about the materials, the vision, the function.

Bunny Plush Keychain

Recently, I shared a Knit Star Plush Keychain Pattern, but that wasn’t the only keychain I’ve been working on. Behold, a knit bunny keychain made from repurposed fabric! This keychain was inspired by my Skzoo Quokka plush keychain which I have styled on my purse and belt loop. I was tempted to buy more as this trend has been all over my feed this year, but that’s unrealistic. So I thought, in Jeremy Clarkson fashion, how hard could it be?

This key chain was made by repurposing a pair of underwear, that was weirdly made without any stretch. They had no purpose but to be trashed, which I didn’t want to do because they were brand new and I liked the pattern and color story. So I wondered, could I translate this to a plushie and I could make this plushie into a keychain without buying any materials beyond the keychain hardware? The answer is yes!

I used a pen to draw pattern pieces onto the underwear by designating the fabric into four ear-pieces, two head-pieces, and a rectangle piece that would be used to connect the keychain hardware. The rest of the fabric was cut into small cut pieces that would be used as the stuffing. This worked like a dream!

I chose to sew this item by hand because of the small nature of the project. The pieces were too small and delicate to sew by machine with any semblance of control or care. It was a quick make and took one day to complete. I sewed 90% of the ears, turned them right side out, stuffed them, and then set the ears aside. Next, I repeated this process with the circle for the head and stuffed it. When I was certain that all the stuffing was divided between the three pieces adequately, I sewed closed the ears and head. Next, I attached the ears to the head. Finally, I sewed the rectangle and threaded it through the loop of the keychain before attaching it to the bunny plushie. I opted for an abstract look so I did not decorate the bunny plush with a face, therefore if it spins around it doesn’t matter what side is facing out.

Overall, this was a quick and thrifty project with the hardware coming in a pack of two for $2.99. I used the other clip on the knit star plush project. This type of plushie could be made with any scrap fabric you have and could be adapted into other animals. It would be an easy DIY gift too!

Were My 2024 Fashion Predictions Accurate?

At the beginning of January 2024, I made a post for fun predicting what I thought would become popular trends in 2024. Now that it’s December, how well did I do? I accurately guessed 6 out of 10 of the predictions I made! So what were these trends that I predicted and what did I get wrong? Let’s jump in!

Gameday Outfits

The NFL had a moment this year with the spotlight of Taylor Swift and Travis Kelce, and her gameday outfits became a source of public fascination. This created a wave of gameday outfit inspiration online, sparked by Blokecore in 2023. This carried on through WAG fashion and trickled into the mainstream. The Paris Olympics created fashion buzz, as did the movie Challengers. There was a rising fascination for F1 in the US. Not to mention the popularity of the team-branded baseball cap and Adidas soccer shorts paired with a button-down shirt. This one was a big deal and was unifying to be honest because who doesn’t like at least one of these sporting events? There is something for everyone.

Patches and Visible Mending

This definitely became a trend as DIY fashion and upcycling continue to grow in popularity online for sustainability and creative expression. Mending and learning to sew continues to rise in popularity as people choose to opt out of the fast fashion loop in search of clothing that will last all while standing out in a crowd. I think we can agree there was a hive mind within fashion since the Tik-Tok “core” aesthetics took off at the beginning of the decade and we are all looking for original ideas again.

Colorful Knit Accessories

Similarly, knitting along with crochet has continued to grow in popularity as hobbies and as a way to create DIY fashion by hand. It was so popular that chatGPT patterns and AI-created crochet and knit images cluttered the creative space. With Balletcore being popular, so were leg warmers and slouchy socks. Fingerless gloves, colorful hats, and brightly colored vests made 2024 what it was – a fiber artist paradise.

Exaggerated Tailoring

This was seen on the runway, with tailoring having a moment with trousers, vests, and blazers finding popularity once again. Dramatic shapes were popular on the runway. I also saw vests and dramatic trouser shapes in mainstream stores. I think this should always be in style so let’s keep in that way fashion trends. It’s a classic.

Resurgence of the Flip Flops

Yes, these were hailed the “It girl” shoe of the summer after Gisele Bundchen (yes I know I’m missing the umlauts) was seen wearing them. The specific flip-flop brand Havaianas, was the iconic style of 2024, but luxury brands tried to corner that market with $900+ flip-flops. I think it makes sense for these to come around again after how long the Birkenstock sandal has been the favorite choice, followed by Tevas, it’s the next logical evolution from clunky to delicate. Personally, all three of these drive my feet nuts but I’d probably choose the Teva for comfort or flip-flops for sheer chillness. Flip-flops were also worn by athletes at the Paris 2024 games.

Jersey Shore Nostalgia

Indeed Ed Hardy and Von Dutch did trend again this year! Mainly with teens and tweens, but this styling returned to the runway with Kim Petras’ Spring 2024 collection which featured Ed Hardy’s iconic designs. I’m excited for this era of fashion to return because I enjoyed the late 2000s-early 2010s fashion and the over-the-top spectacle of it. I’m certainly more for this than the mob wife styling of early 2024.

Parasols for Sun Relief

This one I thought, was a long shot but it made sense for it to become a trend because of how practical they are while protecting skin from UV damage. They are technically better for the planet than single-use sunscreen. I was not wrong. This market is projected to grow from 2024-2032 as the parasol or sun umbrella market is anticipated to grow globally. In 2024, there was significant growth as a trend for Japanese men. That’s a result! 🙂

What Did I Miss the Mark On?

  • ARMY-core was not a thing even though all BTS members were in the military this year, no trends emerged from this across the K-pop sphere. The only popular examples of camo I saw were from Chappell Roan’s ‘Midwest Princess’ camo hats from her tour and the Harris-Walz campaign hats which copied the same style.
  • Gilded Age Finery did not take off like I hoped. The only instances I found were Bad Bunny’s Met Gala look and Paris Fashion Week using late Victorian and Regency era opulence as inspiration for glamour.
  • Bonnets this was a flop except for two key shifts. One I hope I explain right because I am not familiar with the hair culture. According to a few articles I found black men styled bonnets as a protective hair style in 2024. Secondly, hats became popular again with rope hats and pillbox styles being the most talked about.
  • Cosmic Cowboy or Sailor Cowboy would have been accurate if I had dropped the qualifiers. Cowboy was the most iconic aesthetic of this year with cowboy styling, media, and country music being a key player in pop culture. Americana in general had a moment which is odd but hopefully a turning point for unification in my divided land.

What were your favorite style moments of 2024? And did you participate in any of these trends?

Sewing Stretch Fabric Struggles

Do you ever spend time learning a skill just to forget it when you need to use it? That’s me. That’s how I sew stretch fabric on my machine. I just jump in and completely forget that I need to first properly adjust the tension and stitch type or else mayhem ensues. Mayhem like my machine having a nice little snack on my fabric.

Sometimes the machine gets extra bold and drags the hem under into the bobbin’s domain, jamming the machine. This is what I am talking about:

In the moment of panic, when I realize the fabric is stuck down in the machine a few thoughts dance through my mind.

  • Why didn’t you sew this by hand?!
  • You did it, you finally broke the machine you maniac!!
  • It’s ripped to shreds, isn’t it? The whole project might be gone in a moment.
  • This machine hates me. How do other people sew so effortlessly??

But it’s not the machine’s fault and it’s not the fabric that caused this, and it’s not even my fault. It’s morally neutral, it’s an accident and a learning experience to grow from!

As I was writing this, I caught myself crafting sentences to describe the situation with very negative and demeaning language towards myself for making a simple mistake. (A mistake that once I freed the fabric from the machine, I corrected and carried on to make the finished garment. The tight thread tension actually made a happy accident, a lettuce edge hem.)

It is not something that I should hold with such severity against myself that I internally tell myself I am an idiot, a lousy sewist, or useless.

Because how would I respond to hearing someone say that to another person? I would be disappointed in the speaker and make them stop.

How would I respond if I spoke with such aggression to another person? I would be ashamed.

I am learning through these sewing setbacks to temper the internal monologue and be a more gentle and loving person towards myself, to maintain better mental health, and establish the practice in my mind so that I can be a source of gentleness and kindness to others.

How do you speak towards yourself and others when they make a mistake?

Create a website or blog at WordPress.com

Up ↑