What if the clothing we wear is more than just a garment, but connects us to the fibers of our being?
What if a pillowcase, from a loved one no longer here with you, could be more than just an item cluttering your closet? How could you repurpose it so the memories can walk with you in the new days ahead. All while the smell of their laundry detergent, and their home, so distinct to your senses, that being near it makes you feel comfort.
That is what this project is to me. More than an upcycle, or a thrifty hack, but a way to process feelings. Find a way forward. So the things left behind, that remind of what is missing, can do more than drown us in memory and stuff, but become a tangible way of healing.
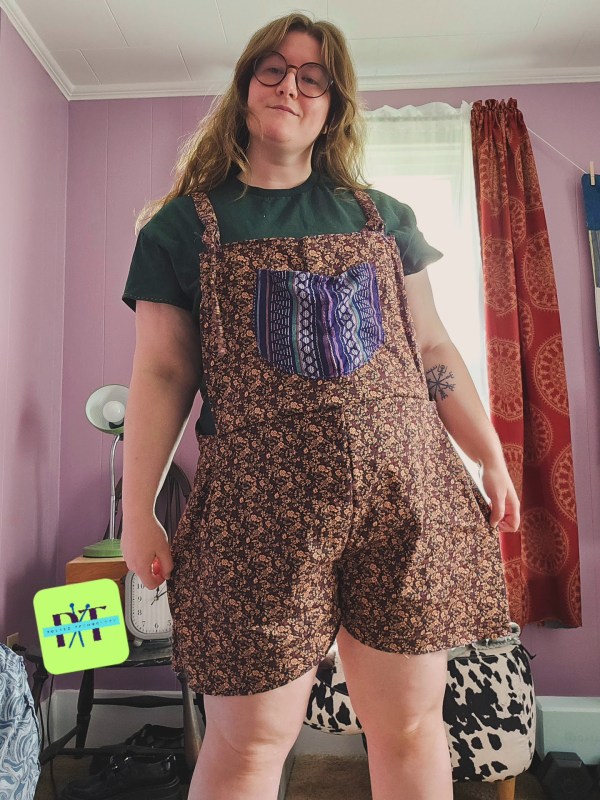
Do you ever think of something you’ve accomplished and wonder if you could do it even smaller? Well, I set a challenge for myself. A year ago, I wrote about creating a summer dress with a button-front from less than 1.5 yards of fabric. That post inspired this one, as this summer I was able to squeak out a pair of shortalls (overall shorts) from a yard of 59″ stretch twill from Mood Fabrics. This was not my first overall attempt, but I think my most ambitious because this yardage was for a pair of shorts with some abundant pockets, but I changed my mind after seeing a variety of overalls styled for spring and summer. I’ve owned this style before in denim. My favorite version I’ve purchased was a pair of vintage ’90s denim shortalls that were baggy and breathable for those swampy summer days. The more fitted versions I’ve found in stores in recent years are not my cup of tea, because for me, overalls are best when they are oversized.
When I cut these overalls out, I had just completed my draft of an overalls pattern from 2 yards of 44″ cotton twill from Kokka Fabrics, and I was itching to make more without fabric shopping, so I went for a dig in my fabric/yarn closet. It’s more of an antique clothing press, to be fair. This is where I found my gold – 1 yard of 59″ across cotton twill in a fun pattern, sturdy enough for a bottom weight garment with just enough fabric to cut the shorts, the bib, the straps. That was all I could muster for sure. I set aside the project and got to work on my Kokka Fabric project, which taught me so many things about sewing overalls that I had overlooked in past attempts.
Firstly, the back bib is not a rectangle. Secondly, a facing for the bib makes the project feel more professional. Thirdly, the buttons on the side need to be properly assembled with the fly for the right stability. Finishing the edges with twill tape made from the project’s fabric helped create a crisp look. Fourth, the overalls need pockets in order for the garment to sit well on the body. Lastly, I did not accomplish these with my 1-yard of fabric overalls. I took some shortcuts.
I ran out of fabric for the pockets, the fly, and the twill tape. To remedy this, I kept the shape to a romper style and less of a traditional overall. The bib is rectangular on both the front and back. The pockets were added from a previous project; I upcycled shorts into pockets. The side does not have any fastening, instead I sewed up the seam and let the boxy cut of the shorts and stretch of the fabric help me compensate for my lack of fabric.
So if this project is a pair of overalls that is not a traditional overall, but more of a romper, why am I writing about this?
Well, because the finished product is a wonderfully comfortable garment, practical for many things – gardening, sewing, cooking, knitting, farmers market, apple picking, cleaning, walking in the woods, going to the beach, etc – and I made it without being an expert. I made this garment through hand sewing, so you don’t even need a sewing machine if it’s out of your current budget. I purchased this fabric on sale for 10 USD/yard. I used less than a spool of thread, and repurposed the pockets from an item in my closet that I didn’t want to wear anymore. Have you seen the price of overalls? They are expensive, even the short version. A low-quality version will still set you back 30 USD.
I made these with 10 USD of fabric for a midsize frame, so this is accessible to all of us, not just the slim people. A lot of popular and cheap DIYs on the internet are made for very small bodies, which makes me nervous that if I try it, it will be expensive, but this wasn’t. Making these overalls was incredibly rewarding, too. These aren’t even the best pair I’ve made this summer, I’ll share the other ones soon! But these ones will have a special place in my heart because they are unique, comfortable, and made with my own hands. So if you have an idea of how you could make something by hand, make it happen! It’s a lot easier than you think, a great learning experience, and there are tons of resources here online to help you succeed!
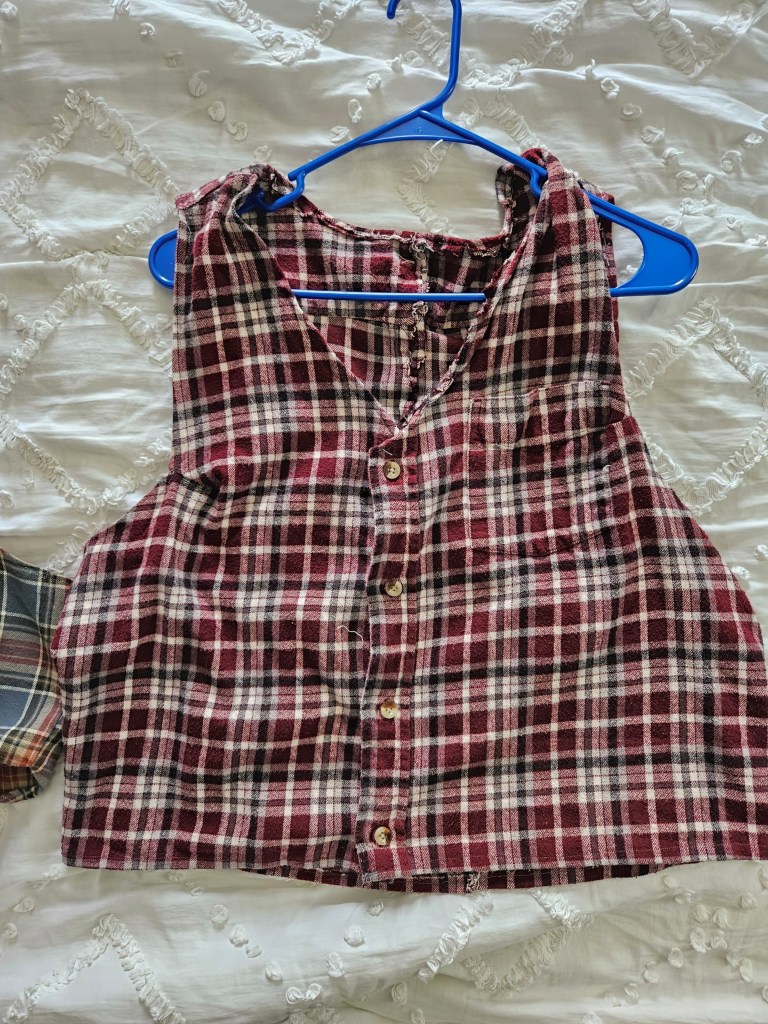
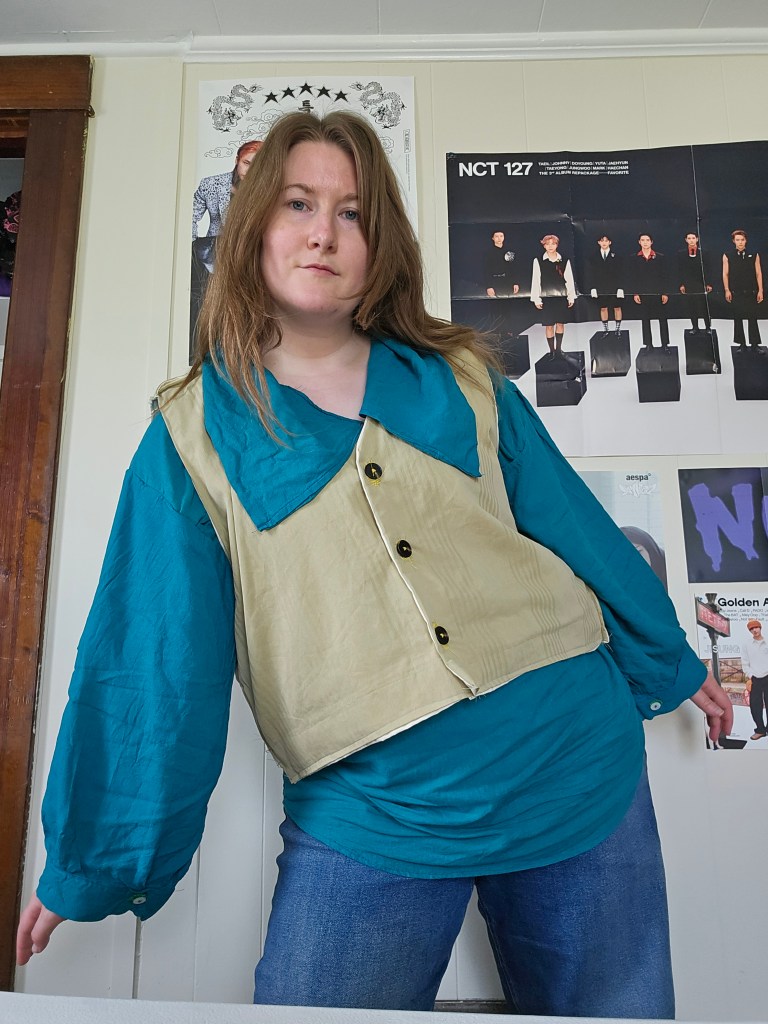
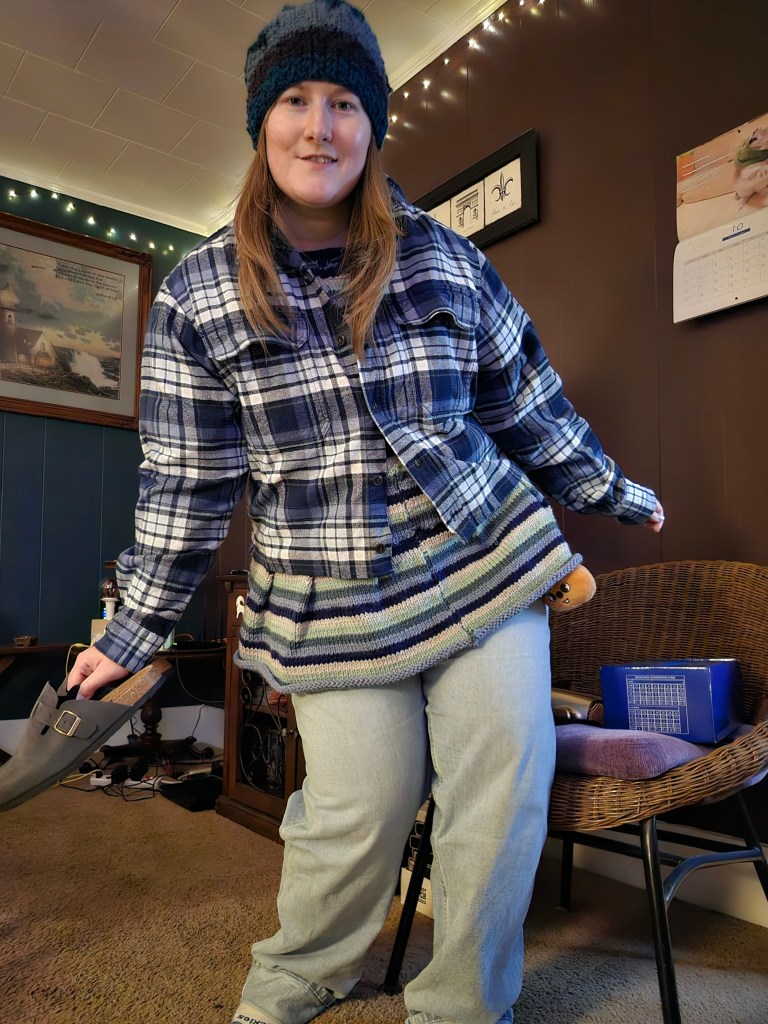
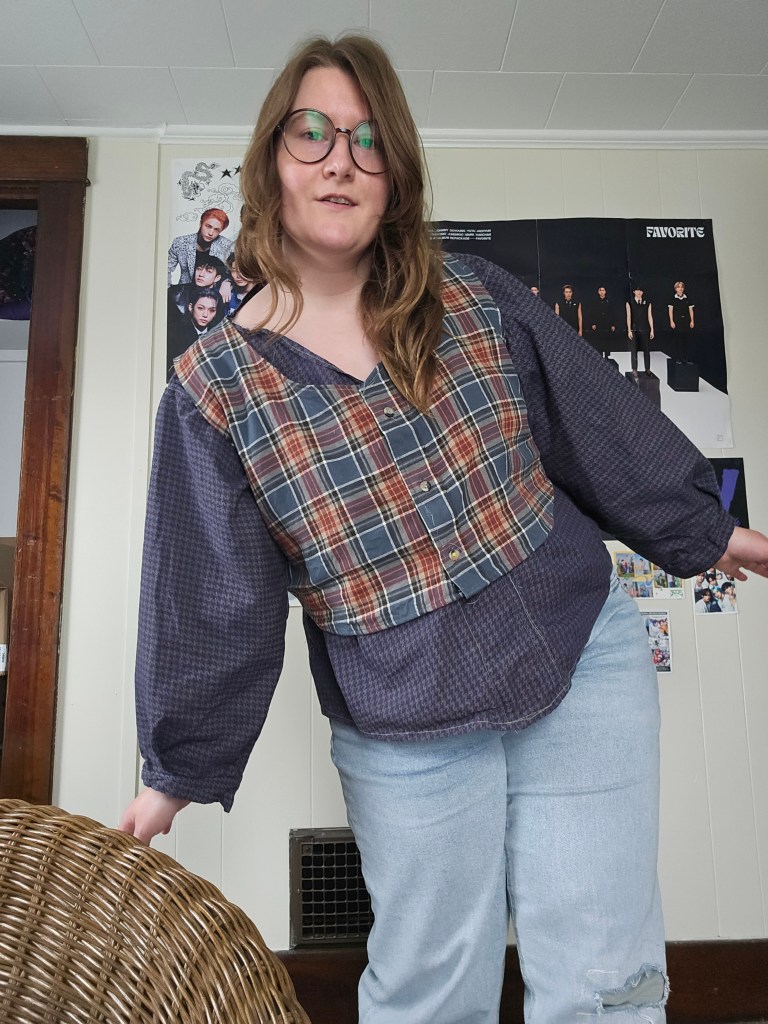
Last summer, I wanted to introduce vests into my wardrobe. I have made vests before for Kyle, but have not sewn a vest for myself before; I have knit them. Because this was a spontaneous idea, I needed to be budget-conscious and find a way to use what I had to make a vest. So I went to my closet and got creative! I had a few flannels in my closet that were hanging there, waiting for me to wear them, but I didn’t. That’s when I looked at the shirts closely – there was a button placket, shoulder yoke, and a sturdy fabric, with room to crop them. I saw the vest within the shirt, so I grabbed my scissors—and was a bit too zealous with the first one! Don’t be like me, have a plan. So how did I make this upcycle work? And what did I learn from my failed attempt?
Shoulder Seams, Yoke, and Waist Length
The crucial points of cutting, I would say, are being aware of the shoulder seams, accounting for the back yoke width, and properly measuring your waist length for a proper fit.
Shoulder seams on a flannel are boxy and loose. To achieve the set-in sleeve opening that accentuates and reveals the shirt underneath, you need to cut away the shoulder line – but not too much. Be mindful of how far into the shoulder you plan to cut, so that you are left with a proportional line.
The shoulder yoke is a technique used to tailor the shoulder line, while leaving the fabric below the shoulder loose. As a result, there will be more fabric on the back of the vest, which may affect the fit of the arm openings and possibly require a dart to remedy the loose fabric. If not, the back will gape open, looking awkward and like a mistake. A vest should hug the body, be tailored, or else the upcycle will look exactly like you cut up a flannel.
The length of the vest determines the style and balance of an outfit. One of my vests I cut too short, and this limits how I can wear it. I find it cuts me off in a regency high-waisted fashion that is fine when I wear it with a high-waisted skirt, but with pants or my linen Darcy shirt, it’s awkward. The other vest was cropped, in a careful fashion, ending at my hip and balancing my body line like a well-tailored garment. It’s far more versatile.
Cutting the neckline is crucial. For the front, a tapered cut to the button placket provides the classic look. Be careful not to cut too low for a historical silhouette. Also, remember not to cut the back the same as the front! I made this mistake and had to sew the cut portion back into my vest. This should be a crew neck line, straight across, with a slight dip in the middle for comfort.
Why a Flannel Shirt?
I chose flannel shirts as my medium to work with for three specific reasons. The first one I already mentioned – cost. We had just moved into our house and paid quarterly taxes. The vests were not a necessity, just a whim, so it made sense to me to take an existing item, I didn’t wear to create something I would wear. It’s funny how the sustainable option is sometimes the free option too. Secondly, flannel is a sturdy fabric, appropriate for the structure of the vest, that could be sewn without the addition of a lining, which I could add later if I wished, when I was more comfortable spending money on fabric. Thirdly, flannel is a classic pattern that reminded me of the woven woolen coating fabrics that vests have been sewn with for centuries, so it was a good match! I hope this inspires you to repurpose items you have to make something new! For the rest of the flannel, the pieces I cut away, like the sleeves, stay tuned to see what I did with those. It’s one of my favorite makes. 🙂
A few months ago, I wrote about my 2025 being a creative slump. Well, things have changed, and now I’d say I’ve found my pace. It’s a dash! I have more ideas than my hands can craft and it feels freeing, like all the crap from the past few months have lifted and the world makes sense, as long as it is crafted from needles.
New Materials
Maybe it’s the new yarns? I’ve been branching out to find new brands and new favorites. Loops and Threads cotton has provided an affordable fiber to try new techniques and play around. The Caron Big Cakes and Blossom Cakes are getting me excited for every stitch, and Knit Picks Pima Cotton has been a dream to work with.
With the news of Big Twist coming to Michael’s, I’m excited to have my tried and true affordable winter yarn to keep pushing my creative limits.
The most exciting new fiber, though, is a recent pickup from my local farmer’s market. A skein of yarn, from sheep in my neighboring county, that was processed and spun over the border in Ohio. It’s not quite the LYS I was wishing for, but it makes me hopeful for the future!
DIY Merch with Yarn
The North American leg of the 2025 Stray Kids Dominate Tour made me feel some big FOMO for the unique merch sold at the shows. From the SKZ Baseball jerseys to the Evil Skzoo tees, dang, I wanted to participate, until I heard the stories of long hot lines at the baseball stadiums and endless screechers, I came back to reality. But – it got me thinking, why can’t I make my own? So I’ve been designing, knitting, and feeling a buzz of happiness because these pieces are some of my best work to date. I can’t wait to share them!
Kokka Fabrics and Firecracker Fabrics
I’ve found new fabric sources and new go-to brands I love. In support of small businesses, I made a purchase from a local fabric store – Firecracker Fabrics, online, because honestly, it is far too difficult to go into Pittsburgh in road work season. Through this purchase, I fulfilled a goal – to try Kokka Fabrics. They are a textile design brand out of Japan, which is sold at my local shop, and it was a dream to work with! With the bad news of Joann’s and the uncertainty of tariffed materials, to be honest, I was thinking my sewing days would be cut short, but this is a fantastic resource. It was affordable, good quality, and unique – all the things I look for in fabrics but have struggled to find at Joann’s, which made me shop at Mood Fabrics. Now I have another option!
I also thrifted some fabric from my in-town thrift store, truly unique fabric that has pushed me forward to try making shorts again and overalls. For not sewing as quickly this year, the garments I have completed are more daring, and I think that is the new materials and new techniques, like elastic, that are pushing me to design more than just sew. I feel like I am back in my 2021 mindset, and I am ready to make clothes that express my design point of view. I lost that in 2023 and got burnt out in 2024, yet a six-month break got me back into it. Maybe that is one good thing that has come from the chaos – a break to reset.
New Inspiration
I’ve found inspiration from K-pop stages and historical sewing channels up to this point, but it was getting stale. Nothing was sparking that drive to create, until recently, when I found some new making channels. I like to watch other people make things, not to copy, but to learn by observing and then channel what I learn into my own inspirations, such as learning how to embroider, make eyelet openings for corset-ish vests, upcycling ideas, etc. A recent find has been Maybe Bre’s channel with her “Mama Mia Summer” video, inspiring me to make overalls. Mark Vogel’s channel has me itching to learn crochet after seeing his granny square vest, and finally Kali’s Threads/Handmade with Kaye – these sisters are innovative. I didn’t know I wanted to wear a crochet polo button shirt until I saw Kali’s finished garment; it’s beautiful!
Final Thoughts
Sometimes we need a break. Sometimes we need limitations to make us push forward in our goals. Sometimes a change of pace helps rediscover our passion. I’ve started gauge swatching, pattern writing, and looking for pieces I think I should make to enhance my wardrobe that are more fun, less functional. It’s weird how the creative process, when you hit a slump, can convince you of a lack of talent. When really, maybe your cup is empty? Or in my case, maybe you have lost your spark because you needed to raise your standard and make new, challenging projects to ignite your passion again. Until next time, thanks, reader, for spending time with me today. Happy creating to you! 🙂
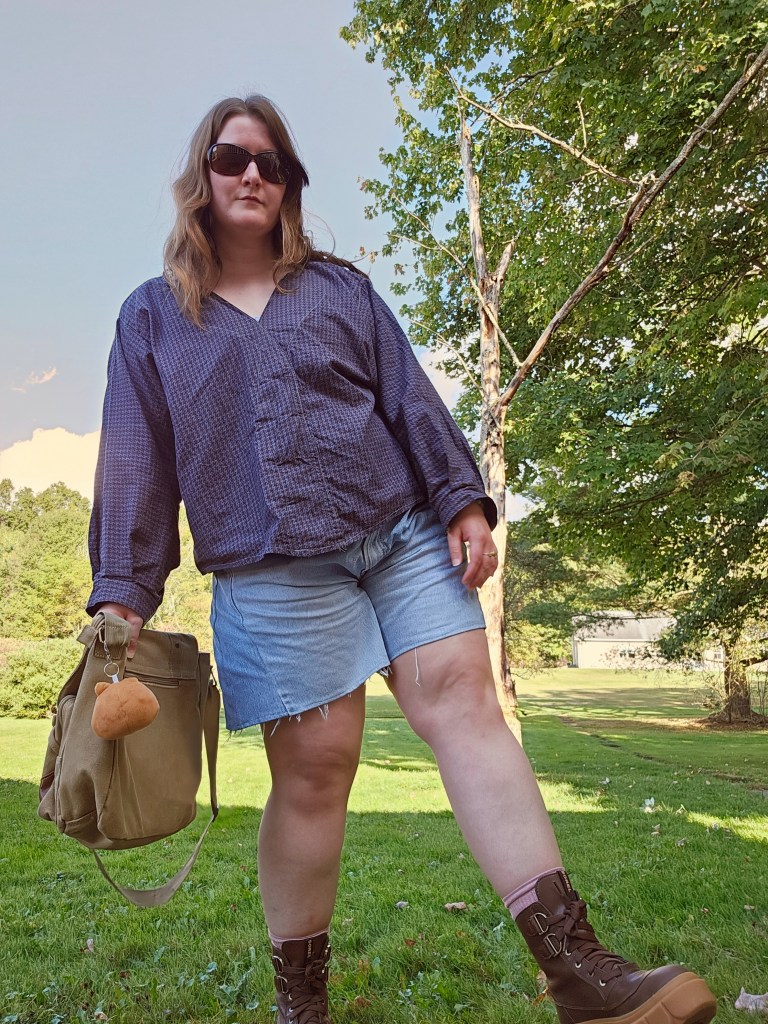
What do we do when an item of clothing doesn’t fit? Rehoming is always a good idea, but here is another one – upcycling. What if you could transform that garment into another garment you will wear? Here’s an easy upcycle using one pair of jeans.
The Process
To begin, I cut off the legs of the denim above the knee. This was important. To hem the denim to the same length, including the excess fabric needed to fold over for a waistband, the leg section needed to be longer than what was cropped.
I carefully cut open the side seams, avoiding both the pocket and the rivets. The belt loops were set aside for later.
I then cut the leg pieces to the proper width, adjusting the fit with try ons, before sewing. The top of the section was hemmed for a waistband and the bottom hemmed with the rest of the short.
I sewed this very carefully with my machine. I did break a needle but, it happens just use caution and wear glasses to protect those eyeballs. Always know where your fingers are too when using a sewing machine.
Next I repaired the worn denim around the belt loops and attached the cut off belt loops to a new section and tada: you have a new pair of shorts for summer!
Do you ever look at an item you want to buy and think, how hard can that be to make? Well, that’s exactly how we got here.
Floor Culture
I’ve been moving my sewing room around, I took down my sewing table and moved to the floor. Which I know sounds extreme, but seriously, sitting on the floor is underated. My back and hips don’t get tight and my posture is improving. In the West, I think we have been foolish to move away from sitting on the floor and should acknowledge how wise other cultures are to sit on the floor for health and posture.
I have a wicker chair that is good for sitting in when I want a break from the floor, but what I was missing was an in between piece of furniture that I could move depending on my needs. I settled on a floor cushion that could be used as a seat, a workspace, folded up in a cushion or rolled into the corner for yoga to add more stretch breaks to my life.
Quick Fix
But here’s the catch, I decided I needed this piece of furniture on a whim and that’s what I am trying to remove from my purchasing decisions – less impulse purchases. I want to become less of a consumer and use what I have, so I thought could I make what I want? Similar cushions for sale online were 100-400 USD and with the tarriffs looming, I was feeling a bit nervous to buy something.
But then I remembered my Mom made a pouf, she knit the cover. I’d watched Morgan Donner make things from her scrap and fashion a mattress from braided fabric. I had also begun saving my fabric scraps and sorting them into bags that were taking over my crafting closet. I just had to settle on the cover fabric and design.
Design and Materials
A large rectangle seemed like the ticket with corners I could sew crisply and easily stuff at the end. There was this one extra wide cut of fabric I bought from Joann’s last summer which caught my eye. It’s a fabric I bought because I enjoyed the design but didn’t want to wear it. It looks a bit like denim and had a lovely swirl pattern that I thought, would compliment the lavender paint of the room. With the fabric sorted, it was time to tackle the pattern and stuffing!
I measured the fabric into two large rectangles and four slimmer sections to form the sides. These I sewed inside out to leave only one end open to stuff. I sewed this by hand over the course of a day, I’d say in total the sewing portion of this project was the easiest part. What lay ahead next was tricky, blister inducing and stressful.
Stuffing and Scraps
I had bags upon bags of scrap fabric in varying sized pieces ready to be repurposed into stuffing, but the thing with fabric cabbage is that it’s not uniform. Which means there will be a lot of cuts to make. This I foolishly chose to do with my old fabric scissors, instead of using my rotary cutter and mat. I wish I had. The repetitive cutting motion wore a blister on my thumb and aggrevated an old injury on my finger joint.
My hands were tired, weak, and wrecked by the end of day one. Worse the cushion was 1/3 full. Not what I was expecting! How could it take that much stuffing?! With my bags of fabric scraps depleted, I moved on to new sources of cushion comfort. Such as yarn that I was given secondhand, which I had no creative plan for. This yarn was a super bulky, acrylic yarn, about 300 yards left, and perfectly fluffy for stuffing. I cut this into pieces and carried on auditing my stash.
I repurposed some old clotbes into stuffing, a blanket Mia’s little bunny chompers had chewed into swiss cheese, and more leftover yarn floating around my sewing room. Yet, I still lacked the floof I was after so I broke down and browsed the interweb. I knew polyfill was an option, but it’s also polyester and the point of this was to repurpose and use up things, not go to Walmart for polyfill, which happened to stretch very little. When I made a bolster pillow for our couch out of an old sheet, I went through 5+ bags of it. Whuch made me wonder, are there alternatives to polyfill on the market? There are! I found a small business, selling cotton filling that shipped. This got me to comfortable fluff, I still need a bit more but I’m going to revisit it later.
Voila! A piece of furniture made (mostly) from what I had in my house that used up some trash in the process. I am pleased. 😁
Like I said in my 2025 So Far Has Been a Creative Slump, I am sharing the projects I’ve hidden away in my closet and the photos buried in my gallery. It’s time to catch up on this blog on what I’ve been sewing, because it’s been a journey of new discoveries.
Go With the Flow
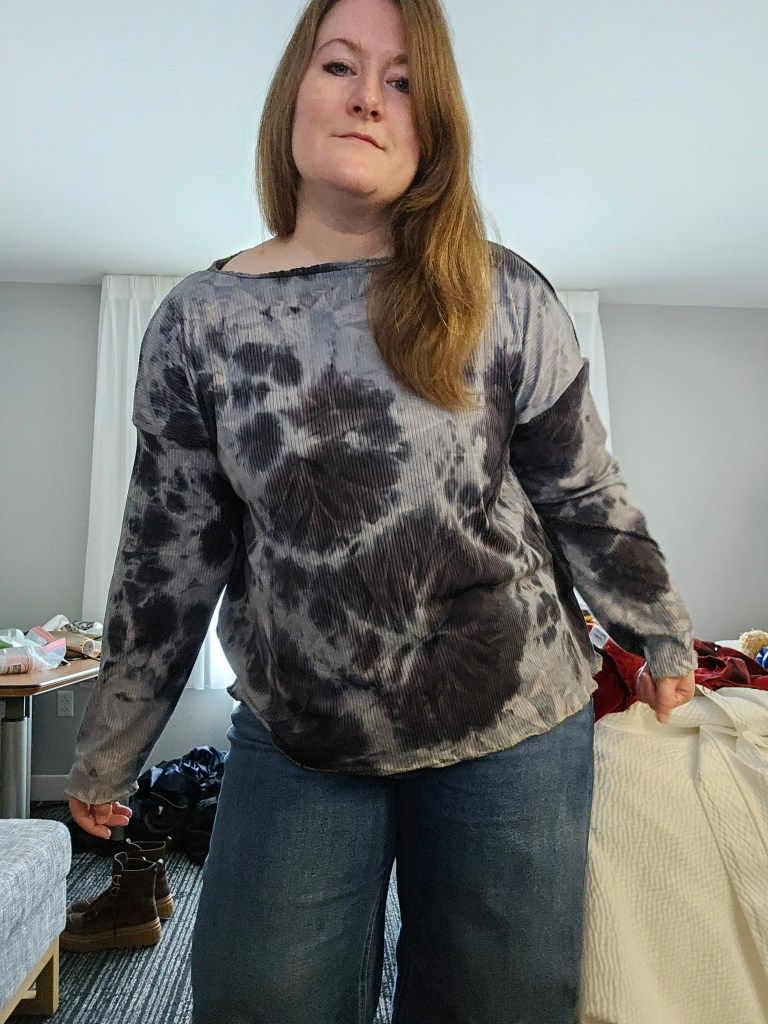
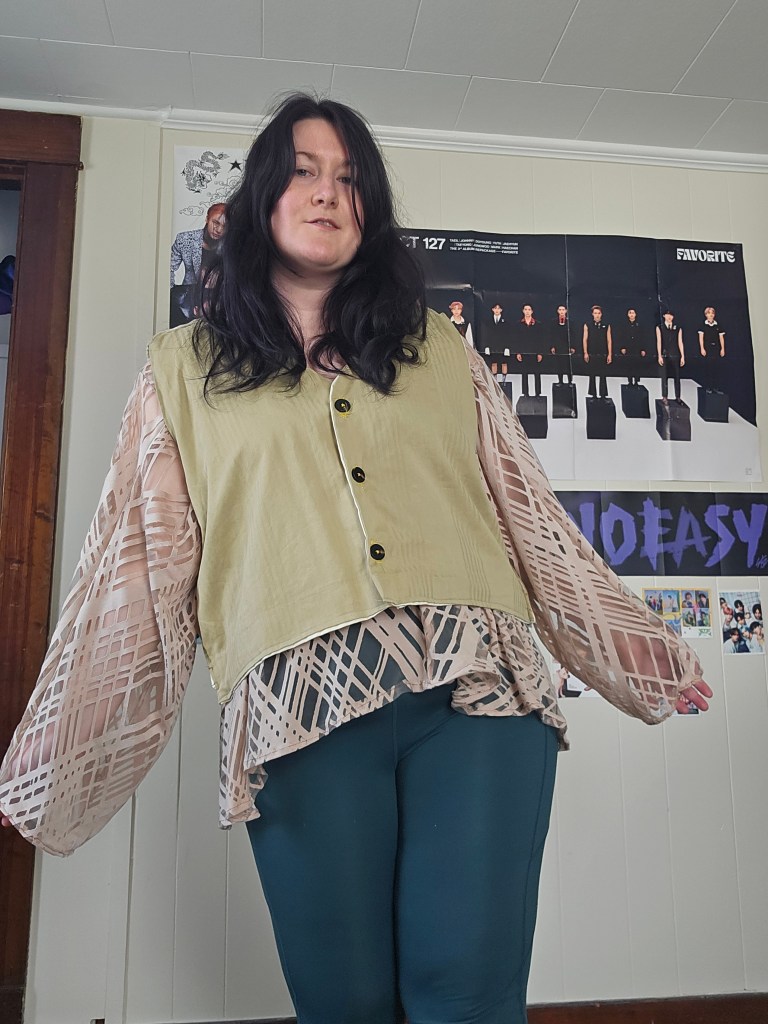
In 2022, Kyle gave me a unique birthday present. He curated a mystery box of fabric for me to do my own “Project Runway” challenge – one of those fabrics was this sheer wheat colored criss-cross fabric. It has lived in my stash ever since. It was a fabric that scared me but intrigued me. It’s a stretch mesh burnout pattern, and for over a year, I was baffled at how to sew it without destroying it.
Even so, after I sewed it into a garment, how would I apply it? Would it be a garment that would be sewn layered on top of an opaque fabric? What would that look like? Should I use a high contrast fabric or something similar in tone? It stumped me. I lived with it a bit more in my stash, and it came with me through the move and into the fall once more. In 2024, after two years, I had an idea – sheer layering. A garment I could wear under or over other pieces to add dimension and disguise the oatmeal color that I was concerned would wash me out.
My decision was to make a shirt. I thought making it a “basic” would provide the most opportunity to style it in my wardrobe. I sewed the delicate fabric with my machine very slowly. I relaxed the tension of the thread and progressed delicately, ready to hand-sew at any moment of panic. It was not terrifying; it was possible.
Structure of a Bodice – Armor
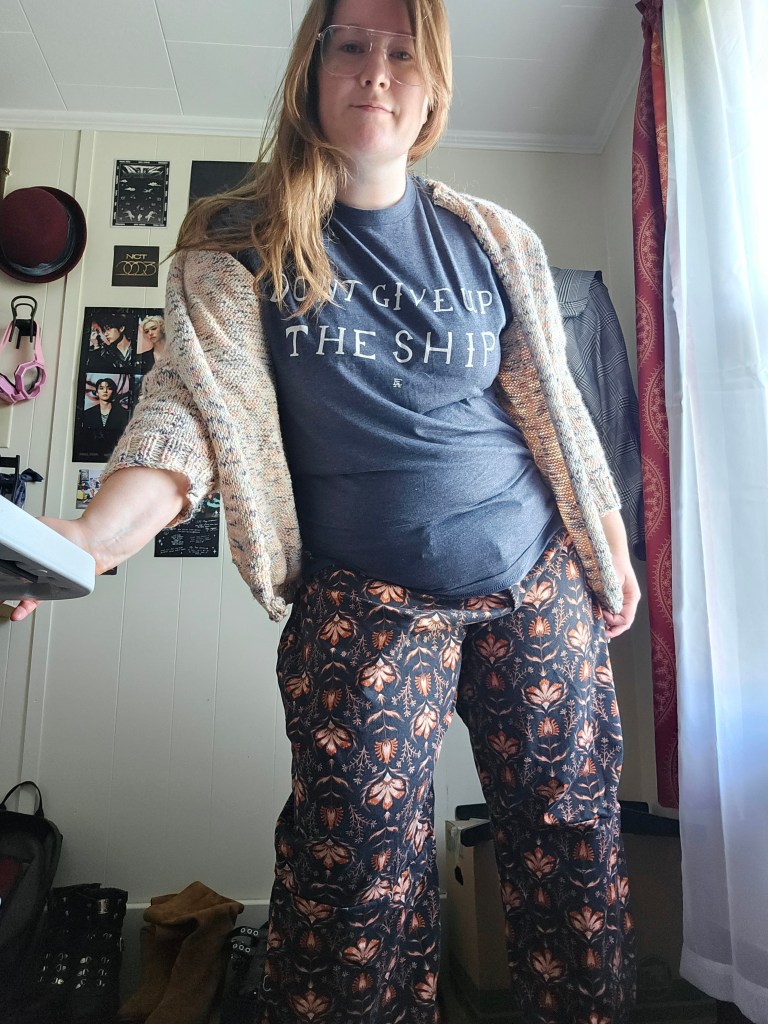
Many years ago, back in 2021 (four years ago, what?!) I crafted a structured dress, based on Lizzie Bennet’s dress, when Charlotte Lucas announces her marriage to Mr. Collins. It was a vest and a skirt, with buttons and a collar. It was ambitious but rubbish, yet a project I can’t stop thinking about how I could have made it better.
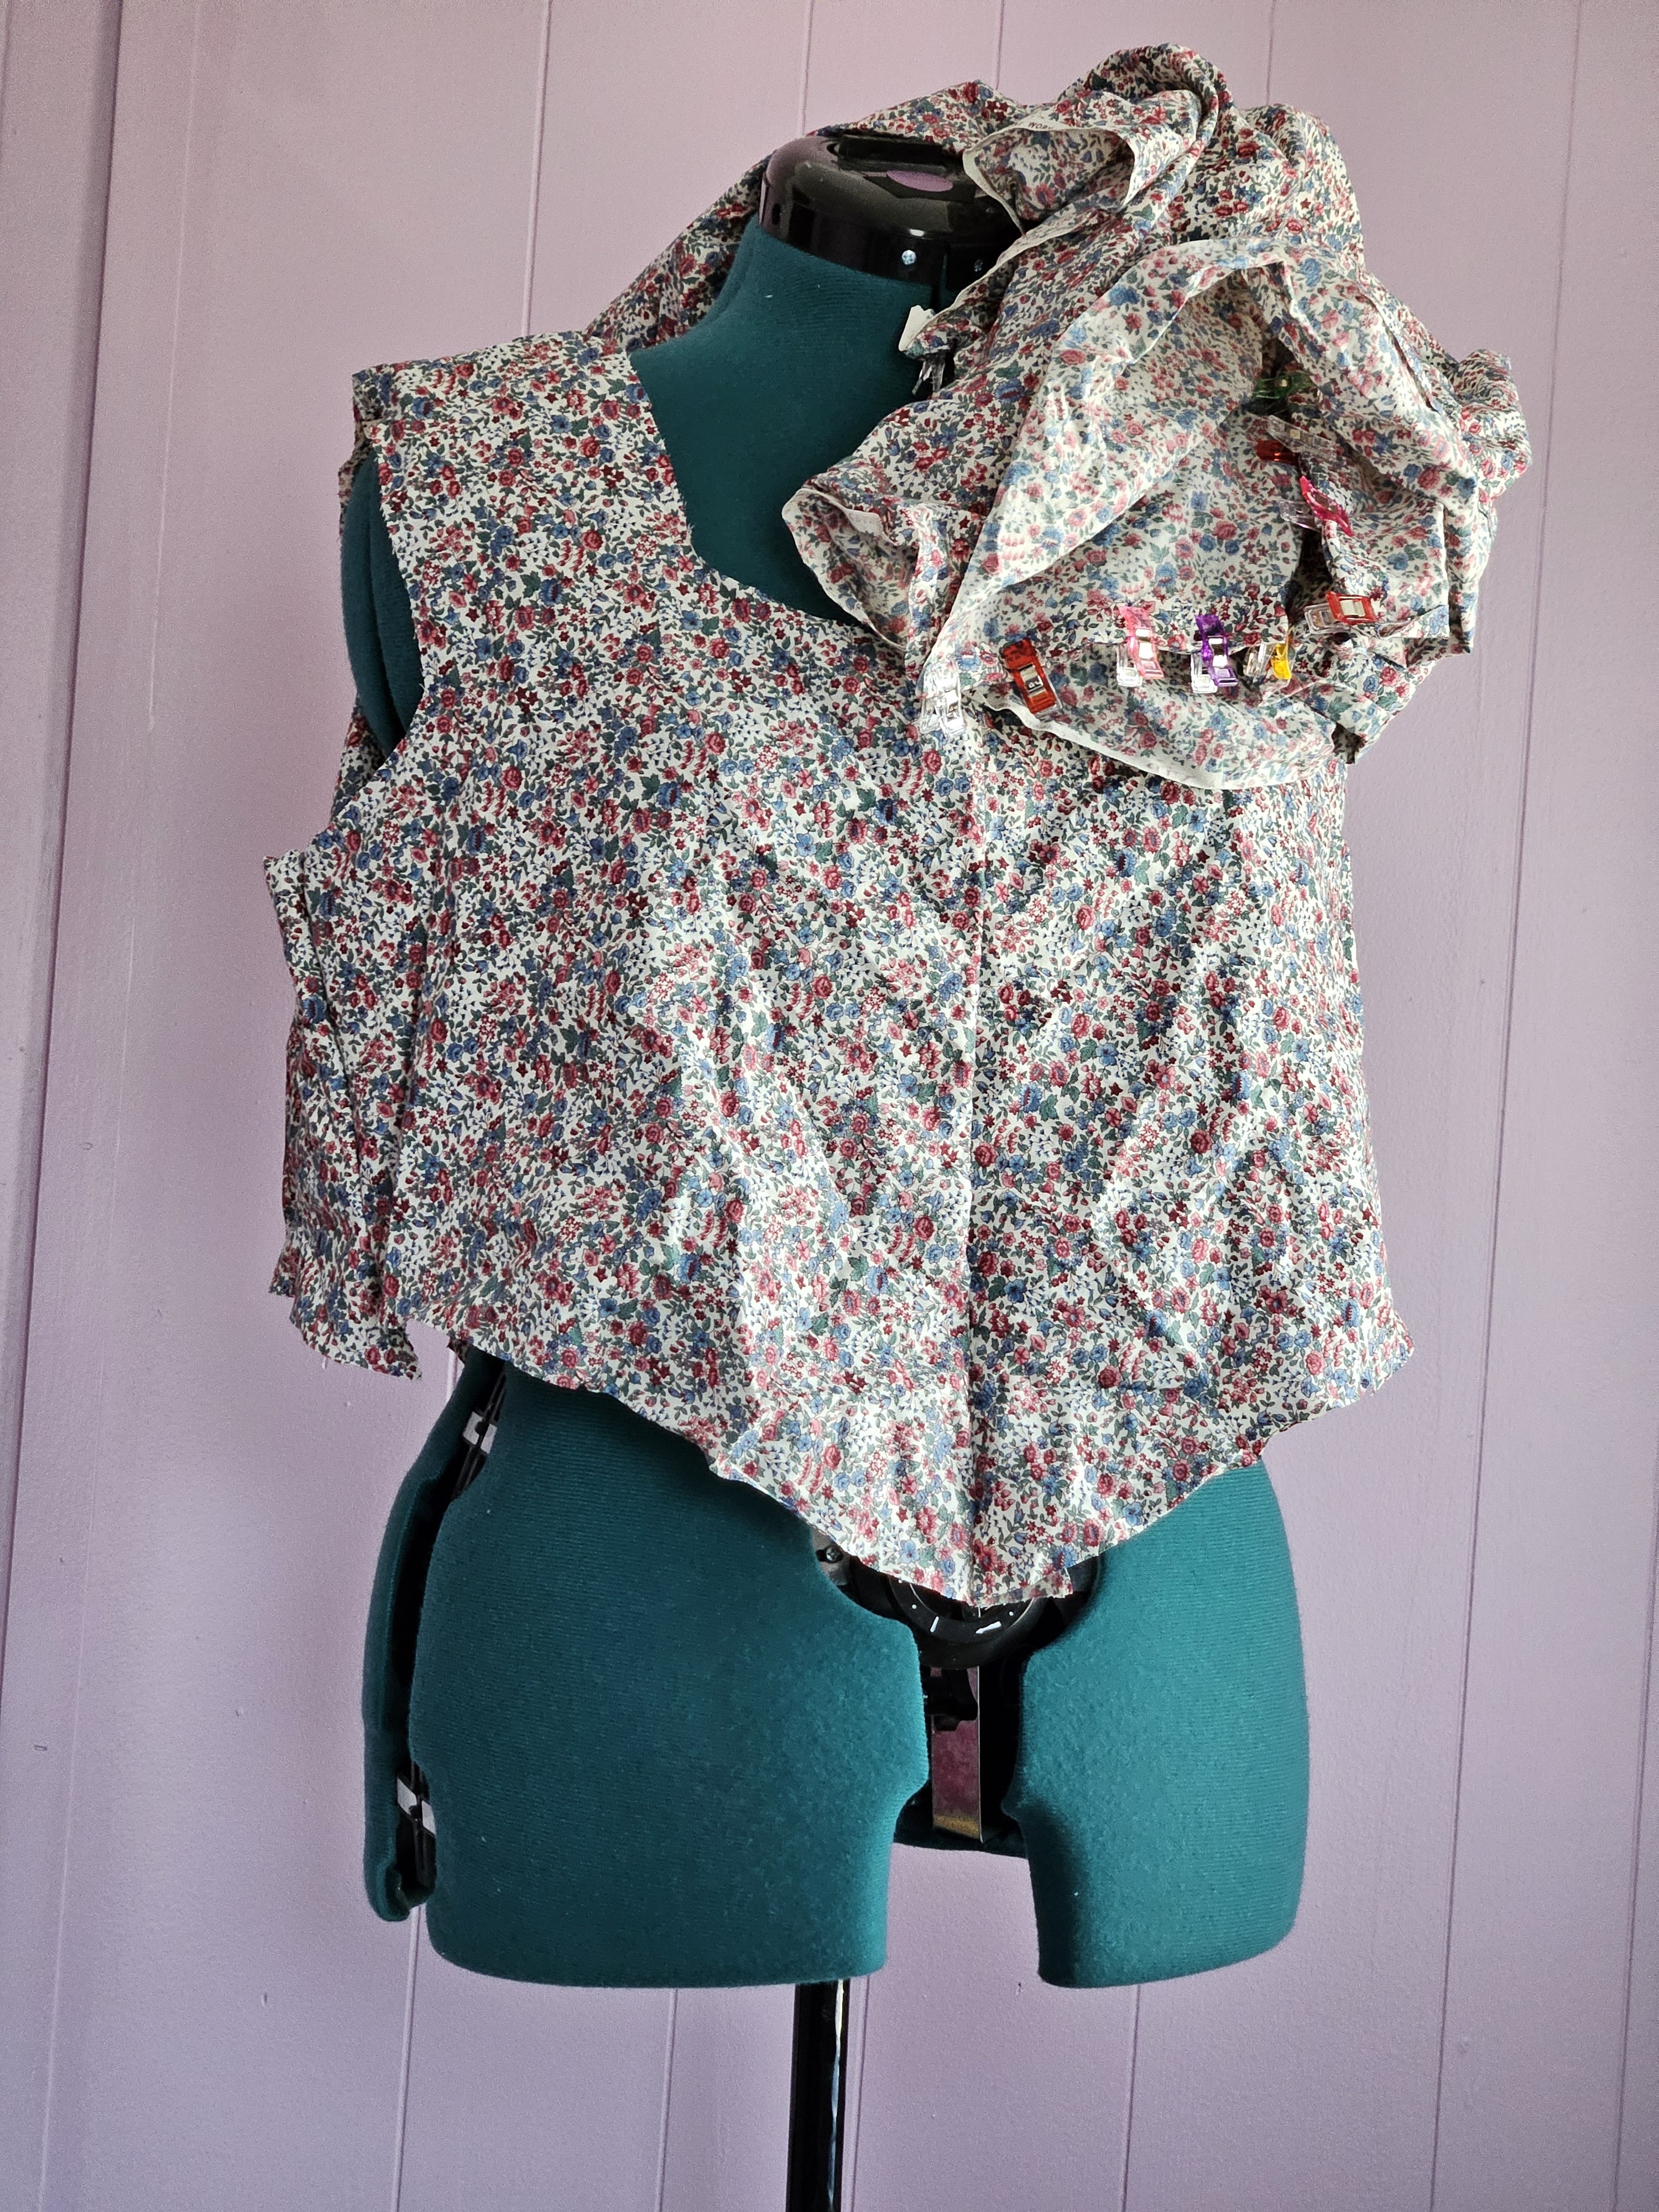
Enter this fabric and this bodice shape. It looks like an armor piece made of vintage ditzy flower fabric, lined with muslin. I wanted to reclaim what I learned in 2021, but try again in 2025, since the failure of my early projects made me shrink back to “easy” projects. I’ve made things that have challenged me a little bit, but not a true experiment. Constant growth is painful. Think of your body after consistent workouts, you’re going to hurt. It’s part of the process of getting stronger, and it feels at times like a negative experience. That feeling ground me down. I was tired of the learning experiences that felt more like loss and waste than an expression of crafting and artistry. It’s human, it’s passion, how can we not want the fruit of our labor to produce something good?
I made this dress slowly, over several weeks, while working on other projects, while being sick. It was a slow, steady, careful process to make a dress that would bring me joy from the creation and the wearing. The other thing I had to wrestle with, in this project, was shaking off the demons of my Lizzie Bennet dress. It was a dress I felt pretty in, but that I took a lot of crap for my appearance when I wore it out. It was structured, fitted, and flowy. The waist was not perfectly matched to the small of my waist, due to my lack of tailoring knowledge. This dress prompted a stranger to ask me when I was due, and then doubled down that I looked pregnant. I wasn’t pregnant, so to her, I looked fat. Thanks lady.
It was rude and such a breach of boundaries. Don’t ask random strangers if they are pregnant; wait for them to clearly tell you. It feels like a slap in the face for so many toxic culture reasons, the main one is the unwanted comment on your body with the double standard of “pregnancy being the most beautiful,” but don’t look pregnant, aka don’t be fat, because the zeitgeist is fat-phobic. I got rid of the dress and don’t have any photos saved of the dress; that’s how much this experience ruined the dress for me. I lacked the confidence to brush it off. I didn’t understand my body’s proportions and lines, therefore, I blamed my body and myself for the dress not working, instead of my tailoring skills being the problem.
2025 Style – Layering and Reclaiming
I chose to confront this feminine dress style once again. I knew it would clash with the natural lines of my body. I don’t have an hourglass body shape, which this fit and flare dress calls for. I’ve been scared to wear it, but I am challenging myself to try. I layered the sheer shirt I made in 2024 with this dress and a belt to create balance. It’s going to take time to get comfortable, for sure.
The dress not only has this flowy skirt, but it is fully lined, and the front gathering has been tracked down with stitches to reduce waist bulk. I also added eyelets and lacing at the back of the garment to define the waist, Lastly, I added a belt to my waist, which I don’t enjoy wearing, but the effect of pulling the eye to the waist should reduce unwanted comments, I hope. I like the contrast of these garments together. They have flow and structure. Together they create a complete thought, and in my opinion, look like designs with a point of view, which is what I am aiming for in my designs 2025.
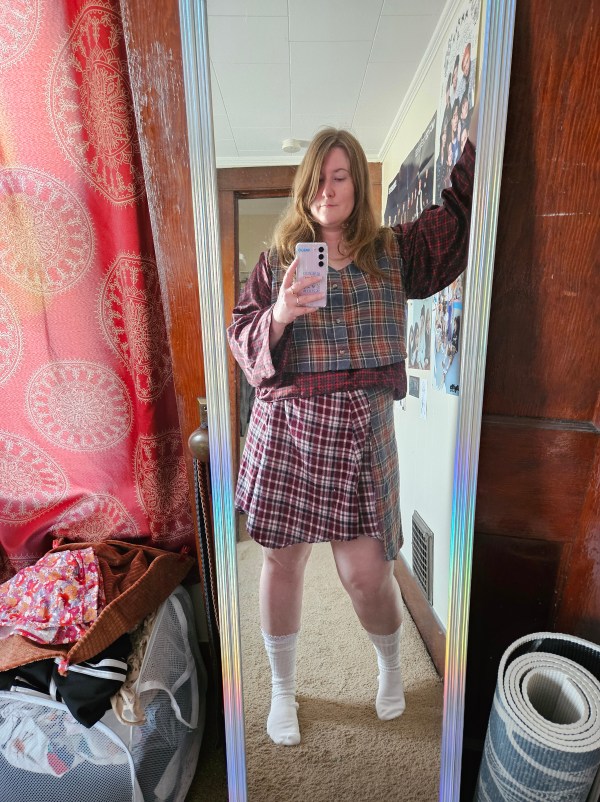
This collection was about upcycling, trying new techniques, and making things that expressed what I like wearing based on previous designs I have made, but with a twist. The items I designed were 75% sourced from existing materials. They were upcycled from items in my closet, hand-me-downs from my mom or grandparents. They were made from destashed yarn I acquired or fabric that had been in my stash for a long time. I focused more on creating with natural materials like wool, linen and as always, I love cotton.
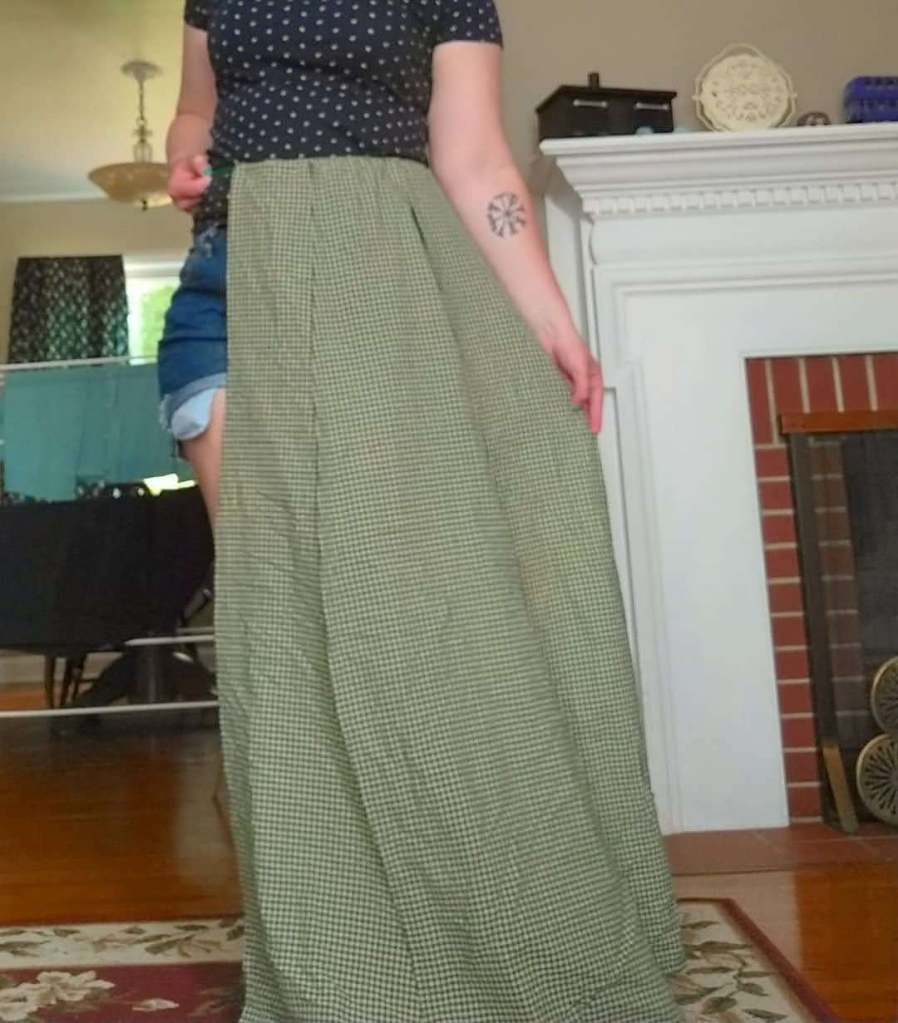
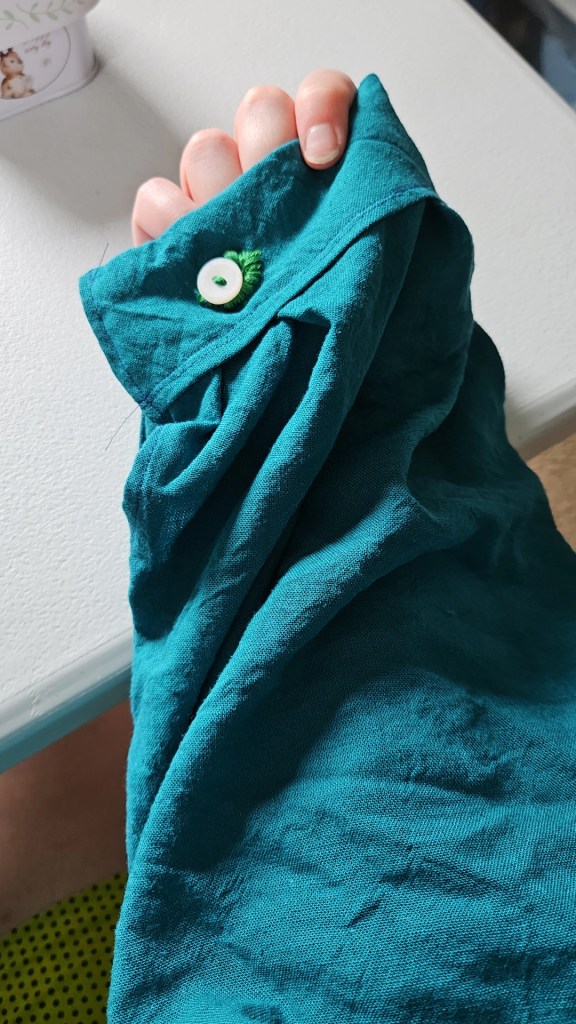
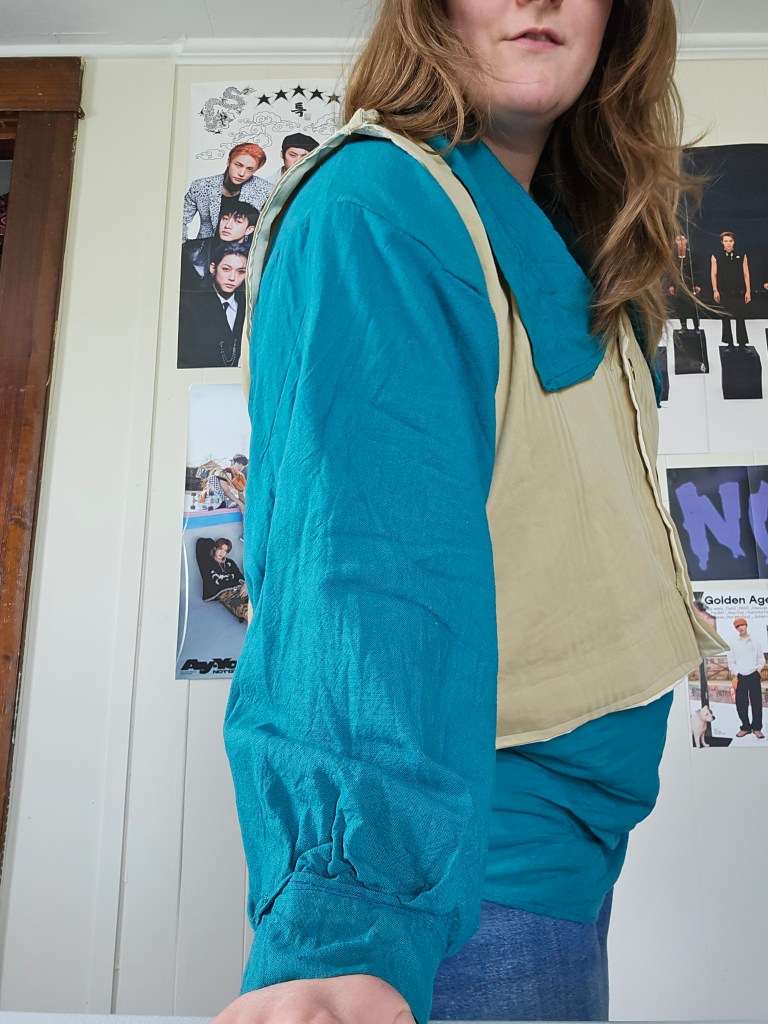
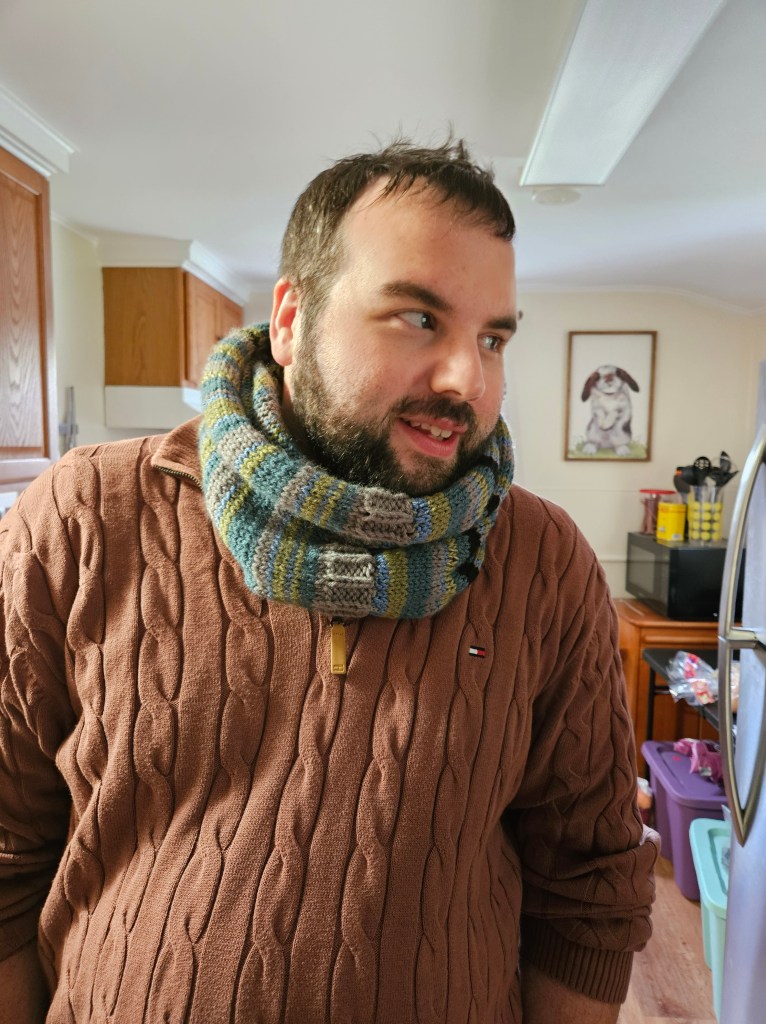
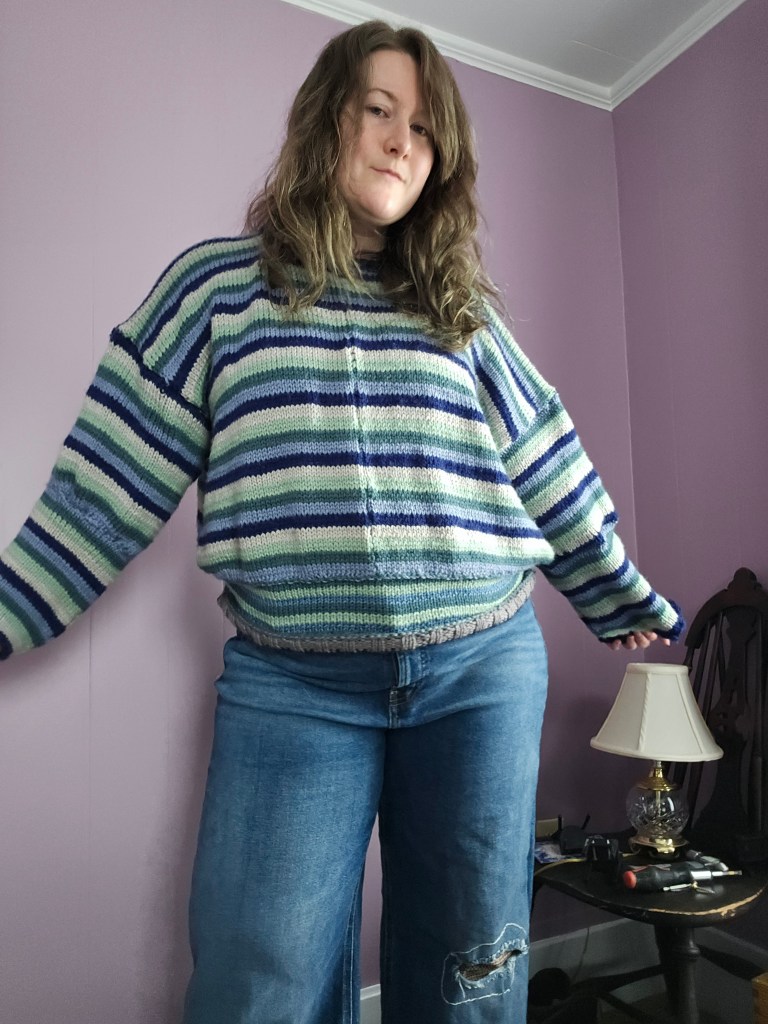
Vests were made from pillow cases and flannels. I re-worked a sweater from the existing sweater and leftover yarn. I dyed denim, deconstructed denim, and made some interesting new shorts and skirts. I combined leftover flannel from Christmas stockings to create a plaid and denim kilt. I used the cut-off sleeves of flannels from my vest projects to create a skirt from four flannel sleeves. I dove deeper into the world of trousers with two new patterns – a floral and railroad stripe. With each pair, I experimented with fastenings and pockets. I constructed my first “Mr. Darcy” shirt from teal linen using Bernadette Banner’s instructions for the body. I put my own spin on the collar, choosing a wider collar similar to a sailor collar that is popular in anime and J-fashion.
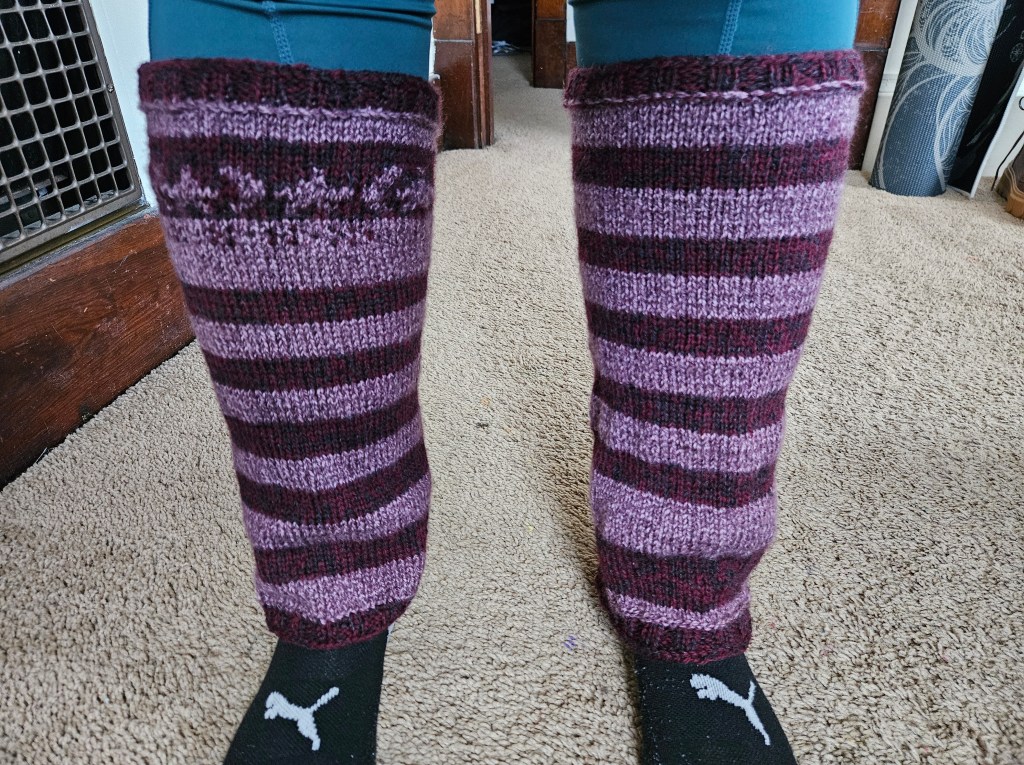
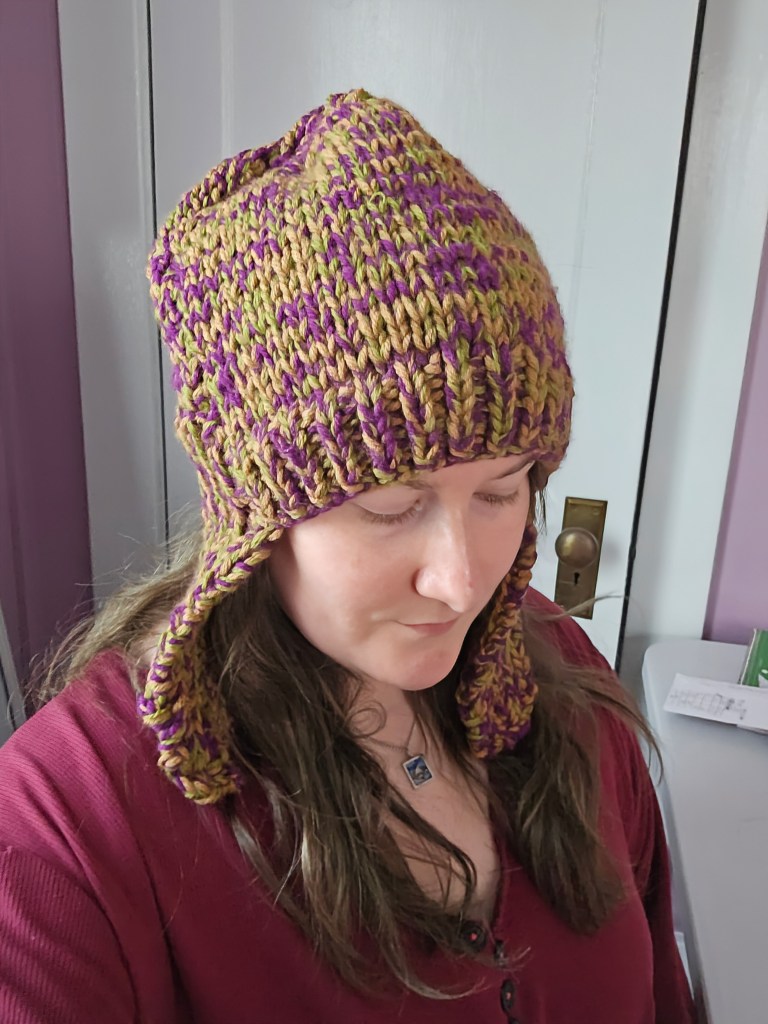
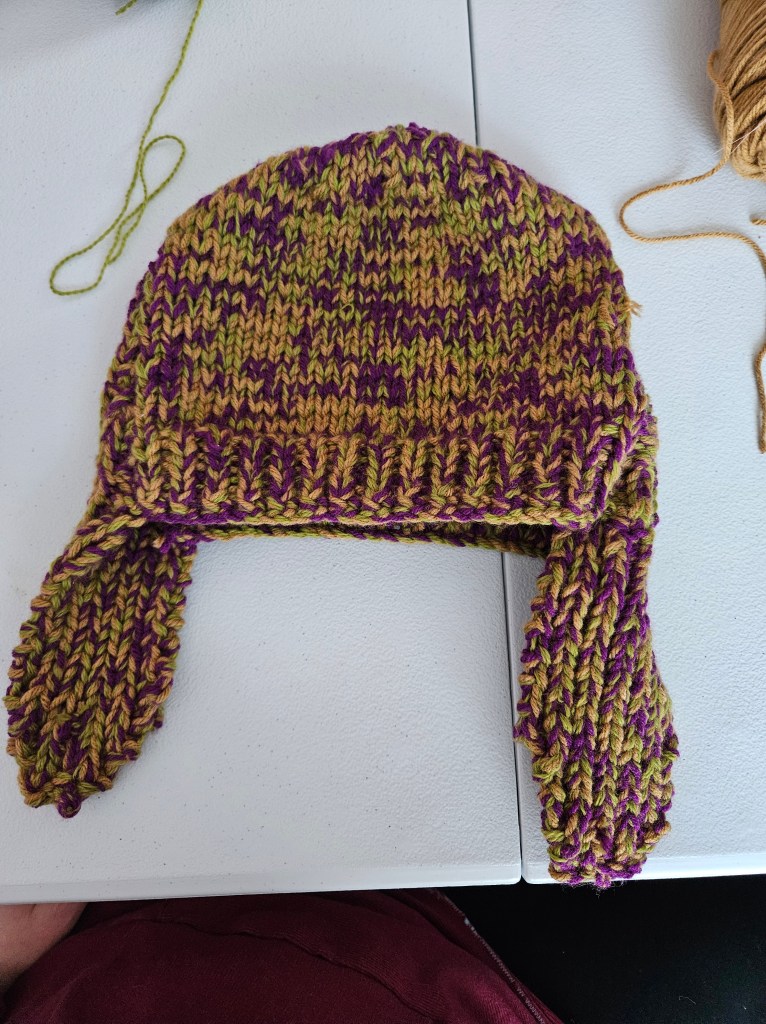
This was the first season I experimented with colorwork in knitting. I made a knit star motif hat from yarn that was leftover from my Magic of Scrap Yarn Cardigan. I made leg warmers, a squirrel motif mitten, and a melange of acrylic and wool to create this ear flap hat that reminds me of medieval European helmets. Although this season of creation was chaotic, I’m not sure if I even included all the projects I worked on, it was a time of great learning. It taught me that fashion design is more than taking raw material and cutting it into a new form.
Great design utilizes new and old. Fashion is about reusing, not wasting, and making things beautiful with careful craftsmanship. It does not mean it needs to be expensive, or need to be made by a great master couturier, it just needs to serve a purpose. We have lost sight of the purpose of fashion, but these projects of upcycling have reminded me that fashion is more than shopping, it is more than consumption, it is about the materials, the vision, the function.
To and fro my footsteps roam, upon the miles of white, fluorescent aisle – vast, void, verigated, vexing wanderings. Where to next? Weaving textiles. Fiber miles spin, spun into nothingness. A paywall of digital footprint. Add to cart.
I’m modifying this prompt slightly to focus on one aspect of my life – sewing. These are the three tools I can’t imagine working without. After four to five years of sewing clothes and trying out various tools and techniques, these are the cream of the crop for me. This is my just opinion. Depending on your sewing style and personality, this list would probably change. I’m sure if I was a sewist who went to design school, I would also have a different list.
Fabric Clips –
When I started sewing, I had no idea fabric clips were an option. I bought a Dritz tin of straight pins and a pin cushion. This is where things began to get uncomfortable. No matter how careful I am when I use pins, I stick myself. When I use pins for a fitting, the pins slip out of the fabric and scratch my skin. I find the pin tins spill easily which is terrifying if you don’t notice it because you are then surrounded by pins in a spill around your feet. When I found fabric clips, my sewing experience improved 180 degrees. I don’t get stuck and the clips stay in place. I can try things on my body and the dress form, without the discomfort of pins sticking or the annoyance of the pins slipping out of place.
Sashiko Adjustable Ring Thimble –
I’ve tried two kinds of thimbles. The first was the cylindrical metal thimble, which I found hard to use. It fell off my finger or I simply struggled to find the correct finger to place it on for my sewing. I tried another metal thimble that looks like a fencing mask, with an adjustable back. It stayed on my finger just fine. I could make it tighter or looser or move it to a different finger but it still felt odd. I noticed the thimble wasn’t providing the support I needed to push the needle through the tough fabric and in turn, was putting stress on my finger joints.
I was introduced to the Sashiko-style ring plate thimble through the account Geri In Stitches and was hooked. The idea of pushing the needle through dense layers by the palm of your hand instead of your fingertip made more logical sense. This has transformed my hand-sewing experience! I can sew longer without hand fatigue. The ring is comfortable. I hardly notice I’m wearing it until I’ve walked into another room with the thimble still in my hand. This is a Japanese thimble, for the sashiko technique, I am using it for general sewing, but the thimble and sashiko have a rich history of their own that you should check out.
Hand Sewing Needles –
I started my sewing journey by hand sewing before I purchased a Singer Heavy Duty Sewing Machine in 2022. It was my preferred method until my hands started showing stress and my mind was fed with how long garments were taking on a deadline. The switch to a machine was fantastic! I quality garments quickly. The only wrinkle was sewing machine maintenance and gremlins in the machine. Sometimes machines have attitudes. Sometimes you can’t get in sync without your equipment. Sometimes you drop the small screws into the machine and you are in a panic. It’s a wonderful asset but also a source of great frustration for me. For that reason, hand-sewing needles will always be by my side because they are easier to manage, and sometimes you and your machine need some therapy. Also, some projects call for the delicacy of hand sewing. It’s an art form that cannot be fully eclipsed by the machine. For example, how can you attach a button or hook and eye closure without a hand-sewing needle? It’s best to keep them handy.