Have you noticed I am not sewing as much as I used to? As Marie Kondo instructs, if it doesn’t bring you joy, let it go. That’s been my relationship with sewing, honestly, since 2024. Sewing and I had hit a rough patch in our relationship. No longer in the euphoric beginning, nor going deeper and bonding through the big sewing wins. We were burned out in the grind of sewing, striving to be better but lacking the proper knowledge to do so. Therefore, we’ve been on a break – off and on since 2025, and it’s been good.
It’s given me time to reflect on what I want to pursue, sewing, specializing, and what I feel like I should make because of the internet. It’s given me time to ponder what drives me to make my own clothes. When I began sewing, I was intrigued by historical styles, and then I drifted into more feminine items like dresses, blouses, and skirts. Shorts and pants were made and quickly cut up for scrap because they were such enigmas for my mind to understand. On this break, I’ve given myself room to figure out what I like to wear, which is key to sewing your own clothes. You can chase all the trendy patterns and styles, but if you don’t want to wear them, then you have a very expensive wardrobe of your own sweat equity that is useless to you. My desire was to break this cycle.
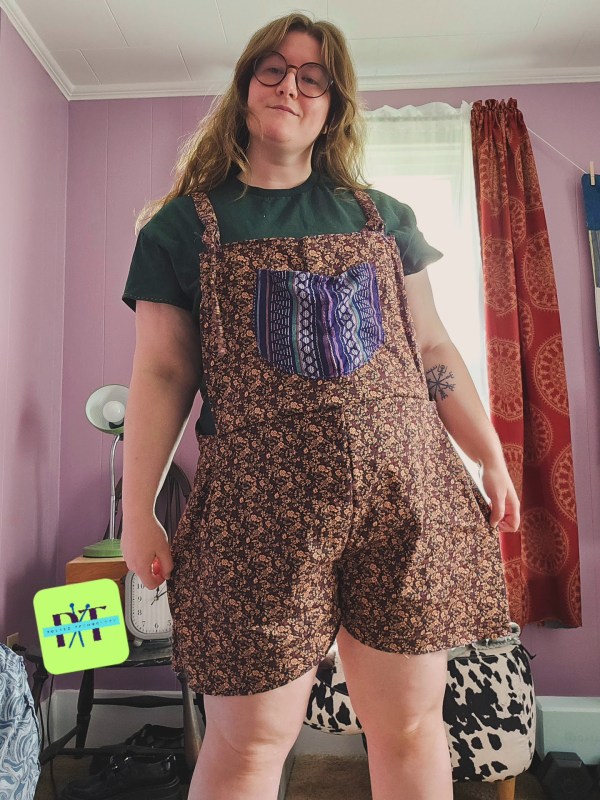
Going into 2023, I wasn’t sure what to make anymore or what I wanted to sew, but I felt this compulsion to keep going because I was so committed to this new hobby. A hobby I wanted to become my future career. It’s been in the midst of the slowdown that my artistic point of view has recalibrated. I like pants (trousers), overalls (dungarees), denim (dungarees), comfortable silhouettes like that of Lucy & Yak, and that is what I want to make.
This has only intensified since the Trad Wife trend co-opted the flouncy dresses, giving me the ick at the thought of associating with something I have always strived to avoid. Growing up in communities dominated by the Reformed Presbyterian church (a denomination I do not belong to and never shall) and Christian Nationalism spreading its snakey tendrils throughout the Christian bubble – I want nothing to do with the Trad Wife and all it represents.
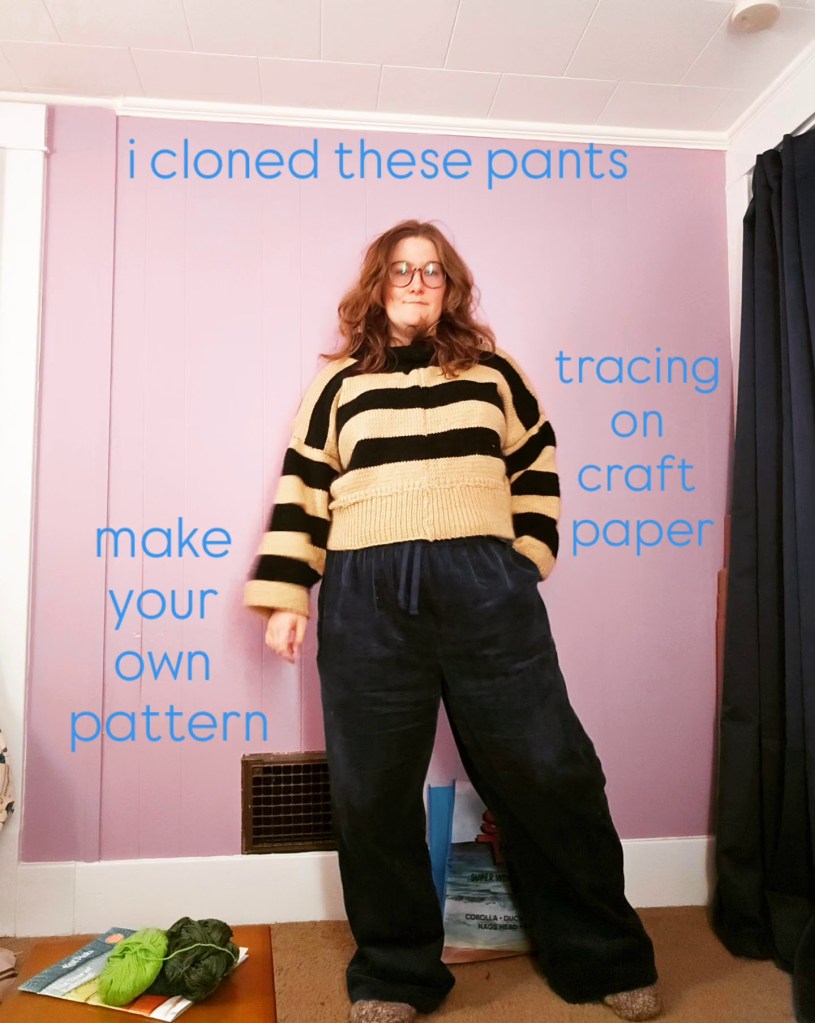
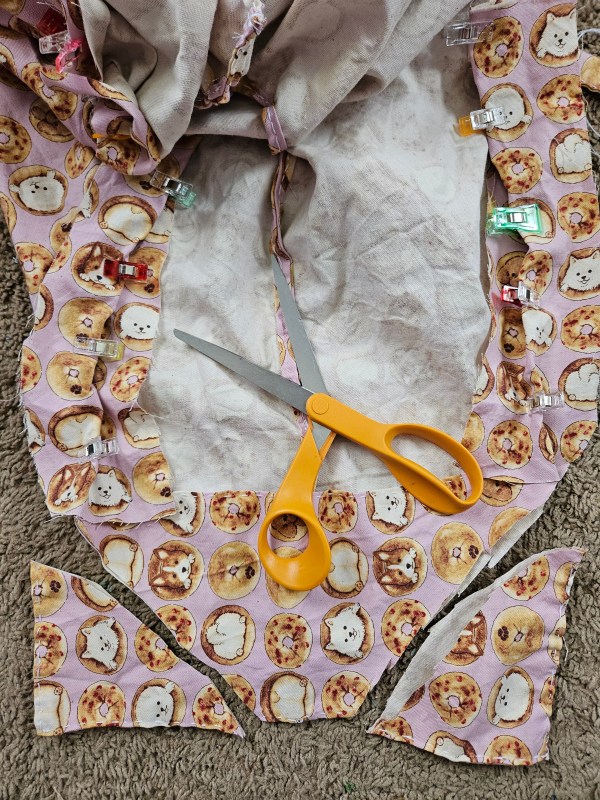
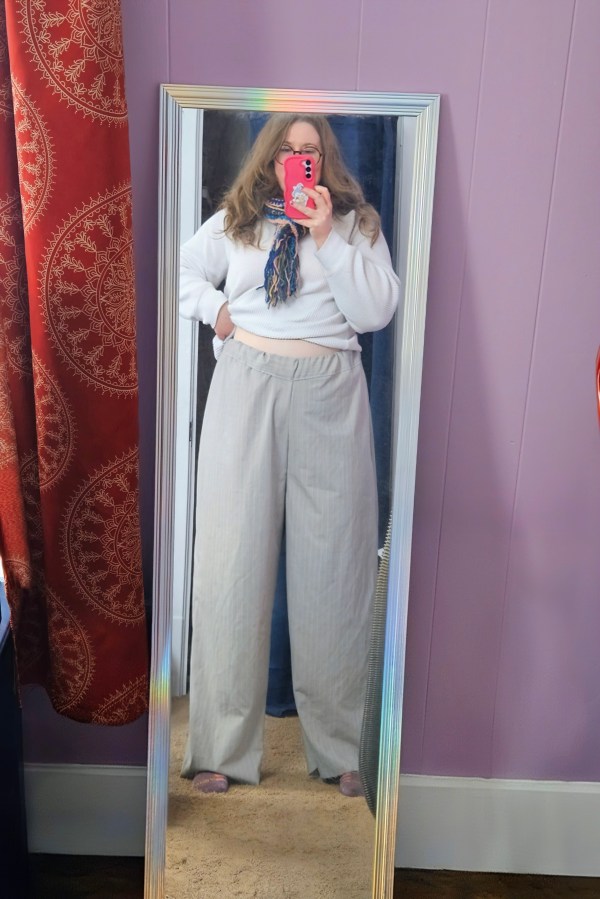
That brings us to the present day, March 2026. After 2 years of sitting in my fabric stash, I finally started to cut the trouser fabric I bought to make my own pants in 2024. Too intimidated by my own past failure, I let it hide in my crafting closet, all of 2025, for fear of failing again. I did fail at pants in September 2025 with another fabric, so it was not unfounded fear. But what is the point of living in fear, especially for something so small? Would I learn that I am not very good at sewing? Sure, and who cares?! Is crafting a competition? No. It’s about making incremental steps towards success through practice.
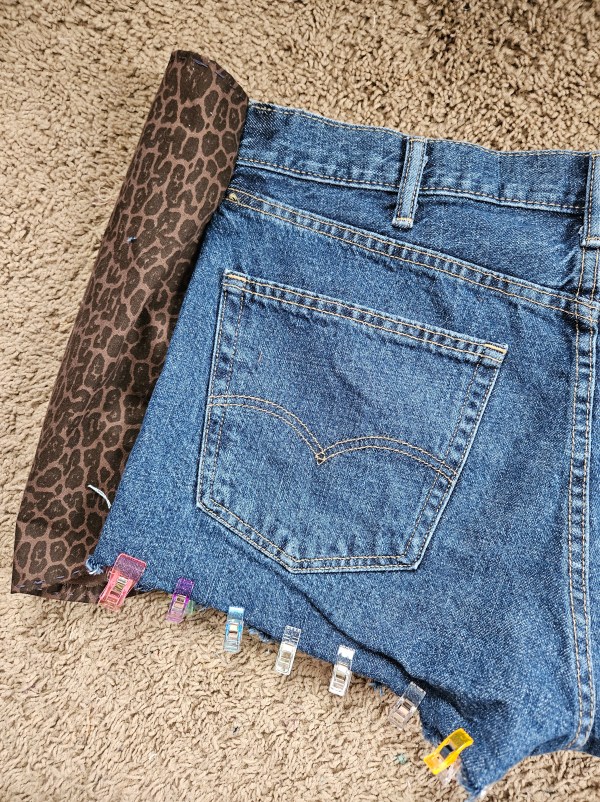
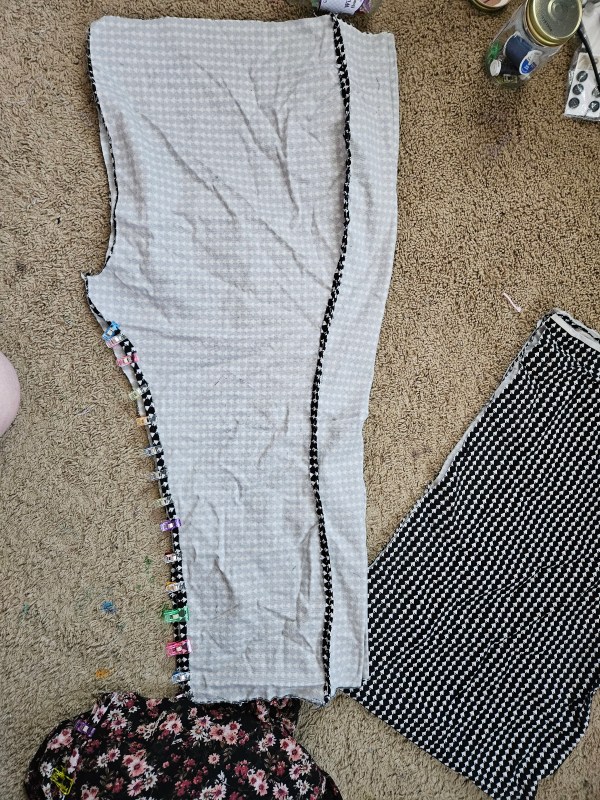
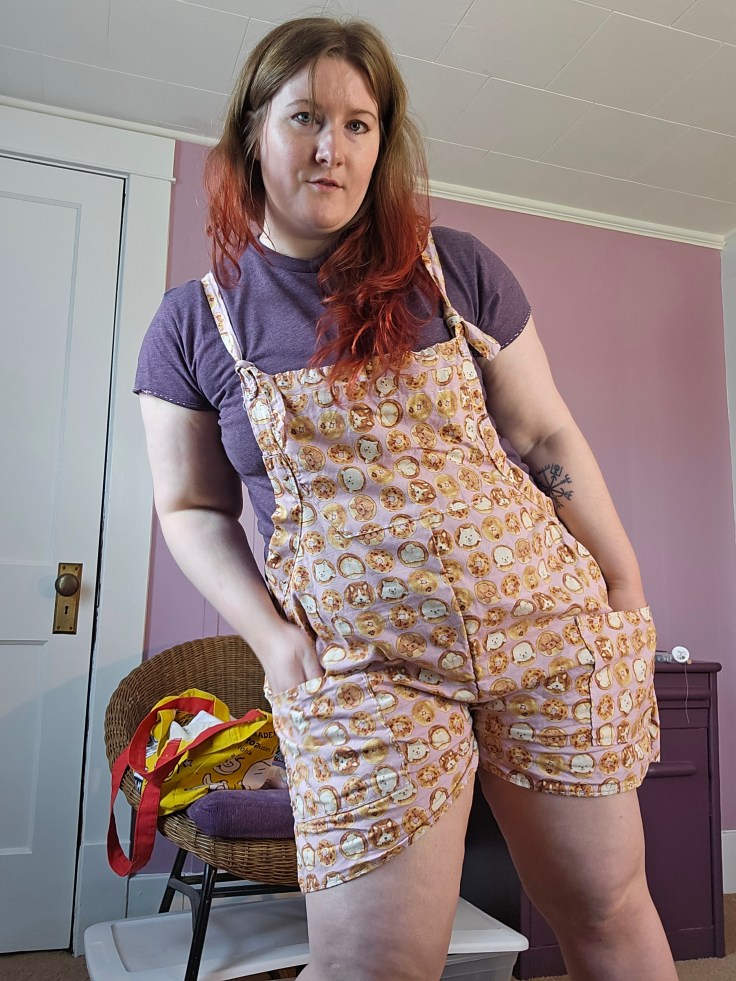
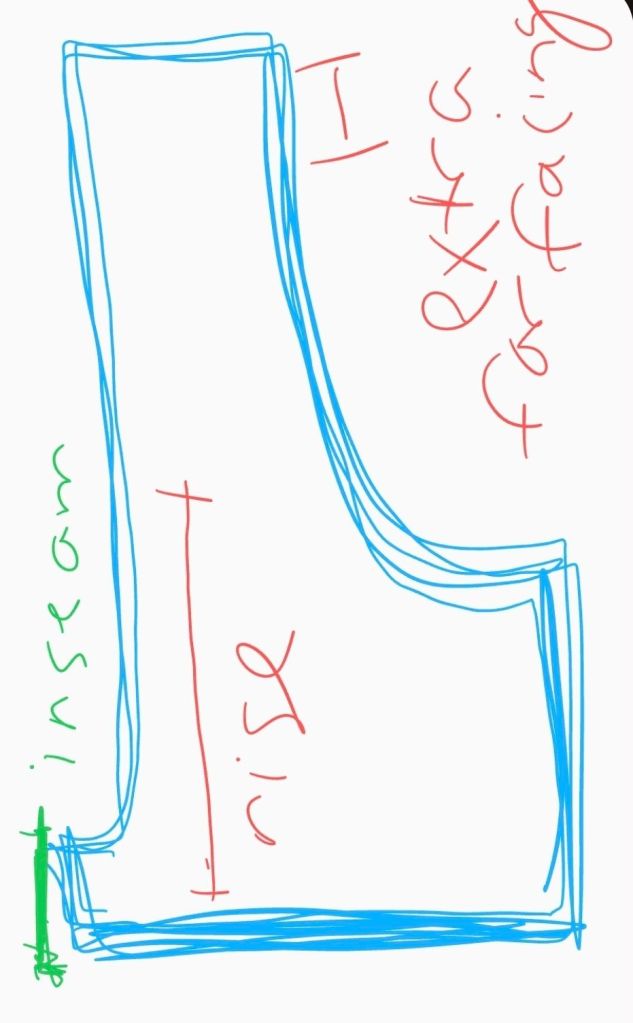
For my birthday, Kyle gave me two garments from Lucy & Yak, something I had dreamed of since 2019. A pair of denim dungarees and a pair of corduroy pants. And you know what I thought of looking at them folded? What a lovely thing to take a pattern from. Use brown craft paper or wrapping paper, and feel free. I traced methodically, marking the seam allowance, and back from the front pattern piece. I carefully laid out my pattern, mirroring the right and left pieces for the front and back. Then, over two weeks, I slowly sewed these pants together by hand with a fresh sewing needle, which makes all the difference. Don’t be cheap like I used to be; buy new needles regularly to save your hands. Sew with courage, because this might be the time it all clicks. What if you never let yourself succeed? That would be more terrible than failing again at doing the hard thing.
I wish you happy sewing and good-fitting pants that make you smile every time you wear them.