Recycling in the Garden

Recycling is an important thing we should do. In the United States, only 21% of all the plastic gets recycled, and of that percentage, roughly 60% actually makes it through the entire process and is turned into something else. Of course, recycling is about more than just plastic, but plastic is the biggest problem. Plastic takes a minimum of 20 years to decompose, but some research suggests it can take up to 500 years for certain types to break down on their own. In the past, metal, glass, and paper/cardboard served the roles we now use plastics for, and all are easier to reuse, repurpose, and recycle. Take cardboard, for instance, which decomposes in two months. Plastic has its positives: it’s stronger, lighter, more flexible, and cheaper to produce than other items. Yet, we’ve become so dependent upon it that our landfills and oceans are full of it, and at this point, it may never go away.

Let me say that I’m not the greenest person you’ll ever meet. We have two gasoline-powered cars, and I don’t see the benefits of buying an electric vehicle, considering the damage that is done to mine the lithium needed for the batteries. The majority of our outdoor power tools are gas-powered, with the exception of our push mower, which is battery-powered and has plenty of problems. I like gas-powered things for their simplicity and how easy they are to work on. I also don’t believe that humans are the sole culprit behind climate change, nor do I think we can be the sole reason it is reversed and saved. I believe that the Earth’s climate has always been cyclical and that we’re currently in a warming trend.

That being said, it is my belief as a Christian that God created the Earth and gave humans the responsibility of stewarding it and all that’s on it, and we’ve failed in just about every aspect. We treat animals and the Earth’s natural resources with a level of disrespect that we would be offended if we were treated the same way. Most don’t think about or value the sacrifices made by the animals when we consume them, and few stop to consider how we need to put resources and nutrients back into the land to replenish what we’re taking from it. I despise fast fashion because of the toll it’s taking on the land and those who make the garments. I also can’t stand the gross willingness to exchange our natural resources for a quick buck. At the same time, I despise greenwashing and any attempt to profit off people’s convictions, especially if there’s nothing behind a company or person’s marketing.

That tangent may have been unnecessary, but I wanted to explain the position I am coming from. I want to be as respectful and loving toward the Earth as I can, but I don’t think that should come at the cost of humans, especially those in underdeveloped areas (have we learned nothing from colonialism?). I think we should put forth real efforts to recycle, but recognizing that it remains a flawed process and system, reusing items is equally, if not more, important. This is where I found myself as I began to think about how to recycle in the garden. To me, it’s only natural to seek out ways to reuse items when you already care enough about the land to reduce your dependency on commercial farming.

Here are some ways we’ve been able to recycle and reuse household items in the garden.

Yogurt Containers

I first learned about using yogurt containers in the garden after watching an MI Gardener video on YouTube. He recommended cutting the small single-serving containers into 1-2″ strips and using them as labels for starting seeds or in the garden. This is a great way to repurpose these containers since many gardeners buy the plastic/vinyl labels anyway. Any plastic container can be cut for this purpose as long as the marker you’re using to write the seed name stands out from the plastic. To me, the best part of using plastic containers this way is that they can potentially be used for multiple years, but if they can’t, you can still recycle them when you’re done using them.

I used yogurt containers in two other ways. One was for soaking bean seeds overnight and transporting them out to the garden for planting. The second way was to start seeds in them. This wasn’t as successful as the dedicated starting cells, but I’m planning to try it again next year. In theory, yogurt containers should work well since they hold more soil than the starting cells you can buy. My attempt at using them this year failed because I didn’t cut enough drainage holes in the bottom to help the excess water run out.

Gatorade (or Other Plastic) Bottles

We keep our seed starting setup in our basement, so I carry water to the plants rather than the plants to a water source. You may remember that I initially recommended using a cheap spray bottle for starting seeds, but I eventually switched to Gatorade bottles and watered the seeds from the bottom. You can use any bottle for this purpose, but Gatorade bottles are a nice size.

Woodworking Scraps

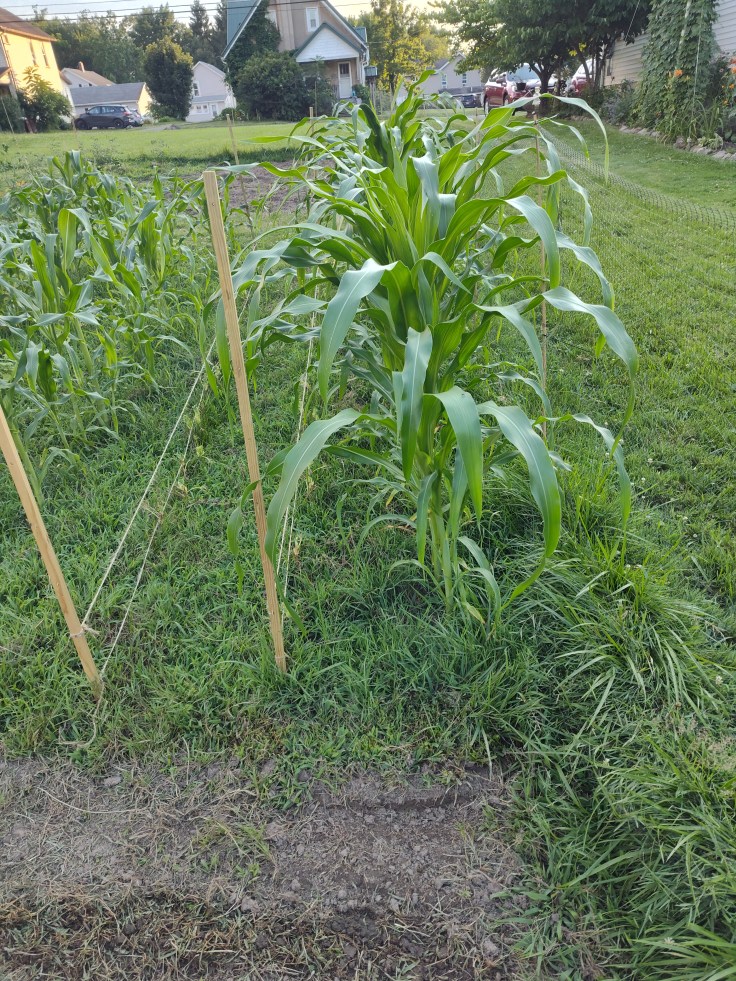
As a woodworker, I accumulate a lot of scraps. I struggle to throw away any pieces, even if it’s unlikely that I’ll ever be able to use them again. Thankfully, gardening gives me a way to use scraps that can’t be used in other woodworking projects. I’ve found that a lot of my cut-offs from squaring up pieces of lumber are the perfect size to stake up plants. I will use any unfinished wood, including pressure-treated, and tie the plant to it with a garden twist tie. Using these cut-offs saves money, since we aren’t buying anything new, and they should last multiple years.

Long Beans, Gardening

I also used scraps to build the planter box and trellis system for our long beans. This project wasn’t technically recycling anything, but I decided to mostly use scraps instead of breaking down a full-size board.

Rabbit Droppings

Not everyone will be able to do this, because I’m not advocating for you searching through your yard for wild rabbit poop. However, if you’re lucky enough to have an adorable pet rabbit like we do, you can use their droppings as fertilizer. In fact, you can use most animals’ poop, but I would stay away from dog and cat feces. Rabbit poop is considered “cold” manure and doesn’t need to be composted or broken down before being applied to the garden. Basically, any animal that produces pelletized poop (goats and sheep are also in this category) can be directly applied. However, other animals, like chickens and horses, have “hot” manure and must be composted first. These animals can carry pathogens and diseases in their feces, and the poop can literally burn the plants if immediately applied. And dog or cat poop should never be used as fertilizer.

Rabbit poop, in particular, is a great fertilizer because it’s high in nitrogen, which is slowly released as the droppings decompose. When you figure that a domesticated rabbit produces up to 200 droppings each day, it can be a substantial fertilizer source, saving you a lot of money. Do yourself a favor: Adopt a rabbit, experience how wonderful they are as pets, and get the added benefits for your garden.

Milk & Juice Bottles

In the spring when the weather can be a bit volatile, it’s not uncommon to have frost advisories after your plants are in the ground, and they need to be protected. There are products sold to meet this need, including ground sheets, but my dad always kept his gallon-size milk bottles to keep his young plants insulated from the cold air. It’s easy to do. Cut either the top or bottom of the bottle off and place it over your plants. That’s it. This keeps warm air trapped inside, prevents the cold air from reaching the plant, and works as a greenhouse, which will help your plant to grow quickly. Milk bottles aren’t the only option, either. You can also save bottles that once held juice, vinegar, tea, etc. If the bottle was able to hold a consumable liquid, it’s probably okay to use in your garden. Just be sure to thoroughly clean it first.

Compost

This feels a little like cheating, but isn’t composting the ultimate act of recycling? You take food scraps that you didn’t eat and convert them into nutrients for your soil. These scraps can be the rinds of melons or strawberry tops. They can also be produce that has gone bad. Throw them in your composter, and they’ll eventually be converted into quality compost that can be mixed into your soil, which adds nutrients to help with your future gardens. If you don’t already compost, I recommend giving it a try. You can buy affordable composters or even build one yourself, and with a little bit of work and a lot of time, you can have a soil amendment that is nearly free.

Cardboard

Like plastic, we use a lot of cardboard in modern society. With all the online shopping and shipping that takes place, it’s common to have multiple cardboard boxes arrive at your house each week. Like I said in the intro, cardboard is great because it quickly decomposes, so no matter what you do with it, it isn’t going to cause long-term harm to the environment. Like most people, we always recycle our cardboard, but before doing that, we look for ways to reuse it. If we need to change the oil in the cars soon, we keep a few sheets on hand to put under the car when doing the oil change. We have also started keeping specific boxes and cardboard packaging to create Halloween and Christmas decorations. But cardboard can also be used in the garden. Because it breaks down so quickly, cardboard is a great form of mulch and compost. In the fall, after everything has been harvested and the plants have been pulled, you can lay sheets of cardboard on top of the soil and allow them to decompose. In the spring, this material will be organic matter that will improve soil quality.

Produce Containers

Eventually, if everything is successful in your garden, you’ll need containers to put your vegetables in after harvesting. We bought a couple of orchard baskets to use in the garden to make it easier to transport everything into the house, but those won’t work for storing vegetables. That’s where saving and repurposing produce containers come in. The plastic packages for cherry tomatoes, strawberries, and blueberries work perfectly for your smaller tomatoes. If you can find any of the cardboard/paper containers used at orchards, those are perfect for your larger tomatoes, peppers, potatoes, and tomatillos. Finding a way to repurpose what you have will save you a lot of money versus buying something specifically for this purpose.

Future Recycling Opportunity: Egg Cartons

I haven’t tried this yet, so it may be a massive failure, but I saw some of our leftover pressed paper seed starting cells yesterday and noticed how similar they are to egg cartons. I’m talking about the cardboard/pressed paper ones; not the foam ones. They’re about the same size as the cells we have, and with a drainage hole added, they would probably work to start seeds. I am going to give this a try next year to see how they do and will report back.

Recycling Where Possible

None of what I mentioned in this post is what most would traditionally call recycling. But it’s a literal understanding of it. It’s repurposing things that may otherwise end up in a landfill. And at the end of the day, the plastic from the yogurt may eventually wind up there anyway, but we’re giving this plastic a second life before it ends up in the recycling bin. I think it’s important to make attempts to improve the environment where possible, especially when we’re already dedicated to sustainable gardening through crop rotation and doing as little tilling as possible. I hope that you found this post helpful and may consider one of the things I mentioned.

Weekly Garden Update #19 – Cucumbers, Eggplants, Starting More Corn & More

In this week’s update, we harvested and began eating from our garden. I’ll tell you what vegetables they were and how we ate them. We also started more corn for a late harvest and planted the last melons we’re growing this year. I’ll provide a general update on everything we’re growing as well. Finally, this edition of the Seed of the Week takes us to the American Southwest, where a variety of corn has been grown for over 800 years. Let’s dive in.

First Harvest

This week saw us achieve a goal we set at the start of the garden: Harvest something from our garden and eat it the same day. That included three cucumbers and two eggplants. Two of the cucumbers were from plants gifted to us by our neighbor, but one was a Boston Pickling that I started from seed, making it the first fruit harvested from this year’s garden that I started from seed. We ate the cucumbers raw by slicing them and eating them on the side with dinner. For the eggplants, Magz sliced them into coin shapes and roasted them in oil and seasoning. They were delicious. We’ve found that doing as little as possible with high-quality, fresh vegetables is the best thing for them. We have a lot more cucumbers coming on, and there are more eggplants that are close to being harvestable, so we’ll be eating a lot more of them moving forward.

Starting More Corn

We had some open areas of our garden beds where potatoes weren’t growing, which we think is the result of poor drainage and too much rain early on. In the open rows, we wanted to grow more of something that we’ve had great success with: corn. We still had some Hopi Blue and Sweet Mexican/Black Iroquois seeds left, but because the Hopi Blue corn takes a lot longer to reach maturity, we planted the rest of the Sweet Mexican/Black Iroquois seeds. All three varieties (the above two and Butter & Sugar) have done exceptionally well, and a late planting of corn could lead to us having sweet corn in September.

At the same time, we planted all the remaining melons and squashes that we’re growing this year. In a few more open spots, we dedicated two of them to the White Scallop Winter Squash, three of them to Ali Baba Watermelons, and four to the Noir de Carmes cantaloupes.

A General Update (With Pictures!)

  • Our tomatoes continue to put on fruit, with the Cherokee Blue, Black Krim, and Queen Aliquppa growing close to full size. Now, we just wait for them to ripen.
  • Our Cal Wonder pepper plants have quite a few fruit on them, but they haven’t reached full size or started to ripen yet. Our plants also haven’t grown to full height, which is weird. I read that peppers are one of the slowest-growing plants and require hot temperatures and full sun, which we’ve had lots of this summer. I’m still holding out hope for them.
  • Our melons, squash, and pumpkins are all doing well. We have spaghetti squash that are close to softball size and many cucumbers that are growing. Most of the other plants are producing blossoms.
  • The tomatillos have been growing their husks for more than a week now, with one of them larger than a golf ball. There are many husks starting and even more flowers coming on at the same time.
  • We are finally starting to see some progress with our beans. The first batch of Provider beans has a few beans on the plants, which is major progress, even if the pods are small. Our Kebarika and Jamapa plants have started to produce flowers.

Seed of the Week

Our Seed of the Week this time is the Hope Blue corn variety. It’s a very old type of corn that has been grown in Northern Arizona for over 800 years by the Hopi Native American tribe. This variety is a flint/flour type of corn and is milled down into cornmeal or flour. The Hopis use it to make a ceremonial type of bread called piki. But even though this variety is primarily used for flour, it can be eaten as sweet corn.

The kernels of Hopi Blue corn are dark blue, nearly black, and the stalks grow up to nine feet tall. We got our seeds from Fedco out of Maine, and on the listing, they quote one of their growers, who says that the corn is “crunchy, corny and wholesome.” We’ve had great success with our Hopi Blue seeds. They overcame torrential downpours within a week of being sown and have excelled. The stalks are currently taller than our fence (so about 4 1/2 feet) and are gorgeous. If you’re curious about growing different varieties of corn, give this one a try.

Up Next

This week, I’d love to see some of our tomatoes begin to ripen. Our cherry tomatoes are pretty much full size, so ripening is the next step. I also think we’ll harvest some of our beans. Beyond that, we’re enjoying how relaxing it is to watch our garden grow. Each day, something new happens or we can see measurable growth. For example, we had a cucumber grow multiple inches in one day. It’s unbelievable. I hope your garden is doing well. Happy gardening.

5 Easiest Seeds to Grow

A couple of weeks ago, I wrote a post on the 5 hardest seeds to grow this year. If you haven’t read it yet, I recommend checking it out. In it, I went over the 5 seeds that I’ve had the most trouble with this year. It could have been the result of an error on my part, poor weather, or something else entirely, but for whatever reason, I couldn’t get them to grow.

Today, we’re going to look at the 5 seeds that I’ve had the best luck growing this year. I didn’t treat these seeds any differently from the ones listed in the previous post, yet they took off and are growing abundantly. With each seed, I’ll go over what has made them a success and why I think each was easy to grow. Let’s dive in.

5.) Queen Aliquippa Tomato

I’ve written about this seed so many times that people will get sick of it. We didn’t know this tomato variety existed until we saw it in this year’s Sow True Seeds catalog. They’ve been selling it for years, but this was the first year we requested their catalog. As a refresher, this tomato variety is named for Queen Aliquippa, a Seneca nation leader who lived in Pennsylvania during the 18th century. She is so well-known in Western Pennsylvania that a town, a school, and businesses are named in her honor. In fact, the town of Aliquippa is only 10 minutes from where Magz and I went to college.

These seeds could have been a bust, and I still would have been happy we bought them. Thankfully, that hasn’t been the case. Of the first batch of tomato seeds I started, only 3 are still alive, and 2 of them are Queen Aliquippas. I treated the Queen Aliquppas the same way as the other tomatoes; however, the others didn’t take off.

These plants have gone through a late Spring that resulted in them getting leggy at the start, multiple torrential downpours, and a week of excessive heat, but they remain our best-looking tomato plants. We have since transplanted a few more plants that I started later, and they are also looking good. The Queen Aliquippa tomato plant is unique among the others we’ve grown. It has potato leaves that aren’t serrated like a typical tomato plant. When ripe, the fruit will also mostly stay green with a bit of amber at the bottom. To this point, we’ve loved growing this variety, and assuming we like how they taste, we’ll continue to grow it in future years.

4.) Seminole Pumpkin

These pumpkins have done exceptionally well so far. We have plants that were started indoors and transplanted outside and ones that were direct sown. Regardless of how they were started, they’ve grown well. We don’t know how many of these plants we’re growing because I misplaced the labels when transplanting the ones I started from seeds, but we think there are 3 or 4 of them. The ones that were transplanted have vined out about 2 feet from the roots and are getting ready to produce flowers. The ones that were directly sown are smaller since they were started later, but all of the plants look healthy.

Even though these are called pumpkins and have pumpkin leaves, the fruit doesn’t look like a typical pumpkin. It’s buff-colored rather than bright orange and reaches about 6 inches in diameter. They can be stored for up to a year but can also be picked early as a summer squash. These have required little attention. Since transplanting or starting them, we’ve made sure they have been consistently watered, and I side-dressed the older plants with some bone meal. If you’re looking for a smaller and historical variety to grow (these were grown by the Seminole people of Florida) and you live in a hot and humid climate, you’ll love these.

3.) All Corn Varieties

Before we started gardening, a common remark I’d hear was that growing corn is hard or not worth having in the garden. I don’t remember any family members trying to grow it. Now, that could be because fresh sweet corn was plentiful and cheap where I grew up, so it may not have been worth the effort in people’s minds. Magz and I first tried growing it in containers in 2022 and had success with it. We had 3 stalks in each tote, and they produced small ears that were delicious.

This year, we bought 3 varieties: Hopi Blue, Black Iroquois/Mexican Sweet, and Butter & Sugar. The Hopi Blue is a flint corn for grinding into meal or flour, the Black Iroquois/Mexican Sweet is a dark-kernel sweet corn, and the Butter & Sugar is the common bi-color sweet corn. We planted a row of each on the same day in May after the threat of frost had passed. Immediately, we had a week of heavy rain that totaled more than 3 inches. I was nervous that the seeds had washed away because some of the soil had been relocated, exposing the seeds. We covered them over again, and within 2 weeks, nearly all of them germinated.

At this point, all 3 varieties are doing well. The Hopi Blue is more than 4 feet tall already and can grow up to 9 feet tall, while the others are about 3 feet tall and should only reach 5-6 feet tall. Yesterday, when I was checking out the plants, I noticed the tassel developing inside the leaves for the first time. Corn is an easy, low-maintenance vegetable to grow. Besides weeding and watering, the only thing I’ve done is give the plants consistent nitrogen. Corn is a heavy feeder, so it needs extra nutrients to reach full height and develop big, full ears. If you’ve been on the fence about growing corn, it’s worth a shot. It doesn’t require a lot of work, and seeing corn grow is a beautiful experience.

2.) All Cucumbers

Cucumbers are another vegetable we’ve had success growing in the past. In our container garden, we grew a pickling variety, and we were pulling multiple ripe cucumbers off it daily. This year, we bought 3 varieties to grow: Boston Pickling for pickles, Tendergreen, which can be harvested for pickles or left on for slicers, and Richmond Green Apple, an Australian heirloom. We were also gifted 2 starts of a burpless variety from our neighbor.

I started the 3 inside and transplanted 2 plants of each variety into the garden. At the time, they didn’t look good. Like other plants, they were leggy at the time, and the weather wasn’t friendly to growing cucumbers. However, within a couple of weeks, they took off and now have blossoms on them with small fruit growing. The starts we were gifted also weren’t healthy when we transplanted them, but they’ve taken off and have produced 2 fruits already. These have required little maintenance other than a side-dressing of fertilizer. We may need to trellis or stake them at some point, but up until now, they’ve grown nicely without any assistance.

Bonus: Most Melons, Squash & Pumpkins

Because I didn’t want to have a listing for all melons, squash, and pumpkins, in addition to already having all corn and cucumbers, I wanted to add an honorable mention or bonus section. In this section are all melons, squash, and pumpkins. The Seminole pumpkin deserved its own listing, but most of the things I wrote about it apply to all of these. Quickly, these are all the melons, squash, and pumpkins that we are growing:

  • Ali Baba Watermelon
  • Noir de Carmes
  • Tigger Melon
  • Black Beauty Zucchini
  • Candy Roaster Melon
  • Golden Glory Yellow Zucchini
  • Queensland Blue Winter Squash
  • Zapallito Del Tronco Zucchini
  • Ping Tung Eggplant
  • White Scallop

Of the above seeds, the only ones that haven’t done well are the Black Beauty Zucchini, Golden Glory Yellow Zucchini, and the Ping Tung Eggplant. I don’t know why the zucchinis didn’t do well since they were planted at the same time as the Zapallito Del Tronco, but they didn’t. Only 1 Black Beauty and none of the Golden Glory seeds germinated. The eggplants were started indoors and never got to the point where they could be transplanted outdoors. The others have all done well.

I started a lot of the squash, melons, and pumpkins indoors. They immediately took off, but we couldn’t transplant them right away due to the weather. As soon as the weather broke, they were moved outdoors, but I had little faith in them doing well. All but 3 of the plants lived and are thriving. We also directly sowed a bunch of them later in early June, and they’ve done exceptionally well. All of the plants look healthy and are growing vigorously. What’s most interesting is how all the squash, all the melons, and all the pumpkins have similar leaf structures and growing behaviors, but have subtle differences between the varieties. For example, the Seminole pumpkins have silver lines on the leaves that the other pumpkin plants don’t.

We bought additional seeds (these are the ones in orange text) in late June to have a wider variety of pumpkins and squash. To put into context how quickly and easily these grow, I started them on Saturday evening. By Tuesday morning, the Hokkaido had germinated, and by Wednesday evening, the Dark Green Yuxi Jiang Bing Gua and Sugar Pie Pumpkin seeds had as well. Consistent moisture levels, full sun, and warm temperatures are the perfect recipe for these. If you find a variety you are curious about, give it a go. Odds are that it will do well.

1.) Provider Bush Bean

I love beans. In the United States, we’ve done a horrible job of educating people on how many bean varieties there are and all the ways we can use them in food. In most grocery stores, the only fresh beans you’ll find are green beans, and you may find some edamame or snap peas, which aren’t beans but are similar enough to include them here. I think that a lot of Americans picture canned beans when they think of beans. Whether these are green beans, black beans, pinto beans, or kidney beans, the average American doesn’t envision bags of dried beans or fresh varieties that are a color other than green. I’ve grown bush beans in the past, but this year, we found ourselves interested in growing other varieties.

American history is filled with people of the past growing bean varieties that were vitally important to their culture and heritage. Baker Creek sells a variety that was found in a New Mexico cave and dates back 1,500 years. In the South, Southern peas (also known as asparagus beans or Cowpeas) were preserved by slaves as a way to save their heritage. It’s the same in Latin America, South America, and Asia – beans (and all seeds) tell stories.

We attempted to grow 5 varieties this year: Kebarika, Jamapa, Red Bush, Provider, and Chinese Red Noodle. We’ve had moderate success with the Kebarika and Jamapa and nearly no success with the Red Bush beans. However, the Provider and Chinese Red Noodle beans have excelled. I planted the Chinese Red Noodle beans in a planter box I built, and they are currently climbing the trellis to a height of 7 feet.

I planted the Provider beans in our bed with the Kebarika and Jamapa, and they’ve done pretty well. They’re not real tall yet (about 18 inches), but are still growing and have started to flower. But when our Red Bush beans failed (only 1 successful plant among a full row of seeds), I planted more Provider beans in the same row around the lone Red Bush bean plant. So, it was the same growing conditions. Within 2 days, almost all the seeds germinated, and at the time of writing this, the plants are nearly the height of the Red Bush bean plant, which is more than 2 weeks older. As Magz pointed out, the name Provider is pretty on point. These plants provide.

So, there it is. These are the (more than) 5 plants that I’ve had the easiest time growing this year. All have a few things in common: they grow in spite of the weather, my mistakes, and questionable soil quality. They’ve all required little maintenance and make you believe in yourself as a gardener. Have you tried any of these varieties? If not, I recommend giving them a go. Do you have any favorite seeds to grow?

Weekly Update #18 – Farmer’s Market, Restarting Beds & Sneaky Rabbit

In this week’s update, we went to a local farmer’s market and got to meet many people who are as invested in gardening as we are, we restarted a few of our garden beds, and we had a cute but unwanted visitor in one of our gardens. Finally, in the Seed of the Week section, virtually travel with me to the Middle East and learn about an Iraqi melon variety.

Farmer’s Market

Last week, we were looking forward to Saturday to visit the weekly farmer’s market in a nearby town. Our town has its own farmer’s market, but it takes place on Thursdays from 3 to 6 p.m., which makes it tough to attend. I work until 5 most days, so we wouldn’t get there until 5:15 at the earliest, and by that point, most of the items are gone. Early last week, our neighbor told us about the farmer’s market in the next town, and this market is held on Saturday mornings from 9 to 12, which is much friendlier to our schedule. We got up in time on Saturday and arrived by 9:45, and it was a great experience.

There were probably between 20 and 25 vendors, and they sold a lot of items, including produce, flowers, meat, baked goods, honey products, wooden kitchen utensils, and yarn. We came home with a bunch of red beets, green and yellow zucchini, 3 strawberry plants, a wooden flour scoop, and a skein of yarn. But it wasn’t just the items that got us excited. We were able to make connections with people in our area who have similar interests to ours and are motivated to grow their own food and be makers. Magz talked with a vendor who raises sheep and sends the wool away to a local mill to be spun into yarn. We also talked with the gardener who sold us the strawberry plants about the best way to grow them.

Lastly, the town’s library has a booth at the market each week, and we were able to become members. Up to this past Saturday, we haven’t had library cards since we moved to town in 2021. Our town’s library doesn’t have a great selection and is in the basement of the borough building, so it doesn’t feel like a library. Becoming members of our new library has us excited for the potential to get more involved in the community and find new books to read. I’m especially excited to check out their reference section for gardening books and to request such books from other libraries.

Restarting Garden Beds

For the past few weeks, we’ve been having some issues with grass growing out of control in a couple of our beds. It choked out the carrots and beets and also wasn’t allowing some of our greens to grow. Given that most of those plants were among the first things we planted, we weren’t confident that they’d grow to maturity at this point. So, we decided to get the mower and tiller out, and we mowed down everything that was growing and turned the soil over to start fresh. In those beds, we planted more winter squash/melons/pumpkins that we recently bought, more carrots and beets, and the strawberry plants we bought on Saturday. By restarting the beds, the plants will have a great chance to thrive, since the rows are spread out and everything is marked.

We’re also going to be turning over the soil where our potatoes were planted (they didn’t grow), where we pulled our ground cherry plant (also didn’t grow), and where a couple of our melons didn’t work. In their places, we’re going to plant a few more cantaloupes and watermelons, some late-season corn, and a final row of shelling beans. While it’s getting late in the season, there’s still time to get a late crop of seeds in the ground. July means hot temperatures for germination and plenty of sunlight to help the plants grow once they start.

A Potentially Unwanted Visitor

On Thursday evening, I was looking out the kitchen window at the backyard. It was close to 8 p.m., and I was about to get a shower. I saw two rabbits, which isn’t unusual. We have a populated woodland community on our property, and the rabbits are some of the most active members. They love our yard because we don’t cut our grass super short and have places that provide shade and protection. To this point, we haven’t had any issues with them getting into our beds or eating our plants. This day, however, one rabbit was outside the fence and one was inside.

The one that was inside the fence was getting dangerously close to one of the melon plants that Magz is passionate about and recently started. I quickly ran outside to get the rabbit out of the garden, which was an interesting experience. Thankfully, it left the way it entered, which revealed a hole in our fence that likely opened when we started the fence or was the result of the mower getting caught in it. I was able to put a new section of fence in and closed up the hole, and we haven’t had any more visitors, so fingers crossed that they stay outside the fence.

Seed of the Week

This edition of the Seed of the Week takes us to Iraq and the Ali Baba watermelon. We bought our seeds from Baker Creek, who originally got the seeds more than 2 decades ago from an Iraqi farmer who preserved them. Thankfully, that farmer and seed companies like Baker Creek have shared and preserved the seed, because it is now nearly impossible to get seeds from Iraq following decades of warfare.

Watermelon, Baker Creek, Ali Baba Watermelon
Ali Baba watermelon

We’ve never grown these before, but the Ali Baba watermelon plant produces an oblong fruit that grows to between 12 and 30 pounds and has a rind that is lighter in color compared to the watermelon we typically eat in the United States. We started these seeds in at least 3 spots, and they germinated successfully and quickly. All of our plants have produced their second set of leaves and will begin vining out next. As long as we keep them well watered, they should continue to grow and hopefully put on fruit. We’ll keep you updated on their progress.

Up Next

A small addition to the weekly update: we harvested our first cucumber last night. It was a burpless variety that our neighbor gave us and was about 5 inches long. It’s definitely a monumental occasion. Between now and next week’s update, we have plans to start a couple more rows of corn and beans in some spare space we have. We’re also going to start at least 1 more cantaloupe or watermelon plant. Hopefully, we’ll also get to harvest a few more items. Until next week, happy gardening!

Weekly Garden Update #17 – Visible Growth, Tackling Grass & Side Dressing Plants

In this week’s update, we’re starting to see our garden really take off. Plants that were already big have started to bloom and produce fruit, while plants that were small or looked a little unhealthy have started to grow and look like they’re going to make it. We also needed to tackle some of the grass in the beds that was becoming unruly, and we side-dressed many of our plants with bone meal. Finally, what is this update’s seed of the week?

Visible Growth

Since last week’s update, we’ve been blown away by how much growth there has been in the garden. The tomato plants we bought from the greenhouse, as well as the original Queen Aliquippa plants I started, have all started to blossom and produce fruit. The Cherokee Purple, Black Krim, and Yellow Pear plants all have fruit on them, while the Queen Aliquippa plants have numerous blossoms. Our pepper plants are the same way, with two of the Cal Wonder plants having at least one fruit. The small starts that we transplanted last weekend have grown and are looking healthy.

Our melon, squash, and cucumber plants are also showing a lot of growth. The spaghetti squash plant we bought at the greenhouse has 15 or so blossoms on it, while another plant that I started inside (we think it’s a pumpkin) is also blossoming. All but a few of the plants in our melon bed are doing very well, including our cucumber plants, where we’re starting to see baby cucumbers growing behind the blossoms. Lastly, our eggplants are growing a lot of fruit, with the largest being roughly three inches in length. It’s safe to say that the heat and sunshine have been wonderful for our garden.

Mowing Inside Our Garden Beds

This weekend, we realized that we needed to deal with the grass that was growing in the last garden bed we planted in. We had been using long shears to trim everything, but Magz smartly suggested that we try getting the mower in between the plants. Yesterday, we did and had so much success that we used the mower in our other beds, which made for much less work by hand. I maneuvered the mower while Magz helped me not run over any plants. While no plants were harmed, I did run over a wooden marker, but after 30 minutes or so and many squeaks from Magz, we were done. She is my Richard Hammond. We’ll be using this method moving forward to save time and work.

Side Dressing Plants

With our plants growing well and starting to bloom, I applied a layer of bone meal to our tomatoes, peppers, beans, and our more mature melons, squash, and cucumbers. I like bone meal because it’s easy to apply and gets absorbed pretty well, but I want to find a better fertilizer. I like bone meal when transplanting starts, but I would like to find something more water soluble or even a liquid fertilizer for side dressing needs later in the season. The bone meal has worked, though. The day after I applied it, we got a nice rainstorm, and the plants looked perkier afterward.

Seed of the Week

This week’s featured seed is the Black Krim tomato. We’re growing these from seed and from starts that we purchased at a greenhouse. These tomatoes are originally from the Crimean Peninsula in the Black Sea and were named after the Isle of Krim. They gained popularity in that region during the 1850s but didn’t become commercially available in the United States until the 1990s. They may have been the first “black” tomato to be sold in the U.S. These are the first black tomatoes we’ve grown.

Up Next

At this point in the garden, we’re largely managing the garden. We’re dealing with weeds, making sure the plants are properly watered, and generally ensuring that everything is healthy. There’s a chance that by next week’s update, we’ll have harvested at least one tomato, eggplant, and/or cucumber. How are your gardens doing? Happy gardening!

5 Hardest Seeds to Grow

Of the 82 seed packets we ordered earlier this year, we have planted nearly all of them, with only the fall crops still remaining. So, I wanted to write two articles: one on the hardest seeds to start and a second on the easiest ones.

I’m starting with the hardest seeds. My experiences with these are just that – my experiences – and are in no way an indictment on them or the seed companies they were purchased from. I could have done something wrong that caused failure, and if you’re curious about them, you should still buy them. Without further ado, here they are.

5.) Principe Borghese Tomato

We bought these seeds to be our paste tomatoes for the year, opting for this heirloom Italian variety over the more popular Amish Paste or San Marzano. We were intrigued because of their history, that they could also be sun-dried, and because they were spherical rather than the typical oblong. Unfortunately, we had nothing but problems with them.

I started these seeds the same way and at the same time as all the other tomato seeds; however, for some reason, these didn’t germinate as well as the others, and the ones that did germinate got leggy within a few days. Side note: Nearly all our tomato starts got leggy due to inadequate lighting, but these starts were worse than the others. When I attempted to harden them off and transplant them into the garden, none of them made it. To be fair, only one variety of tomato plants successfully transplanted due to poor weather conditions, but these were the worst. Later, I attempted to direct sow them in the garden once the soil temperature was warm enough, but it’s been at least two weeks now, and we’ve seen no signs of germination. These seeds not working is disappointing because we were excited about them. There’s a good chance we’ll try them again in the future, but we’ll buy a second type of paste tomatoes if we do.

4.) Calabrese Broccoli

We wanted to grow broccoli this year despite having no experience with it. We chose the Calabrese variety because it is supposed to be a traditional-style broccoli that produces smaller heads and multiple side shoots. Everything I read made me confident that it would grow well in our area. I started them indoors 4-to-6 weeks before the last frost, as the seed packet suggested.

The seeds germinated well, but the new starts immediately struggled. I didn’t know this at the time, but broccoli is sensitive to warm temperatures. That is something I struggled to monitor and control with our seed-starting setup because I started vegetables with different temperature requirements at the same time. Additionally, our current grow light gives off heat but needs to be very close to the plant to provide enough light. This created a lose-lose scenario. Understanding this, we may direct sow late in summer for a fall crop. I think this will result in a better growing experience, but it’s anything but a “set it and forget it” seed.

3.) Husk Tomatoes – Ground Cherries & Tomatillos

I’m combining these two because they’re part of the same husk tomato family, grow in similar manners, and seem to be susceptible to the same issues. This is another vegetable/fruit that we’ve never grown before. Actually, we don’t think we’ve ever eaten ground cherries before and have only had tomatillos in salsa. We had similar issues with these that we had with other seeds: When they germinated, they went leggy pretty fast. One difference, though, was that these seeds took a long time to germinate and were slow to grow after they did.

When it became clear that getting any fruit off our starts was going to be a struggle, we bought a plant of each at the local greenhouse. They were very healthy and already had fruit forming. We transplanted them into one of our garden beds and quickly encountered issues. It started with the three-line potato beetle that required a non-organic spray to treat and has only continued with the plants struggling to grow. I think it’s the result of too much moisture in the soil, but as a bright spot, our ground cherry plant is still producing fruit, and last evening, we were able to harvest one. It wasn’t ripe enough yet, but it was rewarding to get something from it.

We also bought a few more tomatillo starts and transplanted them into a different garden bed with better drainage. I preemptively sprayed them to prevent beetle infestation and staked them. They’re still doing very well with dark green leaves and fruits that continue to develop. We’ve learned a lot since we first started these seeds, and we’re certain that 2025 won’t be the only year we grow them.

2.) Ping Tung Eggplant

We gave these seeds a shot because they were unique compared to the Italian eggplant that is more common in the United States. These originate in Taiwan and have a more cylindrical shape compared to the bell shape of the Italian style. Before purchasing, we were aware of the struggles that some gardeners have experienced with these seeds. Some talked about the issues of successfully moving from germination to transplanting. That’s the same problem we had. They germinated quite well, but like other plants, they quickly went leggy and died. I tried restarting them in May, but they didn’t even get past the germination stage. It’s quite a bummer.

We bought two eggplant starts from the greenhouse, and they’ve been doing very well since being transplanted. I don’t think they’re Ping Tung eggplants, but they are an Asian variety. They have been flowering for more than a week, and several fruits are beginning to develop. We were also gifted an eggplant start from our neighbor. We were unable to transplant it right away, so the plant was looking unhealthy by the time it was transplanted, but it has since recovered and is growing nicely. The Ping Tung seeds may just be difficult to start; I’m unsure, but I think we’ll give this variety another shot in the future, either this fall or next spring.

1.) Ishakura Bunching Onions

The final item on this list is an Asian-variety bunching onion seed. We chose these because we like Asian vegetables and were intrigued by being able to grow onions in the spring. Like the Ping Tung eggplant seeds, there were some mixed reviews from gardeners, so I knew there was a chance of some issues. I attempted to start these inside, which is what the seed packet recommends. In fact, it says to start these up to three months before the last frost date, so I had an expectation of slow but consistent growth, because it’s hard to keep starts going that long without needing to transplant them.

I began them in normal seed cells and had successful germination in the expected timeframe. They grew to about three inches and then stopped. They didn’t grow any taller or thicker. I thought that it could have been part of their growing process and that they would take off after being transplanted, but that wasn’t the case. Transplanting them was difficult due to the fragile root structure, and none survived. I later attempted to direct sow a row of them in the garden, but none germinated. This seed was easily the most disappointing of the season. Part of that is because we were excited about these onions and never experienced a hint of success.

I think part of this was the result of poor growing conditions. I think that growing them in a container would yield better results. You can tightly pack these seeds in, so in a 12″ diameter pot, you can probably grow two or three dozen plants. This would also allow for better moisture management. Still, for how easy the seed description said they were to grow, these were a letdown.

Giving Up or Trying Again

This is the decision we’ll find ourselves with next spring. Do we give up on these seed varieties and buy a different seed or a start, or do we try again with the knowledge we didn’t have before? It’ll likely be a combination of both. We had a conversation last evening about these seeds, and we are unsure if we’ll buy husk tomato seeds next year. They’re quite difficult to start, and the starts are very affordable. That doesn’t mean we won’t try starting them from seed again in the future, but I want to have confidence in successfully growing them to harvest before going back to the starting point again. The Calabrese broccoli seeds may be the same way.

But I think we’ll buy the bunching onions, Principe Borghese, and Ping Tung seeds again. I can pinpoint what went wrong with all of those, make changes, and be confident that we’ll have a different result. We’re going to upgrade our growing light, which will help, and our weather this spring was unusually bad. An improvement back to the norm would have a big impact.

I am planning on doing this article each year as we try new seeds. I’m also going to be doing a post on the five easiest seeds to start. Happy gardening!

Weekly Garden Update #16 – Heat Wave, Lots of Growth & Seed of the Week

In this week’s update, the rainy weather finally came to an end, we’re seeing a ton of growth in our garden, including the grass and weeds, and I’m starting a new section called Seed of the Week. Let’s dive in.

Heat Wave

We had one of the coolest and wettest springs that I can remember this year. If you’re a regular reader of our blog, you know that this delayed our planting and slowed growth. That pattern broke as the official start of summer arrived with a four-day heat wave that has brought temperatures in the 90s, humidity, and a UV index above 10. There was no gradual transition between seasons this year. While it’s not my preferred weather, I’m very thankful that the ground can start drying out and plants can begin to take off.

The extreme heat can make working in the garden less fun, but it’s a reminder to take breaks, stay hydrated, and get as much work done outside the hottest part of the day. I failed at the last part of that this past weekend by working in the middle of the day, which is a mistake I won’t make again during this heat wave.

Lots of Growth

Even though the recent weather pattern hasn’t been ideal, it is allowing our plants to take off. With ample moisture in the ground, all that the plants needed was warmth and sunshine, and now that they have it, the plants have shown measurable growth in recent days. I want to highlight a few plants where this has been most evident.

Corn: Our corn is now about 15 inches tall and on pace to meet the “knee-high by the 4th of July” saying that I heard growing up. The base of the stalks looks strong, and the leaves are a beautiful green with that lovely waxy and silky texture. I continue to side dress them with blood meal every couple of weeks.

Beans and Peas: Our beans have exhibited consistent growth since germinating in mid-May. All the beans, except for the red bush beans that I started in early June, are about 8 inches tall. Our snow peas are also at this height, which led me to build a trellis for them this past week.

Eggplant & Spaghetti Squash: We transplanted a couple of eggplant starts a few weekends ago, and they are doing exceptionally well. They have been consistently producing flowers, and I even felt the start of a fruit on Sunday. We planted a lot of squash and melons this year, and the spaghetti squash start we bought in early May is doing wonderful. It’s spreading outward from the main stem and is starting to show where the flowers and fruit will grow.

Tomatoes & Peppers: Our tomato and pepper plants have started to flower, and one of the yellow pear tomato plants has fruit on it. This hot weather should help produce more fruit and help that first tomato ripen.

One small downside to the weather we’ve had is that weeds and grass have continued to grow at a fast pace. Managing the grass that’s inside our garden fences has been difficult from the beginning. We have a plus sign-shaped walkway between our garden beds. I’m able to tackle that with the mower, but the grass within the garden beds is a different story. We’ve been using hedge-trimming shears to cut down all the grass, which has been surprisingly effective. Hopefully, the hot weather will lead to the grass growing a bit slower moving forward.

Seed of the Week – Queen Aliquippa Tomatoes

This is the first installment of a new section I’m calling Seed of the Week. Each week, I’ll go over a seed we’ve grown and are particularly fond of. I won’t go in-depth with the seed’s history in this weekly post (I’m saving that for a standalone series), but I may briefly highlight the seed’s name inspiration. I will also go over our experience with the seed, including how it is to grow, and what the fruit should look like when it’s ripe. I considered many options for the first Seed of the Week section, but I am going with the Queen Aliquippa tomato, which I briefly highlighted when I wrote about the seeds we bought for this year’s garden.

Tomato Seeds, Seed Packet, Gardening
Queen Aliquippa tomato packet

We bought our Queen Aliquippa seeds from Sow True Seeds, which is located in Asheville, North Carolina. The seeds are named for Queen Aliquippa, a Seneca tribe leader from the 18th century who lived in Central and Western Pennsylvania, which is where Magz and I are from. Queen Aliquippa is a well-known name where we live, so we had to try seeds named in her honor. We’ve never grown these seeds or even seen the tomatoes in person, but the tomatoes are categorized as slicing, so they’re likely larger than pear tomatoes but smaller than a beefsteak. They stay green when ripe but are supposed to be incredibly sweet.

Our experience with growing these seeds has been positive. They were some of the earliest seeds I started, and they were easy to germinate. Unfortunately, not having a strong enough grow light prevented them from growing as big as I would have liked before transplanting them, but we did finally get them outside in late May. We started with two plants going outside when they were about 4 inches tall, and they’ve done remarkably well in spite of the poor weather. As of yesterday, they were over a foot tall. The leaves are beautiful, and we haven’t experienced any leaf curl, which is common with a lot of tomato plants.

Up Next

This coming week will be focused on making sure our plants are watered and aren’t showing any signs of stress from the heat. We’re also looking forward to seeing more flower and fruit development, as well as the potential for harvesting our first tomatoes. Happy Gardening!

Is Container Gardening a Good Idea?

Prior to 2025, the only way Magz and I were able to garden was in containers. As renters, the opportunity to build raised garden beds or dig beds into the ground wasn’t there. In this post, I’m going to walk you through our history with container gardening, including the containers we used and what we grew, and discuss the pros and cons of gardening this way. Finally, at the end, I’ll ask the question, “Is it for you?”

Our Experience With Container Gardening

The Containers We Used

We have grown in many different containers. Our first experience was a terracotta pot that many people are familiar with. That was in 2016, and we used these pots in the years that followed. We’ve also used hard plastic planters of various sizes. They’re affordable and easy to find. The most unique containers we’ve gardened in are plastic totes and 5-gallon buckets. In 2022, we wanted to try growing a bunch of different seeds but couldn’t have an in-ground garden. So, we bought roughly a dozen plastic totes and two dozen buckets, along with some plastic planters and shallow totes for lettuce.

Finally, the most unique and potentially gimmicky planter was the GreenStalk. If you’re unfamiliar with GreenStalk, it’s a tiered growing system that maximizes the space to grow many plants. It has an ingenious design that trickles water down from the top tier. We had the 3-tier system that is currently sold for $110. We’re still technically gardening in a container with the planter box I built for our long beans. It was cheap to build and only took two hours. We also have a plastic rectangular planter that we have butterfly peas in.

I would say that of all the containers we’ve used, my favorites are the homemade wooden one I built and the GreenStalk. The wooden one is nice because it’s homemade and doesn’t use plastic. Anything we can do to reduce our dependency on plastic, even if it isn’t single-use, is a good thing. I also really liked the GreenStalk design. It allows you to grow a lot of vegetables in a small area and is relatively easy to use.

What Did We Grow?

We have grown a bit of everything in containers. In our GreenStalk, we tried growing lettuce, carrots, beets, bok choy, chamomile, and herbs. Prior to the GreenStalk, we grew a cherry tomato plant at our first apartment. Those are all pretty standard things. That all changed when we did our 2022 garden.

We unintentionally pushed the boundaries of what’s possible with a container garden. We attempted everything we could think of and were interested in. That included potatoes (early and mid-season), corn, cabbage, pumpkins, musk melon, watermelon, and Brussels sprouts. We also grew the vegetables that most people grow: cucumbers, tomatoes, peppers, lettuce, and beans. And for the most part, it all grew.

Were Our Container Gardens Successful?

In general, yes, our container gardens were successful, with each attempt producing more than the previous one. We got a few tomatoes from the first tomato plant we grew; however, it eventually died because we had to travel for work that summer and couldn’t find anyone to water it.

Our GreenStalk garden was doing well until we moved. We started everything from seed in early May and had successful germination. Unfortunately, two things happened that caused the plants to die before reaching full maturity. We had a week of intense rainfall not long after germination, which restricted early plant growth, and we unexpectedly had to move later in May. The move led to the plants experiencing shock. After moving, we were unable to tend to them for a week while we were getting some things settled, and by the time we got back, it was too late.

Our 2022 container garden was very successful. I believe people thought we were crazy for trying to grow plants that typically aren’t “container-friendly,” but we harvested multiple ears of corn, at least one big head of cabbage, many pounds of potatoes, and more than one watermelon, musk melon, and pumpkin. We also had a lot of success with our tomatoes, beans, and cucumbers.

Pros & Cons of Container Gardening

I’ve gone over some of our experience with container gardening, the majority being positive, but that doesn’t mean there weren’t some negatives. Here are some pros and cons of gardening in containers.

Pros

You’re (Almost) Guaranteed to Have Good Soil

When container gardening, you are typically bringing in soil to fill the containers. I think most people buy their soil in bags, but you can also buy it in bulk from landscape centers or garden supply stores. This soil is typically nutrient-rich, balanced, and light. It tends to drain well because it has vermiculite, perlite, or coconut coir in it. This is important when container gardening, but more on that in a bit. This type of soil makes it easier to have success when growing root crops like carrots and beets, as well as potatoes, since the roots don’t have to battle compacted soil to grow. If you’ve been following our blog from the beginning, you’ll know that good soil isn’t a guarantee.

Maneuverability

Container gardens give freedom that is impossible with traditional in-ground or raised bed gardens. You can place the containers in “creative” ways to maximize your space and relocate them to give them more sun or shade as needed. If you need to move around them, they can be moved for that reason too.

Opportunity to Garden

If you rent a house, you may not have the chance to build a raised garden bed or till up the lawn to create an in-ground garden. And if you live in an apartment, you certainly don’t have that chance. Containers give you that chance. I think it’s important that people have a connection to their food. Knowing how your food is grown gives us an idea of how much work goes into that vegetable you’re about to eat. A container garden may allow you to only grow a few plants, but that is better than nothing. The joy of harvesting your first successfully grown tomato or pepper is hard to describe.

Cons

Weight

Containers may provide maneuverability that rigid gardens don’t, but they’re not easy to move. The totes we grew in, especially the 33-gallon ones that our potatoes were planted in, were very heavy when full. We never weighed them, but I would guess that each was over 50 pounds. I could pick them up, but it was awkward and gave me some back pain. Dragging them was the easier option. Moving them a couple of feet each week to mow around them wasn’t a problem, but anytime I needed to move the rows around, it was a struggle. The buckets were much easier with their handles.

Another part of the weight is moving the soil around. If you buy soil in bulk, you have to get it into the containers. If you use bagged soil like we did, you have to carry those bags around. An individual bag may only weigh 40 pounds, but when you buy 20 of them at a time, it quickly adds up.

Watering

Something I didn’t know about container gardening before we began our 2022 garden was how different watering is compared to an in-ground garden or raised beds. Traditional gardens retain moisture quite well, so you can get away with only watering them once a week. You place your finger into the soil, and if it’s dry a couple of inches down, it needs water. It’s pretty straightforward. A container garden requires a much more hands-on and active approach. Even though the soil is good, the containers still don’t drain as well as raised beds or in-ground beds. The top of the soil will often dry out, while the bottom retains moisture. This can lead to overwatering and root rot. I found that you need to check the moisture level at a greater depth. Depending on the weather, we either needed to water the containers daily or every other day, but it was rare that the plants went more than a couple of days without water.

Cost

Starting a garden of any type can be expensive. I’ve gone into the costs of this year’s garden in various posts. Container gardens are no different and may actually be more expensive. If you don’t have the containers, you need to buy them. When we bought our totes, each one cost $5.98, so we spent roughly $80 on those. Each bucket was around $3, so we probably spent $50 on those. You also need soil and various amendments to help with draining. We bought perlite and broke up foam to put in the bottoms of the containers. Then you need to buy the seeds/starts, fertilizers, and plant supports that are needed for any garden. It quickly becomes expensive, and it doesn’t include the cost of water. We probably spent $500 on that year’s garden and got rid of most of the containers at the end of the year. For a one-year experience, it wasn’t cheap.

Neither a Pro Nor a Con

Amount of Work

Gardening in any form is a lot of work. It requires physical labor and time. I don’t think this is a bad thing, but it’s a commitment, and oftentimes, it’s done in hot weather. Container gardening is no exception. You don’t have to deal with the digging and weeding required with traditional gardens, but the amount of work is comparable. Each container needed to have drainage holes drilled. They were then filled with the perlite or foam and soil before the seeds were sown. And as I mentioned, the containers needed to be moved. I even moved them into our garage early in the year when we had torrential downpours. It was a lot of work, so please don’t start a container garden, especially a big one, if you think it will be light on work.

Do I Recommend Container Gardening?

Absolutely. If you’re interested in growing your own food but either can’t have a traditional garden or don’t want to commit to one, growing in containers is a great alternative. It is a ton of fun, and if you can commit to only having a few containers, it’s not too much work. The payoff can be huge and can take advantage of space that may otherwise go unused.

Tips for Container Gardening

After recommending gardening in containers, I want to share some tips that can hopefully help you. These are things we learned through our experiences.

1.) Buy the Right Seeds

It’s important to buy the right seeds when container gardening. A vegetable variety that works well in the ground could be problematic in containers. This is often due to the depth of the roots and the height of the plant at maturity. For root crops like carrots, you will have more success with shorter carrots like oxhearts than you will with longer ones like yellowstones. Most containers won’t have enough soil for carrots to reach their full size of 7 to 9 inches, so it’s best to stick to varieties that are only intended to reach 5 to 6 inches.

For non-root crops, you should look for container or determinate varieties. These are only intended to grow to a set height, making it easier to contain them. You can also look for bush varieties that don’t need trellising or supports. You can find bush varieties of beans and cucumbers and determinate varieties of tomatoes. For corn, we looked for varieties that only reached a height of 5 feet. That will reduce the risk of them getting too tall and blowing over in strong winds. There are a lot of container-friendly plant varieties now, so don’t be afraid of growing what you want to eat.

2.) Choosing the Right Size of Container

It’s important to choose the proper container size for the plant you’re growing. When in doubt, go with the bigger option. Plants want soil for their roots to explore, so give them as much depth as possible. You can put multiple plants in one container, but don’t crowd them. We tried growing more than one pepper and bean plant in 5-gallon buckets, which was a mistake. Your plant will be happier and grow fuller with extra room.

3.) Have Fun, and Don’t Worry About Mistakes

Gardening can be a lot of fun. It’s meant to be relaxing and helps us connect with nature. It can also be stressful. Accept that you will make mistakes, but please don’t let that get you down. Keep going (and growing) and focus on the success you’re having. At the end of the season, you can think about ways to improve next year’s garden.

If you’re thinking about container gardening but have been unsure if it’s a good option for you, I hope this post helps you feel confident. It’s certainly worth it.

Weekly Garden Update #15 – Final Plantings, Weeds, and Dealing With More Rain

In this week’s update, we continued to harvest greens and radishes as they were ready. We also bought some starts for plants we were having trouble germinating, we navigated weeds and grass getting a bit out of control, and the rain just won’t stop.

Buying and Planting the Final Starts

We made a decision this past weekend to revisit our local greenhouse and buy some more vegetable starts. This decision came on the heels of struggling to get our Principe Borghese tomato and eggplant seeds to germinate. Earlier in the spring, I had success with getting the Principe Borghese seeds to germinate, but I’ve struggled with the eggplant seeds. We bought 2 eggplant starts, 4 San Marzano tomato plants, and 1 cherry tomato plant. We have some cherry tomato plants started, but we wanted a more mature plant at this point.

Eggplant, gardening
Our eggplant start

We also bought 4 Cal Wonder pepper plants, 3 tomatillo plants, and 1 basil plant. We have a few Cal Wonder plants started, but the cool weather and rain have made growth slower than we’d like. We bought more tomatillo plants after our struggles with the three-striped potato beetle that I mentioned in last week’s update. Finally, we bought a basil plant because we didn’t have any basil until now. Those were all transplanted into the ground on Sunday.

Basil, Gardening
The basil plant we picked up

Last week, we also got the majority of our own starts into the ground. We planted all our squash, cucumbers, and melons, which were the bulk of our remaining starts. We also planted our final beans, yellow squash, and zucchini seeds. That leaves us with only a few tomato plants and any seeds we want to succession sow until we plant our late-season crops.

Dealing With Weeds

Weeds are something that every gardener has to deal with each year. You can do everything to prevent them from growing, but they’ll still pop up. In our situation, the weeds have been as bad as we expected. Because this is our first year gardening in this space, the property was covered with thick grass and many weeds, mainly dandelions. We didn’t have the chance to kill off the grass and weeds before tilling. Ideally, we would have laid out our garden beds in the fall, killed the grass with chemicals or plastic, and tilled them in the fall so that everything could have taken effect during our very cold winter.

When we initially tilled the beds, the weeds and grass were largely removed, and in the rows where we planted things, that’s remained the case, for the most part. In the first bed we planted in, the grass has come back in full force, which is annoying. It’s difficult to see the carrot and beet tops through the grass, but we’re managing. Our plan is to re-till that section of the bed after the carrots, beets, and parsnips are harvested. I did that in another section of the bed, and the grass has mostly stayed away. In the meantime, we are using a weeding tool to dig up dandelion roots (who knew they were so woody) and pruning shears to cut back the grass. After everything is harvested for the year, we’re going to take an aggressive approach to remove all the weeds.

More Rain

This spring has been one of the wettest I can remember. Early last week, we had several days of sunny, dry weather that allowed the soil to dry out nicely, which the plants loved. The end of last week brought more rain, however, and lots of it. Even though the meteorologists were only calling for about a half-inch of rain, we got more than 2 inches. It led to our beds temporarily flooding until the water drained through the soil. Thankfully, the soil did drain, which indicates that our efforts to amend the soil have been successful, but there’s still so much rain.

The plants aren’t growing as fast as they normally would because of the lack of sunshine, but they’re holding on. It has taught me so much about how hardy plants can be. The 10-day forecast provides some positive news. Although there is some rain in the forecast for the next 4 days, the total rainfall isn’t a lot (about three-quarters of an inch). After that, we’re supposed to have 4 consecutive days of hot, sunny weather, which the plants will love. Hopefully, the meteorologists get it right this time.

Up Next

We are definitely getting to the end of the planting portion. We’ll get our remaining tomato and pepper plants in the ground, and that’ll be it. I still need to build the trellis system for our beans, which I’m hoping to do this week. But in general, it’s starting to become a time period of maintenance and slowness, which I’m looking forward to.

Long Beans, Gardening
Our long beans are taking off

Have you had any problems with your gardens this year? Is it a wetter-than-usual spring where you live? Thanks for reading, and Happy Gardening!

The Rain Barrel: A Gardening Game-Changer

In several of my weekly gardening updates, I have mentioned that we installed a rain barrel. I have known several people with them and have been excited to have one of my own for quite a few years. The opportunity to save some money on water? Sign me up!

Before buying our house last summer, we had been renters, so this was our first opportunity to have a rain barrel. As we were planning our garden, the idea of having one for this year came to mind as a potential reality rather than a long-term thought. We knew that we’d need a large amount of water for the garden, and we were looking to reduce our dependency on city water.

Our Barrel

We picked up a 55-gallon food-safe blue barrel from Rural King. It was previously used for transporting drink concentrate. It was $30, so it would quickly pay for itself. We also needed to buy the spigots and a filter for keeping leaves and other debris out of the barrel. Those items came from Amazon.

Rain barrel
Rain barrel

When adding a rain barrel, you can either buy one that is completely put together or repurpose something else. We went the latter route and saved money ($50), but it is a good deal of work. Instructions can also be vague, and YouTube videos may not apply to your setup. It’s also helpful to have power tools for cutting and drilling and have confidence in your ability to operate them. We were able to keep costs down because we have the power tools and only needed to buy a drill bit for the holes that the spigots go through. In total, I think it took an hour to get everything set up. Future ones will take less time now that we know what we’re doing.

If someone isn’t interested in converting a regular barrel into a rain barrel, they can easily buy one. A quick Google search shows many options with prices ranging from $50 to above $100. Some of the lower-priced options are collapsible, which sounds a bit precarious, and the more expensive options hold more than 55 gallons. These rain barrels typically include everything you need to get started.

What Makes a Rain Barrel a Game-Changer?

Simply put: Being able to convert rainwater into water for the garden is a difference-maker. Instead of paying for water (like we do) or using water from a well or spring, you get to use water that would normally run off the roof and be drained somewhere else. In our case, this was the yard, and it was running off into our garden beds. Converting something free into a usable resource has given us a sense of freedom that I didn’t expect.

Having the rain barrel has made us more aware of how much water we use when watering the garden and our flowers. It’s a 55-gallon barrel, but because there is an overflow spigot near the top, it probably holds around 52 or 53 gallons. We water with cans that hold a combined 4.5 gallons, so we get around 11 or 12 trips when using both cans, which is enough to water the entire garden. As a result, we are aware of the importance of not overwatering because the excess runs off, and it’s wasting the water we collected.

Using a rain barrel has also helped to contribute to the slow and quiet nature of gardening that I love. Because the rain barrel is gravity-fed without pressure, it doesn’t fill the cans as fast as our garden hose does. And that’s okay. It’s nice to take a break and let the cans fill at a slower pace. It’s also quieter than a typical hose setup due to the lack of pressure.

Naturally, a big reason to use a rain barrel is the money you can save. At the top, I said that we probably spent around $50 on everything. We don’t know what we pay for water on a per-gallon basis, but we will save enough money with the rain barrel this summer to pay for it. Gardening can use a lot of water, especially when you first start seeds, and being able to use free water that doesn’t need to be treated is wonderful.

Since we started using our rain barrel, we’ve found ourselves excited to see rain in the forecast, especially if it’s been dry in recent days or weeks. Every gardener gets excited for rain after a dry spell, since it means the plants are getting water, but with a rain barrel, you also get excited for your barrel to refill. A full rain barrel after a dry spell means your plants are watered AND you have a full supply to pull water from as needed. Speaking of refilling the rain barrel, I’m amazed at how fast it will fill. A half-inch of steady rain will fill it from empty in a few hours.

Get a Rain Barrel if You’re Able To

If you’re a gardener (flower or vegetable) and have the chance to, I recommend buying or creating a rain barrel. The financial, environmental, and plant health benefits vastly outweigh any negatives. It’s a relatively simple process to set one up, and they can be placed almost anywhere with a downspout.

Magz recently told me that some states have some restrictions against collecting rainwater, which I looked into. It appears that most of the restrictions apply to only using the rainwater for non-potable (aka non-drinking) purposes. That is an understandable restriction. Rainwater is not necessarily safe to drink, especially if it’s running off your roof and through a gutter/downspout system. Please don’t drink it. If you live in an area with more severe restrictions, I recommend trying to change those laws. Many university extension offices (here’s Penn State’s as an example) as well as the Environmental Protection Agency argue for the benefits of a rain barrel. Local municipalities and states should recognize those benefits as well.

We currently have one rain barrel but are planning to get at least one more. Collecting twice the amount of rainwater would further reduce our reliance on city water. When we create that rain barrel, I’ll take pictures and create a step-by-step article.

So, that is our experience with rain barrels and the benefits we’ve seen so far. Water conservation is very important, and being able to participate in it, even minimally, can be a difference-maker. Rain barrels also help to reduce run-off and soil degradation thanks to the presence of grass. The benefits vastly outweigh any perceived negatives. If you have the chance to, I recommend getting one. You almost certainly won’t regret it.

Do you have a rain barrel that you use for your garden? If so, what are your experiences with it?

Create a website or blog at WordPress.com

Up ↑