With the garden wrapping up for the year and little happening on a weekly basis, I’ve decided to pause the weekly updates. There isn’t enough to write about without being redundant. I’ll continue to provide updates as vegetables ripen and grow, but in the meantime, I want to alter my weekly segment to be a Reflections From the Garden column. I want to use this column to go over things I learned or thought about while in the garden. Sometimes, it will be directly related to gardening, while other times, it may be focused on personal things. The first edition will be dedicated to some of the lessons I learned since spring.
Accepting When Things Don’t Work Perfectly
I was originally going to have a section called “Letting Go of Control,” but it felt too similar to this section. This year, I learned that gardening is something I found myself wanting to control at every level. I wanted to control the amount of rain and sun we got, the temperature, when plants germinated, when they should be transplanted, when to restart seeds, and how quickly we should start seeing fruit. I had everything organized and included on one of my spreadsheets. But the reality is that for all the work I put into the organizing and planning, it didn’t matter all that much. I can’t control the weather or temperature. Sometimes, seeds take longer than the packet says to germinate, which means giving them more time to sprout. I also can’t force starts outside just because the calendar says they should be in the ground by a certain date. Likewise, plants can take longer than expected to produce fruit and fully ripen.
In a garden, things are bound to not go to plan at times. There are more things out of our control than in our control. Plants will fail at every stage – germination, transplanting, fruiting, and ripening. Sometimes, it’s because we did something wrong, but other times, we can do everything right and it will still fail. And that’s okay. Letting go of outrageously high expectations and control leads to a more enjoyable experience. I wasn’t there at first, but I began to grasp it as the garden went on.
Have Fun
Gardening is a lot of work. I also set high expectations for things and find it easy to create endless to-do lists. In the garden, those lists included, tilling, seed starting, transplanting, weeding, watering, fertilizing, and on and on. Pretty soon, the garden was only work and no play. I stopped seeing it as a hobby I enjoyed and only viewed it as this thing that needed all my time and attention. I quit woodworking or doing my other hobbies. Eventually, I had to say “enough is enough.” Magz got me to refocus on all the fun that can be had in a garden. It’s a lot of fun seeing the growth of a plant as the days, weeks, and months progress. It’s also fun to see the different varieties of a vegetable present their unique qualities. Finally, it’s the most fun when it’s time to harvest ripe vegetables. It’s easy to get caught up in the work, to forever add new items to your to-do list. But hitting the “pause” button and focusing on why you wanted to garden in the first place is important. Gardening is a hobby for most of us, and hobbies are supposed to be fun.
Don’t Let it Drive You Mad
If you get focused on the success of your garden rather than the process, you will go crazy. Plants will look healthy for a couple of months, and out of nowhere, they’ll die. Fruits will develop on the plant, making you think that they’re going to reach maturity, only to wither and die off. We had that happen with numerous plants this year, including our ground cherries, spaghetti squash, and multiple tomato plants. We had a plant die off, while its neighbor of the same variety reached its full height and produced lots of fruit. They were in the same soil and experienced the same growing conditions. If you think about it too much, you’ll drive yourself mad. Instead, focus on the plants that do make it and continue to give them the best opportunity to succeed. That mindset change will lead to better results now and also help you have a better mindset.
Enjoying the Peace
In my first blog post, I wrote about how a garden provides a sense of home to me, and a home is supposed to be a peaceful place. It can be easy to forget how peaceful the garden is when we’re focused on the work required to make it happen. The sun and heat can feel oppressive, weeding can be back-breaking, and neighborhood noises can drown out the silence. Yet, if I make an effort to do less when it’s hot and sunny, listen to music or talk to God while weeding, and focus on the sounds of the garden instead of my surroundings, I can become lost in the tranquility. There are a lot of sounds in the garden. You’ll hear bees buzzing as they pollinate your plants, crickets chirping in the grass, and the plants rustling in the breeze. All of those sounds are sources of peace.
Hard Work Is Worth It
Prior to starting our garden, I wrote a lot about how much hard work is required to garden. That is very true. I also said that the hard work is worth it because you get to grow your own food for the summer, and potentially longer if you preserve it. But before you actually see it pay off, you don’t actually know that the hard work will be worth it. Now, with the garden wrapping up for the year, I can say for certain that the hard work was worth it. Being able to eat veggies out of the garden this summer made the hard work pay off. This wasn’t so much of a new lesson learned but more confirmation of what I thought would happen.
In this week’s update, we’ve had a meal made entirely from vegetables out of the garden. We’re also starting to notice that summer is coming to an end and fall is on the horizon. This week also gave us multiple opportunities to share produce from our garden with family and friends, which is really what it’s all about. Finally, what is this edition’s Seed of the Week? Let’s dive in.
Eating a Full Meal From the Garden
I had several under-the-surface goals for our garden this year, and any future gardens for that matter. One was to preserve food for winter. That hasn’t happened yet but still could happen with our squash and pumpkins. Another was to share food with our neighbors and family members. More on that in the next section. A third goal was to have meals that were entirely sourced from our garden. Throughout the summer, we’ve had meals that were mostly from the garden with the exception of a protein. In these meals, the vegetables were often the side dish or used to complement the protein rather than serving as the star. We changed that this past week when we made homemade pasta sauce on the fly and ate it on spaghetti.
We used whatever tomatoes we had inside, so there were multiple varieties, including San Marzano paste tomatoes, Mushroom Basket tomatoes, and Queen Aliquippa tomatoes. With those tomatoes, some jarred garlic, sugar, oil, salt, pepper, and dried oregano, we had a great start. When it cooked down, we used an immersion blender to get it smooth, added a can of tomato paste to thicken it, and added some fresh basil from the garden. It resulted in a delicious sauce that was well-balanced. It wasn’t too acidic or sweet. It was savory and had me craving it the rest of the night and the next morning until we had the leftovers for lunch. Homemade sauce on perfectly al dente pasta is a real treat. It is wild how much better homemade sauce is compared to the jarred version. Granted, it wasn’t 100 percent from the garden. We didn’t grow garlic or oregano, and we had to use a can of store-bought tomato paste, but it was almost entirely all garden ingredients.
I had hoped that we would have enough ripe paste tomatoes to make and can pasta sauce for the winter, but that didn’t happen, which is okay. It’s a goal to have for next year’s garden, and we now have an excellent flavor profile to target when we do.
Sharing Food With Those Around Us
Living in community means helping those around us when an opportunity arises. That can mean lending someone a hand with shoveling snow, letting them have a cup of flour that they don’t have, or sharing the blessings we have. We were able to do that last week, and it touched our hearts. We shared some beans, eggplants, squash, and cucumbers with our elderly neighbor across the street. She is the same neighbor who gave us plants early in the season. We also gave our next-door neighbors some zucchini the next day. They are the neighbors whom we’ve regularly shared food with when we’ve had excess and were outside at the same time. These neighbors are also retired, and ever since we in America (in our infinite wisdom) have cut funding to social welfare programs that give food to the needy, Magz and I’ve felt led to help those around us even more than we did before. So, being able to bless those around us with the blessings that God has granted us is what it’s all about. We got a little taste of that this year and only want to do that more with next year’s garden.
This weekend, Magz’ parents and a family friend who was in town from Florida visited, and we were able to send them home with tomatoes, jarred applesauce, and baby bananas that we bought. The family friend hadn’t seen our house or garden yet and really wanted to visit before the garden was done for the season.
Fall Is on the Horizon
After a hot, sunny, and long summer, the weather and environment are starting to change. The 7-day forecast has nighttime lows in the 40s, the humidity has started to dissipate, and we’re beginning to have a fall sky. If you don’t have autumn where you are, the sky looks different in autumn than it does at any other time of the year. I’m not entirely sure why, but the sky has a slightly warmer tone than it has in spring and summer. It’s often a bit cloudy, and if there’s a high-pressure system in the atmosphere, you can see the cirrus and cirrocumulus clouds far off in the distance. While that cloud system happens in summer too, it’s most common in autumn. It’s something I’ve always looked forward to after a long summer in the same way we yearn for the first warm spring day after winter. An autumn sky is associated with chilly mornings and evenings, flannels, jackets, jeans, football (American), college, falling leaves, walks, pumpkins, apples, cider, and hot chocolate. It’s the best time of the year.
For the garden, it means that the end is approaching, which is bittersweet. It’s sad that we’ll no longer have fresh vegetables in the garden or be able to see new fruits ripening on a daily basis. At the same time, though, it will be nice to let the ground and our bodies rest. Our garden was a lot of work this year, and I’m incredibly proud of all that we’ve accomplished. It will be nice to rest, prepare the soil for next year, reflect, and plan next year’s garden. We’re seeing that the end of the garden is approaching. Our cucumber plants died off two weeks ago, and our summer squashes are no longer producing fruit or growing as quickly as they once did. The corn stalks are beginning to dry out, and the tomato plants don’t have the same vibrant green leaves they once did. And yet, other plants are thriving. Our winter squash and pumpkins continue to expand their vines, and we see new fruits or measurable growth each day.
As I wrote in this week’s post, A Parade of Pumpkins, it’s fun to see the different varieties show their different shapes, sizes, and colors. That will continue to be the case as summer winds down and autumn arrives. I was unsure how I’d feel at the end of summer this year, but I’m surprised that I’m feeling a little melancholy and sad. The garden has been a large presence in our lives since April, and this garden will never exist again. Each garden has unique characteristics that define it. We could grow the same plants in the same beds next year (we won’t) and have completely different results. So, we’ll be saying goodbye to something that we’ll never have again, but at the same time, we’ll be saying hello to our favorite season (autumn) and the early phases of next year’s garden. These are emotions I never thought I’d feel or explore.
Notes From the Garden
There aren’t a lot of notes from the garden at this stage, but here are a few updates:
We got a big harvest from the late planting of bush beans that I sowed in June. These were sown after the first batch of bush beans failed. True to their name, these Provider beans came through, and we were able to harvest pods from each plant for a total of a quart. We ate them on Saturday night by steaming them and serving them with butter, salt, and pepper. They were delicious.
We continue to harvest tomatillos as they ripen.
Our paste tomatoes also continue to ripen, but they aren’t ripening all at the same time, which is sad. However, we’ll still be able to make at least one more meal of homemade sauce, which I’ll be looking forward to.
We pulled some of our corn earlier than we wanted to because deer got through our fence, damaged some of the stalks, and ate a bunch of the ears. We’ll learn from this experience and mistake next year.
We’ve harvested what shelling beans we’ve had ripen and dry on the plant. It’s been a struggle with these beans because of the grass, but we’ve pulled about 10 pods that have dried beans in them. The beans are stunning and look identical to the bags of dry beans you can buy in stores.
Dried Jamapa black beans
Seed of the Week
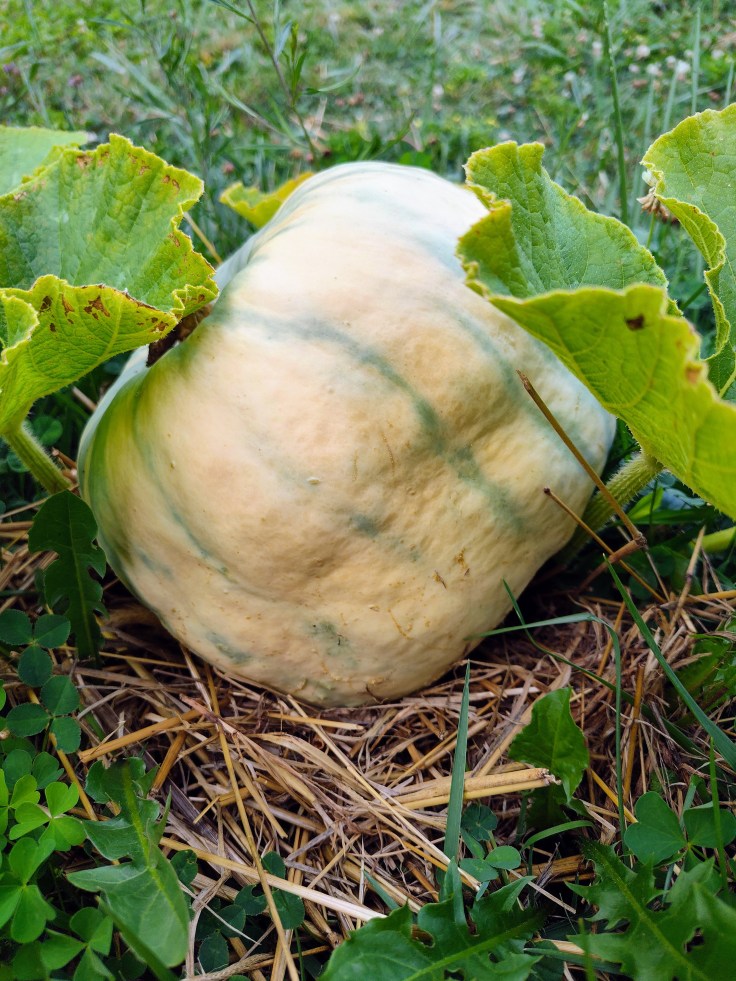
This week, I’m talking about the New England Sugar Pie Pumpkin. This pumpkin variety is the quintessential pie-making pumpkin. It produces many 4-5-pound fruits with sweet flesh that isn’t stringy. Our seeds came from Baker Creek. It’s an heirloom that dates back to the American Civil War and, according to Fedco Seeds, was likely developed out of the Connecticut Field Pumpkin strain. Our plants are growing very well. We didn’t sow them until early July, and they have taken off, with vines sprawling all over the bed and multiple fruits on each vine. We’re so excited about the possibility of using them to make pumpkin treats or to carve.
New England Sugar Pie Pumpkin
If you’re in the Northern Hemisphere, is your garden wrapping up for the season? Or, if you’re in the Southern Hemisphere, have you started to plan your garden?
Just a brief Friday post to end the week and show all the different shapes, sizes, and colors that pumpkins, squashes, and melons come in.
New England Sugar Pie Pumpkin
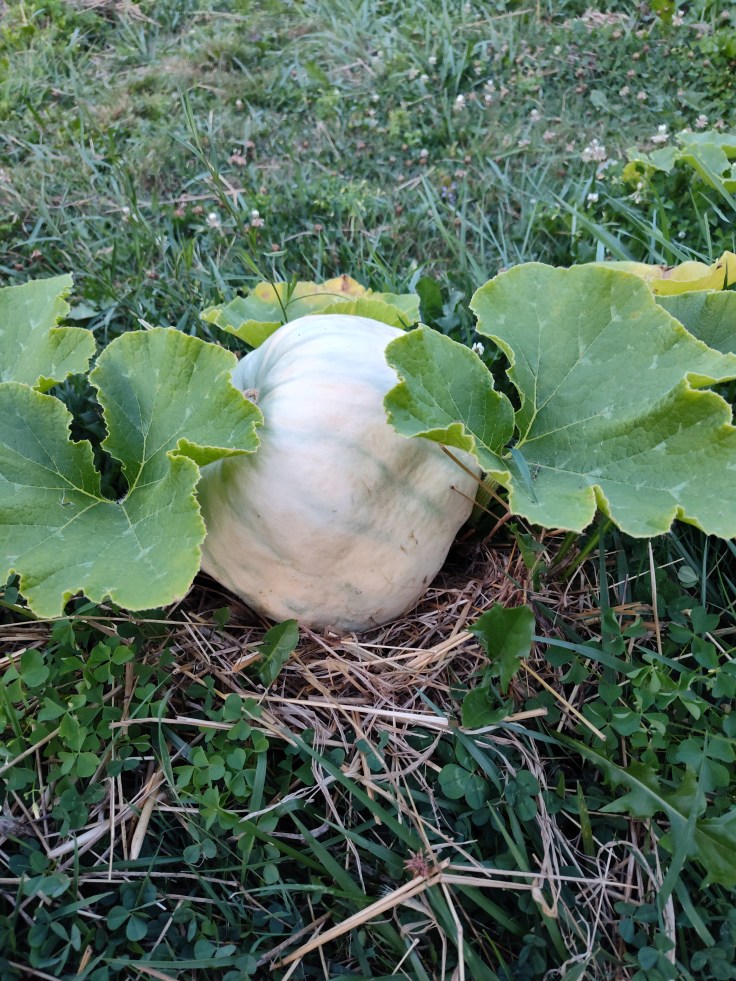
A classic pumpkin that is commonly used in baked goods due to its sweetness. These pumpkins stay relatively small (less than 5 pounds), and the one shown in the picture below likely won’t grow much bigger. These will ripen to the classic orange color that we all know.
New England Sugar Pie Pumpkin
Seminole Pumpkin
This is the most recent of our pumpkins/squash to produce identifiable fruits. The Seminole pumpkin is green throughout much of its growing process before ripening to a tan/buff color. These won’t get much bigger than they are now – about 6 inches in diameter.
Seminole Pumpkin
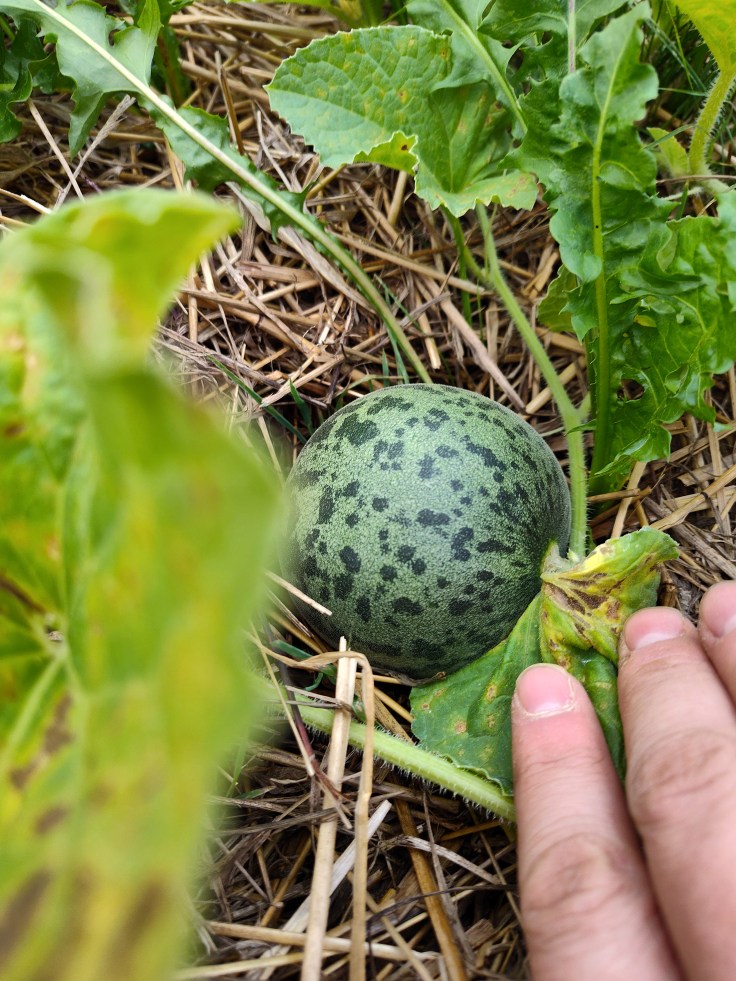
Candy Roaster Melon Winter Squash
This Candy Roaster Melon is easily the largest of our fruits to this point. It’s currently about the size of a basketball. This variety can range from 6 to 30 pounds. Ours is probably somewhere in the middle of that range. When fully ripe, it will be a vibrant orange color with green stripes.
Candy Roaster Melon
Ali Baba Watermelon
We have several watermelons on the vine, but this one is the largest. It’s about the size of a college-size football and could reach 30 pounds. Unlike other varieties that have a dark green color, the Ali Baba maintains a light green rind the entire time.
Ali Baba Watermelon
Noir des Carmes Cantaloupe
I’ve shared pictures of this exact fruit multiple times on the blog, but it’s beginning to change its appearance, an indication that it’s ripening. This won’t have the light tan “webbed” rind that the fruit we call cantaloupe in North America has. Instead, this will ripen to a yellow and green color. It has likely reached full size.
Noir Des Carmes
Tigger Melon
This is another melon I’ve shown a lot on the blog. This Tigger melon will become a beautiful orange color with white speckles or zig-zag stripes when it’s ripe. These small fruits only weigh about a pound when fully grown, but the plants produce plenty of fruit.
Tigger Melon
Red Kuri (Hokkaido) Winter Squash
Part of our late batch of squash, the Red Kuri is a winter squash but will become vibrant orange like a pumpkin when it’s ripe. This squash is on the smaller side at 3-4 pounds, but grows well in cool climates.
Red Kuri (Hokkaido) Squash
There you have it. These are almost all of the pumpkin/squash/melon varieties we have growing. It’s so fun to see all the different shapes and colors that they take, not to mention the sizes they can be when fully ripe. Do you have a favorite pumpkin or squash to grow and eat?
In this week’s update, we have been harvesting a ton of vegetables from the garden and have started having meals comprised entirely of things we grew. And, because it’s mid-August, some of our less heat-tolerant plants have started to die off for the year, relieving some of my concerns. However, just because those plants are dying off doesn’t mean the garden is done for the year. Quite the contrary, as we are officially pumpkin (and melon and squash) growers. Let’s dive in!
Meals Entirely From the Garden
A goal I had for this year’s garden was to have enough healthy and productive plants that we would be able to have meals entirely from the garden. Thankfully, we’ve achieved that goal. For a few weeks, we’ve been eating meals where only the meat and carb portions of meals have been store-bought. However, on Saturday, we had a meal that consisted of vegetables we grew.
A one-day vegetable harvest
The meal was a deliciously simple combination of White Scallop summer squash, which we started from seed, tomatoes, and fresh basil. These were sautéed in a pan with oil and seasoning. The result was tender veggies that sat in a broth (it was thinner than a sauce) that tasted great with butter bread dipped in it. Another unique way we used our veggies was in burritos. We cooked chicken, but instead of having rice, we roasted summer squash and beans and boiled a few ears of corn. They were some of the freshest and complex burritos I’ve ever eaten. In the future, after the growing season is done, I’m going to write a post detailing some of the ways we ate out of the garden.
Plants Are Starting to Die Off
I’ve been noticing that our cucumber and early-season squash plants have been yellowing and looking wilted in recent weeks. Concerned, I speculated that the cause was a lack of nutrients, underwatering, or a pest/disease issue. Unfortunately, nothing I did led to any improvement. Finally, on the r/gardening Subreddit, another gardener was having the same issues and looking for help. The consensus is that it’s mid-August, which means that the cucumber plants are reaching the end of their life cycle. Evidently, cucumber plants can handle some heat but not prolonged periods of it, which we’ve been getting. This was a simple yet informative lesson to learn.
Realizing that there are times when a plant is nearing the end and that no amount of water, fertilizer, or insecticide will fix it was a relief. I know that I can drive myself nuts trying to find a solution or fix for things that appear to be going wrong. In this case, nothing was going wrong. The cycle was simply coming to an end for these plants. Learning this was also a lesson in how different plants like different weather and temperatures. While our cucumbers have been dying off, our tomatillos, melons, squash, pumpkins, and corn have been thriving.
So Many Pumpkins, Melons, and Squash
Picture a cool fall day with overcast skies. The leaves are changing and have started to fall. On the ground, you are surrounded by colorful pumpkins and their vivid green vines. Think Hagrid’s hut in the Harry Potter series. This would be Magz’ ideal scenario, and somehow, we’re close to achieving that this year. When we ordered our initial batch of seeds, we bought many pumpkin and winter squash varieties. We doubled down on that when we bought more varieties in June, and the bulk of them are thriving.
Candy Roaster Melon
Our first “pumpkin,” a Candy Roaster Melon, is the size of a basketball and is starting to turn a buff color. We have a bunch of other pumpkins and melons that are between a baseball and softball size, including the “late-season” pumpkins we planted: New England Sugar Pie, Dark Green Yuxi Jiang Bing Gua, and Red Kuri. Elsewhere, our Noir Des Carmes cantaloupe, Ali Baba watermelon, Tigger melon, and Kajari melon plants are all doing well. All have sizable fruit on their vines, with the Noir Des Carmes, Kajari, and Tigger melons approaching their full size. All that’s left will be for them to ripen to their final colors.
Realizing how fun (and easy) it is to grow these vegetables, I think a long-term goal for our garden will be to expand our pumpkin patch so that we can grow as many varieties as possible. Living in the Northeast, people love fall and all the aesthetics that come with it, including pumpkins. It would be wonderful to be at a place in the future where we can sell our pumpkins to fall lovers who want to carve them, eat them, or just decorate with them. Most people only think of pumpkins as orange, but it would be great to have the opportunity to teach people about all the different varieties and the importance they’ve had in cultures throughout history.
Notes From the Garden
This week, we ate our first and only pepper from this year’s garden. It was a fully ripe Cal Wonder sweet pepper, and it was delicious and aromatic.
I continue to make pickles with any cucumbers we harvest.
Our eggplant and zucchini plants continue to produce, with our largest zucchini over a foot long.
The second batch of beans that I planted (Provider bush beans) is doing well, with pods on every plant that are approaching full size.
We continue to harvest tomatillos as the fruit breaks out of the husks.
We ate the first ears of our Sweet Mexican/Black Iroquois corn, and the kernels were a dark purple color. It was the first time I had eaten corn that wasn’t white or yellow, and it was very tasty. We have limited ourselves by focusing on yellow, white, or bicolor corn for commercial growing purposes. The colorful varieties are stunningly beautiful and taste as good, if not better.
PumpkinPumpkinOur only pepper from this year’s garden
Seed of the Week
We go to Mexico for this edition’s seed of the week, and it’s actually a seed I failed to start and transplant and turned to greenhouse starts – the tomatillo. Specifically, it’s the Rio Grande Verde tomatillo. We bought our seeds from Baker Creek, but the starts went leggy before they failed during the transplanting phase. Instead, we turned to our local greenhouse, where we bought four plants, and we’ve had great success with them. The tomatillo is native to Mexico, where it was cultivated long before Europeans arrived. In fact, in Central America, tomatillos are grown as perennials due to the perfect climate and growing conditions. Our tomatillos have taken off, with three plants growing bushy and developing plenty of fruit. The fourth plant hasn’t done quite as well, but that’s likely because it’s far from the other three and these plants need to be planted in pairs for pollination purposes. We’re planning to use our tomatillos in green salsa by roasting and blending them. If you have been curious about growing tomatillos but haven’t tried it yet, you should give it a go. By a pair of plants, plants them in a sunny location, and watch them thrive. Our hot summer has been perfect for growing them.
Let me start by saying that I’ve not always been a fan of bugs, with one exception: the firefly. My dislike for them has never reached Blathers from Animal Crossing level, but I’ve always wanted them in their space, which is separate from mine. This has been the case despite my love for the outdoors. I spent countless hours hiking, mountain biking, fishing, hunting, and camping growing up, but bugs were one of my least favorite parts of it. Meanwhile, bugs have always loved me. They will bite me every chance they can, and in a group of people, I’ll be covered in bites when others have none. So, it’s safe to say that it’s been a one-sided relationship.
That has changed with our garden this year. Before our garden, I knew how important pollinators were to a garden’s success. I was also aware of the declining bee and butterfly populations. As a result, Magz and I were focused on planting flowers that would attract pollinators. But little did I know just how many pollinators there are. Nor did I know how beneficial non-pollinating bugs can be to our garden and the environment at large.
Research Changed My Mind
When we were planning our garden and researching seeds, we came across a lot of vegetable seeds that rely on pollinators to reach their peak. Many plants, such as tomatoes, peppers, and other members of the nightshade family, self-pollinate but need help from pollinators to reach their fullest potential. Meanwhile, squash, melons, cucumbers, and many fruit plants or trees can’t self-pollinate and need a helping hand. Humans can make this happen by removing the male flower and touching it to the female flower. However, it’s much easier to let our pollinator friends do the work for us. Letting pollinators, such as bees and butterflies, do this work is mutually beneficial. Our plants grow and produce ample fruit, while the pollinators get the food they need to survive.
For the longest time, the extent of my pollination knowledge ended with what I described above and the two types of insects: bees and butterflies. And, if I’m being honest, I was under the impression that the most important bee species was the honey bee. For years, the honey bee was the poster insect for environmental destruction and the collapse of native insect populations. This focus resulted in people buying local honey and establishing bee colonies to rebuild the population. However, I recently learned that the problem and the ways we can address it go much deeper.
Earlier this summer, I learned about Buzzkill, which was a podcast series produced by the Food & Environment Reporting Network (FERN) focused on the declining pollinator population. I learned so much, but what stood out the most was that the number of bees and beehives isn’t the problem. We have plenty of apiaries and beekeepers. The larger issue is a lack of food for the pollinators. Because we have destroyed a large portion of the natural habitat in the United States and many people choose not to grow native plants, we have reduced the amount of food for these insects and animals. Buzzkill also taught me that there are a lot more bee species than I ever realized, and honey bees aren’t necessarily the most important. After learning all of this and discussing it with Magz, it changed our approach to planting and gardening this year.
The Benefits of Bugs
Like most people, I was aware of pollinators and the benefits they bring, but that was largely the extent of my knowledge until I began doing more research and learned about all the ways that bugs help us. The World Wildlife Federation estimates that only 0.5% of all insects damage crops. That doesn’t mean that 99.5% of all insects are good, but it does mean that well over half of the insects are beneficial.
Tackling Problematic Insects
This was the benefit that surprised me the most. I didn’t know that some bugs help to manage the pest population. I ignorantly thought that the only way to handle these pests was with insecticides. As I typed that last sentence, I forgot that I had watched an episode of Ask This Old House, where Roger the landscaping expert traveled to Florida to help answer questions about pest control. Instead of recommending a potentially harmful spray, he brought in an entomology professor from the University of South Florida to educate the homeowner (and the audience) about beneficial insects and how they can destroy the population of invasive species. Now remembering that episode, the information I learned through my research makes a ton of sense.
Not having to solely rely on insecticide sprays or dust is a big deal. Our Creator has provided us with a natural remedy for problematic insects that can destroy our garden. When that’s the case, why would we want to only use chemicals? The majority of these insects are predators (ladybugs, lacewings, praying mantises) that kill and feed on individual pests, such as aphids. However, some of them are called parasitizers that lay eggs on other insects. The resulting larvae then feed on the insect. An example of this is the parasitic wasp.
Decomposition
Insects also operate as the garbage collectors and recyclers of our ecosystem. They eat and break down what we don’t want to touch or do anything with: animal matter, dead plants, food that we didn’t or can’t eat, etc. If you have a composter, you will have witnessed this. Anytime I open the lid to our composters when it’s warm, I see insects flying around or crawling on the rotting food and grass. As the insects consume these items, they produce nutrient-rich organic matter that improves your soil.
Soil Improvement
Soil improvement is slightly different from decomposition. This category applies to the insects (earthworms, ants, and termites) that tunnel through the soil. This aerates compacted soil, improving drainage and leading to better soil. So, the next time you’re digging in the garden and come across an earthworm, remember that it’s doing yeoman’s work to provide you with better soil.
Why it Matters & Applying the Knowledge
Why it matters is pretty obvious. Humanity has severely damaged the environment through selfish acts committed in the name of progress. The commercial farming industry has used chemicals that have killed all insects, including beneficial ones, stripped the ground of its nutrients, and run off into our water sources. We plant non-native or non-pollinating species of flowers that don’t provide food to pollinators, and international shipping has led to invasive species being transported throughout the world, so the native insects can no longer control the population. And to top it all off, we aren’t doing anything on a large scale to put nutrients back in the soil or restrict the importing of ornamental flowers that serve no purpose beyond looking pretty.
Focusing on beneficial bugs, growing plants that attract pollinators, and creating an environment where native, productive insects can thrive has many benefits. As mentioned above, predator and parisitizer insects reduce our dependency on chemicals to control the bad insects. Even organic insecticides can kill the beneficial bugs that we want to thrive. Relying on insects to do the job lets nature take its course.
Providing pollinators with a food source helps your plants to reach their full potential while also letting some of the most beautiful and productive insects (honeybees and butterflies) succeed. Furthermore, flowers that attract pollinators not only feed insects; They also serve as a food source for hummingbirds and bats. Both species eat a lot of insects, with brown bats capable of consuming up to 1,000 mosquitoes per hour, according to the U.S. Forest Service. Meanwhile, hummingbirds feed on aphids, weevils, and spiders, all of which can be detrimental to your garden. In fact, hummingbirds eat far more insects than the nectar they get from feeders or flowers.
Finally, we arrive at my last point. As gardeners, we should all be motivated to create native habitats on our property. That means growing native species, creating safe spaces for prey animals, and providing food and water sources for birds, insects, and herbivores. The benefits of doing this are innumerable, but include serving as the foundation of the entire food system, hosting native insects, and often having deeper root systems that address water runoff problems. Not to mention, there’s also the benefit of fitting into your area’s history and culture.
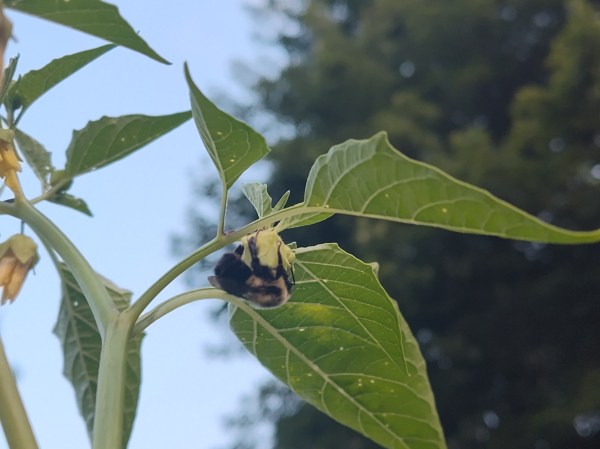
Magz and I applied this knowledge as soon as we started to plan our garden. We only bought flowers that attract pollinators, and when possible, we planted them close to our vegetables that need to be pollinated. We also started researching insects found in the garden to learn if they are beneficial or detrimental. Previously, I would have killed them without a second thought. I have also started to sincerely appreciate bees and not fear them when I’m in the garden. Of course, I still hate hornets, wasps, and yellow jackets, but being around bumblebees in the garden is a wonderful experience. I recently watched a bumblebee crawling over the flowers of a tomatillo plant as it collected pollen on its legs. It was such a peaceful environment to be in, and I recommend doing it unless you’re allergic to bee stings. Even then, though, you have to bother bumblebees to get them to sting.
Where We Want to Be
I’m at a place where I would say I’m borderline obsessed with pollinators, saving native habitats, and treating the earth with respect. Like I said, I’ve always loved being outside and have been committed to preserving nature. But my motivation has been intensified this year. The attempt to sell off protected lands pushed me over the edge and pissed me off. As an individual, I can’t change the nation’s direction on my own (although I did contact our representatives), but I can make a difference in my backyard.
Bee Pollinating Tomatillo Blossom
We’re going to dive deeper into native plants next year and continue our commitment to only growing flowers that attract pollinators. We are also going to continue converting our yard into gardens, both flower and vegetable. Ultimately, we’d love to have the bulk of our current yard be a wildflower meadow in the future. We’re also going to continue to provide animals with safe spaces with brush piles.
We recently learned that you can have your property certified by the National Wildlife Federation as an official Wildlife Habitat. The requirements aren’t outrageous and are pretty easy to meet. We’re going to pursue this in the coming years, and when combining it with our conscious gardening practices, we’re hoping to make a real difference. It may be difficult to fix commercial farming practices, but if we all focus on our own property, it will add up.
Future Preservation Content
I know that this post wasn’t as focused on our garden as my content typically is, but I think it’s important to think about. I also hope you enjoyed it, because I’m planning to write more posts in this area. I have plans to write about how we’ve blended flower and vegetable gardening, the frustration I have with lawn obsession, and more environmental content in general.
In this week’s update, we had our first encounter with powdery mildew this year. We’ve also been in a drought, which has led us to find creative ways to water. In harvesting news, we got our first ripe tomatillos and long bean. Finally, I’ll go over all the updates from this past week and highlight the seed of the week. Let’s dive in.
Powdery Mildew
Late last week, we were in the garden looking over things, and Magz noticed that a few of our squash and melon plants had powdery mildew on them. Even though we hadn’t encountered it before, she correctly diagnosed it. While still in the garden, I researched how to get rid of it, learning that hydrogen peroxide will kill it without harming the plant. There appear to be several home remedies that can tackle the problem, including baking soda and water and vinegar. I’ve also read of people who don’t treat the mildew and haven’t noticed any negative impacts on their plants. We addressed it because we want our plants to grow in the best environment possible.
First Tomatillos & Long Beans
Our tomatillos have been growing fast and abundantly. I’ve read that once they take off, you can become overwhelmed by how much fruit you’ll have. We have four plants, including three with large fruit on them, so we likely have close to 100 tomatillos growing. On Friday, we harvested the first two ripe fruits. If you’ve never grown tomatillos before (and we haven’t), they are interesting to watch develop. The plants produce blossoms similar to tomatoes and peppers, but from those blossoms appear papery greenish-yellow husks. The tomatillos develop inside these husks, and as they grow, you can feel the fruit get bigger through the husk. Near the end, when they’re close to being ripe, the tomatillo breaks through the husk so that you can see the fruit.
First Tomatillo Harvest
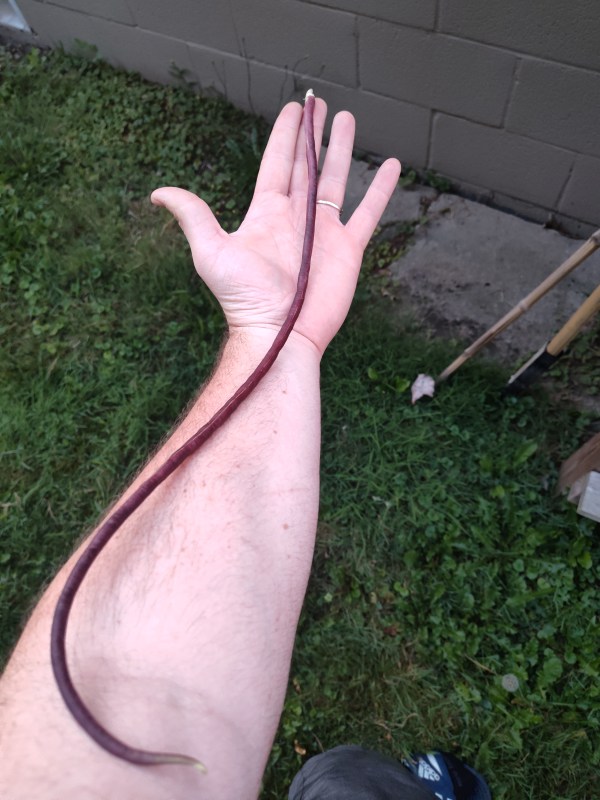
We also harvested our first Chinese Red Noodle Bean last week. This is a bean that Magz has been excited about since she first saw it in the Baker Creek seed catalog. It’s also the one I built a planter box and trellis for, and it’s been a joy to watch these plants grow to the height of our garage roof and see the pods begin to form. We watched the first pod grow for a few weeks, starting from being uncertain if we were actually looking at a bean pod to being nearly two feet long. We haven’t eaten the bean yet, but it’s supposed to retain its color during the cooking process and be very tasty. We have more developing on the vines too, which is exciting.
Chinese Red Noodle Bean
Drought – Eating My Words From the Spring
This spring was one of the rainiest I can remember. I haven’t looked into the historical data, but I’m confident it was one of the wettest on record. There were multiple weeks with consecutive days of rain totals greater than one inch. We went weeks without walking in sections of the garden because we would sink in the mud. The rain also delayed planting some of our seeds for fear that they’d wash away or the conditions would be too damp. At the time, I wanted everything to dry out so badly, but Magz reminded me that there’d be a time in summer when we would be wishing for rain. That time is now. Although it hasn’t been overly hot or humid recently, we haven’t had much rain over the past couple of weeks, with no rain in over a week. Our rain barrel is tapped out, so we’ve had to resort to city water for the garden.
Unfortunately, our outdoor hose spigot also broke last week. It was a pretty old faucet and had been on the fritz since we bought our house last year, but it finally kicked the bucket, snapping the stem off inside. I thought I would be able to fix it, but I was unable to extract the old stem. I also don’t have enough plumbing experience at this time to solder the new faucet to the existing water line and install a shutoff valve inside the house. So, we have a plumber coming this morning to do the work. In the meantime, we had to find creative ways to water the garden because we don’t have another exterior water source. We used teamwork to make many trips inside with our watering cans, empty two-quart juice bottles, and a five-gallon bucket to fill them at our kitchen faucet, but it ended up going smoother than either of us thought it would. While it took longer than it would have with a hose, we were done in about an hour and thoroughly watered every plant and flower. While it wasn’t ideal, it ended up being somewhat of a fun experience.
Notes From the Garden
We were finally able to harvest some paste tomatoes after they began to ripen last week. This is the tomato variety I’ve had to be most patient with, as we’ve had dozens of full-size tomatoes for a couple of weeks now, but they’ve remained green until recently.
A couple of our Cal Wonder peppers have started to ripen to a lovely orange color.
The Candy Roaster melon that I discussed in last week’s update is now the size of a volleyball. There are roughly five additional Candy Roaster melons growing in the same bed.
We have noticed a lot more small melons growing in recent days, including the Tigger, Kajari, and Noir des Carmes.
The first Richmond Green Apple cucumber was ready to be pulled last week. This is the cucumber I was most excited about this year, and I’ve been struggling with patience as we wait for the cucumbers to grow and ripen. We brought it inside and immediately ate it. It’s a wonderful cucumber. It’s crunchier than more common varieties, such as Marketmore or Tendergreen, and is also sweeter. They have no bitterness.
We also harvested our first Zapallito Del Tronco zucchini. This is another plant we were excited about this year. Baker Creek says it has a “creamy, buttery soft flesh” and “creamy in consistency.” Other gardeners have called it a cross between a squash and an avocado. It’s also sort of a hybrid between a winter and summer squash, as it ripens in summer like a zucchini but has a more durable rind like a winter squash. We had it for dinner the night after harvesting it. Magz roasted it in the oven with some oil and seasoned salt, which is how we typically prepare our squash. I thought it was delicious, and you can recognize the difference in texture compared to other squashes. However, I think I could have left it on the plant to ripen for a few more days, as the flesh was still green instead of a creamy yellow.
Richmond Green Apple CucumberZapallito Del Tronco Zucchini
Seed of the Week
This edition of Seed of the Week takes us to the land down under and the Richmond Green Apple cucumber. Because we harvested the first one last week, it’s only fitting to write about it. This is an heirloom cucumber from Australia that has become popular throughout the world. I couldn’t find any historical details about the seeds with a quick Google search, but I’m planning on doing a deep dive this winter to learn more. I love these cucumbers. I described their flavor and texture above, and be assured, these are different from other cucumber varieties. They are definitely worth giving a try, as they’re easy to grow and very productive.
Up Next
We’re holding out for rain. The most recent forecast I looked at didn’t show any potential for rain until Wednesday, but it was a 70 percent chance. Hopefully, that changes, because we need rain. The lack of rain also confirms our plan to add at least one more rain barrel to our setup. It wouldn’t have prevented us from needing to use city water in the garden, but it would have put it off a bit longer. In the garden, we will look forward to harvesting more zucchini, squash, and tomatoes. Happy gardening!
In this week’s update, we harvested our first ears of corn and ate them the same day. We have had an abundance of cucumbers, which led to me making some pickles and giving them to neighbors. Finally, our melon plants are setting fruit, and we’re starting to see what makes each variety unique. Finally, what is the seed of the week in this update?
Harvesting the First Ears of Corn
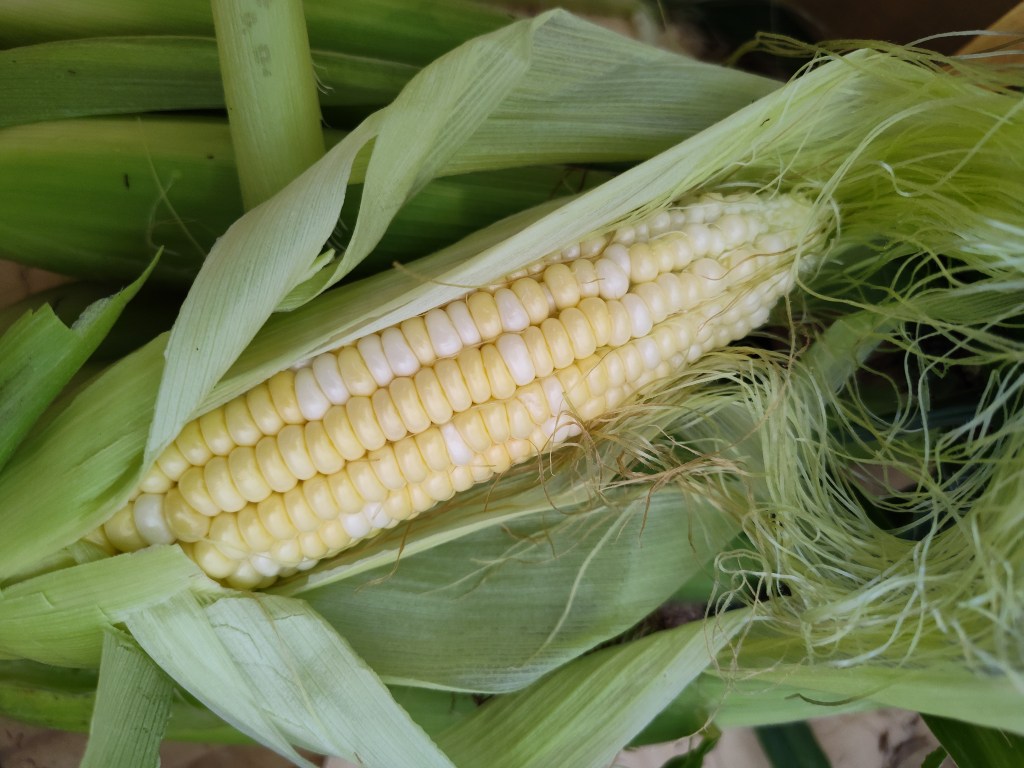
On Friday, Magz and I harvested the first ears of corn from the garden. For several weeks, our Butter & Sugar stalks have had silk growing, which began turning brown last week. I was originally going to let it go a bit longer because I thought it took a long time to ripen. But, after coming back inside, I researched how to determine when corn is ready to be harvested, and I’m glad I did. If you are like me and don’t know, it’s when the silk starts to dry out at the end. You can also pull back the top of the husk to feel the kernels. If they’re full and have some give, it means they’ve reached the milk stage and are ripe. In total, we harvested about half of the Butter & Sugar ears.
Butter and Sugar CornCorn Harvest
We also checked the Sweet Mexican/Black Iroquois corn that has shown similar progress to the Butter & Sugar – full tassel with silk for over a week. However, the first ear we pulled didn’t have the dark blue to black kernels that define this variety. They also weren’t at the milk stage yet. We’re going to leave them on the stalk for a few more days to a week to see if they’ll be ready at that time. After gathering all the ears, we promptly husked and boiled them, eating about half the ears for dinner. We even split the Sweet Mexican ear that we prematurely harvested. There is nothing like eating corn that fresh. From stalk to plate, it probably only took 30 minutes. The Butter & Sugar was incredibly sweet, with full kernels. It’s every bit as good as that corn you can buy from roadside stands in rural parts of America. The ears weren’t big (about seven inches long and two inches in diameter), but the majority were full.
Making Pickles
Our cucumber plants are regularly producing ripe fruits, and we’re able to harvest at least one per day right now. The only variety we haven’t harvested any cucumbers from yet is the Richmond Green Apple, which is the variety I’m most excited about…because of course it would be. Anyway, last week, we had a half-dozen or so cucumbers in the fridge, and something needed to be done with them, so I made pickles.
I love pickles and have made them before. I’ve tried making both dill and bread and butter versions. Unfortunately, though, they weren’t great. They were either too salty or not dilly enough. They also didn’t retain their crunch. So, this time, I wanted to make refrigerator pickles that don’t need to be canned. By not canning them, chilling the cucumbers and jars, and letting the brine cool to room temperature before pouring it into the jars, the cucumbers can stay firm and retain their crunch. They were a great success. They still have their crunch after a week of being in the brine. The downside is that they won’t keep as long as they would if they were canned, but they can still last more than a month before going bad. The recipe I used came from Love and Lemons. I didn’t have fresh dill or garlic on hand, so I substituted them for dried dill and jarred garlic in oil, and it was still delicious. Magz isn’t the biggest fan of dill pickles, and she really likes them!
Baby Melons
In recent updates, I’ve mentioned that we’ve seen some of our melon plants put on fruit. Since last week’s update, at least one fruit for each type of melon is close to golf ball size. At this size, we’re starting to see small differences develop between the different varieties. Some examples of the differences are:
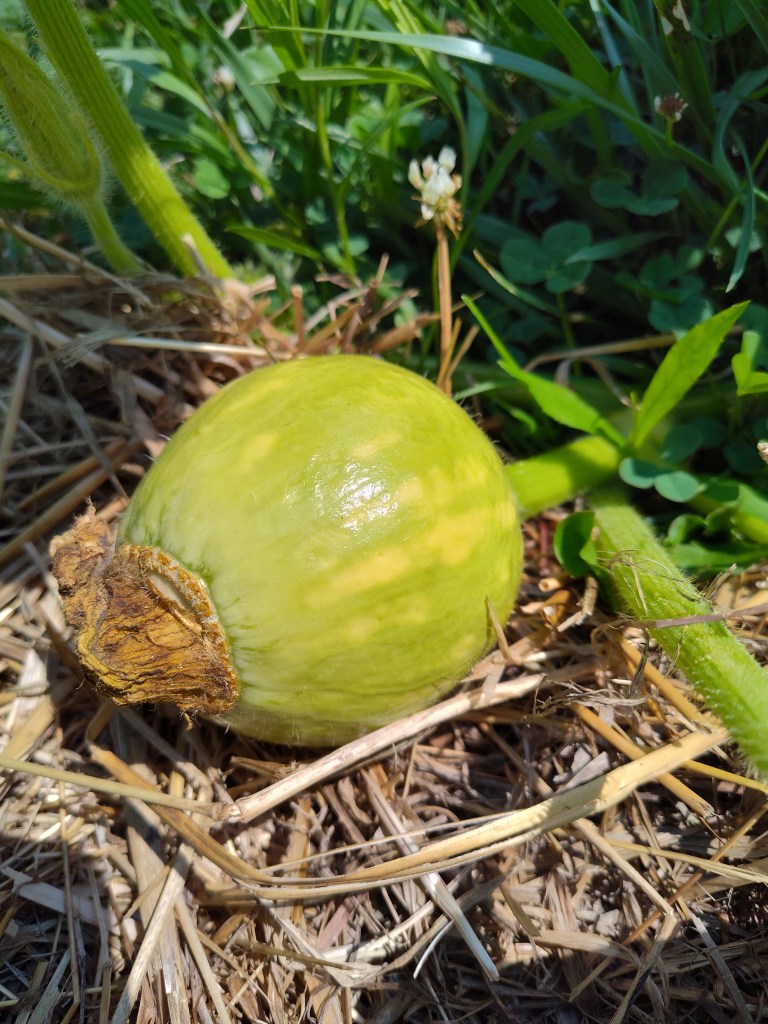
The Candy Roaster Melon/Seminole Pumpkin starts yellow before turning green. It is also staying perfectly round.
The Kajari Melon is very small-about the size of a marble-but it already has dark and light green alternating stripes.
The Ali Baba Watermelon looks like, well…a very small watermelon.
What I have found fascinating about our melon plants is how the plants look similar to each other. Most have similar leaf structures and vine in the same manner. They also put on flowers that are nearly identical. I knew that the varieties would eventually separate themselves, but I didn’t expect it to happen so early in the fruiting process. I can’t wait to watch them grow more and continue to see each variety’s unique qualities.
Kajari MelonCandy Roaster Melon or Seminole Pumpkin
Notes From the Garden
Our tomato plants’ leaves have been curling recently. I can’t tell if it’s because they need water, have too much water, need nutrients, have too much fertilizer, or have some sort of disease. And the internet isn’t helpful at all. The fruit still looks good, though, so I’m not too concerned about it. I’m also going to water the plants with leaves that are dry on the edges. I’ll probably let the others go.
Also about tomatoes, our paste variety has a ton of tomatoes on the plants, but none have ripened yet. It’s a similar story with our Queen Aliquippa plants. Being patient while they ripen is a struggle.
Our Hopi Blue corn has reached nine feet, which seemed impossible at the beginning. I never thought that we’d be able to get the corn stalks that tall.
In the above section on our corn harvest, I mentioned that the ears weren’t as long as I expected, nor were they as thick. I haven’t done the research yet, but I’m curious to know what causes that. Initial speculation is that there is not enough nitrogen. I fed those plants once a month or so, but I wonder if feeding them every two weeks would have produced larger ears. I’m going to be more consistent in feeding the new rows of corn to see if it makes a difference.
We lost our first Spaghetti Squash, which is super sad. The vine it was growing on died out of nowhere. I think it either got too damp and died off or there was a pest problem.
We think we know what the mystery melon that’s been growing is. Or at least we’ve narrowed it down to two options: Seminole Pumpkin or Candy Roaster Melon Winter Squash. This plant is one of the starts that I transplanted without a marker, so we have no idea what it is, but the color and shape look like one of these varieties.
Our tomatillos are starting to get papery husks on them, which is supposed to be an indicator of them continuing to ripen properly. I’ve read that tomatillos are a vegetable that requires a ton of patience.
Our Chinese Long Beans have put on their first bean pod. It’s currently longer than my hand and is a beautiful purple color.
Hopi Blue HeightChinese Long Bean
Seed of the Week
This edition of the Seed of the Week takes us back into the cornfield since we harvested and ate many ears of it last week. I’ve already written about the Hopi Blue and have discussed the Sweet Mexican/Black Iroquois corn in several places on the blog. So, I’m going to highlight the third variety we’re growing: Butter & Sugar sweet corn. It isn’t an heirloom, nor does its history span the centuries, but it’s one of the most popular and best-tasting corn varieties grown in the United States. When we were picking corn seeds in the spring, we wanted one variety that was relatively easy to grow and has a track record of success. That led us to this bi-color variety. Ours came from NE Seed in Connecticut.
Up Next
Hopefully, we’ll definitely learn what the mystery melon/squash is this week. The fruit shows visible growth on a daily basis, with the color consistently changing too. It started yellow, went to a light green, and currently has some yellow streaks on it. I’m also hoping that our paste and Queen Aliquippa tomatoes ripen.
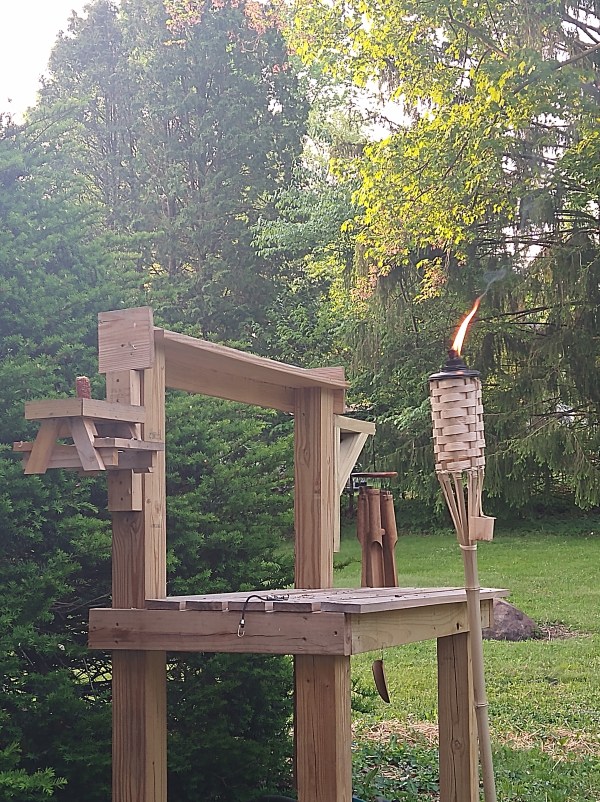
If you’ve been reading my gardening articles for a bit now, you know I’ve written about using my woodshop to create things for the garden. Some examples are the planter box and trellis for our beans, the trellis system for our snow peas, and the fence posts I’ve been cutting. Lately, I’ve been looking forward to getting back into the woodshop and doing serious woodworking again. The garden and our screened-in porch projects took precedent over woodworking projects this spring and summer, and I’m now ready to get back at it.
As I’m thinking about and planning my next projects, I wanted to write about blending two of my favorite hobbies: gardening and woodworking. I mentioned the ways I’ve used my woodshop to build things for the garden this year, but only the planter box was somewhat serious woodworking. It was the only thing that required glue, but not even that project needed me to use my table saw. In this post, I’ll go over some future project ideas I’d like to pursue and a previous piece that I built and we still use. And if I have fun writing about this, and it seems interesting, I may write more woodworking articles.
A Planting Table
In 2022, I wanted a planting table that would aid in the process of transplanting starts, starting seeds, mixing the soil, and filling the containers of our container garden. I’ve always been a fan of the classic planting table that includes multiple areas for storage, a place to hang tools, and a flat surface to work on. There are a lot of videos of woodworkers and makers building these, including Bob Clagett (I Like to Make Stuff), Norm Abram (The New Yankee Workshop), and Steve Ramsey (Woodworking for Mere Mortals). These three makers represent three versions of a planting bench. Bob Clagett’s was made of dimensional cedar, Norm Abram’s was based on an antique found in Savannah, Georgia, and built from recycled pine, and Steve Ramsey’s was built with scrap wood, largely reclaimed pallets. A planting table can be made as cheaply or expensively as you’d like. I went somewhere in the middle of these three.
I didn’t have any recycled or reclaimed wood to use for the project, so we bought pressure-treated lumber for it. This included two 4x4x8s and numerous 2x4x8s and 1x6x8s. The 4x4s served as the main strength of the table, with one at each corner. The 2x4s were used as the main framework to connect the 4x4s to each other, while the 1x4s became the slats for the tabletop and shelves. Here are two pictures of how it turned out:
Planting table with our containers on it.Planting Table
This table was a blast to work on. Dimensional lumber, which you can find in the big box stores (Home Depot or Lowes), is really easy to use, and I would encourage everyone to try building one for your gardening needs. I used my table saw to rip the 1x6s down to narrower pieces, but I could have bought 1x4s instead and not needed a table saw. If I didn’t need to rip those pieces down, the entire thing could have been built with a circular saw and a drill. It’s a perfect project to dip your toes into woodworking if you’re curious.
Tips if You Want to Build One
Bulk cut all the pieces that are the same length. Because all but one of the slats for the top were the same length, I set up a stop block on my miter saw and cut all the pieces in quick succession. This made it so I didn’t have to measure each piece and potentially have small differences in the lengths. This was also the case with the bottom shelf pieces.
Clamps are your best friend. Clamps weren’t required to build this table, but they were really helpful. It can be difficult to hold pieces together with one hand while you’re using a drill with the other. Clamps hold it all together so that both hands can be used for drilling. They also work to prevent the pieces from moving off your mark.
Use a level. This applies when you are attaching the 2x4s to the 4x4s. You’ll measure up from the bottom or down from the top to mark where the 2×4 will go on the 4×4, but it’s wise to use a level to ensure the slats will sit flat and the entire table will be level when assembled.
What I Would Do Different
In general, I’ve been pleased with how the planting table turned out and continues to serve us. However, there are some areas that I’d like to improve and address in the future. The first is trimming the table slat closest to the front. It sticks out over the 2×4 framing piece by an inch or so, which has resulted in that piece cupping and needing to be attached with extra screws. I would like to remove this piece and trim it down so it sits flush on top of the 2×4.
I’d also like to add hooks to the bottom of the top shelf and chicken wire to the back to hold tools. The last improvement I’d make is having a water source and a place to rinse veggies when they’re pulled from the garden. This would be a bit more complicated than the other improvements, but I want to cut a hole in the table slats where a plastic bowl or dish washing basin would sit. That basin would have a hole in it with a small piece of PVC attached for the water to drain into a bucket below. I will also need to have a water source. For that, I want to attach a simple outdoor spigot or faucet that a hose can connect to and mount it close to the basin. Because the planting table is close to where we’re going to add another rain barrel, we’ll have a water source without needing to run a long hose. These are minor improvements, but once they’re done, I think the planting table will be even more useful.
Future Woodworking Projects for the Garden
Planters – These include all the types of planters, including planter boxes that sit on the ground, ones that are attached to porch railings, and window boxes.
Garden Bench – Magz and I want to eventually have our garden be a place where we can sit and enjoy nature. It won’t just be a place to work in, but also a place to relax. Having a bench in our garden would also provide us with a place to rest while working.
Whirligigs – Whirligigs are an area of woodworking that I’m interested in. If you’re unfamiliar with them, they are a nifty decoration that spins when the wind blows. They can be bought or made, and there are endless possibilities for design, style, color, etc. Norm Abram built one on The New Yankee Workshop, and the YouTube video below features the Whirligig Festival. I have a lot of ideas floating around in my head of how to build different versions.
Garden Gate – We’re eventually going to upgrade our fence, likely to something that we build out of wood. When that happens, I want to design and build an aesthetically pleasing garden gate similar to what you see in English gardens. They are incorporated into the fence and can be as ornate or as simple as you want.
Greenhouse – We have talked about wanting to have a greenhouse for some time. We want to be able to start plants outside sooner than we currently can. You can buy greenhouses, but they can be expensive. Instead, we’ll probably build one that perfectly fits our needs and is cost-effective.
Swing – I want to build multiple swings. One is a porch swing or bed that hangs from the ceiling. The other is a covered swing in the garden. Similar to the garden bench, a swing would help in our pursuit of creating a relaxing garden.
Arbor – I have a lovely vision of an arbor in our garden that you can either walk under or sit under. The arbor will be placed so that vining plants, such as cucumbers, squash, or flowers, can climb the arbor, leaving you totally immersed in nature.
To me, woodworking and gardening perfectly go together. They’re both creative, can be hard work, and result in the satisfaction that you built or grew something from scratch. Building something with one hobby that can be used in another hobby is a cool experience. I also try to build something instead of buying something whenever I can. Is woodworking one of your hobbies? If not, what are your favorite hobbies? I hope you enjoyed reading about my experiences with woodworking and gardening. Have a great day.
In this week’s update, it is late July in Pennsylvania, which means the humidity level has been ratcheted up to 10. You sweat if you’re outside for more than five minutes, regardless of how active you are. We’ve also been dealing with some of our fence sections sagging. How have we addressed that problem? We’re beginning to harvest vegetables from the garden on a daily basis, so we’re seeing the hard work pay off in a big way. Finally, what will the seed of the week be? Let’s dive in.
Always Drenched in Sweat
Depending on where you live, your view of July’s weather will vary greatly. If you live in the Southern Hemisphere, it’s winter and one of the coldest months of the year. However, if you live in the Northern Hemisphere, it’s peak summer. In the United States, we have multiple versions of summer. West of the Rockies, it’s a searing dry heat where temperatures regularly surpass 100 degrees Fahrenheit, but with little humidity. Along the Pacific Coast, there’s humidity, but the temperature remains comfortable due to the proximity to the ocean. East of the Rockies, especially in states that have a coast (Atlantic Ocean, Gulf of Mexico, or the Great Lakes), it is often hot and humid. In Western Pennsylvania, where we live, the air temperature may only be in the mid-80s, but when you factor in the humidity and UV Index, the real feel is often in the 90s. High-pressure systems occasionally come through to knock down the humidity, but at this point in summer, we are usually stuck with it until mid-August.
I’m someone who tolerates the heat pretty well, but humidity is rough. Regardless of what time you get outside, you will sweat, and that’s where I’ve found myself over the past week or so. Apart from a couple of days early last week, the temperatures have consistently been in the mid-to-upper-80s with high humidity. Despite the uncomfortable conditions, the garden still needed to be tended to. The plants needed to be watered after we went several days without rain, the weeds needed to be addressed, and the ripe vegetables needed to be harvested. It wasn’t always fun, but it does serve as a reminder of how hard farmers work to grow/produce our food. When we’re able to harvest a ripe vegetable, it makes all the hot and humid days worth it. When you are working outside in the middle of summer, the importance of staying hydrated, wearing sunscreen, and taking breaks can’t be overstated.
Mending Fences
Okay, so I didn’t really mend the problematic fence sections since they weren’t technically broken, but I wanted to use the phrase nonetheless. If you remember, we bought deer fencing for our garden. It’s extruded plastic that is seven feet tall and comes in rolls. It’s been nearly flawless to this point, with any issues being my fault. Recently, though, some of the longer sections have started to sag in the middle. I think this is the result of less tension, since the sections are longer than normal, as well as grass growing at the bottom, which pulls the fence down a bit. In some places, it was so bad that I could have stepped over the fence if I wanted to, and if I can do that, a deer can jump it.
The fix was pretty easy: I cut some fence posts from leftover pressure-treated lumber. If you’re interested in doing this yourself, I started by cutting the pieces to length. For us, this was six feet. I wanted them to be long enough to sink into the ground at least a foot. After that, I ripped the pieces to width (one inch) on the table saw. With that done, I went back to the miter saw and cut a point on one end at a 30-degree angle. This helps them go into the ground more easily. With the pieces cut, I hammered them into the ground and attached the fence with a few staples and twist ties. It ended up being a quick and easy fix. If you have a workshop and some tools, you can make your own fence posts rather than pay for the finished product.
Hard Work Is Paying Off
There were different points in the gardening process where I was unsure if all our hard work was going to be worth it. Struggles with germination, inconsistent weather, and other things out of our control led me to question if we were going to harvest anything from the garden this year. Thankfully, that is no longer a question, and we’re regularly harvesting vegetables with plenty more on the way. We have more cucumbers than we know what to do with, and there are probably more than 100 tomatoes on the vine. Plus, the corn is growing nicely, and we’re going to have lots of melons, squash, pumpkins, and tomatillos. I’ve said it before, but if you’re curious about gardening but have yet to pull the trigger, you should. You can start small with one or two containers of your favorite vegetables. It’s not a ton of work with only a few plants, but the payoff is well worth it.
Cucumbers & Tomatoes
Notes From the Garden
We harvested our first full-size tomatoes this week. Two were Cherokee Purples (or maybe Black Krims?) and two were Queen Aliquippas. We haven’t eaten them yet, since we only pulled them on Saturday night, but it’s definitely a big step.
We continue to have a problem with grass growing in our beds, largely the beets and carrots bed, so I’m trying something new. I took some black garbage bags and laid them on the problem areas, using ground staples to hold them down. The goal is to suffocate the weeds by preventing sun and water from reaching them.
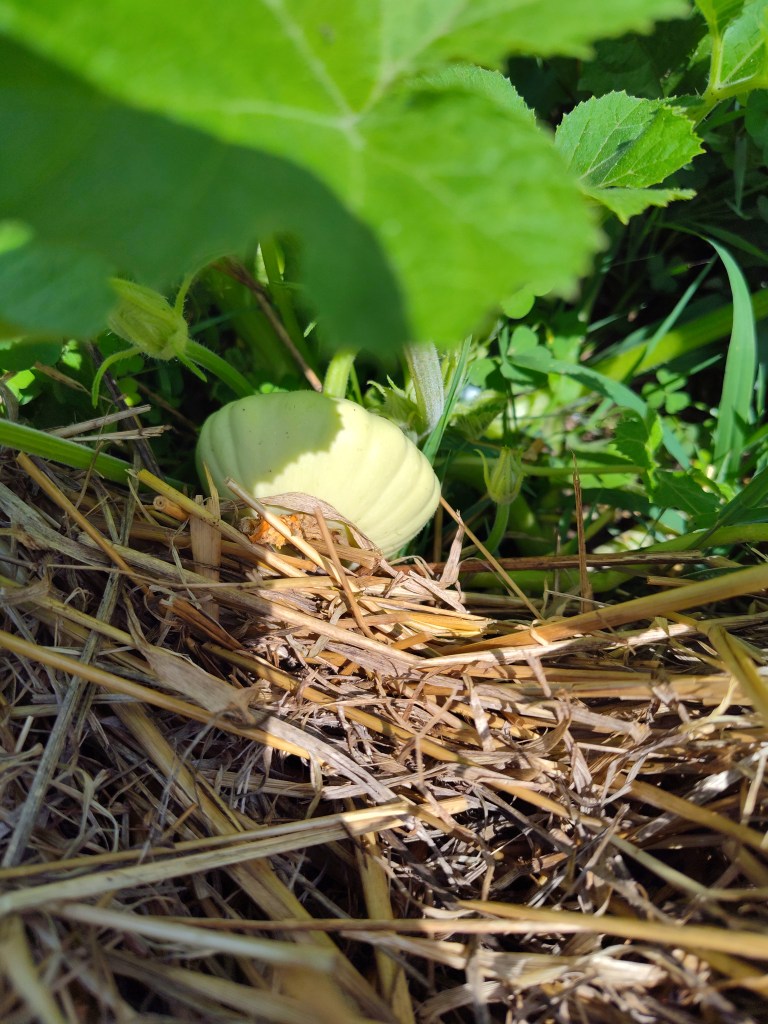
The first cantaloupes and watermelons have started growing. They’re quite small right now, but they look like tiny versions of the fruit, which is cute.
Our third spaghetti squash is bigger than the first two now, and our first squashes have turned from light green to a creamy yellow, so they are ripening.
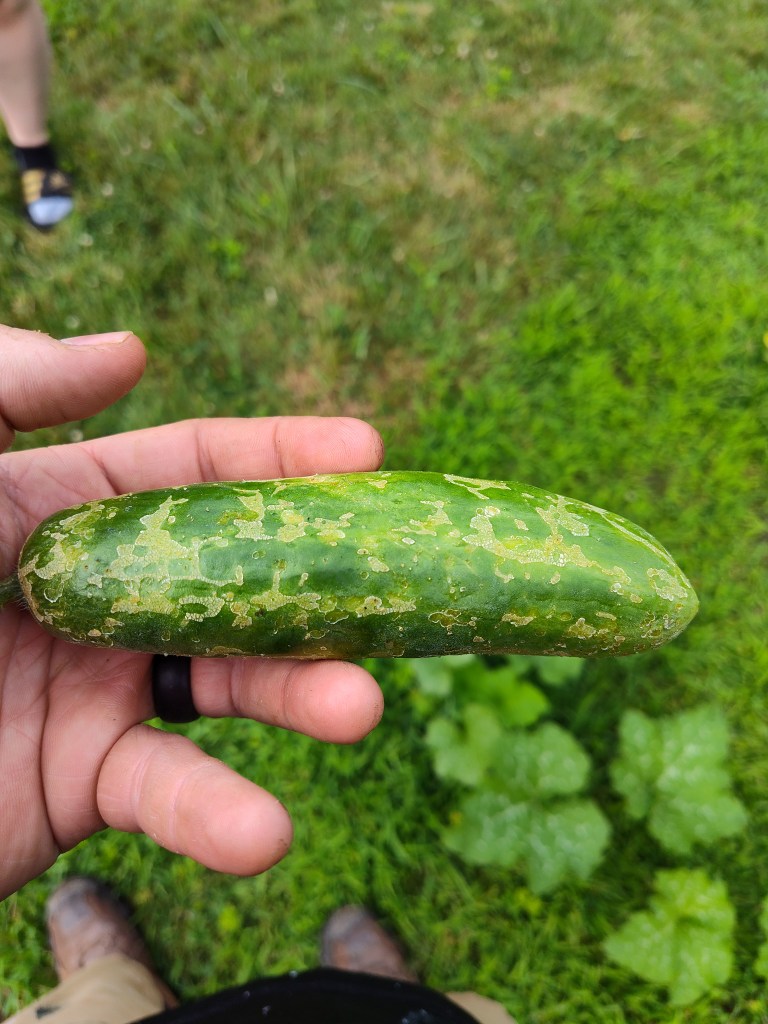
Our first Tendergreen cucumbers were harvested on Sunday, marking the first time that we’ve harvested this type of cucumber.
Noir des Carmes CantaloupeOur first zucchiniGarbage bag weed controlBaby Watermelon
Seed of the Week
The seed of the week this time takes us to France for the Noir des Carmes melon. This muskmelon is a true cantaloupe, whereas most cantaloupes that we find in stores are simply muskmelons. From what I understand, true cantaloupes tend to be grown in Europe. The Noir des Carmes melon dates back to the 18th century and is named for Carmelite monks who grew it. These melons don’t have the tan colored “webbed” skin that we often find in the United States. Instead, this melon stays greenish black for most of the growing process until it transitions to yellow and green, indicating that it’s ripe. It also has a smooth rind. We got our seeds from Southern Exposure.
In this week’s update, we have a lot of tomatoes ripening, but do we know the variety of each? It’s questionable. Our corn is starting to develop ears and silk. Along the same lines, we’re harvesting some beans, and there are a lot of blossoms on the other varieties. Finally, I’ll go over some general notes from the week, including pictures, and highlight this week’s Seed of the Week. Let’s dive in.
So Many Tomatoes
We have more than a dozen tomato plants, and the majority of them have fruit that is starting to ripen. Our paste tomatoes, which I originally thought were pear tomatoes, continue to grow and are now more than three inches long. Our actual pear tomatoes also have lots of fruit, and we harvested the first one on Saturday, immediately eating it. All of our pear and paste tomato plants have dozens of fruit on them. Then there are the Queen Aliquippa plants. These are the tallest tomato plants we have (more than three feet tall) and are growing lots of fruit. The problem we’re having is knowing when they’re ripe. Because they remain green when fully ripe, it’s not as obvious as red tomatoes. Thankfully, they develop a blushy red color on the bottom when they’re fully ripe, which will make it a bit easier to know when they’re ready.
That brings us to our Black Krim and Cherokee Purple tomatoes. These tomatoes look VERY similar to each other, growing to similar sizes when ripe and having similar colors and markings. Both are a deep red on the bottom with a dark blue/purple on the top. I think we bought two Cherokee Purple plants and four Black Krims, but it could be the other way around. The numbers could also be wrong. We kept the plant marker with the plants, but it’s currently buried under straw. If necessary, I’ll dig around to find it, but I’m hoping that we’ll be able to delineate between the two before that point.
Black Krim or Cherokee Purple Tomatoes
Corn Silk Developing
Over the past week, our Butter & Sugar and Black Mexican-Sweet Iroquois sweet corn plants have grown to a point where they’re in tassel, with roughly half the plants now developing ears with silk showing. I think they’re still weeks away from being ready to be harvested, but they’re well on their way. The other variety, Hopi Blue, continues to grow and is close to five feet tall now. The three rows of Black Mexican-Sweet Iroquois that I planted a couple of weeks ago have germinated with nearly a 100 percent success rate. I’ll likely thin these seedlings as needed this week.
Corn Silk
Beans Are Finally Starting to Produce
We haven’t had the greatest success with growing beans this year. The late spring and overabundance of rain stunted their growth, and to this point, they’re still only about 18 inches tall. In the past, we’ve had bean plants reach 30 inches tall. That being said, we are starting to see some bean pods on the plants. We’ve been pulling Provider bush beans for about a week now, but only a few pods per plant. Although the pods are pretty small, they’re delicious eaten right out of the garden. Our Jamapa plants are also putting on pods, with at least one being five inches in length. This bean is a shelling variety, though, so we’re going to let it dry on the plant as much as possible before harvesting. Finally, we have the Kebarika beans. These can be harvested as snap beans or as shelling beans. Our plants have been flowering for about a week now, so the bean pods will be following.
Notes From the Garden
Last week, I weeded and thinned our carrot and beet bed. You may remember that we’ve had a lot of issues growing both this year; however, I’m refusing to give up. My hope is that by clearing the area around the plants and thinning them to only one root every four inches, they’ll be able to develop and be harvestable.
We now have four spaghetti squashes on our plant. The first two are about seven inches in length, the third one is now four inches in length but still green, and the newest one is still a baby with the blossom only recently falling off.
The mystery plant beside our spaghetti squash has started to put on fruit. After flowering, the fruit starts yellow and turns green.
We are beginning to become inundated with cucumbers. Our Boston Pickling cucumbers are rapidly growing. We’ve already harvested three, and there are at least a half-dozen more on the vine that will be ready in the next couple of days. Our burpless variety has produced two more full-size fruit, but we’ve had a pest getting to them. There have been little scrapes all over the fruit, and it’s the only variety with these, which is confusing. We’ve added some straw beneath the vines and fruit to help with any dampness problems, and I sprayed some insect killer on the plant.
Our tomatillos are coming on furiously. I understand why people say that you can quickly become overwhelmed by how many you’ll have. We have three plants, and each of them has more than two dozen husks.
The first White Scallop patty pan squash that we saw is now about four inches in diameter and two inches tall. Everything I’ve read has said that these will grow to six inches in diameter and three inches tall when fully ripe. They should be ready within a week.
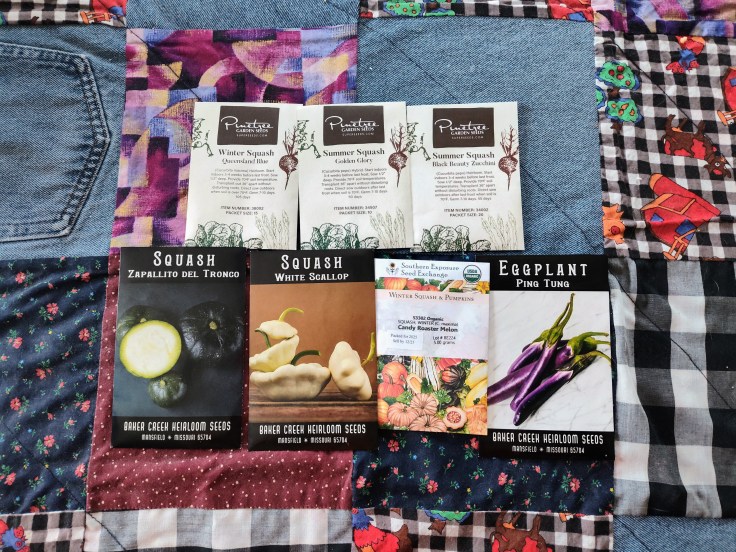
This week’s Seed of the Week is the White Scallop, mostly because it’s doing so well, and we’re close to harvesting our first one. The White Scallop is a patty pan summer squash that is rounder and flatter compared to a zucchini. It’s one of the oldest squash varieties and has been grown by Native Americans for hundreds of years. Baker Creek, which is where we bought the seeds, writes that these were first depicted by Europeans in 1591, so we have evidence of them being grown for at least 400 years. These are very easy to grow. The plants don’t vine out or sprawl, but instead grow vertically and stay compact. They’re supposed to be one of the best-tasting squashes. We’re very excited to eat these.
Up Next
We’ll harvest our first White Scallop squash this week. We’re also hoping to harvest more tomatoes, especially some of the larger varieties. We’ll also likely harvest more cucumbers and need to figure out how to preserve them. Happy gardening!