
Last year, Magz and I screened in our back porch. It’s an elevated concrete slab that had railings on all three sides except for where the steps are located. We removed the railings, strengthened the posts that hold up the roof, and screened in the three sides. We closed in the two ends so that the screen goes from waist height to the roof for privacy, while the back has floor-to-ceiling screens with French doors where the steps are located. The project was a success in the sense that we had more privacy with plenty of airflow and some protection from the elements, including rain. It also reduced the number of bugs, bees, and flies that we have to deal with, but we still didn’t use the porch as much as we thought we would.
That was largely due to the outdoor furniture that we had. The only option we had that was designed to be outdoors was a narrow glider we bought from Aldi a few years ago. And although it’s comfortable for one person, it’s quite narrow and isn’t comfortable for two people to share. We also repurposed two Ikea Poang chairs that we had previously used inside but no longer had a need for. Although they weren’t intended to be used outdoors, they held up since they weren’t directly exposed to the elements. While these chairs worked, they aren’t the most comfortable, especially if you want to do anything with your hands while sitting in them, like typing, cross-stitching, or knitting. This led to us deciding that we wanted something different, and since I really enjoy building things and hate spending money unnecessarily, we designed and built our alternatives.
The Design
Building outdoor furniture is something I’ve wanted to do for a long time. Outdoor tables, benches, chairs, and swings are projects that call to me, but I didn’t have anything designed or planned. So, on a lovely Saturday in February, Magz mentioned that she’d like to figure out our outdoor furniture before the weather was really nice and we wanted to be on the porch. Quickly, we came up with a design.
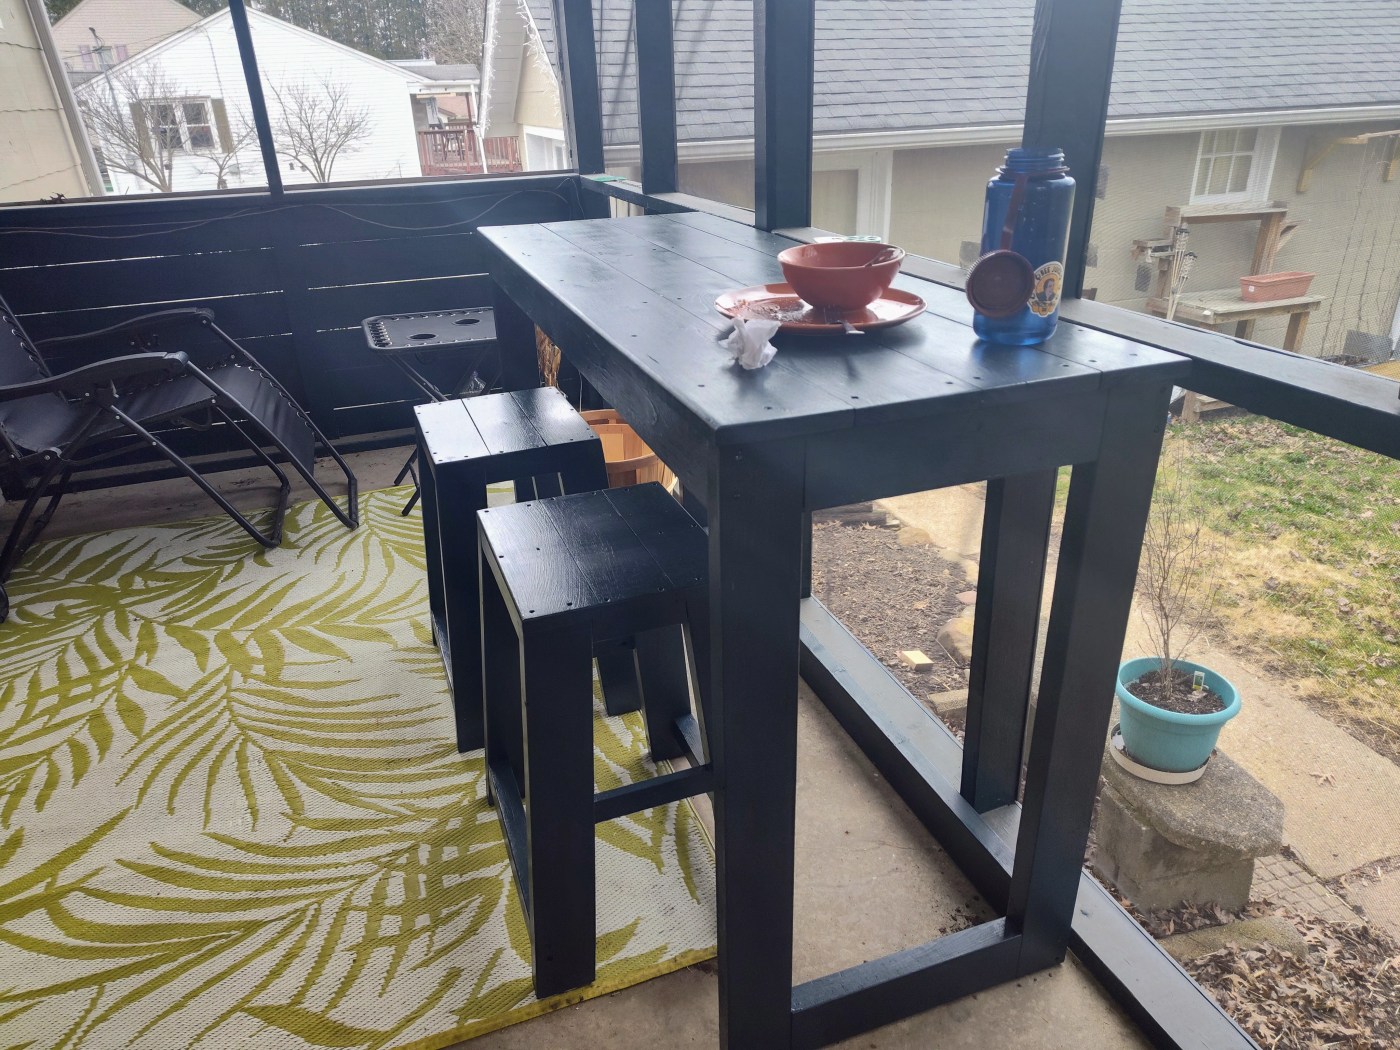
For the table, we wanted something wide enough for us both to sit at it and deep enough that we could play board games or work at it. We also wanted something higher than a coffee table. For the seats, we discussed one long bench versus two individual stools, ultimately choosing the two stools. The freedom for each of us to choose how close or far we sit to the table was important, and having sat at the table multiple times now, it was the right decision.
We were going for something simple and durable. We were fine with it being made of dimensional lumber to make the building process as straightforward as possible. As much as I love building fine woodworking projects, when it comes to outdoor furniture, using dimensional lumber that is designed for strength is often the right move. Here is the design I came up with:
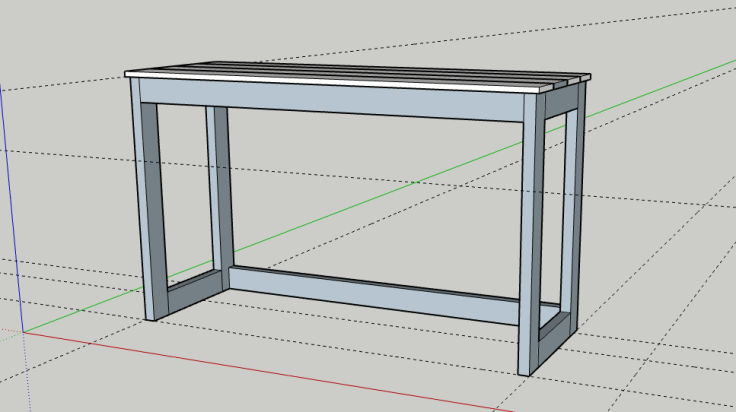
When it came to materials, my initial thought was to buy pressure-treated lumber. It would be great to buy cedar, teak, or composite to build this type of furniture, but those are all very expensive. Plus, cedar and teak will eventually break down over time and need maintenance, and composite lumber requires specific saw blades designed to cut it. All three types are also really difficult to find where we live. I love watching old New Yankee Workshop episodes and think that Norm Abram is an excellent woodworker and craftsman, but one of the least relatable elements of the show is his ability to get exotic wood species or high-end cabinet-grade plywood locally. Finding those in store would require at least an hour’s drive, which isn’t worth it most of the time.
Meanwhile, pressure-treated lumber is readily available; however, it isn’t cheap in our town. We don’t have a local Home Depot or Lowe’s, so we rely on regional franchises for lumber and building supplies if we don’t want to leave town. One of the local stores, 84 Lumber, (the same store we bought our materials to screen in the porch) was charging $2 more per 2×4 than Home Depot and $1 more than the other local store, Busy Beaver. 84 Lumber also stores most of their lumber outside, so running it through a saw isn’t a pleasant experience. Even at Busy Beaver, the pressure-treated 2x4s were more than $1 more than kiln-dried pine 2x4s, which led me to begin considering pine as an alternative.
Pressure-treated lumber has its advantages, with the biggest being that it’s designed to withstand the elements. However, it also has its disadvantages. It can be quite expensive, is heavy and often damp, and it will destroy saw blades. Meanwhile, pine can be a great alternative. It’s cheaper, for one. It’s also pretty light since it should be kiln-dried, so it’s easier to maneuver, and it’s easy to cut. And while it doesn’t have the weather protection of pressure-treated lumber, it can be coated with finish or exterior paint and will do well outside. It will need recoated, and it’s best to not let it directly touch the ground, but it can last a long time. Combining all of those together, we decided on buying regular pine. In total, I think we bought 16 8-foot 2x4s and 5 8-foot 1x6s. We also have a bunch of paint left over from the screened-in porch project, so we didn’t need to buy any. After acquiring the lumber, it was time to start cutting and assembling.
Assembly
Building the table was really easy. In 2020, I built a similarly designed table that we currently have in our kitchen. It’s quite straightforward. Working together, we measured and cut all pieces of the same length for the frame. We then pre-drilled the holes, using a pocket hole jig where normal 2 1/2-inch screws wouldn’t work. Along with the screws, we used exterior-rated wood glue to secure the joints. With the frame assembled, we moved on to the top, where once again, we measured and cut all the slats to length at the same time, ensuring consistency. Three of the slats were full 5 1/2-inch wide boards, while the fourth had to be ripped to be narrower. We allowed for a 1/2-inch overhang on the front for aesthetic purposes and roughly an 1/8-inch gap between the slats. They also weren’t glued to the frame and were only attached with screws to allow for expansion due to humidity. After cutting a round over on the front edge with my router and a quick sand, it was ready for paint.
The stools were a bit more difficult to figure out. There’s generally a standard distance between the top of a stool and the underside of a table, but we adjusted it a bit to be more comfortable for us. With that measurement, I had to work down to calculate the length of the legs. With that number, I could move to cutting, using full-width 2x4s for the legs. Quick note: I didn’t think about this, but stools are most comfortable, stable, and strong when the legs are cut on an angle. Initially, I was going to have them be perfectly straight but learned from a plan on Ana White’s website that they should be cut on a five-degree angle and bevel. Then, the rest of the pieces, including the apron and footrest, are only cut at a five-angle without the bevel.
Once the legs were cut, I cut the apron pieces that connect the legs and the seat slats. These were easy cuts, but the next step was pivotal. Because the angle and bevel of the legs are so minimal, it’s hard to tell which orientation the legs need to be in. On the first stool, I flipped the legs around a bunch of times until it was right, but with the second stool, I held the four legs up against each other and marked the inside corner on all. That made assembly more efficient down the road. The footrests and the remaining two supports (on sides perpendicular to the footrests) were cut individually and attached. Like the table, once the frames were together, the slats were easy. It was as simple as cutting all the pieces to length, allowing for a small gap between the slats and attaching with screws.
The Wrap-Up
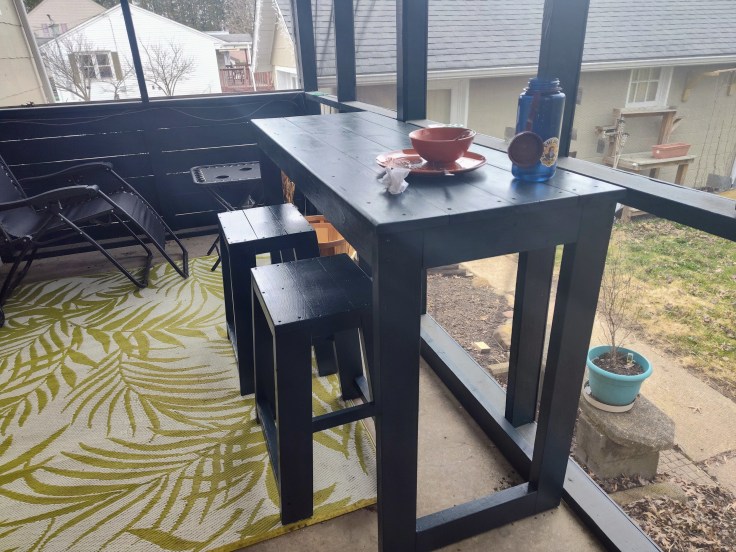
The project flew by and was a lot of fun. On day one, we decided we were going to build these, came up with a design, bought the materials, and had the table’s frame assembled. The stools certainly took more time, but the entire project was done within two weeks, and we’ve been able to sit at the table several times already. It was also very affordable. I think we spent $140 on materials, including the screws, which is much cheaper than anything we could have bought of the same quality. It also could have been built with only minimal power tools, so I would recommend this project for anyone who doesn’t want to overspend on outdoor furniture. And if you find the wooden seats to be uncomfortable, you can always add an outdoor cushion.
Also, we didn’t get rid of our previous furniture. Our glider is going to be placed in front of our back porch in an area where we’re going to grow potatoes in bags. Meanwhile, the Ikea chairs are going to be disassembled, with the backs being used as trellises for climbing plants, and we’re going to build planters for them to connect to.

Leave a comment