A Study in Coffee Tables

There are a few woodworking projects that are on my bucket list to complete in my life. My list includes a Morris chair, a dresser, a lamp, a bed frame, and a coffee table. For the past couple of months, I worked on crossing one of those off my list: the coffee table.

Why We Needed a Coffee Table

Before going into the details of the coffee table I designed and built, let’s first cover why we needed a new coffee table in the first place. Prior to the new one, we were using a gate leg dining room table that I had previously shortened the legs on to make it a more comfortable height for our couch. That had been our setup since May 2021, and it had worked for the most part. We were able to eat at our couch, and we could always put up both ends of the table if we needed the extra space. However, there were also some flaws that had always been present but were getting more annoying the longer we used it.

Finished coffee table

The first is that the table is really old and wasn’t maintained by the previous owners, who also happened to be the people Magz’s mom bought their house from. The table had also been stored in the basement for years, and the result was that the joints were loose, the top had scratches and scrapes in it, and the ends sag if the gate leg isn’t at a perfect 90-degree angle.

The second is that the table’s shape made it difficult to move around. We had to walk all the way around to access the other side of the couch rather than walking between the table and the couch. The gate leg also meant that we would bump into it on a daily basis, which caused anything on top of the table to spill due to the loose joints.

I had considered fixing and refinishing the table, but I think it would have been more hassle than it was worth. It quickly became evident that replacing it was the best option, and when there’s a choice of building vs. buying something, I will always build it.

Picking a Style & Designing the Table

Unless I know exactly what we want before I start designing a piece of woodworking piece, I turn to various books and online resources to determine the style. This usually means starting with craftsman or mission-style furniture. I love everything about these styles, including the warm tone of the wood, clean lines, and function over style. Think Frank Lloyd Wright or the famous Morris chair. I found many examples, the bulk of which had some form of storage, either immediately below the table-top or near the legs. There was a lot to like about a coffee table with built-in storage because we knew that we would be losing a drawer of storage in the gate leg table. However, we also wanted the option to sit at the coffee table with our legs underneath it, which made it difficult to also accommodate built-in storage. So, my search continued.

And here is where my study became interesting. I also have a book on Shaker furniture. Shaker furniture is named for the United Society of Believers in Christ, also known as Shakers, which was started in England in the 1720s and became organized in the United States later in the century. Shaker furniture is known for its durability and simplicity. You can still see well-preserved examples of this furniture at various Shaker museums in the New England region of the United States. Also, Shaker furniture was put on the radar of modern Americans thanks to Norm Abram’s New Yankee Workshop, where he visited several of the Shaker villages and replicated pieces of furniture. What surprised me, though, is that there were no coffee tables in the book I have, nor did Norm Abram recreate one on his TV program. And the reason for that is that coffee tables didn’t actually become a “thing” until the early 20th century. There were examples of low tables placed in the middle of sitting rooms that dated back to the late 18th century and the Victorian Era, but they weren’t called coffee tables until the 20th century.

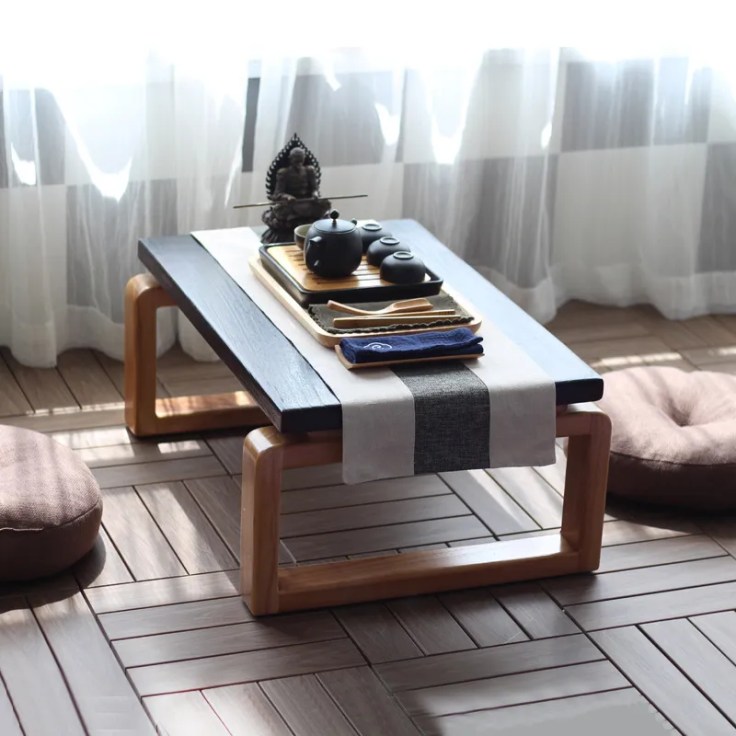
Striking out here led me to begin looking at Japanese furniture. We love Japanese culture and design, and the floor tables they use would perfectly fit our needs for a coffee table. They’re close in height to what’s considered standard for coffee tables and are meant to be sat at with a person’s legs underneath. But what was still proving difficult to pinpoint was the exact style we wanted the table to have. Japanese woodworking is quite different from what is common in Western cultures. They use a lot of hand tools and feature carvings and intricate joinery in their projects. The design is exquisite and is tough to replicate. I’m certainly not at a place where I can confidently replicate something like that. That led me to finding this table and using it as my inspiration:

After determining the style of a project, I turn to SketchUp and create a 3D rendering of the item. If you don’t know what SketchUp is, it’s a web-based program that allows you to design 3D models. Once it’s designed, you can label the dimensions and print everything, which makes it really easy to use in the shop. There is a free and paid version of SketchUp. I use the free version, and it always fits my needs. From there, I like to transfer everything over to a piece of paper and draw specific portions of the project with a pencil. It helps me to see a specific joint or something that is hidden from view and would be difficult to see in a printout of the rendering. I’ll also use these sheets of paper as an opportunity to take any notes that I want to make sure I remember. It could be the size of a dado slot or the type of joint I’m using. The final thing I’ll jot down is a cut list. It includes the quantity I’ll need for each cut. This helps me to make all the same cuts at once, reducing the chance of unequal cuts.

The Materials

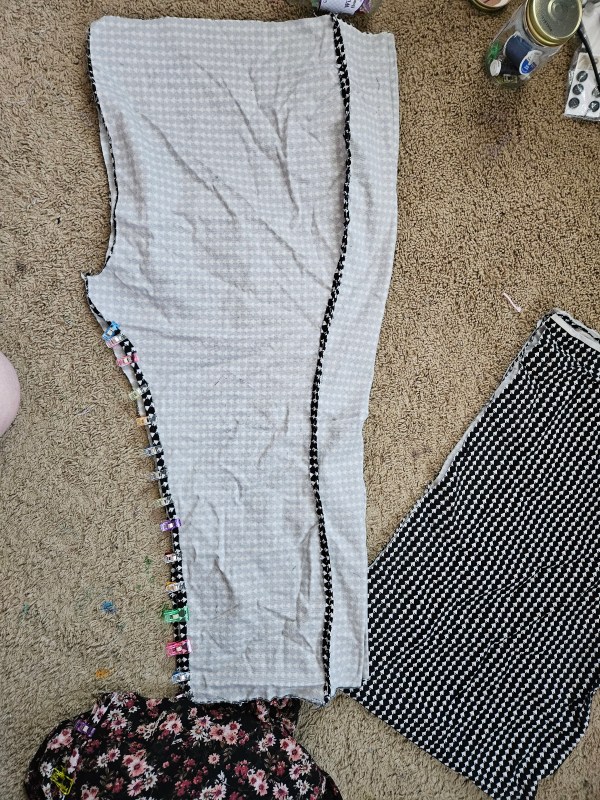
Going into this project, I knew that I wanted to incorporate two heavy planks into the table. They were originally used to move and store heavy pieces of equipment in an aircraft hangar, and we’ve had them for seven years since they were gifted to us. We originally had six of them, and four of them are currently being used: one acts as a shelf for us, and I made three of them into a mantle that is in our living room. The remaining two were originally used as the “hearth” for the mantle I built, but we haven’t used that piece since we bought our house and the mantle has been anchored to the wall. I disassembled the hearth piece, ran the planks through the planer, and was left with two pieces that were roughly 3 inches thick, 40 inches long, and 5 inches wide. Only having two pieces means that I couldn’t use them for the tabletop, so I was always planning to use them as the legs in some capacity.

Rough planks

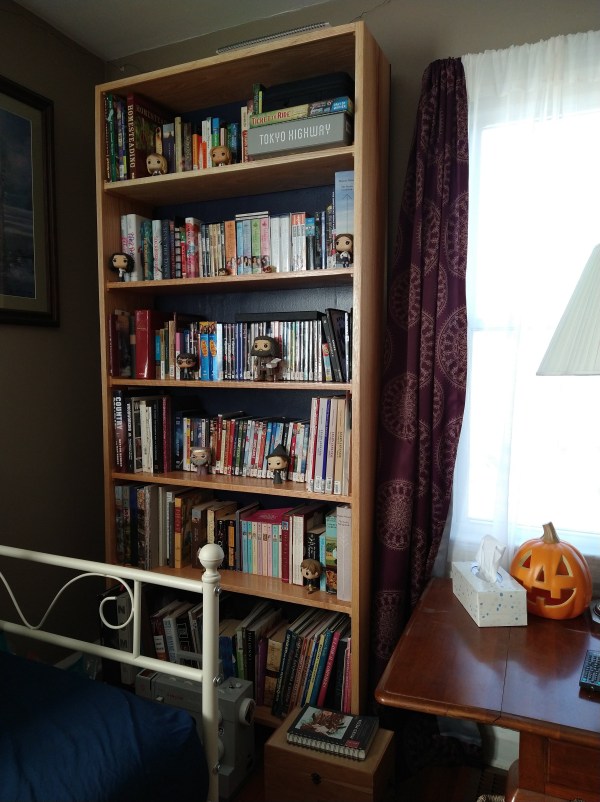
For the top, I turned to my stash of red oak and pulled two 4/4 x 6-inch boards. In 2022, I bought a bunch of lumber that was earmarked for a few projects. I’ve since completed those projects (bookcase, guitar stand, and kitchen cabinet) and still have a few full-length pieces left. The last thing I needed was fasteners to attach the top to the frame. I was unsure how to do this, but eventually found figure-8 clips, which are brackets that attach to the frame and underside of the top, but no screws run through the two pieces, preserving the integrity of the wood.

Building the Table

At its root, this was a simple table build. It has legs and a hidden stretcher under the top, but there were two aspects that were initially confusing and had the potential to trip me up. The first was the shape of the legs. When you first look at the inspiration picture above, the tops of the legs look as though they are bent, which is a skill that I don’t currently possess. However, when you look more closely at it, you can see that only the vertical pieces of the leg frame are curved, where the joint with the horizontal pieces is. This creates the illusion of bent wood, but it’s much simpler. I decided to cut half-lap joints for this and then round over the outside pieces to give it a seamless look. I can’t tell what joint the inspiration piece uses, but I’m guessing it’s a mortise and tenon joint. I didn’t want to do that on such an important joint, and it needed more strength than what a standard butt joint delivers. A half-lap joint allows the weight and force of the tabletop to be shared across the vertical leg pieces rather than all being focused on the joint.

The second aspect that was a bit confusing was how much framework to have under the tabletop. My original design only had a stretcher piece that connected the legs with spacers placed on top of it, which the top would connect to. As the piece came together, though, I wasn’t confident in it being strong enough, especially as we put our feet up on the table (it’s a coffee table, after all), ate at it, and played board games on it. I saw a scenario where the sides would sag in the future without support below. I addressed this by building a ladder-shaped support system that is placed on top of the stretcher and gave me roughly a dozen attachment points for the figure-8 clips.

With those design decisions made, building the table went smoothly. I limited the number of nails I used by only adding them to the leg joints, but even then, only on the top joints. Elsewhere, I drilled holes and used dowels to strengthen joints. I’m a big fan of how this looks. I also used biscuit joints to connect the four pieces used to create the tabletop. Biscuit joints are great because they’re much stronger than a basic butt joint, and biscuit jointers are easy to use once you get the hang of them.

Finishing the Table

Deciding how to finish this project wasn’t easy. In the inspiration picture, you can see that the top is very dark, while the legs appear to be finished naturally. At first, I thought that the top was a dark blue, but I now think it’s black. Either way, I had no intention of painting the top. I have a pretty rigid rule that prohibits me from painting woodworking projects built from hardwood that has beautiful grain patterns. My opinion is that if you want to paint a woodworking project, you should use a cheaper wood, like pine or poplar. The problem that arose was figuring out how to reach the level of saturation needed to get that dark color without turning to paint.

Milk paint was a possibility because you can thin it to still see the grain, but with Magz’s food allergies, we didn’t want to take a chance. You can also thin latex paint, but it’s difficult to create a consistent product and have an even finish. They also make solid stains, which sounds great in theory, but the product has very questionable reviews, citing a short working time, difficulty removing excess stain, and an uneven final product. Eventually, I’d like to give this a try, but I wasn’t going to use this project as a tester. Wood dyes were also a possibility, but like the solid stain, I don’t have experience dying wood and didn’t want to risk ruining this project. Plus, it was going to be expensive. That led me back to traditional wood stain, since they have several really dark tints, including ebony and true black. This stain isn’t perfect because it’s technically transparent, but I have experience layering coats of it to create a more saturated final product, so I was confident. With a half-pint of stain, a quart of oil-based polyurethane, a can of mineral spirits, and a fresh oil-based brush, I was ready to start.

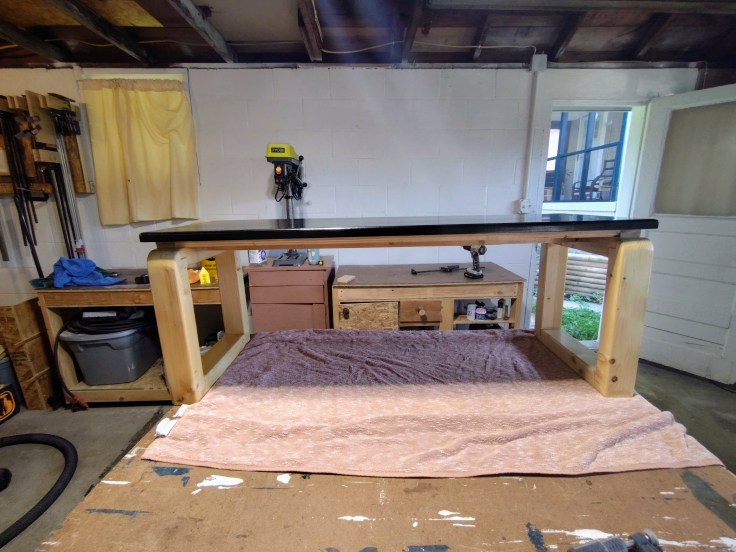
Staining the table proved to be easy. With the surface sanded with 220-grit paper and tacked off, I applied a thick coat of stain before wiping off the excess. The wood absorbed the stain nicely, but it wasn’t dark enough. With the second coat, I let the stain sit for 10 minutes before lightly wiping the excess, which gave us the dark color we wanted. I then let the stain sit for 24 hours before applying the first coat of poly. In total, I applied four coats to the tabletop and three to the frame, lightly sanding between coats, and got a beautiful, glossy, hard finish. After letting the project sit for 48 hours, I attached the figure-8 clips and secured the top to the frame, and finally, it was done.

Reflecting on the Project

In general, I am very happy with this project’s outcome. I started on it in August and had it finished by mid-September. That’s very fast for me. There are several reasons for it, but I’m not the fastest woodworker, so I was thrilled by how quickly this one came together. The most time-consuming part of the project was finishing, as there’s always a lot of downtime while the stain or finish dries.

I’m extremely happy with how strong the table is and how beautiful the table is, especially the legs. It accomplished my goal of resembling Japanese woodworking, but I made it unique. I love how simple everything looks, while still being incredibly strong. That said, it’s not perfect. Some of the joints aren’t as tight as I’d like, and the curves on the legs aren’t perfect. With a bandsaw or scroll saw, this would be easier to achieve. It’s also not perfectly square, but then again, what is?

Ultimately, we love this table, and it perfectly fits our needs and our living room. We’re able to sit at it and eat dinner or do work, which is very comfortable. If we don’t feel like sitting on the floor, we can pull it closer to the couch or sit on a footstool. The table’s height allows us to prop our feet on it, which was a goal. Unintentionally, the table’s height also allows us to stow stools below it, which was a wonderful surprise. Finally, the table is easy to move and clean under. While it’s very strong, it’s pretty light and slides on the carpet. For the first coffee table I’ve made, I couldn’t be prouder.

I hope you enjoyed reading about my journey of building a coffee table. Even more, though, is that I hope it inspired you to build something if you’re considering it. It can be daunting, but it’s okay to make mistakes and take risks.

I Am My Own Crafting Worst Enemy

This is an unplanned part three of my “Drafting Shortalls From Scratch” because I did not succeed in making my overalls for winter. Although I have made shortalls twice this summer, a few silly, but very human mistakes, led to the project going awry. This is what I think went wrong:

  • Flew too close to the sun when tailoring
  • Planning < No Plan
  • Lack of Focus
  • Measure Once, Cuss Twice
  • I kinda hate sewing when it feels this hard
  • Putting too much pressure on myself
  • Not Buying Enough Fabric
  • Not Mocking Up
  • Not using my Patterns when I’m stuck
  • Research the Basics

It’s so easy to think we’ve got this and be too confident when going into a project. With knitting, this approach of fearlessness had led to some great projects, but with sewing, this artistic type of approach crashes and burns. Sewing is fabrication, as weird as that sounds. I think I was prepared to sew such complex tailoring projects, such as my shortalls, this summer, because I spent the spring building a screened-in porch with Kyle. Woodworking is very similar to sewing, I learned! It is about measuring, planning, creating things in a specific order, and constructing something that is built to last. When we started working on the porch, I never imagined how much it would teach me about garment construction. But it gave me a template to focus on. Who knew that woodworking would be such an inspirational experience for me?

So why am I sharing this? I am really struggling to accept that sewing is not coming easily to me; no matter how much I practice, it continues to challenge me. I’d like to invite you to join me in not giving up on those things in our lives that are hard.

Blending Gardening & Woodworking

If you’ve been reading my gardening articles for a bit now, you know I’ve written about using my woodshop to create things for the garden. Some examples are the planter box and trellis for our beans, the trellis system for our snow peas, and the fence posts I’ve been cutting. Lately, I’ve been looking forward to getting back into the woodshop and doing serious woodworking again. The garden and our screened-in porch projects took precedent over woodworking projects this spring and summer, and I’m now ready to get back at it.

As I’m thinking about and planning my next projects, I wanted to write about blending two of my favorite hobbies: gardening and woodworking. I mentioned the ways I’ve used my woodshop to build things for the garden this year, but only the planter box was somewhat serious woodworking. It was the only thing that required glue, but not even that project needed me to use my table saw. In this post, I’ll go over some future project ideas I’d like to pursue and a previous piece that I built and we still use. And if I have fun writing about this, and it seems interesting, I may write more woodworking articles.

A Planting Table

In 2022, I wanted a planting table that would aid in the process of transplanting starts, starting seeds, mixing the soil, and filling the containers of our container garden. I’ve always been a fan of the classic planting table that includes multiple areas for storage, a place to hang tools, and a flat surface to work on. There are a lot of videos of woodworkers and makers building these, including Bob Clagett (I Like to Make Stuff), Norm Abram (The New Yankee Workshop), and Steve Ramsey (Woodworking for Mere Mortals). These three makers represent three versions of a planting bench. Bob Clagett’s was made of dimensional cedar, Norm Abram’s was based on an antique found in Savannah, Georgia, and built from recycled pine, and Steve Ramsey’s was built with scrap wood, largely reclaimed pallets. A planting table can be made as cheaply or expensively as you’d like. I went somewhere in the middle of these three.

I didn’t have any recycled or reclaimed wood to use for the project, so we bought pressure-treated lumber for it. This included two 4x4x8s and numerous 2x4x8s and 1x6x8s. The 4x4s served as the main strength of the table, with one at each corner. The 2x4s were used as the main framework to connect the 4x4s to each other, while the 1x4s became the slats for the tabletop and shelves. Here are two pictures of how it turned out:

This table was a blast to work on. Dimensional lumber, which you can find in the big box stores (Home Depot or Lowes), is really easy to use, and I would encourage everyone to try building one for your gardening needs. I used my table saw to rip the 1x6s down to narrower pieces, but I could have bought 1x4s instead and not needed a table saw. If I didn’t need to rip those pieces down, the entire thing could have been built with a circular saw and a drill. It’s a perfect project to dip your toes into woodworking if you’re curious.

Tips if You Want to Build One

  • Bulk cut all the pieces that are the same length. Because all but one of the slats for the top were the same length, I set up a stop block on my miter saw and cut all the pieces in quick succession. This made it so I didn’t have to measure each piece and potentially have small differences in the lengths. This was also the case with the bottom shelf pieces.
  • Clamps are your best friend. Clamps weren’t required to build this table, but they were really helpful. It can be difficult to hold pieces together with one hand while you’re using a drill with the other. Clamps hold it all together so that both hands can be used for drilling. They also work to prevent the pieces from moving off your mark.
  • Use a level. This applies when you are attaching the 2x4s to the 4x4s. You’ll measure up from the bottom or down from the top to mark where the 2×4 will go on the 4×4, but it’s wise to use a level to ensure the slats will sit flat and the entire table will be level when assembled.

What I Would Do Different

In general, I’ve been pleased with how the planting table turned out and continues to serve us. However, there are some areas that I’d like to improve and address in the future. The first is trimming the table slat closest to the front. It sticks out over the 2×4 framing piece by an inch or so, which has resulted in that piece cupping and needing to be attached with extra screws. I would like to remove this piece and trim it down so it sits flush on top of the 2×4.

I’d also like to add hooks to the bottom of the top shelf and chicken wire to the back to hold tools. The last improvement I’d make is having a water source and a place to rinse veggies when they’re pulled from the garden. This would be a bit more complicated than the other improvements, but I want to cut a hole in the table slats where a plastic bowl or dish washing basin would sit. That basin would have a hole in it with a small piece of PVC attached for the water to drain into a bucket below. I will also need to have a water source. For that, I want to attach a simple outdoor spigot or faucet that a hose can connect to and mount it close to the basin. Because the planting table is close to where we’re going to add another rain barrel, we’ll have a water source without needing to run a long hose. These are minor improvements, but once they’re done, I think the planting table will be even more useful.

Future Woodworking Projects for the Garden

  • Planters – These include all the types of planters, including planter boxes that sit on the ground, ones that are attached to porch railings, and window boxes.
  • Garden Bench – Magz and I want to eventually have our garden be a place where we can sit and enjoy nature. It won’t just be a place to work in, but also a place to relax. Having a bench in our garden would also provide us with a place to rest while working.
  • Whirligigs – Whirligigs are an area of woodworking that I’m interested in. If you’re unfamiliar with them, they are a nifty decoration that spins when the wind blows. They can be bought or made, and there are endless possibilities for design, style, color, etc. Norm Abram built one on The New Yankee Workshop, and the YouTube video below features the Whirligig Festival. I have a lot of ideas floating around in my head of how to build different versions.
  • Garden Gate – We’re eventually going to upgrade our fence, likely to something that we build out of wood. When that happens, I want to design and build an aesthetically pleasing garden gate similar to what you see in English gardens. They are incorporated into the fence and can be as ornate or as simple as you want.
  • Greenhouse – We have talked about wanting to have a greenhouse for some time. We want to be able to start plants outside sooner than we currently can. You can buy greenhouses, but they can be expensive. Instead, we’ll probably build one that perfectly fits our needs and is cost-effective.
  • Swing – I want to build multiple swings. One is a porch swing or bed that hangs from the ceiling. The other is a covered swing in the garden. Similar to the garden bench, a swing would help in our pursuit of creating a relaxing garden.
  • Arbor – I have a lovely vision of an arbor in our garden that you can either walk under or sit under. The arbor will be placed so that vining plants, such as cucumbers, squash, or flowers, can climb the arbor, leaving you totally immersed in nature.

To me, woodworking and gardening perfectly go together. They’re both creative, can be hard work, and result in the satisfaction that you built or grew something from scratch. Building something with one hobby that can be used in another hobby is a cool experience. I also try to build something instead of buying something whenever I can. Is woodworking one of your hobbies? If not, what are your favorite hobbies? I hope you enjoyed reading about my experiences with woodworking and gardening. Have a great day.

Weekly Garden Update #13 – Building a Planter Box & a Germination Update

In this week’s update, I share a planter box I made over the weekend to grow some beans in, and we had a lot of germination take place. We also got to experience how gardening can help spark conversation and make friends.

Building a Planter Box

When we were picking our seeds for the year, we bought a packet of Chinese Red Noodle long bean seeds. These plants produce pods up to 18 inches long, and the plants can grow up to 7 feet. Safe to say that they need some support to climb that tall. But because these grow so tall, we couldn’t plant the seeds in the same space as our other beans since they grow to different heights. Instead, we decided to plant them outside our garden beds in a raised box and in a location where they can have ample space to reach their full height. A lot of gardeners would buy something for this purpose, but because I love woodworking and building things, I had to make it.

Planter Box, Gardening, Beans
Planter box filled with soil and seeds

It would have been nice to make the planter box out of cedar, red oak, teak, or fir, but I didn’t want to waste the red oak I have on this project and didn’t have any cedar, teak, or fir. Instead, I had a bunch of pressure-treated lumber left over from our screened-in porch project. Pressure-treated lumber often gets a bad reputation, but it is a versatile product that is affordable and will last a long time if maintained. Decades ago, it wouldn’t have been safe to use in gardening applications, but it’s now perfectly safe as long as you aren’t chewing on it.

My goal was to use as many scrap pieces as I could without having to cut too many of the full-size pieces. That’s why there are smaller pieces between the two longer pieces on the sides. This allowed me to only take a little bit from one of the remaining full-size 1x6s I have left. All told, the box is 11 inches front-to-back, 40 inches wide, and 10 inches tall. There are vertical supports inside to attach the stacked side pieces to each other, corner supports to connect the four sides, and horizontal supports to strengthen the sides. There are also a few holes in the bottom for drainage and feet on the bottom to lift the box off the ground. It’s quite heavy and should serve our needs.

Planter Box, Gardening
Planter box

Once the box was done, we lined it with a couple of black garbage bags. A lot of gardeners will buy black plastic that is sold specifically for gardening, but it’s essentially the same thing as the thick garbage bags people use for collecting lawn clippings. They both serve the same purpose: lining the box so there’s some separation between the lumber and the soil. It should also help the box last longer and create less of a mess.

With the liner installed, we cut drainage holes into the bottom and filled it with soil and Garden Tone and planted the seeds. After a thorough watering, it was ready to go. The seeds are supposed to take 5-8 days to germinate, so we’ll monitor them. The box was placed on the side of our garage/my woodshop where the plants will be in direct sunlight for most of the day. The only time it won’t get sunlight is at the very end of the day. To accommodate the trellis system, I’m going to build two brackets that will hang on the garage. The brackets will have holes in them to hold a dowel or bamboo stake, which will have garden twine tied to it. That twine will hang down to the planter box so the plants can climb.

Germination Update

In last week’s update, I mentioned that we were going to restart some of our seeds. That was the result of some of the starts not doing well and the rain preventing us from transplanting them for a few weeks. It led to some plants being leggy. There was also the fact that I messed up starting some of them, and I wanted to get a second chance with them. Last week, I restarted all of our tomato varieties, peppers (Cal Wonder and Scotch Bonnet), melons, cucumbers, eggplants, tomatillos, and ground cherries. I took extra time this go around by pre-moistening the soil and pressing it down a bit to pack the cells a bit more. The soil remains light and airy, but there’s more soil now for the roots to grow in.

In the 5 or 6 days since sowing the seeds, most of the varieties have germinated. The majority of the tomatoes and nearly all the melons have already sprouted and are looking healthy. This morning, I moved the cells with germinated plants in them off the heat mat and into another tray under the grow light. I’m attempting to be a bit more proactive with moving the starts sooner this time. The goal is to have the starts inside for a few weeks so that they can develop strong root structures before moving them outside.

In the garden beds, we have also started to see the successful germination of seeds, including corn, beans, carrots, and beets. The root crops have been growing pretty well for a few weeks now, but things have been a bit slower with the corn and beans. Corn is a slow germinating plant, so patience is key, but with the heavy rains we had not long after sowing, as well as the cool weather, I don’t think we were overly confident in their germination. However, on Sunday, we noticed that both had sprouted. The corn stalks were only about an inch above the soil, and the beans about two inches, but sure enough, they’re growing. That is incredible news! And with how fast bean plants grow, we should see them take off pretty quickly since we’re supposed to finally get some seasonally-appropriate temperatures this week.

Meeting a Neighbor

Yesterday, when we were working in the garden, our neighbor from across the street walked over and introduced herself. She is an older lady whom we hadn’t met yet, but she wanted to say hello and bring us a few cucumber starts that she had. It was such a wonderful gift and a great way to get to know a neighbor. Gardening is a great way to make friends and spark conversation.

Up Next

That’s it for this week’s update. Between now and next week’s post, we’re going to finish tilling the last bed, plant some sunflowers in front of the corn rows, and sow some butterfly pea seeds in a store-bought planter box. Thanks for reading, and Happy Gardening!

#39 -Bookcase

Last night my husband and I added an exciting new addition to our home, a rather large and fantastically sturdy bookcase, crafted with love by his own two hands.

It is 7 feet tall. As the pieces began to form the bookcase shape out in his shop, it was intimidating to think about how we were getting it in the house. Not because it was large beyond the doorway or Kyle hadn’t measured and planned the design to fit in our house, but instead who was going to help us carry this?

It looked heavy and ominous. Quite tall. I used to have more upper body strength from working manual labor jobs when I was younger but I lost it over time. I’ve learned that toning and building muscle seem to require more nuance than just practice and I was not doing the latter. Recently when we have carried things, my arms have been noodles, my strength as effective as trying to herd squirrels.

But I was pleasantly surprised, not because I magically became buff or someone else appeared to carry that thing up the stairs and into the house. Wall pilates came in clutch.

See there was an important building block I forgot about where true strength lies in your foundation, which is made ready through discipline. All those I got!

I mentioned in #34 – Shaping Up that I was getting serious about toning my waist for real this time. In doing so I have challenged myself to do at least one minute wall sit and one minute of planks per day. I’ve been doing this for over two months and have added wall pilates and deep-core training along the way. I’ve made my foundation strong by training my legs and my core, which blew me away last night because I think I lifted properly for the first time in my life.

It was all legs and core, my back and my arms didn’t hurt for a second. This is a first! And actually, I was able to shift the empty bookcase a bit on my own. This has shown me that like in everything in life preparation does make the difference. It’s important to keep up with my routine, even when I don’t feel like doing it because I’m busy. This training and discipline have positively affected my ability to do things before I even knew what was ahead of me! I was so relieved to be able to help him instead of having to ask my stepdad or brother-in-law.

I am quite pleased by both the results of deep core training and more importantly how lovely this bookcase looks in our house. He did a fantastic job!

Create a website or blog at WordPress.com

Up ↑