Can I Make Mid-Size Overalls from 1 Yard of Fabric?

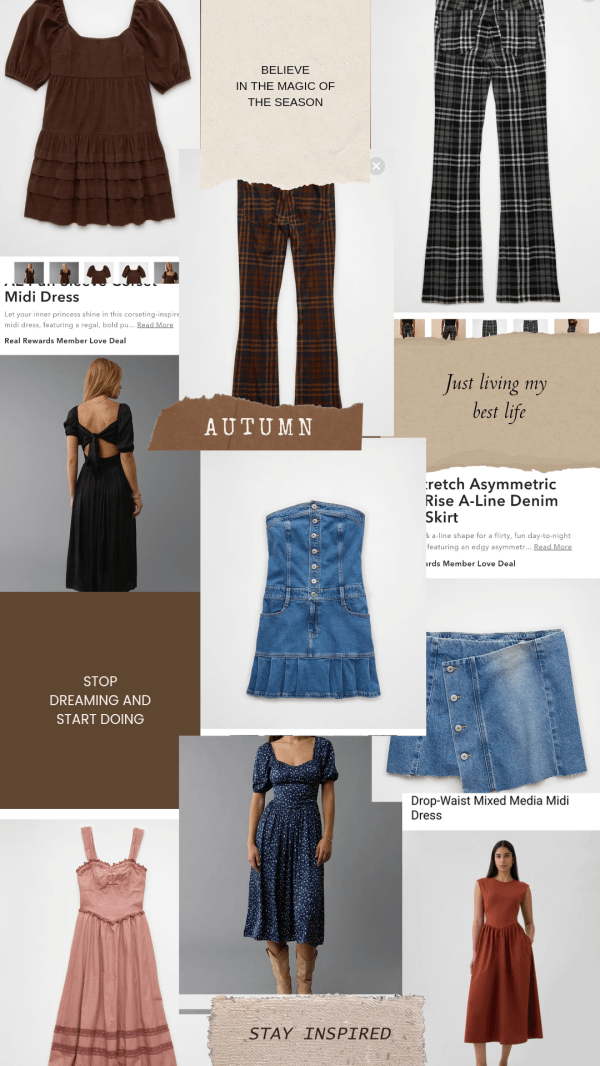
Do you ever think of something you’ve accomplished and wonder if you could do it even smaller? Well, I set a challenge for myself. A year ago, I wrote about creating a summer dress with a button-front from less than 1.5 yards of fabric. That post inspired this one, as this summer I was able to squeak out a pair of shortalls (overall shorts) from a yard of 59″ stretch twill from Mood Fabrics. This was not my first overall attempt, but I think my most ambitious because this yardage was for a pair of shorts with some abundant pockets, but I changed my mind after seeing a variety of overalls styled for spring and summer. I’ve owned this style before in denim. My favorite version I’ve purchased was a pair of vintage ’90s denim shortalls that were baggy and breathable for those swampy summer days. The more fitted versions I’ve found in stores in recent years are not my cup of tea, because for me, overalls are best when they are oversized.

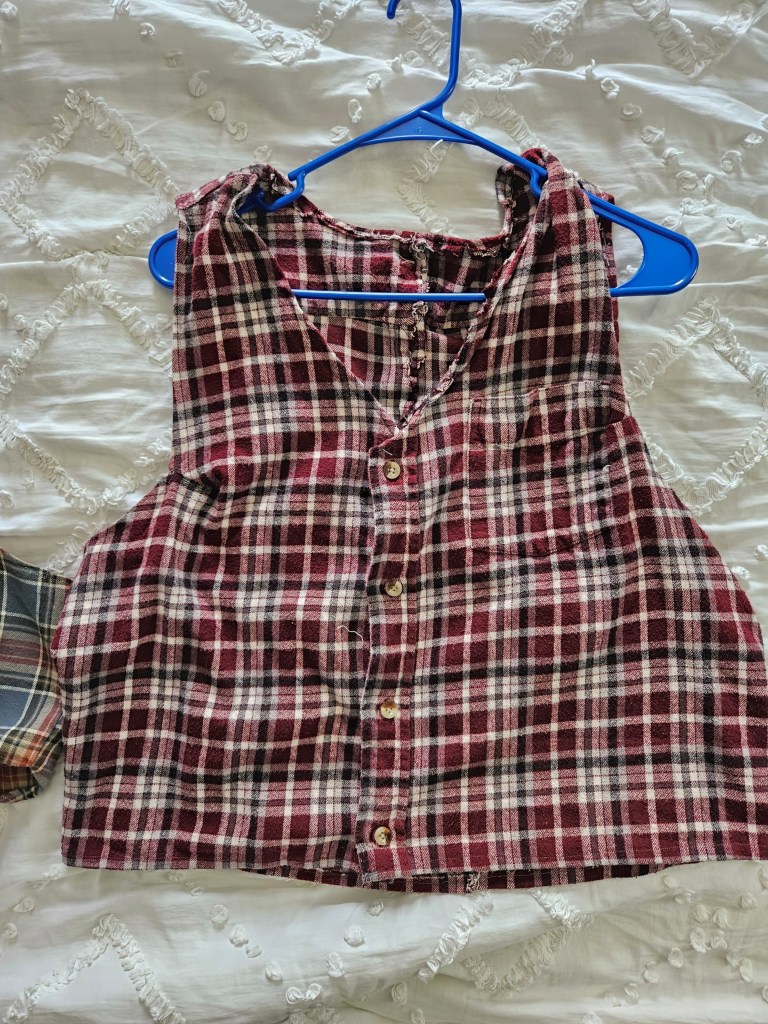
When I cut these overalls out, I had just completed my draft of an overalls pattern from 2 yards of 44″ cotton twill from Kokka Fabrics, and I was itching to make more without fabric shopping, so I went for a dig in my fabric/yarn closet. It’s more of an antique clothing press, to be fair. This is where I found my gold – 1 yard of 59″ across cotton twill in a fun pattern, sturdy enough for a bottom weight garment with just enough fabric to cut the shorts, the bib, the straps. That was all I could muster for sure. I set aside the project and got to work on my Kokka Fabric project, which taught me so many things about sewing overalls that I had overlooked in past attempts.

Firstly, the back bib is not a rectangle. Secondly, a facing for the bib makes the project feel more professional. Thirdly, the buttons on the side need to be properly assembled with the fly for the right stability. Finishing the edges with twill tape made from the project’s fabric helped create a crisp look. Fourth, the overalls need pockets in order for the garment to sit well on the body. Lastly, I did not accomplish these with my 1-yard of fabric overalls. I took some shortcuts.

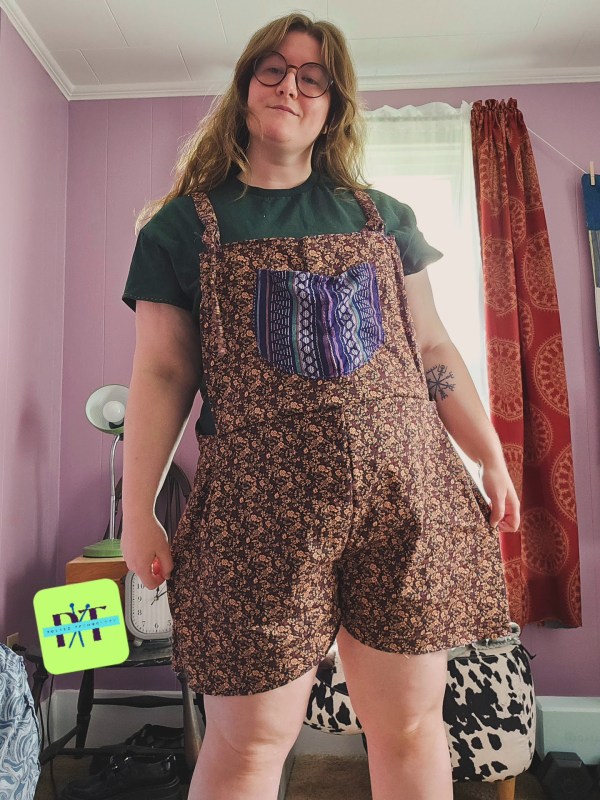
I ran out of fabric for the pockets, the fly, and the twill tape. To remedy this, I kept the shape to a romper style and less of a traditional overall. The bib is rectangular on both the front and back. The pockets were added from a previous project; I upcycled shorts into pockets. The side does not have any fastening, instead I sewed up the seam and let the boxy cut of the shorts and stretch of the fabric help me compensate for my lack of fabric.

So if this project is a pair of overalls that is not a traditional overall, but more of a romper, why am I writing about this?

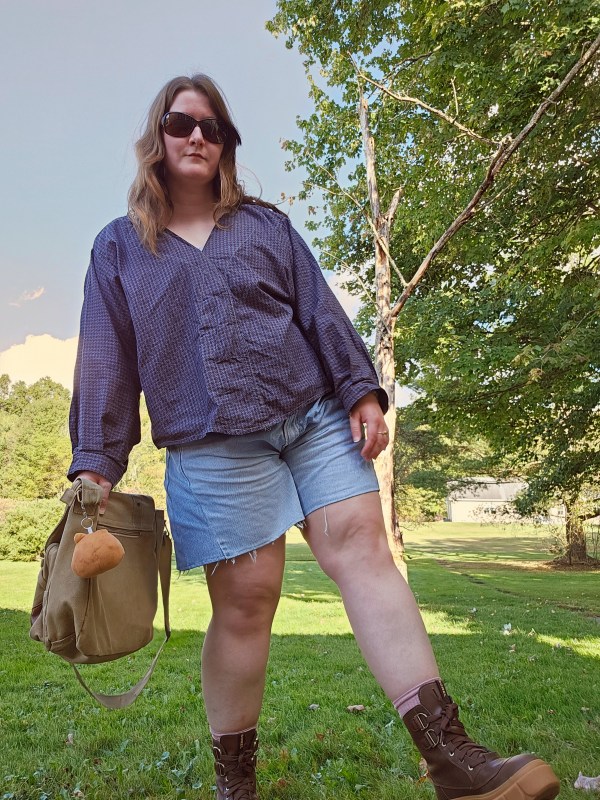
Well, because the finished product is a wonderfully comfortable garment, practical for many things – gardening, sewing, cooking, knitting, farmers market, apple picking, cleaning, walking in the woods, going to the beach, etc – and I made it without being an expert. I made this garment through hand sewing, so you don’t even need a sewing machine if it’s out of your current budget. I purchased this fabric on sale for 10 USD/yard. I used less than a spool of thread, and repurposed the pockets from an item in my closet that I didn’t want to wear anymore. Have you seen the price of overalls? They are expensive, even the short version. A low-quality version will still set you back 30 USD.

I made these with 10 USD of fabric for a midsize frame, so this is accessible to all of us, not just the slim people. A lot of popular and cheap DIYs on the internet are made for very small bodies, which makes me nervous that if I try it, it will be expensive, but this wasn’t. Making these overalls was incredibly rewarding, too. These aren’t even the best pair I’ve made this summer, I’ll share the other ones soon! But these ones will have a special place in my heart because they are unique, comfortable, and made with my own hands. So if you have an idea of how you could make something by hand, make it happen! It’s a lot easier than you think, a great learning experience, and there are tons of resources here online to help you succeed!

Flannel Upcycling | Making A Vest

Last summer, I wanted to introduce vests into my wardrobe. I have made vests before for Kyle, but have not sewn a vest for myself before; I have knit them. Because this was a spontaneous idea, I needed to be budget-conscious and find a way to use what I had to make a vest. So I went to my closet and got creative! I had a few flannels in my closet that were hanging there, waiting for me to wear them, but I didn’t. That’s when I looked at the shirts closely – there was a button placket, shoulder yoke, and a sturdy fabric, with room to crop them. I saw the vest within the shirt, so I grabbed my scissors—and was a bit too zealous with the first one! Don’t be like me, have a plan. So how did I make this upcycle work? And what did I learn from my failed attempt?

Shoulder Seams, Yoke, and Waist Length

The crucial points of cutting, I would say, are being aware of the shoulder seams, accounting for the back yoke width, and properly measuring your waist length for a proper fit.

  • Shoulder seams on a flannel are boxy and loose. To achieve the set-in sleeve opening that accentuates and reveals the shirt underneath, you need to cut away the shoulder line – but not too much. Be mindful of how far into the shoulder you plan to cut, so that you are left with a proportional line.
  • The shoulder yoke is a technique used to tailor the shoulder line, while leaving the fabric below the shoulder loose. As a result, there will be more fabric on the back of the vest, which may affect the fit of the arm openings and possibly require a dart to remedy the loose fabric. If not, the back will gape open, looking awkward and like a mistake. A vest should hug the body, be tailored, or else the upcycle will look exactly like you cut up a flannel.
  • The length of the vest determines the style and balance of an outfit. One of my vests I cut too short, and this limits how I can wear it. I find it cuts me off in a regency high-waisted fashion that is fine when I wear it with a high-waisted skirt, but with pants or my linen Darcy shirt, it’s awkward. The other vest was cropped, in a careful fashion, ending at my hip and balancing my body line like a well-tailored garment. It’s far more versatile.
  • Cutting the neckline is crucial. For the front, a tapered cut to the button placket provides the classic look. Be careful not to cut too low for a historical silhouette. Also, remember not to cut the back the same as the front! I made this mistake and had to sew the cut portion back into my vest. This should be a crew neck line, straight across, with a slight dip in the middle for comfort.

Why a Flannel Shirt?

I chose flannel shirts as my medium to work with for three specific reasons. The first one I already mentioned – cost. We had just moved into our house and paid quarterly taxes. The vests were not a necessity, just a whim, so it made sense to me to take an existing item, I didn’t wear to create something I would wear. It’s funny how the sustainable option is sometimes the free option too. Secondly, flannel is a sturdy fabric, appropriate for the structure of the vest, that could be sewn without the addition of a lining, which I could add later if I wished, when I was more comfortable spending money on fabric. Thirdly, flannel is a classic pattern that reminded me of the woven woolen coating fabrics that vests have been sewn with for centuries, so it was a good match! I hope this inspires you to repurpose items you have to make something new! For the rest of the flannel, the pieces I cut away, like the sleeves, stay tuned to see what I did with those. It’s one of my favorite makes. 🙂

I Made Furniture From Fabric Scraps

Do you ever look at an item you want to buy and think, how hard can that be to make? Well, that’s exactly how we got here.

Floor Culture

I’ve been moving my sewing room around, I took down my sewing table and moved to the floor. Which I know sounds extreme, but seriously, sitting on the floor is underated. My back and hips don’t get tight and my posture is improving. In the West, I think we have been foolish to move away from sitting on the floor and should acknowledge how wise other cultures are to sit on the floor for health and posture.

I have a wicker chair that is good for sitting in when I want a break from the floor, but what I was missing was an in between piece of furniture that I could move depending on my needs. I settled on a floor cushion that could be used as a seat, a workspace, folded up in a cushion or rolled into the corner for yoga to add more stretch breaks to my life.

Quick Fix

But here’s the catch, I decided I needed this piece of furniture on a whim and that’s what I am trying to remove from my purchasing decisions – less impulse purchases. I want to become less of a consumer and use what I have, so I thought could I make what I want? Similar cushions for sale online were 100-400 USD and with the tarriffs looming, I was feeling a bit nervous to buy something.

But then I remembered my Mom made a pouf, she knit the cover. I’d watched Morgan Donner make things from her scrap and fashion a mattress from braided fabric. I had also begun saving my fabric scraps and sorting them into bags that were taking over my crafting closet. I just had to settle on the cover fabric and design.

Design and Materials

A large rectangle seemed like the ticket with corners I could sew crisply and easily stuff at the end. There was this one extra wide cut of fabric I bought from Joann’s last summer which caught my eye. It’s a fabric I bought because I enjoyed the design but didn’t want to wear it. It looks a bit like denim and had a lovely swirl pattern that I thought, would compliment the lavender paint of the room. With the fabric sorted, it was time to tackle the pattern and stuffing!

I measured the fabric into two large rectangles and four slimmer sections to form the sides. These I sewed inside out to leave only one end open to stuff. I sewed this by hand over the course of a day, I’d say in total the sewing portion of this project was the easiest part. What lay ahead next was tricky, blister inducing  and stressful.

Stuffing and Scraps

I had bags upon bags of scrap fabric in varying sized pieces ready to be repurposed into stuffing, but the thing with fabric cabbage is that it’s not uniform. Which means there will be a lot of cuts to make. This I foolishly chose to do with my old fabric scissors, instead of using my rotary cutter and mat. I wish I had. The repetitive cutting motion wore a blister on my thumb and aggrevated an old injury on my finger joint.

My hands were tired, weak, and wrecked by the end of day one. Worse the cushion was 1/3 full. Not what I was expecting! How could it take that much stuffing?! With my bags of fabric scraps depleted, I moved on to new sources of cushion comfort. Such as yarn that I was given secondhand, which I had no creative plan for. This yarn was a super bulky, acrylic yarn, about 300 yards left, and perfectly fluffy for stuffing. I cut this into pieces and carried on auditing my stash.

I repurposed some old clotbes into stuffing, a blanket Mia’s little bunny chompers had chewed into swiss cheese, and more leftover yarn floating around my sewing room. Yet, I still lacked the floof I was after so I broke down and browsed the interweb. I knew polyfill was an option, but it’s also polyester and the point of this was to repurpose and use up things, not go to Walmart for polyfill, which happened to stretch very little. When I made a bolster pillow for our couch out of an old sheet, I went through 5+ bags of it. Whuch made me wonder, are there alternatives to polyfill on the market? There are! I found a small business, selling cotton filling that shipped. This got me to comfortable fluff, I still need a bit more but I’m going to revisit it later.

Voila! A piece of furniture made (mostly) from what I had in my house that used up some trash in the process. I am pleased. 😁

My Three Favorite Sewing Tools

What are three objects you couldn’t live without?

I’m modifying this prompt slightly to focus on one aspect of my life – sewing. These are the three tools I can’t imagine working without. After four to five years of sewing clothes and trying out various tools and techniques, these are the cream of the crop for me. This is my just opinion. Depending on your sewing style and personality, this list would probably change. I’m sure if I was a sewist who went to design school, I would also have a different list.

Fabric Clips –

When I started sewing, I had no idea fabric clips were an option. I bought a Dritz tin of straight pins and a pin cushion. This is where things began to get uncomfortable. No matter how careful I am when I use pins, I stick myself. When I use pins for a fitting, the pins slip out of the fabric and scratch my skin. I find the pin tins spill easily which is terrifying if you don’t notice it because you are then surrounded by pins in a spill around your feet. When I found fabric clips, my sewing experience improved 180 degrees. I don’t get stuck and the clips stay in place. I can try things on my body and the dress form, without the discomfort of pins sticking or the annoyance of the pins slipping out of place.

Sashiko Adjustable Ring Thimble –

I’ve tried two kinds of thimbles. The first was the cylindrical metal thimble, which I found hard to use. It fell off my finger or I simply struggled to find the correct finger to place it on for my sewing. I tried another metal thimble that looks like a fencing mask, with an adjustable back. It stayed on my finger just fine. I could make it tighter or looser or move it to a different finger but it still felt odd. I noticed the thimble wasn’t providing the support I needed to push the needle through the tough fabric and in turn, was putting stress on my finger joints.

I was introduced to the Sashiko-style ring plate thimble through the account Geri In Stitches and was hooked. The idea of pushing the needle through dense layers by the palm of your hand instead of your fingertip made more logical sense. This has transformed my hand-sewing experience! I can sew longer without hand fatigue. The ring is comfortable. I hardly notice I’m wearing it until I’ve walked into another room with the thimble still in my hand. This is a Japanese thimble, for the sashiko technique, I am using it for general sewing, but the thimble and sashiko have a rich history of their own that you should check out.

Hand Sewing Needles –

I started my sewing journey by hand sewing before I purchased a Singer Heavy Duty Sewing Machine in 2022. It was my preferred method until my hands started showing stress and my mind was fed with how long garments were taking on a deadline. The switch to a machine was fantastic! I quality garments quickly. The only wrinkle was sewing machine maintenance and gremlins in the machine. Sometimes machines have attitudes. Sometimes you can’t get in sync without your equipment. Sometimes you drop the small screws into the machine and you are in a panic. It’s a wonderful asset but also a source of great frustration for me. For that reason, hand-sewing needles will always be by my side because they are easier to manage, and sometimes you and your machine need some therapy. Also, some projects call for the delicacy of hand sewing. It’s an art form that cannot be fully eclipsed by the machine. For example, how can you attach a button or hook and eye closure without a hand-sewing needle? It’s best to keep them handy.

Checker Board Pants: Making Pants From Your Favorite Jeans

In 2024, I was inspired to start making pants. I had attempted making pants before and they were successful but I struggled to make them feel like more than just a pair of lounge pants. Part of this was caused by not choosing a good bottom-weight fabric, and instead opting for a lightweight summer cotton that draped beautifully but didn’t give me that tailored look. I also tried an ill-fated scuba fabric in 2023 that crashed and burned because my thread tension was off. Enter this checkerboard denim print I purchased at Hobby Lobby. It was denim but lighter, not too heavy to be a problem for my sewing machine. But how would I find the right pattern?

I had a pants pattern in my stash for menswear trousers, that I considered using on this project. It’s a solid pattern and would make a straight-fit pair of jeans, maybe not the style I was going for though. I considered buying a new pattern, but then I fretted that the pattern would fit me weirdly or might not fit at all. The current style in 2024 still featured that tapered-in waist on pants that favor an hourglass figure, not my rectangle athletic build, so should I risk it? A big reason I chose to make pants in the first place was that I was sick of shopping and trying on pants that made me feel weird about my body. The men’s section was my go-to for their up-and-down pattern cutting, compared to the extreme tapering and high waist silhouette of women’s pants. Even low rise was stuck in mid-rise inseam, not the true low waist inseam I was accustomed to in the 2000s and early 2010s that helped me find good-fitting jeans because they favored my shape not the post-bbl world of fashion. I digress, my point is that buying a pattern someone else drafted felt like a risk because the fit is such a personalized thing.

My solution was to take a pair of pants in my wardrobe that I liked the fit of and to trace that pair of pants to gauge the shape. I did this with a pair of jeans that were high waist but had a nice loose fit through the hip and leg for the K-pop-inspired baggy jeans style I was interested in making with this 1990s Vans checker board print. This worked swimmingly! So much so that I traced the jeans onto a piece of brown craft paper for a quick pattern to reach for on future projects.

I chose to record this project, start to finish in video from instead of video to have a memory of how I did this to learn for myself and remember what I did but to also inspire others to try this. Pants are intimidating, especially from a paper or PDF pattern. The written instructions and diagrams have puzzled me in past projects but truly, pants are simple once you see how its done. I wanted to help others feel that freedom to create because at least in my American fashion market, fast fashion has destroyed the craftsmanship of pants and standardized sizing. I referenced this in a previous post, Shaping Up where I had to confront the dressing room terror of things not fitting and seeking to not be defined by my jeans size, when trends and pattern cutting shape shift sizes, but to take control of it on my end and get healthier in 2023.

This pants project was one of the most challenging and rewarding projects of 2024. I faced my fear of sewing denim, inserting pockets, and fastenings. I chose to not attempt a fly into I had more pants sewing experience, instead I planned to make what I knew I could achieve under my skill set. I opted for a side closer with a drawstring to have an adjustable fit since the denim had zero stretch. The denim containing no stretch was a feature I sought because I believed it would be easier to work with as it was my first project of this kind, and I wanted a crisp tailoring from the woven fabric. A key thing to note is that the jeans I used for my template also are non-stretch denim. For an accurate this is paramount or else the project will not work. Either you will cut your project too large or too small. It is also essential to leave a seam allowance on your pattern pieces. When self-drafting it is your responsibility to take charge of the seam allowances and plan ahead.

I messed this up with the crotch line and had to make a quick fix. My fix was a diamond gusset. Popular in women’s leggings, this diamond gusset shape piece allows for greater mobility while maintaining the strength of the seams.

The second challenge I faced was the problem of a narrow bolt and an all-over pattern. This fabric was quite narrow and because I was cautious with my seam allowance, I cut my pieces large. This meant that I was not cutting from the longest side, but the most wide. The pattern pieces were cut out missing length on the leg. My solution was to add on to the bottom and pattern match. It’s easier to match than people say, it just takes patience and intentional sewing. I’m pleased with how seamlessly I got my pieces to match up.

The pockets were a challenge. How do you place them? How do you insert them with strength so the pockets can be used without pulling the pants down or ripping? I chose to place them angled on the sides, aligned with my hips so that they would be practical and not create weird bunching at the front of the pants. No wonky crotch fit here!

Would you make your own pants? I hope I inspired you to get creative and go for it if you are sewing-inclined. Thanks, reader, for joining me once again on this quest to grow my fashion design skills. Have a wonderful day!

Sewist Reacts: What In the Vintage Inspiration Is This?!

Fast fashion is a problem for many reasons. The overconsumption. The exploitation of workers. The lack of quality in construction and fabric. Polluting water sources and landfills. Ruining thrift stores with Shein products. But one I hadn’t considered was how these fast fashion brands are watering down design to the point that they are misrepresenting fashion terms like corset, choosing the wrong fabrics for construction, and not even trying to pattern match. It’s becoming nonsensical!

Fall fashion trends and fall sales are in full swing here in the US. I’m seeing ads everywhere, in between Instagram stories, in my email inbox, on YouTube, on television advertisements, etc. It’s bonkers! You would think that we had empty closets and had never owned cold-weather clothing before! Each season you need to completely restock your wardrobe! Buy, buy, buy!

So I caved and I started to look at these websites. Looked, not purchased. That is the key here because I found some wacky things masquerading as vintage and historical-inspired pieces of fashion. These fashion brands are two that are quite popular in my neck of the woods.

The Gap does Medieval Plate Armor

A brand I get a lot of ads from, which amuses me because I don’t like this brand, is the Gap. I probably see ads because I do buy occasionally from Old Navy and they are owned by the same company. If only the Gap knew how I feel about them, they would realize it is a lost cause. I think that the Gap cuts its patterns weirdly, is expensive for the quality, and is dry toast in terms of its aesthetic. So I wasn’t surprised to see a rather vanilla dress. What surprised me were the style lines of this dress and the fabric they chose.

This dress looks inspired by 16th-century plate armor, a breastplate specifically, but it is made out of what I would guess is a stretch jersey because there is no structure or fastenings in the photos. So a rigid garment, being made out of a stretch shapeless fabric, just isn’t right. There is something off about the shape of the bodice and how it hangs on the body. This is a missed opportunity. I think they could have added boning channels or made this out of a stiff woven fabric. Maybe a coordinating vest? Vests have come back in popularity. It’s a misrepresentation of the historical garment they were inspired by and as a dress historian, it bugs me. This dress is already an attempt at thinking outside the box, so why not do it properly and celebrate the design? 🙂

There is an exhibit at the Met, linked above showing a historical example of what I am talking about, featuring an exhibit of 16th-century armor with beautifully sculpted lines.

A Corset That is Not a Corset

This dress is not a corset. Maybe it is a Victoria’s Secret definition of a corset with the stretch smocking on the back, but this is not in form or function, what a corset is or was. The corset was a supportive undergarment, a foundation garment as they were called that shaped the body and supported the bust according to the specific standard of beauty at the time. The first iteration of the corset appeared in the 16th century, called a pair of bodies. This was followed by stays in the 17th and 18th centuries and the transition to the corset in the 19th century which held popularity until the 1920s when the corset began to fall out of fashion for other types of garments. This is a very quick overview and I probably oversimplified this so I would recommend checking out historical costuming YouTube for a better reference, also the V&A has an online exhibit featuring Victorian corsetry.

Because of the lack of familiarity, we have with the corset in our 21st-century mind, we tend to slap the word corset on any shape that looks like a formed bodice, which is what this is a bodice cut to accentuate the waist but will fall flat because it is not made with any structure to give the garment a shape. There is no lacing, cording, fake baleen, or steel to give this any shape beyond the body that will wear it. It is all smoke and mirrors. But that bugs me, because American Eagle, the maker of this dress, is a popular teenage and young adult brand that can shape the minds of the future by their experience with clothing!

So why not ride this wave of aesthetic TikTok dressing and go full-on corsetry? Tight lacing is not required, nor was it popular for most women historically, except for the Kim Kardashians of antiquity who did it for the spectacle, people of the past needed to move and breathe just like us so it could be a corseted bodice, and not be controversial! It’s just a thought. I do appreciate the trim on the skirt, it is very 1890s, and I like it.

This dress has the same problem, this is not a corset and this is barely a puff sleeve. This is bad marketing and bad fashion education. You could never corset an open-back dress and to puff a sleeve you need quite a lot of volume and possibly some Tarleton to help keep the sleeves voluminous. The Fashion Institute of Technology has an online exhibit featuring the Gigot sleeve, a beautifully puffed historical design.

When it comes to historical dress there are so many cool designs from the past, and with the amount of research that exists and abilities to connect through technology, there are endless ways to be inspired from the past but not screw it up. I think we should embrace the gift we have of historical dress knowledge and technology like sewing machines, the internet, etc to make something beautiful. These companies have so many resources at their disposal, that I wish they would try a bit harder to make good clothing. But alas, they are fast fashion, and this is one of the worst fast fashion blunders I have seen from these two brands, the Gap and American Eagle until I found this one pair of plaid pants, but that is another story!

Thank you, reader, for going on this adventure into historical dress with me. If you are as tired as I am of the current state of fashion, I encourage you to learn how to sew! It’s the best hack I’ve found.

Experimenting with Stitching and Basics

It’s that time of year when I am ready to wear long sleeves but the weather isn’t so convinced. This blouse is a project I made at the end of March 2024-early April 2024, that I completed and put into my closet to wear later. I was excited as soon as it began to cool off for the chance to style this piece! All summer long I’ve worn its sister piece, my denim houndstooth skirt that can also be worn as a dress that was absolutely lovely material to wear. It’s so breathable and has a bit more visual interest than the usual chambray, something I look for. This fabric is from Mood Fabrics, it looks like they no longer carry it which is a shame because I have two pieces from this cut of fabric, and I want to make more.

This piece is special to me because I did something a little different with the collar, I stitched in white the lines of a blazer lapel and lines of a jacket crossing over, for a bit of a formal feel. I originally wanted to make this fabric into a jacket but ran out of material, and I think it worked out for the best. I want to play with this stitching a bit more. It resembles a tailor’s chalk marking to me and I like that.

As the fall progresses and the temperatures continue to drop I’m looking forward to styling this piece with pants, vests, dresses, skirts, boots, scarves, etc. Styling this piece with new color combos excites me. I’ve only paired it with this brown and blue combo so far, which sparks my interest the most. I’d like to try this stitching application on trousers and dresses too with a solid fabric or maybe another pattern.

Do you like contrast stitching? Do you like clothing with a bit of whimsy like this faux blazer collar? Are you a fan of patterns? I like how different we all are and how tastes and preferences make this fashion thing, full of endless creativity. Thank you, dear reader, for stopping by. I hope we meet again soon. ❤

Peas, Sew A Button-Down Shirt With Personality

This was a special make for my husband Kyle who loves to find short-sleeve button-down shirts with fun and unusual patterns for the summer. This started early in our marriage at the thrift store where he found some nautical print button-downs. I slowly added to his collection finding a lobster print, a pina colada-themed shirt, and a shark one. Now that I sew, I approach this differently by browsing the fabric stores.

When I saw this print on Mood Fabrics’ website I knew exactly what it would be – a short sleeve button-down for Kyle. And it did not disappoint!

What I’m Wearing Summer 2024 – A Cohesive Wardrobe

I’ve been sewing my clothes for nearly four years now, which had some unexpected results. I knew I would like the clothes I made better than those off the rack once my tailoring skills caught up to my ideas and that has happened. I didn’t expect the rocky period of making things I liked that didn’t fit into my wardrobe. This has been a problem over the last two years. I think because my style was changing. I think the clothes I was buying at stores were not really me but more a trendy persona to blend in. Going into 2024, I wanted my clothes to be more cohesive.

I’ve been more intentional with what I sew and how I will wear it with the pieces already in my wardrobe. I’m also less afraid to upcycle and repurpose existing clothes I’ve bought or made into something that will work with my current clothing and accessories. This summer I’ve felt like I every piece has had a purpose in my wardrobe and everything feels like an accurate reflection of who I am. It’s been a lot of fun to mix and match pieces, even dabbling in layering garments in ways I may not have tried before. With how busy this summer has been unpacking, I’ve been less likely to reach for my accessories, which I’d like to get better at because I know that would truly bring an outfit together.

In the meantime, I think this has been a successful season of making and wearing because I reached for my pieces more than anything else in my wardrobe. It feels good to know they are getting used and can easily mix and match with other garments in my closet to get as much use out of the items I made as possible.

I started keeping track of my outfits because of my Instagram and blog, to catalog my makes and it has been a fantastic way to see what I am wearing and what I should repurpose or re-home. If you are feeling stuck in a style rut I’d highly recommend keeping a record of what you wear and how you wear them. It’s been a helpful tool to find my personal style.

Designing clothing has been a journey of learning how outfits come together within an existing wardrobe. That is my biggest takeaway from the last four years and what I’m excited to apply to my future creations as a designer and maker.

Potato Technology’s Version of a Vintage Shirtwaist Dress

You will recognize this fabric if you’ve been here since I shared my Spring/Summer 2023 collection. I originally purchased it for a Christmas present project as part of my Autumn/Winter 2022 Collection for a pair of pants. I happened to not share it on the site. With the extra yardage, I made a blouse and a matching skirt I styled in 2023 as separates and a set.

This got me thinking, should I just make it a dress? So I did, I sewed the two together with mixed results. I liked the dramatic drape of the shoulders in contrast with the defined waist but the fabric is thin and I knew I wouldn’t wear it as a long sleeve garment. So I chopped the sleeves to a flutter sleeve option.

This felt even worse when I wore it as a short-sleeved dress. The dress was constructed well, the fabric of good quality, and the color scheme flattering but I did not reach for it. The sleeves made me feel weird and wide instead of cute. I didn’t feel like me. Have you ever experienced that with a garment or a project you have made? There’s nothing technically wrong with what you made or what you tried on, but it feels off. This left me with one more option. No sleeves.

So I chopped the sleeves entirely and that’s when I felt like I struck gold! It looks like a dress my Grandma used to wear. Shirtwaist dresses were her staple dress and I see why. They are versatile and practical. I can dress this up or down. I can layer over or under for different looks. It’s a dress I know I’ll be making again with a proper button placket and pockets for sure.

Create a website or blog at WordPress.com

Up ↑