Hot Air Balloon Knit Hat

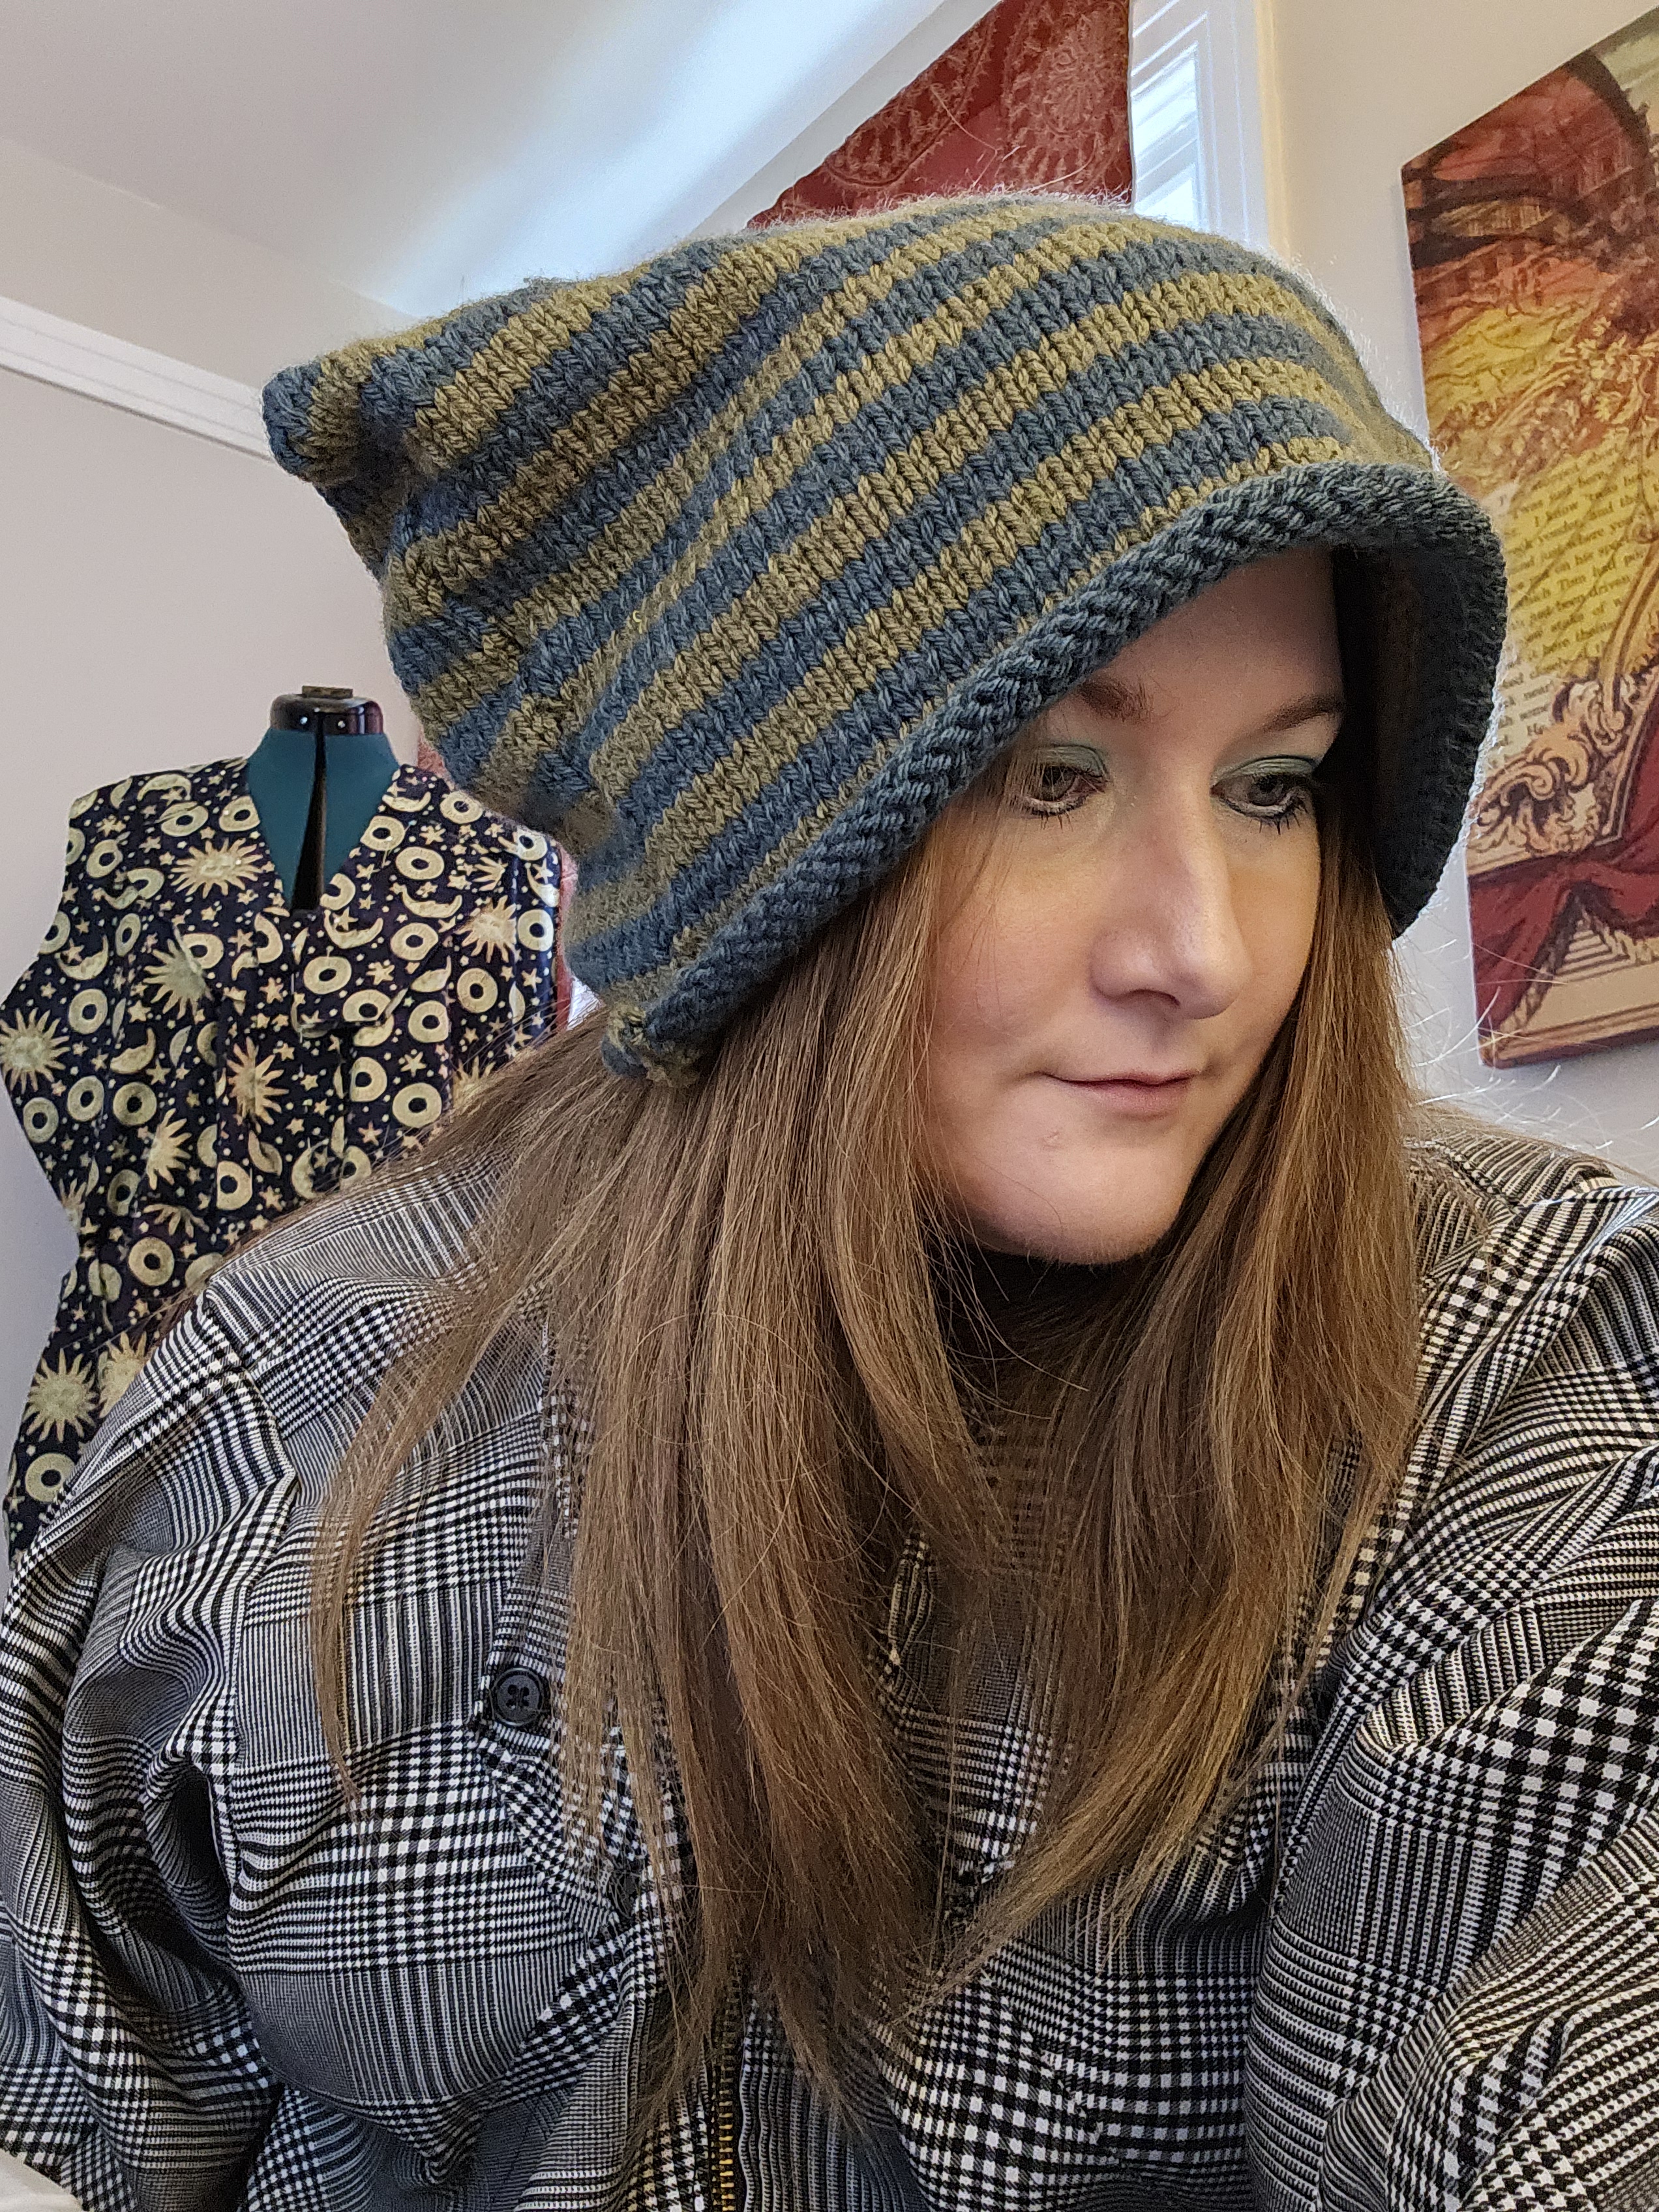
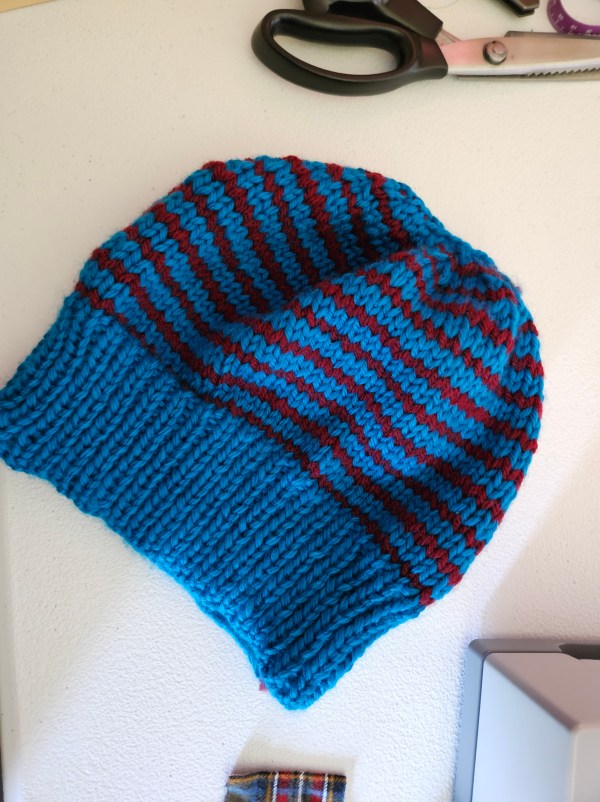
Do you ever pick up a knit object and the fiber feels buttery soft? That’s exactly how this cerulean blue yarn feels to the touch. It is a bulky weight yarn blend of super wash Australian wool and acrylic fibers. It’s a yarn that I believe has been discontinued by Knit Picks but I hope they bring it back because no project has been a joy to knit up like this one. It glided across my needles! It’s one of the reasons I chose to knit this fiber into a hat that would be soft and warm on my head. It’s cozy. Another reason was because this skein of yarn was a destash from my mom, there was only one skein so I decided to make it the focus of one small project.

I’m not very good at using one solid color throughout my projects so I paired this was a Brava bulky in red also from Knit Picks to add visual interest to the hat. I think it looks like a hot air balloon from an illustrated book. An imagination filled tale, like how the heffalumps and woosels turn into hot air balloons during Winnie the Pooh’s trippy dream during the flood. I love how bright the contrast is between the delicate red lines and the vivid water-like blue. It has a bit of the Apres-ski vibe with the vivid color story of the late 80s and early 90s.

I made this knit hat on size 10 bamboo straight needles in two pieces that I seamed together. I made the decision to construct this hat using two pieces because I had not made a hat in over a year and felt a bit rusty. I also wanted control of the taper of the crown, without needing to also refamiliarize myself with circulars or double-pointed needles. I made this hat in August 2024 and I was coming off the big move into the storage unit for two weeks and then into the new house. To be honest, I was feeling a bit creatively stir crazy from the busy summer. I’ve learned a lot since I made this from my dabbling with sock knitting and could confidently make this now with a different construction, but as a quick beginner project or knitting warm up when you’re feeling rusty it’s an easy to make project. I believe I made this over one weekend, potentially one day? I can’t remember how focused I was.

You will need a tape measure or a knit hat that fits you the way you would like your hat to fit for reference. Cast on stitches according to your head size for one half of your head. Knit ribbed stitches for 3 inches and then switch to stockinette for the rest of the hat. Switch yarn at the end of rows and don’t decrease too quickly. I’ve made this mistake before. You will need the width across your crown to join at the top and you can decrease quickly at the end so be filled with care as you taper and don’t hesitate to frog and try again for the right fit. Adding a safety line where you plan to unravel your project to, is a huge life saver! Mirror your second side and stitch the two halves together with a tapestry needle. An easy knitting project that is useful and can help you practice skills like purling, ribbing, yarn over decreases, crown shaping, and yarn tension.

Blueberry Speckle Sweater

In my post about summer knitting plans, I featured a lovely blueberry speckle cotton yarn. I expressed interest in making this yarn into a t-shirt. Initially, my goal was to knit a long-sleeved tee but as time went on and I started getting into knitting podcasts, I realized that knit t-shirts are truly adorable – and versatile! I pivoted and I am absolutely thrilled with the result!

This was my first time making knitwear for the summer and it unlocked a whole new world of design possibilities. For this project, I self-drafted my pattern, which consisted of four pieces. Two body pieces with a shaped neckline and two sleeves that were all sewn together afterward. I used size 6 US needles and used 7ish out of 10 skeins of 108 yards. A grand total of 756ish yards were needed to complete this project.

2000s Style Off-The-Shoulder Sweater and Tutorial

In middle school, I had a black off-the-shoulder sweater with a wide fold-over collar and a coordinating skirt in gray and black stripe. It was the first skirt outfit I tried wearing over pants, a trend that has come back in popularity over the past few years along with the 2000s style. All of this has made me nostalgic for my old sweater, but not interested in buying one like it because I don’t love the new take on 2000s fashion with our current-day fabrics and fast fashion construction. It’s just all off-kilter from the original subject material.

So, I had an idea. What if I tried making one with the yarn in my stash? I had several skeins of this navy tweed from Big Twist that I didn’t buy with a specific purpose, and it took up space. It seemed like a fun color I could coordinate like I did with the Houndstooth Denim dress worn as a maxi skirt. It was an ambitious make.

I’ve only been making sweaters for a few years and had no experience designing a pattern with no collar or shoulder seams. There was a lot to think about. How could I incorporate the big fold-over collar? How do you add sleeves with the new style lines? How do you keep it on the shoulder enough so it doesn’t fall down? As with most of my makes, I dove head first into the project ready to fail if that meant I learned something!

The first obstacle I found was not having enough yarn, shocking right? I was surprised I had multiple skeins of this blue, but it wasn’t enough to get the longer length, so I had a choice to buy more or get creative in this stashbusting project? I decided using what I had was more important than keeping the original vision so I chose this gray yarn I also had in my stash from the Bunny Hat project. It brought an interesting contrast to the tweed and I actually loved the color blocking once it was done.

The arm holes were such a challenge. As I was knitting this piece top down, I first knit the ribbed collar and then reduced down for the body section, leaving enough of the collar on the edge to insert an armhole after I was done with both the front and then back. All was seamed together and for a first try, I’d say it was a success. The geometry definitely worked. I had a free range of motion. It was a win!

What was not a win was my over-calculation when it came to fit. I forgot to accommodate the size needle I was using, a US size 8, which knits up with a larger gauge. I had been using US size 7 more recently and I sized like I would have for this gauge. My second mistake was not accounting for the stretchiness of this yarn. It is an acrylic and nylon blend that gets roomy with wear leading to a sweater that simply didn’t fit.

After the move, several months after this project was done, I tried this on again and realized that I had toned up more than I thought carrying all those boxes because the sweater slips right off my shoulders and off my hips too. It’s a total size failure! Now I’m not sure what to do with it. I’ve already taken in the collar back in April, I don’t think I can take it in again and it is constructed well so frogging this project is not going to be easy. It’s a shame because I think I had a good design here.

I think my only option is to potentially re-home it and make another one following the tutorial that I shared on Instagram which was my first time doing that. I felt such imposter syndrome! To my surprise, it was met positively even though it was not created for circular needles. It showed me that sharing my craft and creating tutorials is becoming a calling, free tutorials, and free knitting and sewing tips because I just want people to do this too.

Stashbusting in 2024: Color Palette Knitting

A goal I have in 2024, is to go through my yarn stash and use what I have to create unexpected pieces. A lot of my yarn has been sitting on my yarn shelf for a year so I decided to try a new approach to my design process – to create a garment from a color palette. I chose these five yarns to make a striped and joyful sweater that encapsulates the coolness of a winter landscape, yet the minty green hints at the spring yet to come.

This project was a journey! I didn’t quite know where it was going to end up. At first, my plan was to make a striped cardigan, but I worried about the sleeves. I thought the stripes would be too busy if carried on to the arms. I also had fears of playing yarn chicken. So I pivoted to an unusual piece because of how cool the bodice looked over a t-shirt. In the climate I live in there is no reason to wear an acrylic yarn vest over a t-shirt, but I couldn’t get the image of that out of my mind, so I made a “t-shirt” looking sleeve with the light gray yarn. For length and a bit of vintage flair, I added a peplum that took this piece to a place of whimsy that brings me joy.

When I look at this piece, I smile. When I wear this piece, I am filled with joy and sunshine. It is the first piece of knitwear I have designed that I think would show wonderfully on the runway and that is freaking cool! Lastly, I added a navy blue collar to the neck opening and gathered the neckline slightly so that it sat on my shoulders properly. The peplum was knit in two pieces where I continued the pattern and knit the sections wider than I needed to pleat it. Now that I’ve blocked the piece in the dryer it floats over the body and looks so effortlessly.

A new technique I used for this sweater was to knit one side at a time. I knit I believe 60 stitches across and began my striping pattern, switching colors after three rows. Next, I bound off stitches at my desired armhole position and carried on to the neckline where I again bound off stitches which made the shoulder more narrow than the rest of the garment. I then continued to knit down the back of the piece, mirroring the neckline by casting on a new row. I continued on to the armhole where I again, cast on more stitches and then followed the piece down to match the length of the front.

I did this a second time on the other side, mirroring the original. It is important to make sure you are mirroring so that the two pieces will match up knit side + knit side or else one side will be inside out – which is easier to do than you think! I ruined a previous project by doing that and had no choice but to rip it out. That’s okay! It’s all a part of the learning process!

If you’re a knitter or crocheter, I hope this project inspires you to get creative with your stash and make something out of the box. Or if you’re an artist, a maker, or just a human reading this, get creative with what you have! It is a fun journey. Thanks for taking time with me today! I hope you know that you are worthy, you are loved, and you are special to me. Until next time ❤

Create a website or blog at WordPress.com

Up ↑