Knit Star Keychain Pattern

Back in the spring, I had this grand idea that I would learn how to crochet. I had a friend who crocheted next door, I had recently found TL Yarn Crafts on YouTube. Toni made it look so fun. I was enamored by what I saw others creating with crochet hooks. Crochet rose in mainstream popularity again through 2020 and beyond in 2024.

My Impression of Crochet

The internet is chock full of crochet plushies, dresses, sweaters, bags – you name it you can crochet it. I didn’t see this kind of creativity from my corner of the knitting internet. I had this impression that knitters were serious and crocheters were mavericks. So the hook was calling to me.

I bought a crochet hook and spent a few weeks watching videos, perusing a book my neighbor lent me, and getting the hook into some loops. It’s a weird transition from knitting. I apparatus from two is a change. There is a posture, one hand, and yarn holding. There is a new way to keep yarn tension, and there are a lot of new stitches. There was more emphasis on turning your work than the orientation of the wrong side and right side. Single crochet and double crochet were not a one-for-one of knit and purl. That surprised me.

Granny squares were a bit more involved than I expected. It’s an art form that deserves respect. I definitely respect it. It kept me back, I had the tightest tension and felt like I had never done yarn crafting before. I was shocked, shouldn’t this be a piece of cake? I’ve been knitting off and on since 2012. Yeah, it’s not that simple.

Fluff Around and Find Out

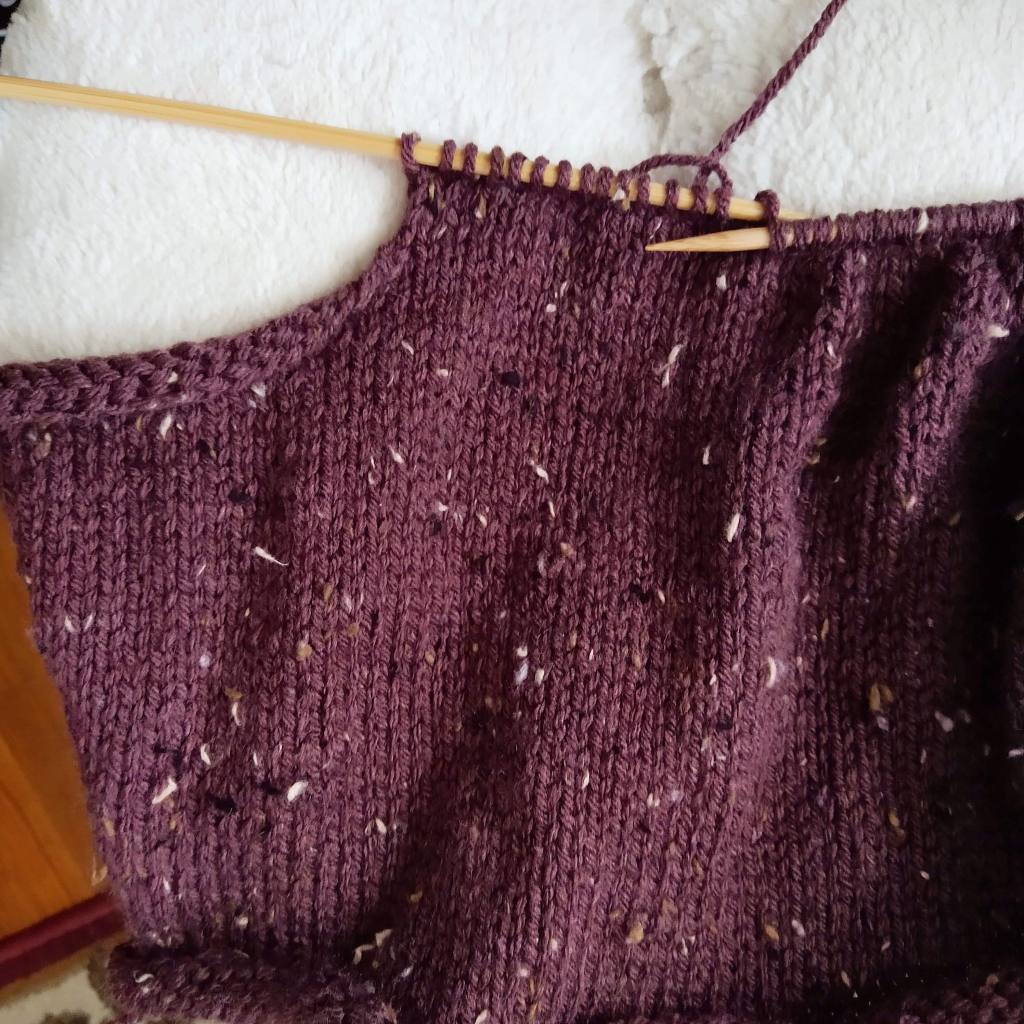
To be honest, the way that I learn best is to just go for it, and doing these basic crochet stitches on a project that was a rectangle, all while it looked like a tattered mess was discouraging. I wanted to make one of the little plushies or shapes that seemed to be a sculpture that only crochet could create. But I was seriously not getting it. So I paused and thought about it. Is there any way to apply this creative point of you, the sculpting of yarn that only crochet can, but try it with knitting needles?

This might seem weird to consider if you don’t knit or crochet but the processes seem vastly different to me. There’s a strategy to knitting. You have to do things in stages, like knitting a section and transferring stitches to a stitch minder or picking up stitches that were bound off or are just part of a knit edge. While crocheting builds on itself and is an amorphous thing that is truly sculpting and adding as you go.

So I decided, what if I made something with the sculpting element of crochet but with knitting steps. I decided on a star as you can see above that was crafted out of multiple knit sections that were stitched together. This pattern has a lot of little steps but I think it was effective.

Star Knitting Pattern

Star Point Diamond – Row 1: Cast on, Knit 1, Row 2: Purl 1, Add Stitch, Row 3: Knit 2, Add Stitch, Row 4: Purl 3, Add Stitch, Row 5: Knit 4, Add Stitch, Row 6: Purl 5, Row 7: Knit 4, Decrease 1, Row 8: Purl 3, Decrease 1, Row 9: Knit 2, Decrease 1, Row 10: Purl 1, Decrease 1, Row 11: Knit 1 and Bind Off.

Repeat four times until five are made. Then using a tapestry needle, join the five points together at the center so that you have the base for a star, then join the sides of the diamonds together so that you have a flat star. Repeat the whole process one more time so that you have two flat stars and then sew them together with the tapestry needle.

So now that you have a star what can you do with it? I had planned originally to make a star garland for Christmas, but then the Fire Nation attacked and I had to move.

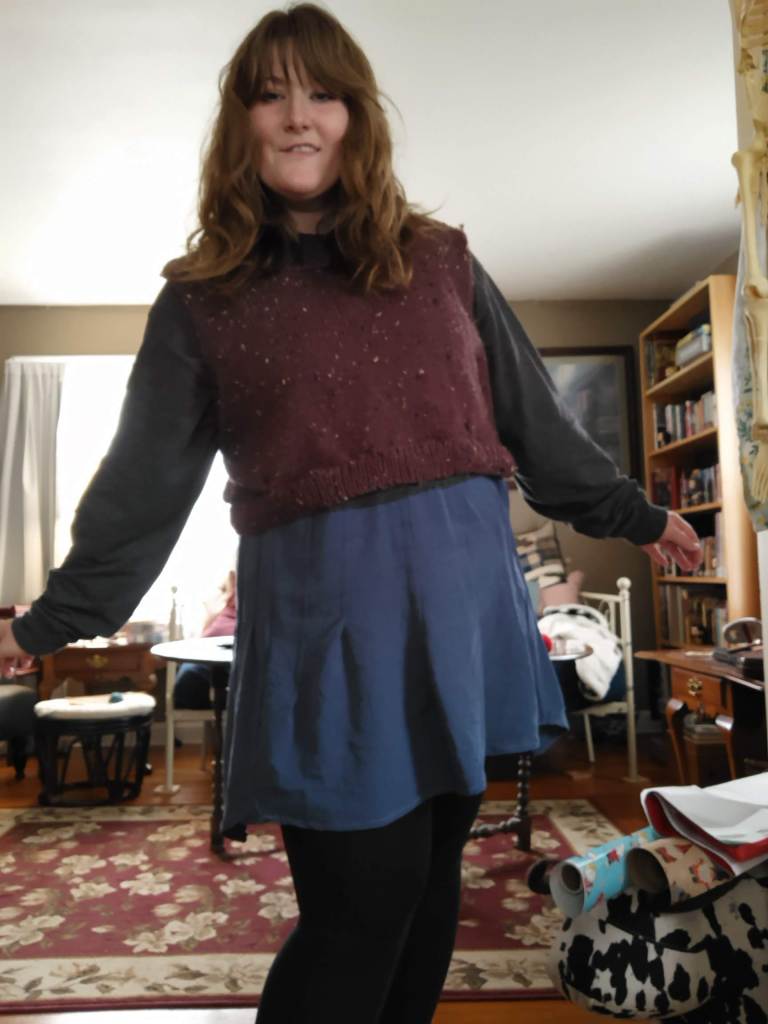
So we pivot to the bag decoration trend of 2024. This is a combination I’d say of Kpop, Xiaohongshu style trends, and the Japanese Ita bag becoming popular in the West. If you would like to learn more about Ita bags, I would highly recommend Addy’s video on YouTube. And these little stars in the original green and its pink starfish cousin have made excellent DIY plushie keychains.

Finished Product Used as a Keychain

Final Thoughts

I think creativity is about experimentation and learning as you go. I think sometimes it is important to do it the normal way and other times it is more satisfying to try a new method, a new medium, and make something you may not have thought you could. I still have incredible respect for crochet and I also think knitting has more potential than I thought. I have also learned that if a key chain or other small trinkets are not specifically branded I should try making them before I buy. It’s a great way to use up materials in my stash, level up my skills, and keep my consumption down and my wallet happier.

Landscape Painting with Yarn

This year I’ve been looking for ways to use my stash as completely as possible and use up what I have to make new fibers and new projects. One way I accomplished this was through color palette knitting and through the stripe hype sweater. But another project idea I had this summer was to try minimal colorwork knitting by “painting” with yarn through a mix of new cotton yarn I purchased and yarn extras my mom passed onto me. This helped stretch the teal cotton yarn I bought, underestimating how much I needed to make a t-shirt. It was an opportunity to make a “graphic print” t-shirt out of yarn, something I didn’t have in my wardrobe, but sounded like a fun piece to wear.

These are the yarns I decided to use for the landscape painting section of the garment. Cotton yarn that was originally purchased by my mom to create handknit dishcloths in a color selection of blue, green, and pooling gray-to-white-to-blue, a lime green cotton-bamboo yarn, and the teal cotton I purchased. The pooling yarn was perfect for the clouds. Each side of the garment is unique because of this pooling yarn like a real sky. The plain blue was used for water, the dark green for a marshy grown-up bank, and the lime green for sunkissed meadows of grass. The teal was used for a distant tree line that was framed by the clouds.

I opted to make this oversized with a short sleeve opening, somewhere between a vest and a t-shirt because I haven’t decided how I want to wear this. As a t-shirt of course but do I want this to be a layering piece in the cooler months of the year? Or do I want to make detachable sleeves? That is something I am still milling over in my mind. I did split the back of the piece in a moment of indecision, where I thought it would be cute to make it a short-sleeved button cardigan. I may do this in the future. I opted to keep the t-shirt structure for simplicity and the ability to wear it more quickly. I was impatient to wear it.

I love projects that utilize things I already own and use techniques I haven’t tried before. Since this project I’ve begun to learn proper colorwork knitting, it’s been fun. Thank goodness for YouTube and knitting books to make the complicated things, like learning how to switch colors, feel approachable!

How have you been expressing your creativity this week? Do you like getting crafty? Are you a knitter and have you tried colorwork knitting before?

The Candle Light Cardigan

Fall knitting is here! I’ve been working on this cardigan, off and on, amid a myriad of projects since July. As the days have passed, and a slightly cooler air awakens, I am thrilled to say this piece is ready to wear! I used to struggle to finish sweater projects and I would wander along with my yarn, for three or four months, dilly-dallying on a section because I was bored. This led to a lot of plans and not a lot of garments. This is in the past though. 2024 has been the year of sweaters for me, this being my seventh finished sweater this year! And its only September so I’m excited to see what else I can do in the last quarter of the year.

Do you remember what episode of Gilmore Girls this audio clip is from?

This Comfy Cotton Blend yarn from Lion Brand is a 1 to 1 ratio of polyester and cotton and the tag labels this color blend as chai latte. As I knit it, I saw it more as a banana split blizzard color and now in the spooky cloudy light of fall, I see it as candle light with highlights and shadows. Hence the name, the Candle Light Cardigan. I opted for now to keep this as an open cardigan without a button placket. Not out of laziness, but out of my intention to wear it. This was a cardigan I made specifically for the changing seasons, as a piece I could layer over my summer dresses and tops to get a little more wear out of them on these days when it is both cool and warm as the day progresses. I have two more yarn cakes of this color way which I can use to add a button placket at a later time if I change my mind.

I received this yarn as a gift from my mom as she was de-stashing it. It has been a lovely weight to knit and I like how soft it is. My only notes for Lion Brand would be to work on the splitting. This yarn split often as I was knitting which caught on my needles and led to messy stitches. Either because my needle held on to the stitch below or the yarn split and left some of the stitch behind. It was frustrating at times but not impossible to work with. The fabric it made has a good breathability and warmth to it which I was looking for in a changing seasons layering piece. This is a self drafted pattern that I knit on US 7 straight needles.

Happy Fall everyone one! (And Happy Spring to the southern hemisphere!)

I Made the Stripe Hype Sweater

This is a weird knitting project for me because I usually can’t follow a pattern, at least it has been a few years since I tried to make anything with a pattern, and that was Butterick Retro ’44 #6374 and Butterick Retro ’44 #6485. They didn’t go super well.

This is the only picture I saved from #6485 because it was so bad. It felt like a weird Star Wars dress. But I digress, with knitting, I would like to rectify my aversion to patterns to learn new skills and appreciate the creativity, celebrate even, the creativity and talent of my fellow knitwear designers. So I was inspired by Making Cassie’s Stripe Hype Sweater knitting project and through my move, I decided to use up leftover yarn in my stash to make a sweater someone else designed. It was one of the most rewarding knits I’ve made all year!

Who Designed the Stripe Hype Sweater?

The original Stripe Hype sweater and sweater pattern was designed by Veronika Lindberg and the pattern was published on Ravelry in 2023. Now I didn’t realize there was an actual Ravelry pattern, I just gave it a go off of other people’s versions of the Stripe Hype Sweater on Instagram and YouTube, like playing a song by ear. Whoops! Sorry, Veronika! But here is the link to her pattern.

My Take on the Stripe Hype Sweater

This is one of my favorite sweaters I’ve made because it challenged me to do things I wouldn’t gravitate towards like using white on a sweater. After all, I’m pale and I’m clumsy so stains. But dang it’s a fun background for the colors of this sweater. It taught me how to balance color, to mix colors with more abandon, and to bring balance and order to my pieces. This is also a make that grew my skills as it was the first project where I tried casting back onto sections – such as the ribbed collar and the sleeves.

It was a rewarding experience and reminded me that even though I like designing my own pieces there is always something new I can learn from using a pattern and although I can find it tedious, it puts limits on my creative energy to channel it into a direction I may not have gone if not for the guidance of the pattern. Always have a teachable spirit, my grandma would say, and yeah she’s definitely right about it when it comes to knitting!

Have you heard of the Stripe Hype Sweater? Would you wear or make something like this design? What colors would you choose? Until next time, thanks for being here, dear reader. I hope you have a lovely day!

2000s Style Off-The-Shoulder Sweater and Tutorial

In middle school, I had a black off-the-shoulder sweater with a wide fold-over collar and a coordinating skirt in gray and black stripe. It was the first skirt outfit I tried wearing over pants, a trend that has come back in popularity over the past few years along with the 2000s style. All of this has made me nostalgic for my old sweater, but not interested in buying one like it because I don’t love the new take on 2000s fashion with our current-day fabrics and fast fashion construction. It’s just all off-kilter from the original subject material.

So, I had an idea. What if I tried making one with the yarn in my stash? I had several skeins of this navy tweed from Big Twist that I didn’t buy with a specific purpose, and it took up space. It seemed like a fun color I could coordinate like I did with the Houndstooth Denim dress worn as a maxi skirt. It was an ambitious make.

I’ve only been making sweaters for a few years and had no experience designing a pattern with no collar or shoulder seams. There was a lot to think about. How could I incorporate the big fold-over collar? How do you add sleeves with the new style lines? How do you keep it on the shoulder enough so it doesn’t fall down? As with most of my makes, I dove head first into the project ready to fail if that meant I learned something!

The first obstacle I found was not having enough yarn, shocking right? I was surprised I had multiple skeins of this blue, but it wasn’t enough to get the longer length, so I had a choice to buy more or get creative in this stashbusting project? I decided using what I had was more important than keeping the original vision so I chose this gray yarn I also had in my stash from the Bunny Hat project. It brought an interesting contrast to the tweed and I actually loved the color blocking once it was done.

The arm holes were such a challenge. As I was knitting this piece top down, I first knit the ribbed collar and then reduced down for the body section, leaving enough of the collar on the edge to insert an armhole after I was done with both the front and then back. All was seamed together and for a first try, I’d say it was a success. The geometry definitely worked. I had a free range of motion. It was a win!

What was not a win was my over-calculation when it came to fit. I forgot to accommodate the size needle I was using, a US size 8, which knits up with a larger gauge. I had been using US size 7 more recently and I sized like I would have for this gauge. My second mistake was not accounting for the stretchiness of this yarn. It is an acrylic and nylon blend that gets roomy with wear leading to a sweater that simply didn’t fit.

After the move, several months after this project was done, I tried this on again and realized that I had toned up more than I thought carrying all those boxes because the sweater slips right off my shoulders and off my hips too. It’s a total size failure! Now I’m not sure what to do with it. I’ve already taken in the collar back in April, I don’t think I can take it in again and it is constructed well so frogging this project is not going to be easy. It’s a shame because I think I had a good design here.

I think my only option is to potentially re-home it and make another one following the tutorial that I shared on Instagram which was my first time doing that. I felt such imposter syndrome! To my surprise, it was met positively even though it was not created for circular needles. It showed me that sharing my craft and creating tutorials is becoming a calling, free tutorials, and free knitting and sewing tips because I just want people to do this too.

Summer Knitting Plans

Going into June, after being in a yarn stash busting low-buy for the first half of 2024, I knew I wanted to break away from the acrylic in my stash and go for something lighter. In preparation, I watched a summer yarn review from NE Knits (I recommend her channel) to get a lay of the land for these lighter yarn and the best projects in her opinion to make with them.

Now if you look at my summer pickups below, they don’t really match what I thought I would buy based on her review. I gleaned a ton of fiber knowledge from her video that I plan to apply to future purchases (and one I already did from Knit Picks) to try silk, linen, and bamboo yarn.

As far as what I am actually working on this summer, these were capricious finds from the sale and clearance bins, as well as one destashed lot from my mom. Going into these purchases, I knew what to expect from some because of NE Knits review which helped me lower my expectations of one brand that has led to me being pleasantly surprised. It also helped me get in a good mindset for shopping so that I browsed with intention instead of reckless abandon. Let’s get into it!

Big Twist Cotton in Blueberry Speckle

Based on the online reviews, Big Twist Cotton is not a fan favorite, which is probably why these balls of cotton yarn were marked down to $0.97/107 yard skeins. This blend of 85% cotton and 15% polyester in composition is delightfully soft and easy to knit up. I instantly felt in love with the dye work on this yarn. It looks like blueberry ice cream! There were 10 balls of yarn left at my local store so I gathered the lot in hopes of making a long sleeve knit tee. The label calls for 11 balls to make a sweater so I hope it pans out because this project is stitching together so well! The fabric it makes feels cozy, breathable and like a garment I will enjoy wearing in multiple seasons.

I’m currently 6 skeins into the project, wrapping up the back panel. I’m about to split for the neck and shoulder pieces. Next I’ll split the remaining 4 balls of yarn between two sleeves and sew up. I’m knitting on size 6 needles.

Lion Brand Comfy Cotton Blend in Chai Latte

This set of yarn was an unexpected plan, but was graciously given to me by mom from her de-stashing project we worked on over the fourth of July weekend. It is a yarn that I was familiar with but as a knitting novice, I didn’t understand how to use at the time. It has a blend of colors that somewhat stripe and somewhat cluster throughout the stitches to make a knit fabric that resembles a meadow or hillside dotted in flowers.

Instead of calling this color way “chai latte” I prefer ‘seashell’ for its subtle variations of creams, a soft peach, and a purple-gray that is reminiscent of the variety of seashell colors you find washed up on the sand. I get distracted as I knit, looking at how the colors deposit across the rows. It’s a beautiful play on highlight and shadows.

I am currently knitting a cardigan, unless I change my mind to a sleeveless sweater dress, time will tell. I enjoy the weight of the yarn, the only thing I don’t enjoy is how the strands split whilst knitting them. It’s caused me to drop stitches and have some messy yarn work. In spite of that it is comfy, cozy, and a lovely yarn to behold. I have 5 balls of 392 yards that is a wonderful amount of yarn to be gifted. I’m knitting on size 7 needles.

Big Twist Cotton in Sea Glass

This yarn is vibrant and exciting – I can’t wait to get started on this project. It was on the same sale as Blueberry Speckle and is the same composition and yardage. I bought 12 balls of yarn for 1274 yards in total. I am planning to make a garment, probably a knit shirt because I’d like to knit more basics. If not a shirt a very short sleeveless sweater dress. This colorway combines my favorite shades and looks like salt water taffy. It was a win-win of a find!

This kind of blend I have been wanting to try again since I bought a blend like this as my first knitting project after a 5 year knitting hiatus. I ended up leaving the project as a UFO (unfinished object) and I regret that decision. I’m excited to see what comes of this multi-color blend and how I will style it once its done. I plan to knit my garment on size 6 needles.

Loops & Threads Everyday Cotton Yarn in Peacock

This was my first yarn purchase of the summer, a pick up during a big week, the week of our closing and this was definitely a stress purchase. I was wanting a new project to distract myself with and I’d say I got what I paid for. This yarn is not my favorite. It dyed the ends of my bamboo needles. I have actually taken my first project off the needles and put it back in my stash because I was so frustrated.

This was on sale for $1.99 per 120 yard skein and I bought 8 balls. I’m not certain what I’m going to make with it because of the dye transfer issue. I had originally thought of a knit top. I’ve also brainstormed a skirt, a bag, and wash clothes, but again the dye transfer. Will it stop after the first wash? I’ll have to try and find out.

Overall, I was dissatisfied with my experience with Michael’s this time. They did not give me the remnant price for the end of the bolt I purchased and their yarn seems subpar to Joann Fabrics and Walmart. It was also more expensive for both yarn and fabric with the fabric being but not fantastic. I think I’ll stick to Michael’s art supplies next time.

Eddie Bauer Cotton Adventurer in Blue Bird

This delicate yarn was an unexpected sale find with a yarn weight more like a fingering yarn for socks. It was an exciting and affordable way to plan a delicate project while seeing the yarn in person. I love this shade of blue and think a cardigan would be a great piece to make from this yarn. It’s lightweight and natural fiber should allow this finished garment to used almost 12 months a year. It seems gimmicky when I see clothing brands put out a yarn collection, but these skeins of “adventurer cotton” felt like good quality that I would purchase without the fancy label.

I haven’t worked with this yarn yet but plan to knit this with size 5 needles or possibly smaller if needed. I don’t want an open weave. I bought 6 skeins with 344 yards per ball in fingering weight yarn. If I like this yarn I think fingering weight will be a permanent fixture in my stash because I have plans to learn sock making.

Final Thoughts

Now, this can’t be a complete review because I haven’t worked with all the yarns I purchased yet, but I do have some takeaways from this experience. I highly recommend watching yarn reviews. Not because you have to take their word as law, but it was great inspiration. It helped me go into this season of knitting with ideas of what I wanted to look at. I went into the yarn store with a plan and took the time to read fiber content, examine the yarn weight and needle size, and to be particular about what I was buying.

My original plan without the clearance finds, was to buy Coboo instead of Truboo based on NE Knits suggestion of how the yarn knitted up. I took the time to look at each version and decided that Truboo also seemed like a better yarn for my needs. If it had been on sale I would have purchased but the price compared to some of the other finds did not make sense at the time.

I bought a yarn that was not reviewed well by customers because of the under $1 price per skein and because I wanted more time to practice with cotton yarn. That made sense to me before I splurge on a Coboo, a Truboo, and eventually a mulberry silk or linen for summer. More experience was my tipping point. So far I haven’t found the Big Twist Cotton to split like the reviews said, I hope this stays true for the rest of my projects.

This was the most organized I’ve been for a knitting shopping trip and a knitting season of project planning. I liked having a plan for each project, as silly as that sounds because I don’t believe I over bought which is important to me since the storage in my new studio is tricky at the moment. I don’t want to be overrun with materials. If you are a knitter or crocheter I hope this mini-review is helpful for your future projects, or that you just enjoyed the yarn content. If you are not a yarn junkie I hope this was still fun, I appreciate you being here and taking the time to read my blog. Have a wonderful day ❤

Stashbusting in 2024: Color Palette Knitting

A goal I have in 2024, is to go through my yarn stash and use what I have to create unexpected pieces. A lot of my yarn has been sitting on my yarn shelf for a year so I decided to try a new approach to my design process – to create a garment from a color palette. I chose these five yarns to make a striped and joyful sweater that encapsulates the coolness of a winter landscape, yet the minty green hints at the spring yet to come.

This project was a journey! I didn’t quite know where it was going to end up. At first, my plan was to make a striped cardigan, but I worried about the sleeves. I thought the stripes would be too busy if carried on to the arms. I also had fears of playing yarn chicken. So I pivoted to an unusual piece because of how cool the bodice looked over a t-shirt. In the climate I live in there is no reason to wear an acrylic yarn vest over a t-shirt, but I couldn’t get the image of that out of my mind, so I made a “t-shirt” looking sleeve with the light gray yarn. For length and a bit of vintage flair, I added a peplum that took this piece to a place of whimsy that brings me joy.

When I look at this piece, I smile. When I wear this piece, I am filled with joy and sunshine. It is the first piece of knitwear I have designed that I think would show wonderfully on the runway and that is freaking cool! Lastly, I added a navy blue collar to the neck opening and gathered the neckline slightly so that it sat on my shoulders properly. The peplum was knit in two pieces where I continued the pattern and knit the sections wider than I needed to pleat it. Now that I’ve blocked the piece in the dryer it floats over the body and looks so effortlessly.

A new technique I used for this sweater was to knit one side at a time. I knit I believe 60 stitches across and began my striping pattern, switching colors after three rows. Next, I bound off stitches at my desired armhole position and carried on to the neckline where I again bound off stitches which made the shoulder more narrow than the rest of the garment. I then continued to knit down the back of the piece, mirroring the neckline by casting on a new row. I continued on to the armhole where I again, cast on more stitches and then followed the piece down to match the length of the front.

I did this a second time on the other side, mirroring the original. It is important to make sure you are mirroring so that the two pieces will match up knit side + knit side or else one side will be inside out – which is easier to do than you think! I ruined a previous project by doing that and had no choice but to rip it out. That’s okay! It’s all a part of the learning process!

If you’re a knitter or crocheter, I hope this project inspires you to get creative with your stash and make something out of the box. Or if you’re an artist, a maker, or just a human reading this, get creative with what you have! It is a fun journey. Thanks for taking time with me today! I hope you know that you are worthy, you are loved, and you are special to me. Until next time ❤

Knitwear Designer

To start the path of becoming a knitwear designer, I first had to quit knitting, totally walking away from it to understand that it was something I was passionate enough to keep growing, pursue, and be willing to fail at to create something beautiful. Sometimes personal growth requires surrendering your plan to find the plan you were called to follow.

These pieces were made two years apart and yet I think they fit seamlessly together even though they were not planned. None of my knitting pieces from 2023 onward were planned because I decided to quit knitting in 2021 and was feeling pretty lost and frustrated in 2022. Knitting became a place of competition with my mom, a comparison with more advanced knitters, and a direct competitor to my sewing process.

It took a while for me to see this skill as an art form instead of a distraction. An extension of fashion design, storytelling, and fiber art. These forms are symbiotic, yet the way I was approaching it created struggle in my mind and it wasn’t until I made peace with the process that I could see how this was a way to continue self-expression and design.

It took being willing to approach knitting the way I feel comfortable instead of the way others feel comfortable, like knitting on straight needles, and taking the scenic route in my knitting technique to learn and improve. I had to accept that my pieces were going to look different because my approach was different than how I was being taught. Because of my background in art and sewing, I think about garment creation as I would in sewing. Knitting is the opposite, instead of cutting shapes out of a whole, you are making the whole shape out of nothing, it’s a brain teaser. It was at least until I took time to think about it.

After I completed the scarf, I put my needles away, donated my excess yarn stash, and walked away. For a year, I didn’t want to knit. I wasn’t inspired, I wasn’t interested. But at that time, I was designing with fabric. I was tailoring and learning how to read patterns. That’s when it clicked. All of it clicked.

It wasn’t that I couldn’t figure out knitting, I needed a better approach! My brain needed time to process the knowledge that I was learning from sewing and knitting. My mind was figuring out what kind of story it wanted to tell. Making a collection in 2022 for my family and friends got the ball rolling in my mind. I realized it wouldn’t be that difficult to be a successful knitter, I just needed to be a knitwear designer and go that extra step to create my own pattern and my own plan. Knitting hadn’t clicked before because I was trying to be like other knitters, instead of experimenting and finding my own style.

Just like personal style, creative writing, and art, you have to find your thing! The process may not feel like progress and that is where falling in love with the process is such an important piece of the puzzle. I have a passion for designing clothing, I’ve had it my whole life, but I was divorcing clothing from knitwear because I was not pushing myself to make clothing. Once I got serious and dove into making an actual garment it transformed my perspective. They are the same just different approaches. One does not need to be a distraction from the other, they can work in sync. That’s when the light bulb went off in my mind – so can accessories. Layers are little things that make a piece pop. If I am going to go all in for design, then a symbiotic relationship between what I design with thread and what I design with yarn must play off of each other. This is how I realized being a knitwear designer was as much a part of me as being a fashion designer, a sewist, an artist, and a writer.

Tweed Yarn Sweater Vest

The sweater vest. It was on my radar but did not become an item I dreamed of until I saw a lookbook from Steal the Spotlight styling Friends-inspired outfits, inspired by Chandler, the sweater vest king. I continued down the rabbit hole and to Katie’s K-pop Comeback Fashion review and I was done for. K-pop fashion, Korean fashion, and the sweater vest were a layering piece I knew I was going to make. Maybe it is the color combinations or the accessories, but how these sweater vests are styled across different boyband concepts just got me. It felt fresh and fun, not preppy or stuffy.

A year later, I was ready to tackle this project. After making a few sweater projects, and learning how to pattern from garment construction, I felt like I had a good understanding of the shape needed to make the sweater. At Joann’s, I found a non-wool tweed yarn and I knew this was the yarn I wanted to start with. It looked like garments I love from Irish Aran Jumpers and was a way to bridge my heritage and this new world I was exploring through K-pop. I like the garments I design to have a story and intentionality behind them.

The New Technique

With US Size 8 needles in hand and one skein of Big Twist tweed yarn awaiting a new form, I began by casting on 65 stitches. Working my way up I did the basic knit-purl stitch and gradually binding off on either side when I reached my desired length for the armhole. I chose to make a cropped sweater vest to accentuate my waist and break up my long torso. The big moment though came when I did some research and made the decision to branch out and knit the shoulder and neckline on two sets of needles. This required knitting, casting off in the middle, and continuing to knit on a second set of needles. It worked!

Learning new techniques is always worth the time and the trial because eventually it clicks and you have something new, you didn’t think you could do, but you can!

Making two instead of four pieces on my straight needles was a time-saver! Honestly, I see why having a teachable spirit is important in all aspects of life because I thought I had a good technique before, but dang, two pieces are such a better experience. Four pieces was a mental game, and I got bored. Hence why my previous sweater projects have taken months and months, and months because I distract myself with palette cleanser projects and then avoid finishing the four-piece projects.

Afterward, I sewed the two pieces together and knit two 65-stitch pieces of ribbed trim for the bottom. I liked how rustic the sweater looked without the ribbing on the neckline and armholes. It looks like an old-fashioned piece, and a bit like armor. Which is cool.

Sweater Vest Fits of 2023

This is how I have styled the finished garment so far! I like it over my black flannel and charcoal jeans for a moody look. It styled surprisingly well over this DIY project where I added a flared skirt to a cropped graphic long-sleeve shirt. This is where I saw the armor aesthetic come through. In 2024 I look forward to playing around with it even more!

Some things I plan on either finding or making, are basic layers I can wear under this vest. Currently, I have my flannels, that random diy-tunic, and maybe some long-sleeve tees but I’m not certain if they are long enough to layer out the bottom of the vest. This is the struggle of adding a brand new item to your wardrobe – how do you integrate it and style it well without buying a bunch of new things? Yeah, I’m figuring that out and until I do it’s going to be some time before I think I can make a truly amazing outfit with this piece. But I’d rather do this responsibly and be a patient person instead of draining my bank account for instant gratification. (Age has done me well in that respect because I used to do the opposite!)

2024 Project Update:

Since finishing the garment, I have either lost weight or the vest has stretched a bit from wear and one wash. It was not sitting well on my waist anymore but ballooning out so I took it in. I took it in at the arm hole seams and gradually took in the waist at the back so the garment has a back center seam which is not the look I was going for but the fit is on point again. Lastly, I knit another section of ribbed trim to lengthen the garment to keep it from riding up, in doing so I made the ribbed trim addition of 60 or 55 stitches, I forgot to take note when I made it, to pull the waist in even more. I like the fit and plan to make another version of this garment with a smaller adjusted pattern.

Create a website or blog at WordPress.com

Up ↑