This post is inspired by current Wuthering Heights and Jane Austen adaptation discourse, in particular, the thoughtful discussion of the Regency Rumours podcast that sparked my musings. Which novels would I love to see adapted that have not been made into a movie or streaming show?
My list will be organized by author, since for some, there are multiple books I am featuring. I will try my hardest to tease the story without giving spoilers so that you can enjoy these stories on your own. Let’s jump in!
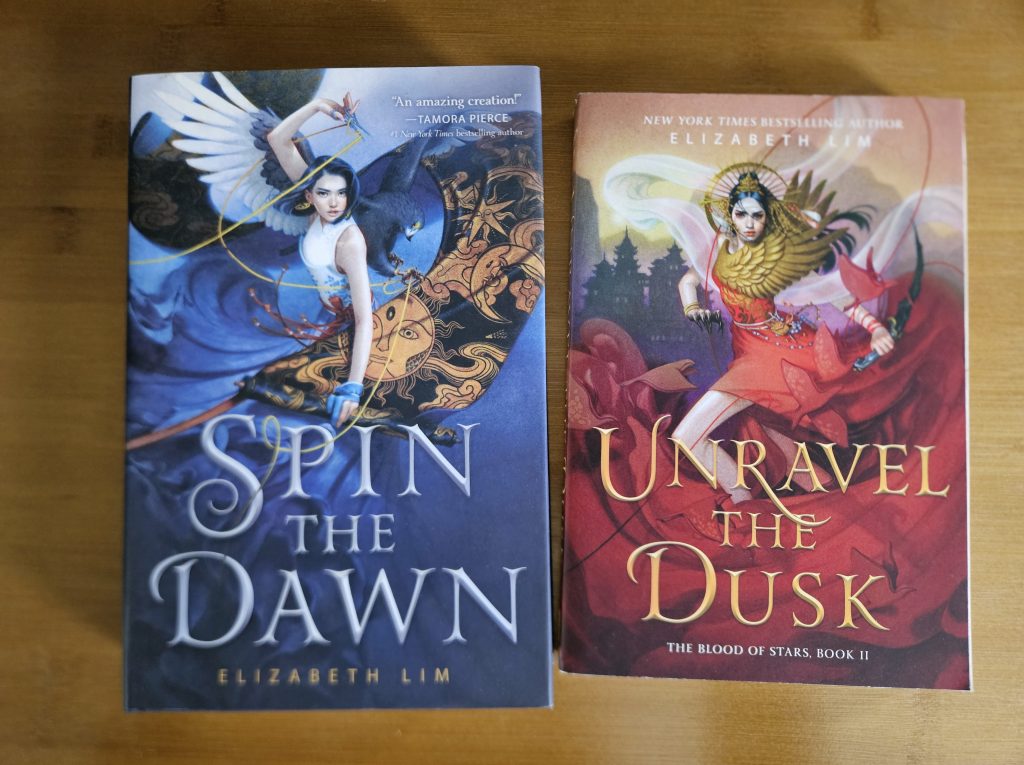
Elizabeth Lim
It started with Spin the Dawn, concluding with Unravel the Dusk. Now I find myself fully enveloped in another masterpiece of Chinese fairytale-inspired adventure fantasy – Six Crimson Cranes. The sequel, The Dragon’s Promise, and the prequel, Her Radiant Curse.
Why? These stories have imagination, action, twists, and flawed characters that experience growth. They live in both a fantastical world and also feel tangible to our everyday life.. Although magic is a driving force, the experiences of the plot feel incredibly human. Family, love, freedom, and facing down injustice, these are real-world issues placed in a far-off land.
I think these stories need grandeur, like C-dramas and the imagination of other magical favorites, like the school in Scotland with the magicians. Spin the Dawn features sewing, a dangerous competition, a perilous journey, a curse, a Kingdom in danger, and a main character facing crushing grief. Six Crimson Cranes features the confusion of adulthood, the consequences of our choices, looming corruption, and the fear of losing it all.
I think these two duologies – The Blood of the Stars duology (Spin the Dawn/Unravel the Dusk) and Six Crimson Cranes duology (Six Crimson Cranes/The Dragon’s Promise) would make excellent mini-series. Like the concise one or two-season format of K-Drama shows. With her Radiant Curse either being a separate show or a movie. I believe Elizabeth’s work will be beloved for generations to come for her imagination, unique settings, and plot pacing. Please, someone, adapt these stories and adapt them well.
Judy I. Lin
You know what really bugs me about the creative world? How can we can’t have nice things. That we compare and put down. I think it is idiotic for readers to compare Lin and Lim for their work of reimagining Chinese fairytales when Judy I. Lin created a magic system unlike anything I’ve encountered before – tea. But some people like to yuck my yum and say Lin is a lesser Lim, and to that I say, you’re missing out. A Magic Steeped in Poison and A Venom Dark and Sweet would translate well to film. Think Avatar: The Last Airbender and Murder on the Orient Express, but in a Chinese fairy tale. These books sing!
What if you needed to solve a murder, while sneaking into a national competition, with a skill you have to master overnight, and you have an undeniable connection with a person who may or may not be responsible for your demise? It’s just so dang good.
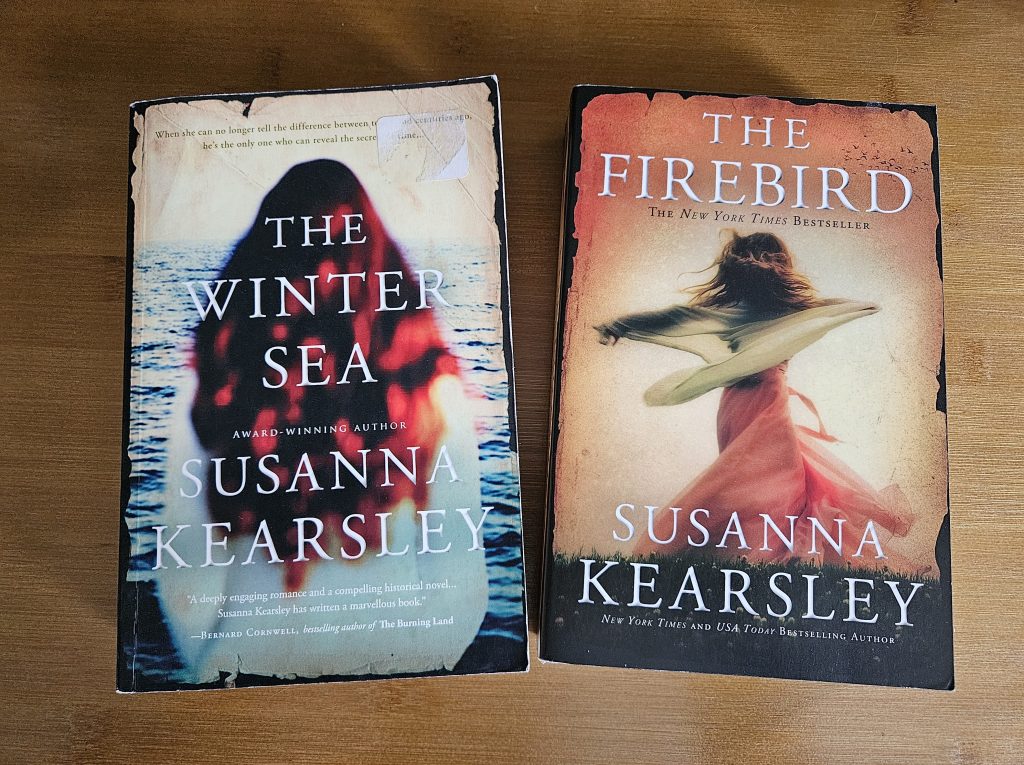
Susanna Kearsley
I have read most of Susanna Kearsley’s body of work. She is my favorite historical fiction author. Her romance-filled stories are closed-door, but charismatic, like a satisfying slow burn of a Jane Austen novel. The first book I encountered of her work was The Shadowy Horse, set near Hadrian’s Wall at an archaeology dig. This book feels a bit like Jurassic Park, Indiana Jones, and The Banshees of Inisherin. A movie would be great for a Halloween watch.
What about a cozy Cornwall mystery? Featuring a cozy rom-com protagonist, like a Kathleen Kelly who has a connection to the town and the house she rents that is stronger than she would ever imagine. The romance in this one gets me every time. Will they actually get together?! I’ve read this multiple times, and I am still on the edge of my seat. A movie of this would be lovely.
What about the Jacobean period, vaguely pirate in nature? What about romance, a castle, and the intrigue of spies? How about a two-book arc over several points of view, generations apart? Could history truly come to life from the relics of the past? I wish I could weave a story together with the same ease as Susanna can. This would be excellent as a mini-series with elaborate costumes.
With the rise of historical dramas in Hollywood and beyond, I think Susanna Kearsley’s stories should be shared in this way. Fans of Outlander would be intrigued, as well as Austenites, Bridgerton fans, and costume lovers.
Kayla Cagan
Were you an art kid? Did your parents ever discourage you from pursuing a career built on your artistic passions? Has your home life been disrupted by that one relative who is selfish and dysfunctional? Have you ever felt trapped in your hometown?
Piper Perish and its sequel, Art Boss, will pull on your heartstrings. The desire to pursue our dreams is a journey we can all empathize with. This coming-of-age story would make a great two-part movie set or a small mini-series. The art, the fashion, the settings! It could be fierce.
Annie Gray
Adapt a cookbook? With a historical interpreter. Yas queen. Mrs. Crocombe is that girl. She ran the kitchen at Audley End in the mid to late Victorian Era, a position also held by men. It was a great responsibility to prepare, plan, and manage the food systems on site and beyond in Audley End’s local produce. She had to keep up with trends and changing fancies, all while providing elegant meals for the family and their guests. In addition, cooking for the staff.
The restaurant world is a wonderful canvas to build a show upon. This would appeal to fans of Downton Abbey, The Mind of A Chef, The Bear, Great British Baking Show, and Chef’s Table.
Elizabeth Kostova
Alright, this last book is technically in progress. The rights have been sold, but nothing has moved forward for a movie or series. This could be a horror masterpiece.
This story pulls me in, to the point of drowning in the world that feels too real for comfort. It is Dracula, unlike the world has seen him before. It needs to be played out on screen.
I’m not really sure how long this post is going to be, but I wanted to speak out into the void today because there is far too much darkness hanging around, and it’s honestly eating me up. I’m disappointed in my own feeling of doom, and feeling hopeless when what I am feeling afraid of is shadows on the wall. Like the Cave allegory of Plato. I think C.S. Lewis’ work The Screwtape Letters does a magnificent job of adding a new layer to the allegory of the Cave, in my opinion. (They are not directly connected by anything other than my own musings.)
In my opinion, we are living, staring at the shadows, chained by things of our own choosing. The main one I would say is social media, and the 24-hour news cycle, which in concert is keeping us chained in our own prisons, by keeping us distracted. We are stuck dwelling in the never-ending waterfall of problems, and we don’t stop to think or to choose a problem to tackle; instead, we are thrown over the waterfall, and our peace is dashed against the rocks every day. If we would pause and breathe. Stop and consider, you realize that you can either continue being overwhelmed by the world, or you can take the chains of social media off. This thing that so easily entangles us and shuts down the ever-wailing news and its dribble of despair, to seek ways to fill your cup. Therefore, you can approach the troubles of the world with renewed eyes that have hope because we have hope from within. Not the human spirit but the Holy Spirit. I think we forget that we can do that and still care about the problems in front of us. We are not apathetic but proactive. Seeking more than what seems possible from all these voices shouting hate, doom, and fear. Are things broken? Very much so. But when have they been perfect?
The world is doomed. It has been doomed since the fall of man. Even though Jesus overcame the world, there is still no guarantee of a charmed life for believers. This place of fallen things is temporary, for the world will pass away someday. It doesn’t mean it is happening now. We all went through a collective world trauma in 2020, which compounded the daily things that make the world unfair, and it also opened our eyes to injustice in our midst. Just because we are more aware of the bad doesn’t mean that we can’t fight to fix it. But I think we need to do that offline. It’s a distraction. And I think Screwtape and Wormwood have a very easy job as long as we stay divided, isolated, and helpless online. The algorithm forces us to consume things at its pace, but that pace is a complex math equation, not the inner workings of millions of human minds, each made uniquely, that process, cope, and solve at our own pace.
For my fellow Americans specifically, if the Big Beautiful Bill is going to destroy America, I think we are looking with tunnel vision because of our own privilege. How many of our marginalized neighbors have endured far worse over the history of America, and they still have hope and have fought for a better future? I’m not falling for this propaganda anymore, and I’m also not supporting the workforce blackout either. We need supply lines, and we need to provide for ourselves. Protest with wisdom, not with sabotage in mind, because not having goods trucked in is going to hurt those most vulnerable in society, not the Senate or the Executive branch.
Finally, there are so many resilient cultures around the world that we could look up to right now for a reality check. All the countries deemed “3rd World” or developing nations. They are exploited every day by 1st world nations, and have for centuries been held down for the profit of the few. Do those people give up even though this is their reality every day? No. Against every odd, they provide for their families without help. We have help, and we cry poor and ignore their struggles and worry about our first-world inconveniences. We do this to the most vulnerable in our own country, too. Look at what’s going on in our communities due to ICE, the housing crisis, the cultural genocide of Native peoples, and African peoples through the slave trade. We have always had evil running things; this is not new. If America is ruined by the BBB, our foundation was always sinking sand. So don’t give this junk another moment of worry and focus on the big picture – how can we be the light of the world and the salt of the earth? And every day, let’s focus on the solid foundation freely given to everyone through the sacrifice of God’s son.
Sorry that this is a bit of a rant, I just needed to push back against the heaviness I feel pushing down on this lovely July day. Happy Canada Day! And stay strong. ❤
In this week’s update, we’re starting to see our garden really take off. Plants that were already big have started to bloom and produce fruit, while plants that were small or looked a little unhealthy have started to grow and look like they’re going to make it. We also needed to tackle some of the grass in the beds that was becoming unruly, and we side-dressed many of our plants with bone meal. Finally, what is this update’s seed of the week?
Visible Growth
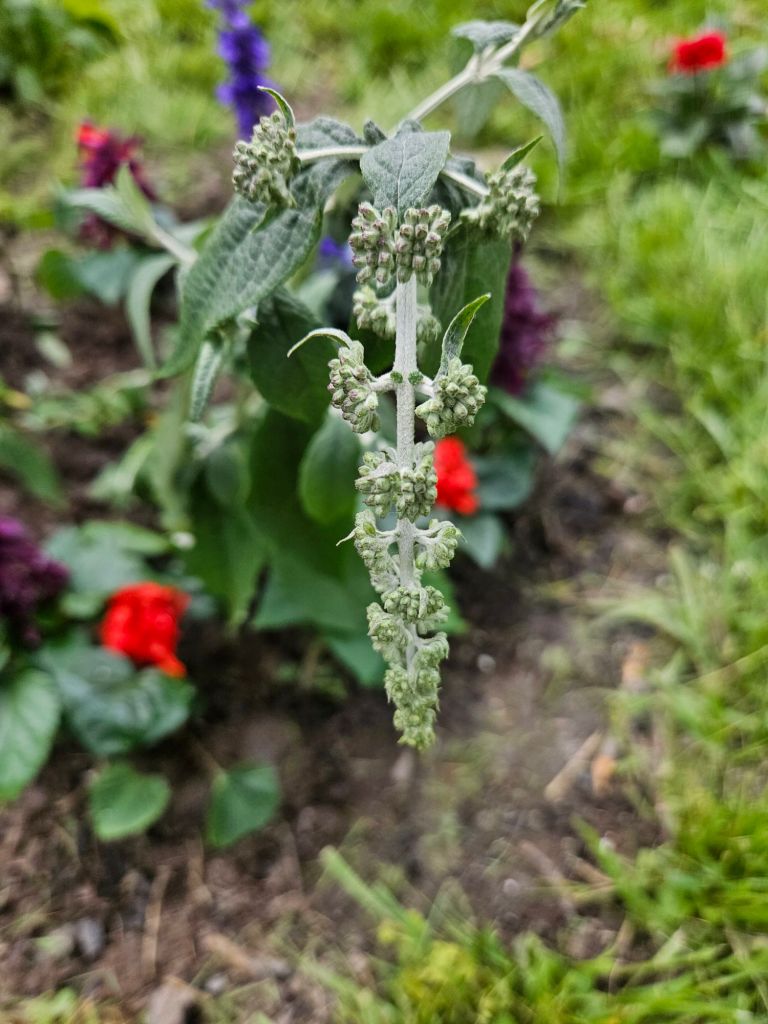
Since last week’s update, we’ve been blown away by how much growth there has been in the garden. The tomato plants we bought from the greenhouse, as well as the original Queen Aliquippa plants I started, have all started to blossom and produce fruit. The Cherokee Purple, Black Krim, and Yellow Pear plants all have fruit on them, while the Queen Aliquippa plants have numerous blossoms. Our pepper plants are the same way, with two of the Cal Wonder plants having at least one fruit. The small starts that we transplanted last weekend have grown and are looking healthy.
Our melon, squash, and cucumber plants are also showing a lot of growth. The spaghetti squash plant we bought at the greenhouse has 15 or so blossoms on it, while another plant that I started inside (we think it’s a pumpkin) is also blossoming. All but a few of the plants in our melon bed are doing very well, including our cucumber plants, where we’re starting to see baby cucumbers growing behind the blossoms. Lastly, our eggplants are growing a lot of fruit, with the largest being roughly three inches in length. It’s safe to say that the heat and sunshine have been wonderful for our garden.
Mowing Inside Our Garden Beds
This weekend, we realized that we needed to deal with the grass that was growing in the last garden bed we planted in. We had been using long shears to trim everything, but Magz smartly suggested that we try getting the mower in between the plants. Yesterday, we did and had so much success that we used the mower in our other beds, which made for much less work by hand. I maneuvered the mower while Magz helped me not run over any plants. While no plants were harmed, I did run over a wooden marker, but after 30 minutes or so and many squeaks from Magz, we were done. She is my Richard Hammond. We’ll be using this method moving forward to save time and work.
Side Dressing Plants
With our plants growing well and starting to bloom, I applied a layer of bone meal to our tomatoes, peppers, beans, and our more mature melons, squash, and cucumbers. I like bone meal because it’s easy to apply and gets absorbed pretty well, but I want to find a better fertilizer. I like bone meal when transplanting starts, but I would like to find something more water soluble or even a liquid fertilizer for side dressing needs later in the season. The bone meal has worked, though. The day after I applied it, we got a nice rainstorm, and the plants looked perkier afterward.
Seed of the Week
This week’s featured seed is the Black Krim tomato. We’re growing these from seed and from starts that we purchased at a greenhouse. These tomatoes are originally from the Crimean Peninsula in the Black Sea and were named after the Isle of Krim. They gained popularity in that region during the 1850s but didn’t become commercially available in the United States until the 1990s. They may have been the first “black” tomato to be sold in the U.S. These are the first black tomatoes we’ve grown.
Up Next
At this point in the garden, we’re largely managing the garden. We’re dealing with weeds, making sure the plants are properly watered, and generally ensuring that everything is healthy. There’s a chance that by next week’s update, we’ll have harvested at least one tomato, eggplant, and/or cucumber. How are your gardens doing? Happy gardening!
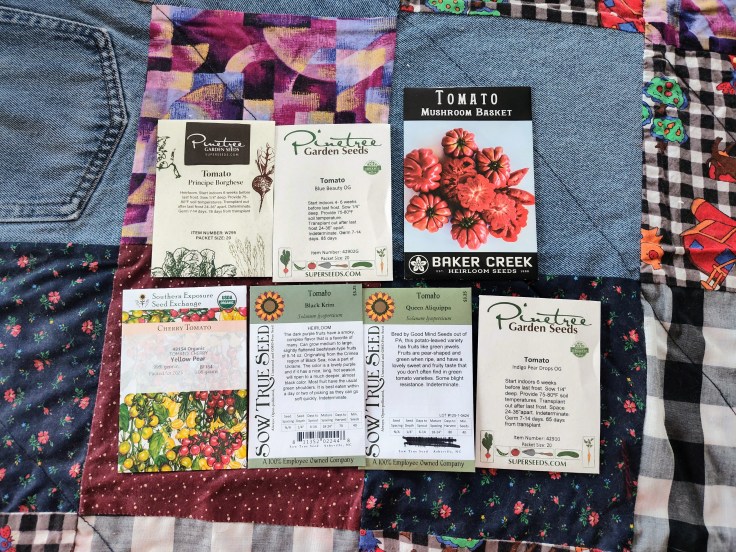
Of the 82 seed packets we ordered earlier this year, we have planted nearly all of them, with only the fall crops still remaining. So, I wanted to write two articles: one on the hardest seeds to start and a second on the easiest ones.
I’m starting with the hardest seeds. My experiences with these are just that – my experiences – and are in no way an indictment on them or the seed companies they were purchased from. I could have done something wrong that caused failure, and if you’re curious about them, you should still buy them. Without further ado, here they are.
5.) Principe Borghese Tomato
We bought these seeds to be our paste tomatoes for the year, opting for this heirloom Italian variety over the more popular Amish Paste or San Marzano. We were intrigued because of their history, that they could also be sun-dried, and because they were spherical rather than the typical oblong. Unfortunately, we had nothing but problems with them.
I started these seeds the same way and at the same time as all the other tomato seeds; however, for some reason, these didn’t germinate as well as the others, and the ones that did germinate got leggy within a few days. Side note: Nearly all our tomato starts got leggy due to inadequate lighting, but these starts were worse than the others. When I attempted to harden them off and transplant them into the garden, none of them made it. To be fair, only one variety of tomato plants successfully transplanted due to poor weather conditions, but these were the worst. Later, I attempted to direct sow them in the garden once the soil temperature was warm enough, but it’s been at least two weeks now, and we’ve seen no signs of germination. These seeds not working is disappointing because we were excited about them. There’s a good chance we’ll try them again in the future, but we’ll buy a second type of paste tomatoes if we do.
4.) Calabrese Broccoli
We wanted to grow broccoli this year despite having no experience with it. We chose the Calabrese variety because it is supposed to be a traditional-style broccoli that produces smaller heads and multiple side shoots. Everything I read made me confident that it would grow well in our area. I started them indoors 4-to-6 weeks before the last frost, as the seed packet suggested.
The seeds germinated well, but the new starts immediately struggled. I didn’t know this at the time, but broccoli is sensitive to warm temperatures. That is something I struggled to monitor and control with our seed-starting setup because I started vegetables with different temperature requirements at the same time. Additionally, our current grow light gives off heat but needs to be very close to the plant to provide enough light. This created a lose-lose scenario. Understanding this, we may direct sow late in summer for a fall crop. I think this will result in a better growing experience, but it’s anything but a “set it and forget it” seed.
3.) Husk Tomatoes – Ground Cherries & Tomatillos
I’m combining these two because they’re part of the same husk tomato family, grow in similar manners, and seem to be susceptible to the same issues. This is another vegetable/fruit that we’ve never grown before. Actually, we don’t think we’ve ever eaten ground cherries before and have only had tomatillos in salsa. We had similar issues with these that we had with other seeds: When they germinated, they went leggy pretty fast. One difference, though, was that these seeds took a long time to germinate and were slow to grow after they did.
When it became clear that getting any fruit off our starts was going to be a struggle, we bought a plant of each at the local greenhouse. They were very healthy and already had fruit forming. We transplanted them into one of our garden beds and quickly encountered issues. It started with the three-line potato beetle that required a non-organic spray to treat and has only continued with the plants struggling to grow. I think it’s the result of too much moisture in the soil, but as a bright spot, our ground cherry plant is still producing fruit, and last evening, we were able to harvest one. It wasn’t ripe enough yet, but it was rewarding to get something from it.
We also bought a few more tomatillo starts and transplanted them into a different garden bed with better drainage. I preemptively sprayed them to prevent beetle infestation and staked them. They’re still doing very well with dark green leaves and fruits that continue to develop. We’ve learned a lot since we first started these seeds, and we’re certain that 2025 won’t be the only year we grow them.
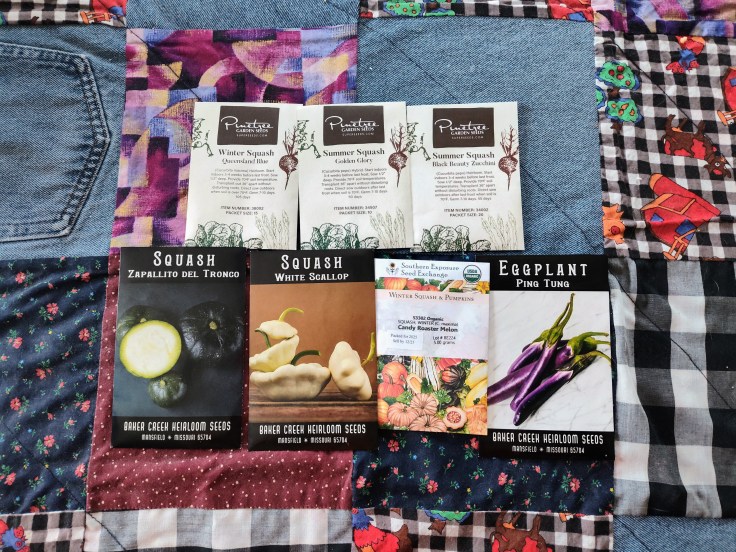
2.) Ping Tung Eggplant
We gave these seeds a shot because they were unique compared to the Italian eggplant that is more common in the United States. These originate in Taiwan and have a more cylindrical shape compared to the bell shape of the Italian style. Before purchasing, we were aware of the struggles that some gardeners have experienced with these seeds. Some talked about the issues of successfully moving from germination to transplanting. That’s the same problem we had. They germinated quite well, but like other plants, they quickly went leggy and died. I tried restarting them in May, but they didn’t even get past the germination stage. It’s quite a bummer.
We bought two eggplant starts from the greenhouse, and they’ve been doing very well since being transplanted. I don’t think they’re Ping Tung eggplants, but they are an Asian variety. They have been flowering for more than a week, and several fruits are beginning to develop. We were also gifted an eggplant start from our neighbor. We were unable to transplant it right away, so the plant was looking unhealthy by the time it was transplanted, but it has since recovered and is growing nicely. The Ping Tung seeds may just be difficult to start; I’m unsure, but I think we’ll give this variety another shot in the future, either this fall or next spring.
1.) Ishakura Bunching Onions
The final item on this list is an Asian-variety bunching onion seed. We chose these because we like Asian vegetables and were intrigued by being able to grow onions in the spring. Like the Ping Tung eggplant seeds, there were some mixed reviews from gardeners, so I knew there was a chance of some issues. I attempted to start these inside, which is what the seed packet recommends. In fact, it says to start these up to three months before the last frost date, so I had an expectation of slow but consistent growth, because it’s hard to keep starts going that long without needing to transplant them.
I began them in normal seed cells and had successful germination in the expected timeframe. They grew to about three inches and then stopped. They didn’t grow any taller or thicker. I thought that it could have been part of their growing process and that they would take off after being transplanted, but that wasn’t the case. Transplanting them was difficult due to the fragile root structure, and none survived. I later attempted to direct sow a row of them in the garden, but none germinated. This seed was easily the most disappointing of the season. Part of that is because we were excited about these onions and never experienced a hint of success.
I think part of this was the result of poor growing conditions. I think that growing them in a container would yield better results. You can tightly pack these seeds in, so in a 12″ diameter pot, you can probably grow two or three dozen plants. This would also allow for better moisture management. Still, for how easy the seed description said they were to grow, these were a letdown.
Giving Up or Trying Again
This is the decision we’ll find ourselves with next spring. Do we give up on these seed varieties and buy a different seed or a start, or do we try again with the knowledge we didn’t have before? It’ll likely be a combination of both. We had a conversation last evening about these seeds, and we are unsure if we’ll buy husk tomato seeds next year. They’re quite difficult to start, and the starts are very affordable. That doesn’t mean we won’t try starting them from seed again in the future, but I want to have confidence in successfully growing them to harvest before going back to the starting point again. The Calabrese broccoli seeds may be the same way.
But I think we’ll buy the bunching onions, Principe Borghese, and Ping Tung seeds again. I can pinpoint what went wrong with all of those, make changes, and be confident that we’ll have a different result. We’re going to upgrade our growing light, which will help, and our weather this spring was unusually bad. An improvement back to the norm would have a big impact.
I am planning on doing this article each year as we try new seeds. I’m also going to be doing a post on the five easiest seeds to start. Happy gardening!
What do we do when an item of clothing doesn’t fit? Rehoming is always a good idea, but here is another one – upcycling. What if you could transform that garment into another garment you will wear? Here’s an easy upcycle using one pair of jeans.
The Process
To begin, I cut off the legs of the denim above the knee. This was important. To hem the denim to the same length, including the excess fabric needed to fold over for a waistband, the leg section needed to be longer than what was cropped.
I carefully cut open the side seams, avoiding both the pocket and the rivets. The belt loops were set aside for later.
I then cut the leg pieces to the proper width, adjusting the fit with try ons, before sewing. The top of the section was hemmed for a waistband and the bottom hemmed with the rest of the short.
I sewed this very carefully with my machine. I did break a needle but, it happens just use caution and wear glasses to protect those eyeballs. Always know where your fingers are too when using a sewing machine.
Next I repaired the worn denim around the belt loops and attached the cut off belt loops to a new section and tada: you have a new pair of shorts for summer!
In this week’s update, the rainy weather finally came to an end, we’re seeing a ton of growth in our garden, including the grass and weeds, and I’m starting a new section called Seed of the Week. Let’s dive in.
Heat Wave
We had one of the coolest and wettest springs that I can remember this year. If you’re a regular reader of our blog, you know that this delayed our planting and slowed growth. That pattern broke as the official start of summer arrived with a four-day heat wave that has brought temperatures in the 90s, humidity, and a UV index above 10. There was no gradual transition between seasons this year. While it’s not my preferred weather, I’m very thankful that the ground can start drying out and plants can begin to take off.
The extreme heat can make working in the garden less fun, but it’s a reminder to take breaks, stay hydrated, and get as much work done outside the hottest part of the day. I failed at the last part of that this past weekend by working in the middle of the day, which is a mistake I won’t make again during this heat wave.
Lots of Growth
Even though the recent weather pattern hasn’t been ideal, it is allowing our plants to take off. With ample moisture in the ground, all that the plants needed was warmth and sunshine, and now that they have it, the plants have shown measurable growth in recent days. I want to highlight a few plants where this has been most evident.
Corn: Our corn is now about 15 inches tall and on pace to meet the “knee-high by the 4th of July” saying that I heard growing up. The base of the stalks looks strong, and the leaves are a beautiful green with that lovely waxy and silky texture. I continue to side dress them with blood meal every couple of weeks.
Beans and Peas: Our beans have exhibited consistent growth since germinating in mid-May. All the beans, except for the red bush beans that I started in early June, are about 8 inches tall. Our snow peas are also at this height, which led me to build a trellis for them this past week.
Eggplant & Spaghetti Squash: We transplanted a couple of eggplant starts a few weekends ago, and they are doing exceptionally well. They have been consistently producing flowers, and I even felt the start of a fruit on Sunday. We planted a lot of squash and melons this year, and the spaghetti squash start we bought in early May is doing wonderful. It’s spreading outward from the main stem and is starting to show where the flowers and fruit will grow.
Tomatoes & Peppers: Our tomato and pepper plants have started to flower, and one of the yellow pear tomato plants has fruit on it. This hot weather should help produce more fruit and help that first tomato ripen.
One small downside to the weather we’ve had is that weeds and grass have continued to grow at a fast pace. Managing the grass that’s inside our garden fences has been difficult from the beginning. We have a plus sign-shaped walkway between our garden beds. I’m able to tackle that with the mower, but the grass within the garden beds is a different story. We’ve been using hedge-trimming shears to cut down all the grass, which has been surprisingly effective. Hopefully, the hot weather will lead to the grass growing a bit slower moving forward.
Seed of the Week – Queen Aliquippa Tomatoes
This is the first installment of a new section I’m calling Seed of the Week. Each week, I’ll go over a seed we’ve grown and are particularly fond of. I won’t go in-depth with the seed’s history in this weekly post (I’m saving that for a standalone series), but I may briefly highlight the seed’s name inspiration. I will also go over our experience with the seed, including how it is to grow, and what the fruit should look like when it’s ripe. I considered many options for the first Seed of the Week section, but I am going with the Queen Aliquippa tomato, which I briefly highlighted when I wrote about the seeds we bought for this year’s garden.
Queen Aliquippa tomato packet
We bought our Queen Aliquippa seeds from Sow True Seeds, which is located in Asheville, North Carolina. The seeds are named for Queen Aliquippa, a Seneca tribe leader from the 18th century who lived in Central and Western Pennsylvania, which is where Magz and I are from. Queen Aliquippa is a well-known name where we live, so we had to try seeds named in her honor. We’ve never grown these seeds or even seen the tomatoes in person, but the tomatoes are categorized as slicing, so they’re likely larger than pear tomatoes but smaller than a beefsteak. They stay green when ripe but are supposed to be incredibly sweet.
Our experience with growing these seeds has been positive. They were some of the earliest seeds I started, and they were easy to germinate. Unfortunately, not having a strong enough grow light prevented them from growing as big as I would have liked before transplanting them, but we did finally get them outside in late May. We started with two plants going outside when they were about 4 inches tall, and they’ve done remarkably well in spite of the poor weather. As of yesterday, they were over a foot tall. The leaves are beautiful, and we haven’t experienced any leaf curl, which is common with a lot of tomato plants.
Up Next
This coming week will be focused on making sure our plants are watered and aren’t showing any signs of stress from the heat. We’re also looking forward to seeing more flower and fruit development, as well as the potential for harvesting our first tomatoes. Happy Gardening!
Prior to 2025, the only way Magz and I were able to garden was in containers. As renters, the opportunity to build raised garden beds or dig beds into the ground wasn’t there. In this post, I’m going to walk you through our history with container gardening, including the containers we used and what we grew, and discuss the pros and cons of gardening this way. Finally, at the end, I’ll ask the question, “Is it for you?”
Our Experience With Container Gardening
The Containers We Used
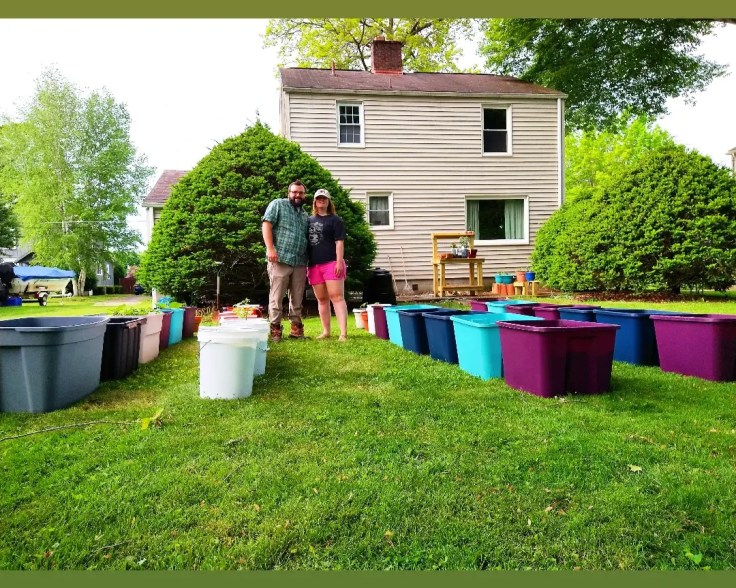
We have grown in many different containers. Our first experience was a terracotta pot that many people are familiar with. That was in 2016, and we used these pots in the years that followed. We’ve also used hard plastic planters of various sizes. They’re affordable and easy to find. The most unique containers we’ve gardened in are plastic totes and 5-gallon buckets. In 2022, we wanted to try growing a bunch of different seeds but couldn’t have an in-ground garden. So, we bought roughly a dozen plastic totes and two dozen buckets, along with some plastic planters and shallow totes for lettuce.
Finally, the most unique and potentially gimmicky planter was the GreenStalk. If you’re unfamiliar with GreenStalk, it’s a tiered growing system that maximizes the space to grow many plants. It has an ingenious design that trickles water down from the top tier. We had the 3-tier system that is currently sold for $110. We’re still technically gardening in a container with the planter box I built for our long beans. It was cheap to build and only took two hours. We also have a plastic rectangular planter that we have butterfly peas in.
I would say that of all the containers we’ve used, my favorites are the homemade wooden one I built and the GreenStalk. The wooden one is nice because it’s homemade and doesn’t use plastic. Anything we can do to reduce our dependency on plastic, even if it isn’t single-use, is a good thing. I also really liked the GreenStalk design. It allows you to grow a lot of vegetables in a small area and is relatively easy to use.
What Did We Grow?
We have grown a bit of everything in containers. In our GreenStalk, we tried growing lettuce, carrots, beets, bok choy, chamomile, and herbs. Prior to the GreenStalk, we grew a cherry tomato plant at our first apartment. Those are all pretty standard things. That all changed when we did our 2022 garden.
We unintentionally pushed the boundaries of what’s possible with a container garden. We attempted everything we could think of and were interested in. That included potatoes (early and mid-season), corn, cabbage, pumpkins, musk melon, watermelon, and Brussels sprouts. We also grew the vegetables that most people grow: cucumbers, tomatoes, peppers, lettuce, and beans. And for the most part, it all grew.
Were Our Container Gardens Successful?
In general, yes, our container gardens were successful, with each attempt producing more than the previous one. We got a few tomatoes from the first tomato plant we grew; however, it eventually died because we had to travel for work that summer and couldn’t find anyone to water it.
Our GreenStalk garden was doing well until we moved. We started everything from seed in early May and had successful germination. Unfortunately, two things happened that caused the plants to die before reaching full maturity. We had a week of intense rainfall not long after germination, which restricted early plant growth, and we unexpectedly had to move later in May. The move led to the plants experiencing shock. After moving, we were unable to tend to them for a week while we were getting some things settled, and by the time we got back, it was too late.
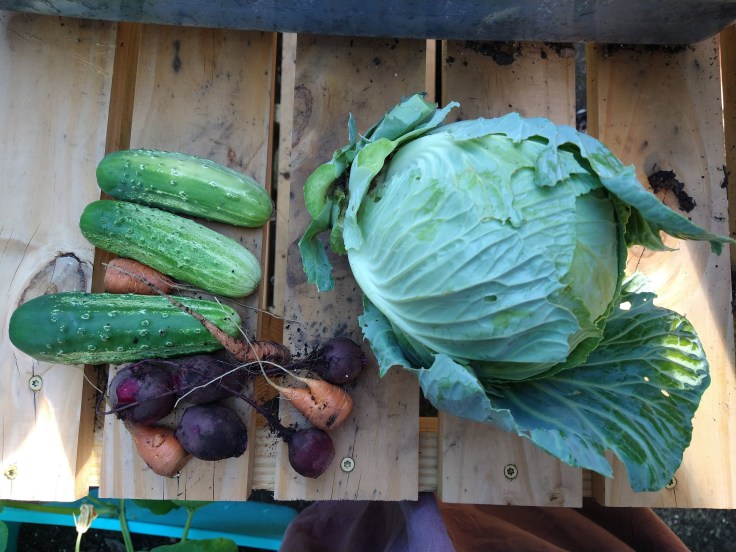
Our 2022 container garden was very successful. I believe people thought we were crazy for trying to grow plants that typically aren’t “container-friendly,” but we harvested multiple ears of corn, at least one big head of cabbage, many pounds of potatoes, and more than one watermelon, musk melon, and pumpkin. We also had a lot of success with our tomatoes, beans, and cucumbers.
Pros & Cons of Container Gardening
I’ve gone over some of our experience with container gardening, the majority being positive, but that doesn’t mean there weren’t some negatives. Here are some pros and cons of gardening in containers.
Pros
You’re (Almost) Guaranteed to Have Good Soil
When container gardening, you are typically bringing in soil to fill the containers. I think most people buy their soil in bags, but you can also buy it in bulk from landscape centers or garden supply stores. This soil is typically nutrient-rich, balanced, and light. It tends to drain well because it has vermiculite, perlite, or coconut coir in it. This is important when container gardening, but more on that in a bit. This type of soil makes it easier to have success when growing root crops like carrots and beets, as well as potatoes, since the roots don’t have to battle compacted soil to grow. If you’ve been following our blog from the beginning, you’ll know that good soil isn’t a guarantee.
Maneuverability
Container gardens give freedom that is impossible with traditional in-ground or raised bed gardens. You can place the containers in “creative” ways to maximize your space and relocate them to give them more sun or shade as needed. If you need to move around them, they can be moved for that reason too.
Opportunity to Garden
If you rent a house, you may not have the chance to build a raised garden bed or till up the lawn to create an in-ground garden. And if you live in an apartment, you certainly don’t have that chance. Containers give you that chance. I think it’s important that people have a connection to their food. Knowing how your food is grown gives us an idea of how much work goes into that vegetable you’re about to eat. A container garden may allow you to only grow a few plants, but that is better than nothing. The joy of harvesting your first successfully grown tomato or pepper is hard to describe.
Cons
Weight
Containers may provide maneuverability that rigid gardens don’t, but they’re not easy to move. The totes we grew in, especially the 33-gallon ones that our potatoes were planted in, were very heavy when full. We never weighed them, but I would guess that each was over 50 pounds. I could pick them up, but it was awkward and gave me some back pain. Dragging them was the easier option. Moving them a couple of feet each week to mow around them wasn’t a problem, but anytime I needed to move the rows around, it was a struggle. The buckets were much easier with their handles.
Another part of the weight is moving the soil around. If you buy soil in bulk, you have to get it into the containers. If you use bagged soil like we did, you have to carry those bags around. An individual bag may only weigh 40 pounds, but when you buy 20 of them at a time, it quickly adds up.
Watering
Something I didn’t know about container gardening before we began our 2022 garden was how different watering is compared to an in-ground garden or raised beds. Traditional gardens retain moisture quite well, so you can get away with only watering them once a week. You place your finger into the soil, and if it’s dry a couple of inches down, it needs water. It’s pretty straightforward. A container garden requires a much more hands-on and active approach. Even though the soil is good, the containers still don’t drain as well as raised beds or in-ground beds. The top of the soil will often dry out, while the bottom retains moisture. This can lead to overwatering and root rot. I found that you need to check the moisture level at a greater depth. Depending on the weather, we either needed to water the containers daily or every other day, but it was rare that the plants went more than a couple of days without water.
Cost
Starting a garden of any type can be expensive. I’ve gone into the costs of this year’s garden in various posts. Container gardens are no different and may actually be more expensive. If you don’t have the containers, you need to buy them. When we bought our totes, each one cost $5.98, so we spent roughly $80 on those. Each bucket was around $3, so we probably spent $50 on those. You also need soil and various amendments to help with draining. We bought perlite and broke up foam to put in the bottoms of the containers. Then you need to buy the seeds/starts, fertilizers, and plant supports that are needed for any garden. It quickly becomes expensive, and it doesn’t include the cost of water. We probably spent $500 on that year’s garden and got rid of most of the containers at the end of the year. For a one-year experience, it wasn’t cheap.
Neither a Pro Nor a Con
Amount of Work
Gardening in any form is a lot of work. It requires physical labor and time. I don’t think this is a bad thing, but it’s a commitment, and oftentimes, it’s done in hot weather. Container gardening is no exception. You don’t have to deal with the digging and weeding required with traditional gardens, but the amount of work is comparable. Each container needed to have drainage holes drilled. They were then filled with the perlite or foam and soil before the seeds were sown. And as I mentioned, the containers needed to be moved. I even moved them into our garage early in the year when we had torrential downpours. It was a lot of work, so please don’t start a container garden, especially a big one, if you think it will be light on work.
Do I Recommend Container Gardening?
Absolutely. If you’re interested in growing your own food but either can’t have a traditional garden or don’t want to commit to one, growing in containers is a great alternative. It is a ton of fun, and if you can commit to only having a few containers, it’s not too much work. The payoff can be huge and can take advantage of space that may otherwise go unused.
Tips for Container Gardening
After recommending gardening in containers, I want to share some tips that can hopefully help you. These are things we learned through our experiences.
1.) Buy the Right Seeds
It’s important to buy the right seeds when container gardening. A vegetable variety that works well in the ground could be problematic in containers. This is often due to the depth of the roots and the height of the plant at maturity. For root crops like carrots, you will have more success with shorter carrots like oxhearts than you will with longer ones like yellowstones. Most containers won’t have enough soil for carrots to reach their full size of 7 to 9 inches, so it’s best to stick to varieties that are only intended to reach 5 to 6 inches.
For non-root crops, you should look for container or determinate varieties. These are only intended to grow to a set height, making it easier to contain them. You can also look for bush varieties that don’t need trellising or supports. You can find bush varieties of beans and cucumbers and determinate varieties of tomatoes. For corn, we looked for varieties that only reached a height of 5 feet. That will reduce the risk of them getting too tall and blowing over in strong winds. There are a lot of container-friendly plant varieties now, so don’t be afraid of growing what you want to eat.
2.) Choosing the Right Size of Container
It’s important to choose the proper container size for the plant you’re growing. When in doubt, go with the bigger option. Plants want soil for their roots to explore, so give them as much depth as possible. You can put multiple plants in one container, but don’t crowd them. We tried growing more than one pepper and bean plant in 5-gallon buckets, which was a mistake. Your plant will be happier and grow fuller with extra room.
3.) Have Fun, and Don’t Worry About Mistakes
Gardening can be a lot of fun. It’s meant to be relaxing and helps us connect with nature. It can also be stressful. Accept that you will make mistakes, but please don’t let that get you down. Keep going (and growing) and focus on the success you’re having. At the end of the season, you can think about ways to improve next year’s garden.
If you’re thinking about container gardening but have been unsure if it’s a good option for you, I hope this post helps you feel confident. It’s certainly worth it.
To write, you must read. Simple right? Like any skill, it requires building those muscles, learning from example, immersion in a new concept, but as I started to brainstorm a new novel project, my tank was empty. I had concepts, settings, character types, but the world building through dialogue and metaphor…it was pretty bland. Not what I expected!
When I began work on Udal Cuain in the summer of 2016, the story poured out of my mind. I had to carry a notebook around, for the small pieces of plot, personality, and setting I found welling up throughout my day. Names were easy to determine, as well as the dramatic conflicts. Why does it feel so different? Well, I remembered something when I picked up Six Crimson Cranes by Elizabeth Lim – to be a good writer, you must read other stories. In 2016, I wasn’t sewing, knitting, or gardening; I was reading in my spare time. I was still watching movies and TV shows regularly, instead of how I spend my time now watching far too many YouTube videos.
Although I have read a lot of books, it’s past tense. I have not been a consistent reader for years now. Honestly, since 2021, my reading has dropped off. We moved from a town with an incredible library to a borough with a library that is so underwhelming, and on the verge of losing its funding, that I have not been reading new things, nor have I discovered new authors. I have a few books on my TBR list, books that I have bought with the intention of reading, but instead have become bookshelf decor. It’s disappointing.
I used to have a Kindle, where I would buy books on sale for $2.99, sometimes splurging on a full-price one if it was intriguing enough. I would borrow a book a month, and browse the free section for something fun to pass the time. A book I remember finding on a sale that became an absolute favorite of mine was ‘The Shadowy Horses’ by Susanna Kearsley. I found this book initially in high school, reading it before work and during breaks at my summer job. I found Susanna Kearsley again, books upon books of her work at my local library in Meadville. They had a fantastic selection, with a monthly rotation of featured books and new authors. This is how I found Elizabeth Lim – her debut novel, ‘Spin the Dawn’, was a featured YA selection with a stunning cover that drew me in.
I miss the rotation of books and the lack of consumerism. The books were picked by the librarians, books that I could borrow and return with the option of buying. Now, if I want to find something new, the best affordable option is Thrift Books, but it lacks the in-person ambience of a library. Kindle helped me find some great twisty thrillers during the time that the mid-2010s. Remember when Gone Girl, Girl on the Train, The Wife Between Us, and An Anonymous Girl? I used to love these twisty books. There was a fantastic emergence of fantasy around this time, too. I remember finding endless YA fantasy series on my library shelves – I miss that time in my life, diving from adventure to the next. A good story connects us, inspires us. I forgot how important it is to be immersed in stories to be a good storyteller.
So I have picked up reading again. I am forcing myself to put down my projects, and the Animal Crossing, which I didn’t play before when I was reading often, and to read again. It’s going okay. The moments I give myself to sit and read are magical, like I remember, and I think I’ve already had better ideas since reading again. I wish I had kept a list of the books I read in the 2010s; it’s a bit of a blur. Maybe, with a little research, I can find them again and share my favorites with you?
I hope you are enjoying your summer (or winter if you live in the southern hemisphere) and that you have a good story to escape into today. Thanks for checking out my corner of the internet today. I hope to see you again. ❤
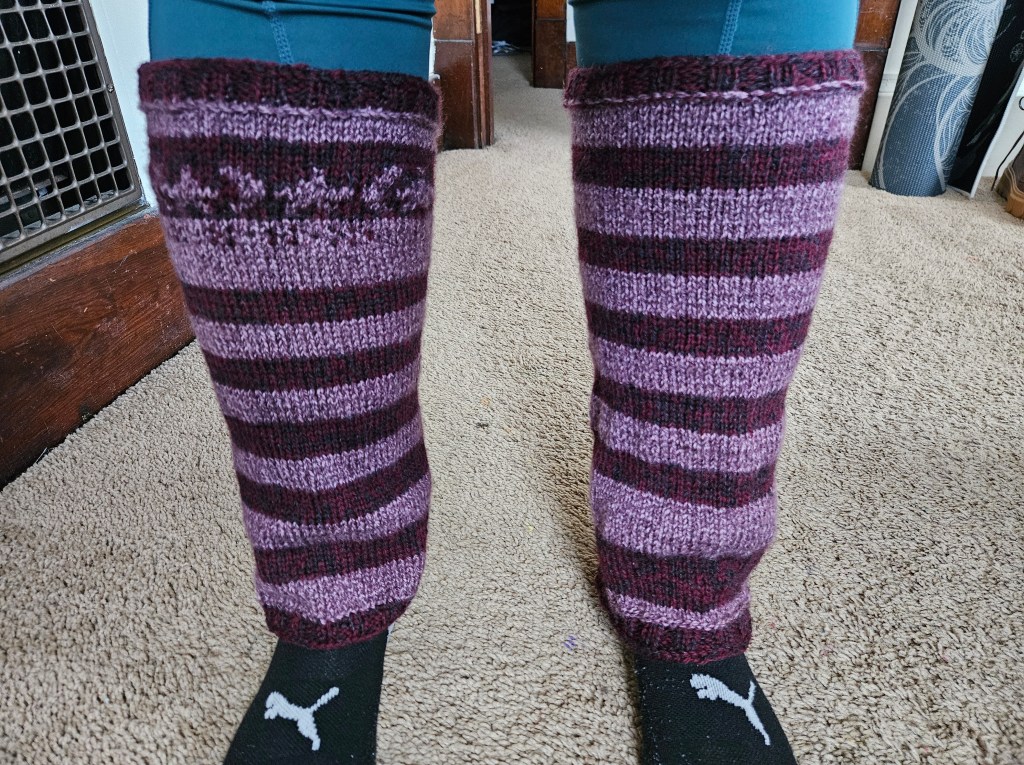
As a yarn enthusiast, sometimes I have many skeins of different yarn that I don’t know what to do with. This happens when I buy sale yarn, find unexpected yarn secondhand, or buy too much of one color for a project. Purchasing the right yardage is definitely a learning process!
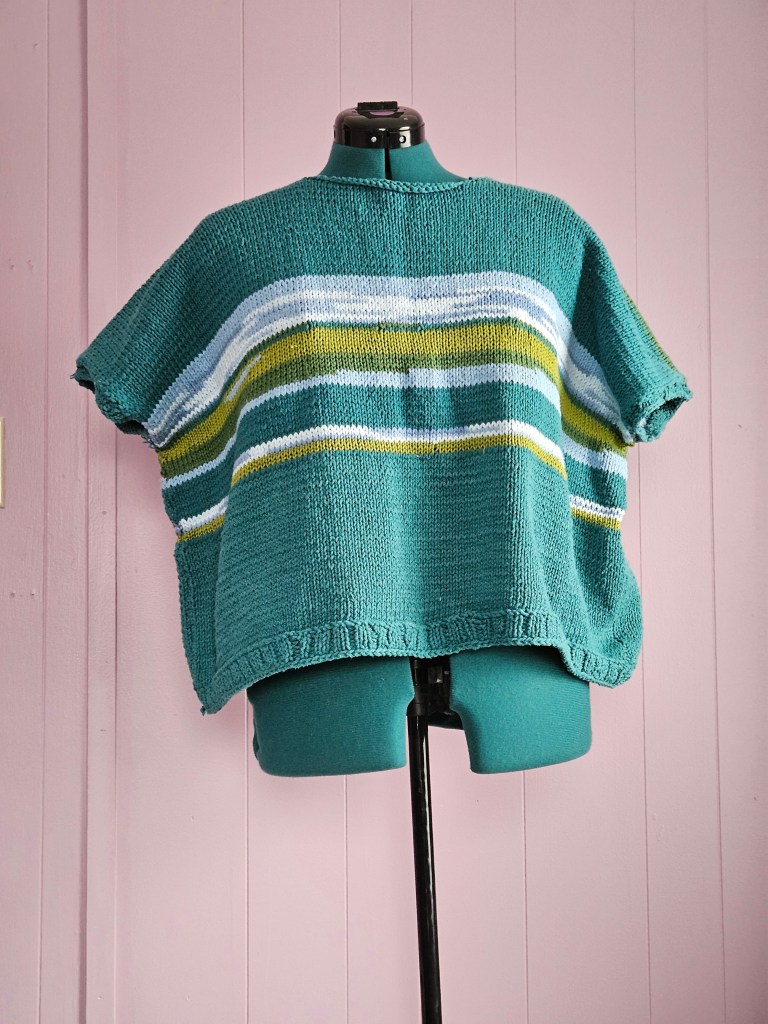
So, how can you make your yarn stash go further and use up those skeins you don’t know what to do with? An easy fix I’ve found is to get really scrappy, lean into stripes, experiment with colorwork, and my new favorite – blending yarn by holding two strands of different yarn, even variegated yarn, to make something fresh and inspiring! This has helped me need to destash, donate, or feel weighed down by my yarn inventory.
Once you have a color story, what do you stitch up? There are the tried and true tanks, tote bags, and scrappy cardigans, but what about something outside the box?
Baskets
Small Storage Bags with Zipper
Shorts
Sailor Collar
Overalls
Mini Skirts
Koozies
Tapestry
I get stuck in the idea of knitting as wearables, but it can be used to make so many things, and at the end of the project, you’ll have something truly unique from your own hands!
One of the most satisfying ways I have found to use up random yarn is colorwork. Hints of color with scrap that add a touch of whimsy? Sign me up!