In 2025, one of my goals was to try my hand at crafting my own K-Pop Merch. Some bands are easy to find Merch for, and others, well, you are left to your own ingenuity. The bands I selected to try for this are NCT 127 and NMIXX, which I have tried and failed to find band tees for that I liked. For this project, I used two different techniques – embroidery and stranded colorwork knitting.
NCT 127 Embroidery
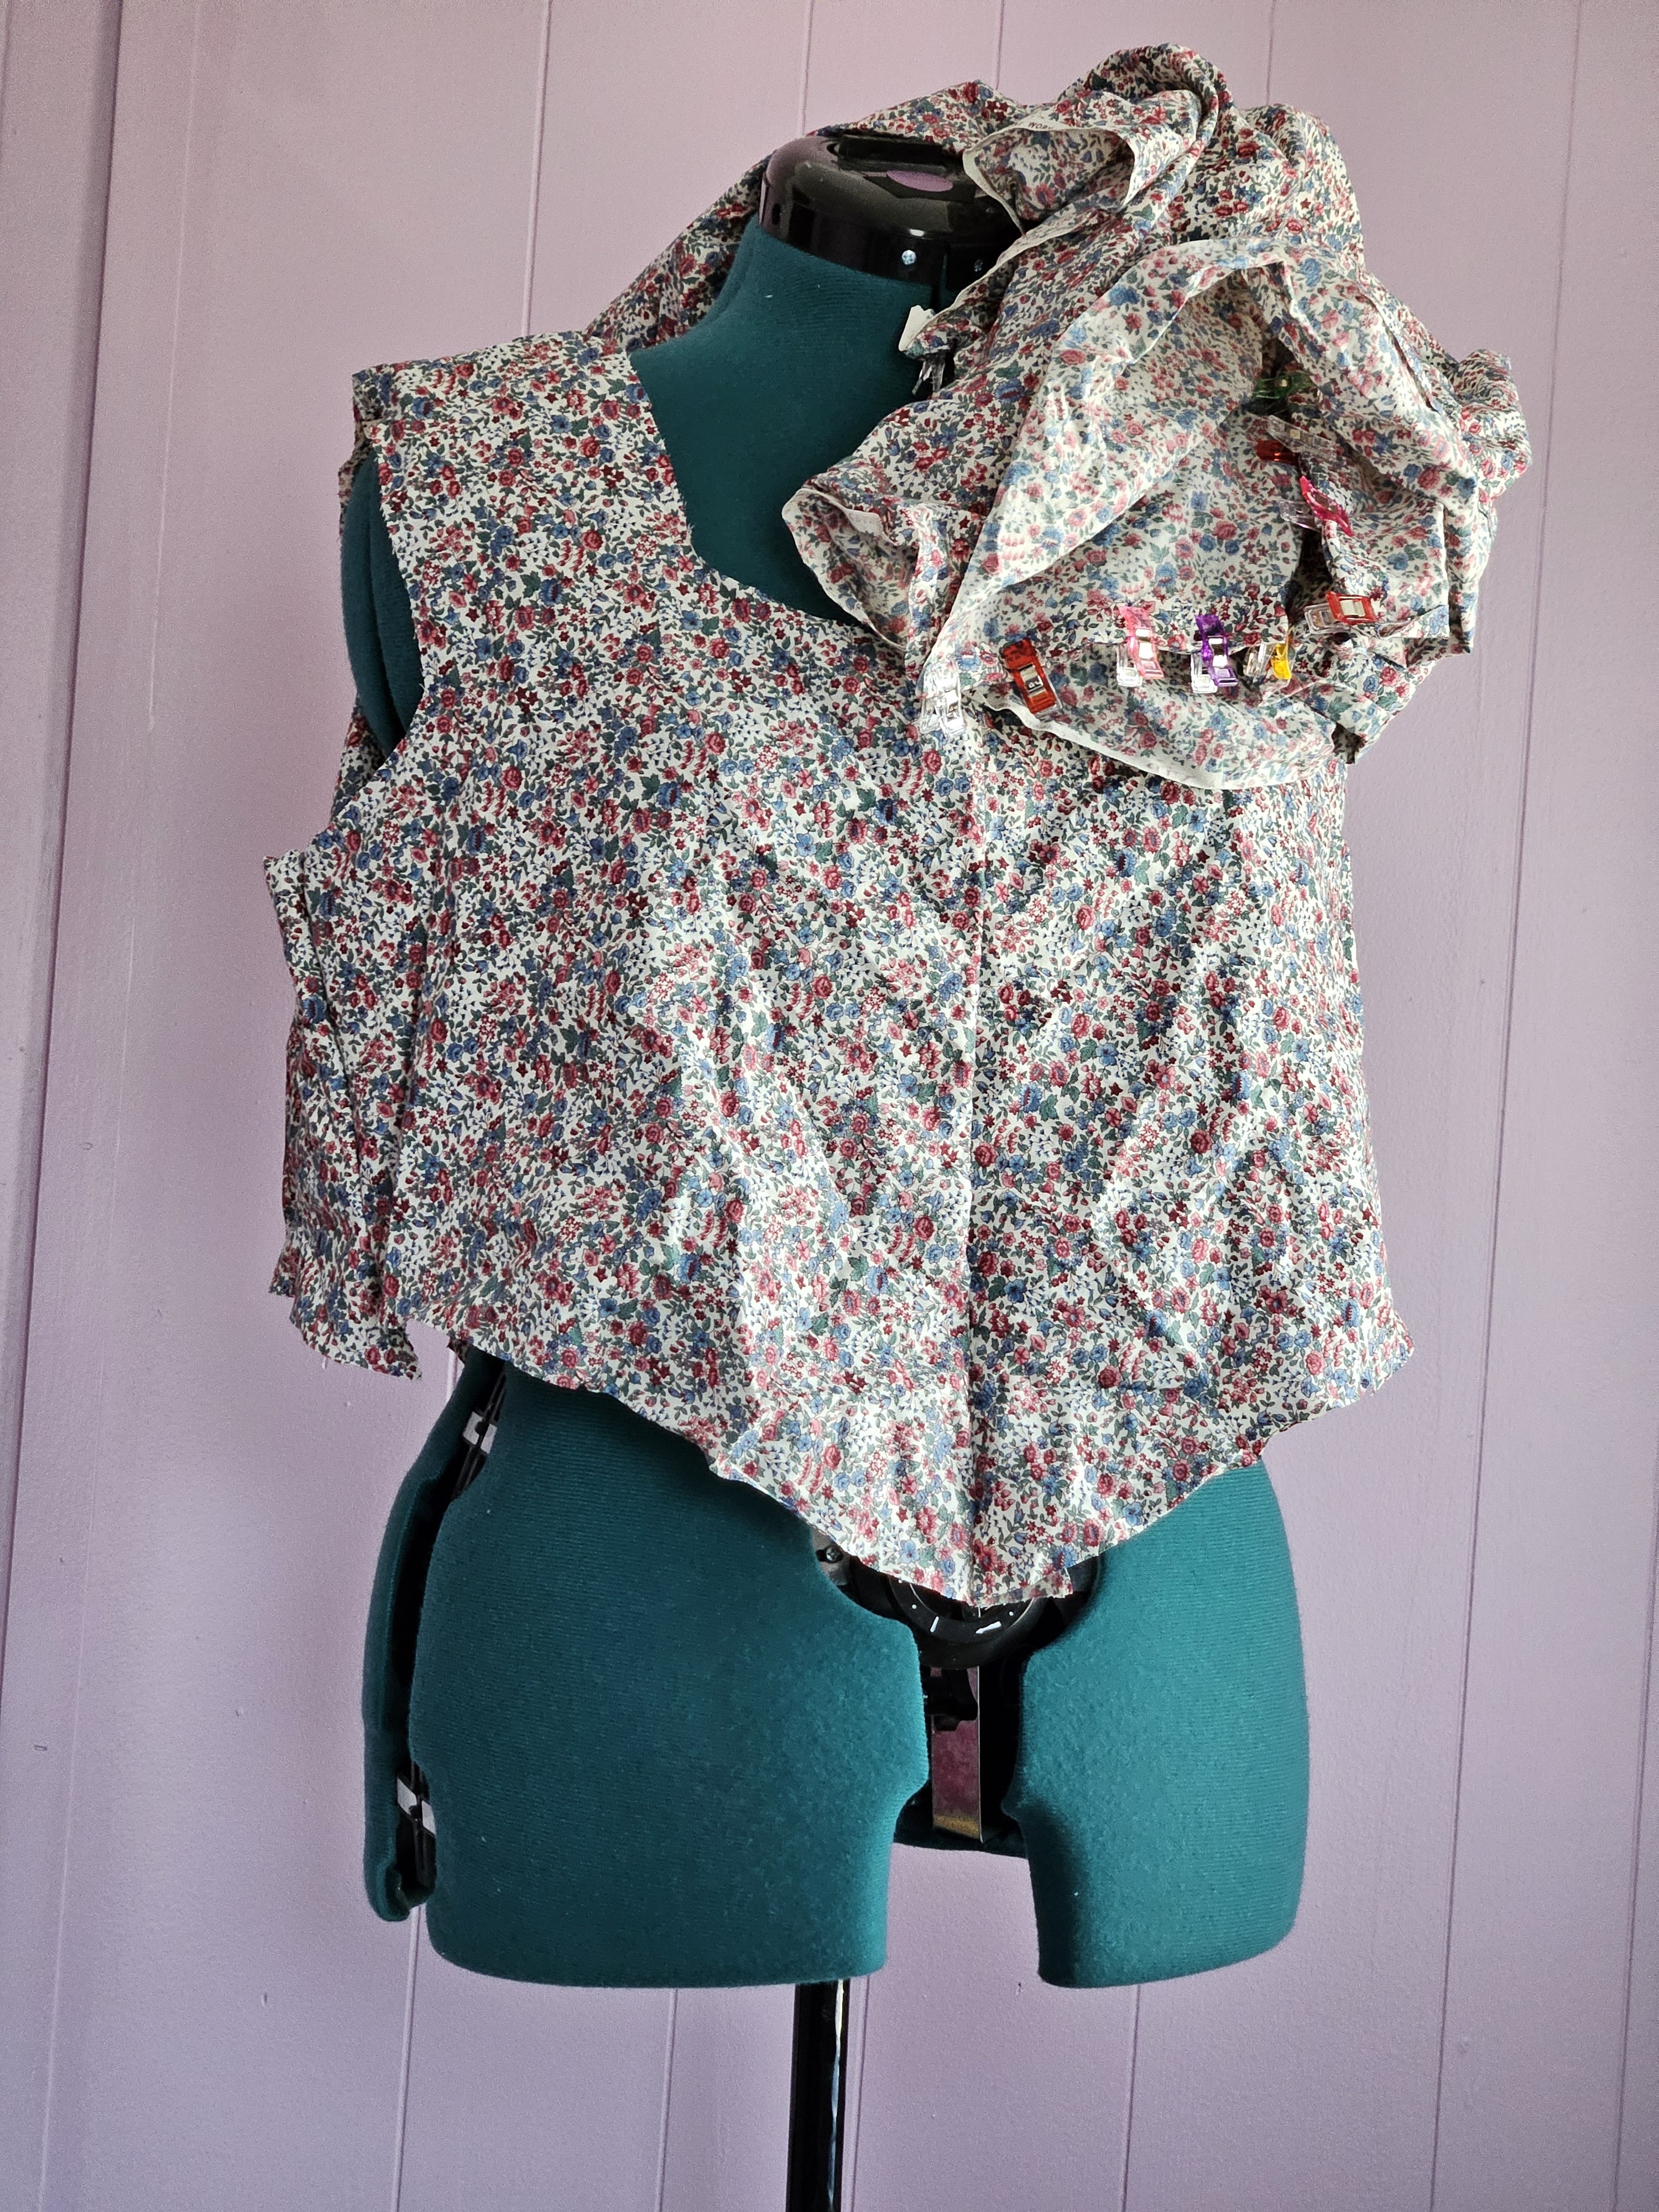
My first idea was to pick up a blank T-shirt from the craft section and get to work. The shirt I chose was a Gildan tee from Walmart, which I DO NOT recommend. This shirt is so freaking thin. Horrible quality compared to the blanks I have found at Michael’s, Dollar General, or even Hobby Lobby. But as I was dubious of my embroidery skills, I went ahead with the Walmart shirt as practice. That was the right call, because dang, embroidery is not as straightforward as it looks.
For this project, you will need: an embroidery hoop, embroidery floss bundles, a marker or pen to sketch your design on your shirt, and backing like embroidery interfacing or a fabric scrap that I used (because I forgot that the embroidery needed a backing).
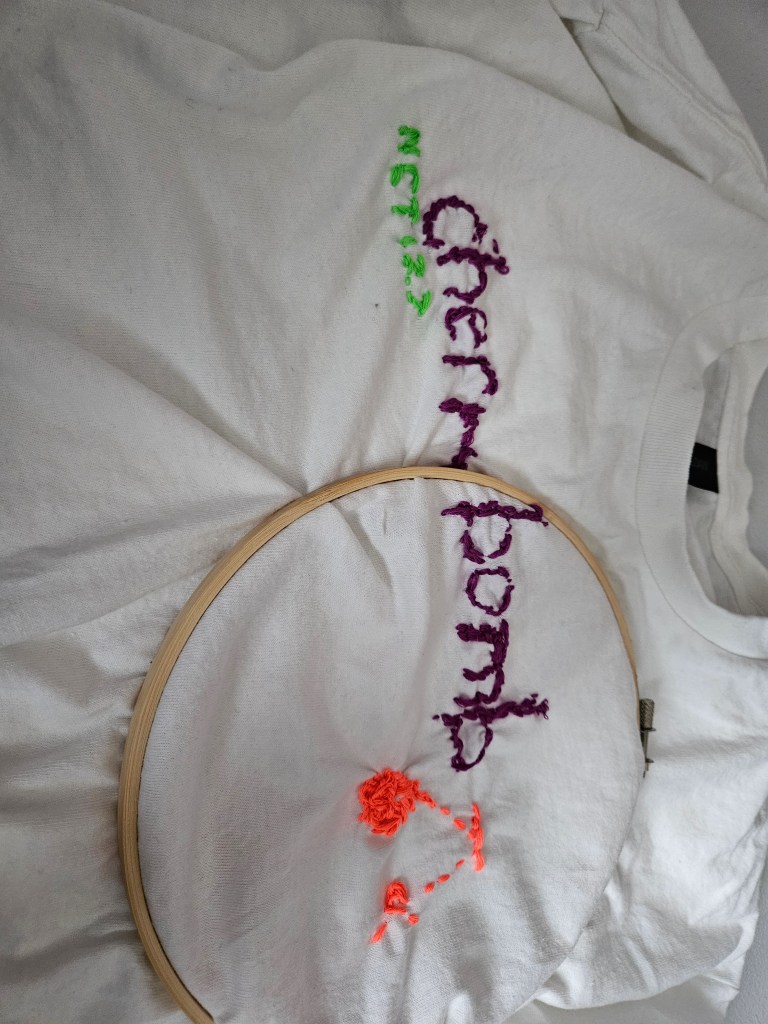

For the design, I chose something simple. The song, the band, and a little imagery. I love their early album Cherrybomb (2017), but the song is almost 10 years old now, and it’s kinda hard to find any NCT Merch with it at this point. Seemed like the perfect option for a first try. I wasn’t expecting my stitches to be so tight; I felt like I was fighting myself across the whole piece. This was because I forgot about the backing for stability, and all this embroidery on this poor quality shirt, yeah, it wasn’t great. Afterwards, I added a backing to the embroidery with a scrap piece of another t-shirt.
Is it my best work? No. But is it a start for making better projects in the future? Yes! And I wear it anyway in the garden and as a sleep shirt.
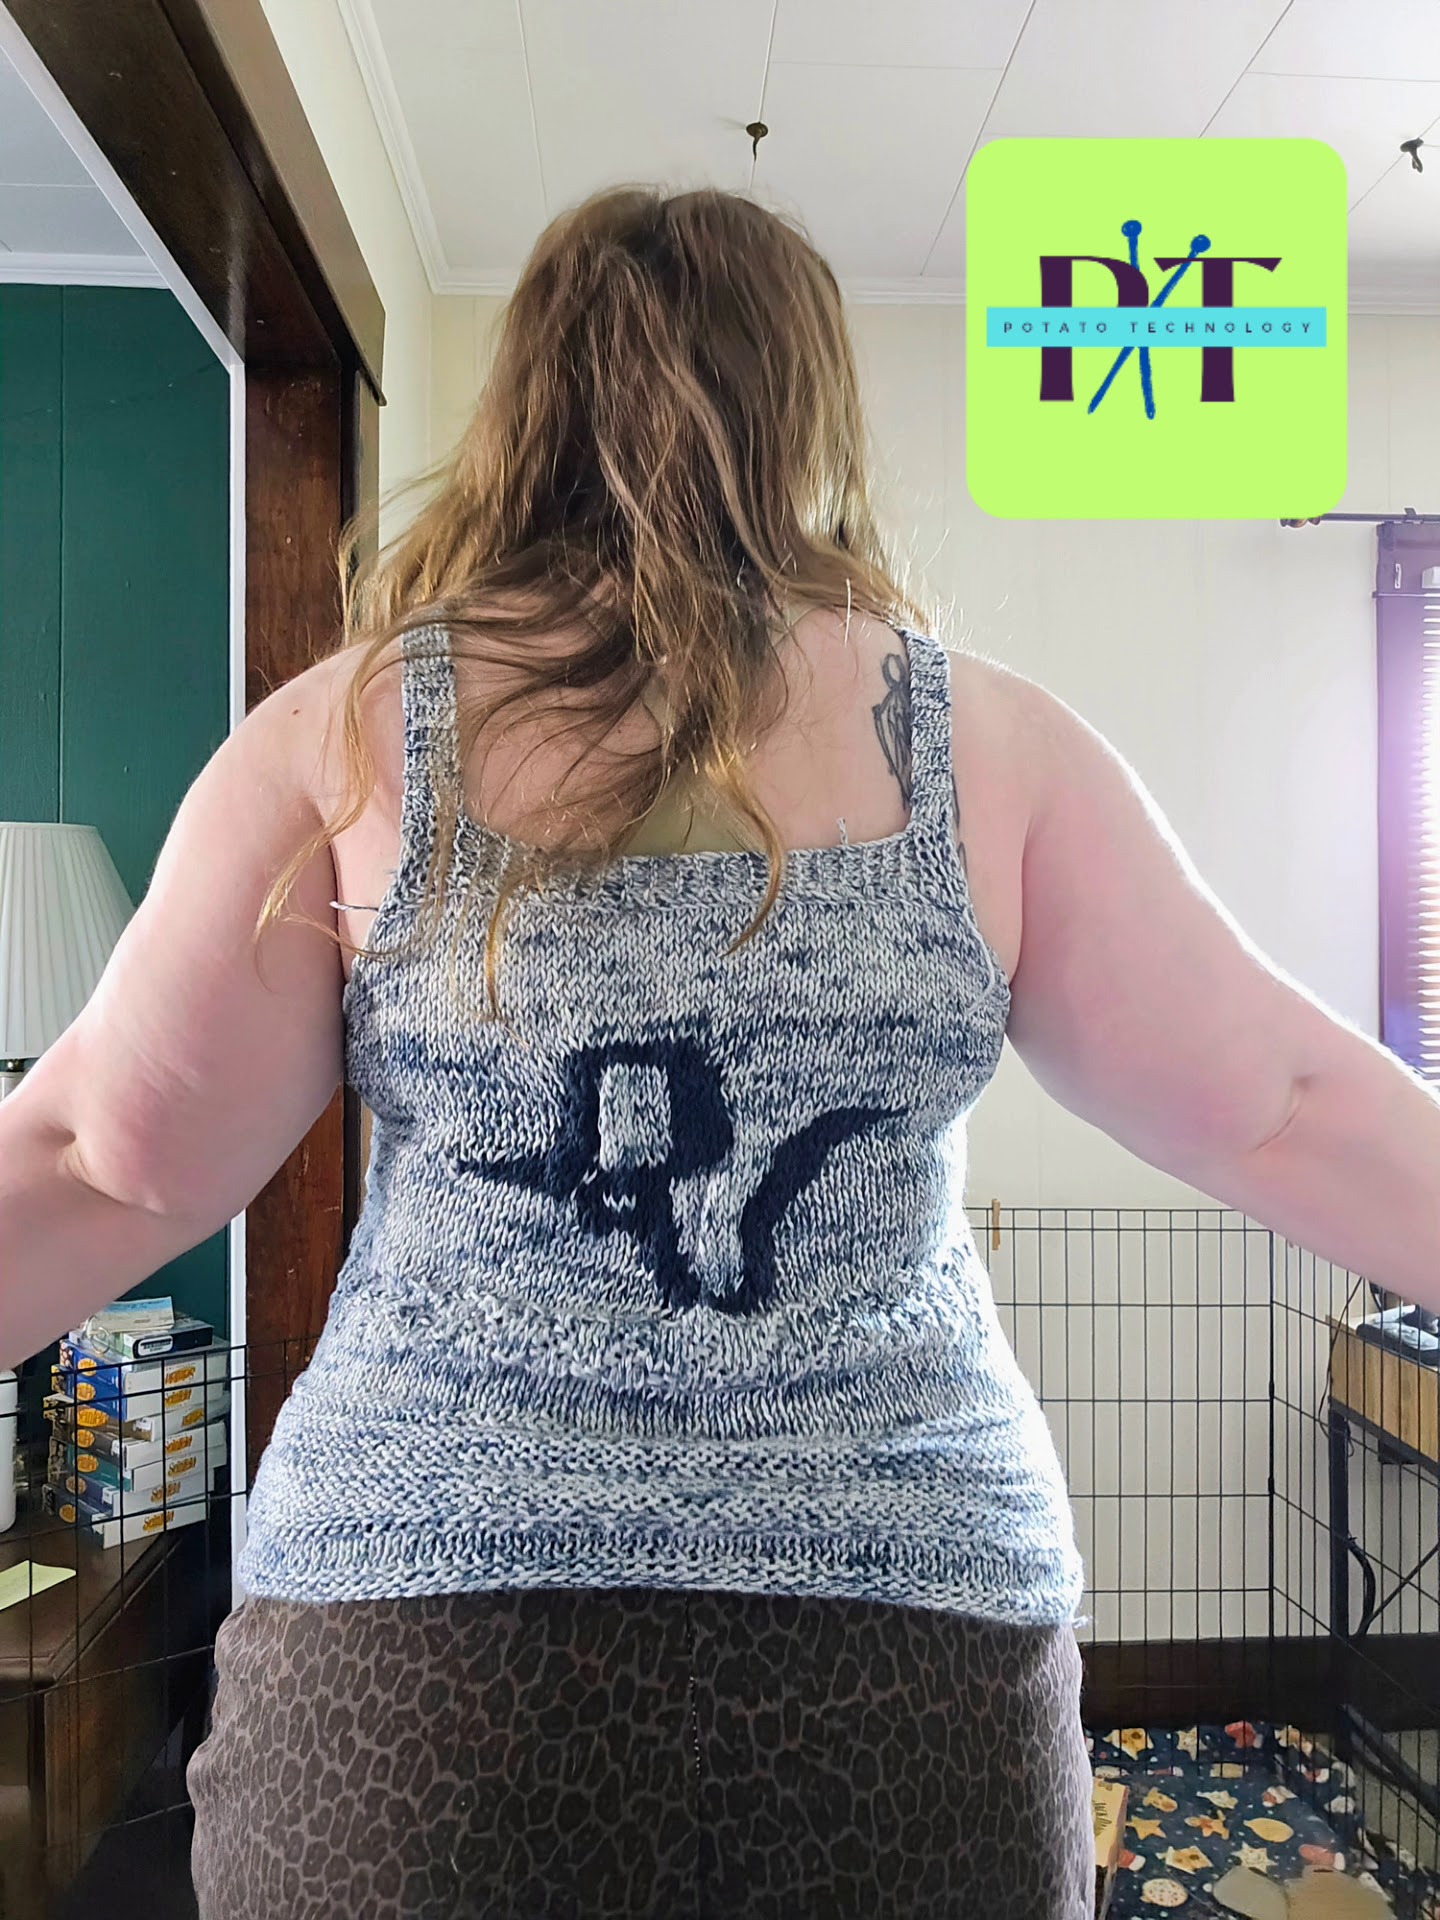
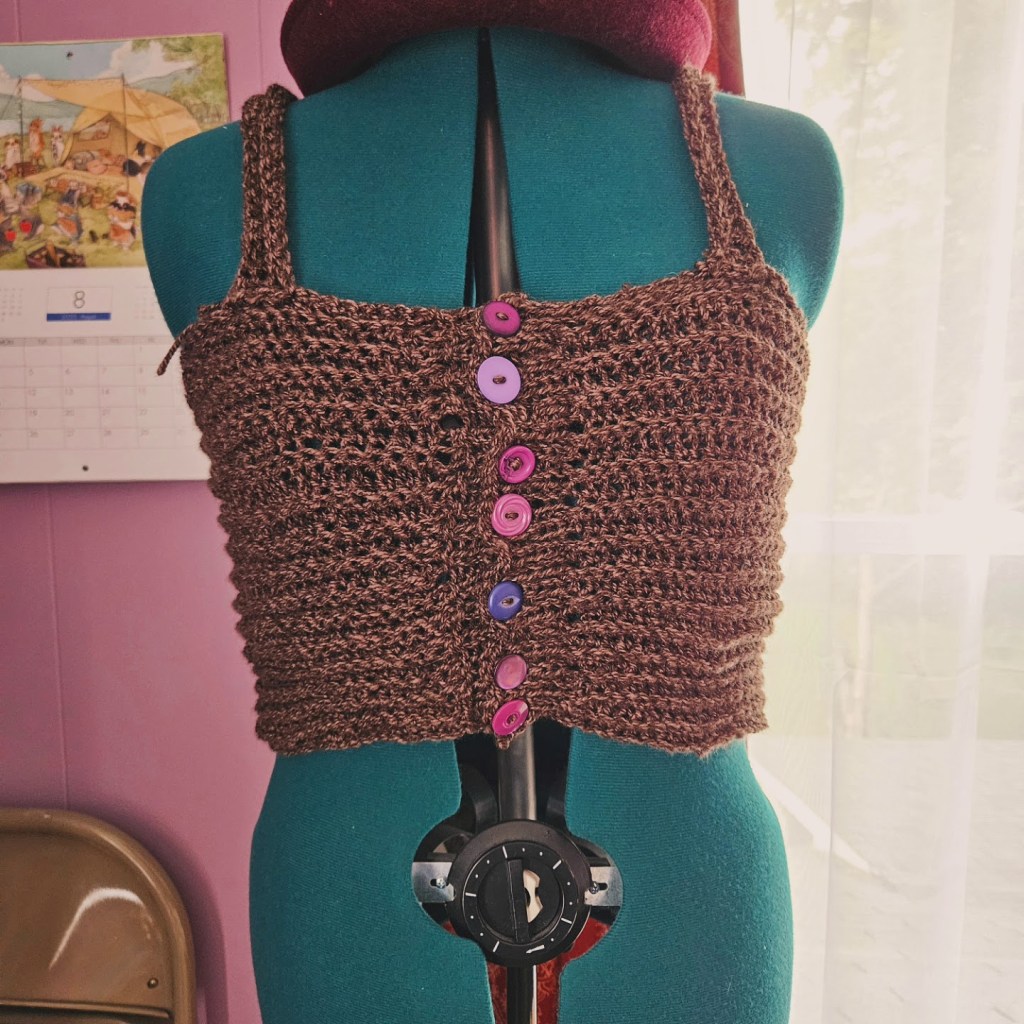
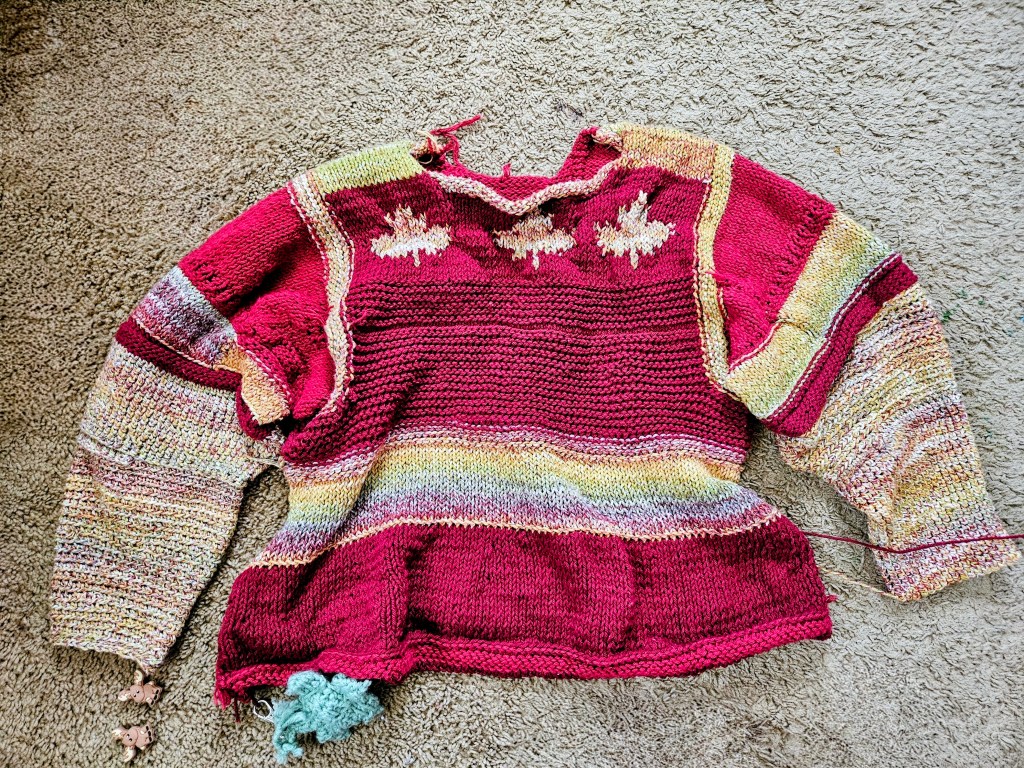
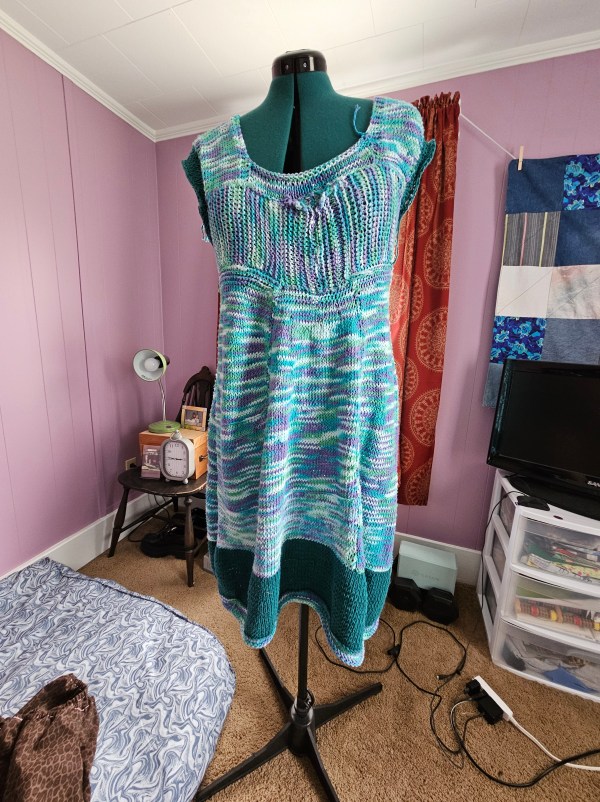
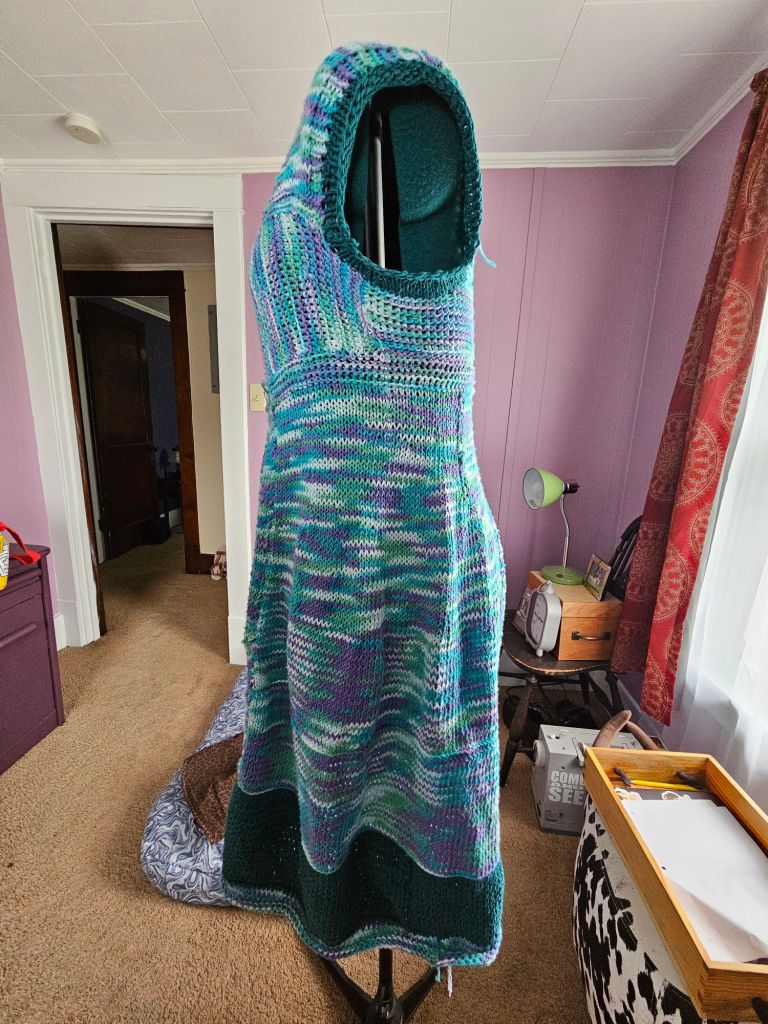
Red Velvet Knitting
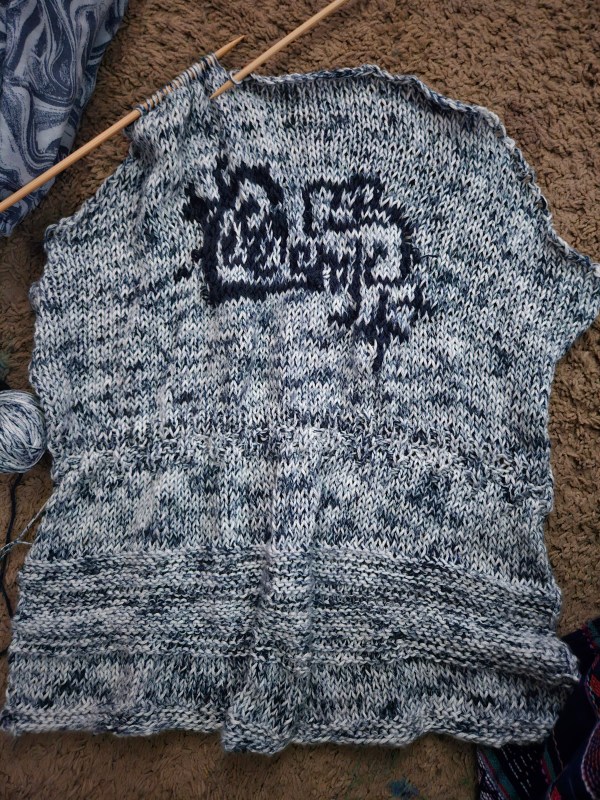
My desire for Red Velvet Merch was entirely motivated by the confusing announcement in April 2025 that members Yeri and Wendy did not renew their contracts with SM Entertainment, but Red Velvet was not disbanding. They have become one of my top girl groups after their release of Cosmic in 2024, so it seemed only appropriate to use the album Cosmic as my muse for a cotton knit tank with stranded colorwork. It’s a bit easier to find Red Velvet Merch on sites like Teepublic, from which I have bought a shirt. This project was more about expressing my love for this album, and I hope that Cosmic will not be their last release as a group.
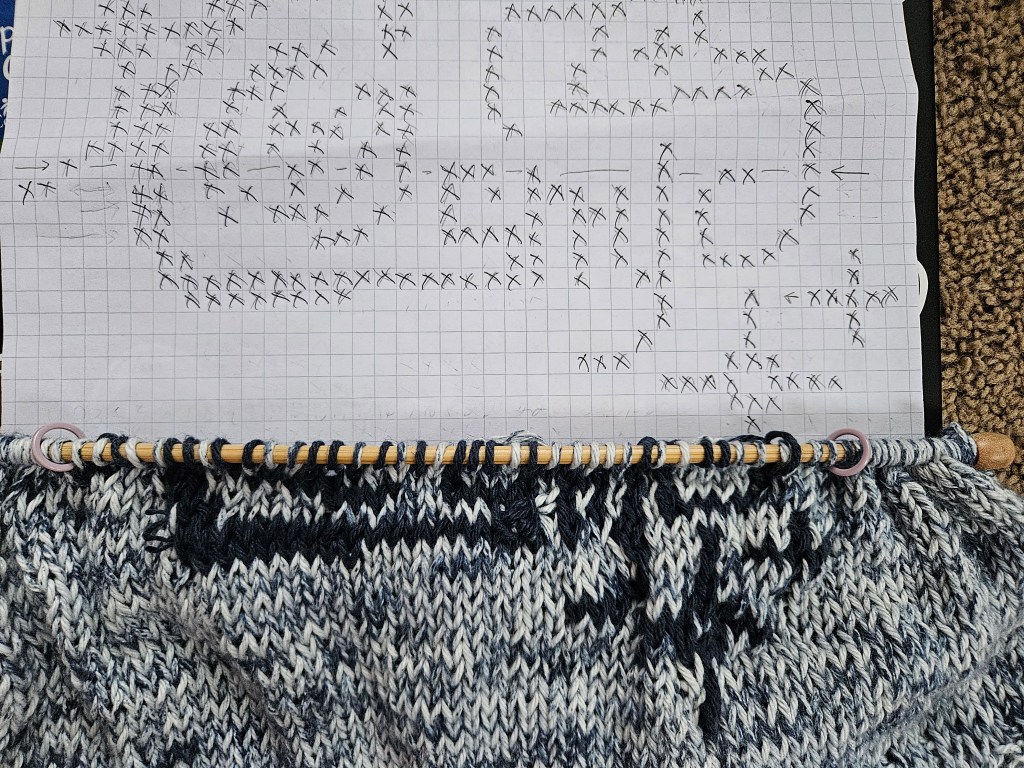
You will need: a pencil, pen, graph paper, and stitch markers. (Along with your basic knitting supplies – needles, yarn, scissors, tapestry needle)
To start, I searched Pinterest for album artwork and a logo. I found a lot of options to use as a compass for the project, but decided the simplest option would be best. I opted for one color to keep the floats simple. To make my colorwork charts, I always use graph paper and a pencil to be able to adjust the marks that I transfer from the image. Once I am happy with my design, I trace over it in pen and use a pencil to cross out the lines of the pattern as I complete the project to mark my progress. To understand the dimensions of the image as I worked, I also marked the “canvas” with stitch markers. It is also important to note your garment construction and how that relates to your chart. I made this tank knitting bottom up, so I began working on my colorwork from the bottom of the chart.

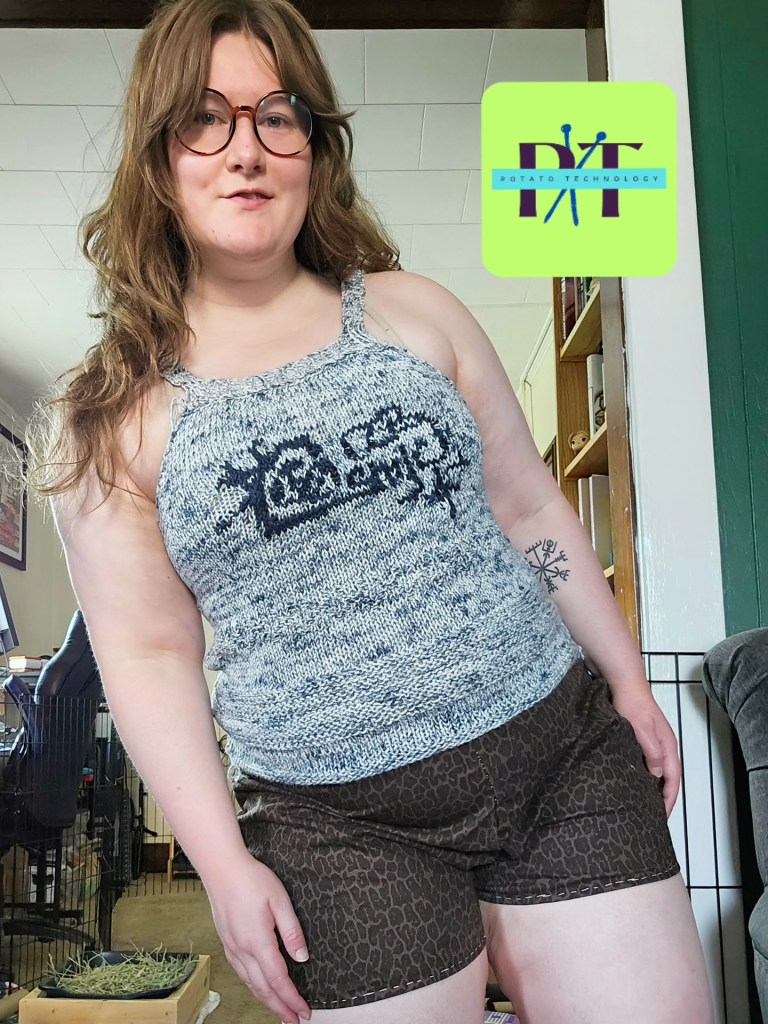
I am thrilled with how this project turned out! As my first stranded colorwork project with this complex of a design, it was far easier than I thought to complete. You just have to plan out your image and be patient with your floats. Try not to hold too tightly and remember that blocking will help the tension relax.