


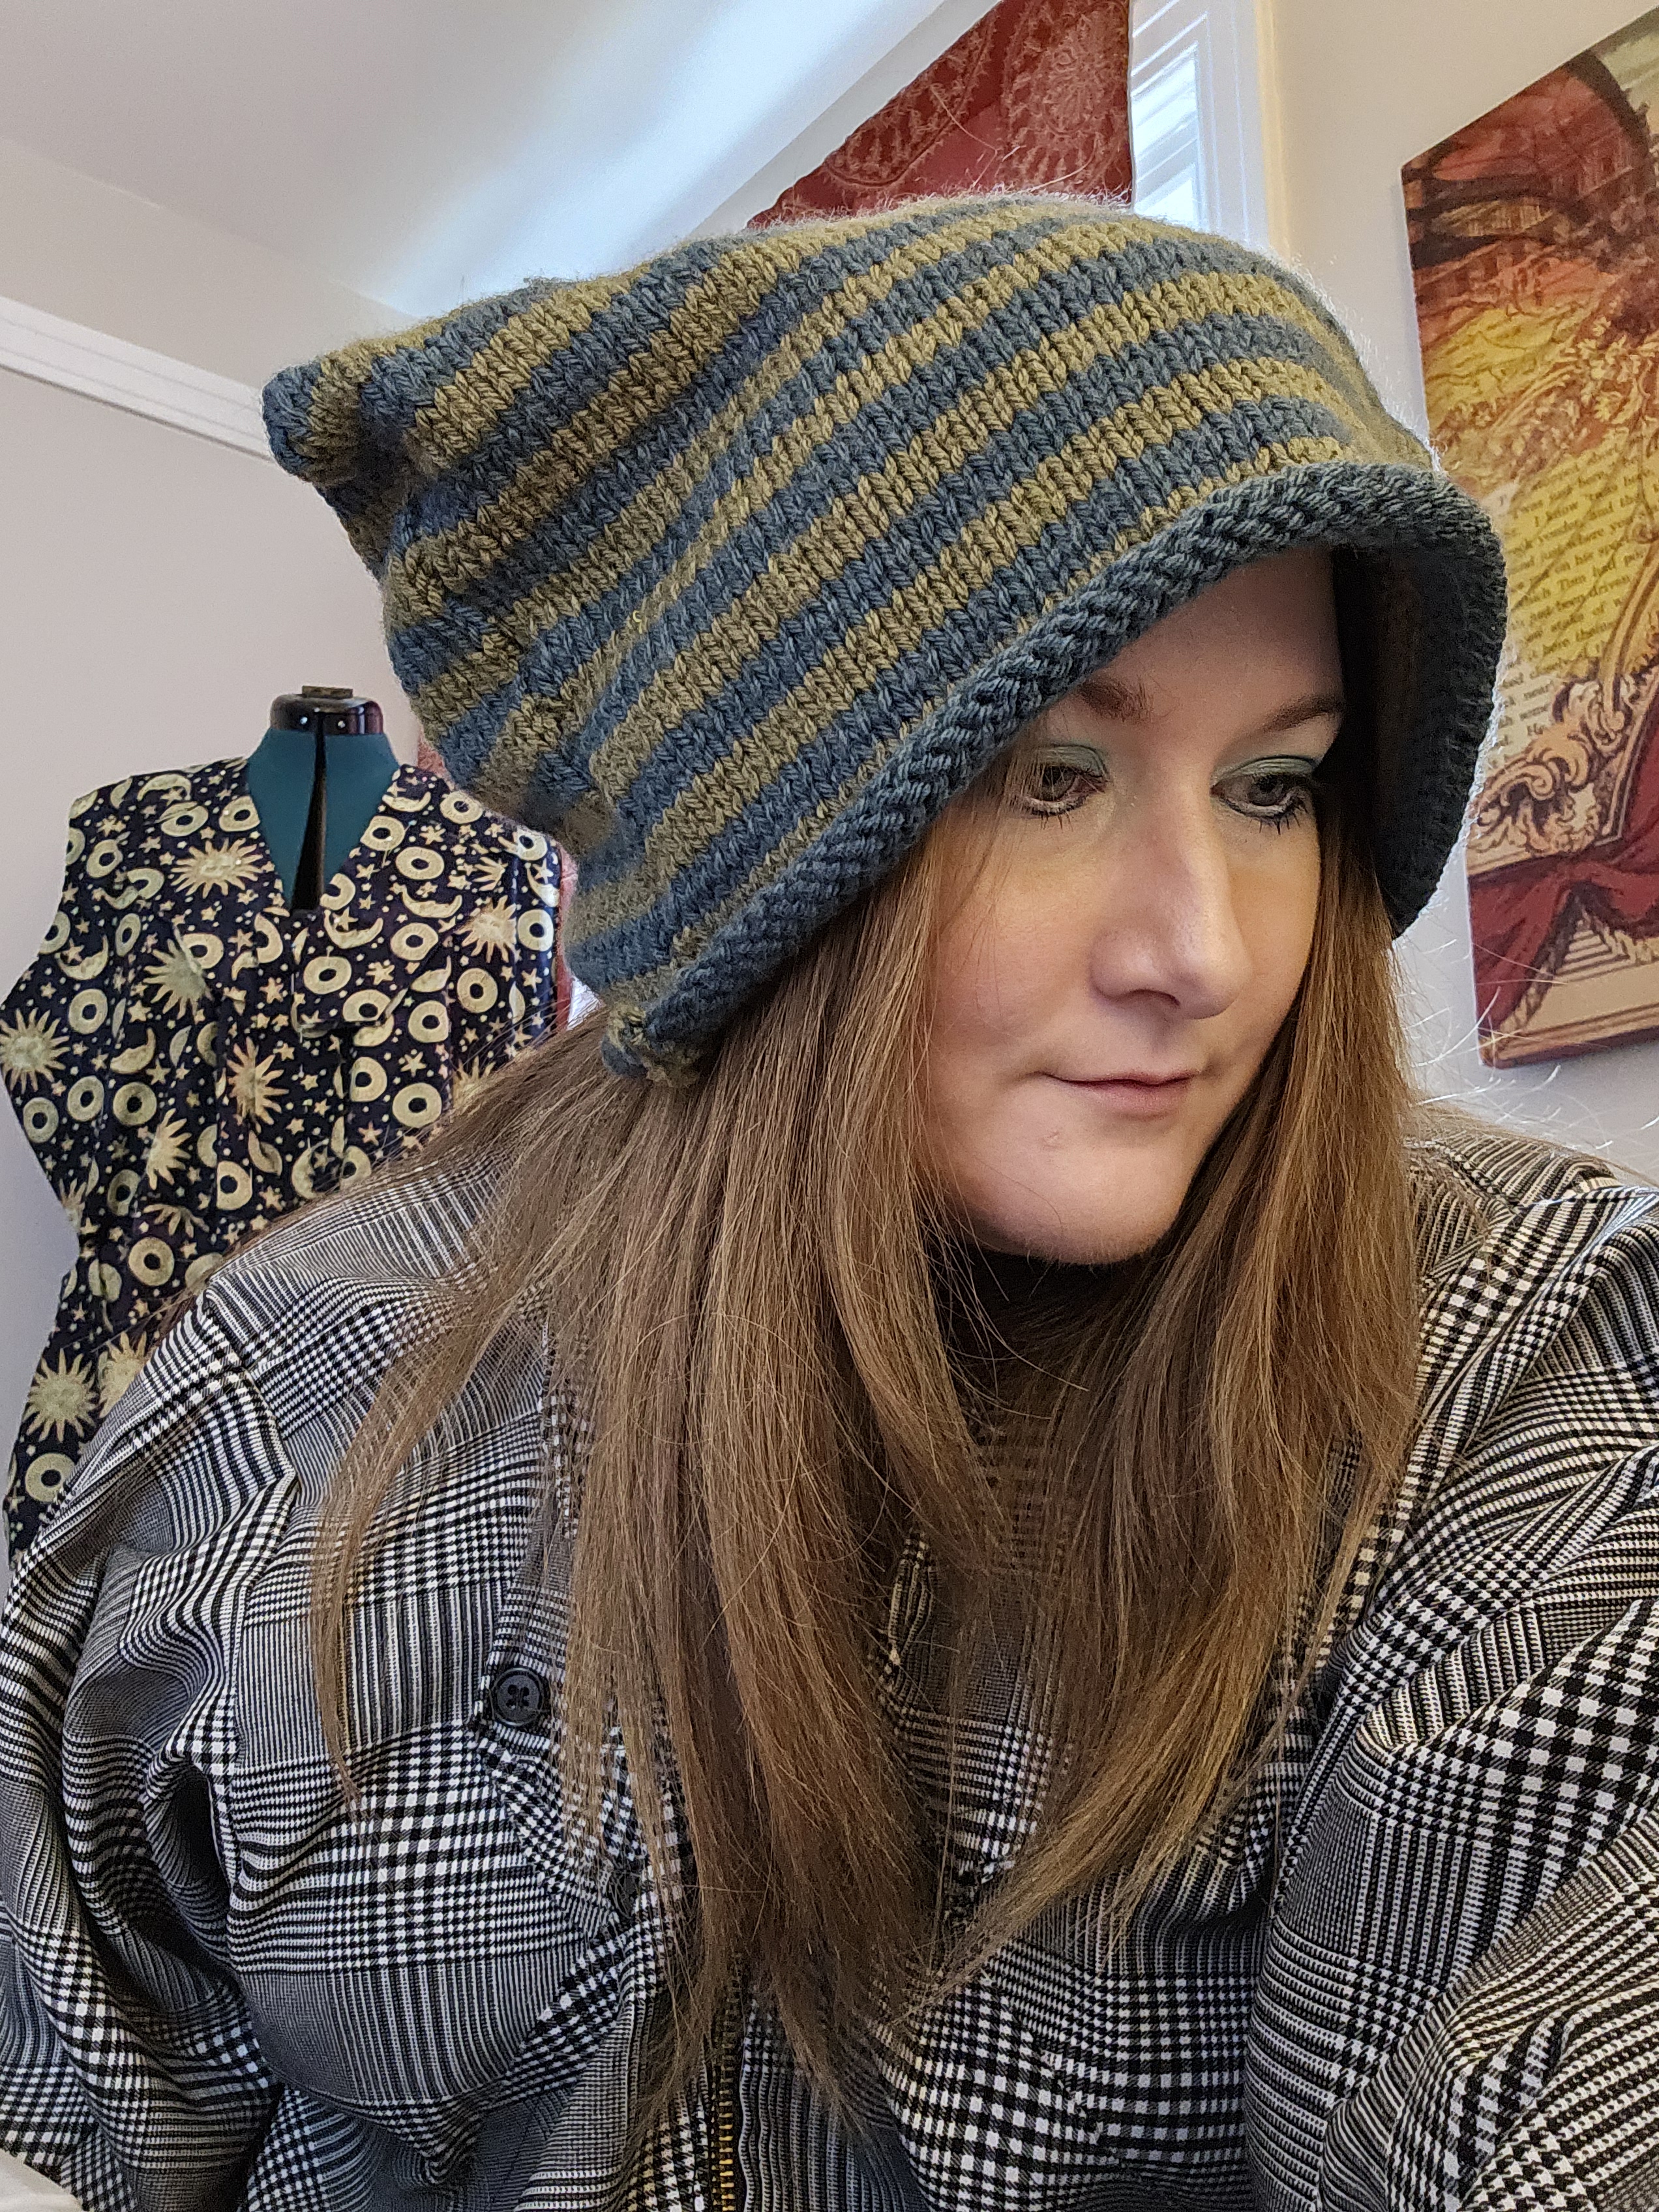

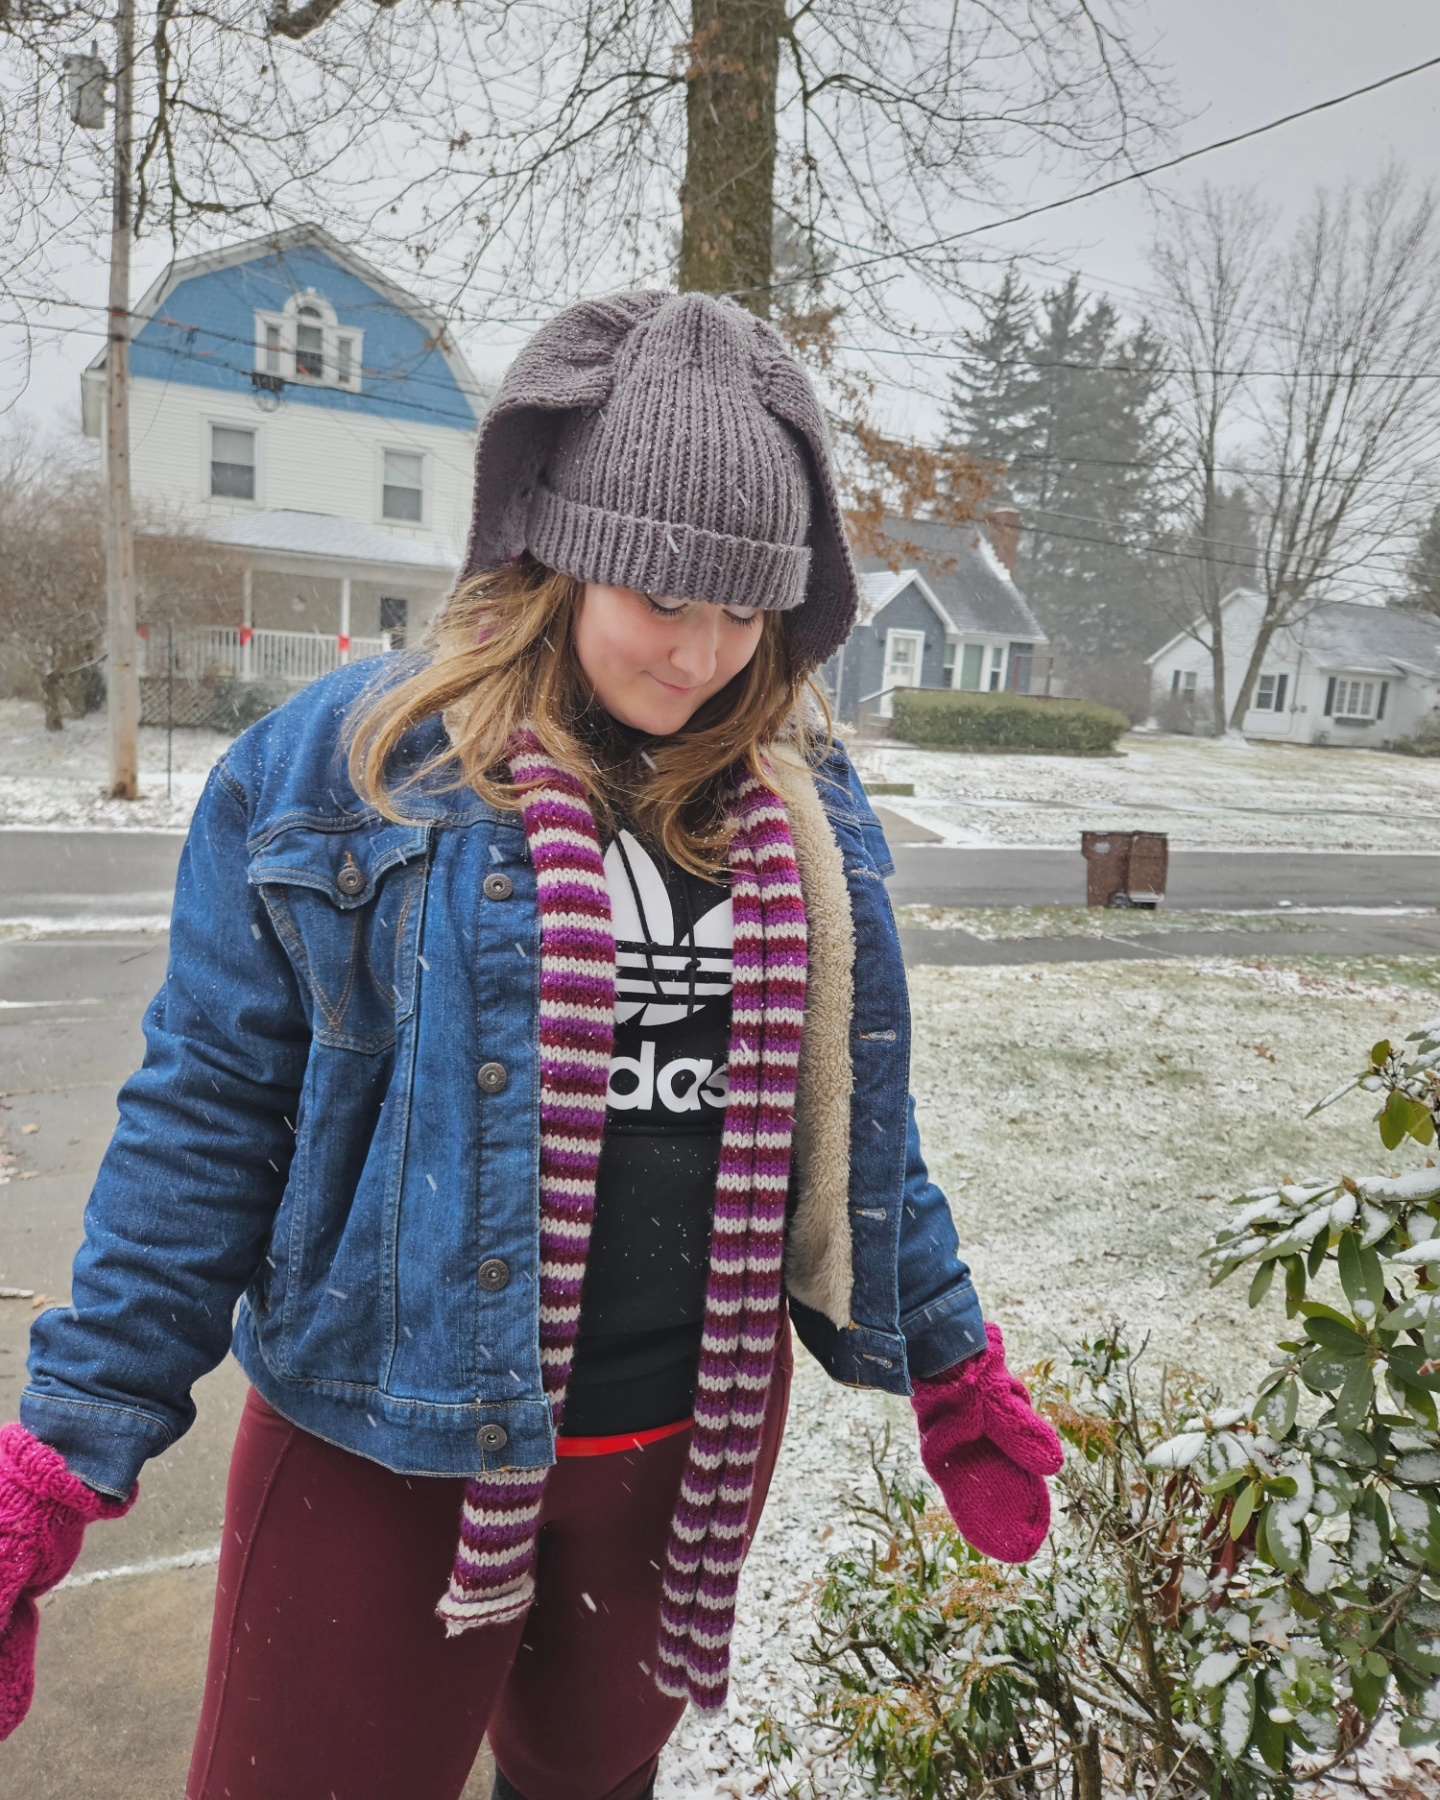


Stray Kids. More specifically, Felix’s hat on stage at the Music Bank Paris performance in 2023 and Hyunjin’s striped crochet beanie during a video in 2023.


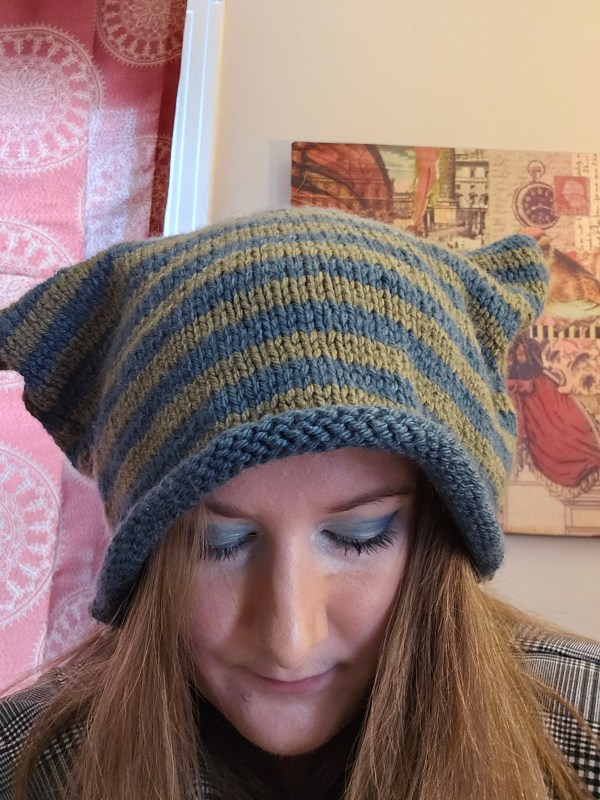
It seemed simple at first glance but then again, new knitting patterns can be a bit confusing so I did research, to be safe. The cat ear is a corner and the point or drape, depending on the structure of your beanie is created by the length of the hat horizontally across. Once I understood that the shape would be determined by these top corners it was easy to jump in!
So I cast on 50 stitches on size 8 needles with worsted-weight acrylic yarn (I’m allergic to wool) and alternated between olive green and teal every three rows. After 55 rows, I cast off and sewed the two panels together to form this lovely cat-ear beanie. Honestly, such a fun and easy project once the ear structure clicked. 🙂 I’d say if you are an intermediate knitter you could make this over a weekend for sure, potentially in 24 hours if you were in a super rush. As a beginner, I’d say give yourself a week and take your time to keep the stitches even across. Sew up the sides and top with a tapestry needle.
I think the trickiest part was choosing what colors of yarn to use for the striped pattern. I didn’t want to make an exact copy this time, well I couldn’t anyway because I don’t currently crochet, but I wanted to use a unique color palette from my existing stash. These colors are some of my favorites in my stash. I’ve found the color story versatile to style with both cool and warm-toned accessories. I think the earth tones help keep it neutral. I love it and reach for it the most out of all the hats I’ve made in 2023.


The sweater vest. It was on my radar but did not become an item I dreamed of until I saw a lookbook from Steal the Spotlight styling Friends-inspired outfits, inspired by Chandler, the sweater vest king. I continued down the rabbit hole and to Katie’s K-pop Comeback Fashion review and I was done for. K-pop fashion, Korean fashion, and the sweater vest were a layering piece I knew I was going to make. Maybe it is the color combinations or the accessories, but how these sweater vests are styled across different boyband concepts just got me. It felt fresh and fun, not preppy or stuffy.


A year later, I was ready to tackle this project. After making a few sweater projects, and learning how to pattern from garment construction, I felt like I had a good understanding of the shape needed to make the sweater. At Joann’s, I found a non-wool tweed yarn and I knew this was the yarn I wanted to start with. It looked like garments I love from Irish Aran Jumpers and was a way to bridge my heritage and this new world I was exploring through K-pop. I like the garments I design to have a story and intentionality behind them.

With US Size 8 needles in hand and one skein of Big Twist tweed yarn awaiting a new form, I began by casting on 65 stitches. Working my way up I did the basic knit-purl stitch and gradually binding off on either side when I reached my desired length for the armhole. I chose to make a cropped sweater vest to accentuate my waist and break up my long torso. The big moment though came when I did some research and made the decision to branch out and knit the shoulder and neckline on two sets of needles. This required knitting, casting off in the middle, and continuing to knit on a second set of needles. It worked!
Learning new techniques is always worth the time and the trial because eventually it clicks and you have something new, you didn’t think you could do, but you can!
Making two instead of four pieces on my straight needles was a time-saver! Honestly, I see why having a teachable spirit is important in all aspects of life because I thought I had a good technique before, but dang, two pieces are such a better experience. Four pieces was a mental game, and I got bored. Hence why my previous sweater projects have taken months and months, and months because I distract myself with palette cleanser projects and then avoid finishing the four-piece projects.
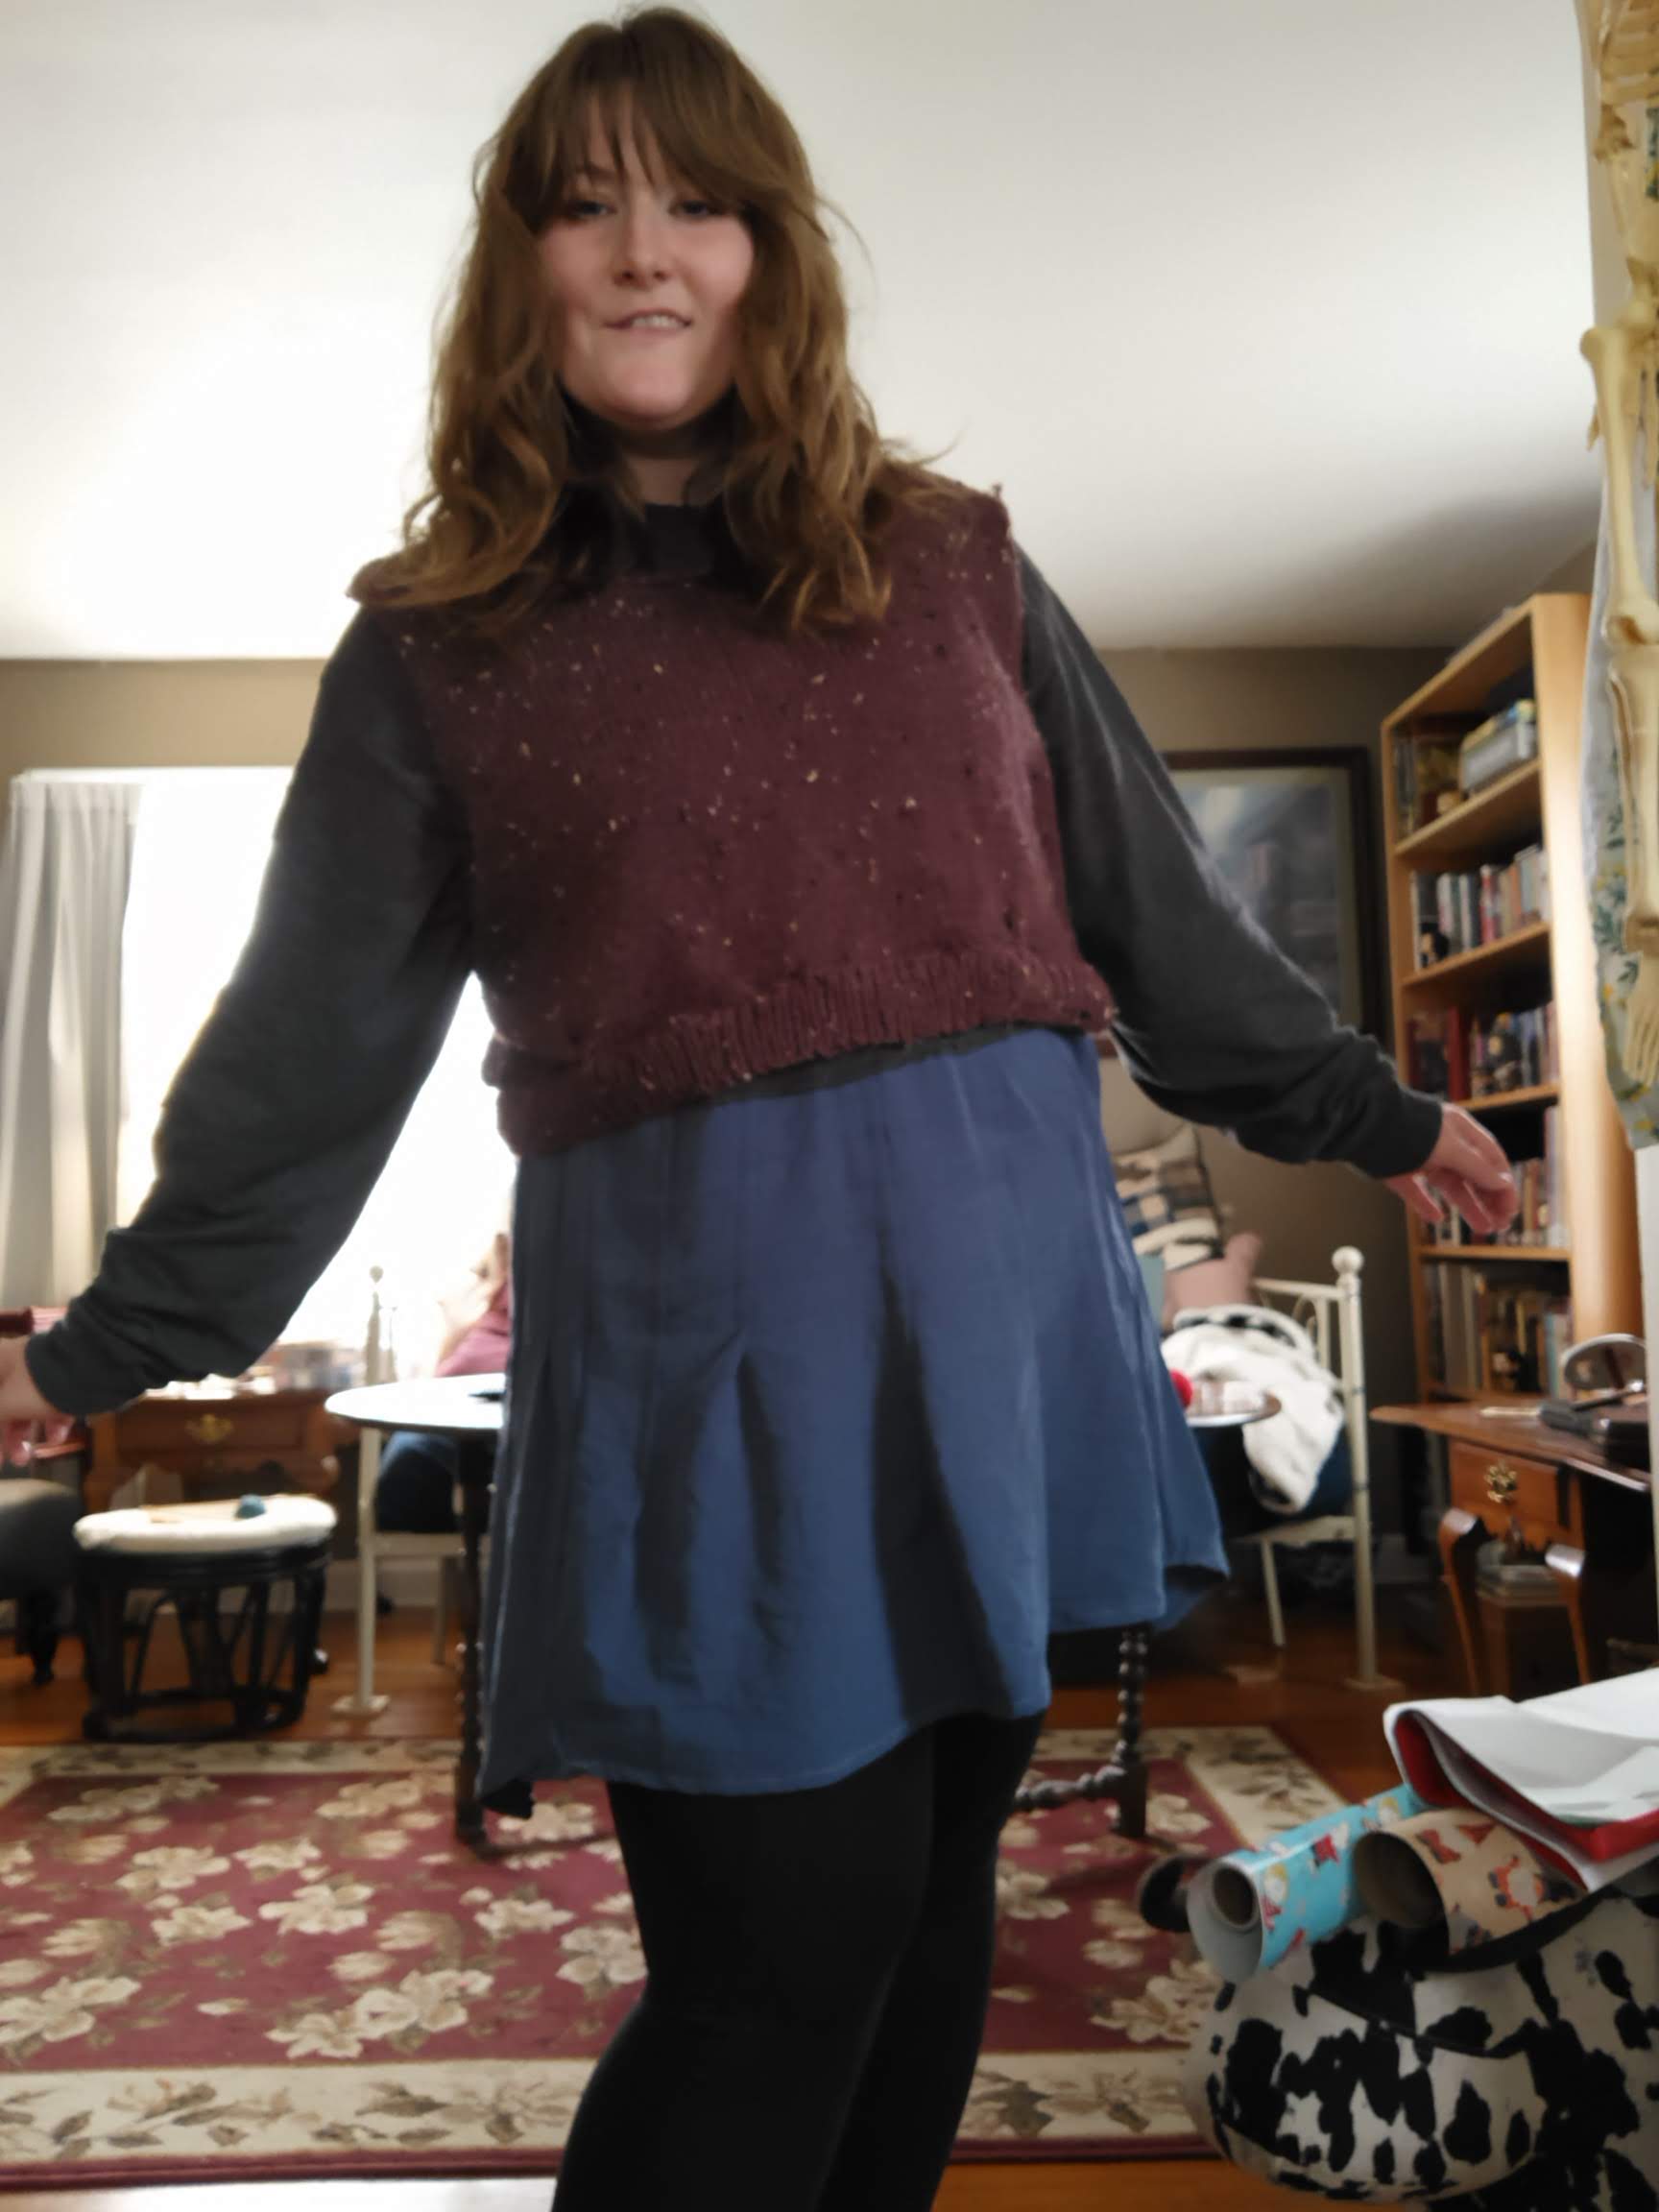
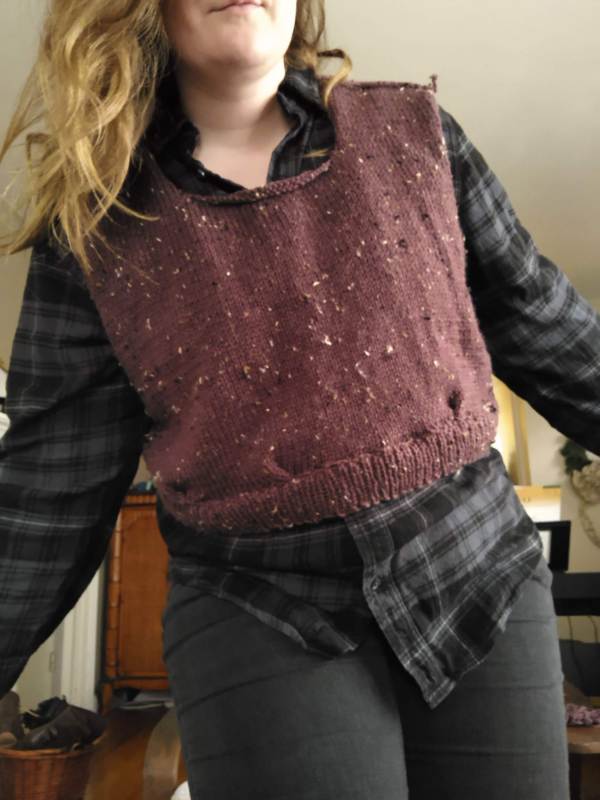
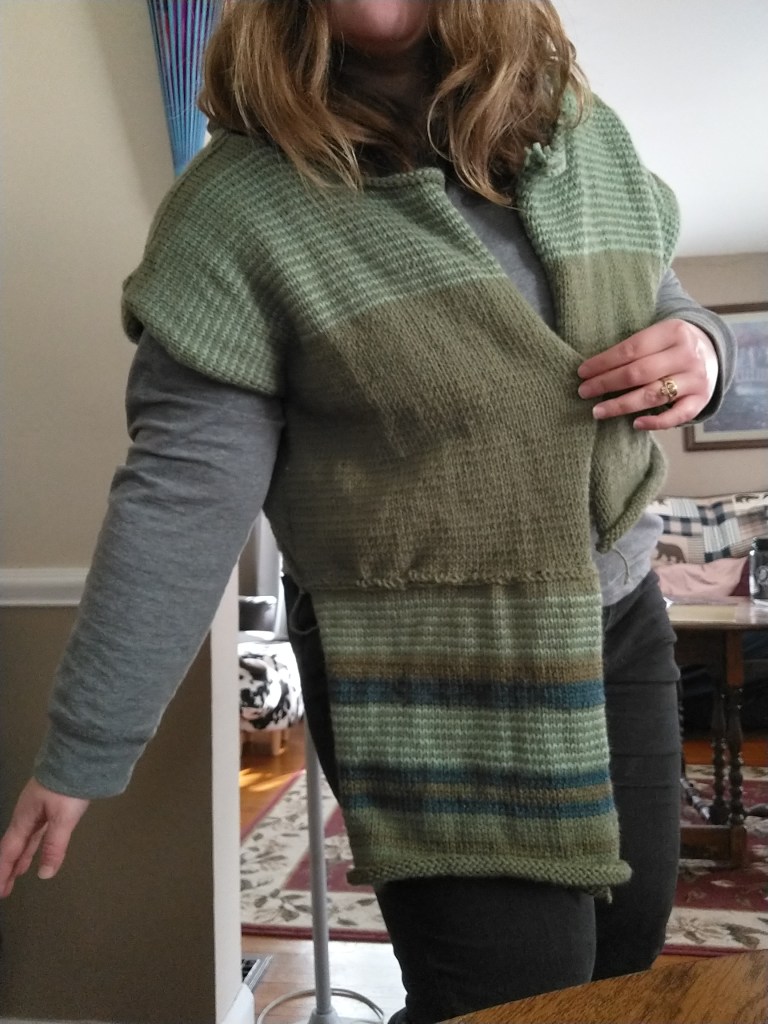
Afterward, I sewed the two pieces together and knit two 65-stitch pieces of ribbed trim for the bottom. I liked how rustic the sweater looked without the ribbing on the neckline and armholes. It looks like an old-fashioned piece, and a bit like armor. Which is cool.

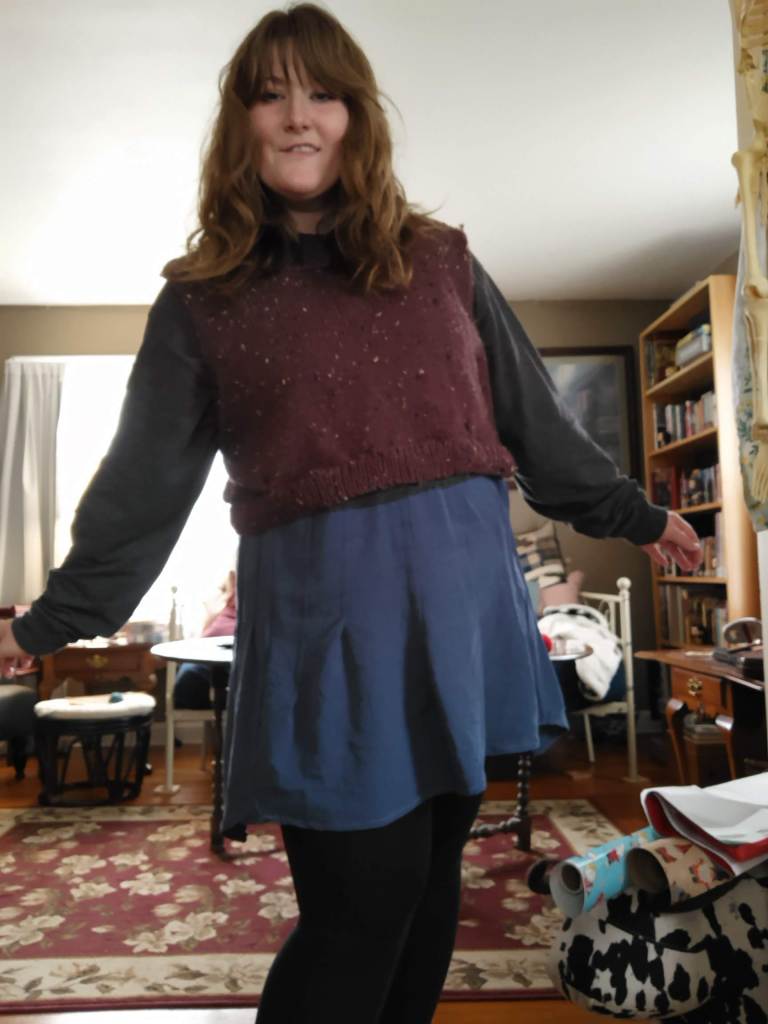
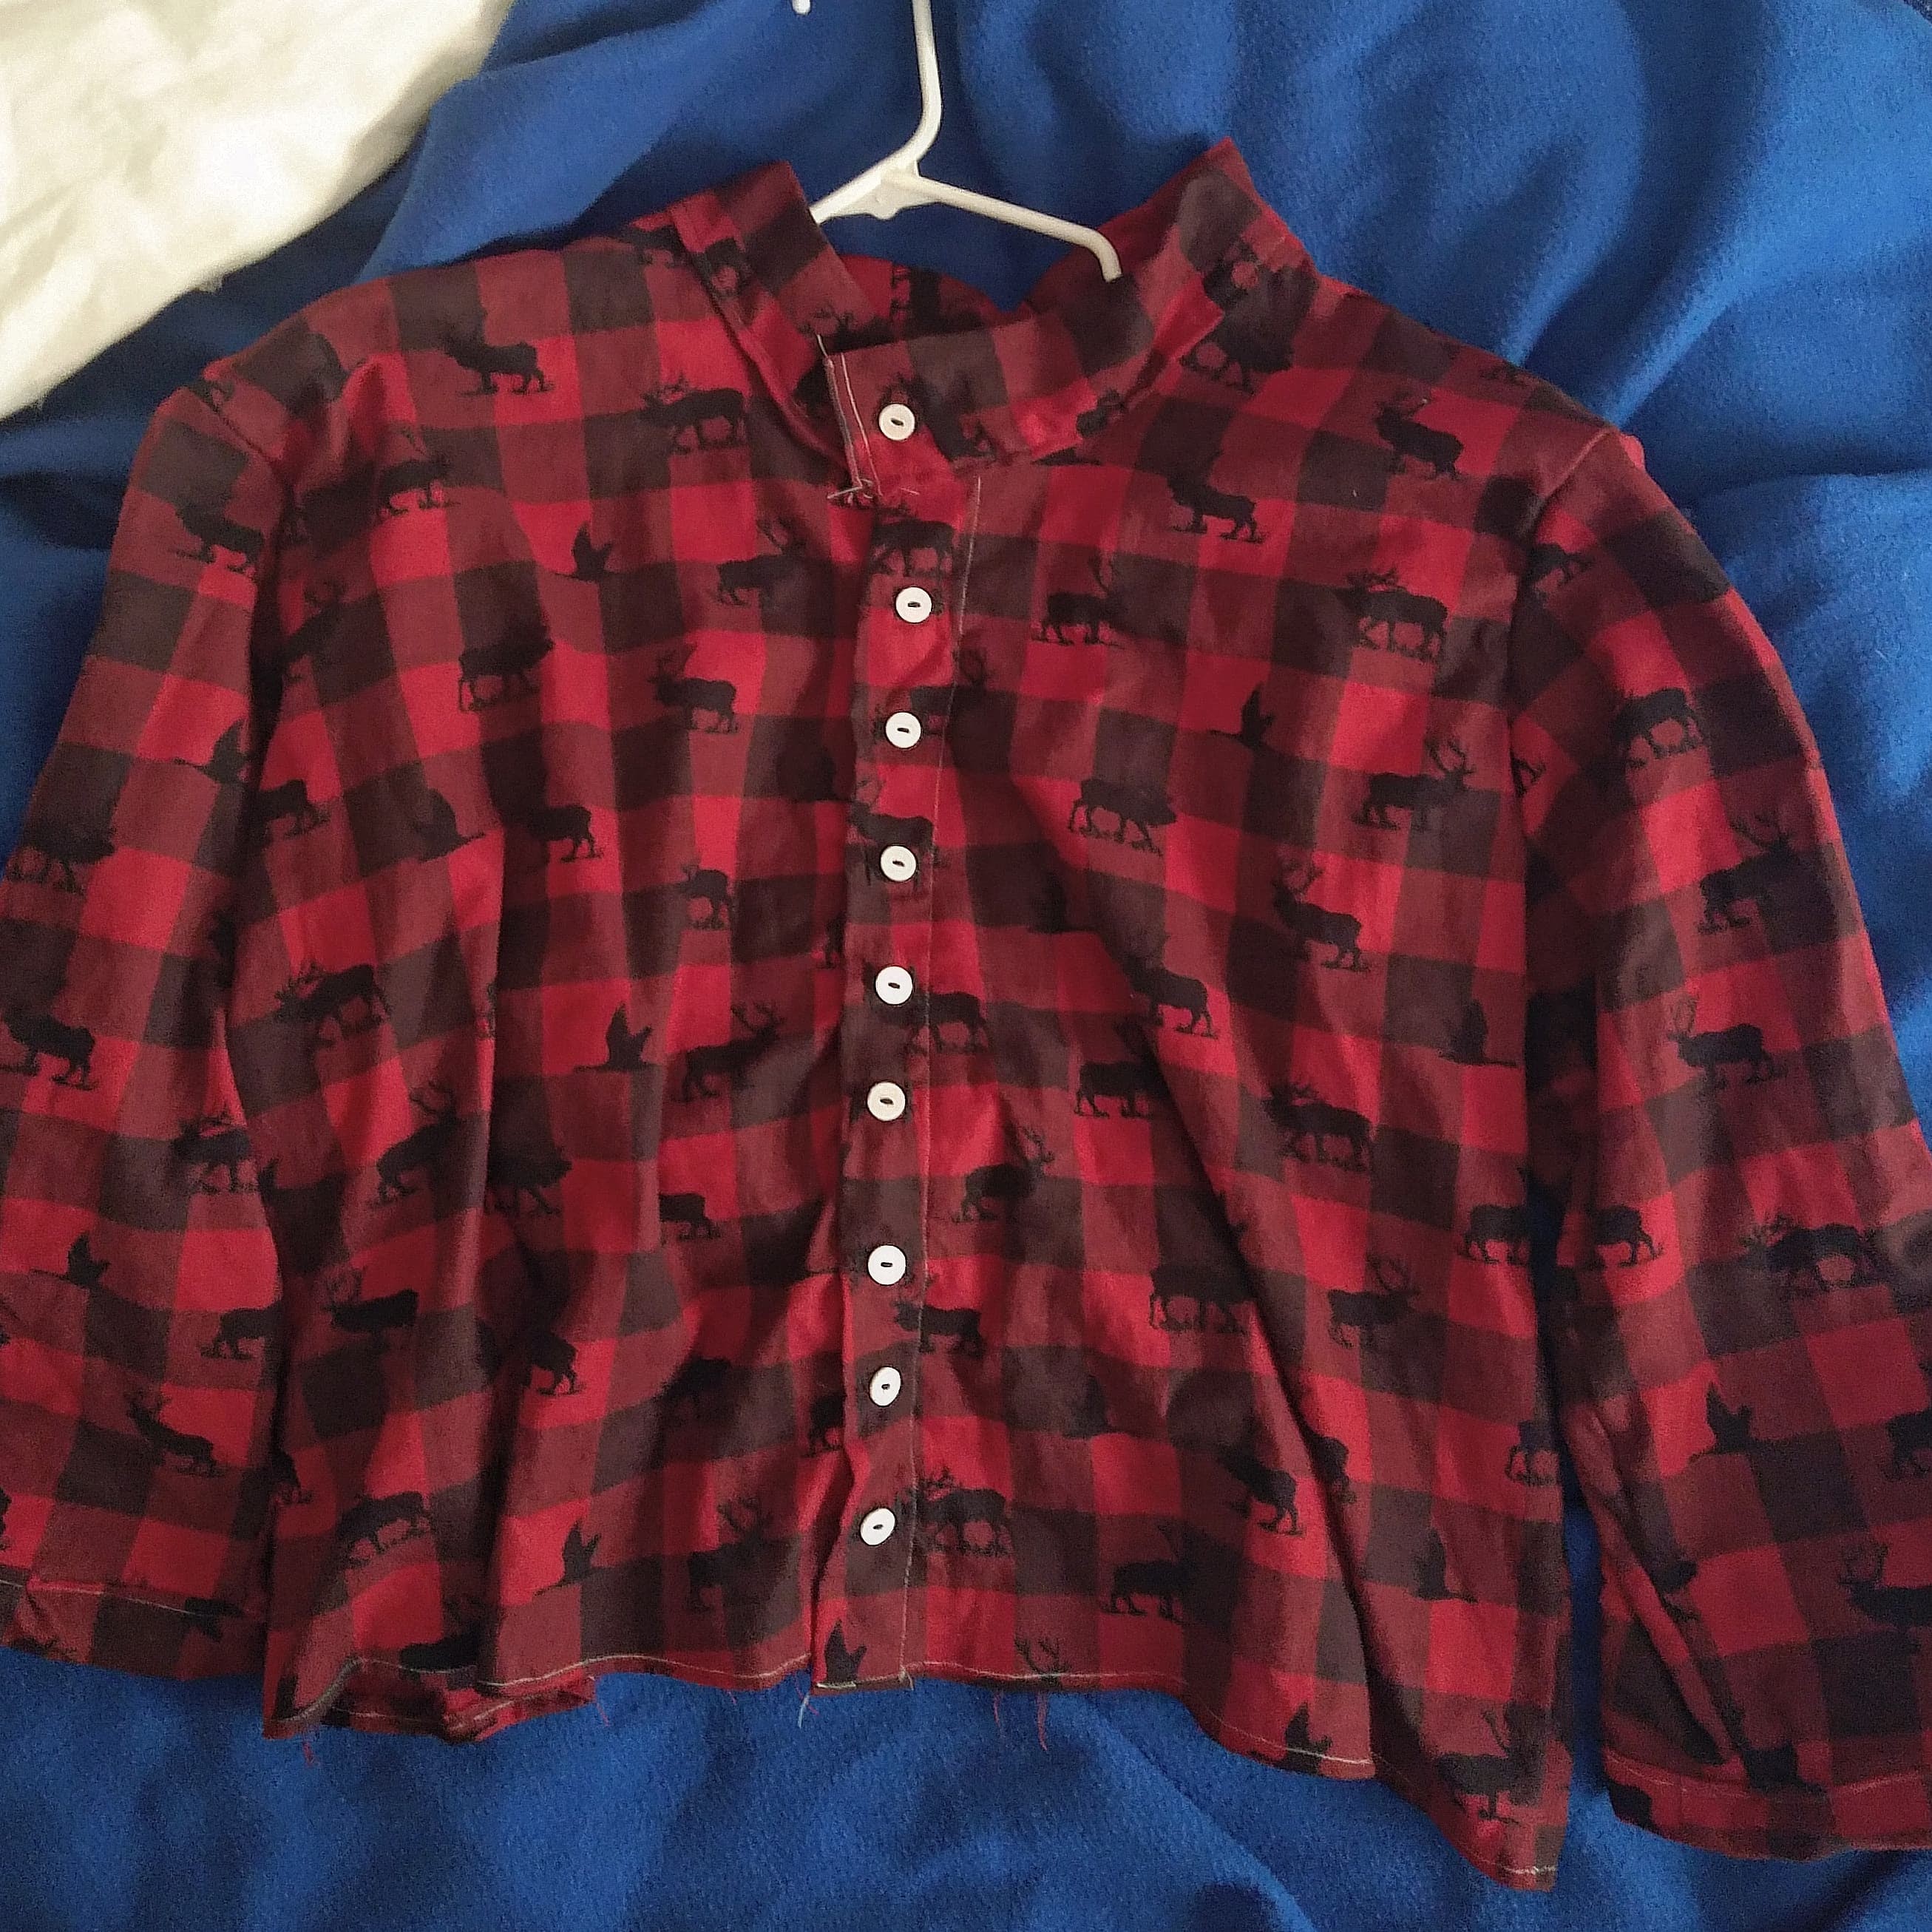
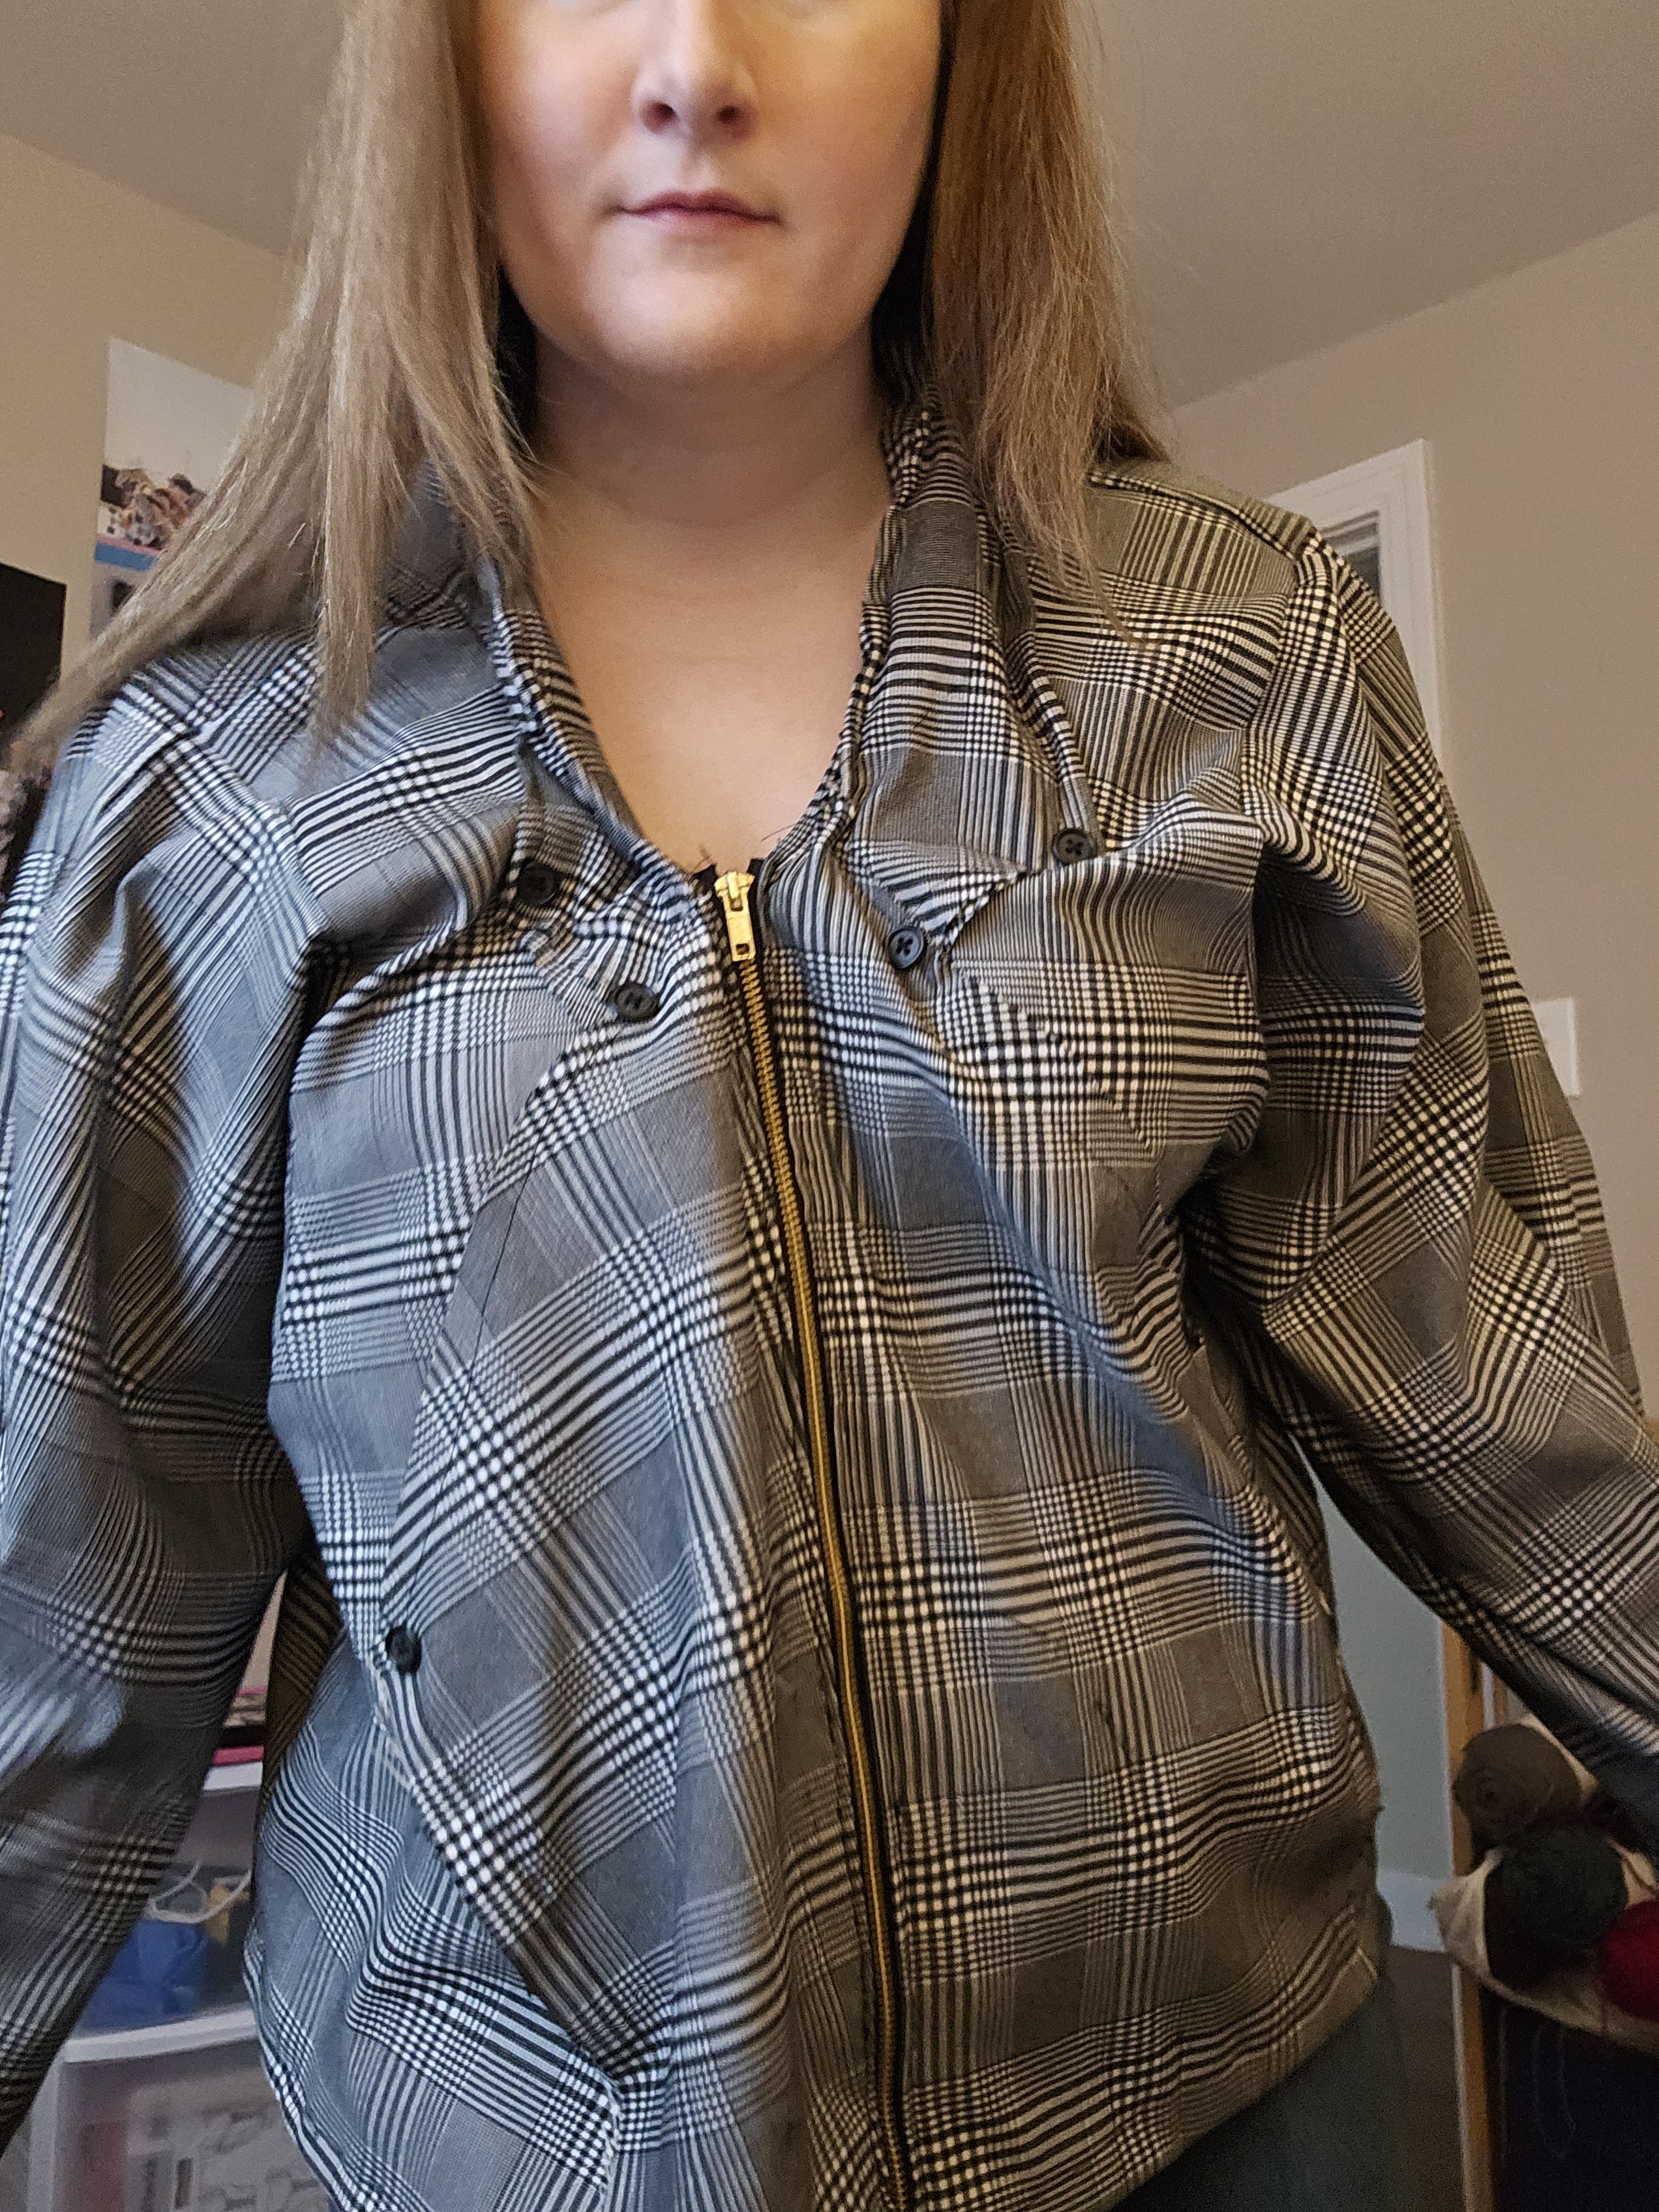
This is how I have styled the finished garment so far! I like it over my black flannel and charcoal jeans for a moody look. It styled surprisingly well over this DIY project where I added a flared skirt to a cropped graphic long-sleeve shirt. This is where I saw the armor aesthetic come through. In 2024 I look forward to playing around with it even more!
Some things I plan on either finding or making, are basic layers I can wear under this vest. Currently, I have my flannels, that random diy-tunic, and maybe some long-sleeve tees but I’m not certain if they are long enough to layer out the bottom of the vest. This is the struggle of adding a brand new item to your wardrobe – how do you integrate it and style it well without buying a bunch of new things? Yeah, I’m figuring that out and until I do it’s going to be some time before I think I can make a truly amazing outfit with this piece. But I’d rather do this responsibly and be a patient person instead of draining my bank account for instant gratification. (Age has done me well in that respect because I used to do the opposite!)
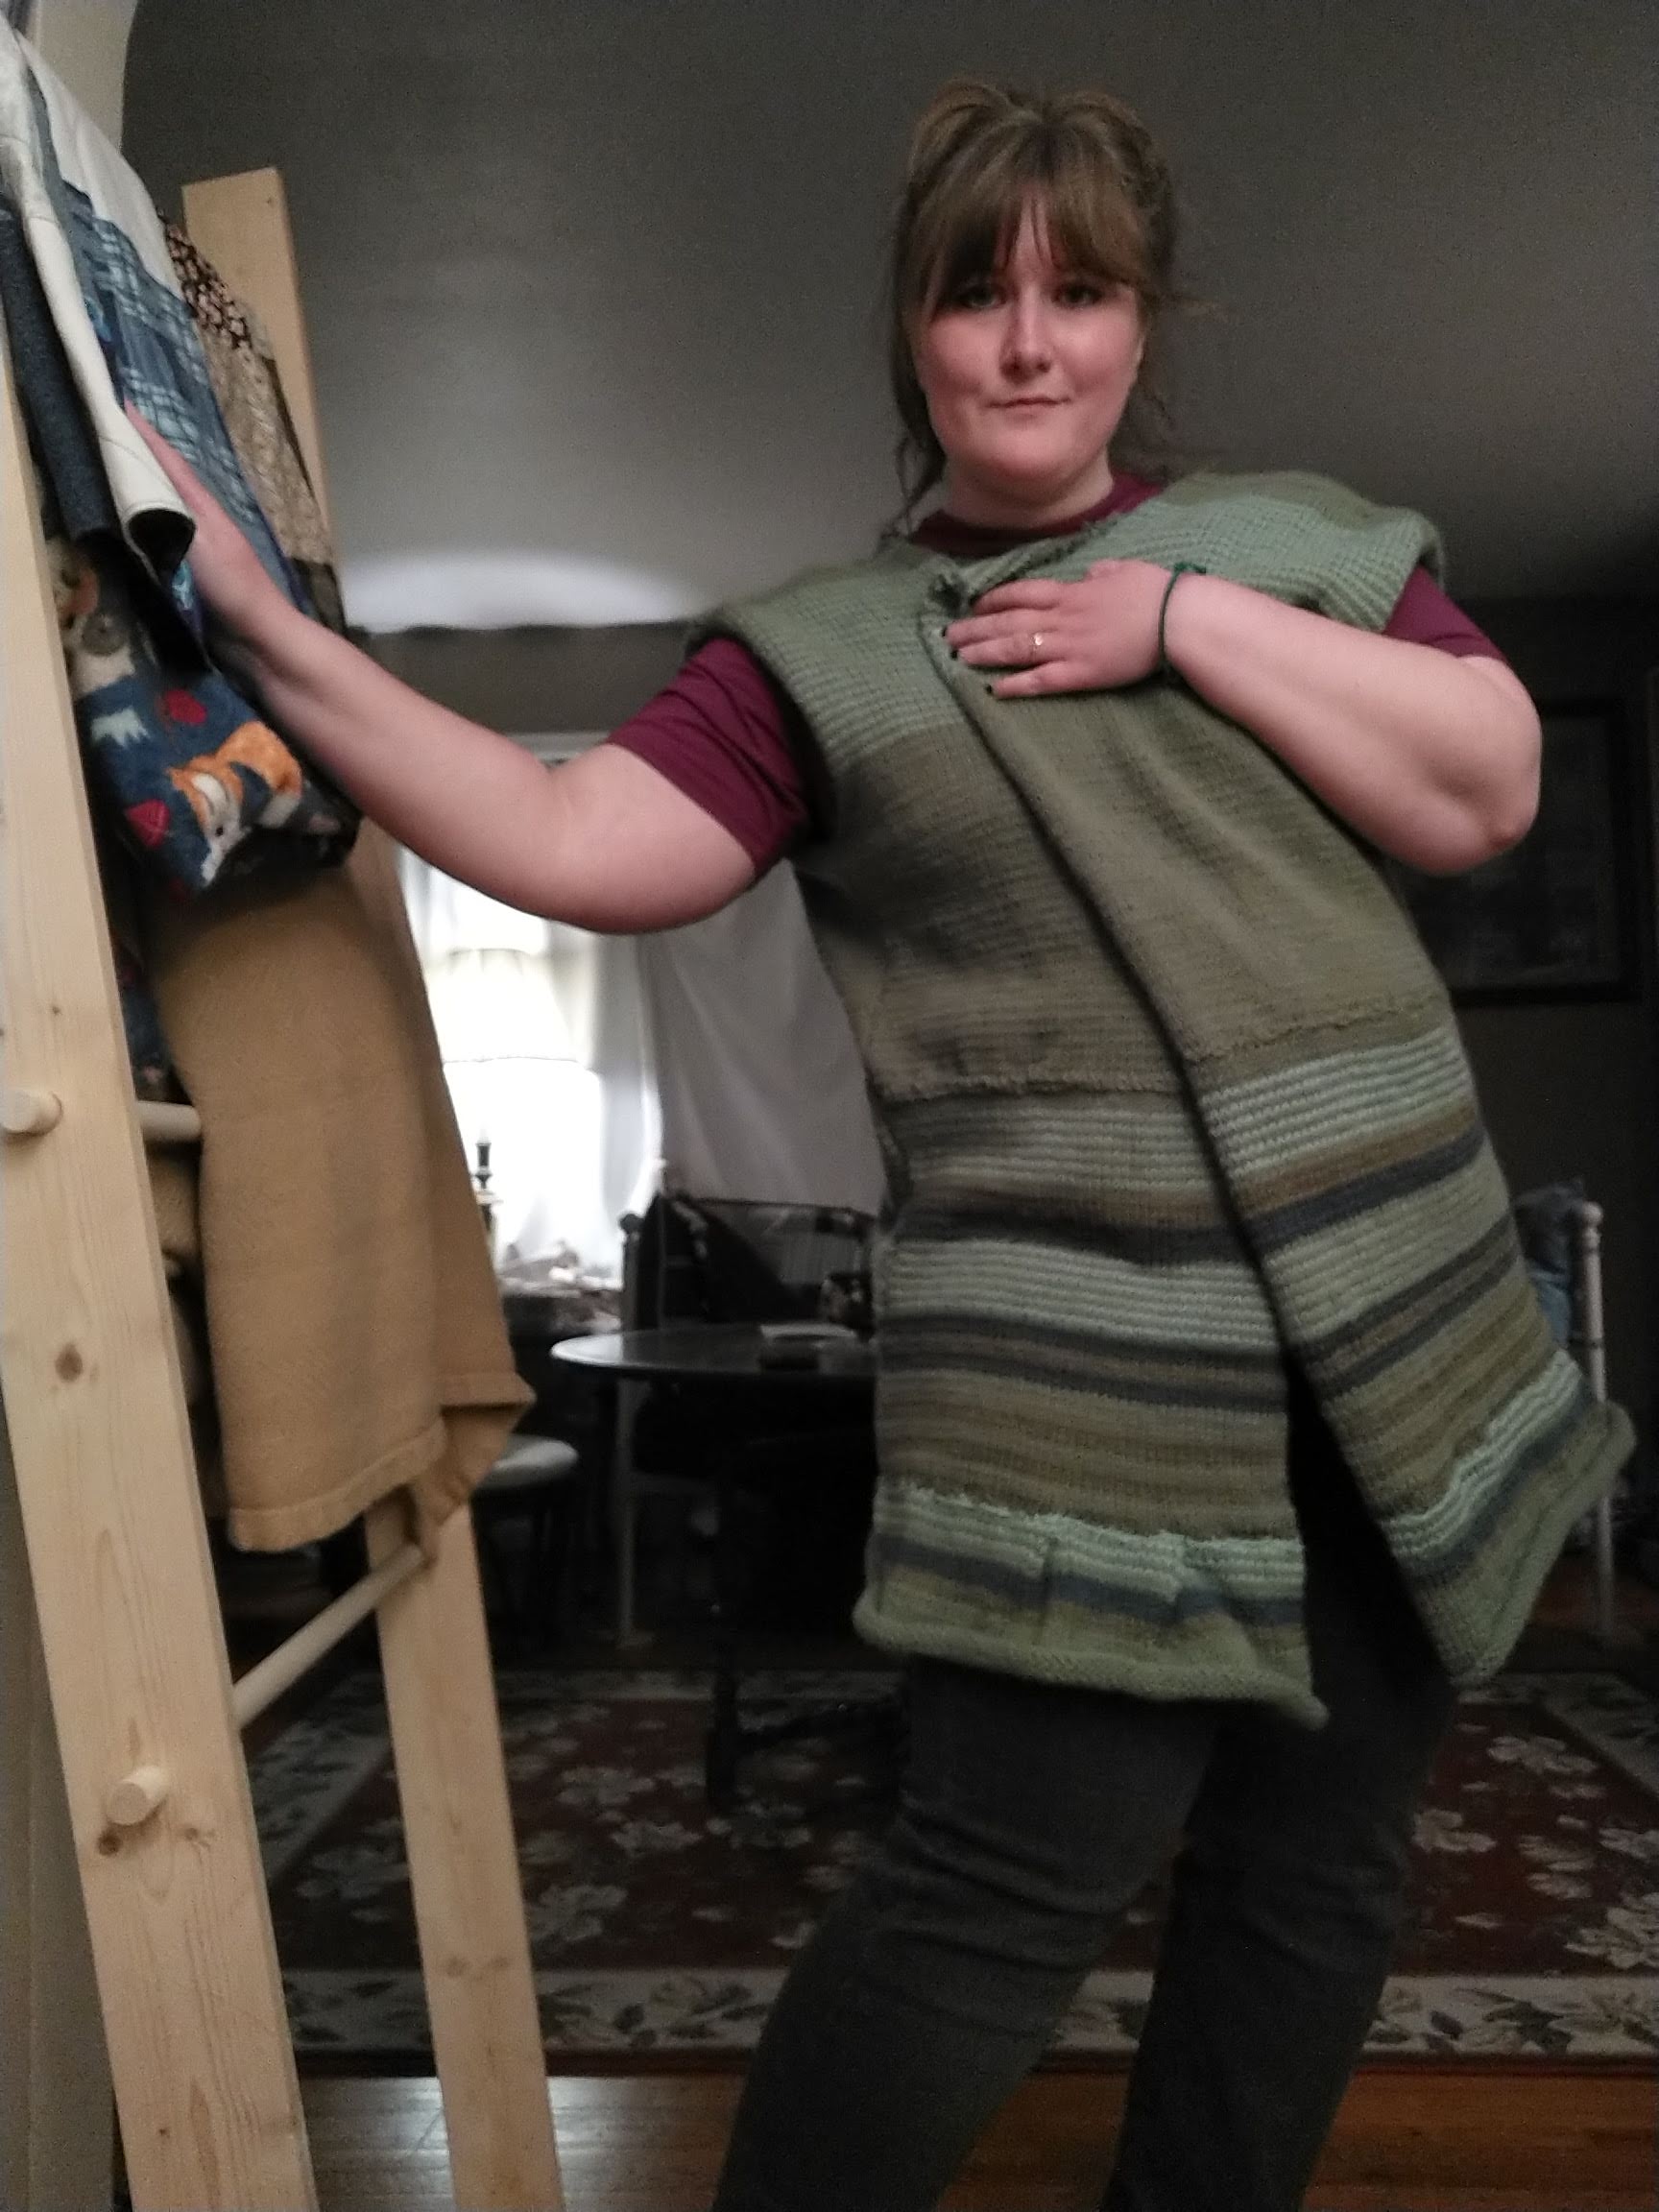
Since finishing the garment, I have either lost weight or the vest has stretched a bit from wear and one wash. It was not sitting well on my waist anymore but ballooning out so I took it in. I took it in at the arm hole seams and gradually took in the waist at the back so the garment has a back center seam which is not the look I was going for but the fit is on point again. Lastly, I knit another section of ribbed trim to lengthen the garment to keep it from riding up, in doing so I made the ribbed trim addition of 60 or 55 stitches, I forgot to take note when I made it, to pull the waist in even more. I like the fit and plan to make another version of this garment with a smaller adjusted pattern.

What I’ve wanted since I started my sewing journey was to be able to wear a head-to-toe outfit of my designs. Now have I technically done this before wearing a dress I made? Yes, but a higher level of skill is needed to wear an entire outfit of sportswear separates, crafted with my own self-drafted patterns. This was the level up in my sewing I wanted and in Fall 2023, I achieved it!
In Trying Something New – Hot Pink Scuba Fabric I mentioned I was working on a trouser pattern, and although the pink scuba pants didn’t work I learned an important lesson about designing pants – fabric choice! I revised my trouser pattern, referencing the dimensions of one of my existing pants in my closet and chose a better fabric. This paisley pattern corduroy is lightweight and strong, with a bit of stretch. This fabric took the stitches far more effectively than the scuba. The weave is different and therefore the stitches did not have to cut through and pull through the fabric as it did with the scuba’s texture. Lightweight corduroy gave me the drape I wanted with the opacity and structure I was looking for. Hopefully, the longevity too!
I’ve worn these pants three times and they are going strong. I’ve even altered them to take the waist and add a zipper fly and they fit excellently. In addition to the trousers, I crafted a matching belt and belt loops to adjust the waist as needed.
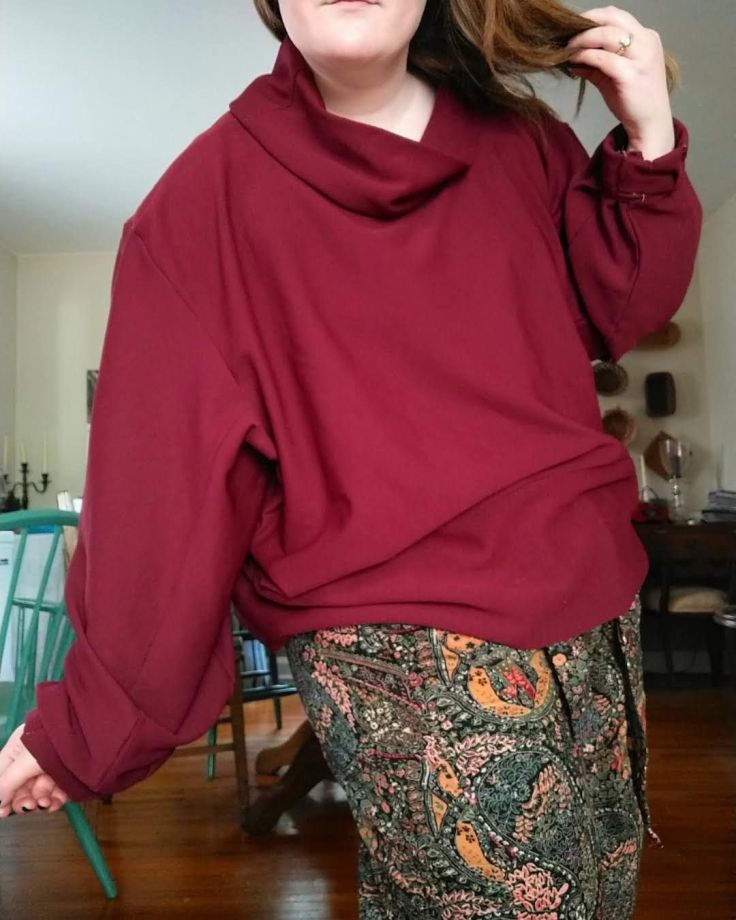
I had a favorite sweater in college from Victoria’s Secret. It was a black drapey knit sweater, boxy shaped, and featured an exaggerated cowl neck that could be worn off the shoulder. I wore it for a long time until I lost it and I haven’t quite found another one like it. I wanted to make a 2023 version of it that bridged the gap between sweater and sweatshirt.
Enter this cranberry stretch fabric that was warm but with a texture that looked like a sweatshirt. I went into the unknown and decided to make a cowl neck for the first time and I’d say it turned out just as I wished. I don’t like wearing things off the shoulder anymore therefore I made the cowl neck opening smaller than the inspiration piece. I added cuffs as a cuffed bottom to encourage the garment to hang in a boxy fit but not ride up as I move through out my day. It does as it is asked. I’ve worn this piece with jeans, leggings, and these corduroy pants and I have to say it’s pretty dang versatile.
The only thing I wish I could change is the few sections of seam where I was fighting with my sewing machine. I had a mishap with a stitch and had to stitch rip the seam. Unfortunately I caught a small piece of the fabric and caused damage to the cuff. Other than that unfortunate event, I’m properly chuffed. These two pieces moved my sewing skills and design portfolio in the direction I am aiming for – tailoring, construction, bigger projects, head-to-toe looks.

This was my most ambitious project yet and I’m happy to say it’s done! And on schedule too because the deadline in my head was by the end of 2023. I didn’t think I would get there, especially with other projects, but it happened!
It’s funkier than I first designed, and it’s also a dress now which is fun and unique to my wardrobe. I don’t have any sweater tunics or dresses like this. I’m excited to play around with styling this piece as winter is yet to come. It’s still autumn technically which makes me want to jump for joy because I’ll be able to enjoy this piece all season long instead of partially or not at all like some of my former projects.

The clearance section of a fabric store may be my biggest design inspiration. It is in the bolts of discounted fabrics from seasons past that you can find some real gems in my opinion. My brain gets a break from the items deemed trendy or seasonal for a moment to look for something new and at a reasonable price to justify taking a chance on something new. That is how I took a chance on this two-sided scuba fabric that is hot pink and light pink. Not really my cup of tea! But it was 2 USD per yard and honestly a fascinating texture and weight. It was worth the leap to try something new, so I did!
Now, do I always have a garment idea in mind when I pick out these cuts? Nope. Should I? Probably. But some magic can happen as they hang out in my fabric stash like inspiration finding its way to me, which is quite fun.

For this cut, in particular, I was a scuba newbie. The weight was hefty with a bit of stretch, so it needed to be a garment that could handle the heavier textile. The two-sided nature provided two color palettes in one. I considered a jacket, a coat dress maybe? The thing that was working against my creative brain was the Barbie movie. I did not want to make a Barbie cosplay, simply because Barbie was not my favorite toy. I was an American Girl Doll and a Fashion Polly girl through and through. Making a Barbie-inspired garment would not be authentically me nor would it be something I would wear because, did I mention I don’t really wear pink? Yeah, I don’t love pink, especially hot pink, so why did I buy hot pink fabric fabric? I think I like pushing myself to a place of adventure with the clothes I make. I don’t want to make boring clothes if my skills will allow me to do so. No matter what I did with this fabric it was not going to be boring.
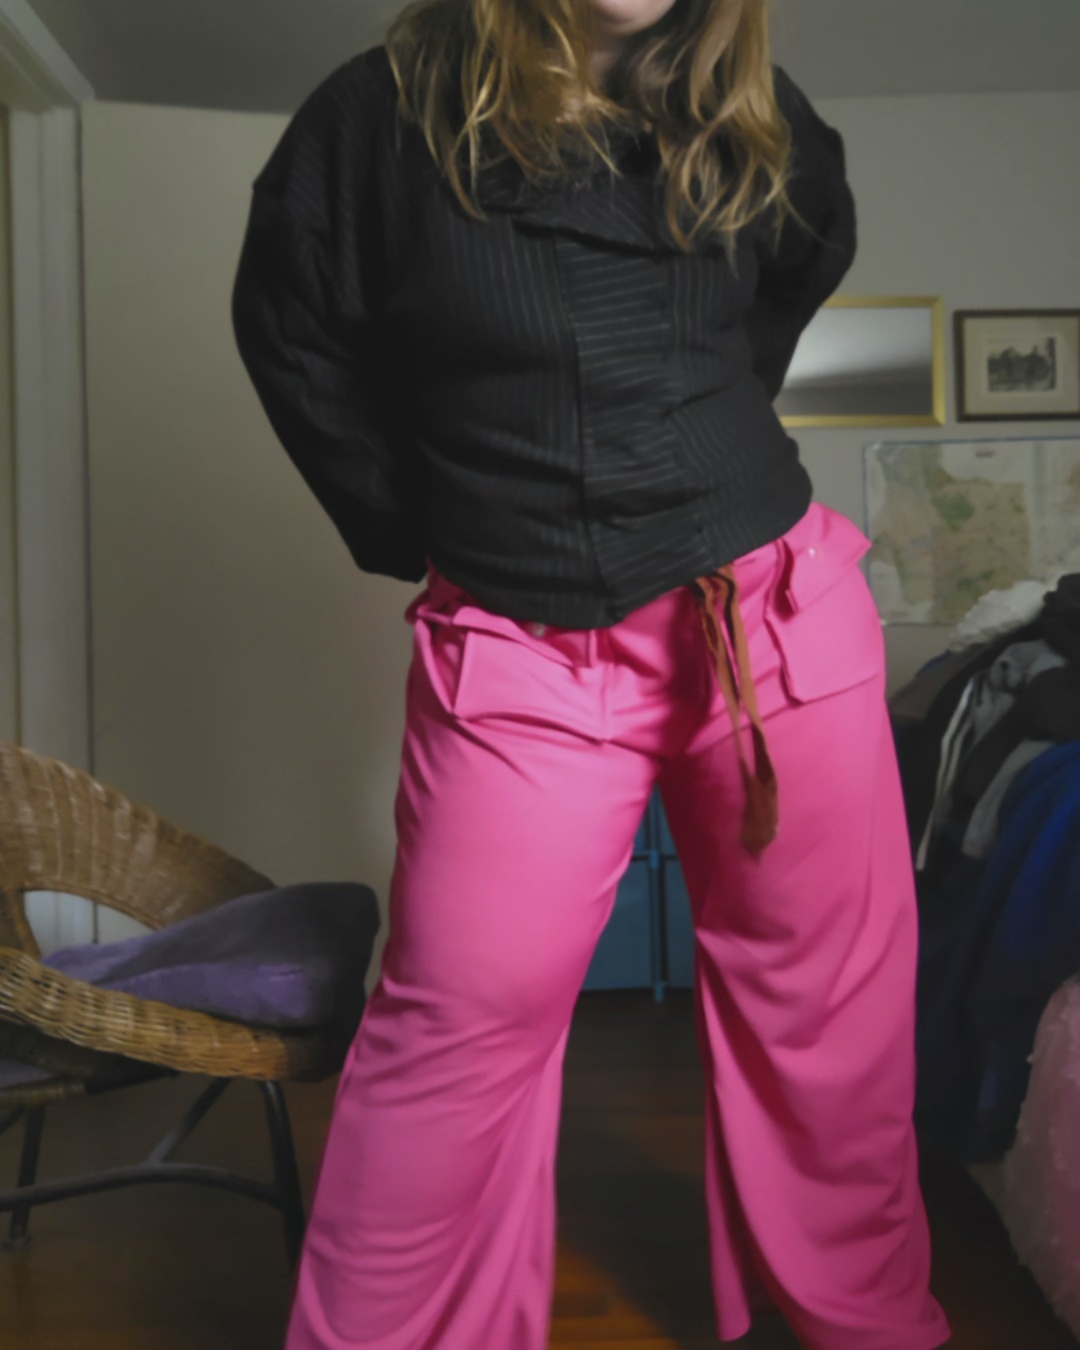
One day I saw this photo of Hyunjin on Instagram and it hit me, why does this pink scuba fabric half to be made into a feminine Barbie cosplay? Hot pink looks fantastic in a masculine silhouette. Making a neutral garment, like a pair of pants could be just the thing I need to make this fabric feel accessible to me and my own personal style. A pink dress felt too on the nose for me to get any wear out of and that is a big thing for me. I don’t want to make things I am not going to wear just for the heck of it. Maybe one day if I have a way to sell things that aren’t my personal style but right now that would be a poor use of resources and excess clutter my closet doesn’t need.
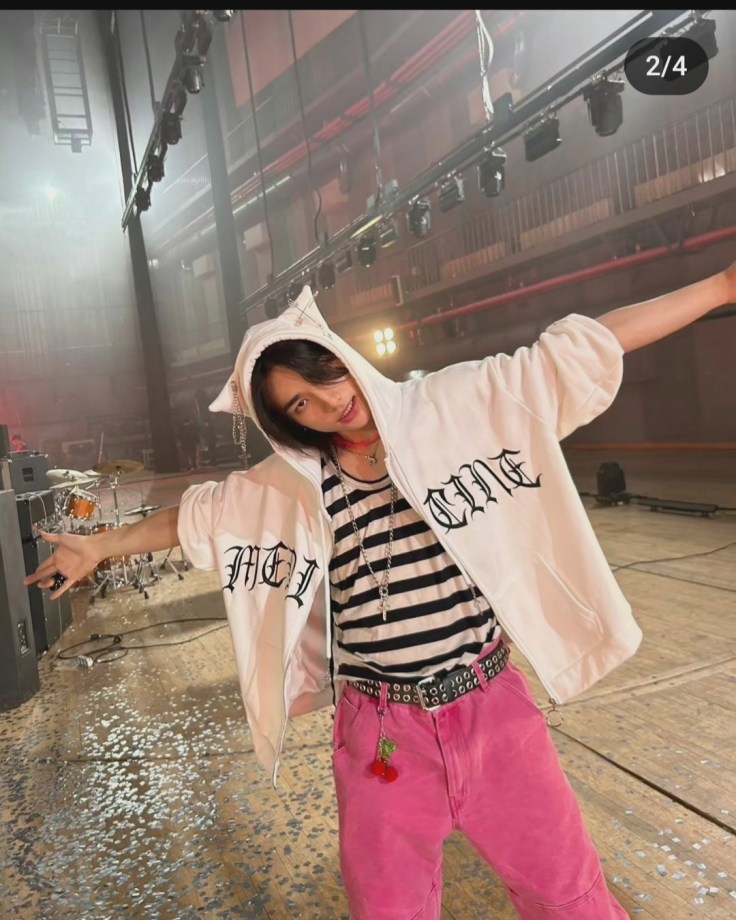
I knew I wouldn’t be able to make a hot pink pair of jeans like Hyunjin is wearing, I simply don’t have a jeans pattern in my stash, but I do have a menswear trouser pattern. I chose to use that instead of free-handing a jeans pattern so this garment would have the best chance of success. Jeans have an incredible amount of details that make them distinct and classic. The pants I drafted were going to be far more simple as these would be my first attempt at sewing my own trousers. It was a big moment!


I altered the menswear trouser pattern I had for a better fit by raising the rise for a higher-waisted fit. I did this to fit my waist better and to give more room to my hips. I was nervous these were not going to fit me right because I was grading the pattern to my own design so I cut a generous seam allowance around each piece. (A little too generous I will find out later.) This fabric cut like butter and did not make a mess, which was a huge victory after my Jack Sparrow Inspired Coat corduroy left a layer of fluff on my floor that I still find remnants of today.
To match the crotch lines better, I tried something new from my previous shorts projects and sewed the front and back seams first and then I worked the inseams, working my way out the outside leg seams last. I don’t know if this is the proper technique for sewing trousers but it worked well for this project. I tried them on and the pants fit well, a little wonky at the front because I left too much seam allowance, but they looked like actual pants that an actual person would wear. It was around this point that I realized I needed to do more than just sew two leg tubes together, these trousers would need pockets, fastening, and belt loops to be a properly finished garment.

I recently learned how to make button holes which I shared in My First Buttondown Shirt and with this newfound knowledge I decided to go in a Spicy direction, literally like the Aespa Spicy M/V, I was going y2k! What was cooler than popstar fashion when I was a kid? Nothing. I wanted these to feel like Destiny’s Child or a backup dancer for Proto Zoa would wear.
I decided the best way to accomplish this would be to make cargo pockets for a funky twist and place them higher like you would normal pockets, to hide the weird fit around the front of the pants. These pockets I designed to be usable, big enough for my phone, and secure, with proper button closures. This was my first attempt at cargo pockets and belt loops and I have to say, they were not as scary to make as I thought, especially with the use of my heavy-duty sewing machine.


So as far as my first pair of proper pants, not just lounge pants, I am supremely pleased with how they fit. I can see the flare leg starting at the knee. I like how they fall around my hips. I like the length and the rise of the waistline. The pockets were stronger than I anticipated and the belt loops were functional, which came in handy because these pants were a bit big and continued to stretch as I wore them. Styling them was a bit of a challenge, as I realized I didn’t own much in my existing wardrobe that paired well in color and proportion to the silhouette of these pants. Shoes were also a challenge, I opted for a pair of Converse high tops since I believe they go with almost anything.
This is where things got interesting. I wanted to show my mom and my excitement bested my judgment. I unwisely decided to wear these pants out and about for a day of running errands in Wexford. This was my first mistake. My second mistake came from my unwise decision to cut the pieces with an extra seam allowance that made the front of the pants fit weird. The waistband was a bit big which I thought I could remedy with a belt. It did work for a bit until the fabric began to stretch, and stretch it did! The belt stopped working which was awkward, as every few minutes I had to adjust the belt.
My third mistake was not inserting a zipper to take the waistband in, which I should have planned for. I got excited and sewed the seams before I remembered the zipper. This scuba fabric showed every hole, whether pin or needle, therefore seam ripping and inserting the zipper worried me because the fabric was weaker in those spots. I was concerned the pants would rip (foreshadowing) so I left the pants as is to depend on that belt for structure. The side was the only place to put the zipper because the front was fitting so weirdly I did not want a zipper shining a big spotlight on that error.
Herein lies my final boss of mistakes, the fabric versus my thread tension. It was a mele. With thick fabric, I raise the thread tension because it helps the needle sew through the thicker fabric. Being unfamiliar with scuba I didn’t know how the scuba would respond. The scuba did not like the high tension nor did it like being sewn. I was able to get the pants, the pockets, the waistband, buttons, and belt loops on, but there were times I could barely get a needle through. The tension came back to bite me in the butt as my wear test went on. By the end of the day, I was incredibly thankful we headed home early. The thread on structural seams, like the main ones in the front, back, and sides had begun to rip through the fabric. The seams were on their last leg.
I’ve never had this happen with a project before! I was incredibly frustrated as this project took days to sew. My fingers were scratched up from the pins and the needle accidentally stabbed me as I hand sewed the buttons. There was no way to fix them, they were toast.
And so ends the journey of the pink pants. They had a good day out. A one-time adventure. They were good pants that deserved better. In my short time with them, they taught me a lot. Thank you pink pants and random scuba fabric. I will never purchase scuba again!

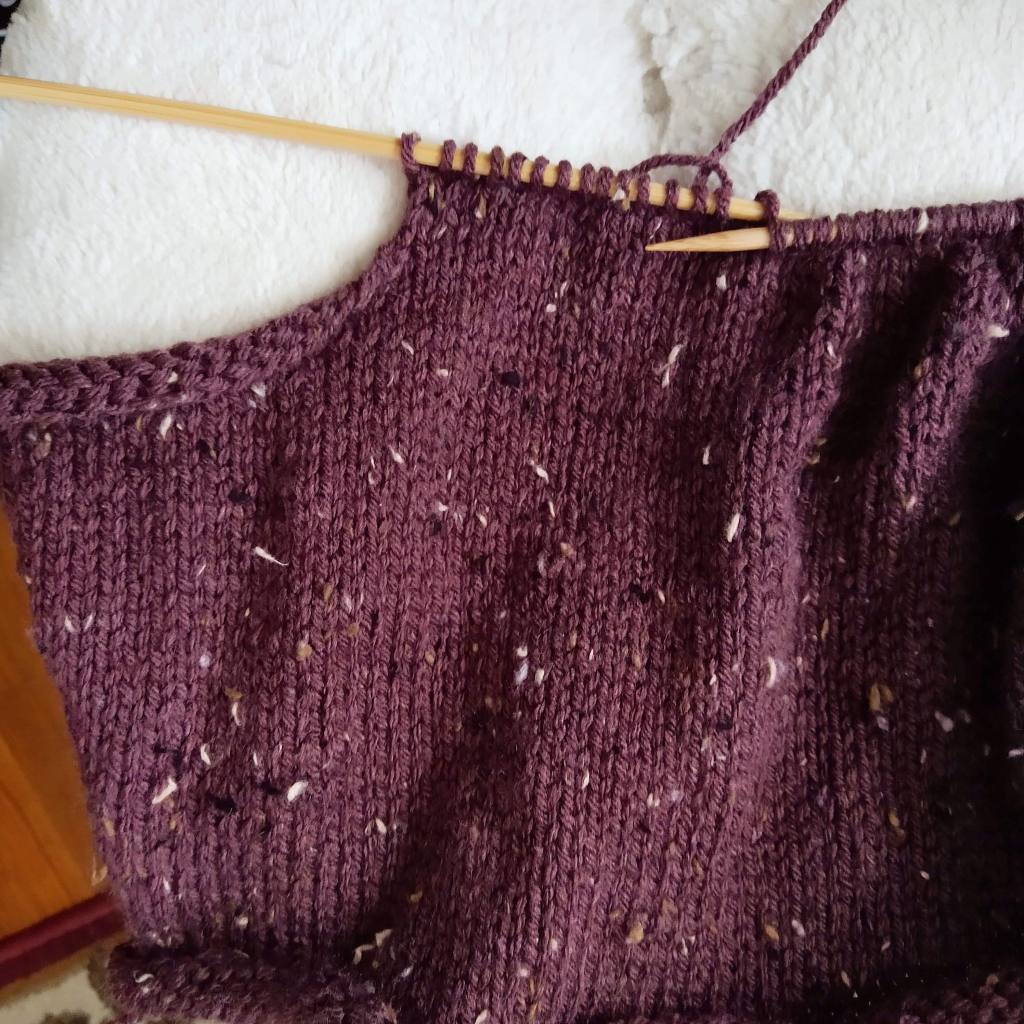
I’m currently working on a big knitwear design project. Probably the most ambitious project that I have taken on yet in my time designing knitwear and fabricating sweaters. It is a sweater coat with varying stripes that I have knit in sections over the past few months. I’m currently three months into this project, and per my working style, I’ve worked on smaller projects alongside this big project to keep me stimulated and my motivation high.
This was my progress at the end of September. I had the entire bodice done and sewn together at the shoulder seams, back seam, and under the arms until the point of the sleeve opening. Because I sew, this process of knitting makes more sense to my creative brain than the knitting in the round process. If this type of knitting drives you nuts, it’s only going to get worse so I warned you. 🙂


In October, I honestly futzed around with the hood and collar and that was about it. I knit one other body panel so two out of four were done and drafted collar and hood patterns, over and over again. I initially expected to make more progress in October and to have just the sleeves left going into November. That didn’t happen.
It was that dang collar and hood section, that kept me in this place of indecision and design frustration. I initially made a collar with a normal stitch, not a ribbed which looks a bit cleaner. I think I was concerned about the collar looking cohesive and was afraid that a solid collar in rib instead of a knit-purl stitch with a stripe would look less cohesive. It looked odd actually. The stripe was good, but the flat collar which began to roll on the end looked ineffectual for a collar. After I sewed it in I carefully cut the collar away which was discouraging from a progress perspective, until I realized the stitched of the collar remained (because I was afraid of snipping the wrong yarn and destroying the shoulders) and the neck opening had this lovely fit and structure now. The shoulders were slightly gathered up to the neck opening and the fit was fantastic now! It just needed a new collar.
I had an idea – what if instead of a collar I went straight to a hood. I had been watching a lot of Gilmore Girls throughout October, seasons four and five to be exact which spanned the years of 2003-2005, peak 2000s fashion. And you know what was popular during this time? The duster! I had an idea, what if the hood was just one piece of this puzzle, what if I made it longer, much longer, added a hood, a rib trim around all the edges with a button closure! A funky duster the likes of Sookie, the Olsen twins, Lindsay Lohan, and even Lorelai herself would have worn during this time.
I knew I wanted to keep the stripe theme going, something that looked labor-intensive and expensive, like a bohemian duster or sweater coat that would be featured in an Anthropologie campaign. I wanted the hood to carry on that stripe motif to make it feel integral to the garment, not an add-on.
Last October, I learned how to draft hood shapes for several outerwear pieces that I crafted for my loved ones as a part of my Potato Technology’s Autumn/Winter 2022 Collection so I am pretty comfortable with the shape and sizing scale for a hood on an outerwear garment. The thing I underestimated though was how tricky it would be to form the hood as I went, as you do with knitting, instead of cutting the hood shape out of fabric. This kicked my butt. I spent a weekend making one half of a hood out of yarn and it was so cursed. When I took it off the needles it didn’t look like the hoods I had created out of fabric and thread. It was lumpy, too short, and not going to work for what I needed.
Once again, I got my scissors out cut the bind off loose, and proceeded to wind the yarn back into a ball. That is when I decided I had to move on to a new section of the project, for my own sanity. Because I still didn’t know how the hood became misshapen in the fabrication process. None of it made sense. Going straight back into making a new hood when I didn’t know how to solve the problem would be a waste of time and resources. I only have one set of size 7 needles, there was no need to tie them up in another likely failed attempt.
I pivoted to the the length of the duster. To make the bottom have more structure I decided to knit this section in two pieces.
This was a good move. I made the first half 30 stitches wider than the previous body panels to create some drape around the hips and the results are cute. The sweater has this sophisticated little flare that accentuates the waist – I was not expecting that! 🙂
With this step in the right direction, I got to work and powered through the last two body panels and the second flare panel at the bottom. It was a lot of work but only took two weeks to complete with focus, stretching, and snacks.
I have a tendency to let the garment lead me. I like to see how the fabric or yarn responds to the vision I have in my head and adjust the design accordingly to the way the project is coming together. The flared panels at the bottom of the sweater inspired me to pivot again, to step back from the hood and long duster to a sweater coat cardigan that could be buttoned into a sweater dress if I would be inclined to wear it as such.
That’s where it stands now. I began drafting a sleeve and designing the color work I had planned for the stripes before I continued any further because I could change my mind and add more length. The hood is out through, it’s just not the vibe.
When will this project be done? I sure hope by the end of 2023, but we shall see.

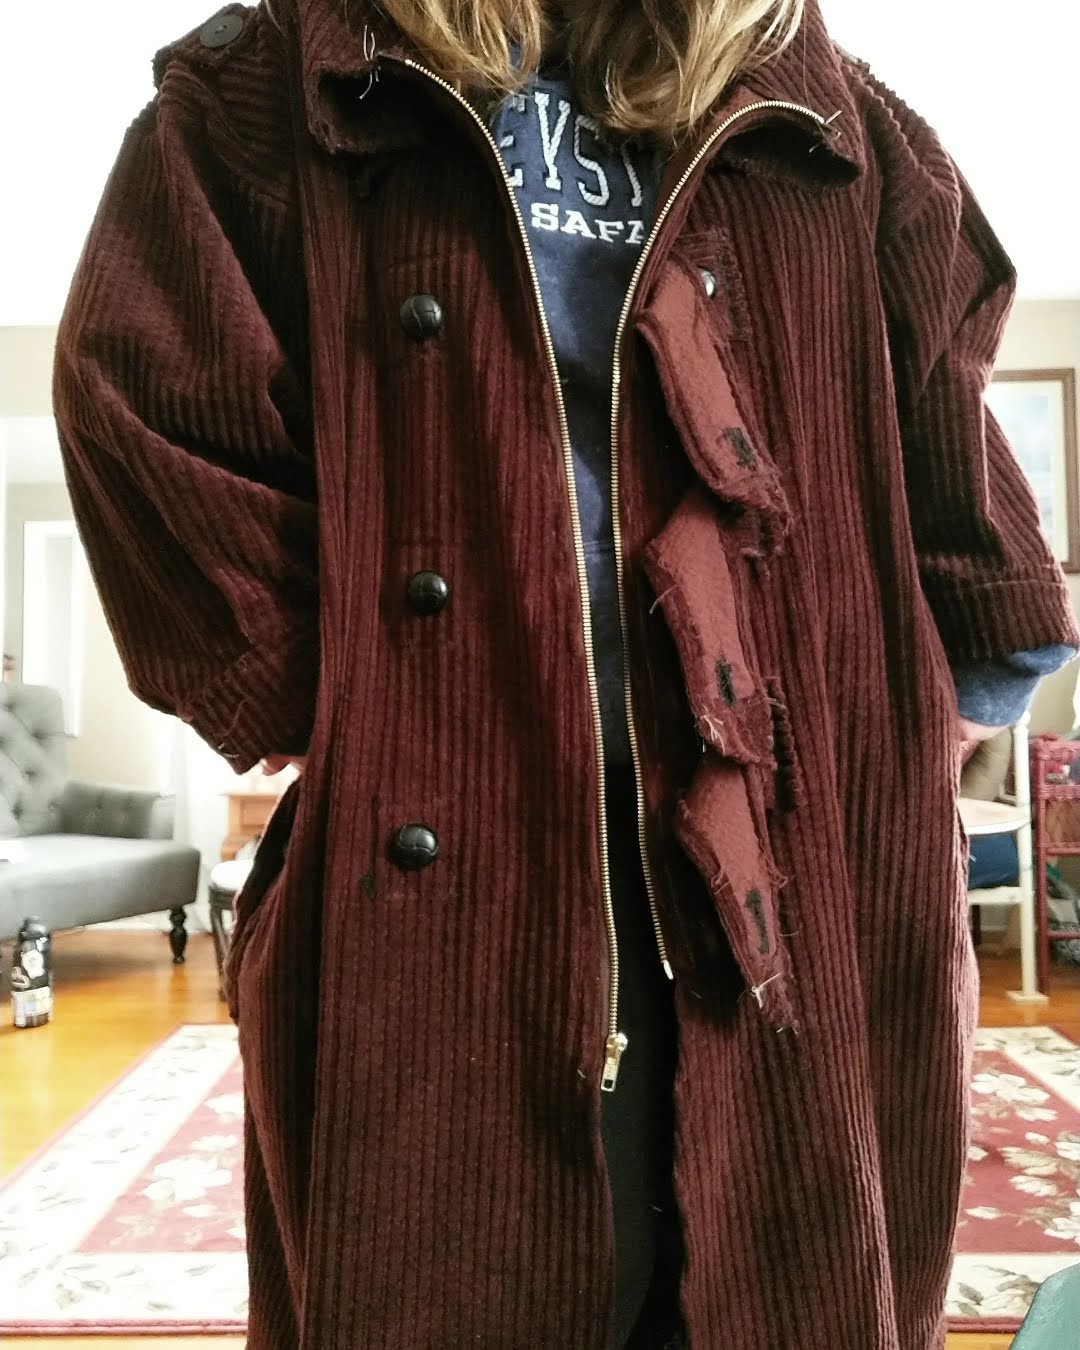
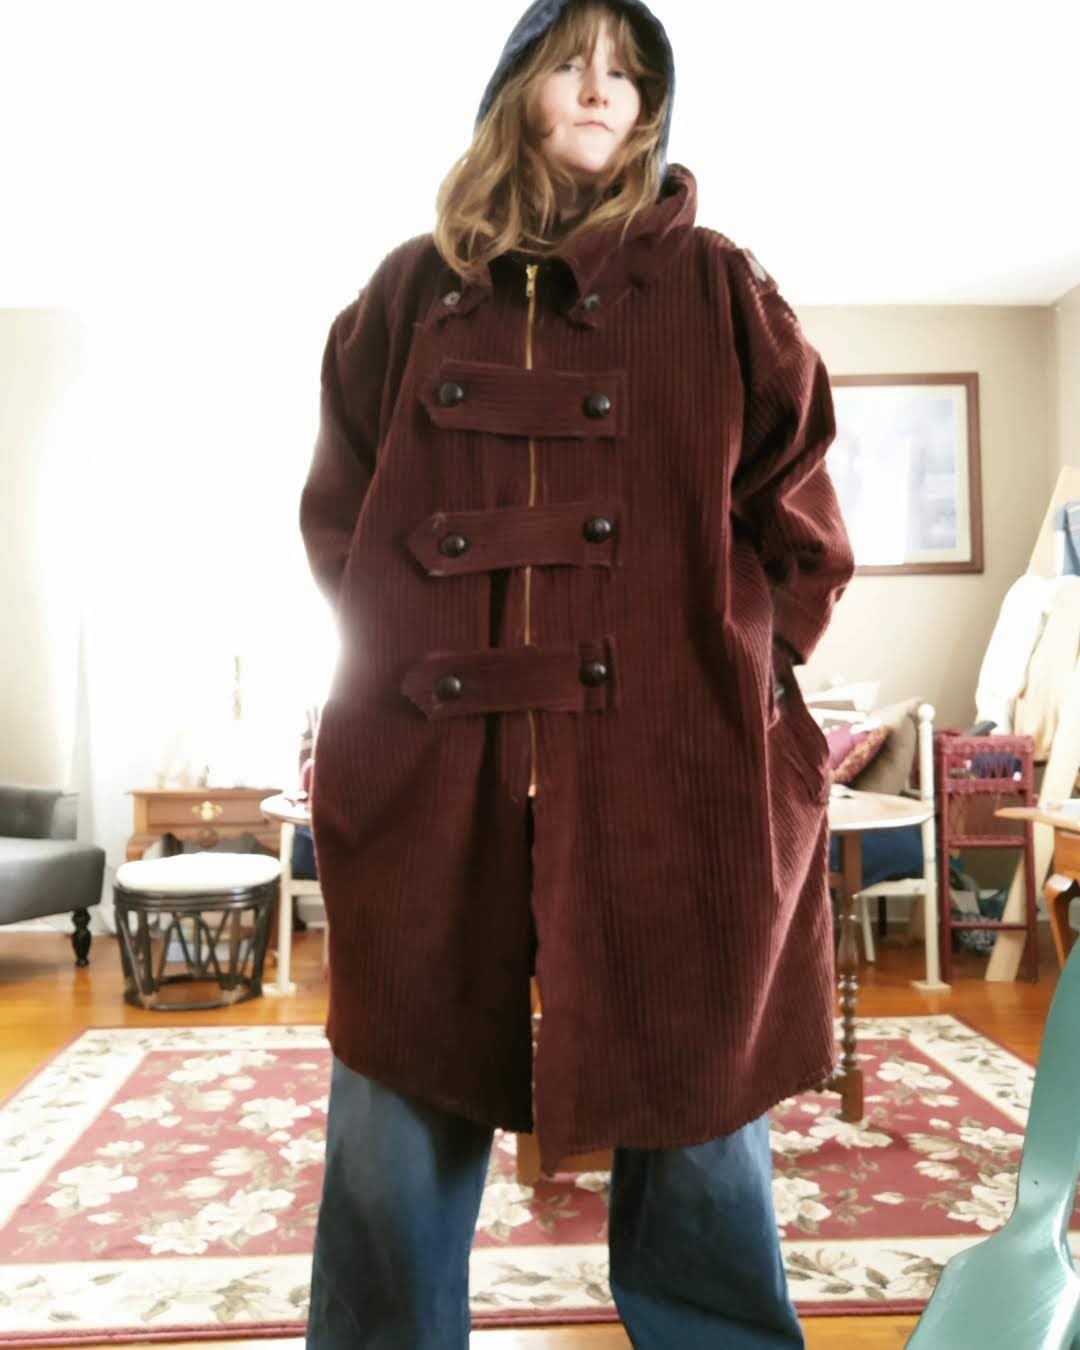
After a wear test this past weekend I realized my Jack Sparrow-inspired coat needed a few more touches to truly pop. Including accessories which will be coming soon. As for the coat, it was missing that polish, you know? So I took the belt and chopped it into five rectangles to make the button tabs and the pocket flaps. I also added more buttons! Two more styles, actually. I added leather-inspired buttons for the chest tabs and a tortoiseshell set to the lapels and the pockets. The pockets have closing buttons for security which was desperately needed because I was close to losing my phone on Saturday due to those gaping pockets. For only having the yardage from the belt to work with this turned out well. Is it a complete project? Time will tell. 🙂


I alluded to my love of pirate-inspired looks in Piratecore, Lorelai Gilmore & Sportswear Influences but to be honest, I’ve been chasing after the pirate fashion feels since watching The Pirates of the Caribbean as a kid. The movies came out at a formative time for me, I was a tween and then a teen as the first three movies premiered ( I don’t count the fourth or fifth movies as part of the franchise for many reasons, quality being one, anyway) which is a time when you begin to discover inspirations and your individual style. I remember having a Pirates of the Caribbean locket charm bracelet from Claire’s that I wore often with boots for that pirate mood. It had a skull and crossbones and a cringe picture of Will Turner, my middle school fave inside. That was the beginning of this pirate journey.
In high school, I dabbled with the skulls and skeletons, including a Flogging Molly pirate graphic tee, but I had yet to find anything that truly captured the costuming of the movie. In college, I got a bit closer with a pair of over-the-knee Vince Camuto boots that had pirate cuffs and studs down the back. Now that I know how to sew, it’s time to get serious about this, right?
As an adult, I admire the costuming of Jack Sparrow and Elizabeth Swann more than Will Turner. Particularly the costumes from the third movie, At World’s End. This poster I’ve had this since middle school and it still inspires me today, I actually used it for the basis of my coat and plan to recreate a coat dress like Elizabeth Swann wears along with an accurate Jack Sparrow cosplay at some point in the future.

At this point in time, I knew that would require in-depth research of both the historical garment and the costumes created for the movie. I would also be taking on a greater cost by sourcing specific materials like linen or duck canvas for this project along with historical patterns and additional fastenings, stiffeners, and not a lot of expertise to fall back on if something went wrong. So I decided to do a modern interpretation. Something that would have a pirate essence but would not look costume-like.
I settled on this chocolate-brown corduroy that acquired from Joann’s clearance over a year ago. With four yards to work with, I knew I could make a long and oversized coat that would be lighter in weight but could accommodate a bulky sweater or hoodie underneath. I knew I also wanted a simple fastening and toyed with the idea of a belt, which I made, and a zipper, which I prefer as the primary closure.
To figure out what silhouette I wanted, I referenced the outerwear of several Ateez music videos, including Don’t Stop which puts a modern spin on the pirate aesthetic. Kim Hongjoong was my modern inspiration for the cut of this coat, down to the epaulette details on the shoulder. I wanted the coat to be boxy and cape-like, like a modern-day pirate captain. A future goal is to acquire an Ateez compass patch to sew on the arm and complete the Hongjoong reference.


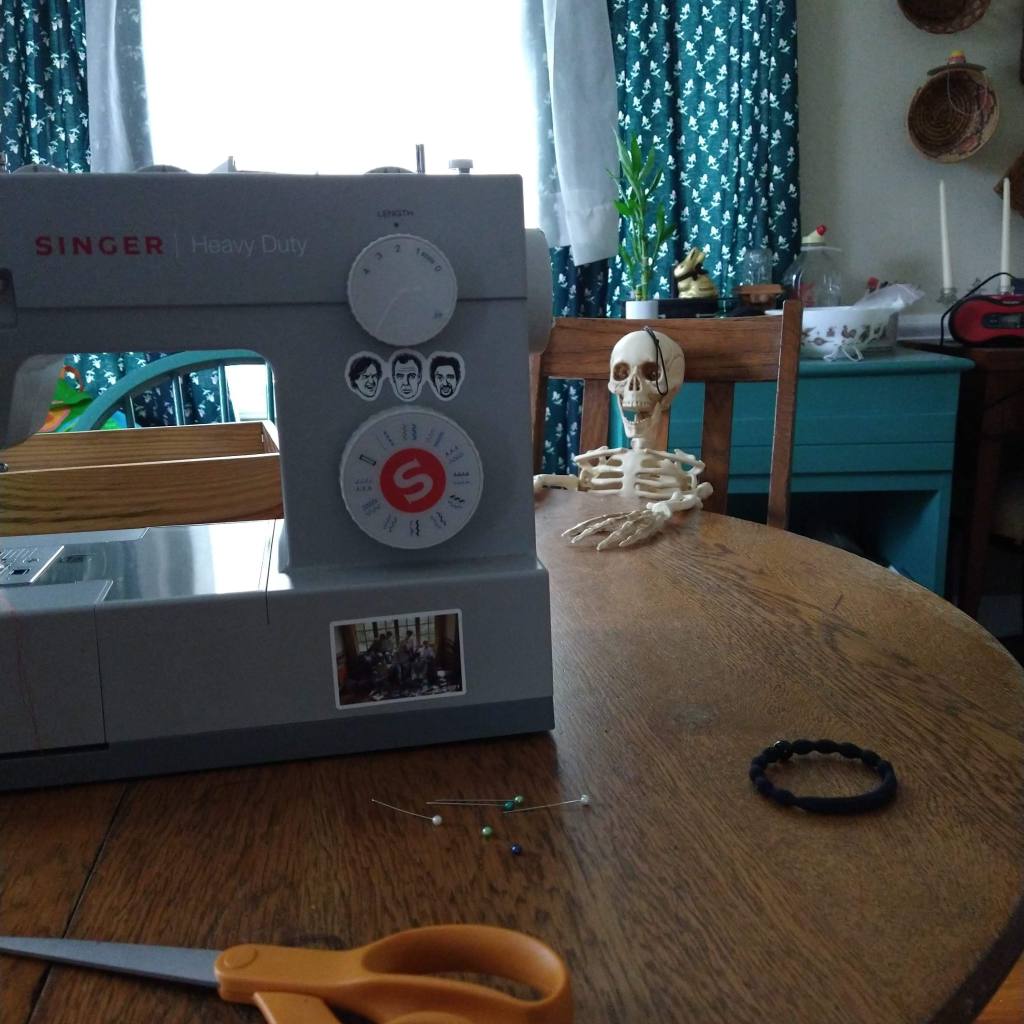
One of my favorite memories from childhood is carving pumpkins into jack-o-lanterns with my Papa. Together we would plan out our pumpkin design, and like the pals we were, we would set to work! Papa would carefully place the gourd on newspaper and we would ponder the sides, choosing the perfect canvas upon which to carve. Then with Mom and Grandma in toe, we would gather around the kitchen table to begin our masterpiece. The very same table I sit at now as I write this.
Papa would handle the knife and I with a spoon in hand was in charge of scooping out the seeds and pumpkin flesh. Like an assembly line, Papa would cut a small piece from the top, which was attached to the stem making a lid. With my mind-filled young curiosity, my hands would dig into the pumpkin, into the cold cavern of seeds and orange squishy goodness, wondering if would it be as fun as last year? Would it be as squishy? I still love squishing my hands between the seeds and the pulp. My Mom and Grandma sorted the seeds from the mess, rinsing and soaking the seeds to later roast in the oven. The memory of this process still lingers in my mind at the taste of salted pumpkin seeds. It was something I looked forward to, a hallmark of October.
Each year the pumpkin face was different, spooky and goofy, the way we liked our Halloween festivities which consisted of carving this pumpkin and the neighborhood trick-or-treat. The pumpkin carving happened a few days before trick or treat. I remember getting excited when the night came because I knew that meant I could dress up and wander the neighborhood with my friend a few days later, collecting candy as we went. When I saw this fabric at Joann’s it tugged at my heartstrings of those memories of childhood. The faces of these pumpkins look just like the way we would craft our jack-o-lantern. It was nothing too fancy, we were far from experts, but the expression carved from a kitchen knife had a certain charisma that I loved.
Not only did the pattern call to me, but the fabric was incredibly cozy, being made from a heavier flannel. I had to buy it. In true me fashion, I cut one side of the pants upside down, so my trademark pattern-matching mishap carries on into my fall-winter sewing escapades. I think at this point I should just embrace it. I’m not sure if we will carve a jack-o-lantern this year but here is our proud pumpkin friend from 2019. Happy Halloween!


