In August, Project Runway returned under a new network and reshuffled the format, hosts, and challenges to make a show I think was actually okay. Compared to where the show was left on Bravo in 2023, I think bringing back Heidi Klum was a good choice compared to the choice of Karlie Kloss, whom I didn’t see as an appropriate casting choice for a role that requires personality and colorfulness. It was boring. So were the new judges. The only new casting decision I was excited about at the time was Christian Siriano, my ult bias from the original show. So what was the good and the not-so-good, in my opinion, of season 21? And how has the show changed, for the better, yet in some ways, become less about fashion? These are my thoughts on my beloved Project Runway in 2025.
The Evolution of Project Runway
The original show premiered on Bravo in 2004 with host Heidi Klum, mentor Tim Gunn, and judges Nina Garcia and Michael Kors. It was filmed in NYC, at Parsons The New School for Design, where Tim was on staff, and the competition culminated in three finalists showing their work at NYFW Bryant Park. This format remained for the first five seasons, season four featuring Christian Siriano, who won his season.
After season 5, the show switched networks to Lifetime, where it remained until season 17. This change for season 6 also changed the location, with the show being filmed in Los Angeles at the FIDM campus until the finale, which was held at NYFW. Season 7 returned to Parsons and NYC, where the show stayed the course until season 11, when Zac Posen replaced Michael Kors. Zac Posen, Nina Garcia, Tim Gunn, and Heidi Klum remained through season 16.
Because of Harvey Swinestein being a producer of the show, and #Metoo movement addressing his depravity, Project Runway changed hands and returned to Bravo for season 17, sans the original cast. Karlie Kloss was the new Heidi, Christian Siriano the new Tim, and the judges were swapped for Elaine Welteroth and Brandon Maxwell.
The show remained this way through season 20, until the show changed again, switching to Freeform as its network, returning Heidi Klum to the host position, retaining Christian Siriano as mentor, and returning Nina Garcia to judge, with a new addition of Law Roach as the second judge. It’s a lot of change.
The Three Fashion Musketeers
When Project Runway moved back to Bravo in 2019, it was not the only fashion competition show in the American market; Netflix launched Next in Fashion for two seasons. Finally, Tim Gunn and Heidi Klum launched their own show on Amazon Prime, called Making the Cut, which was the equivalent of the original trio of Top Gear UK launching The Grand Tour on Amazon.
In my memory, from watching these three shows, Project Runway felt like a shell, undercut by Making the Cut, but losing the carefree fun of what Next in Fashion captured with hosts Alexa Chung and Tan France. All this change made me question what was the purpose of these shows anymore? With the rise of fast fashion and social media, it seemed like a relic. I could watch fashion design content on YouTube with varying points of view, to decide for myself what I thought was good fashion. Why would I care about the judges or the magazines anymore?
Project Runway in 2025
So now, six years later, what did the new Project Runway feel like? To be honest, it doesn’t have its own identity anymore, in my opinion. This could easily be RuPaul’s Drag Race with the amount of drama they packed into these episodes. The original format of challenge, runway, judging, and elimination was gone. Now you find out who goes home next week, which was unnecessary for me. I am tuning in each week, don’t make me have to, I want to, so just tell me who goes home so that the point of the show doesn’t seem like it’s an MTV reality show. It was hard to remember what challenge they were judging from last week. In some ways, I didn’t care; I just wanted the new challenge to be presented.
The contestants fought a lot, with Jesus and Veejay being a near constant. It was too much, and that leads me into one of my biggest gripes with the new season of the show. The editing was off. When Veejay was announced as the season 21 winner, I was confused. The final two eliminations before the finale were also edited strangely, because each time it seemed as though they were not going to keep Veejay, the judges’ critiques reflected this, and so it created this uncomfortable tension for the final three episodes, where it seemed like they were keeping Veejay in the competition so that she would become the first trans winner because of all the fighting.
That frustrated me because Veejay was doing good work, but then why make it seem like she was at the bottom, if the judges saw her work in high regard? It was really awkward. So was the out-of-control arguing between Veejay and the Estrada brothers, which I think the producers wrongfully kept in for a toxic series of episodes that is problematic, and I thought was manipulative. I wish for everyone’s sake that they would have paused the competition in a Tim Gunn fashion to unify the contestants again, because I liked this group of people. I can see where Jesus was coming from, and I can understand how bullying from the past can bring up past hurt, like Veejay expressed.
This is where the show shifted for me into a trash television show, such as Teen Mom, The Challenge, Real Housewives, or Keeping up with the Kardashians. Finally, the omission of NYFW for a quick 6-piece collection immediately after filming the bulk of the show felt lame. Every collection for me was a letdown, and this was the production’s fault once again. 8 out of 9 challenges were one-day challenges, so every other day, they were creating a brand new garment; it’s a recipe for burnout and mediocrity. The final runway show was like a fart instead of a spectacle of creativity, and it was underwhelming.
I hope they get a bigger budget for season 22 because the show has captured its thing again, but the finale and shift to the focus on drama over scenes from the workroom was a poor choice in my opinion. When I think of good reality competitions that have carried on throughout the decades, Survivor and Great British Baking Show are great examples that I may dive into in a part two.
Have you ever watched Project Runway? Did you think it was about planes? That’s what I first thought when I heard about the show in the mid-2000s.
I’ve written a few times about how peaceful gardening and being in the garden can be. Escaping from technology, surrounding yourself with nature, and being fully present with your plants has nothing but a positive effect on your life. But that doesn’t mean it is a perfect prescription for everything in life, and this summer, I found myself battling mental health problems that the garden alone couldn’t solve.
This post will be a bit different from what I typically write here, but I think it’s important to share. As a guy, there’s often a stigma surrounding mental health and attempting to get help (or at least that’s the case in the United States). This is a little bit about recognizing that I needed help and how it’s going so far.
Owning a House & Having a Garden Were What I Always Wanted
Buying our own house and having a yard big enough for a large in-ground garden were two goals I’ve had for a few years. When we were in the house we previously rented, I always said that it was going to be the last place we rented. I knew that only so much of that was in our control, but I was hopeful. The opportunity presented itself after three years, which was earlier than we would have liked, but with much prayer, help, and perseverance, we stuck with it. After signing all the paperwork and moving in, there was great excitement, but I still didn’t feel as happy as I probably should have. When last winter arrived, I was very happy and excited to be planning our first garden. I was also happy early in spring to be digging new garden beds, which I wrote about in great depth. But something still wasn’t right.
Feeling Off
Even in the midst of all the excitement that comes with gardening, I found myself being frustrated, irritable, and angry at the drop of a hat. Even in situations where I should have been happy, such as planting seeds, I was getting overly upset at little things. For example, if I put too many seeds in one area, I would beat myself up. That alone isn’t the worst thing; however, it affected my mood and how I interacted with those around me, including Magz. I would be short in how I communicated with her and have an edge to my voice.
I also began putting unnecessary pressure on things. I constantly focused on what was going wrong with the garden or what work needed to be done next instead of enjoying our successes or taking breaks. Weeds needed to be pulled and fertilizer needed to be added regardless of the temperature or UV index. This led to me being outside in the afternoon on hot, sunny days when the temperature was above 90 degrees. That work didn’t need to be done at that exact moment, but I felt like it had to. Worse yet, was that I passively applied that same standard to Magz. She asked me if I needed help or would be disappointed if she didn’t help (even though I know that she doesn’t do as well as I do in hot weather). I would tell her no, but when I came back inside, I would either act like I just did the hardest work anyone has ever done or would hold a grudge over it.
The last things I noticed were regularly being tired even after getting a good night’s sleep, no longer being interested in hobbies or activities I like, being moody, struggling to make decisions, and feeling as though I couldn’t hold conversations. In general, I felt depressed and down. Magz regularly asked me what was wrong, but I couldn’t pinpoint anything and just said that I felt off. Eventually, this led to us fighting pretty regularly and me not feeling confident in my ability to get out of the fight. I just felt paralyzed in my own mind and body. Finally, in July, I realized that I needed help. Mentally, I was at rock bottom, but I didn’t know what to do. I wasn’t interested in doing in-person therapy because I struggle to open up to people in person right away. Through our insurance, I found numerous services that provide virtual therapy, and the best part was that I could apply filters to find someone I was comfortable with.
Finding a Therapist, First Sessions & Progress
I wanted a therapist who is a Christian and a man. I didn’t feel comfortable talking to a woman in that situation, and I wanted a Christian counselor because I felt that it would be important to have a similar faith background. Within an hour, I found someone I was interested in, scheduled an appointment, and filled out the initial consultation. In a week or so, I had my first session, which was quite awkward.
Prior to this, I had never sought help from a therapist, although I should have. My parents’ divorce, multiple traumatic incidents, and some general emotional events that I never dealt with were all examples of times that I should have spoken to someone. Because of that, I had no idea of what to expect. I originally thought that I’d be “healed” in five or so sessions and didn’t want to drag this thing out. Boy, was I wrong. The first session was a basic “get to know” Kyle meeting where we went over my expectations and goals, and I began to tell him about my background and why I was there. Besides the goals and expectations, that’s actually how my first few sessions went, and I’ve only recently started to move beyond the intake portion of therapy, but I’m seeing real progress.
My therapist has given me the tools needed to process and react to situations and events that trigger me. I didn’t know it, but my ability to handle triggering situations in a healthy manner was basically stripped down to zero. I would overreact to everything and be unaware of how my body and mind were reacting to situations in the moment. Not recognizing this, I would respond to lies that I was telling myself, and situations would blow up. These new tools helped me slow everything down, recognize the emotions and bodily reactions I was experiencing in a given moment, and process them so that I could have a healthy reaction that was rooted in reality instead of falsehood.
What I’ve Learned
I’ve learned so many things from therapy. One is that it’s okay to admit that you need help. That’s a cliché, but it’s true. Not being okay is okay, but you don’t want to stay there. The second thing is that it’s really easy to fall into bad patterns of mental health. I never intended to develop poor reactions to events. It was a slow process that happened over time. The third thing is that developing healthy patterns takes a lot of work. You have to rewire how your mind responds to situations. You’ll have setbacks, which can be disheartening, but it’s important to stick with it. And the last thing is that it’s all worth it. It’s a time and financial commitment, and it’s also going to hurt if you allow yourself to be transparent with your therapist, but being healthy again is completely worth it.
And one more thing. Let’s call it an honorable mention. And this is for my fellow Christians who are having mental health struggles: Don’t let anyone tell you that your struggles are the result of not praying enough or that you don’t have enough faith. God is able to do anything and can solve a person’s struggles without any effort from us. But sometimes, it’s important that we put in the work, meet with a professional, and be able to process what’s causing our struggles.
Don’t Be Afraid to Get Help & Learning to Love Life Again
I started this post by talking about the stigma surrounding men and their mental health. Society is a much safer space for guys to have serious conversations about their mental health, but the sigma is still present. There are plenty of men (and women) who think guys are weak for seeking help with their mental health. If you’re struggling with mental health and would like to speak to someone but are concerned about how someone would view you, you owe it to yourself to get yourself help. Oftentimes, people aren’t as abrasive as we think they’ll be. But if you have a friend who would make fun of you or speak negatively of you wanting to get yourself help, you deserve better friends.
Now, let’s get this back to the garden. I struggled to find joy in the garden in spring and early summer. That began to change after talking to my therapist. It wasn’t instantaneous, but in August, I began to feel like myself again. I began to let the little things that went wrong in the garden go. We could only do so much to prevent the deer and other critters from getting into the garden, and it was wonderful to walk the garden and see the progress of our pumpkins. I also began to find joy in my favorite hobbies. I started the coffee table project and finished it in a (personal) record amount of time. Things are really beginning to look up, and I feel optimistic for the first time in a long time. I hope that if you are struggling with your mental health that you find someone you feel safe with and help yourself. You owe it to yourself. Your life is invaluable, and you deserve to live it to its fullest.
There are a few woodworking projects that are on my bucket list to complete in my life. My list includes a Morris chair, a dresser, a lamp, a bed frame, and a coffee table. For the past couple of months, I worked on crossing one of those off my list: the coffee table.
Why We Needed a Coffee Table
Before going into the details of the coffee table I designed and built, let’s first cover why we needed a new coffee table in the first place. Prior to the new one, we were using a gate leg dining room table that I had previously shortened the legs on to make it a more comfortable height for our couch. That had been our setup since May 2021, and it had worked for the most part. We were able to eat at our couch, and we could always put up both ends of the table if we needed the extra space. However, there were also some flaws that had always been present but were getting more annoying the longer we used it.
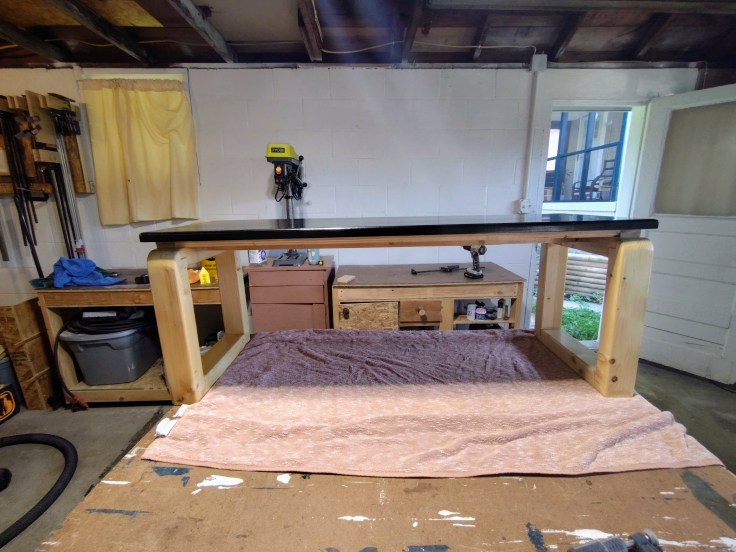
Finished coffee table
The first is that the table is really old and wasn’t maintained by the previous owners, who also happened to be the people Magz’s mom bought their house from. The table had also been stored in the basement for years, and the result was that the joints were loose, the top had scratches and scrapes in it, and the ends sag if the gate leg isn’t at a perfect 90-degree angle.
The second is that the table’s shape made it difficult to move around. We had to walk all the way around to access the other side of the couch rather than walking between the table and the couch. The gate leg also meant that we would bump into it on a daily basis, which caused anything on top of the table to spill due to the loose joints.
I had considered fixing and refinishing the table, but I think it would have been more hassle than it was worth. It quickly became evident that replacing it was the best option, and when there’s a choice of building vs. buying something, I will always build it.
Picking a Style & Designing the Table
Unless I know exactly what we want before I start designing a piece of woodworking piece, I turn to various books and online resources to determine the style. This usually means starting with craftsman or mission-style furniture. I love everything about these styles, including the warm tone of the wood, clean lines, and function over style. Think Frank Lloyd Wright or the famous Morris chair. I found many examples, the bulk of which had some form of storage, either immediately below the table-top or near the legs. There was a lot to like about a coffee table with built-in storage because we knew that we would be losing a drawer of storage in the gate leg table. However, we also wanted the option to sit at the coffee table with our legs underneath it, which made it difficult to also accommodate built-in storage. So, my search continued.
And here is where my study became interesting. I also have a book on Shaker furniture. Shaker furniture is named for the United Society of Believers in Christ, also known as Shakers, which was started in England in the 1720s and became organized in the United States later in the century. Shaker furniture is known for its durability and simplicity. You can still see well-preserved examples of this furniture at various Shaker museums in the New England region of the United States. Also, Shaker furniture was put on the radar of modern Americans thanks to Norm Abram’s New Yankee Workshop, where he visited several of the Shaker villages and replicated pieces of furniture. What surprised me, though, is that there were no coffee tables in the book I have, nor did Norm Abram recreate one on his TV program. And the reason for that is that coffee tables didn’t actually become a “thing” until the early 20th century. There were examples of low tables placed in the middle of sitting rooms that dated back to the late 18th century and the Victorian Era, but they weren’t called coffee tables until the 20th century.
Striking out here led me to begin looking at Japanese furniture. We love Japanese culture and design, and the floor tables they use would perfectly fit our needs for a coffee table. They’re close in height to what’s considered standard for coffee tables and are meant to be sat at with a person’s legs underneath. But what was still proving difficult to pinpoint was the exact style we wanted the table to have. Japanese woodworking is quite different from what is common in Western cultures. They use a lot of hand tools and feature carvings and intricate joinery in their projects. The design is exquisite and is tough to replicate. I’m certainly not at a place where I can confidently replicate something like that. That led me to finding this table and using it as my inspiration:
After determining the style of a project, I turn to SketchUp and create a 3D rendering of the item. If you don’t know what SketchUp is, it’s a web-based program that allows you to design 3D models. Once it’s designed, you can label the dimensions and print everything, which makes it really easy to use in the shop. There is a free and paid version of SketchUp. I use the free version, and it always fits my needs. From there, I like to transfer everything over to a piece of paper and draw specific portions of the project with a pencil. It helps me to see a specific joint or something that is hidden from view and would be difficult to see in a printout of the rendering. I’ll also use these sheets of paper as an opportunity to take any notes that I want to make sure I remember. It could be the size of a dado slot or the type of joint I’m using. The final thing I’ll jot down is a cut list. It includes the quantity I’ll need for each cut. This helps me to make all the same cuts at once, reducing the chance of unequal cuts.
The Materials
Going into this project, I knew that I wanted to incorporate two heavy planks into the table. They were originally used to move and store heavy pieces of equipment in an aircraft hangar, and we’ve had them for seven years since they were gifted to us. We originally had six of them, and four of them are currently being used: one acts as a shelf for us, and I made three of them into a mantle that is in our living room. The remaining two were originally used as the “hearth” for the mantle I built, but we haven’t used that piece since we bought our house and the mantle has been anchored to the wall. I disassembled the hearth piece, ran the planks through the planer, and was left with two pieces that were roughly 3 inches thick, 40 inches long, and 5 inches wide. Only having two pieces means that I couldn’t use them for the tabletop, so I was always planning to use them as the legs in some capacity.
Rough planks
For the top, I turned to my stash of red oak and pulled two 4/4 x 6-inch boards. In 2022, I bought a bunch of lumber that was earmarked for a few projects. I’ve since completed those projects (bookcase, guitar stand, and kitchen cabinet) and still have a few full-length pieces left. The last thing I needed was fasteners to attach the top to the frame. I was unsure how to do this, but eventually found figure-8 clips, which are brackets that attach to the frame and underside of the top, but no screws run through the two pieces, preserving the integrity of the wood.
Building the Table
At its root, this was a simple table build. It has legs and a hidden stretcher under the top, but there were two aspects that were initially confusing and had the potential to trip me up. The first was the shape of the legs. When you first look at the inspiration picture above, the tops of the legs look as though they are bent, which is a skill that I don’t currently possess. However, when you look more closely at it, you can see that only the vertical pieces of the leg frame are curved, where the joint with the horizontal pieces is. This creates the illusion of bent wood, but it’s much simpler. I decided to cut half-lap joints for this and then round over the outside pieces to give it a seamless look. I can’t tell what joint the inspiration piece uses, but I’m guessing it’s a mortise and tenon joint. I didn’t want to do that on such an important joint, and it needed more strength than what a standard butt joint delivers. A half-lap joint allows the weight and force of the tabletop to be shared across the vertical leg pieces rather than all being focused on the joint.
Leg pieces and half-lap joints cutLegs gluedStretcher attachedDry fitted before finish
The second aspect that was a bit confusing was how much framework to have under the tabletop. My original design only had a stretcher piece that connected the legs with spacers placed on top of it, which the top would connect to. As the piece came together, though, I wasn’t confident in it being strong enough, especially as we put our feet up on the table (it’s a coffee table, after all), ate at it, and played board games on it. I saw a scenario where the sides would sag in the future without support below. I addressed this by building a ladder-shaped support system that is placed on top of the stretcher and gave me roughly a dozen attachment points for the figure-8 clips.
With those design decisions made, building the table went smoothly. I limited the number of nails I used by only adding them to the leg joints, but even then, only on the top joints. Elsewhere, I drilled holes and used dowels to strengthen joints. I’m a big fan of how this looks. I also used biscuit joints to connect the four pieces used to create the tabletop. Biscuit joints are great because they’re much stronger than a basic butt joint, and biscuit jointers are easy to use once you get the hang of them.
Finishing the Table
Deciding how to finish this project wasn’t easy. In the inspiration picture, you can see that the top is very dark, while the legs appear to be finished naturally. At first, I thought that the top was a dark blue, but I now think it’s black. Either way, I had no intention of painting the top. I have a pretty rigid rule that prohibits me from painting woodworking projects built from hardwood that has beautiful grain patterns. My opinion is that if you want to paint a woodworking project, you should use a cheaper wood, like pine or poplar. The problem that arose was figuring out how to reach the level of saturation needed to get that dark color without turning to paint.
Milk paint was a possibility because you can thin it to still see the grain, but with Magz’s food allergies, we didn’t want to take a chance. You can also thin latex paint, but it’s difficult to create a consistent product and have an even finish. They also make solid stains, which sounds great in theory, but the product has very questionable reviews, citing a short working time, difficulty removing excess stain, and an uneven final product. Eventually, I’d like to give this a try, but I wasn’t going to use this project as a tester. Wood dyes were also a possibility, but like the solid stain, I don’t have experience dying wood and didn’t want to risk ruining this project. Plus, it was going to be expensive. That led me back to traditional wood stain, since they have several really dark tints, including ebony and true black. This stain isn’t perfect because it’s technically transparent, but I have experience layering coats of it to create a more saturated final product, so I was confident. With a half-pint of stain, a quart of oil-based polyurethane, a can of mineral spirits, and a fresh oil-based brush, I was ready to start.
Staining the table proved to be easy. With the surface sanded with 220-grit paper and tacked off, I applied a thick coat of stain before wiping off the excess. The wood absorbed the stain nicely, but it wasn’t dark enough. With the second coat, I let the stain sit for 10 minutes before lightly wiping the excess, which gave us the dark color we wanted. I then let the stain sit for 24 hours before applying the first coat of poly. In total, I applied four coats to the tabletop and three to the frame, lightly sanding between coats, and got a beautiful, glossy, hard finish. After letting the project sit for 48 hours, I attached the figure-8 clips and secured the top to the frame, and finally, it was done.
1st coat of stain2nd coat of stain
Reflecting on the Project
In general, I am very happy with this project’s outcome. I started on it in August and had it finished by mid-September. That’s very fast for me. There are several reasons for it, but I’m not the fastest woodworker, so I was thrilled by how quickly this one came together. The most time-consuming part of the project was finishing, as there’s always a lot of downtime while the stain or finish dries.
I’m extremely happy with how strong the table is and how beautiful the table is, especially the legs. It accomplished my goal of resembling Japanese woodworking, but I made it unique. I love how simple everything looks, while still being incredibly strong. That said, it’s not perfect. Some of the joints aren’t as tight as I’d like, and the curves on the legs aren’t perfect. With a bandsaw or scroll saw, this would be easier to achieve. It’s also not perfectly square, but then again, what is?
Ultimately, we love this table, and it perfectly fits our needs and our living room. We’re able to sit at it and eat dinner or do work, which is very comfortable. If we don’t feel like sitting on the floor, we can pull it closer to the couch or sit on a footstool. The table’s height allows us to prop our feet on it, which was a goal. Unintentionally, the table’s height also allows us to stow stools below it, which was a wonderful surprise. Finally, the table is easy to move and clean under. While it’s very strong, it’s pretty light and slides on the carpet. For the first coffee table I’ve made, I couldn’t be prouder.
I hope you enjoyed reading about my journey of building a coffee table. Even more, though, is that I hope it inspired you to build something if you’re considering it. It can be daunting, but it’s okay to make mistakes and take risks.
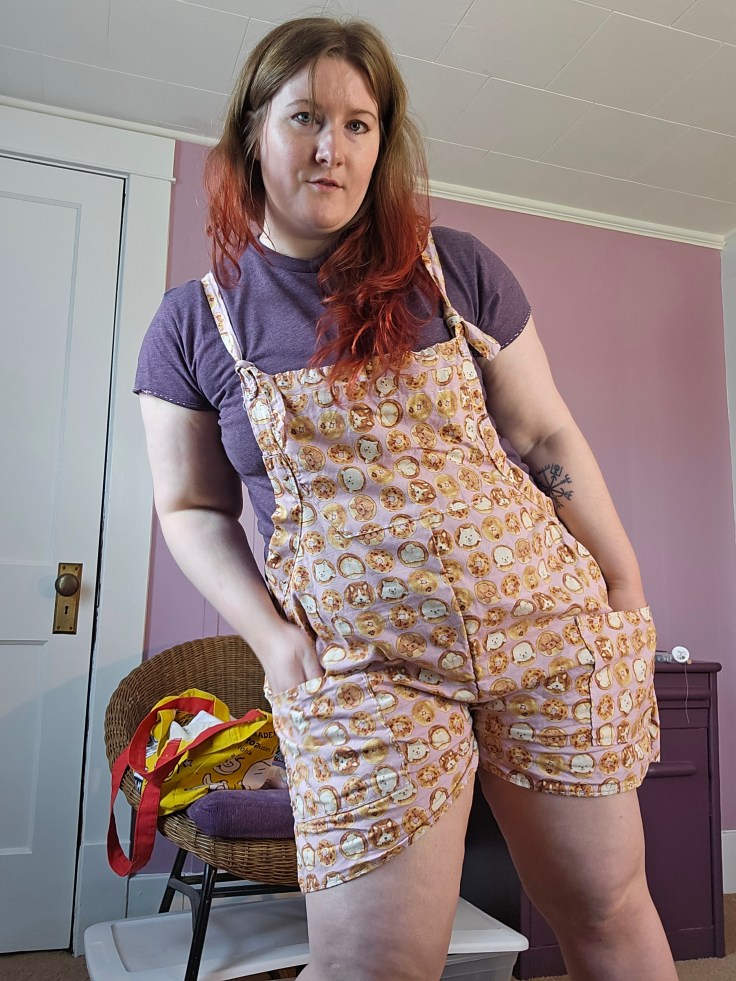
This is an unplanned part three of my “Drafting Shortalls From Scratch” because I did not succeed in making my overalls for winter. Although I have made shortalls twice this summer, a few silly, but very human mistakes, led to the project going awry. This is what I think went wrong:
Flew too close to the sun when tailoring
Planning < No Plan
Lack of Focus
Measure Once, Cuss Twice
I kinda hate sewing when it feels this hard
Putting too much pressure on myself
Not Buying Enough Fabric
Not Mocking Up
Not using my Patterns when I’m stuck
Research the Basics
It’s so easy to think we’ve got this and be too confident when going into a project. With knitting, this approach of fearlessness had led to some great projects, but with sewing, this artistic type of approach crashes and burns. Sewing is fabrication, as weird as that sounds. I think I was prepared to sew such complex tailoring projects, such as my shortalls, this summer, because I spent the spring building a screened-in porch with Kyle. Woodworking is very similar to sewing, I learned! It is about measuring, planning, creating things in a specific order, and constructing something that is built to last. When we started working on the porch, I never imagined how much it would teach me about garment construction. But it gave me a template to focus on. Who knew that woodworking would be such an inspirational experience for me?
So why am I sharing this? I am really struggling to accept that sewing is not coming easily to me; no matter how much I practice, it continues to challenge me. I’d like to invite you to join me in not giving up on those things in our lives that are hard.
Our garden is on its last legs, with only our pumpkins left to grow. It’s weird to look outside and see our dried-out corn stalks that are now tan and rustic-looking, squash plants that are withering because there are no more fruit to produce, and Queen Aliquippa tomatoes that have turned a warm yellow color. Last week, I wrote an article about learning to appreciate all the seasons and all that they offer, but even in that appreciation, I’m feeling immense sadness knowing that we’ll be tearing down this year’s garden in the coming weeks.
This Garden Will Never Exist Again
There will always be some common threads across the different years’ gardens. We’ll always grow tomatoes, cucumbers, squash, melons, and corn. We’ll even grow some of the same varieties each year. Despite that, future gardens will never be the same as this year’s. Plants won’t be in the same spot even if they’re in the same bed and growing conditions will mean that plants will grow faster or slower in future years.
Something that surprised me this year is that gardens and plants take on unique characteristics. For example, we learned which sections of the garden will quickly flood if there’s a lot of rain and which ones dry out the quickest. We also learned which vines went to which plants, even as they overlapped and tangled. Finally, we learned when it was time to be concerned about a plant’s leaves wilting due to disease or lack of water and when it was because of afternoon heat and sun. Some of these characteristics will be repeated in the future, but we’ll have to approach each garden with fresh eyes and be willing to learn.
Memories
Something that surprises me is feeling sad about the memories made in this garden going away. It’s similar to a trip or time period that you didn’t want to end. It could be a great vacation that you looked forward to for a long time or being in college with friends that you won’t see as often after graduation. Because this was our first in-ground garden, as well as the first one at our own home, we made a lot of memories in it. Magz and I spent so much time working side by side, prepping it and then planting in it. Here are a couple that stand out.
The first goes back to winter when our seed catalogs arrived. There was one night, in particular, when we were both lying on the floor of our living room with our rabbit, Mia. The TV was off, and only the minimum amount of lights were on. We both had a pen and were circling seeds we were interested in as we were reading them to each other. We’ll likely do that every year, but there’s extra importance because this was our first year doing it. And there’s always something special about the first time doing anything, just like the Kenny Chesney song said.
The second memory is working beside each other as we planted seeds outside. While I’ve fallen down the path (or dark well) of taking everything too seriously, Magz has always been great at having fun, no matter what we’re doing. That was the case with planting seeds. I would fuss over making sure that the holes were all the same depth and were spaced correctly, while she was much more relaxed about it. Ultimately, the seeds she planted grew just as well as the ones I did. It taught me a lot, and that memory will stick with me.
The third memory is a joint one. It’s the first vegetable we harvested from the garden and the first pot of pasta sauce we made solely with our tomatoes. I believe that the first thing we pulled from the garden was a burpless cucumber. It was from a plant that was gifted to us, and we didn’t think it would reach maturity, but it did. We simply sliced and ate it by itself, but it was delicious. Then, in August, we finally harvested enough tomatoes at the same time to make a pot of pasta sauce for spaghetti. That was the proudest I’ve ever been in a garden. I know that I’ve talked about being proud of the melons we grew, but being able to eat 100 percent homemade pasta sauce was amazing. In that moment, I felt such relief, knowing that all the work and effort had paid off in something. We made two or three more pots of sauce after that first one, but none tasted as good as the first batch. And I don’t think another batch ever will.
Hard Work
The last reason that saying goodbye to this year’s garden is proving to be difficult is because of all the hard work we put into it. As I mentioned above, the hard work was absolutely worth it, but knowing that we have to tear it down and put in more hard work next year is definitely sad. While we don’t have to start over from scratch, we still have to address the grass problem and upgrade our fence. Ideally, I think we’d love to not have to repeat some of the same hard work moving forward, but that isn’t the case. It’s not a big deal, but it’s still a source of sadness.
Looking Forward to Next Year’s Garden
In spite of the sadness, I’m already looking forward to next year’s garden. I can’t wait to apply the lessons learned this year to future gardens. I’m also excited to make more memories and in general, be in a healthier headspace to start the garden than I was this year. We accomplished so much this year, and I know that the future only holds more, yet we still mourn this year’s garden going away.
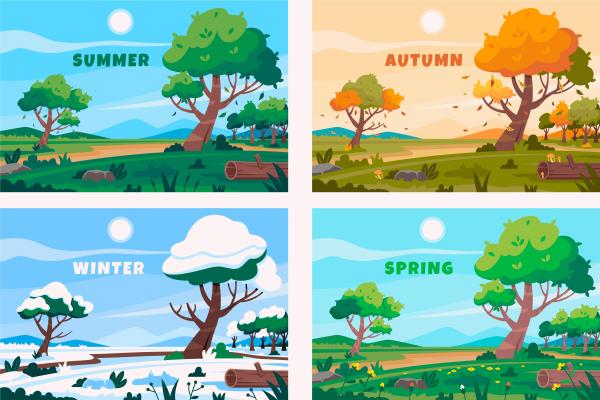
In the past, I have always looked forward to fall, so much so that I would wish for an early end to summer. In fact, that was the case with every season. Toward the end of fall, when all the leaves were off the trees, I wanted snow on the ground. When the bitter cold and iciness of February arrived, I couldn’t wait for the first hint of warm spring days. Then, after several months of rain and muddy ground, it was time for warm summer nights. In general, I have always been someone who looked to the next thing and struggled to appreciate the present moment. But that all changed this year, and the garden is a big reason why. Here are the reasons I’ve learned to appreciate each season, along with lyrics from songs that remind me of the season.
Spring
Let “hallelujahs” flow like a river We’re coming back to life Reaching towards the light Your love is like springtime
Chris Renzema, “Springtime”
Spring has always been a season of excitement for me. When I was a kid, it meant getting back onto the baseball diamond. As an adult, spring has taken on a deeper meaning, but the first hint of warmth in the air still lets me know that baseball season is upon us. In general, the first February or March day when the sun simply feels warmer than it has since October or November is welcomed. The length and intensity of winter will determine just how happy I am for that first hint of warmth. Last winter was a harsh one, so spring felt like a long-lost friend.
Along with the warm temperatures come rain showers and longer days, which soon give us the first signs of life from the soil. Typically, the first flowers we’ll see are the crocus and daffodil. Ironically, neither of these is native to North America. These flowers indicate that gardening season isn’t too far away, and that it’s time to start seeds, either outdoors for the hardiest of plants or indoors for the tender ones. Spring is a time of renewal and looking forward to what’s ahead.
For my song, I went with Springtime by Chris Renzema, who is one of my favorite Christian music artists. It’s a song about the renewal that Jesus’ sacrifice brings. Earlier in the chorus, he sings: “‘Cause death is dead and gone with the winter.” Is there anything more relatable in spring than that?
Summer
Still we sing with our heroes, 33 rounds per minute We’re never going home until the sun says we’re finished I’ll love you forever if I ever love at all Wild hearts, blue jeans, & white t-shirts
The Gaslight Anthem, “Blue Jeans & White T-Shirts”
Summer has been both a season I despise and one that I love. I’ve despised the heat, humidity, lack of air conditioning, and oppressive sun at various points, but I’ve also loved what comes with summer: beach trips, campfires, being outdoors, and fishing. This summer has been the first one where I think I’ve cherished every moment of it and haven’t been ready for it to end.
To me, summer represents the continuation of warm weather that starts in spring. It brings with it sunshine and warm nights that are perfect for sitting on the porch late into the evening. I’ve also (re)learned to love thunderstorms. I’m not a fan of the intense thunderstorms that bring a lot of lightning and wind, but I love the ones that produce steady rain and rolling thunder. It is one of the most peaceful weather events we get. In the garden, summer is a season of rapid growth. Plants will double in size in a week, and blossoms will produce fruit that will display each variety’s unique qualities. Eventually, this will lead to harvesting, and there’s nothing better than eating entire meals from the garden.
In general, summer is a time of production, which can be beneficial and problematic for me, as someone who loves being busy. I love being outside in the garden or in my shop woodworking. But by the end of summer, which is where we are as I write this, I’m ready for some rest that we find in fall and winter.
Picking a summer song wasn’t easy, as there are plenty to choose from. Take country music, for example, where nearly every song during the 2010s was summer-focused in some manner. I ultimately went with “Blue Jeans & White T-Shirts” by The Gaslight Anthem, which is a rock band from New Jersey. A lot of the songs from their ’59 Sound album focus on summer, the beach, and the boardwalk. Blue Jeans & White T-Shirts perfectly encapsulates the feeling of summer, and the final lines of the song are:
Sleep on the beach if we ain’t got a ride Sleep on the beach all night
Fall/Autumn
When I close my eyes I see you No matter where I am I can smell your perfume through these whisperin’ pines I’m with your ghost again It’s a shame about the weather But I know soon we’ll be together And I can’t wait ’til then I can’t wait ’til then
Zac Brown Band, “Colder Weather”
Autumn has regularly been my favorite season. It represented a return to my college campus, friends, football, and general happiness. And while some of those items have changed, fall is still my favorite season. For me, it now means a slowdown after the busyness and productivity of summer. With shorter days, plants and the lawn don’t grow as fast and need less maintenance, which creates more time to work on hobbies and do fun fall activities, like apple picking and pumpkin carving.
Other things that make me think about fall are cool weather, jackets, sweaters/hoodies, jeans, and boots, which are my favorite clothing items. And I certainly can’t overlook fall foliage and drives to see the leaves. Pennsylvania is one of the best states in the country for leaf peeping due to the diverse tree species we have. This leads to red, yellow, and orange leaves peaking at different times.
Even though autumn is my favorite season, it was not an easy season to pick a song for. There is only one song I like that specifically mentions autumn or fall in the title, and it’s by The Gaslight Anthem, and I didn’t want to repeat artists. Instead, I went with the Zac Brown Band’s Colder Weather. I think the song is meant to be more about winter than fall, but the line “I can smell your perfume through these whisperin’ pines” always reminds me of fall and the quiet sounds that come with it.
Winter
And in the winter night sky, ships are sailing Looking down on these bright blue city lights And they won’t wait, and they won’t wait, and they won’t wait We’re here to stay, we’re here to stay, we’re here to stay
Of Monsters and Men, “King and Lionheart”
A lot of people in Pennsylvania hate winter and see it as something that must be endured to enjoy the other seasons. I choose to enjoy winter. I have always loved snow and enjoy pretty much everything about it. I also don’t mind the cold weather and find it refreshing. There’s nothing like the crispness of winter air and just how fresh it feels compared to the other seasons.
Winter is a time of rest for me. Aside from clearing snow, there often isn’t a lot that can be done outside. I usually try to do some woodworking, but even that takes a pause if it’s really cold out. The time of rest is so nice, and after working hard from spring through fall, it’s earned. I also love the quiet of winter. Everything about it is quieter than in the other seasons. Snow makes very little noise, and when there is a snowstorm, people are less likely to be on the roads, so that noise is reduced as well. One noise I do like in winter is the squeaking of footsteps in the snow when it’s really cold. If you’ve never experienced it, here’s what it sounds like:
It can only happen when the temperature is below 14 degrees Fahrenheit, as above that temperature, your shoes will melt the snow as it’s getting compressed. I have many memories of being outside in winter and that being the only sound. It’s peaceful, eerie, and wonderful.
I would be remiss if I didn’t include hot chocolate and baking among my favorite things of winter. I love drinking hot chocolate on cold winter nights, and baking is one of my favorite activities. My preference is cookies, but I’m a fan of baking all kinds of goodies. We recently found an older Betty Crocker cookie book and plan to bake our way through it this fall and winter. Finally, winter is when we begin looking forward to the next year’s garden. We’ll request new seed catalogs, plan out our garden, and order seeds. The break helps me to appreciate all that the garden provides, and I start to get excited for the upcoming garden in January when the cold really starts to set in.
For winter’s song, I didn’t want to go with a Christmas song. Instead, I went with a song from Of Monsters and Men, an Icelandic band. And who better to write about winter than people from Iceland?
Appreciating All the Seasons
Appreciating every season isn’t about loving all aspects of it. For example, I get tired of the mud that comes with spring, summer droughts, the dreary skies of fall and winter, and the ice of winter. But those aren’t enough to get me to hate a season or wish it would preemptively end. Instead, I try to enjoy the general positives from start to finish of each season and squeeze every last ounce of joy from it. I’m writing this as we only have three days of summer left and am filled with sadness and excitement. I’m sad that summer’s end means saying goodbye to our garden and all the fresh vegetables it brought us. But I’m also excited to see our pumpkins ripening and can’t wait to pick more apples. Life is great, but it’s also short, and modern society rushes everything. Let’s slow down and really enjoy what we have when we’re in the moment.
I’ve been looking at how to make a custom overalls pattern, based on drafting techniques, which I began with this post: Drafting Shortalls from Scratch. But how to construct them? Well, that’s what I plan to explore today! To do this, yesterday, I cut out another pair of overalls, this time for the fall-winter-spring season, to retrace my steps.
Step One
With your pieces cut out according to your measurements, you should have four leg pieces – two front and two back. The next two bib pieces should be cut out, with the back piece cut a bit differently to accommodate the straps. This is to anchor the straps at the middle of your shoulders to keep the overalls securely on your frame.
Step Two
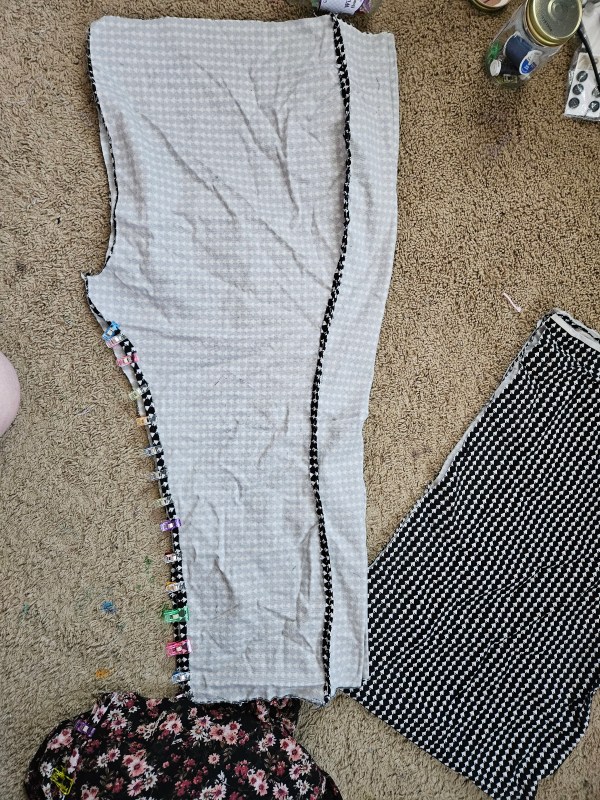
I like to begin with the pants or shorts portion of an overall project, because they are foundational to the silhouette. I like to pin the leg pieces together to try on before sewing. Remember to leave several inches of the outer thigh seams pinned for the flies and buttons.
Once you know that the pieces will fit, with seam allowance accounted for, I begin sewing the leg pieces together, leaving out the crotch seam and the top part of the inseam, to attach the two pieces as one pair of pants. After these have been sewn together and I have tried them on, I will move on to the bib.
Step Three
For less bulk, I like to cut the seams of the crotch portion and leg seams that will join together, with pinking shears, to make my hems less thick. This lets the sewing machine, or your hand sewing needle, pass through the seam with ease, and is more comfortable to wear.
How do you join pants? Well, you leave the top of the inseam open so that those two inseams will line up together, making the two legs join at the top where the pelvis is. Remember this is a bifurcated garment, so you want your final shape to be two tubes, joined to make one tube at the top. I’ve messed this up several times; it’s okay even if you sew it wrong the first thousand times. That is what mockups and seam rippers are for!
Step Four
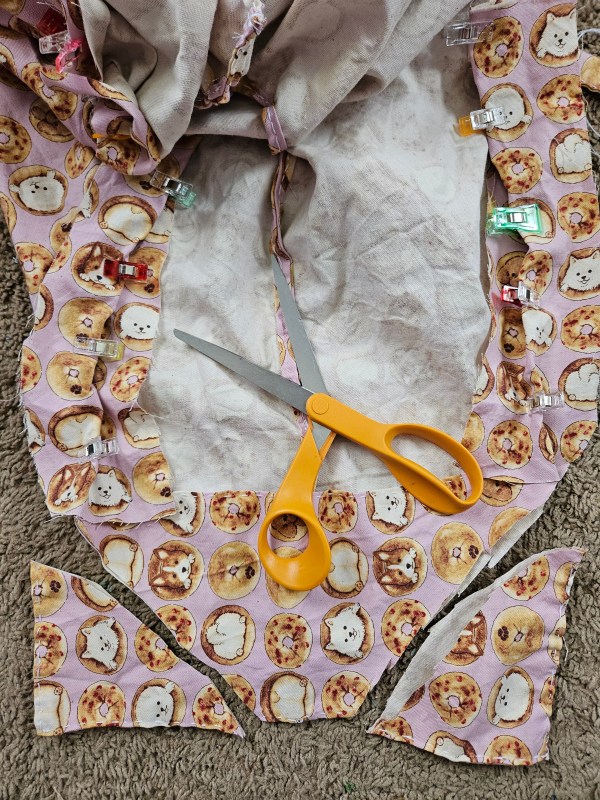
For the bib of these overalls pictured above, they were cut into short pieces, so I just had to join these pieces together. I added a facing to the inside of the bibs, which is just a piece of the fabric’s right side facing inside, so that the bibs are finished cleaner around the neckline.
I inserted the straps between the facing and the bib for a clean and secure stitch. The straps were finished with a loop on either side of the front bib to tie around, instead of the metal fastenings. I was inspired by Lucy and Yak Dungarees.
Step Five
The final touches are the bias tape, the side buttons, and the five pockets. I find the bias tape the most mundane thing; therefore, I choose to do that next, which is a 1-2″ ribbon of the fabric used to finish the raw edges still exposed on the sides.
Step Six
Next, I created the flies on either side by folding over the fabric to make the button placket and button hole placket. This was planned out when I cut out the overalls. After making the button holes and finishing them with either the machine or by hand, I mark out on the other side where the holes overlap to mark for buttons.
Step Seven
Finally, I sew the pockets. I chose a large, half-rounded bib pocket on the front, two smaller rectangle pockets on the backside, and medium side pockets sewn across the hip. Next? Enjoy your creation and feel a sense of accomplishment. You did something hard, and probably felt lost at times, but you persevered to learn a new skill. It’s not cringeworthy to try. So go for it! ❤
If you have been following my blog this year, you will know that I was feeling a bit frustrated, that I didn’t have a local yarn store to turn to after Joann closed – but that’s no longer the case! I found a local shop thanks to the Yarn Discovery Tour of North Eastern Ohio. How wonderful is that!
As a Western Pennsylvania resident, it was a little bit of a drive, but not too far to visit the lovely Three Sheep Gallery and Workshop of Boardman, Ohio. This yarn shop had so much for me and my mom to check out – spinning wheels, weaving looms, yarn brands galore, project kits, needles, hooks, etc. I picked up a sock kit with a superwash merino and nylon blend fingering weight yarn that is self-striping. I was excited to try this sock kit because it came with a free pattern from Urth Yarns. This sock pattern has been full of surprises, some good and some challenging. It is a toe-up sock pattern, based on traditional Turkish sock design.
I’ve never made a toe-up sock before, I’m excited to learn new techniques, but here is where I am struggling. I bought double-pointed needles, on recommendation for sock knitting, and they are wonderful needles, but dang, the combo of a new sock technique and new tools has been frustrating. I’m getting laddering on the sock every time I start over, and I feel a bit on the edge of tears because these needles were expensive – 21 USD! On top of the sock kit for 29 USD for 100 grams of yarn and a PDF pattern. I feel a lot of pressure, from my own mind, because I was not paying attention to the price and feel like I made a mistake, but I need to remember that new skills take time. With patience and practice, the skill will come in time.
The second project I purchased was a scarf kit with two yarn hanks of worsted weight wool and a pattern from Urth Yarns, that my mom also purchased so we will have matching scarves! I’m so excited. The biggest blessing of this day was the opportunity to share what I love with my mom, my Scott, and my Kyle. I am truly grateful for all that these guys did to make this a great day of bonding for my mom and I, and for the four of us. It’s been a heavy few weeks after losing our beloved Sully, and getting a day to explore a new yarn store, learn about weaving, and getting to meet the lovely owner of Three Sheep was a bright spot after days of gray.
Our fence has become somewhat problematic over the past month or so, and animals are either taking advantage of it or are the cause of it. In the spring, I wrote about the fence we bought and how we reached that decision. We ended up buying deer fencing that is typically used in orchards to protect the fruit trees. It is seven feet tall, although we folded it over, so it is only about 4 1/2 feet, comes in 100-foot rolls, and only costs $23 per roll. We were able to fence in our entire garden for less than $200, including the bamboo stakes. We bought it with the intention of it being a short-term solution that we can upgrade over time. And for the first three and a half months, it was perfect.
Deer didn’t try to breach it, and rabbits didn’t burrow under it. In general, it worked better than expected, and any issues we had were self-inflicted. It’s relatively easy to overstretch and tear the material, and you have to be careful to not get too close to it when walking near it, as your shoes can get caught in it. But beyond that, it survived heavy winds, driving rains, swampy ground, and general ignorance. That was until about mid-August, when we started to notice that something was getting at our corn stalks.
Deer? Raccoons? Squirrels?
I first began to notice evidence of animals around our garden in July when I saw raccoon poop in the grass outside the fence. I didn’t think much of it, though, since they weren’t getting through the fence. Fast-forward to mid-August, and we started to notice that some of our corn was being eaten and stalks were showing signs of stress. At the same time, our sunflower plants were decapitated not long after the heads began to form. It only got worse from there.
Nearly entire ears of corn were consumed, while others were being torn from the stalk. From the outside of the fence, an animal was pulling our tall Blue Hopi corn stalks to bend down on the fence, reducing its height from 4 1/2 feet to about 3 1/2 feet. Elsewhere, we were seeing bite marks in some of our remaining cucumbers, our melons, and one of our pumpkins. And the worst part was that the animals weren’t eating the entire vegetable. They were taking a single bite and leaving it on the ground. And how did these thieves gain access? Flaws in the fence were the main culprit, and the evidence was everywhere.
It started with small horizontal tears or cuts in the fence that left the top intact and the bottom hanging, exposing an access point that is just big enough for a raccoon to climb through. In other areas, the zip ties, staples, and twist ties we used to connect the fence to the stakes failed, causing the fence to fall down. This meant that entire sections of the fence were reduced to a height of 2 1/2 feet, or plenty low enough for a deer to hop over. Finally, some of the stakes started to bend or angle, which also lowered the fence’s height. I’m not 100 percent certain of the cause, but my theories are animals pushing on them, plant vines growing against the fence and putting strain on the stakes, and the lack of rain not keeping the stakes in the ground as deep as they should be. In general, it’s become a mess.
Thankfully, it appears that the crims are simply raccoons, deer, and squirrels, or just your average neighborhood scoundrels. They don’t do a lot of damage. Funny enough, I think the squirrels are the most annoying of the trio. Even with an upgraded fence, they can climb up and over to gain access.
Upgrading Security
Given that this year’s fence was only intended to be a short-term solution, we’re unsurprised and undeterred by the animals. It may be a bit demoralizing, but luckily, there are ways to remedy it for next year. We’re already discussing how we can improve some of the fencing. While we likely won’t upgrade all the fencing for next year’s garden, we can upgrade it a little at a time. Even improving the fence for individual beds will make a difference. We’ll likely go with some type of chicken wire that is metal. We’re also going to upgrade the stakes with pressure-treated 2x4s that I’ll cut down to the appropriate width/height. Something else we can do is spray plants with a hot pepper solution that will deter animals from wanting the food. It’s not a permanent solution, as it needs to be reapplied after rain, but it’s organic and tested.
Ultimately, there’s only so much we can do. We’re growing vegetables in an area with a lot of animals. It’s a blessing to not live in an urban setting, which means we occasionally have to deal with animals. I’m also choosing to take it as a compliment that the animals want our food. Sure, they could have just eaten forageables, but they’re choosing to eat what we grow, and that’s pretty cool. And we are a big fan of animals, after all.
Have you had problems with animals getting into your garden? If so, what vegetables were they most drawn to and what steps did you take to prevent it from happening again?
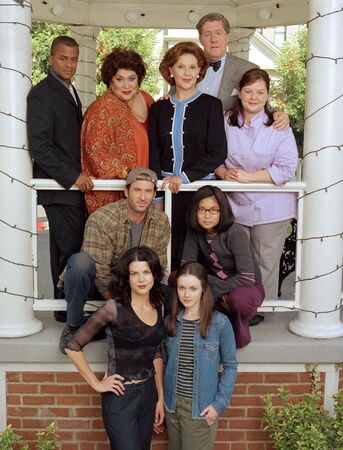
If there is a new fall tradition from the 2020s, it must be Gilmore Girls. Maybe it’s the 20 year rule of trend cycles? Or the power of a tiktok phenomena? But this little show, that was niche throughout my time as a teen and into my twenties, is now a cornerstone of American autumnal celebration in our modern age.
I am honestly thrilled to see this story and its characters embraced by a new generation. It was a connecting point for me, my mom, and a few of our close friends. For a while it felt like a secret club, always disappointing me when I would make a new friend and ask – do you like Gilmore Girls? They shoot me a look of puzzlement, like it was a figment of my imagination. It was my comfort show throughout my teens, and finally others are finding its charm!
The only thing that I don’t if I agree with, is Gilmore Girls being crowned as a fall show when I believe it is a show that showcases the seasons. I guess, that’s why the follow up series – A Year In the Life had a seasonal format. At the time I thought it was ASP doing her own thing again, and it might be, but it may also be, artistic focal point to bring attention to what the show’s storytelling is rooted in – all four seasons.
So I took a look at the episodes, season by season, and tallied fall, winter, spring, and summer. I did not count Season 7 because creators, Amy Sherman Palladino and Daniel Palladino, departed after season six.
Fall: 38 episodes
Winter: 43 episodes
Spring: 28 episodes
Summer: 20 episodes
This is why I don’t understand the hype for this being solely a “fall” show. It is a winter show. A spring show. It is a story about four seasons. I’m happy people are finding joy in something that has brought me so much enjoyment. I just don’t agree that Gilmore Girls is only a fall show. I think it sells a show short, when it celebrates the seasons better than most.
Do you agree? Have you ever watched Gilmore Girls? What is your favorite way to celebrate the beginning of fall?