Listening For Wisdom | 2025

It has been a while since I shared any Bible Study reflection posts on this blog, and I wanted to dive into why there has been such a drop-off in talking about the Bible.

It’s not because I have stopped reading the Bible or questioned my faith, nothing like that. Instead, it is because I am at a loss for how to write about what God is teaching me.

This year has been challenging; there is a lot of hurt going on around the world, and there has been a lot of chaos and hurt happening in my country. I have friends and family affected by DOGE. I am unhappy with the way ICE and immigration is being handled. I have been fearful of the tariffs, the executive orders, and the student loan discussions. I’ve been outraged, in tears, and had moments of feeling hopeless.  But I know God is steadfast.

There has also been chaos within American Christianity. There is a distinct difference between a follower of Jesus, a far-right Christian, a far-left Christian, and the Gods, G*ns, and Trump crowd. I am disappointed in the divisions in the church politically and the lack of adherence to Jesus’ message. It’s not about political allegiance, it’s about doing what the Bible says – caring for the poor, not being proud, not creating division, and loving your neighbor as yourself.

I have been praying a lot and listening to all I can to learn and see the world with Kingdom eyes, not American eyes. I want to see those who need help in society and help them regardless of who they are. Knowing how to put these lessons into words has been tricky because I am still listening and don’t feel qualified to weigh in on anything going on. Especially as a white, Jesus following, female – I see a lot of hypocrisy, apathy, and exclusionary entitlement from this demographic, and I don’t want to be taking up space when other voices need room to speak.

The major thing I have learned this year from listening, studying, and my own prayer-filled conversations with God has been to love. When I ask God for direction or an answer on how to help, I feel the resounding answer – love. Love them, specifically. I also feel immense righteous anger at injustice. I can’t ignore it; my heart is broken. I have been asking to see things the way that God wants me to, and that means recognizing the evil being done in the name of “good,” and that is not aligned with the Bible at all. It’s a mess, but one that I believe we can fix if we remember to humble ourselves, to admit wrong, ask forgiveness, and change behavior on a cultural level.

A verse that I learned about in a discussion of the Exodus Way, I believe, or maybe it was the beginning of the City series, was this verse from Ezekiel about why Sodom in particular angered God.

Behold, this was the guilt of your sister Sodom: she and her daughters had pride, excess of food, and prosperous ease, but did not aid the poor and needy.

Ezekiel 16:49 ESV

That verse has eaten me up inside, as I see the rich getting richer and the poor being hurt more. How can any of our efforts be blessed if we are being selfish with the blessings we have?

I have also been reading Galatians. Paul’s writing just nails it every time. As humans, we are so cyclical in our bad behavior, but if we came together in unity and with the fruits of the spirit, dang, we could do some good. I am hopeful with each moment of protest that is carried out with words and without violence, that those moments will shine bright in the darkness.

Hopefully, I will feel more comfortable soon sharing more in-depth thoughts. It’s just a lot of chaos to sort through with God, to discern what is good in this mess of 2025. Clinging to Him above all, I guess, is the biggest takeaway.

Have you read or heard that passage of Ezekiel before? I was pretty stunned by that. I hope wherever you are, you know that you are loved. Until next time, thanks for spending time with me today, dear reader.

The Rain Barrel: A Gardening Game-Changer

In several of my weekly gardening updates, I have mentioned that we installed a rain barrel. I have known several people with them and have been excited to have one of my own for quite a few years. The opportunity to save some money on water? Sign me up!

Before buying our house last summer, we had been renters, so this was our first opportunity to have a rain barrel. As we were planning our garden, the idea of having one for this year came to mind as a potential reality rather than a long-term thought. We knew that we’d need a large amount of water for the garden, and we were looking to reduce our dependency on city water.

Our Barrel

We picked up a 55-gallon food-safe blue barrel from Rural King. It was previously used for transporting drink concentrate. It was $30, so it would quickly pay for itself. We also needed to buy the spigots and a filter for keeping leaves and other debris out of the barrel. Those items came from Amazon.

Rain barrel
Rain barrel

When adding a rain barrel, you can either buy one that is completely put together or repurpose something else. We went the latter route and saved money ($50), but it is a good deal of work. Instructions can also be vague, and YouTube videos may not apply to your setup. It’s also helpful to have power tools for cutting and drilling and have confidence in your ability to operate them. We were able to keep costs down because we have the power tools and only needed to buy a drill bit for the holes that the spigots go through. In total, I think it took an hour to get everything set up. Future ones will take less time now that we know what we’re doing.

If someone isn’t interested in converting a regular barrel into a rain barrel, they can easily buy one. A quick Google search shows many options with prices ranging from $50 to above $100. Some of the lower-priced options are collapsible, which sounds a bit precarious, and the more expensive options hold more than 55 gallons. These rain barrels typically include everything you need to get started.

What Makes a Rain Barrel a Game-Changer?

Simply put: Being able to convert rainwater into water for the garden is a difference-maker. Instead of paying for water (like we do) or using water from a well or spring, you get to use water that would normally run off the roof and be drained somewhere else. In our case, this was the yard, and it was running off into our garden beds. Converting something free into a usable resource has given us a sense of freedom that I didn’t expect.

Having the rain barrel has made us more aware of how much water we use when watering the garden and our flowers. It’s a 55-gallon barrel, but because there is an overflow spigot near the top, it probably holds around 52 or 53 gallons. We water with cans that hold a combined 4.5 gallons, so we get around 11 or 12 trips when using both cans, which is enough to water the entire garden. As a result, we are aware of the importance of not overwatering because the excess runs off, and it’s wasting the water we collected.

Using a rain barrel has also helped to contribute to the slow and quiet nature of gardening that I love. Because the rain barrel is gravity-fed without pressure, it doesn’t fill the cans as fast as our garden hose does. And that’s okay. It’s nice to take a break and let the cans fill at a slower pace. It’s also quieter than a typical hose setup due to the lack of pressure.

Naturally, a big reason to use a rain barrel is the money you can save. At the top, I said that we probably spent around $50 on everything. We don’t know what we pay for water on a per-gallon basis, but we will save enough money with the rain barrel this summer to pay for it. Gardening can use a lot of water, especially when you first start seeds, and being able to use free water that doesn’t need to be treated is wonderful.

Since we started using our rain barrel, we’ve found ourselves excited to see rain in the forecast, especially if it’s been dry in recent days or weeks. Every gardener gets excited for rain after a dry spell, since it means the plants are getting water, but with a rain barrel, you also get excited for your barrel to refill. A full rain barrel after a dry spell means your plants are watered AND you have a full supply to pull water from as needed. Speaking of refilling the rain barrel, I’m amazed at how fast it will fill. A half-inch of steady rain will fill it from empty in a few hours.

Get a Rain Barrel if You’re Able To

If you’re a gardener (flower or vegetable) and have the chance to, I recommend buying or creating a rain barrel. The financial, environmental, and plant health benefits vastly outweigh any negatives. It’s a relatively simple process to set one up, and they can be placed almost anywhere with a downspout.

Magz recently told me that some states have some restrictions against collecting rainwater, which I looked into. It appears that most of the restrictions apply to only using the rainwater for non-potable (aka non-drinking) purposes. That is an understandable restriction. Rainwater is not necessarily safe to drink, especially if it’s running off your roof and through a gutter/downspout system. Please don’t drink it. If you live in an area with more severe restrictions, I recommend trying to change those laws. Many university extension offices (here’s Penn State’s as an example) as well as the Environmental Protection Agency argue for the benefits of a rain barrel. Local municipalities and states should recognize those benefits as well.

We currently have one rain barrel but are planning to get at least one more. Collecting twice the amount of rainwater would further reduce our reliance on city water. When we create that rain barrel, I’ll take pictures and create a step-by-step article.

So, that is our experience with rain barrels and the benefits we’ve seen so far. Water conservation is very important, and being able to participate in it, even minimally, can be a difference-maker. Rain barrels also help to reduce run-off and soil degradation thanks to the presence of grass. The benefits vastly outweigh any perceived negatives. If you have the chance to, I recommend getting one. You almost certainly won’t regret it.

Do you have a rain barrel that you use for your garden? If so, what are your experiences with it?

Starting a Knit Garment

Do you ever get stuck in start mode when beginning a new thing?

Like you’re wandering through a maze of ideas. Maybe it’s the planning stage, too many ideas, not enough organization? It’s weird. I feel such a rush when I have multiple WIPs on my needles. The satisfaction of binding off stitches and slipping that garment onto my body makes every week of work worth it!

The void though, between new idea and casting on a new project, is a shape shifting process. The indecision sets in.

  • What yarn should I use?
  • Do I have a color palette
  • Stockinette or a new stitch?
  • Texture?
  • Colorwork?
  • Do I have an inspriation garment in mind?
  • Have I thought about how I want to garment to fit?
  • How much positive or negative ease should I plan for?

The next phase is choosing needles, selecting the amount of yardage, and gauge swatching the stitches to inches ratio to calculate the size of the garment.

It feels as important to start with the correct amount of stitches as it does to pour a concrete foundation evenly. I think this is why I get stuck in neutral instead of shifting into gear – when you get a creative idea sometimes the final design outcome is a little fuzzy.

So how do I get out of it and move forward with my design? I sketch, even simply shading the colors together in simple patterns helps me see if the image in my head will fit the realized garment. I also start working with the room to frog the yarn and begin again.

That is my favorite thing about fiber art, you can tear out and begin again without ruining your materials. Even though the first stitches feel like concrete the process is flexible.

Do you get stuck in planning? How do you move your mind forward? Thanks for spending time with me today. You are amazing and I hope you know that you are loved. Until next time. ❤

Weekly Garden Update #14 – First Harvest, Pests & Knowing When to Stop

In this week’s update, some of our early crops were ready to be harvested. We’ll tell you what plants and how they turned out. We also encountered an unfamiliar pest and were forced to turn to non-organic pesticides. Finally, Magz helped me to realize that it’s okay to say we’ve done enough for this year and that the rest can wait until next year.

First Harvest

Over the past few weeks, we’ve been able to watch our plants grow by leaps and bounds. Our greens have developed their baby leaves, our bean and melon plants have their second sets of leaves, our corn is 4 inches tall, and our radishes have started to poke their roots above the soil. Taking note of this, we went out on Sunday and harvested about half of our French Breakfast radishes and took the first cut from some of our greens (Komatsuna and Cherokee Blue). The greens were harvested at the baby leaf stage and were delicious in a salad. They both had a peppery taste with the Cherokee Blue being the spicier of the two. Its spiciness is comparable to horseradish.

Radishes, greens
Radishes and greens

The radishes weren’t too big (about 1/2-inch in diameter and 3 inches long). This is slightly narrower than the seed packet says they should be, but that is likely the result of us not thinning them enough or the ground being a bit too compacted still. Either way, we ate them raw in a salad, and they were delicious. Radishes aren’t something that I remember people eating a lot of growing up, and most of the people who did eat them were a bit older. I only started to try them within the past few years and find that they add a nice little “pop” to a salad. They’re also very nutritious, providing calcium, Vitamin C, riboflavin, and niacin, among other nutrients.

Tomatillo Pest

Last week, when I was walking through the garden, I noticed that our tomatillo leaves had a lot of holes in them. Even worse was that something was eating its stem, which isn’t something I’ve encountered before. A quick Google search revealed that it was being attacked by the three-striped (also called three-lined) potato beetle. I did some research and learned that despite its name, this beetle doesn’t go after potato plants and only rarely goes after tomato plants, a relative of the tomatillo in the nightshade family. Trying to find an insecticide revealed the unfortunate information that organic measures generally don’t work against these beetles. Instead, you need specific chemicals to go after the larvae.

In our case, we found Garden Tech Sevin at our local Tractor Supply. While it doesn’t list the three-lined potato beetle among the insects it kills and repels, it does list the Colorado potato beetle, which is closely related. Since spraying the plant, including the undersides of the leaves, we haven’t seen more damage, but only time will tell if we caught it in time. It’s starting to produce buds, and you can see where the fruit will grow eventually, so we’ll see and keep you updated.

Knowing When to Stop

For months, we’ve planned on having six garden beds for this year. If you’ve been following along, you’ll know that we have plants in four beds, have one bed finished and ready for planting, and another that has been started but isn’t completed. I’ve been feeling stressed about needing to finish the last bed in recent weeks with all the other things that need to be done. This past weekend, Magz kindly told me that we don’t absolutely have to have the sixth garden bed this year and that it can wait until next year.

For a lot of people, this realization may seem obvious, but I’ve always struggled with reaching this conclusion. If I have a plan in place, I feel that I have to see it through, even if it’s unnecessary or not good for my physical or mental health. My natural inclination is to put myself in stressful situations by pushing through even when it isn’t needed. Having a wife who will help me to see that we can wait until next year’s garden to have that sixth bed is wonderful, because even at 33, I am unable to see that myself.

We still have starts and seeds that need to be planted in the ground, and we could certainly fill that sixth bed this year, but we also don’t have to. We’re going to have plenty of plants and work to do with our five beds. We will circle back to that final bed this fall, when we can till it for our winter cover crops.

Up Next

Over the next couple of days, we’re going to need to fence in the fifth garden bed so that we can plant in it this week. After a rainy weekend, plus thunderstorms in today’s forecast, Tuesday through Friday are looking nice with sunny skies. Our plan is to plant our squash and zucchini seeds this week and transplant our remaining melon, tomato, and pepper starts.

Happy gardening!

Playing Animal Crossing Has Improved My Style

As a kid, one of my favorite pastimes was designing. I loved the fashion styling flash games from Lizzie McGuire and My Scene. I designed my own catalog of clothes for a made-up brand with my friends in 4th grade, illustrating with my school supplies and piecing it together with scrap paper. Mary-Kate and Ashley’s movies captured my imagination through their use of clothes to characterize each sister’s personality.

That’s So Raven enveloped me in imagination, not from her psychic abilities, no, Raven Baxter’s closet pulled me in! Raven’s room was a stunner as well, like Zenon Kar’s space station cabin, and my Fashion Polly’s colorful playsets that folded out like Richard Hammond’s caravan. My friends and I discovered shows like What Not To Wear and Trading Spaces, which launched my sketches from clothing brands to interior design. I had a notebook full of room drawings. There were designs with slides, hammock beds, and intricate themes. I drew a Survivor-themed room with a tribal council area on the lower level, an outer space room with circular windows and futuristic lighting, even a beach room with a lofted bed, sunset paint scheme, and a pool placed in the middle of the floor. I wish I knew what happened to these sketches; it’s been such a long time.

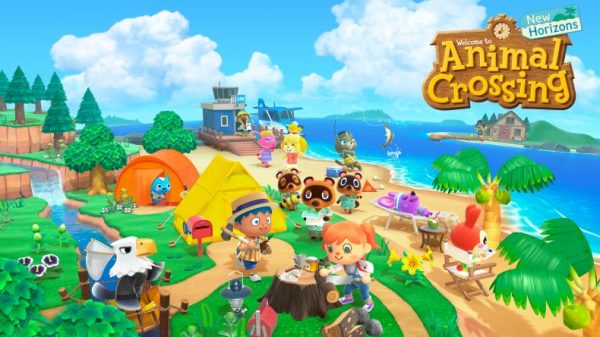
When I discovered Animal Crossing in 2020, I was curious what the fuss was about, and later the next year, we bought a Nintendo Switch, opening a world of design I thought was lost to childhood. I was thrilled! Animal Crossing New Horizons debuted in March 2020, and because of the unique time, it had a huge following for its charming island life. You begin your game landing on a deserted island as part of a Nook Inc. Getaway Package, and assist Tom Nook in developing the island with the help of Timmy, Tommy, Dodo Airlines, Blathers, Isabelle, and the villagers who move to the island with you.

But what about the fashion and the home decor? This game first places you in a tent that you upgrade into a house, with subsequent expansions costing large sums, but with a relaxed payment policy. You also gain the ability to design custom things with Nook Mile redemption upgrades, craft unique recipes from resources on the island, and buy items from Nook’s Cranny and clothing items from Able Sisters. A ridiculous amount of my gameplay, even years later, comes from pairing and collecting new clothing items for my character to wear on her adventures. This game loves coordination!

As a player who is well-versed in the Animal Crossing fashion catalog, I wait and anticipate finding my favorite pieces with each new island. The game has four seasons, with clothing corresponding to the season at play, including specialty garments for holidays. Currently, as I play in June, it’s wedding season and Able Sisters is selling traditional Japanese wedding attire, Nook Shopping is selling Father’s Day items, and International Children’s Day pieces, which include a paper crown that is oh so cute!

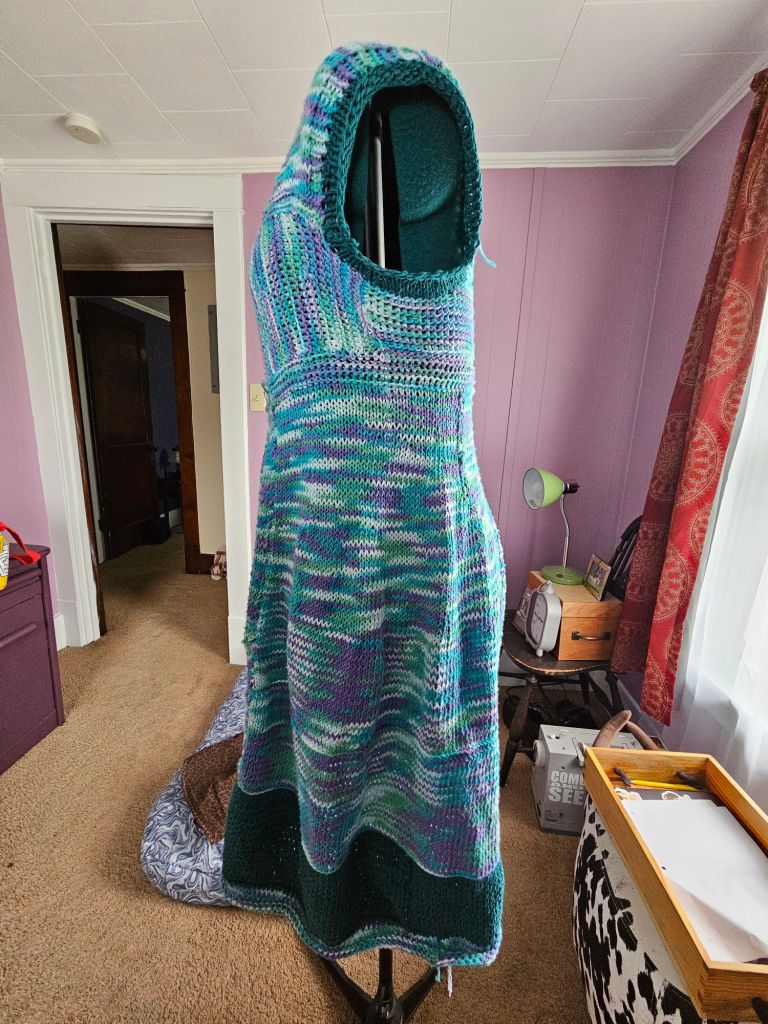
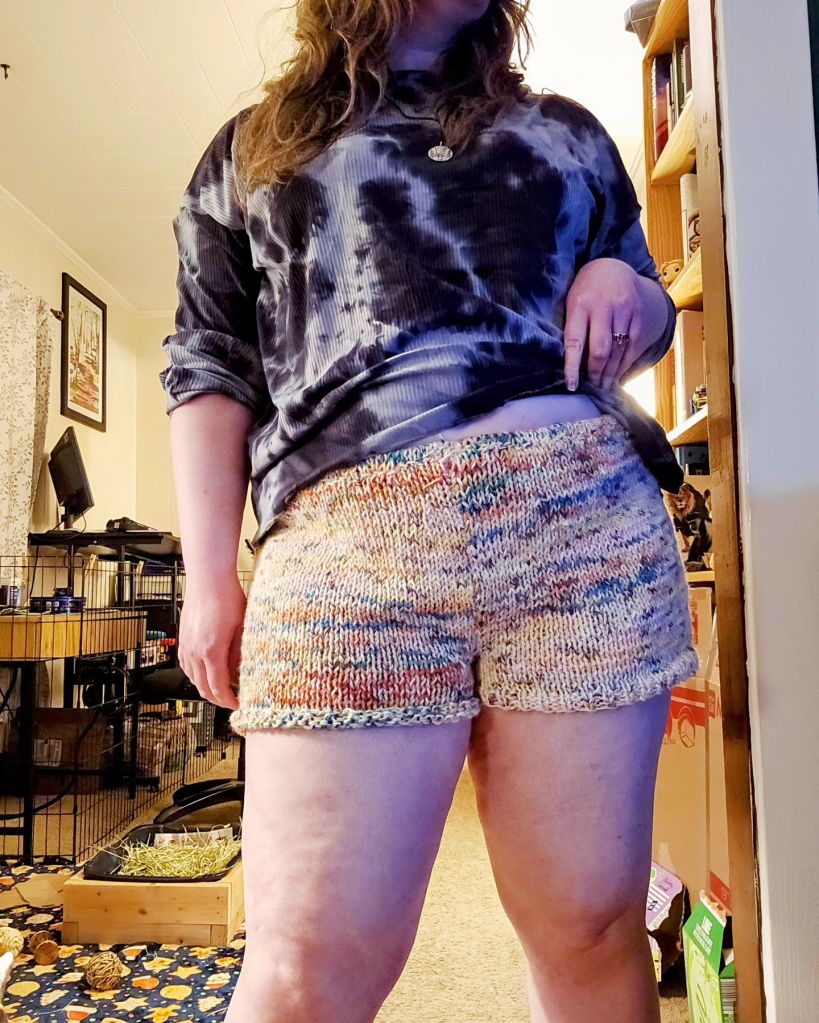
How has this impacted my own personal style, though? Well, it has brought me back to the mindset of creating a full look. Working from home or working in professional painting at jobsites for most of my adult life has killed the style I used to have. I no longer felt the need to put together a look, but instead I got used to throwing on pieces and wearing things for function, not fashion. But that’s not who I really am, just what the environment of life drifted me into. I was missing intentionality, Animal Crossing lit that spark once again. My little character doesn’t just get dressed to do life; she wears a head-to-toe look with hats, bags, glasses, specialty socks, clever shoes, cute tools, and interestingly paired garments. This game got me out of jeans and a t-shirt, or a hoodie and leggings, because this game has trousers in many fabrics and shapes, shorts in colorful prints, skirts in a bouquet of fancy, coats, hats a plenty, tops that span the seasons – it’s a blast to explore! There are dresses – modern and traditional. I can where a kimono! I change her outfit at least once, maybe three times a session. You can also curate hairstyles and experiment with colors.

This exercise has shown me that pink hair is something I’d like to try. It’s my most-used fashion color. It has inspired me to introduce cute socks of varying heights and weights to my wardrobe, even making some of them. I’ve started wearing hats anytime I leave the house – it pulls the look together! My taste in bags has changed; no longer an option for a sleek purse that looks designer, instead give me a duck bag with feet. I love colorful knitwear, flowing skirts, and shoes that are beyond my comfort zone of boots and Converse. Taking those moments in the game to pair weird combinations together has positively impacted my design sensibility. When I plan a sewing or knitting project, I take into account what I’ve learned from dressing up my character, seeking to inject the whimsy and delightful wares of Animal Crossing into my real-life closet. I’m not the only one; I’ve seen this across Pinterest, YouTube, and Instagram.

But what about interior design? Well, this game not only presents the opportunity to design your house and the island, but you can also download Happy Home Paradise to design vacation homes for clients. This has really challenged me in a fun sandbox way to care about how a room is put together. I’ve become far more intentional about my furniture layout, what types of pieces I want to bring into my space, and how I want to pair pieces for a style that tells a story.

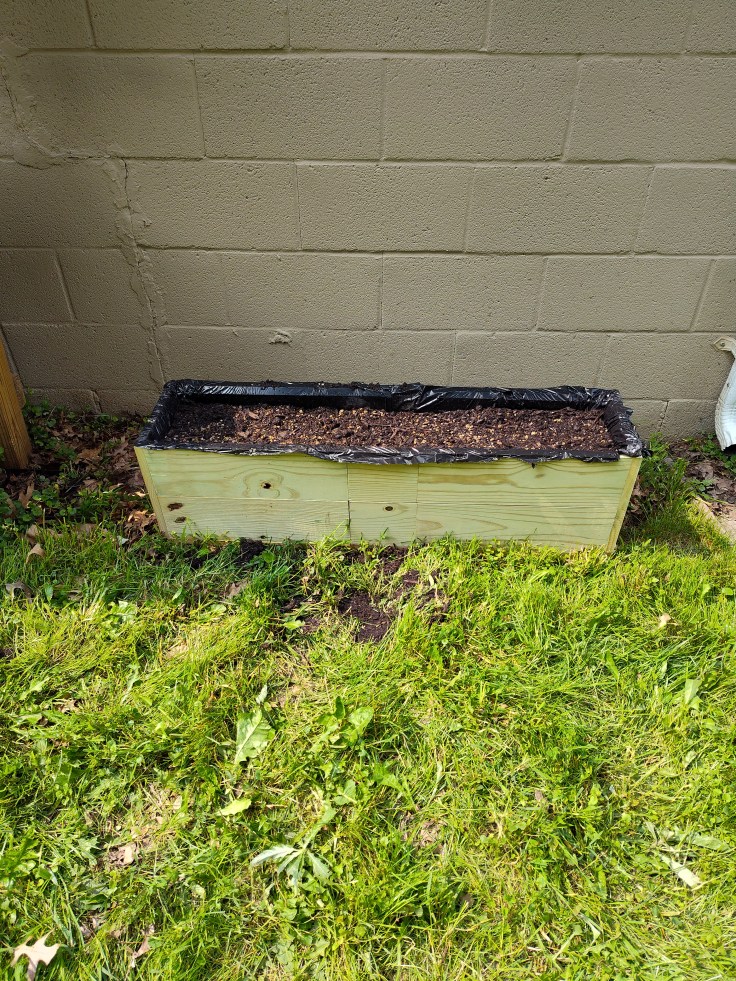
Buying a house last year was the icing on the cake of this new foray into design, as we have painted rooms and dug the garden beds, I’ve felt like it is Animal Crossing come to life. I have this canvas to put my stamp on. Moving from rented landlord-beige homes to a space where we can be colorful, it has shown me that the little details do make a space more welcoming and conducive for creating. The simple act of moving our dining room table from one side of the room to the center, allowing for walkways on either side, has made the room a place I want to be instead of a place I pass through. By filling the empty gaps of cabinets in our kitchen with tables, shelves, and a microwave stand, we have transformed the empty space into a room that feels complete. The simple change of painting my sewing room lavender created an entire mood, a calming and happy vibe that makes me excited to work within those four walls. The garden beds and the screened-in porch have been works of dimension, the outdoor space has useful and designated spaces for us to use that make it more beautiful and purposeful.

I am filled with a sense of possibility again, like the girl who sketched those rooms in a notebook, instead of a person muddling through life. In this time when we feel burned out by AI and stale creativity, it’s been electric to feel the sparks of imagination. The crafting aspect of the game has inspired me to be more creative in my own house. We repurpose, re-finish, and build things in our house from scratch. Because of life’s twists and turns, I have a lot of second-hand pieces that at first felt like a let down, like I was poor, but now I see them as incredibly meaningful items that I have the pleasure of caring for in my home. The game’s customization tools, such as kits for sale or the custom services of Cyrus, demonstrate how a coat of paint truly pulls a room together without buying something new.

Did I think when I purchased Animal Crossing New Horizons that I would see an impact on my own design sensibility? Not at all, but it has been the gift that keeps on giving. It’s an incredibly cozy game, full of wonder that I have grown fond of, year over year. Four years later, I still look forward to running around the island, hunting for recipes, wishing on shooting stars, and besting those pesky Happy Home Academy judges. I hope that I never lose my zeal for dress up and design because it is such a fun little way to relax in this wild and wacky world.

Weekly Garden Update #13 – Building a Planter Box & a Germination Update

In this week’s update, I share a planter box I made over the weekend to grow some beans in, and we had a lot of germination take place. We also got to experience how gardening can help spark conversation and make friends.

Building a Planter Box

When we were picking our seeds for the year, we bought a packet of Chinese Red Noodle long bean seeds. These plants produce pods up to 18 inches long, and the plants can grow up to 7 feet. Safe to say that they need some support to climb that tall. But because these grow so tall, we couldn’t plant the seeds in the same space as our other beans since they grow to different heights. Instead, we decided to plant them outside our garden beds in a raised box and in a location where they can have ample space to reach their full height. A lot of gardeners would buy something for this purpose, but because I love woodworking and building things, I had to make it.

Planter Box, Gardening, Beans
Planter box filled with soil and seeds

It would have been nice to make the planter box out of cedar, red oak, teak, or fir, but I didn’t want to waste the red oak I have on this project and didn’t have any cedar, teak, or fir. Instead, I had a bunch of pressure-treated lumber left over from our screened-in porch project. Pressure-treated lumber often gets a bad reputation, but it is a versatile product that is affordable and will last a long time if maintained. Decades ago, it wouldn’t have been safe to use in gardening applications, but it’s now perfectly safe as long as you aren’t chewing on it.

My goal was to use as many scrap pieces as I could without having to cut too many of the full-size pieces. That’s why there are smaller pieces between the two longer pieces on the sides. This allowed me to only take a little bit from one of the remaining full-size 1x6s I have left. All told, the box is 11 inches front-to-back, 40 inches wide, and 10 inches tall. There are vertical supports inside to attach the stacked side pieces to each other, corner supports to connect the four sides, and horizontal supports to strengthen the sides. There are also a few holes in the bottom for drainage and feet on the bottom to lift the box off the ground. It’s quite heavy and should serve our needs.

Planter Box, Gardening
Planter box

Once the box was done, we lined it with a couple of black garbage bags. A lot of gardeners will buy black plastic that is sold specifically for gardening, but it’s essentially the same thing as the thick garbage bags people use for collecting lawn clippings. They both serve the same purpose: lining the box so there’s some separation between the lumber and the soil. It should also help the box last longer and create less of a mess.

With the liner installed, we cut drainage holes into the bottom and filled it with soil and Garden Tone and planted the seeds. After a thorough watering, it was ready to go. The seeds are supposed to take 5-8 days to germinate, so we’ll monitor them. The box was placed on the side of our garage/my woodshop where the plants will be in direct sunlight for most of the day. The only time it won’t get sunlight is at the very end of the day. To accommodate the trellis system, I’m going to build two brackets that will hang on the garage. The brackets will have holes in them to hold a dowel or bamboo stake, which will have garden twine tied to it. That twine will hang down to the planter box so the plants can climb.

Germination Update

In last week’s update, I mentioned that we were going to restart some of our seeds. That was the result of some of the starts not doing well and the rain preventing us from transplanting them for a few weeks. It led to some plants being leggy. There was also the fact that I messed up starting some of them, and I wanted to get a second chance with them. Last week, I restarted all of our tomato varieties, peppers (Cal Wonder and Scotch Bonnet), melons, cucumbers, eggplants, tomatillos, and ground cherries. I took extra time this go around by pre-moistening the soil and pressing it down a bit to pack the cells a bit more. The soil remains light and airy, but there’s more soil now for the roots to grow in.

In the 5 or 6 days since sowing the seeds, most of the varieties have germinated. The majority of the tomatoes and nearly all the melons have already sprouted and are looking healthy. This morning, I moved the cells with germinated plants in them off the heat mat and into another tray under the grow light. I’m attempting to be a bit more proactive with moving the starts sooner this time. The goal is to have the starts inside for a few weeks so that they can develop strong root structures before moving them outside.

In the garden beds, we have also started to see the successful germination of seeds, including corn, beans, carrots, and beets. The root crops have been growing pretty well for a few weeks now, but things have been a bit slower with the corn and beans. Corn is a slow germinating plant, so patience is key, but with the heavy rains we had not long after sowing, as well as the cool weather, I don’t think we were overly confident in their germination. However, on Sunday, we noticed that both had sprouted. The corn stalks were only about an inch above the soil, and the beans about two inches, but sure enough, they’re growing. That is incredible news! And with how fast bean plants grow, we should see them take off pretty quickly since we’re supposed to finally get some seasonally-appropriate temperatures this week.

Meeting a Neighbor

Yesterday, when we were working in the garden, our neighbor from across the street walked over and introduced herself. She is an older lady whom we hadn’t met yet, but she wanted to say hello and bring us a few cucumber starts that she had. It was such a wonderful gift and a great way to get to know a neighbor. Gardening is a great way to make friends and spark conversation.

Up Next

That’s it for this week’s update. Between now and next week’s post, we’re going to finish tilling the last bed, plant some sunflowers in front of the corn rows, and sow some butterfly pea seeds in a store-bought planter box. Thanks for reading, and Happy Gardening!

Create a website or blog at WordPress.com

Up ↑